Removal Procedure
Caution: Refer to Battery Disconnect Caution in the Preface section.
Important: When a suitable hold open device is being removed or installed, provide alternate support to avoid the possibility of damage to the vehicle or personal injury.
- Open and suitably support the liftgate.
- Remove the quarter inner trim finish panel on both sides. Refer to Quarter Inner Trim Finish Panel Replacement.
- Remove the headlining rear trim panel retainer. Refer to Headlining Rear Trim Panel Retainer Replacement.
- Remove the body side window rear garnish moulding on both sides. Refer to Body Side Window Rear Garnish Molding Replacement.
- Detach and lower the headlining (2).
- Pull the liftgate grommets (3) out of the rear header (4).
- Using a suitable tool release the liftgate strut to upper strut stud retaining clip (1) on both sides.
- Detach the liftgate strut (2) on both sides.
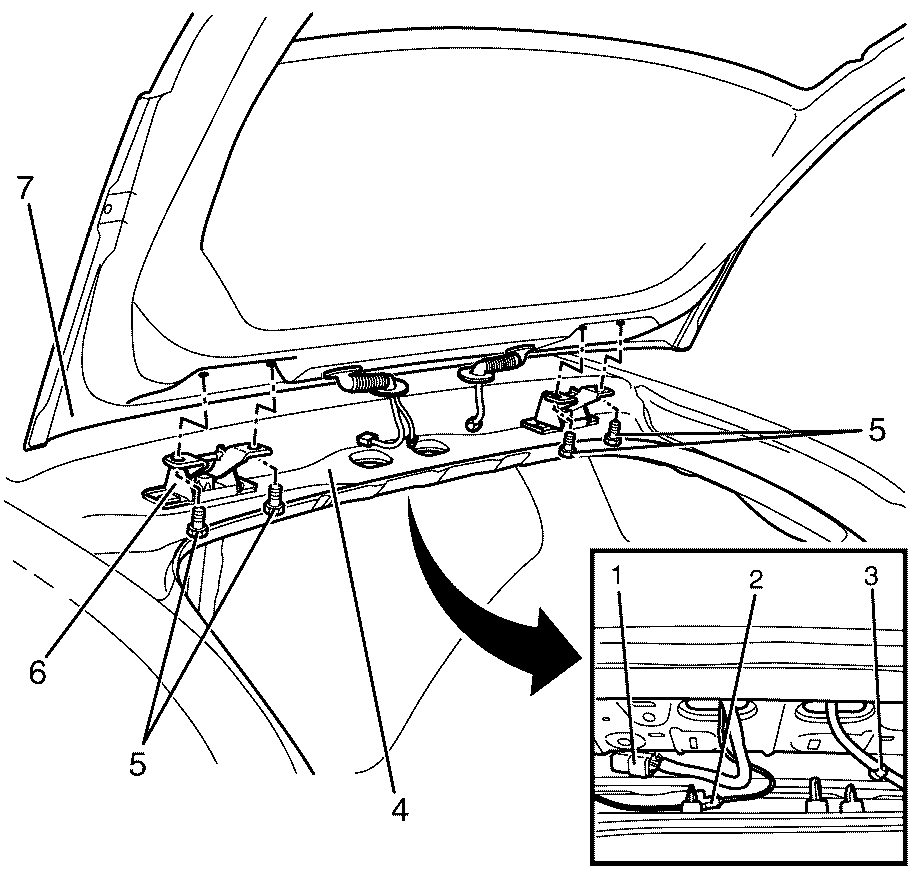
- Disconnect the liftgate electrical harness connector (1) and the antenna connector (2).
- Disconnect the rear washer hose (3).
- Mark the location of the liftgate hinge (6) to the liftgate (7) with a wax pencil.
- Remove the liftgate hinge to liftgate retaining bolts (5).
- With the aid of an assistant remove the liftgate from the vehicle.
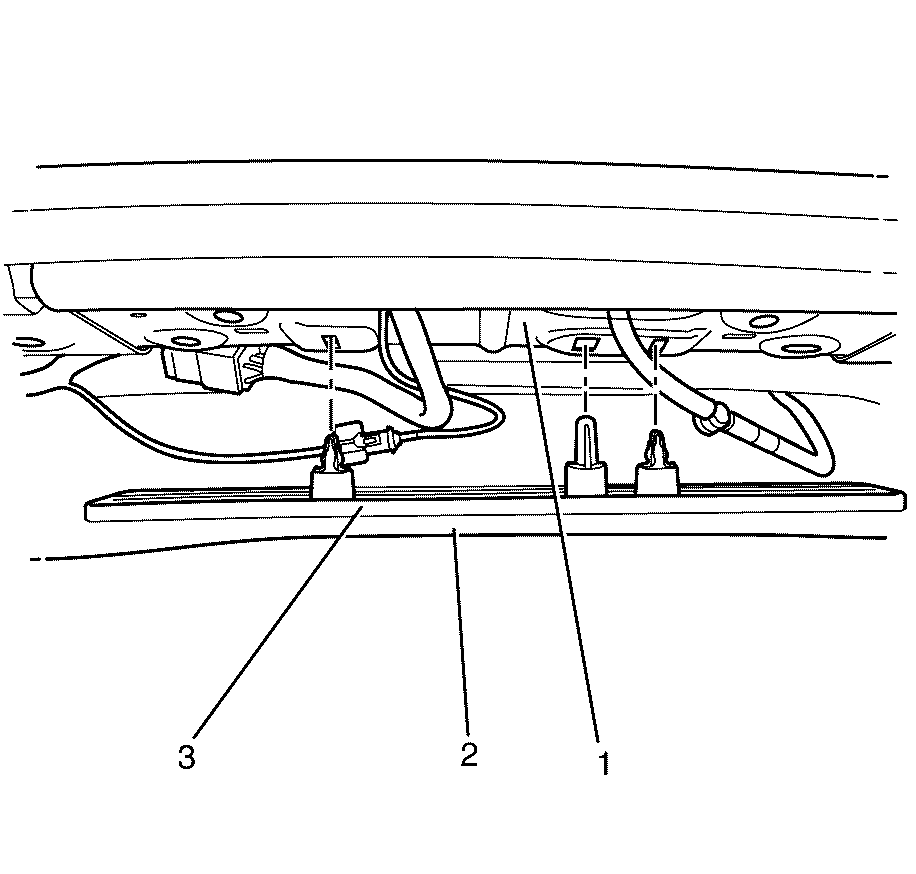
Important: To avoid damage to the headlining carefully pull down on the headlining rear clip assembly (3) to detach from the roof panel (1).
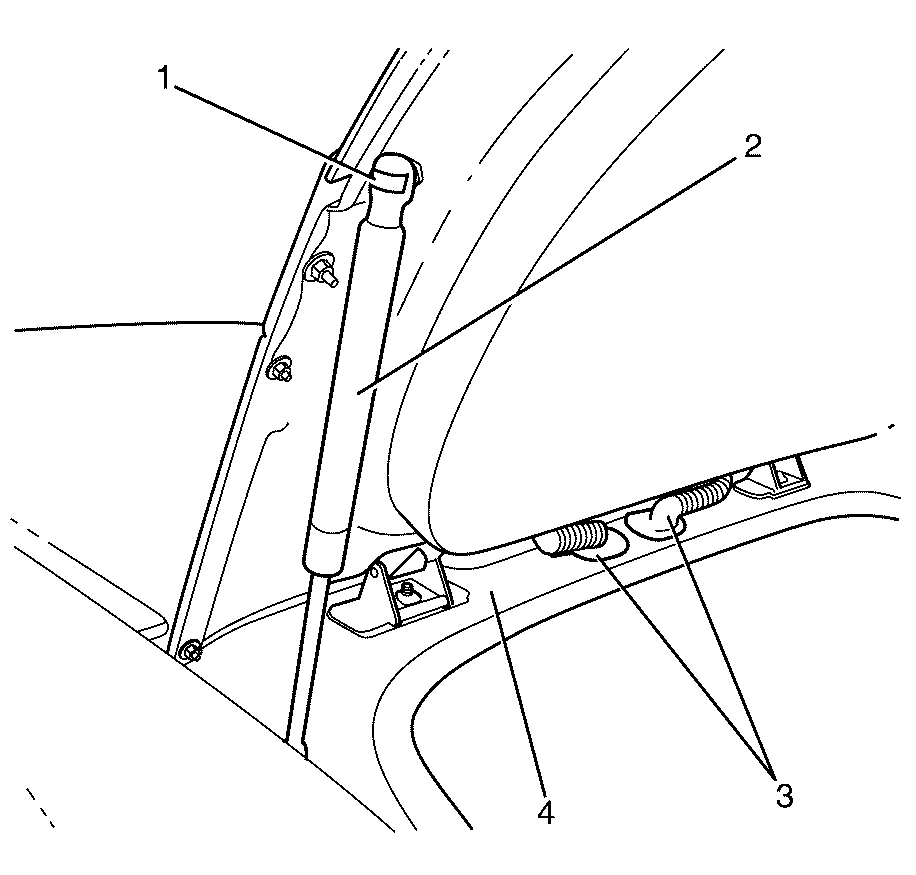
Important: DO NOT fully remove the liftgate upper strut retaining clip (1) as this will assist in the installation.
Important: Apply pressure only at the end of the liftgate strut (2) that you are removing or attaching. DO NOT apply pressure to the middle of the strut because damage or bending will result.
Disassembly Procedure
- Remove the liftgate window side garnish moulding on both sides. Refer to Liftgate Window Side Garnish Molding Replacement.
- Remove the liftgate window lower garnish moulding. Refer to Liftgate Window Lower Garnish Molding Replacement.
- Remove the liftgate trim panel. Refer to Liftgate Trim Panel Replacement.
- Remove the liftgate window upper garnish moulding. Refer to Liftgate Window Upper Garnish Molding Replacement.
- Remove the liftgate emblem nameplate. Refer to Liftgate Emblem/Nameplate Replacement.
- Remove the liftgate centre applique. Refer to Liftgate Center Applique Replacement.
- Remove the rear window wiper arm. Refer to Rear Window Wiper Arm Replacement.
- Remove the rear roof weld joint reveal moulding on both sides. Refer to Roof Weld Joint Reveal Molding Replacement.
- Remove the liftgate upper moulding. Refer to Liftgate Upper Molding Replacement.
- Remove the liftgate window. Refer to Liftgate Window Replacement.
- Remove the liftgate latch. Refer to Liftgate Latch Replacement.
- Remove the rear window wiper motor. Refer to Rear Window Wiper Motor Replacement.
- Remove the liftgate wedge on both sides. Refer to Liftgate Wedge Replacement.
- Remove the liftgate strut stud on both sides. Refer to Liftgate Strut Stud Replacement.
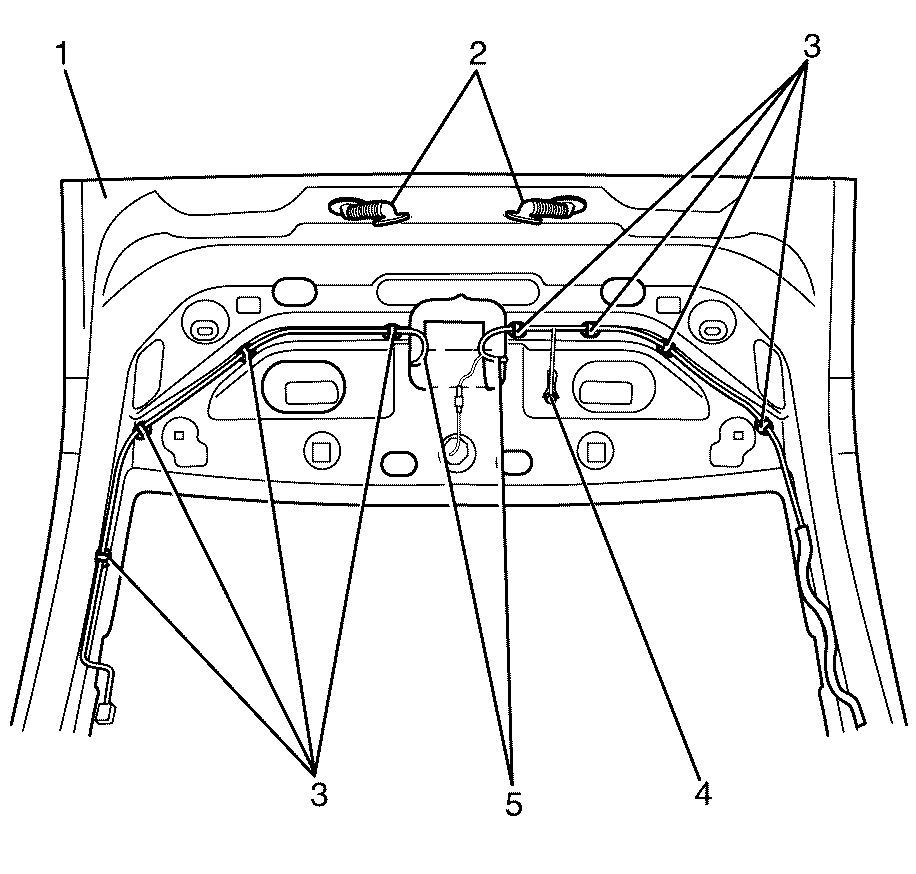
- Remove the liftgate wiring harness retaining clips (3) from the liftgate (1).
- Remove the liftgate wiring harness former (2) from the liftgate (1).
- Remove the ground bolt (4) from the liftgate (1).
- Remove the liftgate wiring harness retaining clips (3) from the liftgate (1).
- Pull the liftgate grommets (2) out of the liftgate (1).
- Remove the liftgate wiring harness (5) from the liftgate (1).
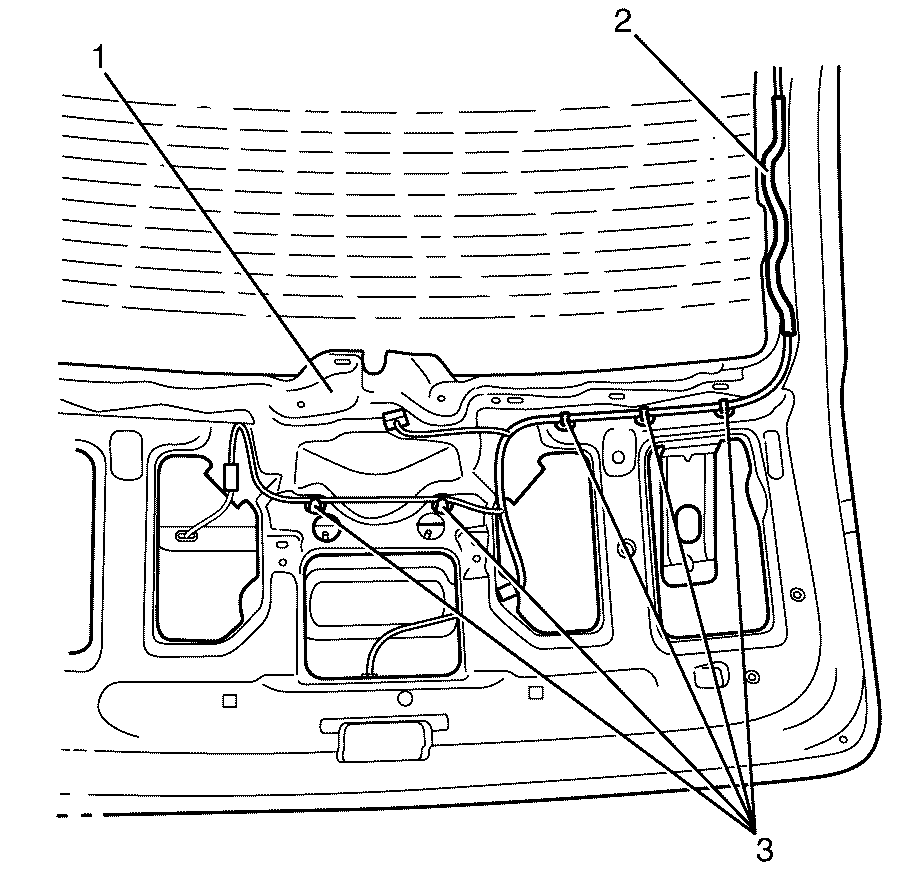
Important : A suitable tool must be used to avoid damaging the wiring harness retaining clips (3) when removing them from the liftgate (1).
Assembly Procedure
- Install the liftgate wiring harness (5) to the liftgate (1).
- Install the liftgate grommets (2) to the liftgate (1).
- Install the liftgate wiring harness retaining clips (3) to the liftgate (1).
- Install the ground bolt (4) to the liftgate (1).
- Install the liftgate wiring harness former (2) to the liftgate (1).
- Install the liftgate wiring harness retaining clips (3) to the liftgate (1).
- Install the liftgate strut stud on both sides. Refer to Liftgate Strut Stud Replacement.
- Install the liftgate wedge on both sides. Refer to Liftgate Wedge Replacement.
- Install the rear window wiper motor. Refer to Rear Window Wiper Motor Replacement.
- Install the lftgate latch. Refer to Liftgate Latch Replacement.
- Install the liftgate window. Refer to Liftgate Window Replacement.
- Install the liftgate upper moulding. Refer to Liftgate Upper Molding Replacement.
- Install the rear roof weld joint reveal moulding on both sides. Refer to Roof Weld Joint Reveal Molding Replacement.
- Install the rear window wiper arm. Refer to Rear Window Wiper Arm Replacement.
- Install the lftgate centre applique. Refer to Liftgate Center Applique Replacement.
- Install the liftgate emblem nameplate. Refer to Liftgate Emblem/Nameplate Replacement.
- Install the liftgate window upper garnish moulding. Refer to Liftgate Window Upper Garnish Molding Replacement.
- Install the liftgate trim panel. Refer to Liftgate Trim Panel Replacement.
- Install the liftgate window lower garnish moulding. Refer to Liftgate Window Lower Garnish Molding Replacement.
- Install the liftgate window side garnish moulding on both sides. Refer to Liftgate Window Side Garnish Molding Replacement.


Installation Procedure
- With the aid of an assistant, position the liftgate (7) to the liftgate hinge (6) making sure the marked location points are aligned.
- Install the liftgate hinge to liftgate retaining bolts (5).
- Connect the rear washer hose (3).
- Connect the liftgate electrical harness connector (1) and the antenna connector (2).
- Press the liftgate strut (2) onto the liftgate ball stud and listen for an audible click to confirm fitting.
- Make sure that the liftgate upper strut stud retaining clip (1) is fully seated on the liftgate strut (2).
- Install the liftgate grommets (3) into the rear header (4).
- Locate the headlining clip assembly (3) and attach the headlining (2) to the roof panel (1).
- Install the body side window rear garnish moulding on both sides. Refer to Body Side Window Rear Garnish Molding Replacement.
- Install the headlining rear trim panel retainer. Refer to Headlining Rear Trim Panel Retainer Replacement.
- Install the quarter inner trim finish panel on both sides. Refer to Quarter Inner Trim Finish Panel Replacement.
- Close the liftgate.
- Verify the alignment of the liftgate to the body and adjust as necessary. Refer to Liftgate Adjustment.
- Tighten the liftgate hinge to liftgate retaining bolts (5).
- Install the liftgate wedge on both sides. Refer to Liftgate Wedge Replacement.

Important: DO NOT fully tighten at this stage.
Important : Make sure the liftgate harness connector (1) seats into the headlining electrical connector with an audible click, failure to do so could disable the liftgate release.


Important: Make sure the liftgate does not contact the top and each side of the vehicle body.
Notice: Refer to Fastener Notice in the Preface section.
Tighten
Tighten the bolts to 22 N·m (16 lb ft).
