Tools Required
| • | J 44643 Flywheel Holding Tool |
| • | J 26900-13 Magnetic Base |
| • | J 26900-12 Dial Indicator |
Removal Procedure
- Remove the cylinder heads. Refer to Cylinder Head Replacement - Left Side and Cylinder Head Replacement - Right Side .
- Remove the valve lifters. Refer to Valve Lifter Replacement .
- Remove the charged air cooler. Refer to Charged Air Cooler Replacement .
- Remove the air conditioner condenser. Refer to Condenser Replacement in Heating, Ventilation, and Air Conditioning.
- Remove the starter. Refer to Starter Motor Replacement in Engine Electrical.
- Install the J 44643 in the starter opening. Ensure the J 44643 is flush to the flywheel opening.
- Remove the engine front cover. Refer to Engine Front Cover Replacement .
- Remove the oil pump driven gear nut.
- Remove the oil pump driven gear.
- Remove the oil pump drive gear and crankshaft reluctor assembly.
- Using the J 26900-12 (1) and the J 26900-13 (2), measure the camshaft end play.
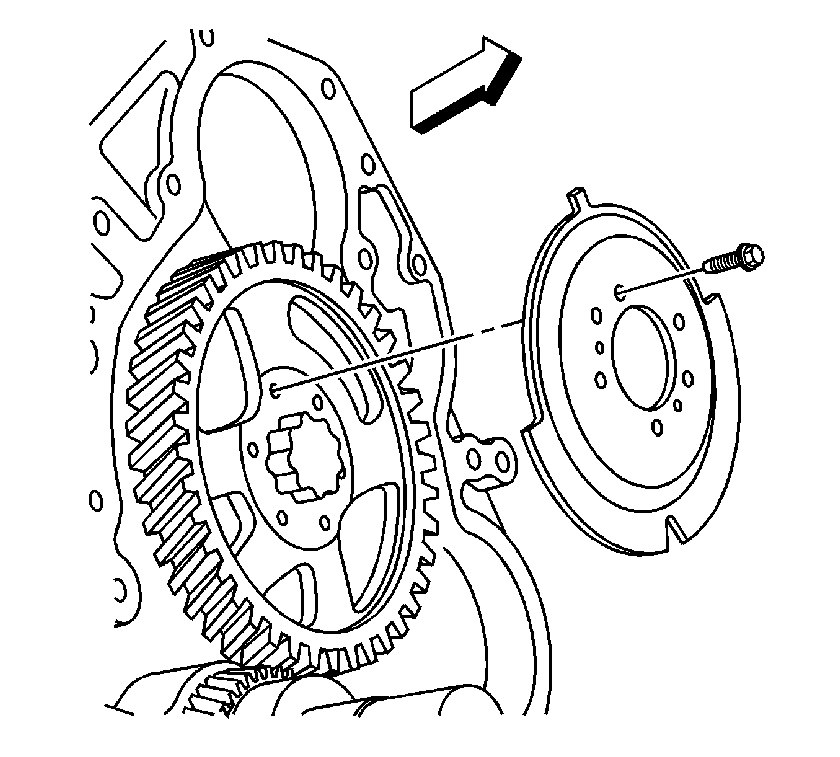
- Remove the camshaft reluctor screws.
- Remove the camshaft reluctor.
- In order to loosen the camshaft gear bolt use the J 44643 in the starter motor opening in order to hold the engine from turning.
- Loosen the camshaft gear bolt and leave the bolt finger tight.
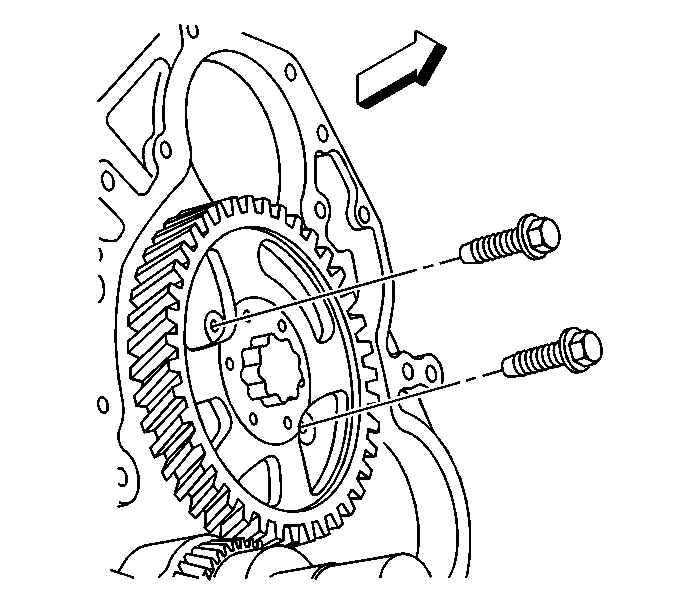
- Remove the camshaft thrust plate bolts through the holes in the camshaft gear.
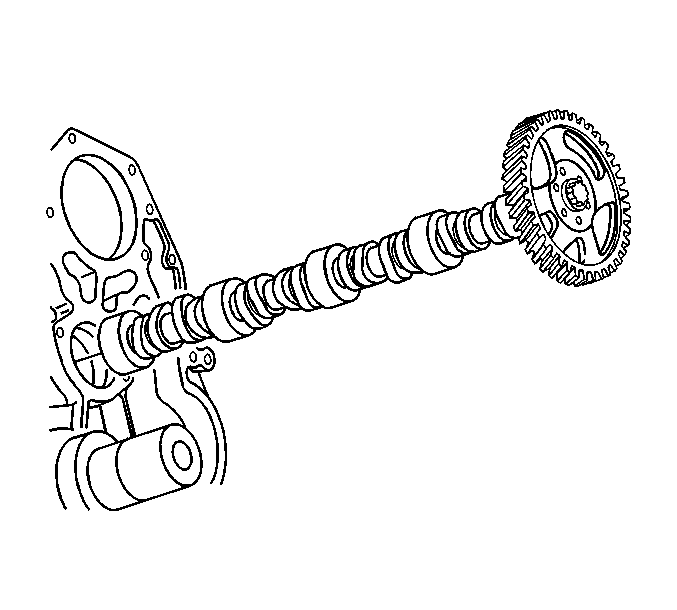
- Remove the camshaft with the camshaft gear attached.
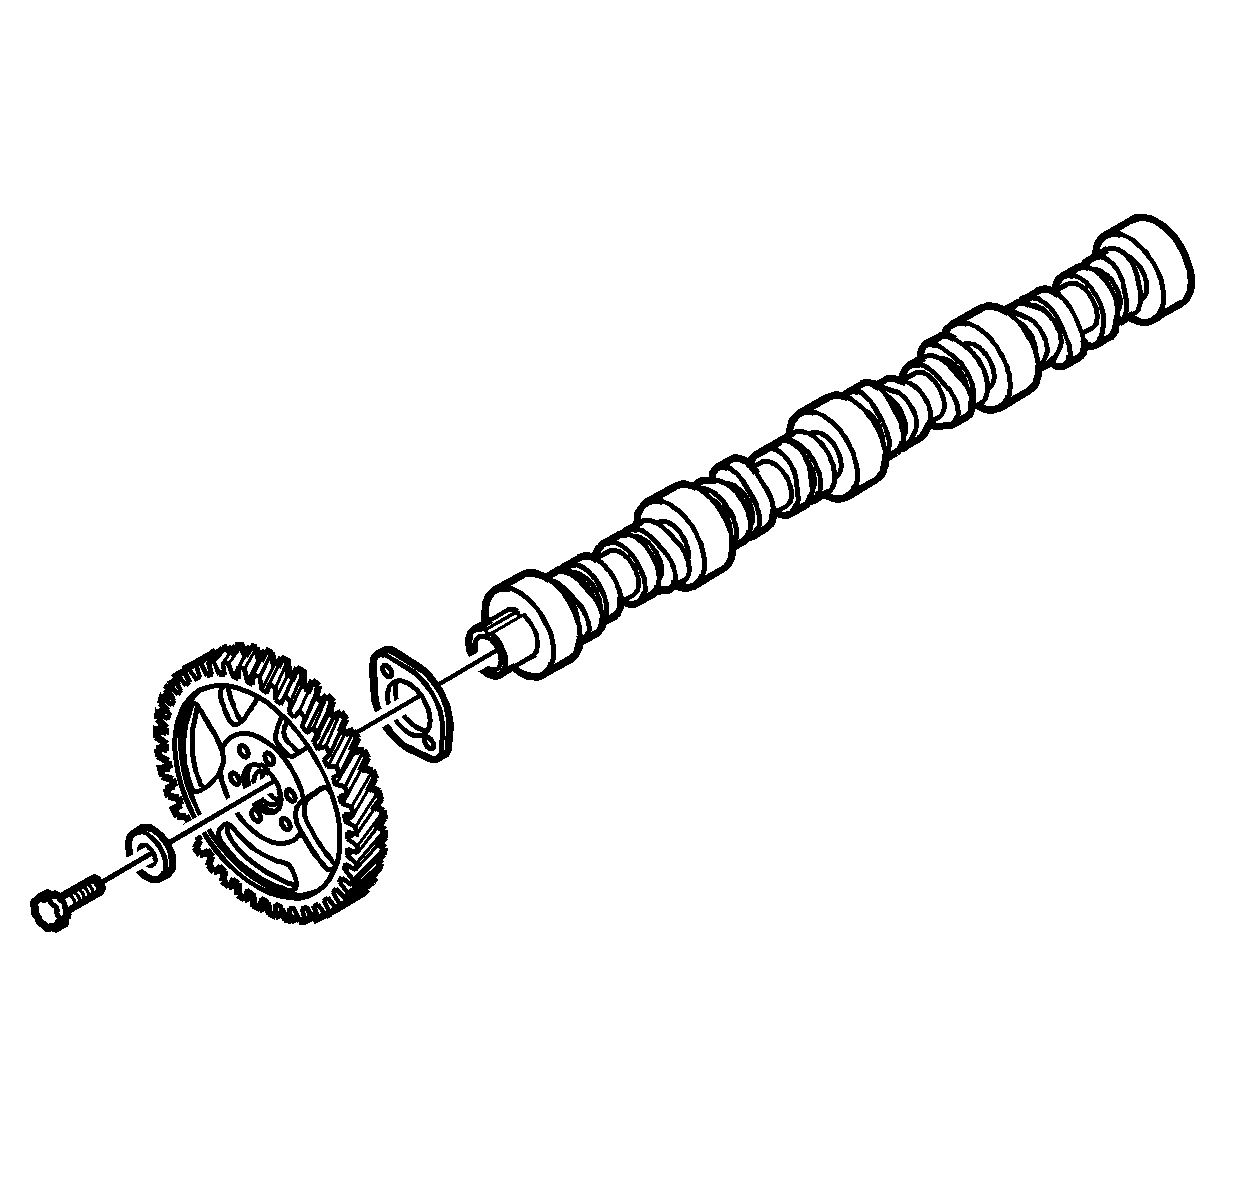
- Remove the camshaft gear bolt and discard.
- Remove the camshaft gear.
- Remove the camshaft thrust plate.
- Clean and inspect the camshaft and the bearings. Refer to Camshaft and Bearings Cleaning and Inspection in the Engine Mechanical - 6.6 L Unit Repair.
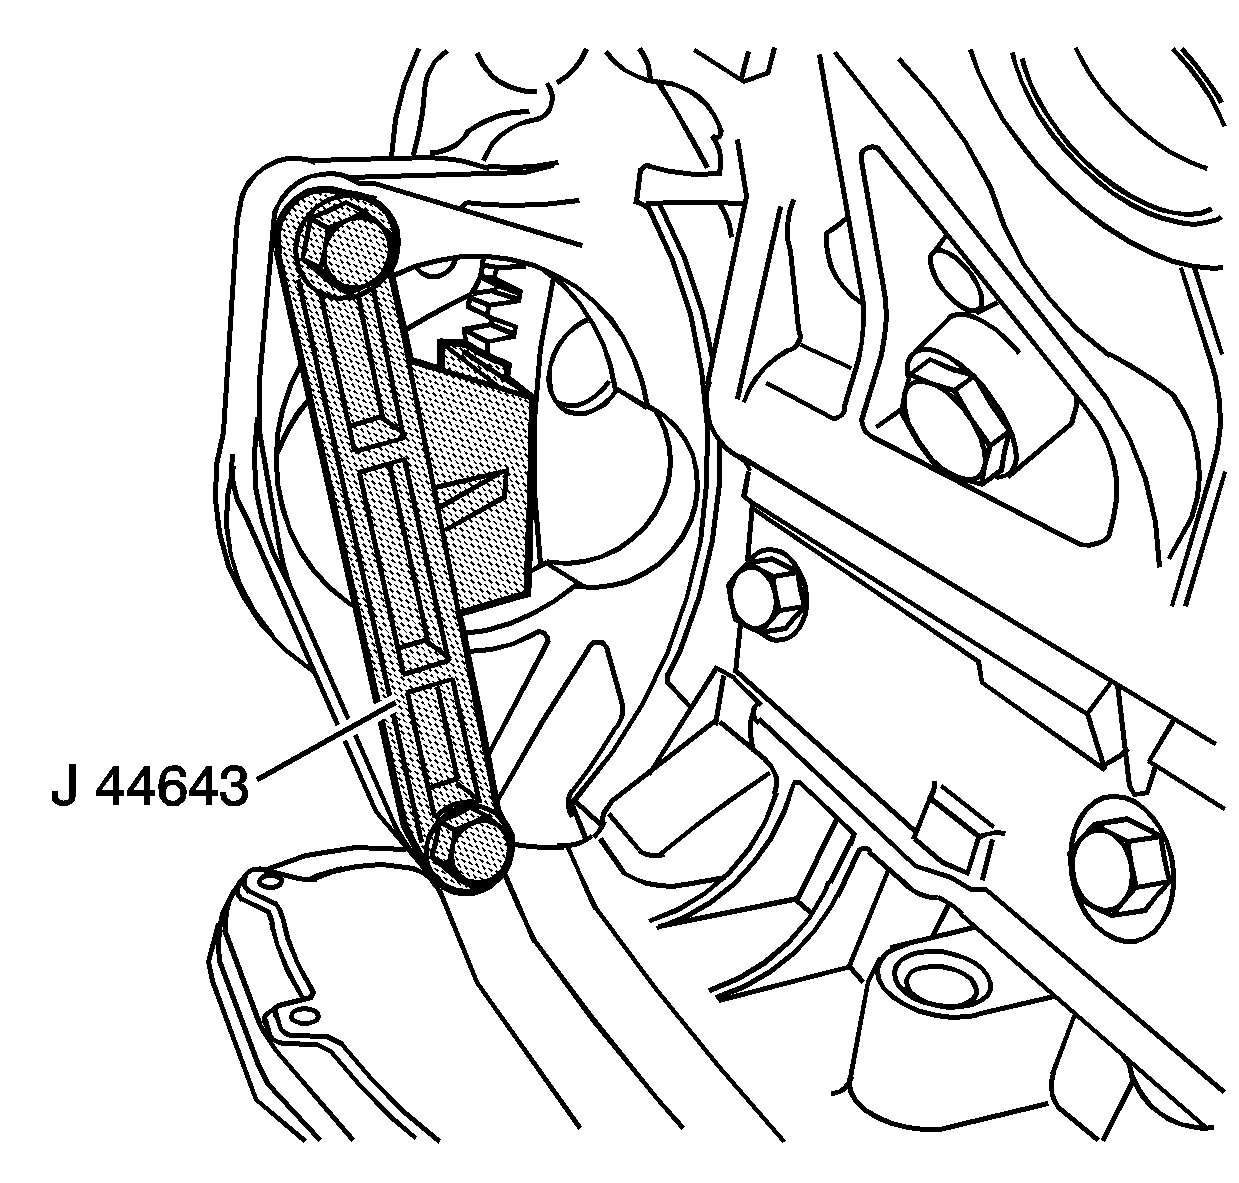
The J 44643 will be used to remove the crankshaft balancer bolt and the camshaft drive gear bolt.
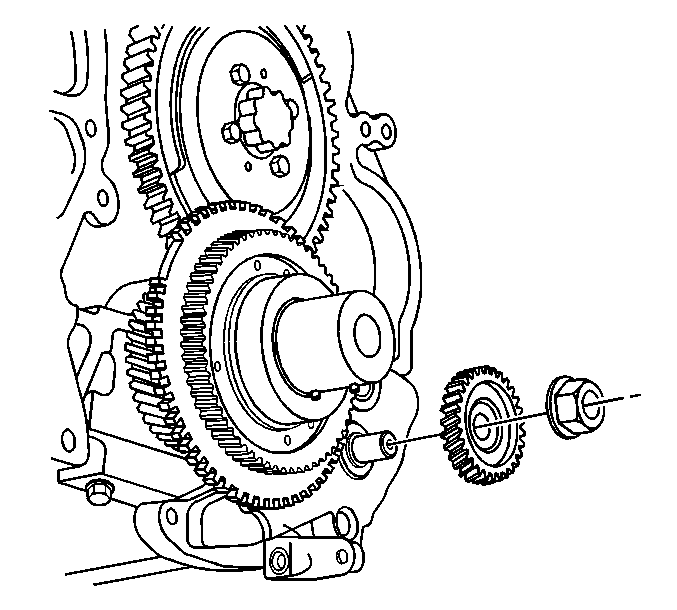
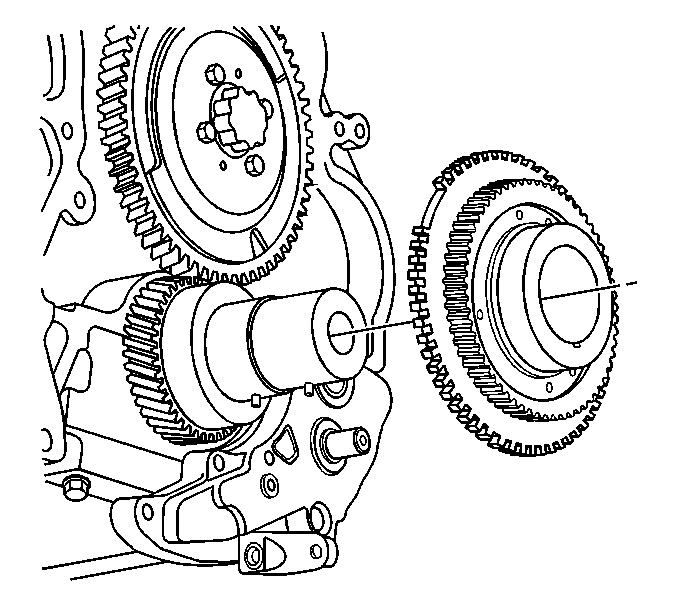
Important: The crankshaft reluctor and the oil pump drive gear are timed together at the factory. Do not remove the crankshaft reluctor from the oil pump drive gear.
| • | Do not remove the crankshaft reluctor bolts. |
| • | Do not damage the reluctor teeth. |
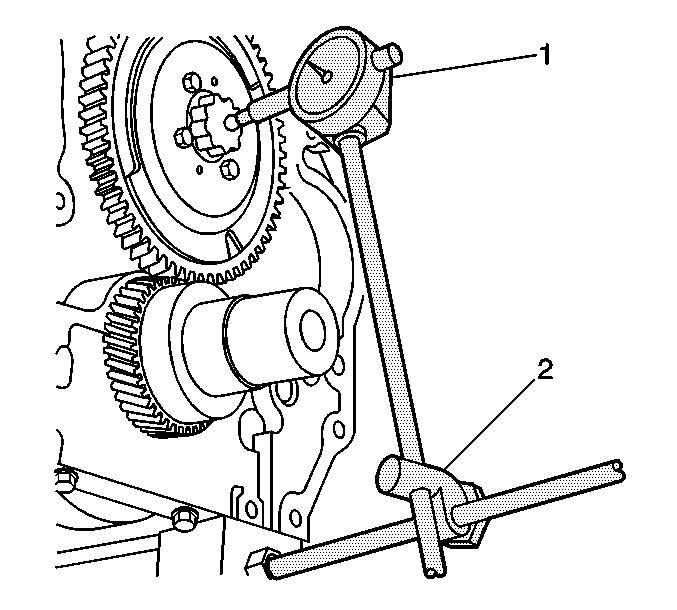
| • | The production value is 0.050-0.114 mm (0.002-0.0045 in) and service limit is 0.20 mm (0.008 in). |
| • | Replace the camshaft gear or the camshaft thrust plate if measured value exceeds service limit. |
If the camshaft bearings are worn or damaged the engine will require removal in order to replace the camshaft bearings. Refer to Engine Replacement .
Installation Procedure
- Install the camshaft thrust plate to the camshaft.
- Install the camshaft driven gear.
- Install the NEW camshaft driven gear bolt.
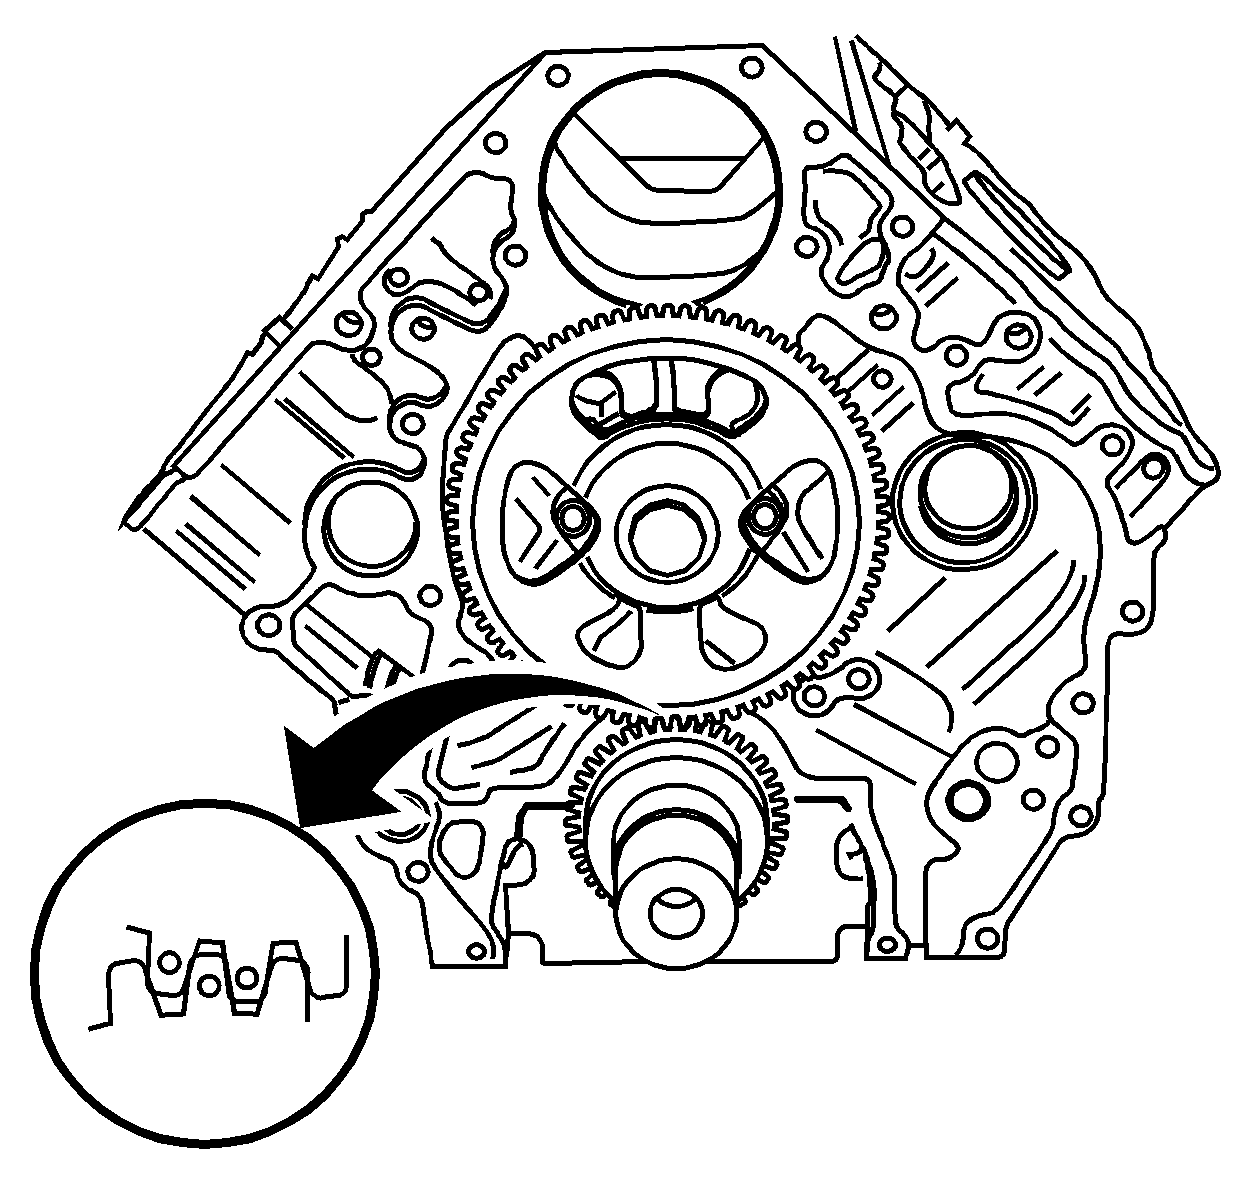
- Install the camshaft and gear assembly into the cylinder block, aligning the camshaft gear to the crankshaft gear as shown.
- Install the camshaft thrust plate bolts.
- Install the camshaft reluctor to the camshaft gear.
- Install the camshaft reluctor bolts.
- Reinstall the J 44643 in the starter opening. if removed.
- Install the NEW camshaft gear bolt.
- Using the J 26900-12 (1) and the J 26900-13 (2) measure the camshaft end play.
- Install the oil pump drive gear and reluctor assembly to the crankshaft.
- Install the oil pump driven gear.
- Install the oil pump driven gear nut.
- Install the engine front cover. Refer to Engine Front Cover Replacement .
- Install the air conditioner condenser. Refer to Condenser Replacement in Heating, Ventilation, and Air Conditioning.
- Install the charged air cooler. Refer to Charged Air Cooler Replacement .
- Install the valve lifters. Refer to Valve Lifter Replacement .
- Install the cylinder heads. Refer to Cylinder Head Replacement - Left Side and Cylinder Head Replacement - Right Side .

Leave the bolt finger tight.

Notice: Use the correct fastener in the correct location. Replacement fasteners must be the correct part number for that application. Fasteners requiring replacement or fasteners requiring the use of thread locking compound or sealant are identified in the service procedure. Do not use paints, lubricants, or corrosion inhibitors on fasteners or fastener joint surfaces unless specified. These coatings affect fastener torque and joint clamping force and may damage the fastener. Use the correct tightening sequence and specifications when installing fasteners in order to avoid damage to parts and systems.
Tighten
Tighten the bolts to 26 N·m (19 lb ft).

Tighten
Tighten the bolts in a cross-bolt pattern to 9 N·m (80 lb in).

Tighten
Tighten the camshaft gear bolt to 234 N·m (173 lb ft).

| • | The production value is 0.050-0.114 mm (0.002-0.0045 in) and service limit is 0.20 mm (0.008 in). |
| • | Replace the camshaft gear or the camshaft thrust plate if measured value exceeds the service limit. |

Important: Do not damage the teeth on the crankshaft reluctor assembly.

Tighten
Tighten the nut to 100 N·m (74 lb ft).
