Tools Required
J 37228 Seal Cutter
Removal Procedure
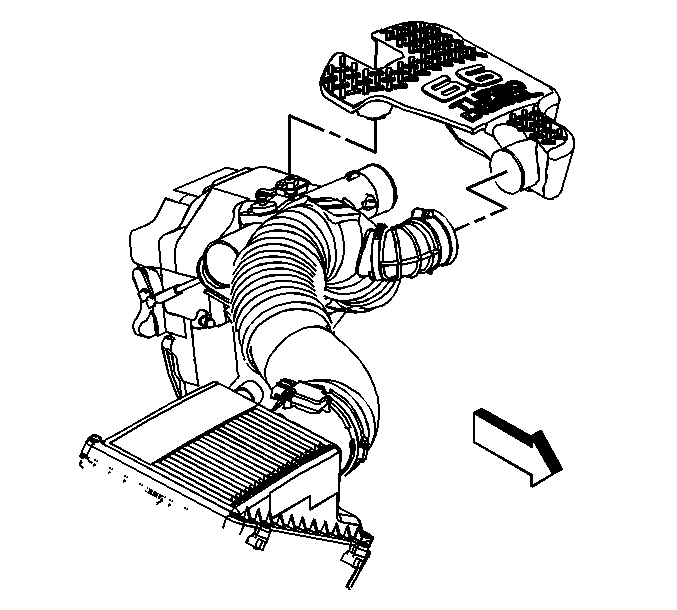
- Loosen the outlet duct clamp at the upper intake manifold cover.
- Remove the upper intake manifold cover from the outlet duct.
- Remove the upper intake manifold cover.
- Disconnect the battery negative cable. Refer to Battery Negative Cable Disconnection and Connection in Engine Electrical.
- Drain the engine coolant and the engine block. Refer to Cooling System Draining and Filling in Engine Cooling.
- Remove the right front fender wheelhouse panel.
- Remove the upper fan shroud. Refer to Engine Coolant Fan Upper Shroud Replacement in Engine Cooling.
- Remove the fan clutch. Refer to Fan Clutch Replacement in Engine Cooling.
- Remove the drive belt. Refer to Drive Belt Replacement .
- Remove the oil fill tube. Refer to Oil Filler Tube Replacement .
- Remove the thermostat housing crossover. Refer to Thermostat Housing Crossover Replacement in Engine Cooling.
- Remove the crankshaft balancer. Refer to Crankshaft Balancer Replacement .
- Remove the crankshaft front oil seal. Refer to Crankshaft Front Oil Seal Replacement .
- Remove the water pump. Refer to Water Pump Replacement in Engine Cooling.
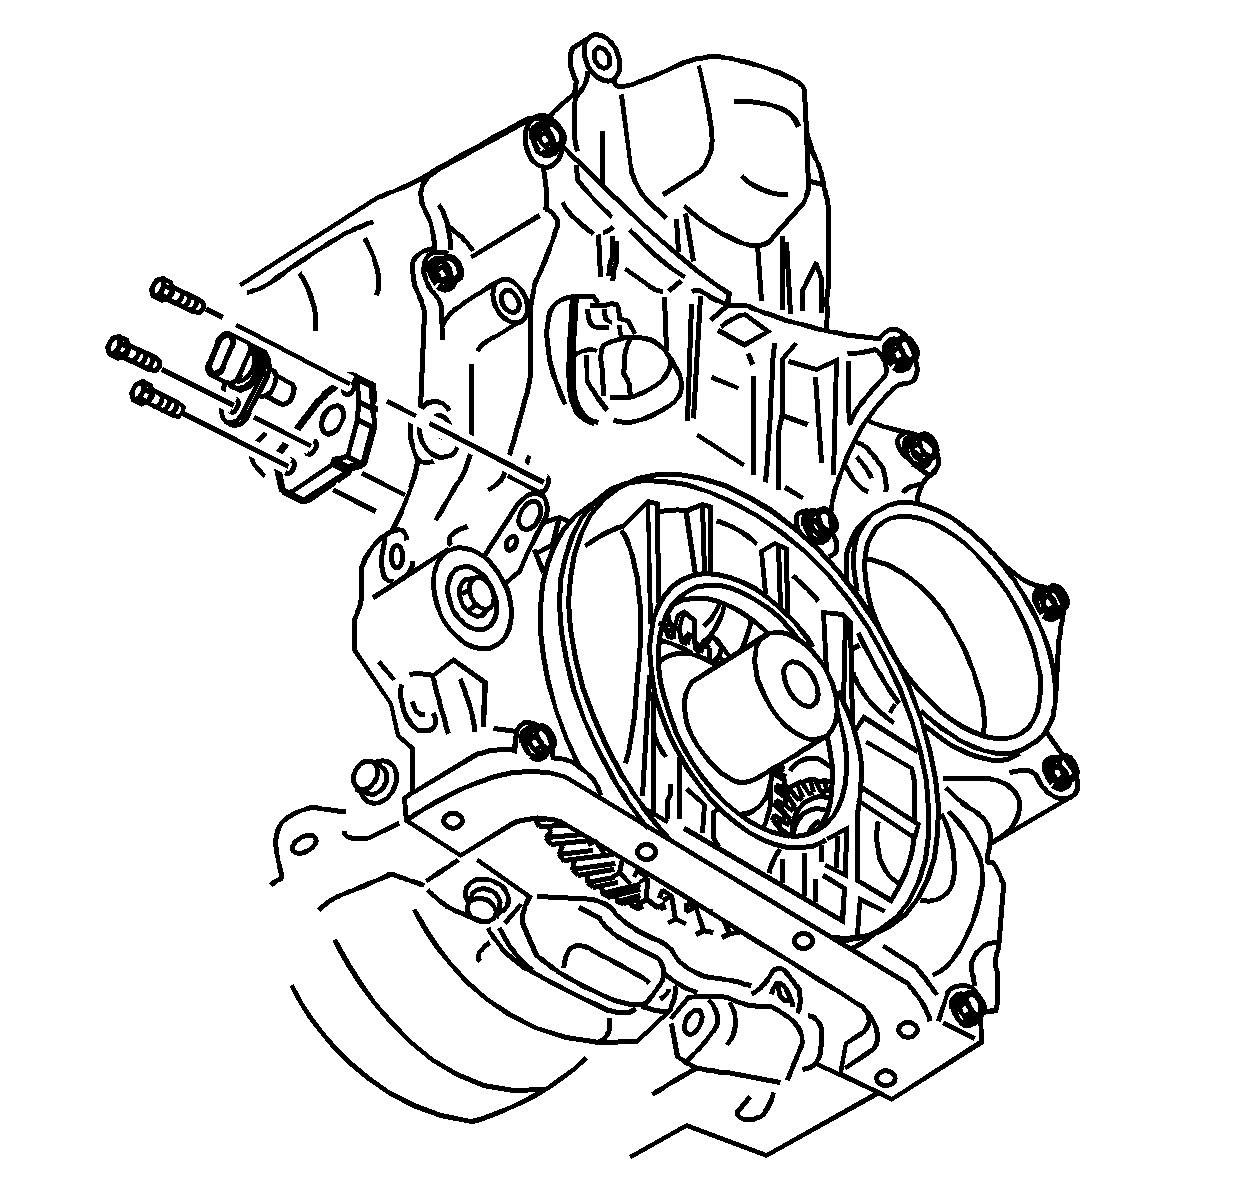
- Disconnect the camshaft sensor electrical connector.
- Remove the camshaft sensor bolt and sensor.
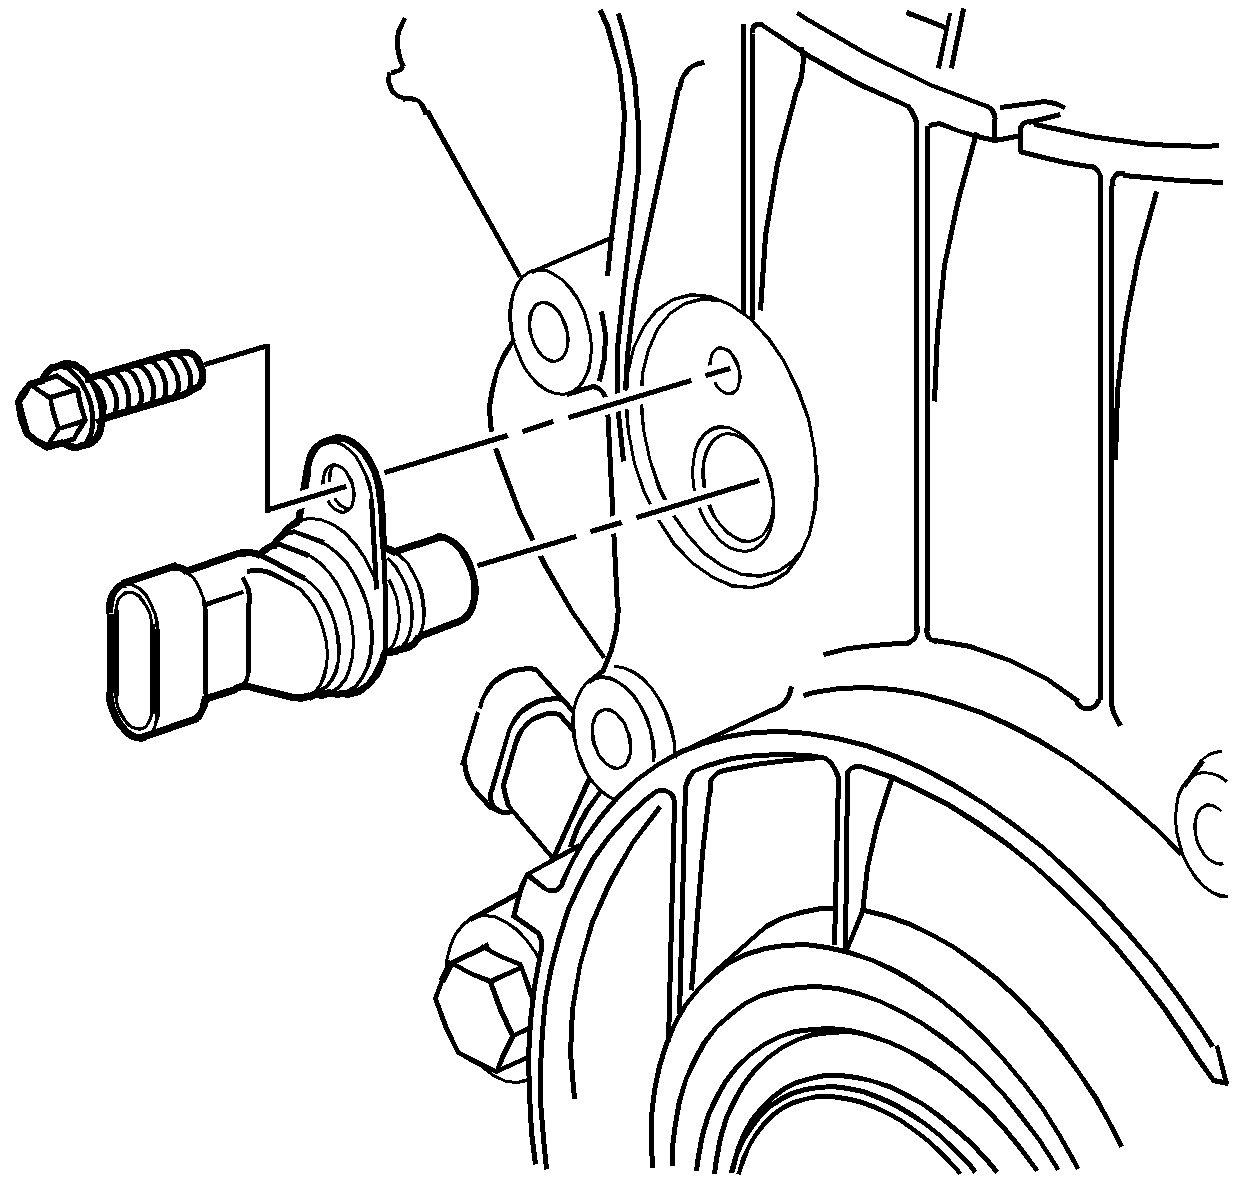
- Disconnect the crankshaft sensor connector.
- Remove the crankshaft sensor bolt and sensor.
- Remove the crankshaft position sensor spacer bolts.
- Remove the crankshaft position sensor spacer.
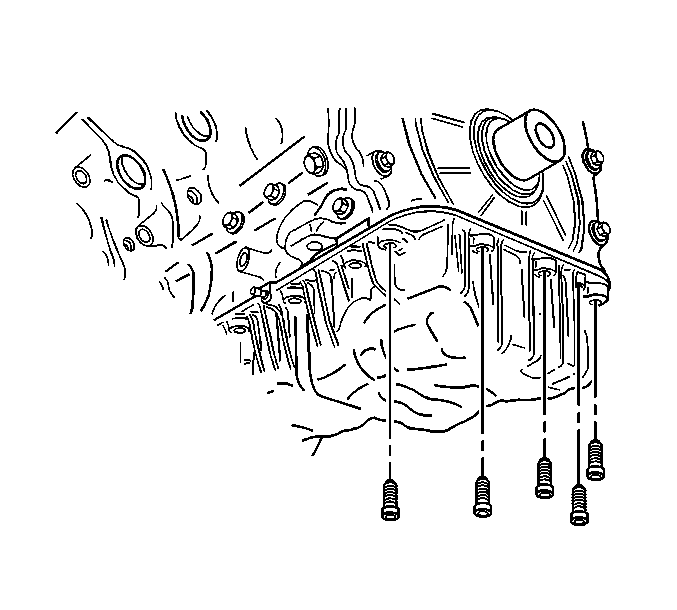
- Remove the 5 bolts retaining the upper oil pan to the engine front cover.
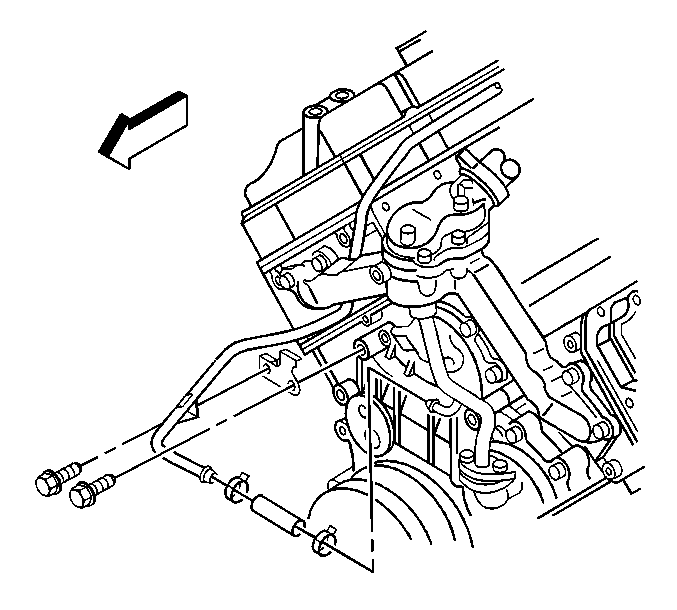
- Remove the bracket bolts and the bracket for the turbocharger outlet coolant pipe.
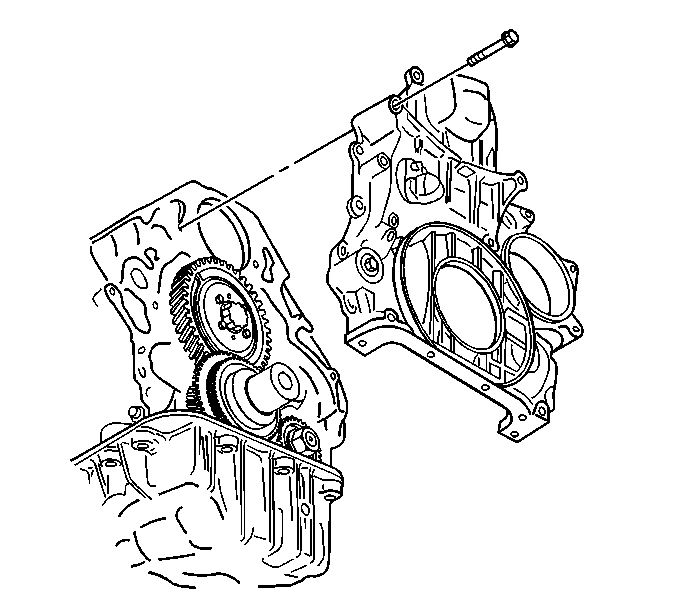
- Remove the 13 bolts for the engine front cover.
- Using the J 37228 separate the engine front cover from the cylinder block and the upper oil pan.
- Remove the engine front cover.
- Remove the O-ring from the engine front cover.
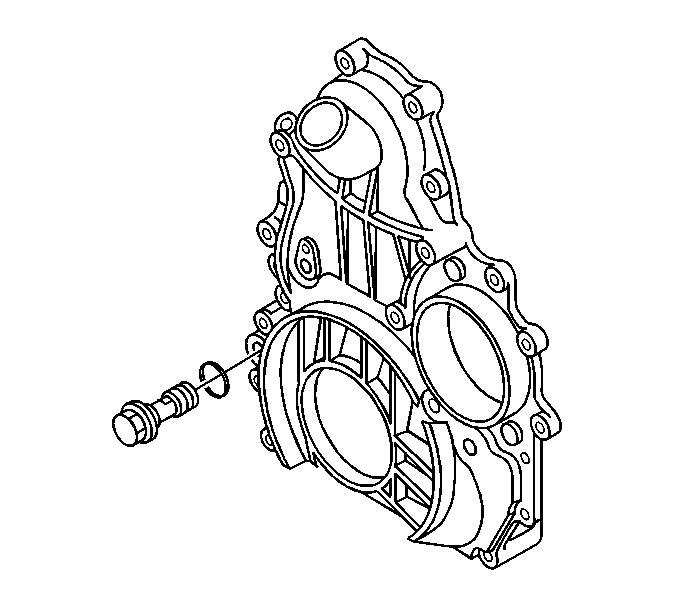
- Remove the oil pressure relief valve from the engine front cover.
- Clean the engine front cover with a suitable cleaning solvent.
- Clean the engine front cover and the engine mating surfaces.
- Inspect the engine front cover mating surfaces for damage.
- Inspect the engine front cover O-ring sealing surfaces for damage.
- Replace the engine front cover if any damage is found.
Important: Do not bend the turbocharger coolant pipe.
Installation Procedure
- Install the oil pressure relief valve with a new O-ring seal in the engine front cover.
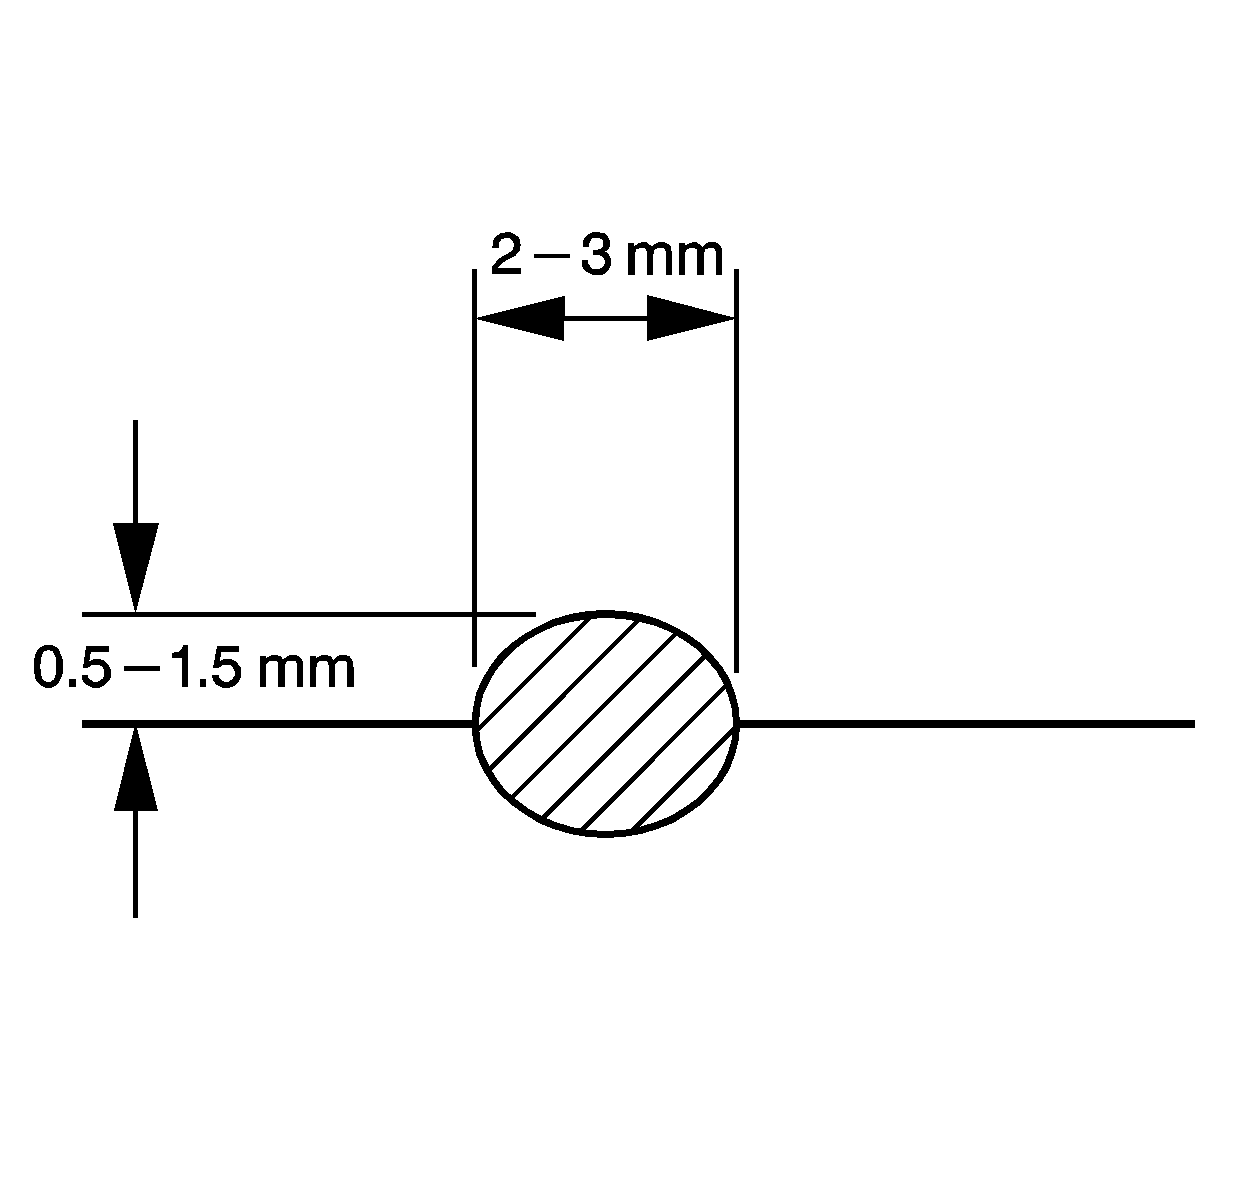
- Apply a 2-3 mm (1/8 in) wide to 0.5-1.5 mm (1/16 in) high bead of sealant GM P/N United States 97720043, GM P/N Canada 88901148, or equivalent to the engine front cover sealing surface to the engine block.
- Apply a 2-3 mm (1/8 in) wide to 0.5-1.5 mm (1/16 in) high bead of sealant GM P/N United States 97720043, GM P/N Canada 88901148, or equivalent to the engine front cover sealing surface to the upper oil pan.
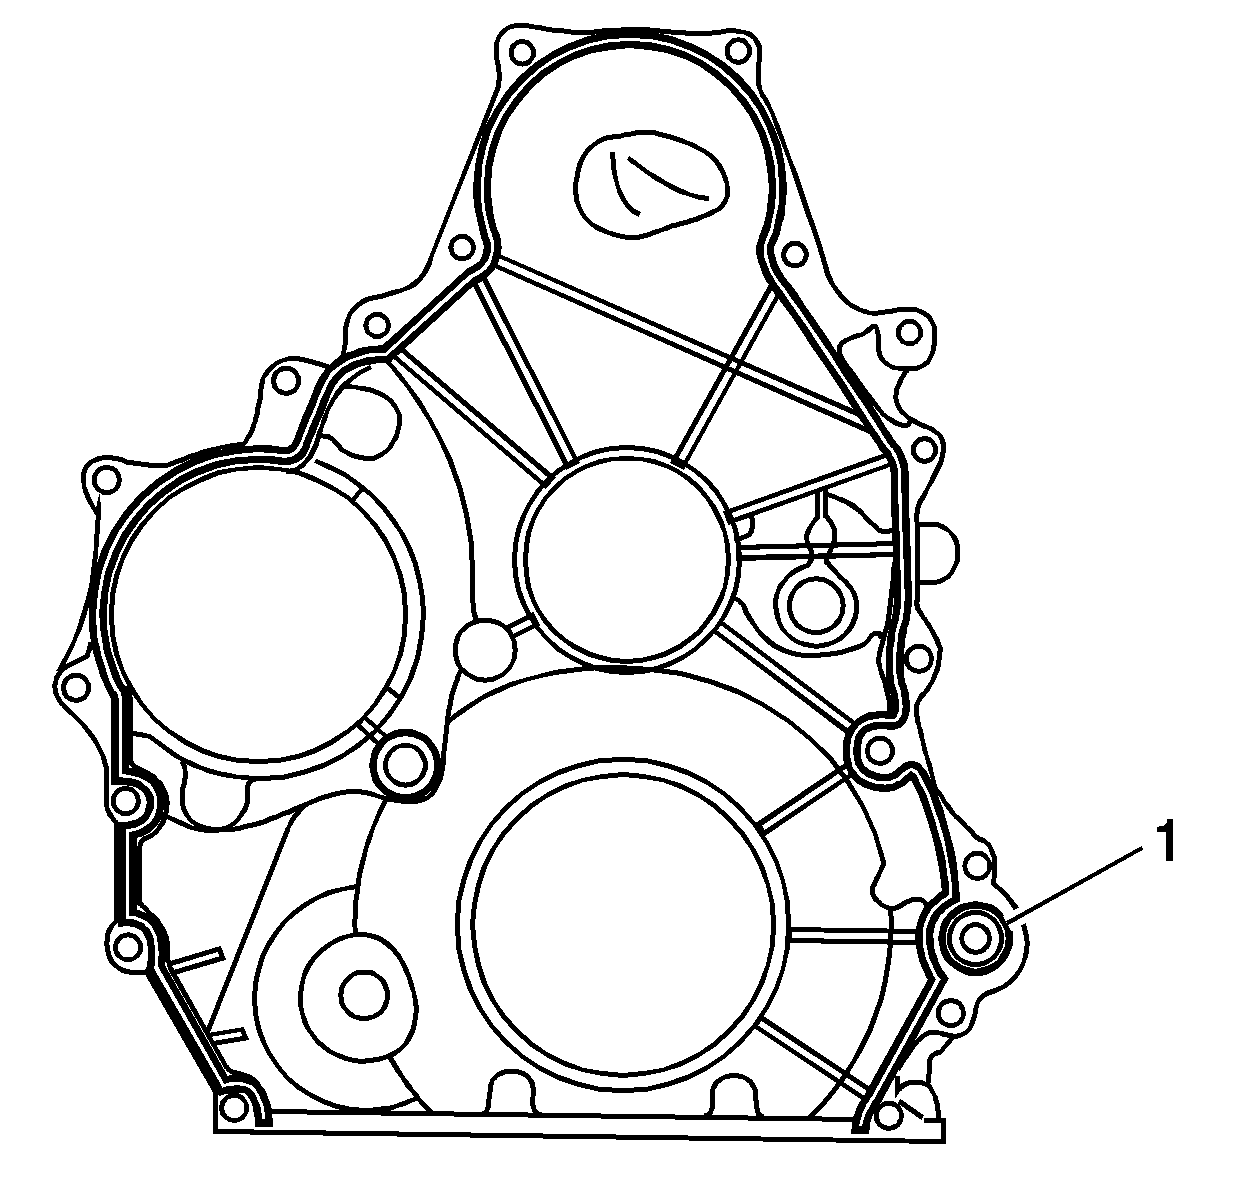
- Install the new O-ring (1) in the front cover.
- Install the engine front cover.
- Install the engine front cover 13 bolts.
- Install the 5 bolts retaining the upper oil pan to the engine front cover.
- Install the turbocharger coolant outlet pipe bracket and bolts.
- Install the camshaft sensor bolt and sensor.
- Connect the camshaft sensor electrical connector.
- Install the crankshaft position sensor spacer.
- Install the crankshaft position sensor spacer bolts
- Install the crankshaft position sensor.
- Install the crankshaft position sensor bolt.
- Install the water pump. Refer to Water Pump Replacement in Engine Cooling.
- Install the crankshaft front oil seal. Refer to Crankshaft Front Oil Seal Replacement .
- Install the crankshaft balancer. Refer to Crankshaft Balancer Replacement .
- Install the thermostat housing crossover. Refer to Thermostat Housing Crossover Replacement in Engine Cooling.
- Install the oil fill tube. Refer to Oil Filler Tube Replacement .
- Install the drive belt. Refer to Drive Belt Replacement .
- Install the upper fan shroud. Refer to Engine Coolant Fan Upper Shroud Replacement in Engine Cooling.
- Install the right front fender wheelhouse panel.
- Fill the engine coolant. Refer to Cooling System Draining and Filling in Engine Cooling.
- Connect the battery negative cable. Refer to Battery Negative Cable Disconnection and Connection in Engine Electrical.
- Install the upper intake manifold cover.
- Install the upper intake manifold cover to the outlet duct.
- Tighten the outlet duct clamp at the upper intake manifold cover.
Notice: Use the correct fastener in the correct location. Replacement fasteners must be the correct part number for that application. Fasteners requiring replacement or fasteners requiring the use of thread locking compound or sealant are identified in the service procedure. Do not use paints, lubricants, or corrosion inhibitors on fasteners or fastener joint surfaces unless specified. These coatings affect fastener torque and joint clamping force and may damage the fastener. Use the correct tightening sequence and specifications when installing fasteners in order to avoid damage to parts and systems.
Tighten
Tighten the valve to 41 N·m (30 lb ft).
Lubricate the O-ring with clean engine oil.
Tighten
Tighten the bolts to 21 N·m (15 lb ft).
Tighten
Tighten the bolts to 21 N·m (15 lb ft).
Tighten
Tighten the turbocharger coolant outlet pipe bracket bolts to 21 N·m
(15 lb ft).
Tighten
Tighten the bolt to 10 N·m (89 lb in).
Important: The crankshaft position sensor spacers are machined with different timing positions. However, if the crankshaft position sensor spacer requires replacement, replace with a grade "B" spacer.
Tighten
Tighten the bolts to 10 N·m (89 ft in).
Tighten
Tighten the bolt to 10 N·m (89 lb in).
Tighten
Tighten the clamp to 6 N·m (53 lb in).
