For 1990-2009 cars only
Removal Procedure
- Remove the fuel injector sight shield. Refer to Fuel Injector Sight Shield Replacement.
- Remove the air cleaner outlet duct. Refer to Air Cleaner Outlet Duct Replacement.
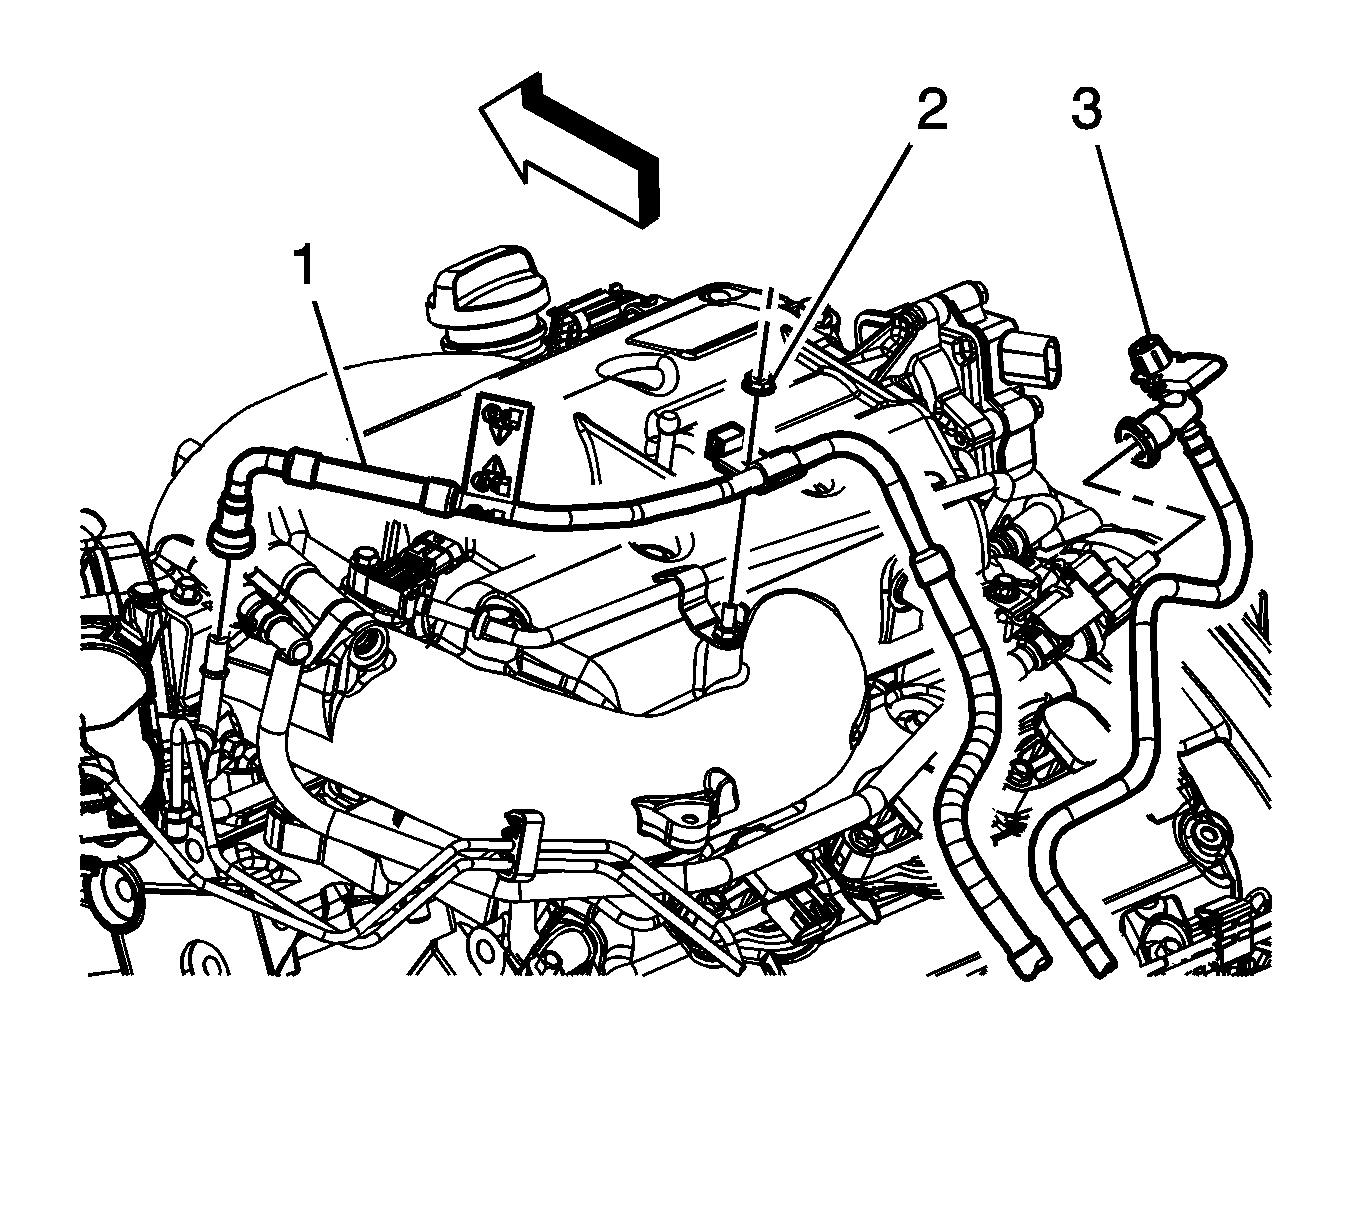
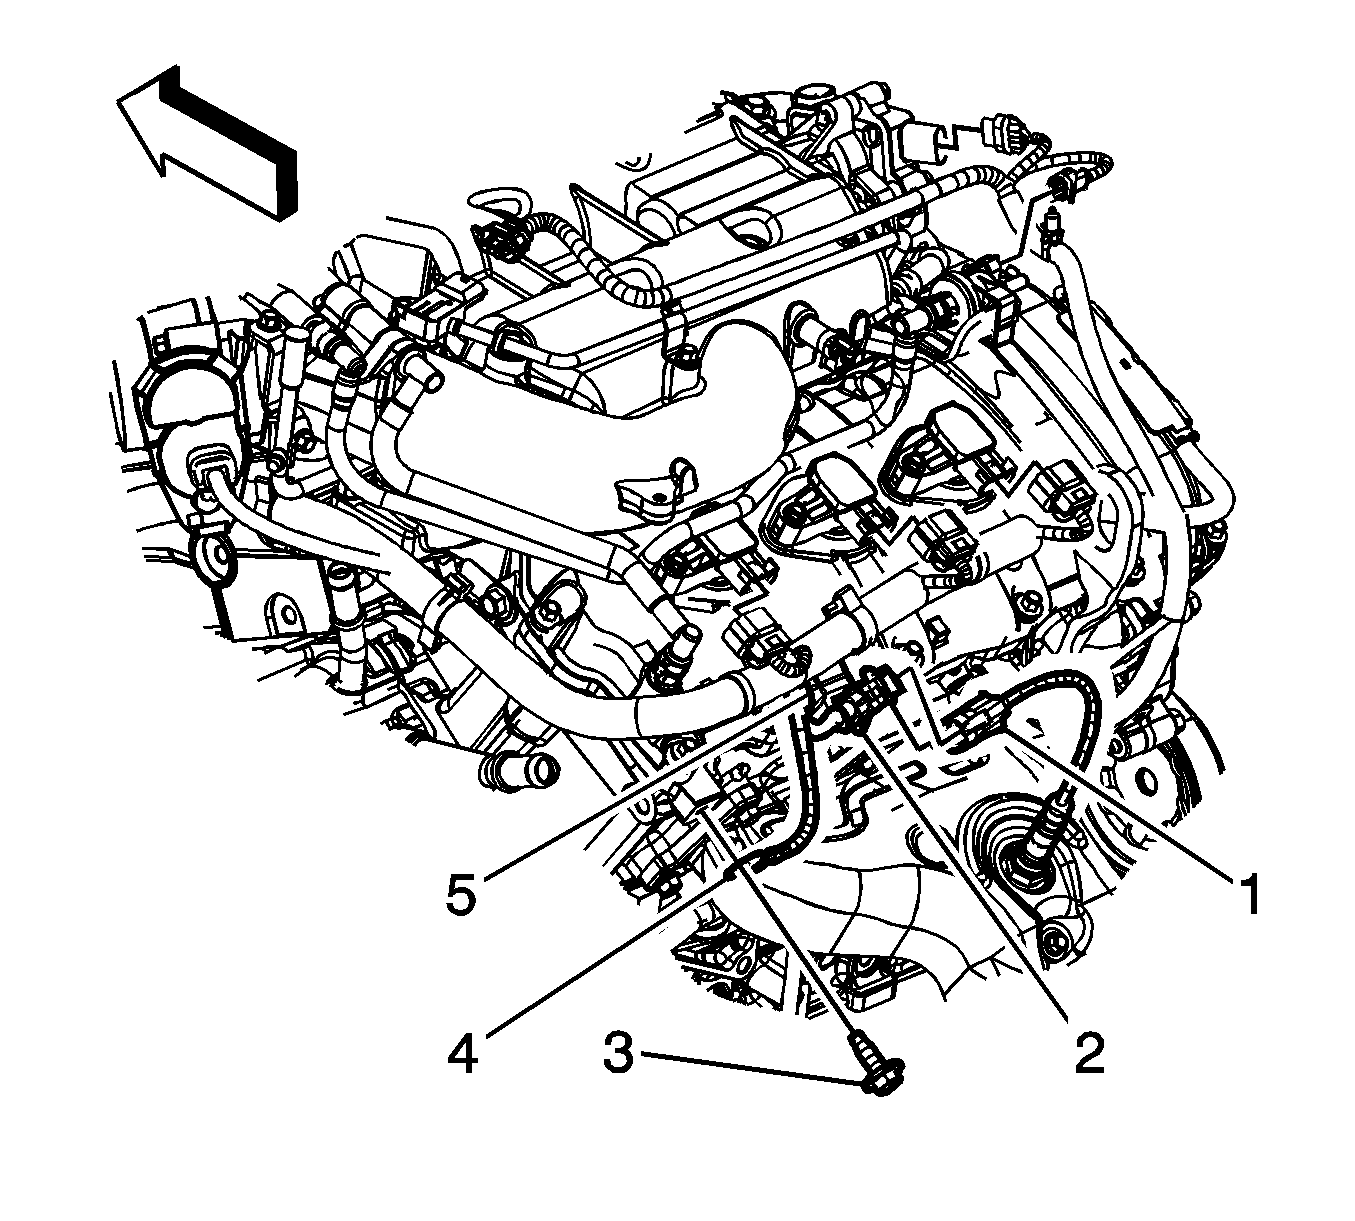
- Disconnect the fuel feed line (1) quick connect fitting from the fuel rail. Refer to Metal Collar Quick Connect Fitting Service.
- Remove the fuel feed pipe line nut (2) and remove the fuel feed line clip from the stud.
- Reposition the fuel feed line out of the way.
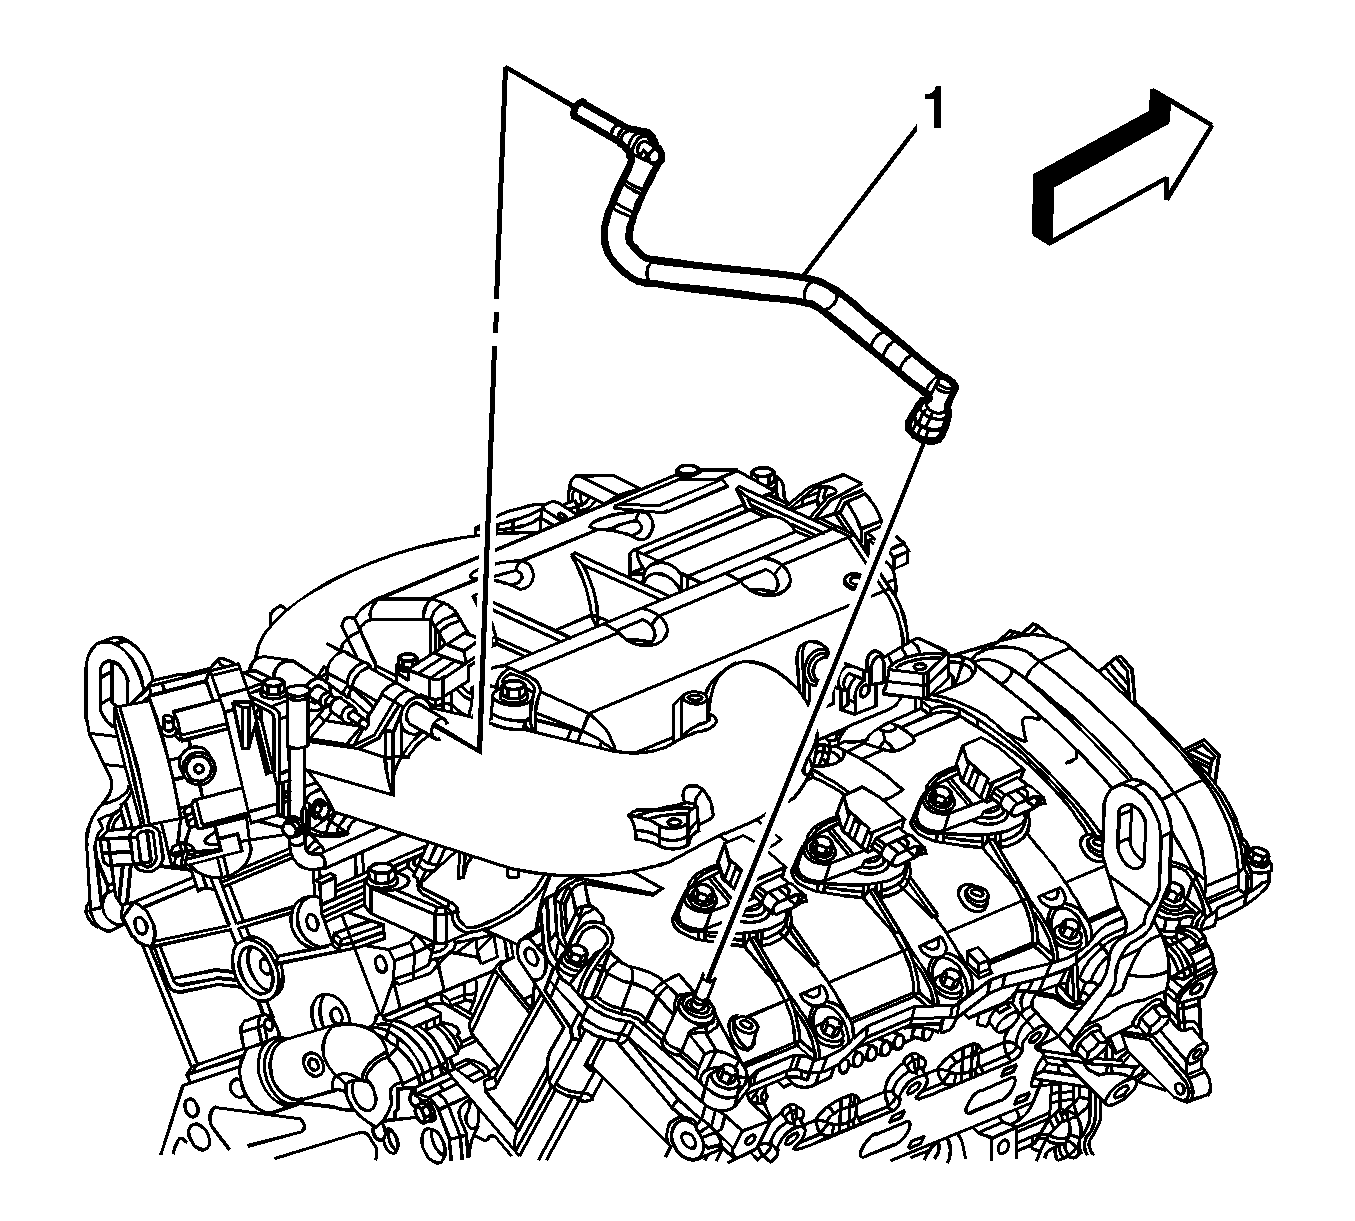
- Remove the coolant air bleed hose/pipe clip bolt (3) from the upper intake manifold.
- Reposition the coolant air bleed hose clamp (2) at the water outlet.
- Remove the coolant air bleed hose from the water outlet.
- Remove the coolant air bleed hose/pipe clip from the upper intake manifold stud and reposition out of the way.
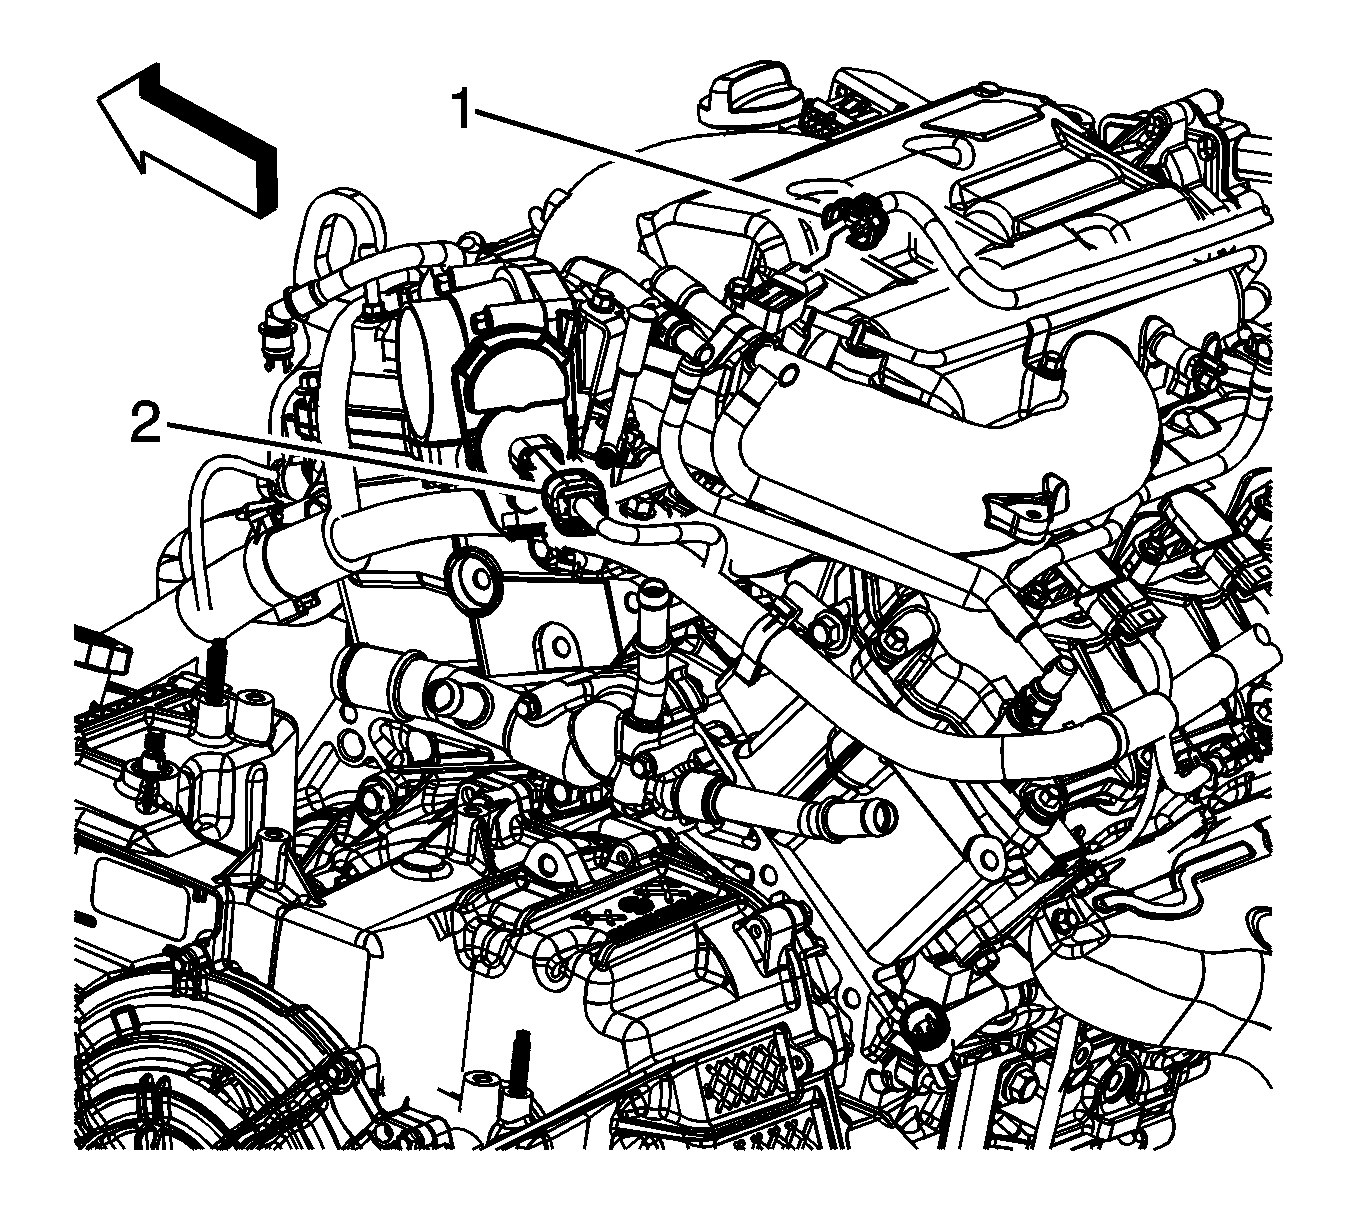
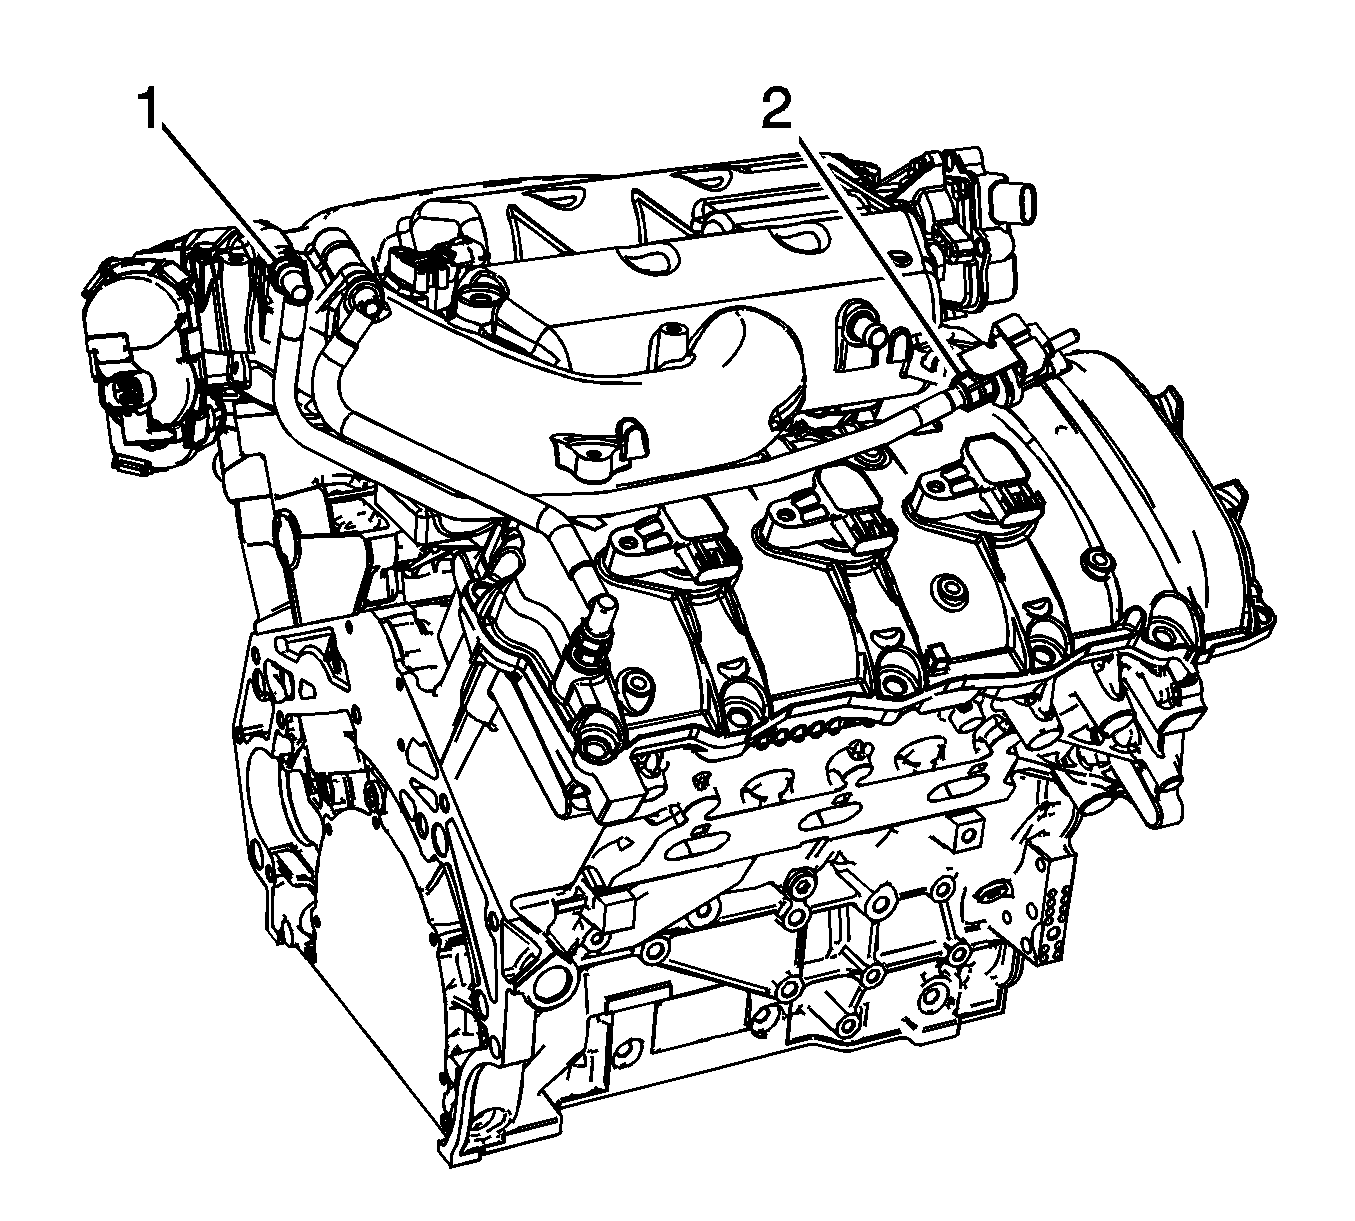
- Reposition the brake booster vacuum hose clamp (1) at the upper intake manifold.
- Remove the brake booster vacuum hose (2) from the upper intake manifold.
- Disconnect the engine wiring harness electrical connector (1) from the manifold absolute pressure (MAP) sensor.
- Disconnect the engine wiring harness electrical connector (2) from the electronic throttle control (ETC).
- Disconnect the engine wiring harness electrical connector (1) from the intake manifold tuning valve.
- Disconnect the engine wiring harness electrical connector (2) from the evaporative emission (EVAP) canister purge solenoid.
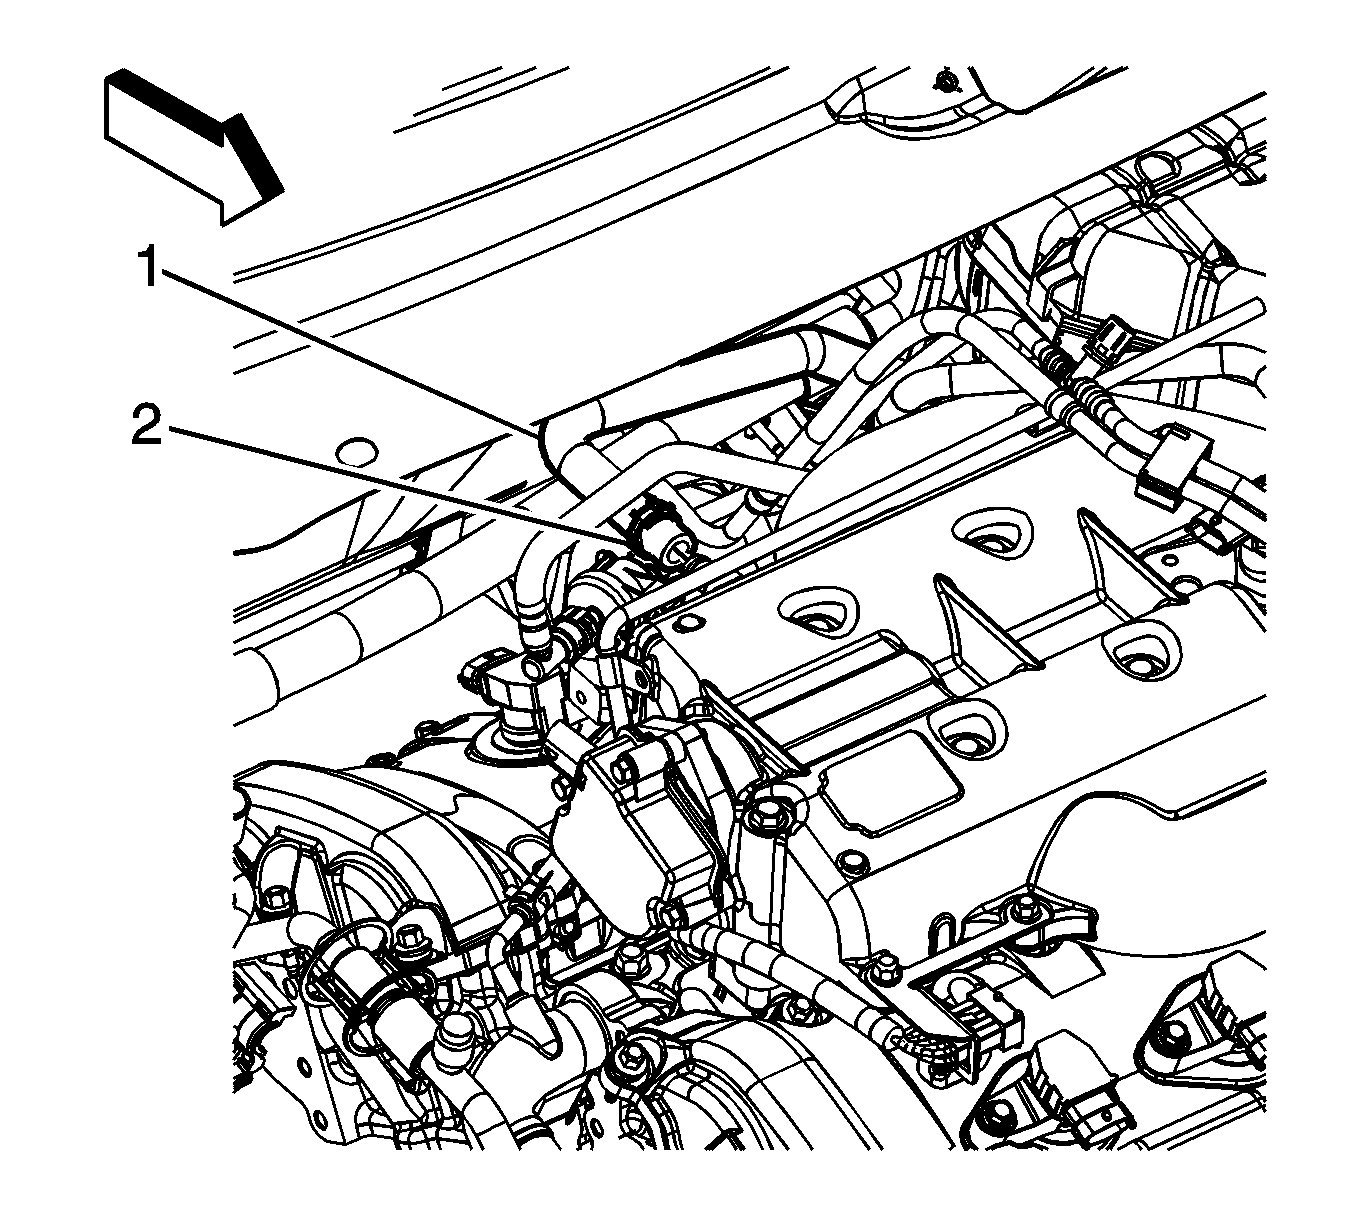
- Disconnect the positive crankcase ventilation (PCV) tube (1) from the upper intake manifold and reposition aside.
- Disconnect the EVAP canister purge solenoid tube quick connect fitting (1) at the upper intake manifold and reposition aside.
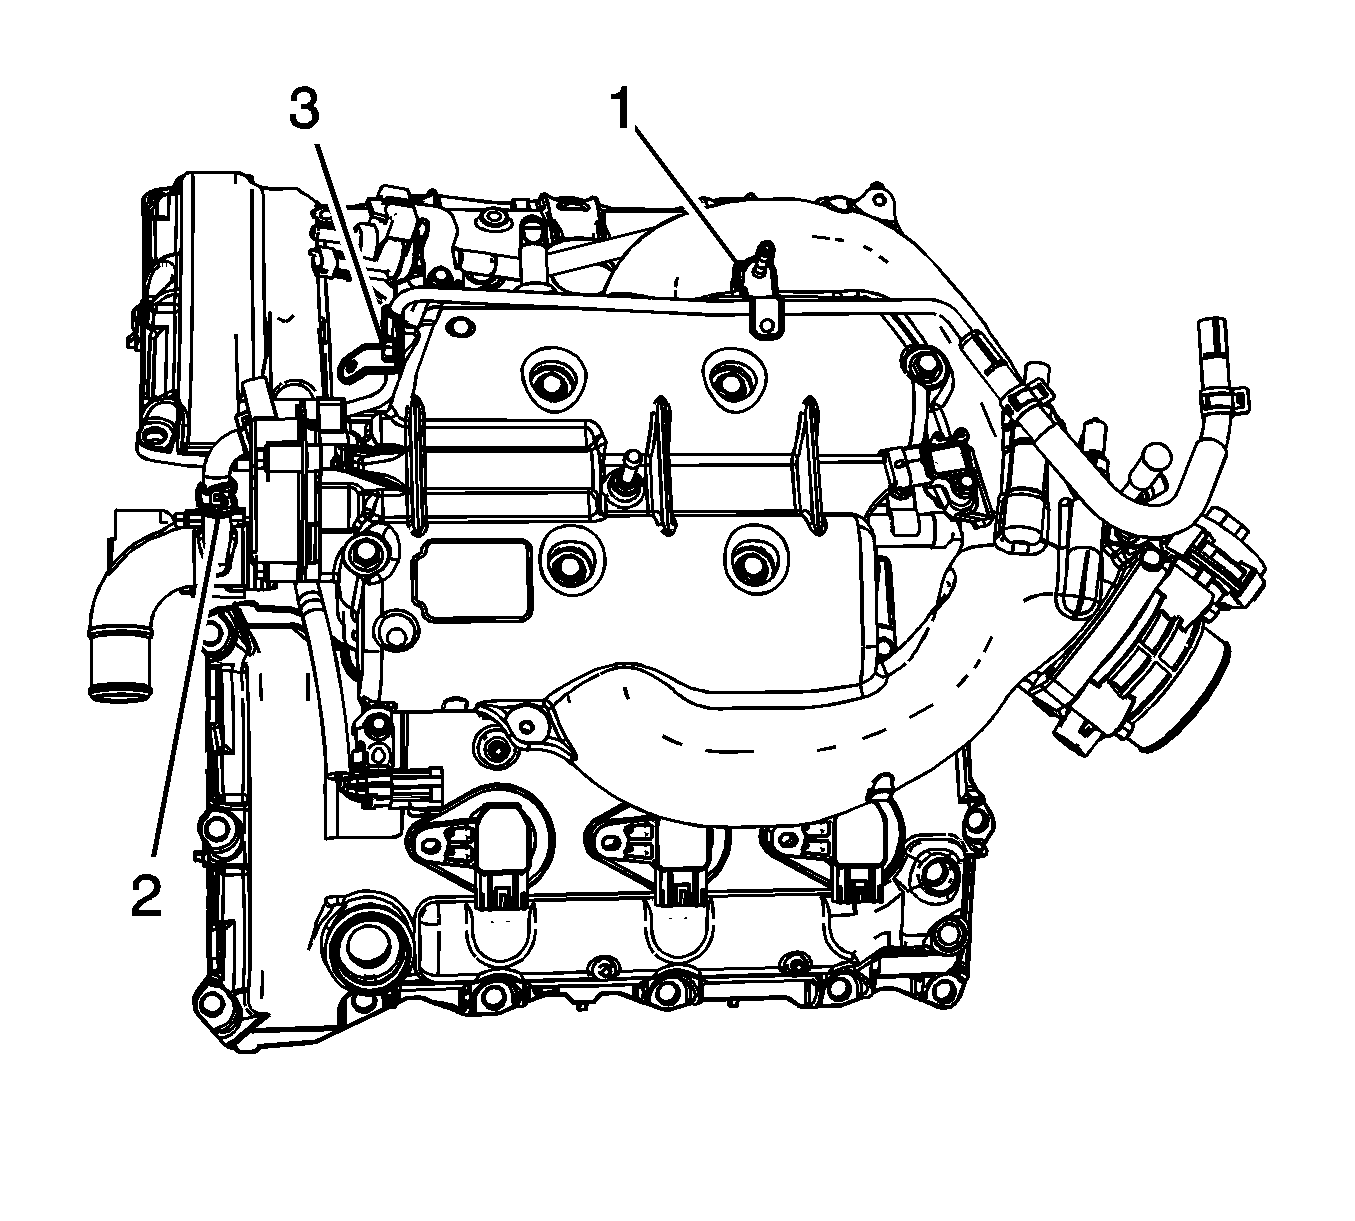
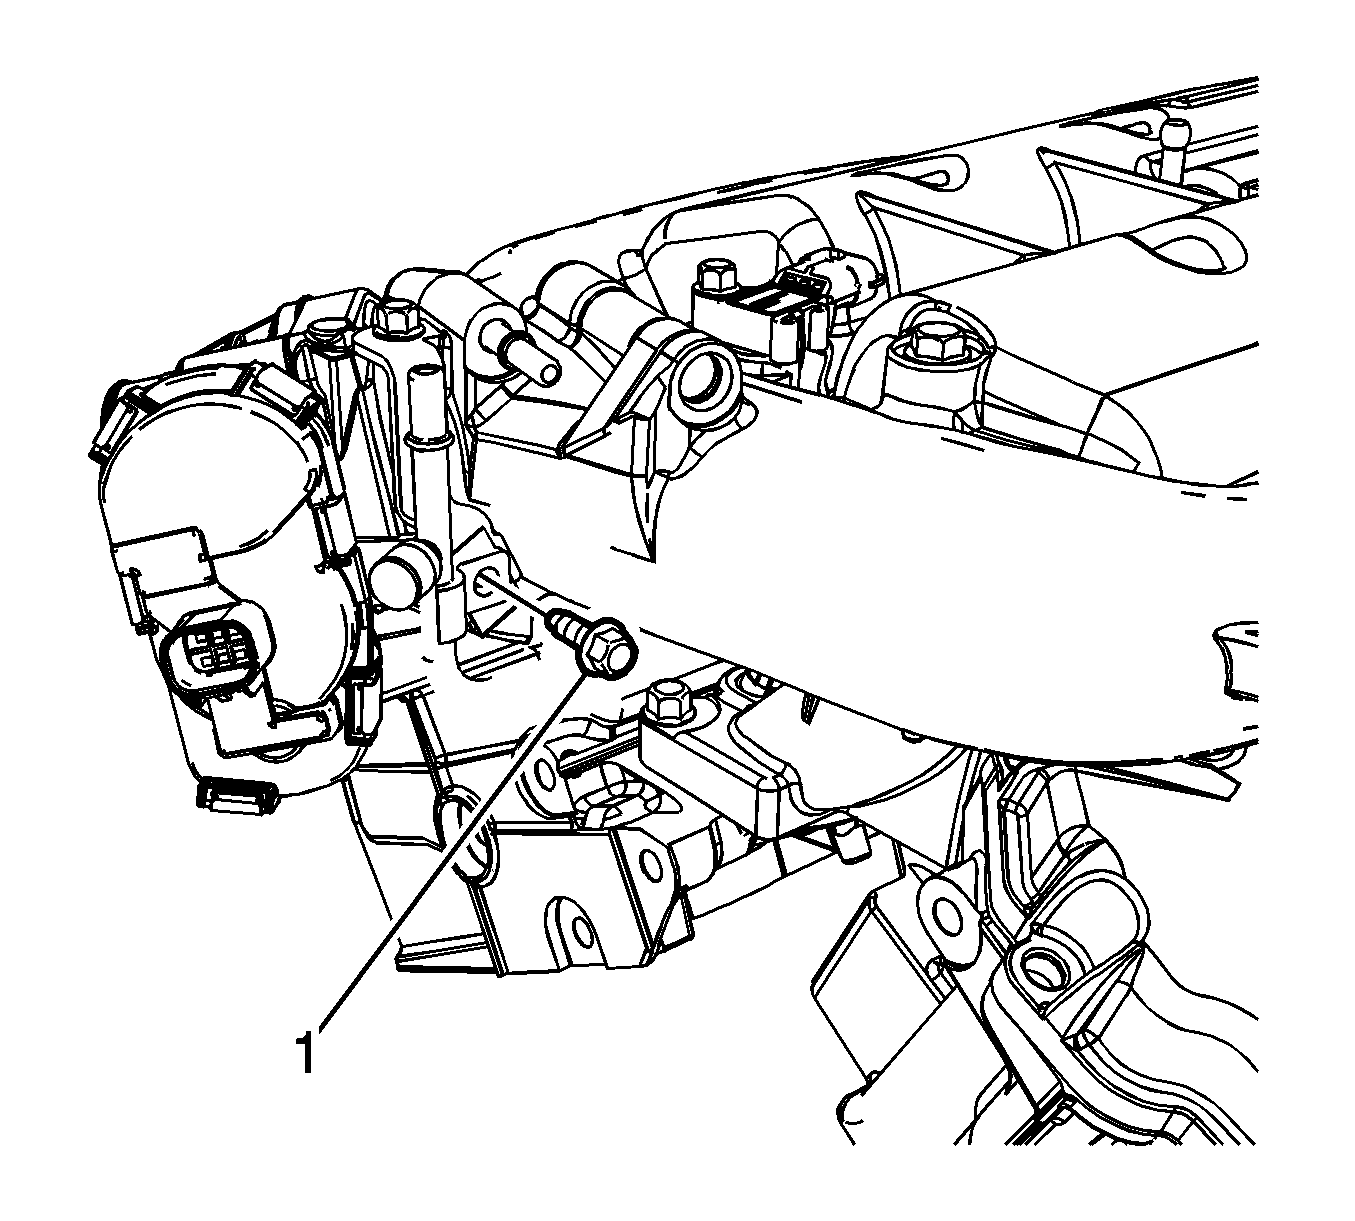
- Remove the fuel rail to bracket bolt (1).
- Remove the fuel rail wiring harness electrical connector bolt (2) and reposition the harness out of the way.
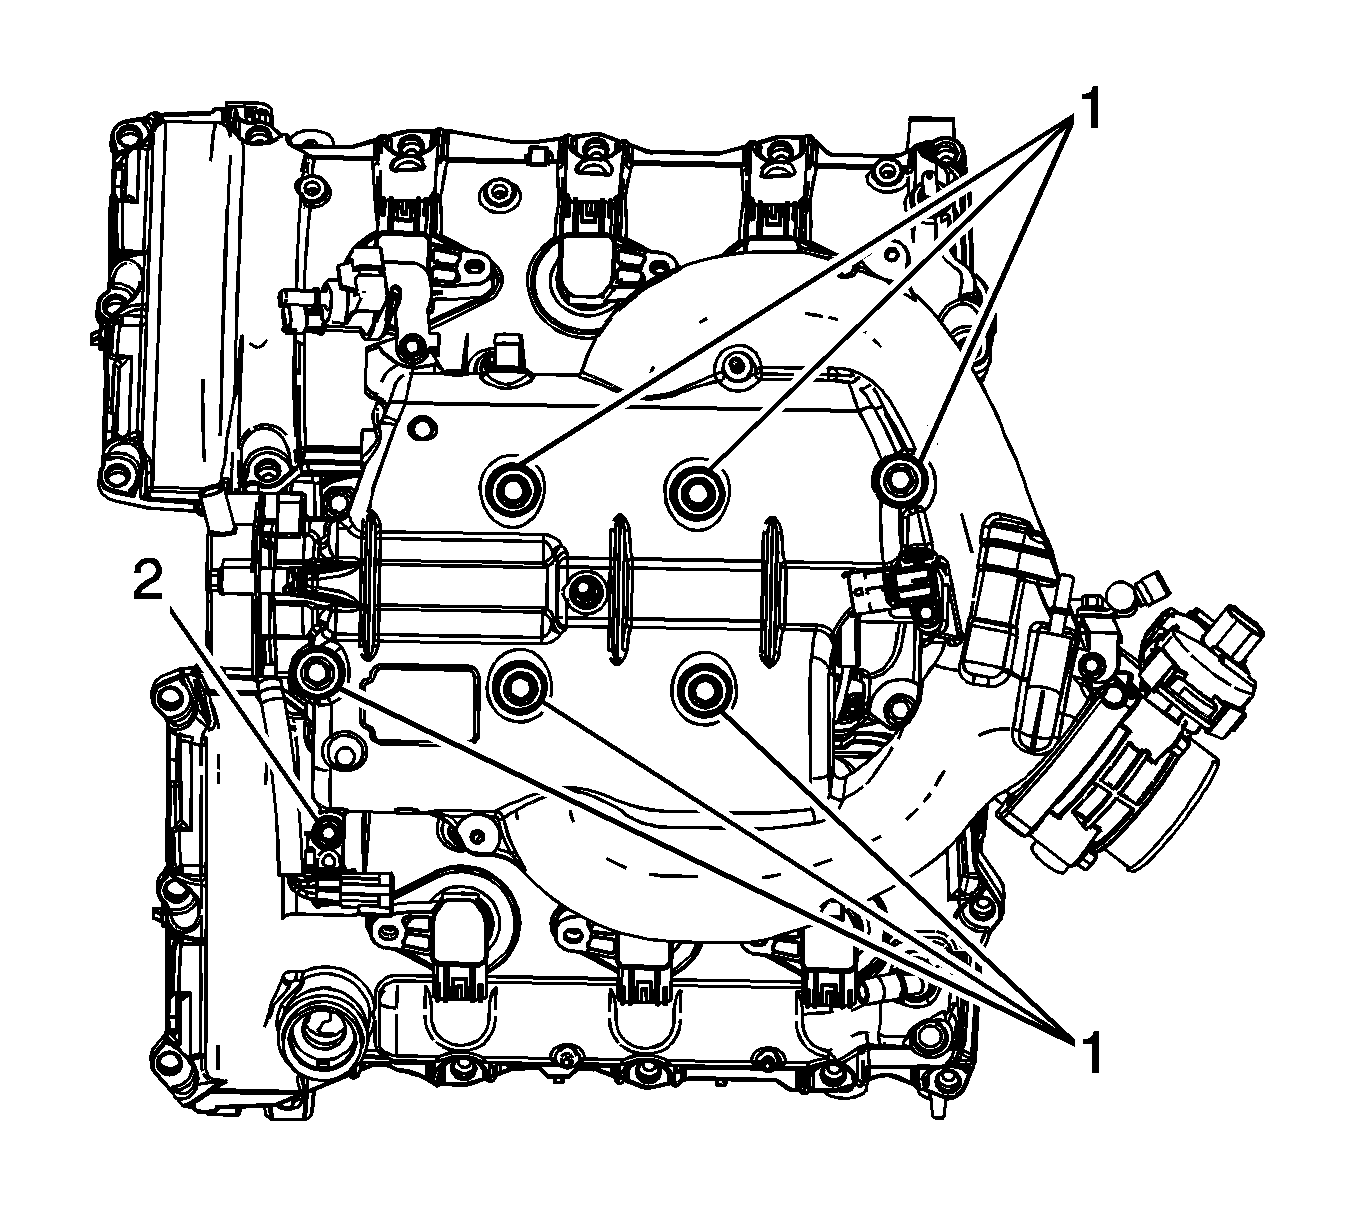
- Remove the upper intake bolts (1).
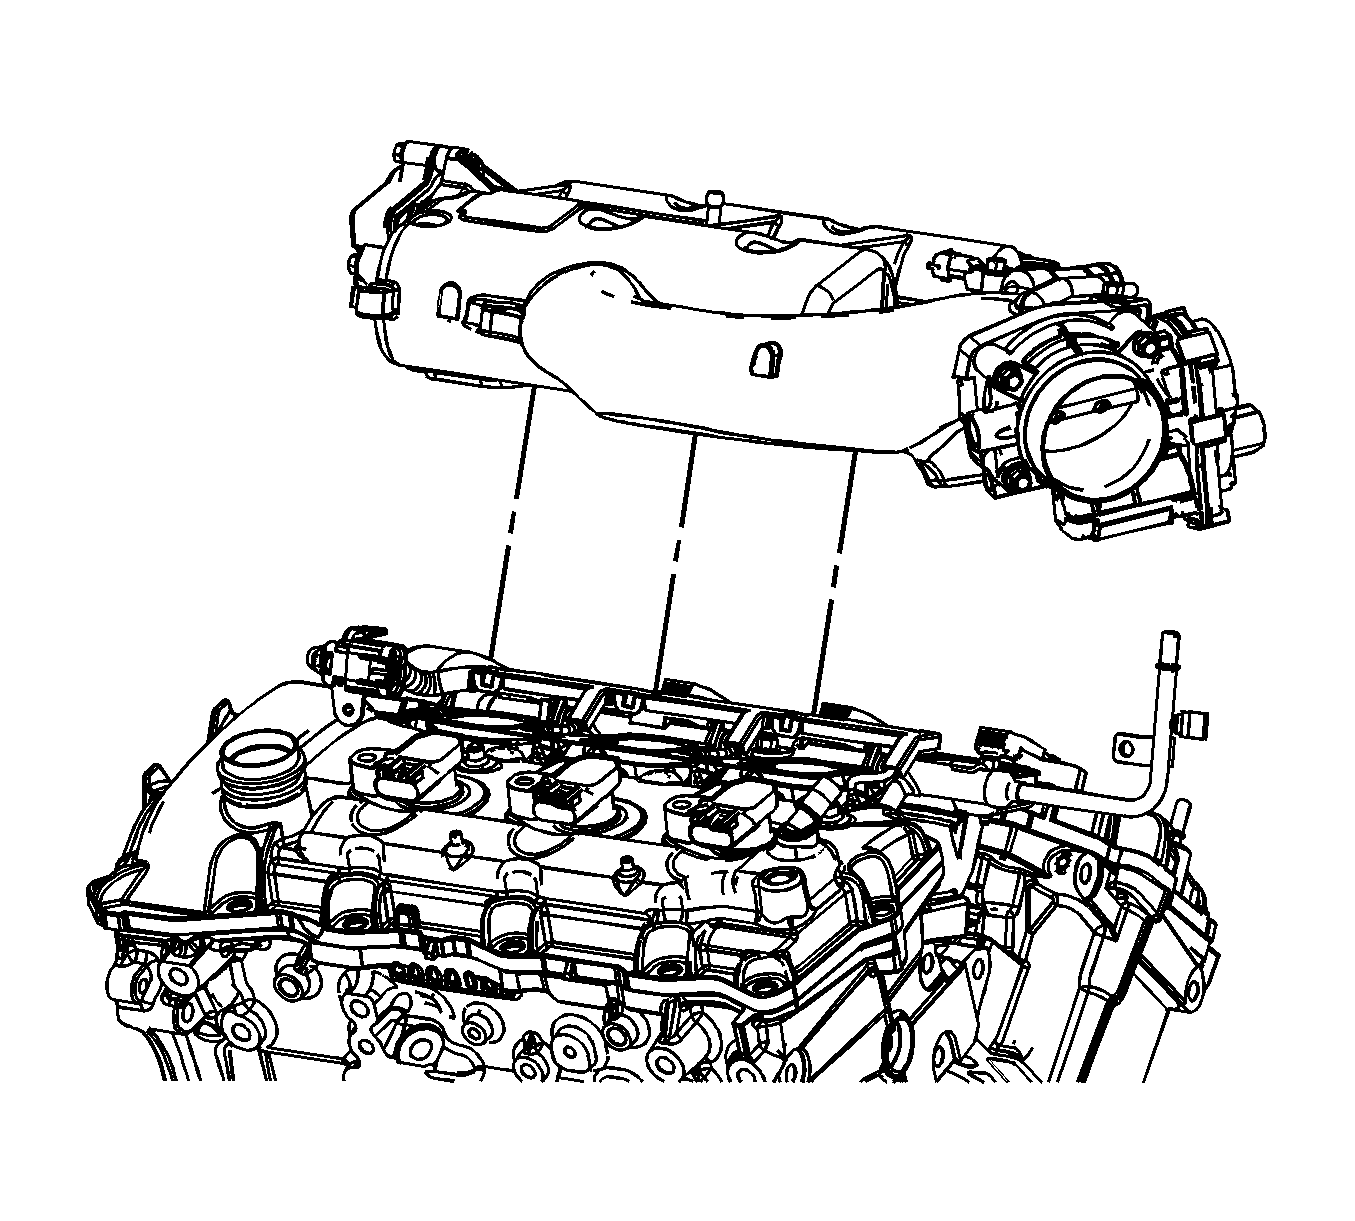
- Remove the upper intake manifold and gaskets. Discard gaskets.
- If replacing the upper intake manifold complete the following steps:
| 22.1. | Remove the MAP sensor. Refer to Manifold Absolute Pressure Sensor Replacement |
| 22.2. | Remove the throttle body. Refer to Throttle Body Assembly Replacement. |
| 22.3. | Remove the EVAP canister purge solenoid valve. Refer to Evaporative Emission Canister Purge Solenoid Valve Replacement. |
| 22.4. | Remove the intake manifold tuning valve. Refer to Intake Manifold Tuning Valve Replacement. |
Installation Procedure
- If the upper intake manifold was replaced complete the following steps:
- Place NEW upper intake manifold gaskets onto the lower intake manifold.
- Place the upper intake manifold onto the lower intake manifold.
- Install the upper intake bolts (1).
- Position the fuel rail wiring harness and install the fuel rail wiring harness electrical connector bolt (2).
- Install the fuel rail to bracket bolt (1).
- Position and install the EVAP canister purge solenoid tube quick connect fitting (1) to the upper intake manifold.
- Position and install the PCV tube (1) to the upper intake manifold.
- Connect the engine wiring harness electrical connector (2) to the EVAP canister purge solenoid.
- Connect the engine wiring harness electrical connector (1) to the intake manifold tuning valve.
- Connect the engine wiring harness electrical connector (2) to the ETC.
- Connect the engine wiring harness electrical connector (1) to the MAP sensor.
- Install the brake booster vacuum hose (2) to the upper intake manifold.
- Position the brake booster vacuum hose clamp (1) at the upper intake manifold.
- Position and install the coolant air bleed hose/pipe clip to the upper intake manifold stud.
- Install the coolant air bleed hose to the water outlet.
- Position the coolant air bleed hose clamp (2) at the water outlet.
- Install the coolant air bleed hose/pipe clip bolt (3) to the upper intake manifold.
- Position the fuel feed line and install the fuel feed line clip to the stud.
- Install the fuel feed line nut (2).
- Connect the fuel feed line (1) quick connect fitting to the fuel rail. Refer to Metal Collar Quick Connect Fitting Service.
- Install the air cleaner outlet duct. Refer to Air Cleaner Outlet Duct Replacement.
- Install the fuel injector sight shield. Refer to Fuel Injector Sight Shield Replacement.

| 1.1. | Install the MAP sensor. Refer to Manifold Absolute Pressure Sensor Replacement |
| 1.2. | Install the throttle body. Refer to Throttle Body Assembly Replacement. |
| 1.3. | Install the EVAP canister purge solenoid valve. Refer to Evaporative Emission Canister Purge Solenoid Valve Replacement. |
| 1.4. | Install the intake manifold tuning valve. Refer to Intake Manifold Tuning Valve Replacement. |
Caution: Refer to Fastener Caution in the Preface section.

Tighten
Tighten the bolts to 23 N·m (17 lb ft).
Tighten
Tighten the bolt to 10 N·m (89 lb in).

Tighten
Tighten the bolt to 10 N·m (89 lb in).


Tighten
Tighten the bolt to 10 N·m (89 lb in).

Tighten
Tighten the nut to 10 N·m (89 lb in).
