Removal Procedure
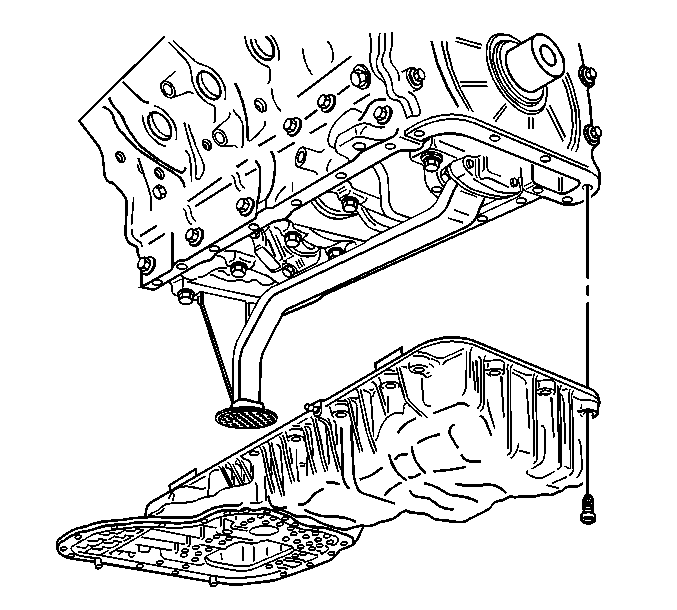
- Remove the oil level indicator.
- If equipped with 4-wheel drive (4WD), remove the front differential carrier. Refer to Differential Carrier Assembly Replacement in Front Drive Axle.
- If equipped with 2-wheel drive (2WD), disconnect the relay rod from the pitman arm and idler arm. Refer to Relay Rod Replacement in Steering-Steering Linkage (Non-Rack and Pinion).
- Remove the lower oil pan. Refer to Lower Oil Pan Replacement .
- Remove the engine flywheel. Refer to Engine Flywheel Replacement - Automatic Transmission or Engine Flywheel Replacement - Manual Transmission .
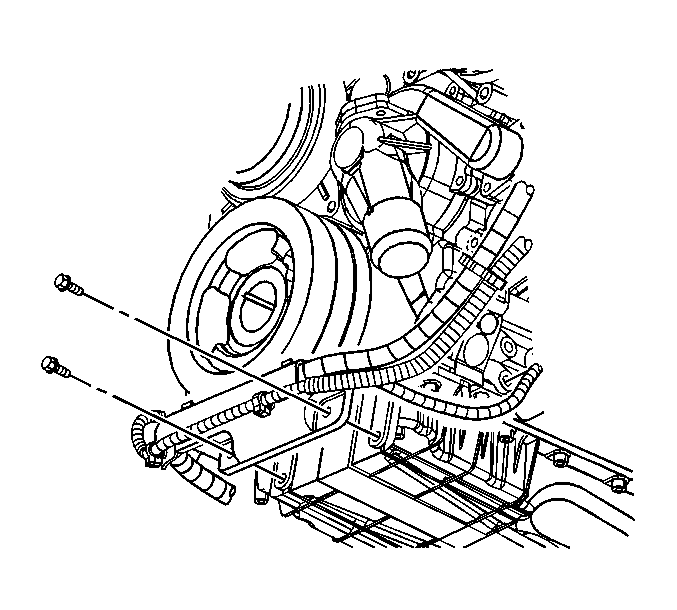
- Remove the battery cable bracket bolts.
- Remove the battery cable bracket nut.
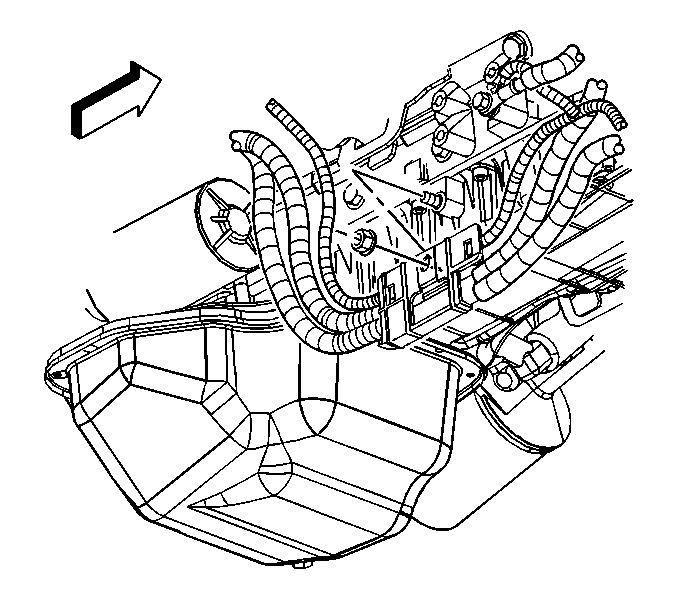
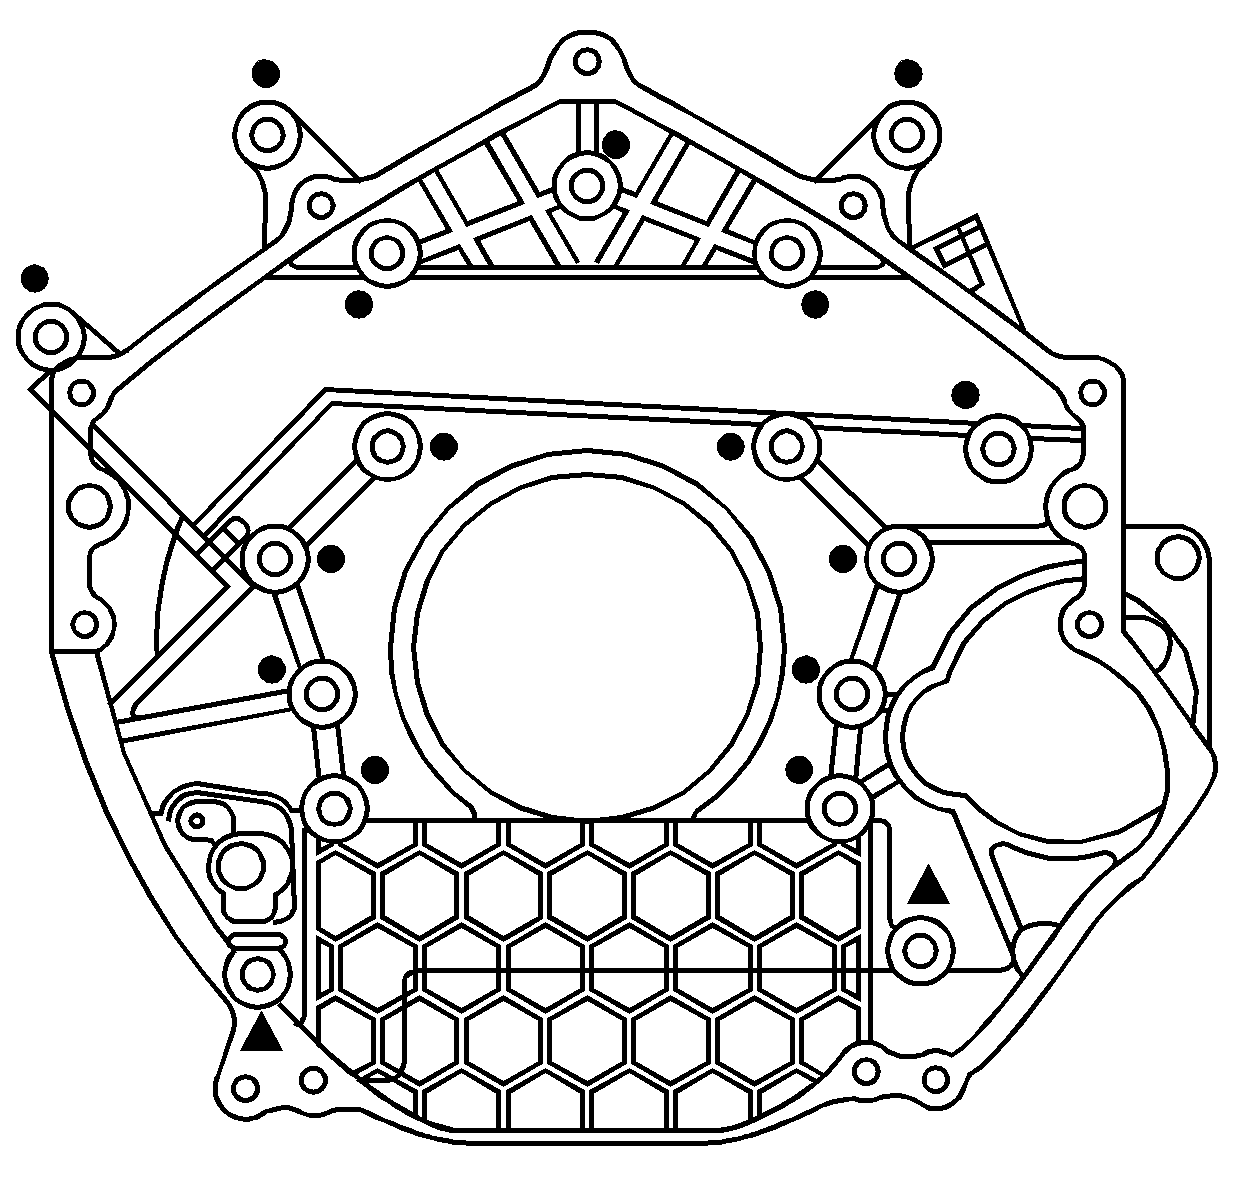
- Remove the flywheel housing to upper oil pan bolts, denoted by the black triangles.
- Remove the upper oil pan bolts and any brackets. Mark the bolt location of the bracket.
- Separate the upper oil pan from the engine block.
- Remove the upper oil pan. The oil level indicator tube needs to be removed while lowering the upper oil pan.
- If required, clean and inspect the upper oil pan. Refer to Upper Oil Pan Cleaning and Inspection .
Installation Procedure
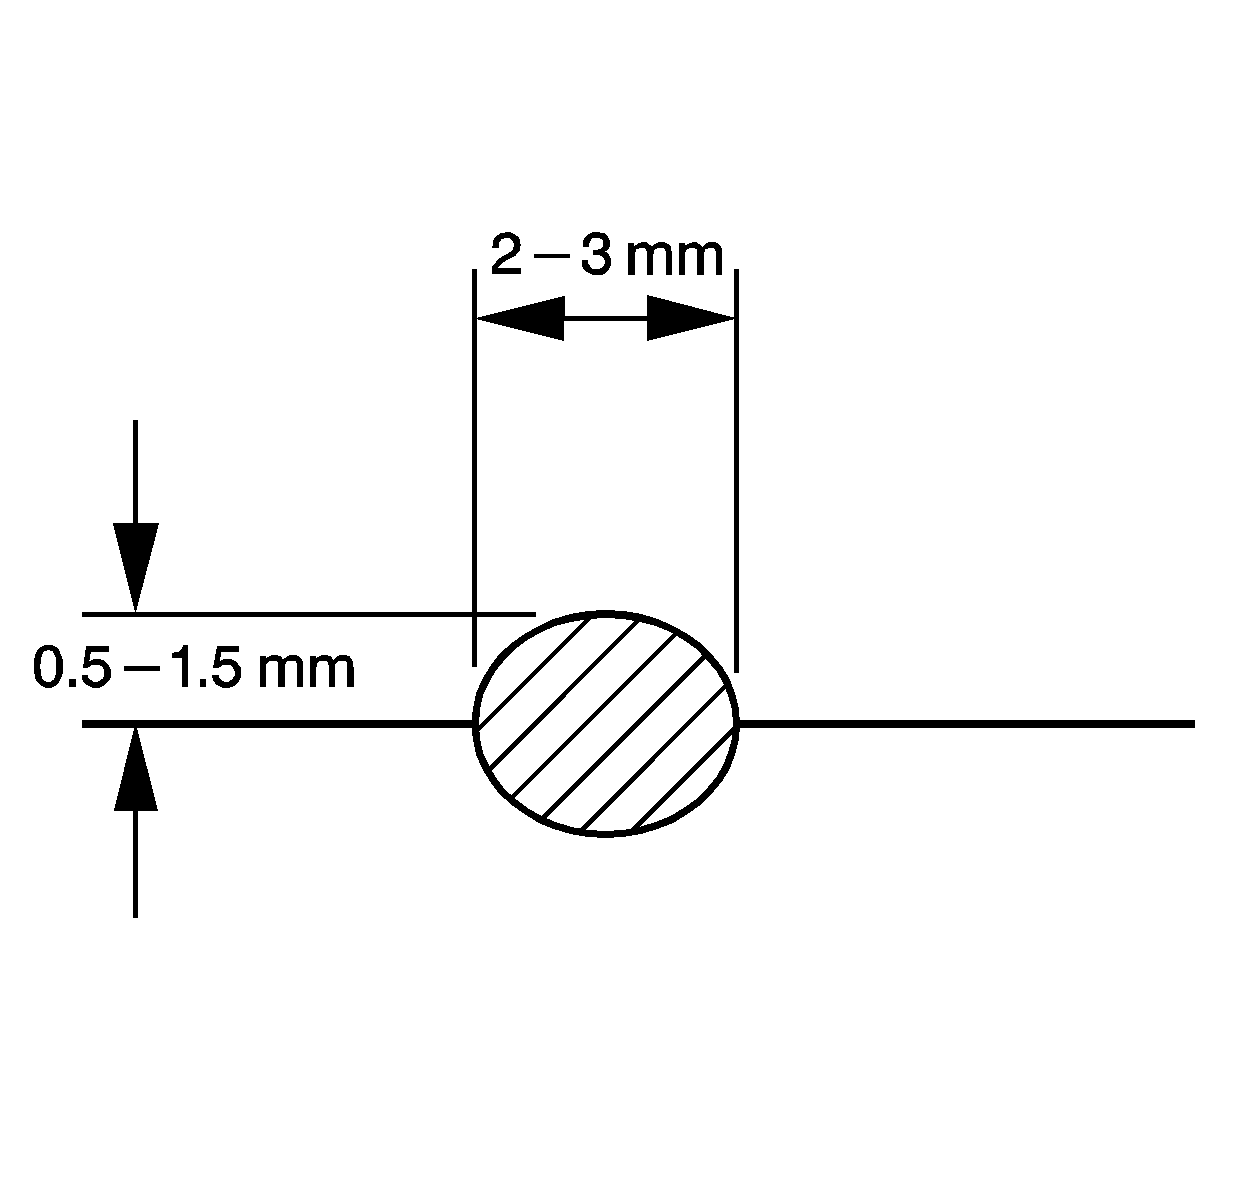
- Apply a 2 mm (1/8 in) wide bead of sealant GM P/N 97720043 (Canadian P/N 88901148), or equivalent to the upper oil pan mating surfaces.
- Apply a 2 mm (1/8 in) wide bead of sealant GM P/N 97720043 (Canadian P/N 88901148), or equivalent to the flywheel housing sealing surface.
- Install the upper oil pan to the engine block. Ensure the oil level indicator tube is installed into the upper oil pan.
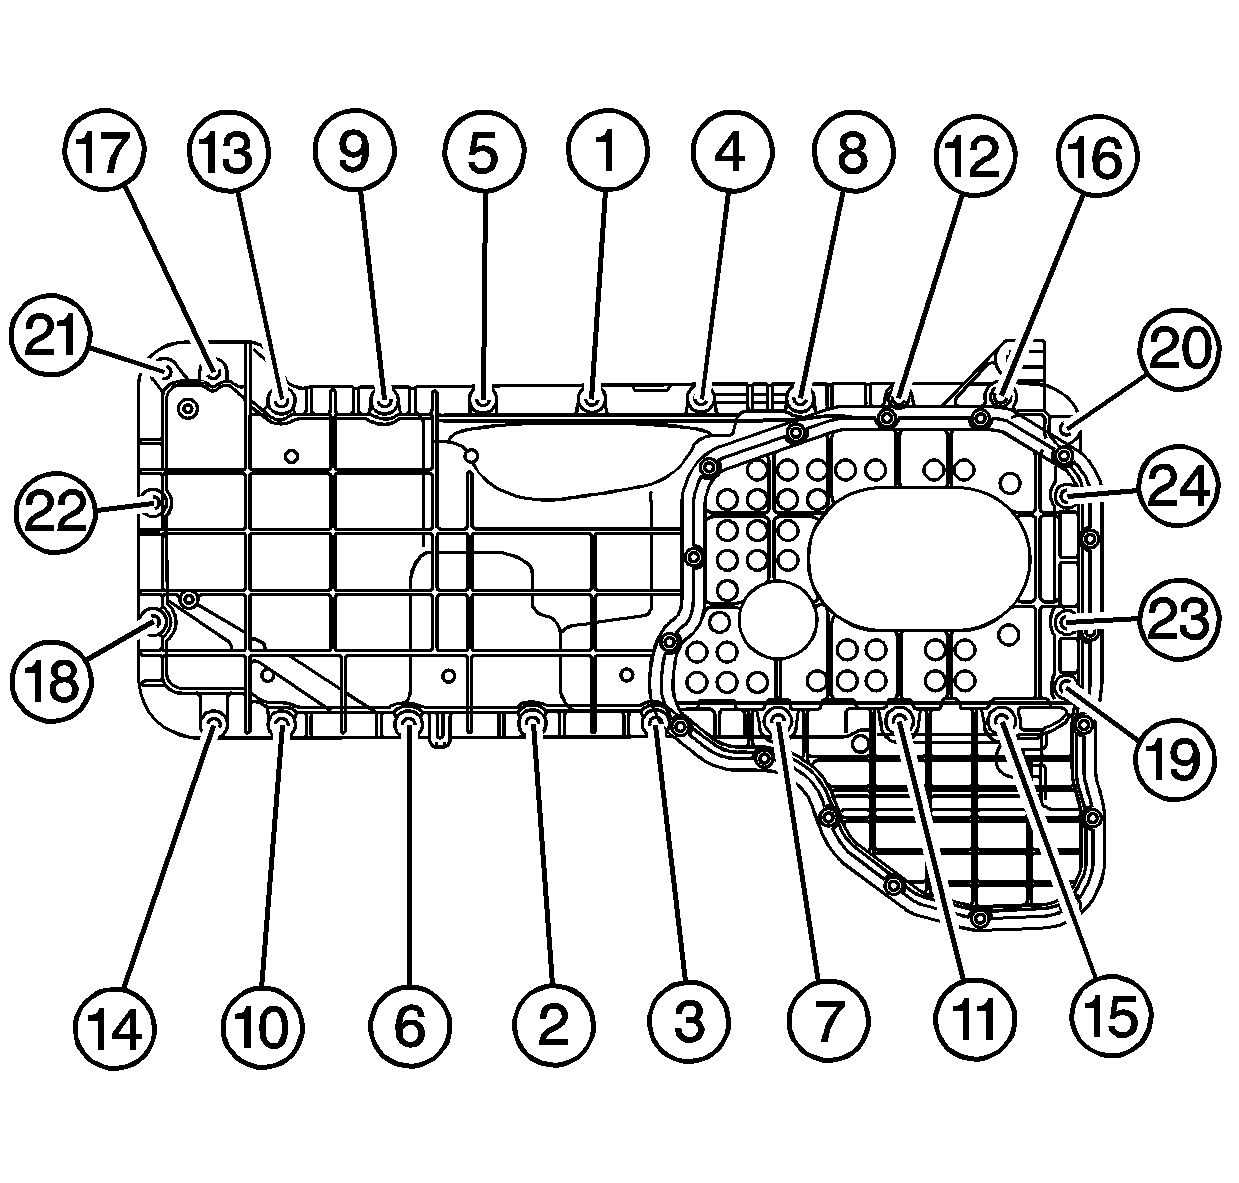
- Install any brackets and the upper oil pan bolts in the sequence shown.
- Install the flywheel housing to upper oil pan bolts denoted by the black triangles.
- Install the battery cable bracket bolts.
- Install the battery cable bracket nut.
- Install the engine flywheel. Refer to Engine Flywheel Replacement - Automatic Transmission or Engine Flywheel Replacement - Manual Transmission .
- Install the lower oil pan. Refer to Lower Oil Pan Replacement .
- If equipped with 4WD, install the front differential carrier. Refer to Differential Carrier Assembly Replacement in Front Drive Axle.
- If equipped with 2WD, Connect the relay rod to the pitman arm and idler arm. Refer to Relay Rod Replacement in Steering Linkage (Non-Rack and Pinion).
- Lower the vehicle.
- Install the oil level indicator.
- Fill the engine with oil. Refer to Engine Oil and Oil Filter Replacement .
Notice: Use the correct fastener in the correct location. Replacement fasteners must be the correct part number for that application. Fasteners requiring replacement or fasteners requiring the use of thread locking compound or sealant are identified in the service procedure. Do not use paints, lubricants, or corrosion inhibitors on fasteners or fastener joint surfaces unless specified. These coatings affect fastener torque and joint clamping force and may damage the fastener. Use the correct tightening sequence and specifications when installing fasteners in order to avoid damage to parts and systems.
Tighten
Tighten the bolts to 20 N·m (15 lb ft).
Tighten
Tighten the bolts to 50 N·m (37 lb ft).
Tighten
Tighten the bolts to 12 N·m (106 lb in).
Tighten
Tighten the nut to 8 N·m (71 lb in).
