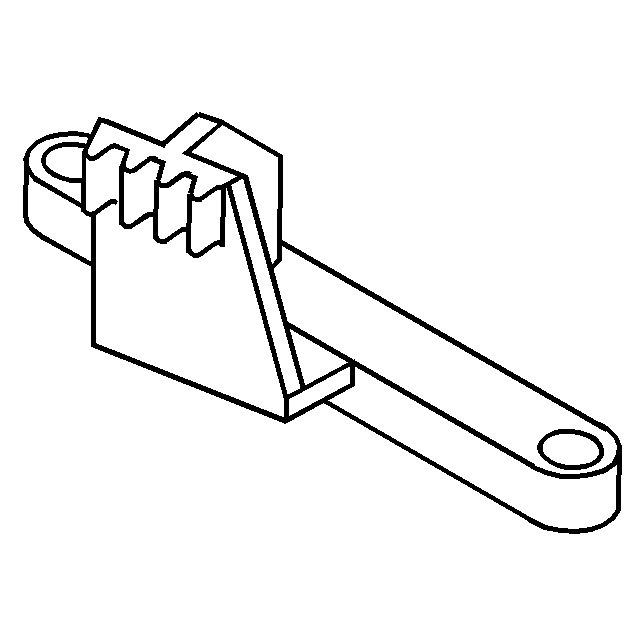
Tools Required
| • | J 44643 Flywheel Holding Tool |
| • | J 36660-A Torque Angle Meter |
Removal Procedure
- Remove the clutch. Refer to Clutch Assembly Replacement in Clutch.
- Remove the starter. Refer to Starter Motor Replacement in Engine Electrical.
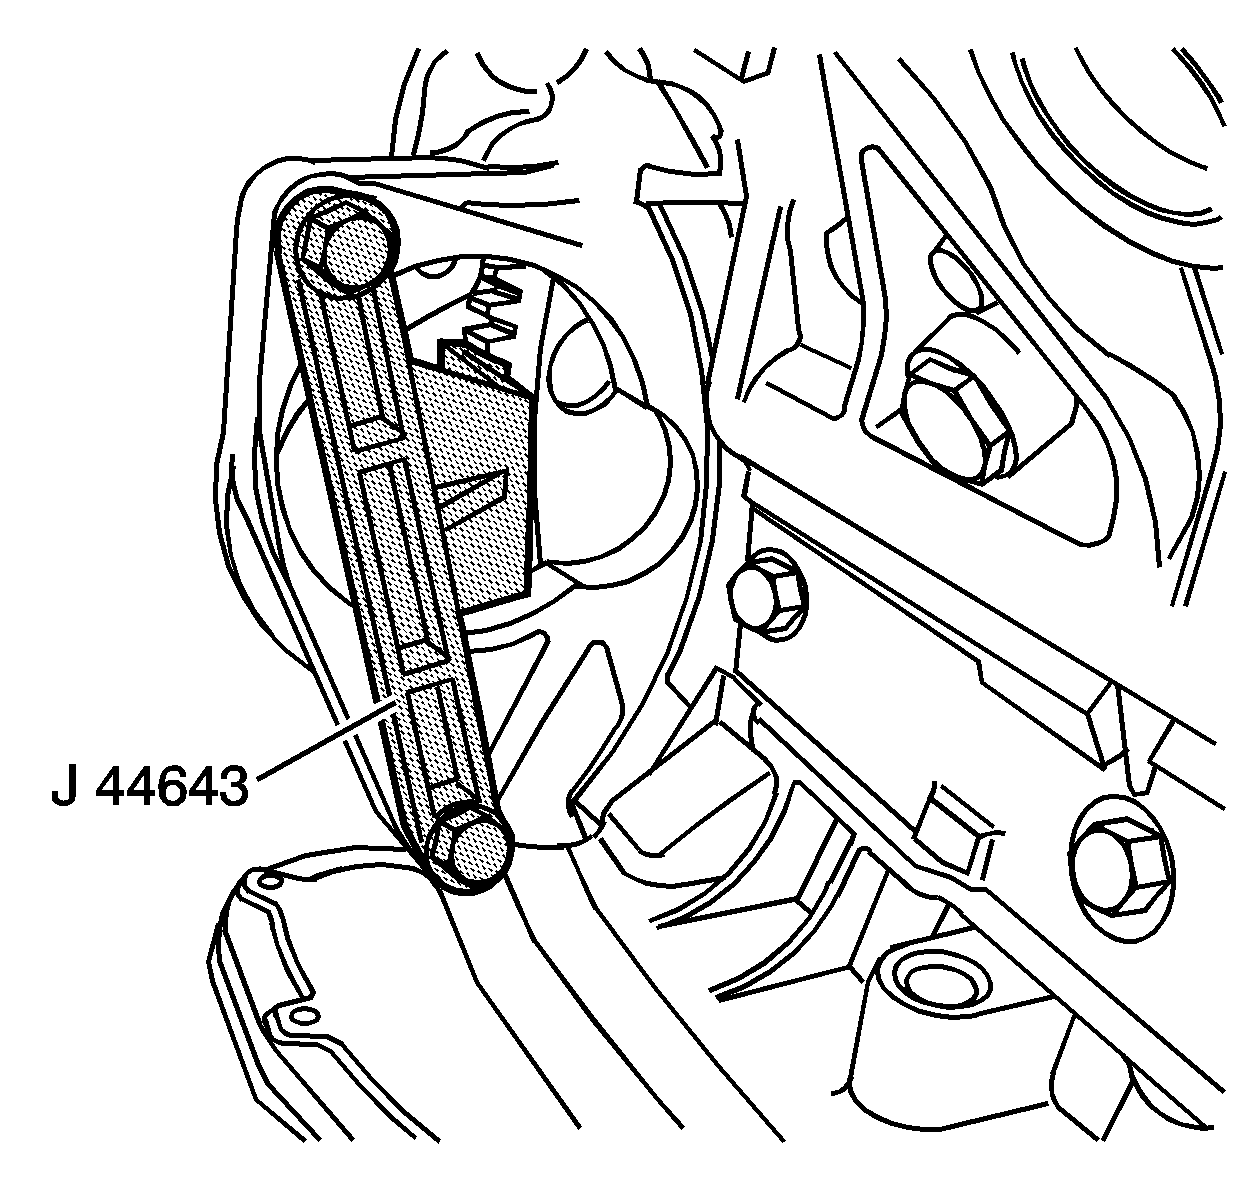
- Install J 44643 in order to hold the flywheel.
- In order to access the flywheel to crankshaft bolts re-index the dual mass flywheel using the following procedure:
- Remove and discard the flywheel bolts.
- Remove J 44643 .
- Remove the flywheel.
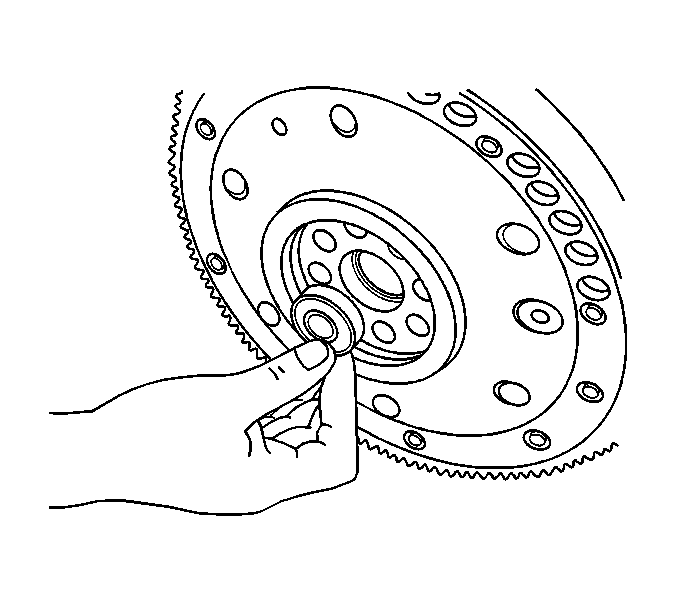
- Remove the pilot bearing using a hammer and a punch from the flywheel. The pilot bearing is removed from the crankshaft side of the flywheel.
Important: The dual mass flywheel may require re-indexing in order to access the flywheel to crankshaft bolts through the secondary ring of the flywheel.
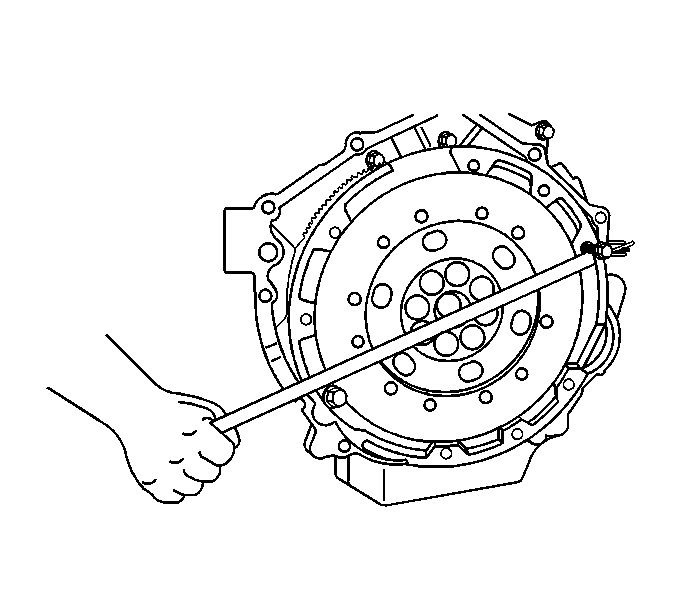
| 4.1. | Install 2 bolts into the clutch pressure plate holes 180 degrees apart. Do not use the clutch pressure plate bolts. Use a bolt of the correct thread and length that protrudes enough to use a pry bar. |
| 4.2. | Using a long pry bar turn the secondary ring of the dual mass flywheel clockwise until the flywheel bolts can be accessed. It may require turning the secondary ring past the bolt holes in order to compensate the spring tension. |
Caution: When removing, handling or installing this component wear protective gloves. The sharp edges on the component may be very sharp and may cause injury.
Inspection and Repair
- Inspect the flywheel for the following:
- Replace the flywheel if any of the conditions are found.
- Replace the ring gear on the flywheel if teeth are worn or damaged.
- Use the following steps in order to replace the ring gear on the flywheel:
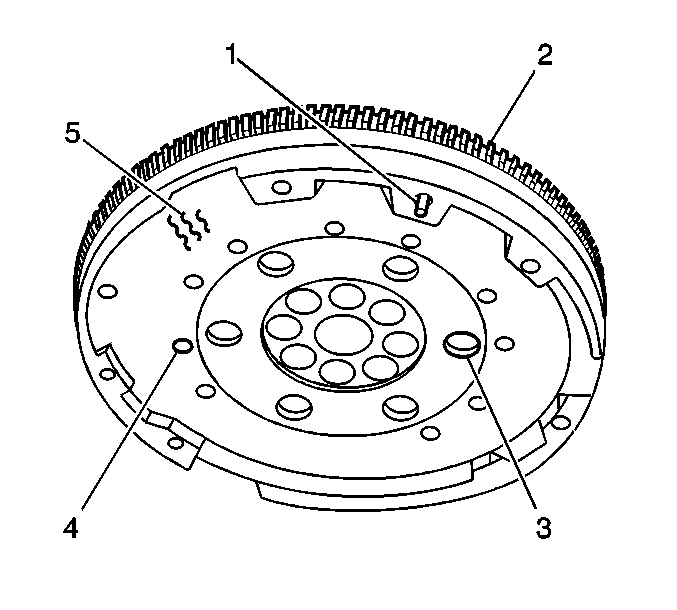
| • | Missing or damaged clutch plate pins (1) |
| • | Excessive wear to the ring gear teeth (2) |
| • | Broken damper springs (3) |
| • | Loose rivets (4) |
| • | Clutch surface for cracking, hot spots, grooved, or excessive wear (5) |
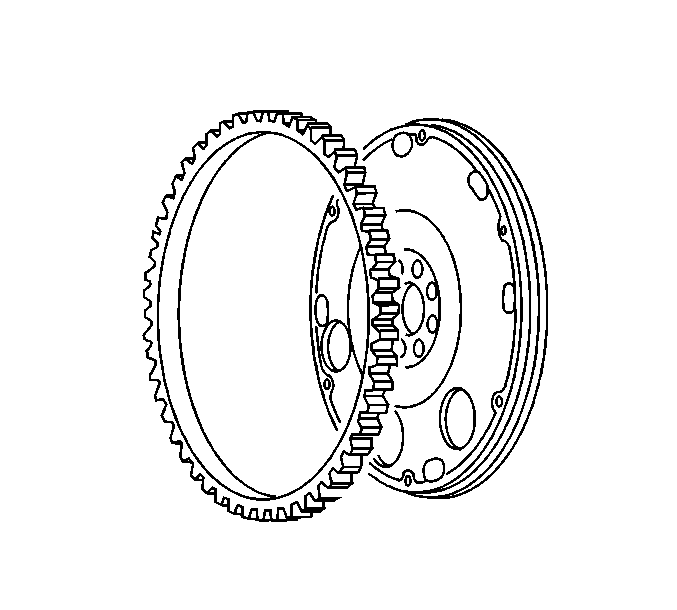
| 4.1. | Heat the ring gear evenly with a torch. Do not overheat. |
| 4.2. | Using a hammer and punch remove the ring gear. |
Installation Procedure
- Replace the ring gear, if removed.
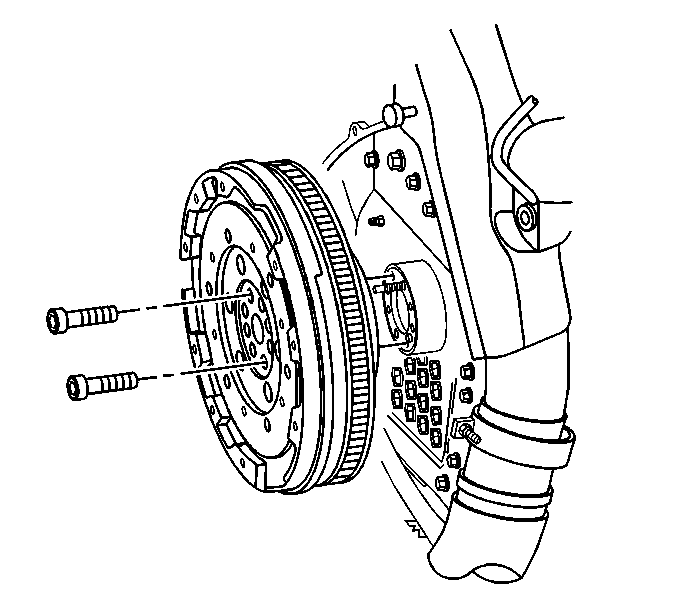
- Install the pilot bearing in the flywheel.
- Install the flywheel.
- Loosely install NEW flywheel bolts.
- Install J 44643 in order to hold the flywheel.
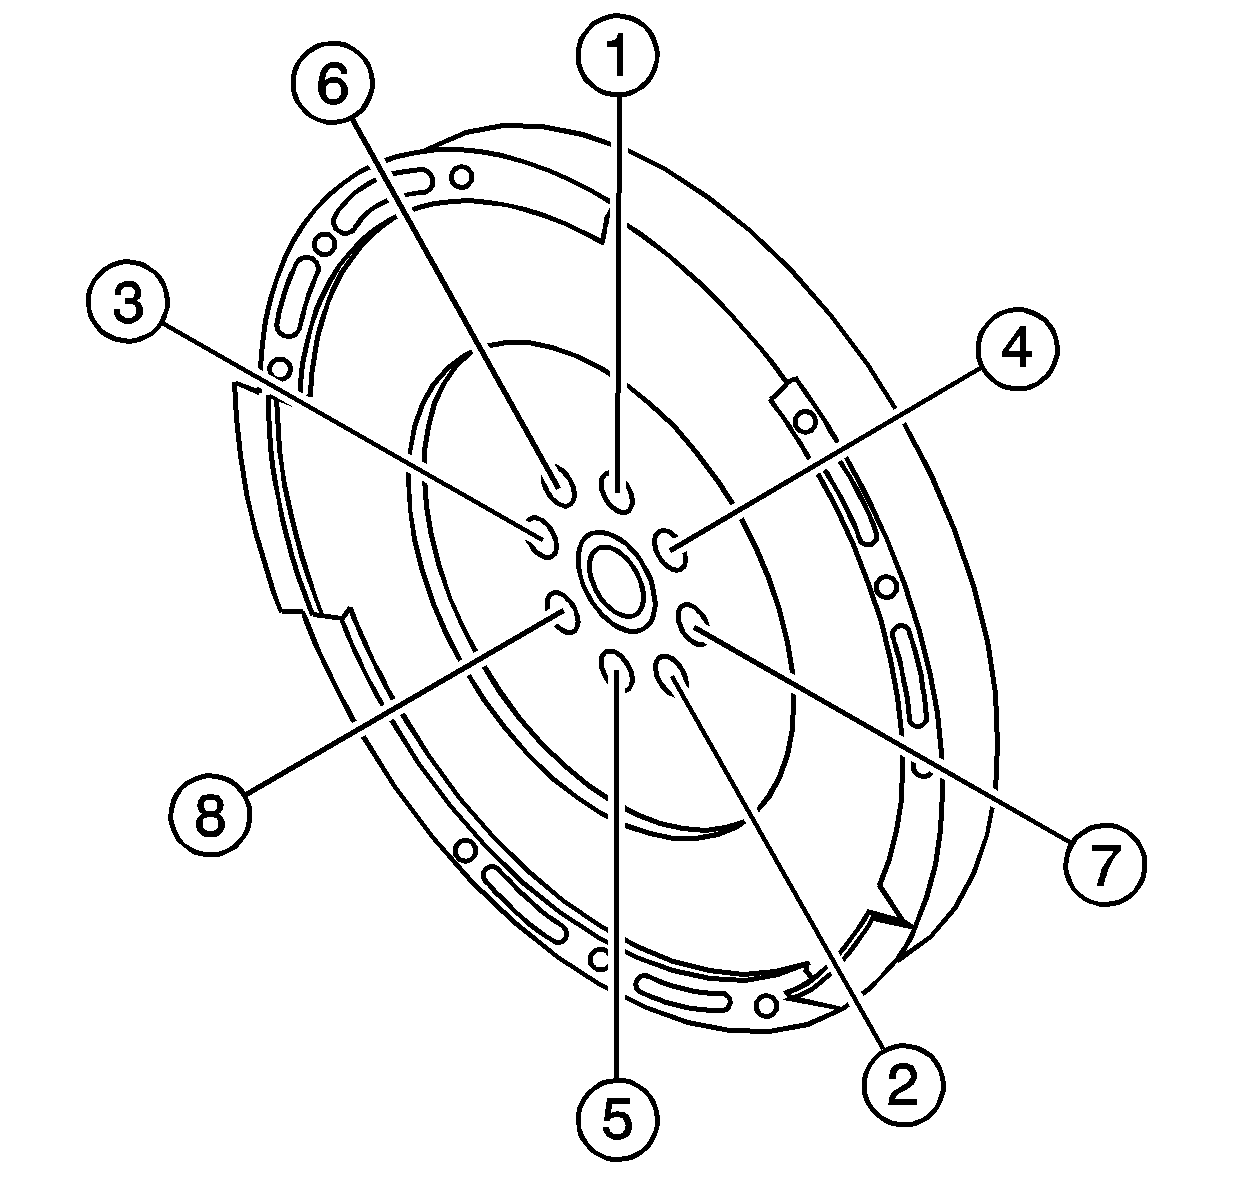
- Use the following steps and the sequence shown, tighten the bolts:
- Tighten the bolts to 79 N·m (58 lb ft).
- Tighten the bolts to 60 degrees using the J 36660-A .
- Tighten the bolts again to 60 degrees using the J 36660-A .
- Remove J 44643 .
- Install the clutch. Refer to Clutch Assembly Replacement in Clutch.
- Install the starter. Refer to Starter Motor Replacement in Engine Electrical.
| Important: When heating the ring gear with a torch do not overheat. Do not get the ring gear so hot that it turns blue or red. |
| 1.1. | Heat the ring gear evenly with a torch. |
| 1.2. | Using a hammer and a brass punch install the ring gear until seated. |
Caution: When removing, handling or installing this component wear protective gloves. The sharp edges on the component may be very sharp and may cause injury.
Notice: Use the correct fastener in the correct location. Replacement fasteners must be the correct part number for that application. Fasteners requiring replacement or fasteners requiring the use of thread locking compound or sealant are identified in the service procedure. Do not use paints, lubricants, or corrosion inhibitors on fasteners or fastener joint surfaces unless specified. These coatings affect fastener torque and joint clamping force and may damage the fastener. Use the correct tightening sequence and specifications when installing fasteners in order to avoid damage to parts and systems.
Tighten
