Intake Manifold Replacement Upper
Removal Procedure
Tools Required
J 37088-A Fuel Line
Quick Connect Separator
- Drain the engine coolant.
Refer to
Cooling System Draining and Filling
in Engine Cooling.
- Disconnect the intake air temperature (IAT) sensor electrical
connector.
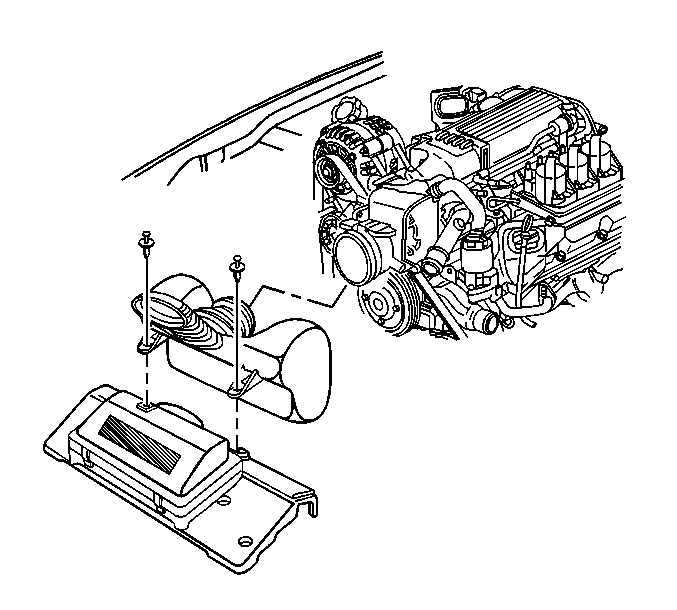
- Remove the air intake
duct.
- Remove the drive belt tensioner. Refer to
Drive Belt Tensioner Replacement
.
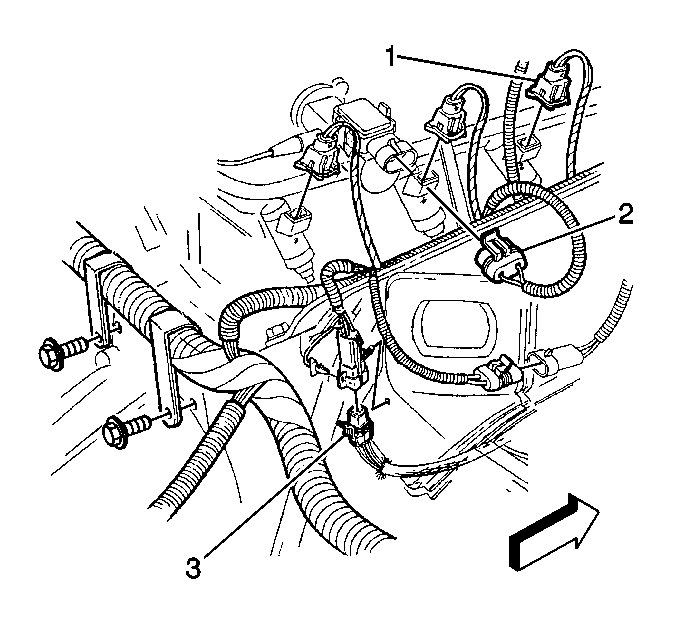
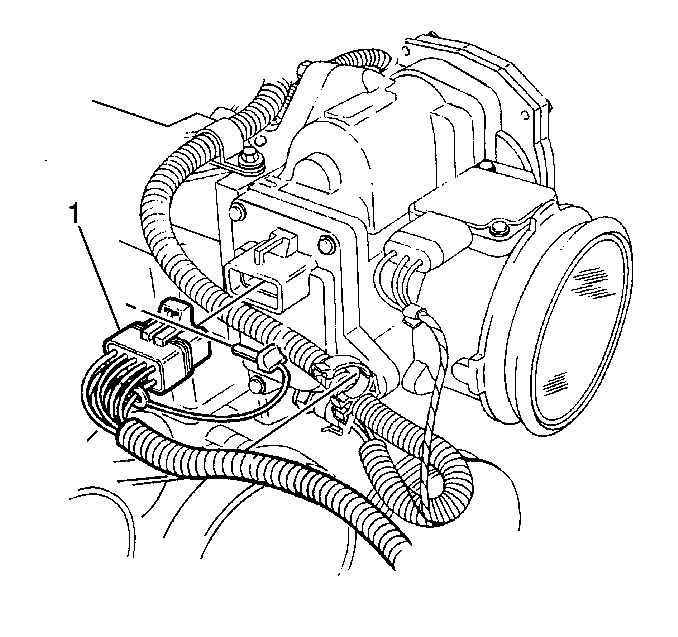
- Disconnect the fuel injector
electrical connectors (1) from the fuel injectors.
- Disconnect the manifold absolute pressure (MAP) sensor electrical
connector (2).
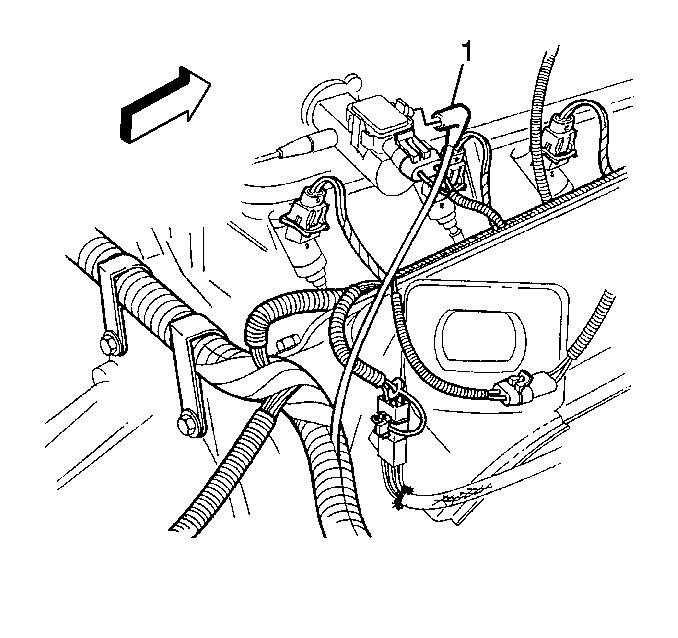
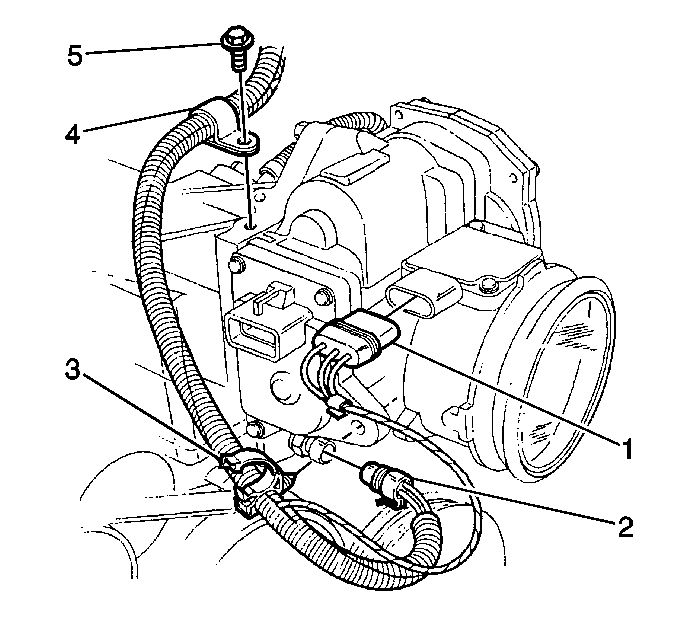
- Disconnect the engine
harness vacuum tube (1) from the vacuum port.
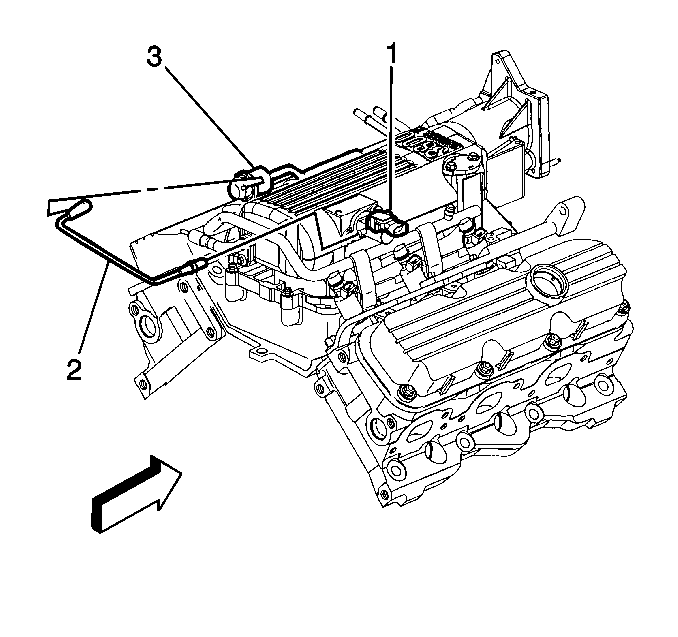
- Remove the fuel pressure
regulator tube (2) from the following components:
| • | Manifold vacuum source (1) |
| • | Fuel pressure regulator valve (3) |
- Remove the manifold vacuum
source screws (2).
- Remove the manifold vacuum source (1) from the upper intake manifold.
- Disconnect the fuel injector
electrical connectors (1) from the fuel injectors.
- Disconnect the evaporative emission (EVAP) canister purge valve
switch electrical connector (2).
- Relieve the fuel pressure. Refer to
Fuel Pressure Relief
in Engine Controls - 3.8 L.

- Disconnect the fuel lines
(1) from the fuel rail using J 37088-A
.
- Disconnect the fuel vapor line (4) from the EVAP canister purge
valve (5).
- Remove the EVAP canister
purge valve bolts (1).
- Remove the EVAP canister purge valve (2) from the upper intake
manifold.
- Remove the ignition control module. Refer to
Ignition Coil Module Replacement
in Engine
Electrical.

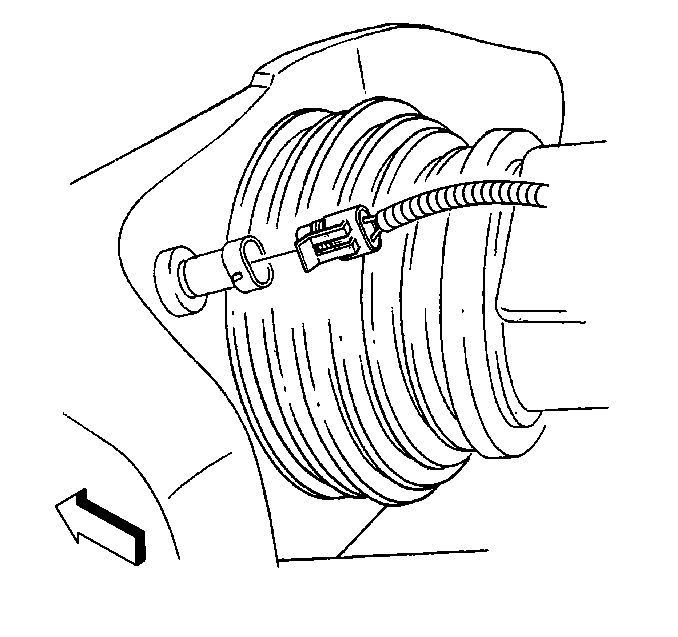
- Reposition the brake booster
hose clamp.
- Remove the brake booster hose (2) from the upper intake manifold
fitting (1).
- Remove the captured secondary
lock from the connector.
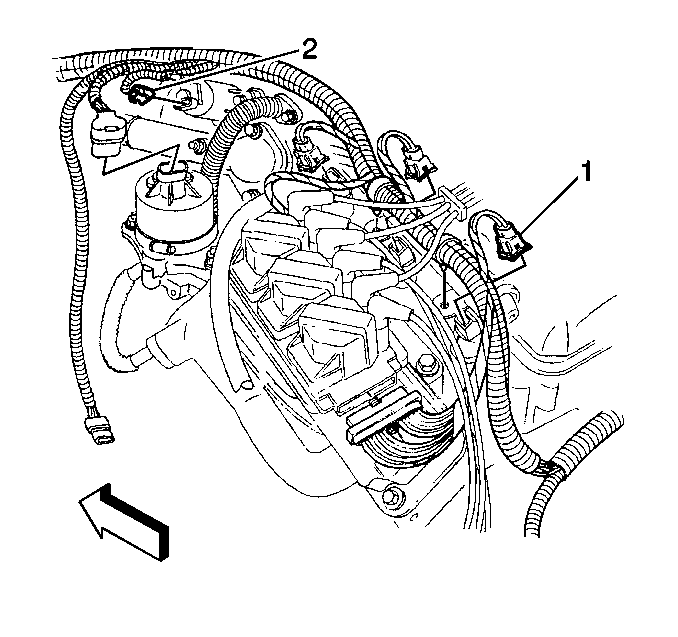
- Disconnect the electronic throttle control (ETC) electrical connector
(1).
- Disconnect the following
electrical connectors:
| • | Mass airflow (MAF) sensor (1) |
| • | Engine coolant temperature (ECT) sensor (2) |
- Remove the engine harness rosebud clip (3) from the throttle body.
- Remove the engine harness clamp bolt (5) and harness clamp (4).
- Reposition the engine wiring harness.
- Remove the thermostat housing. Refer to
Engine Coolant Thermostat Housing Replacement
in Engine
Cooling.
- Disconnect the wiring harness rosebud clips from the fuel rail.
- Reposition the wiring harness.
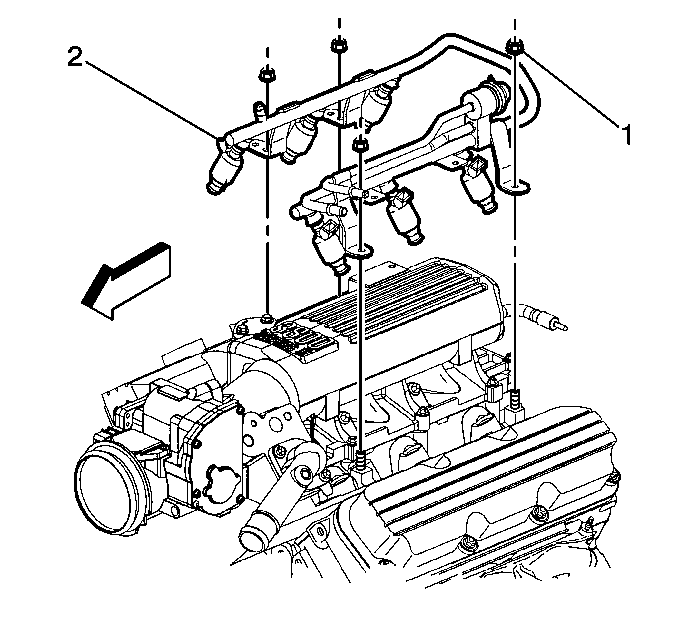
- Remove the fuel rail nuts
(1).
Important: Clean any dirt out of the injector bores with compressed air.
- Remove the fuel rail (2) from the upper intake manifold.
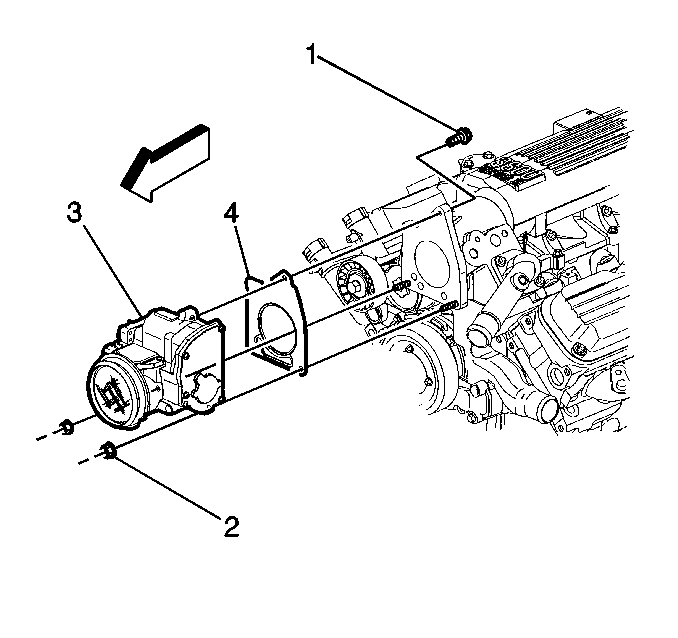
- Remove the throttle body
bolt (1) and nuts (2).
- Remove the throttle body (3) and gasket (4).
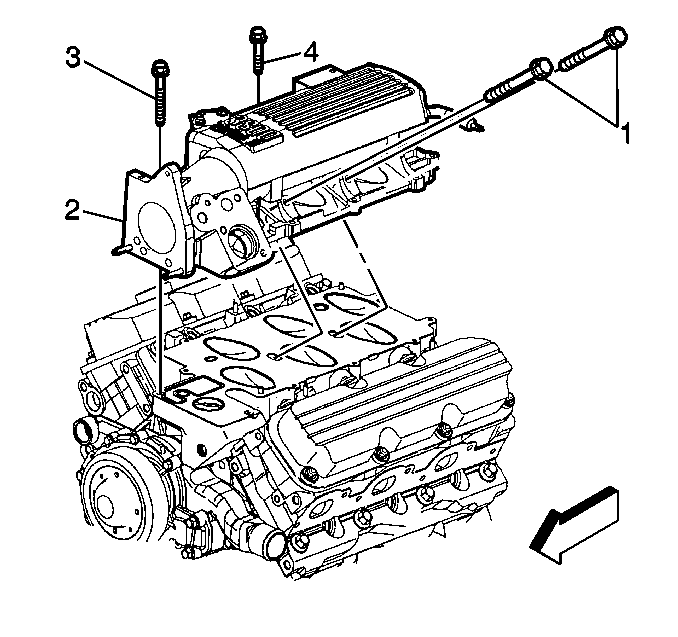
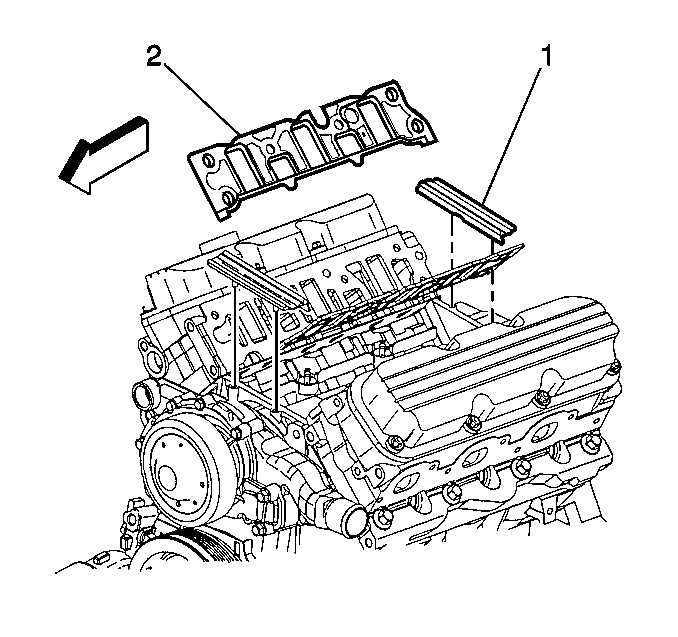
- Remove the upper intake
manifold bolts (1, 3, 4).
- Remove the upper intake manifold (2).
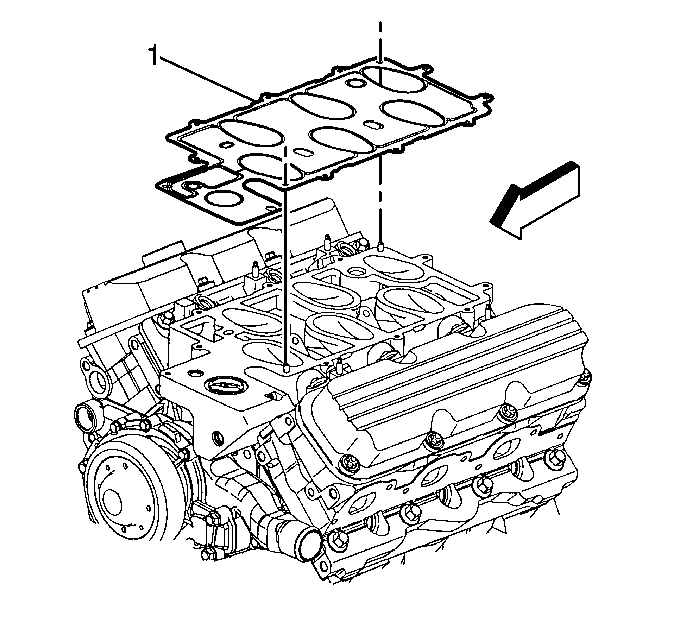
- Remove the upper intake
manifold gasket (1).
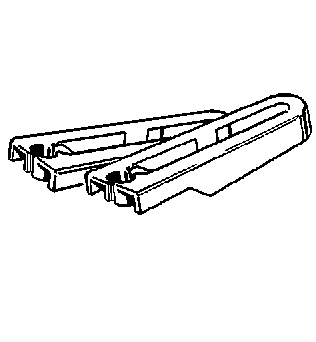
- Clean the upper and lower intake manifold sealing surfaces.
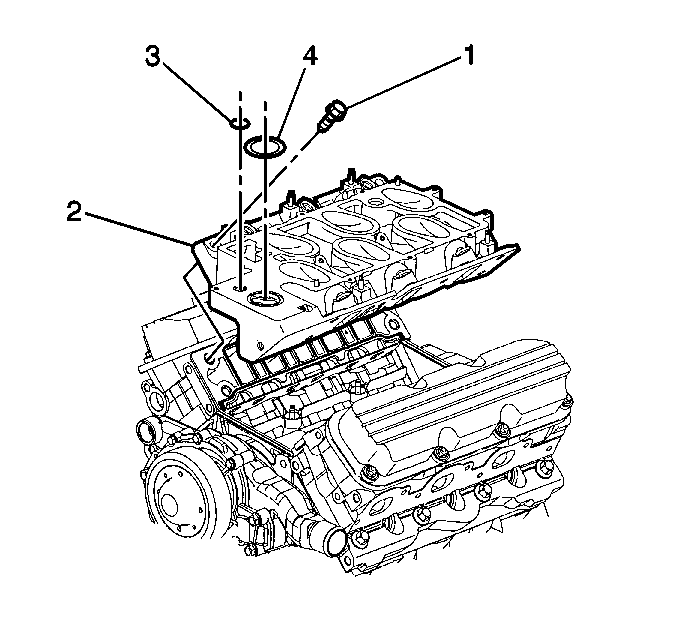
- Remove the lower intake
manifold O-rings seals (3, 4), if necessary.
Installation Procedure
- Install new lower intake
manifold O-ring seal (3, 4), if removed.
- Install the upper intake
manifold gasket (1).
- Install the upper intake
manifold (2) onto the lower intake manifold.
- Install the upper intake manifold bolts (1, 3, 4).
Tighten
| • | Tighten the upper intake manifold bolt (3) to 15 N·m
(11 lb ft). |
| • | Tighten the nine upper intake manifold bolts (4) to 10 N·m
(89 lb in). |
| • | Tighten the two upper intake manifold bolts (1) to 30 N·m
(22 lb ft). |
- Install the throttle body
(3) and gasket (4).
- Install the throttle body bolt (1) and nuts (2).
Tighten
| • | Tighten the throttle body nuts (2) to 10 N·m (89 lb in). |
| • | Tighten the throttle body bolt (1) to 10 N·m (89 lb in). |
- Install the fuel rail
(2) to the upper intake manifold.
- Install the fuel rail nuts (1).
Tighten
Tighten the fuel rail nuts (1) to 8.5 N·m (75 lb in).
- Position the wiring harness.
- Connect the wiring harness rosebud clips from the fuel rail.
- Install the thermostat housing. Refer to
Engine Coolant Thermostat Housing Replacement
in Engine
Cooling.
- Position the engine wiring harness.
- Install the engine harness
clamp (4) and harness clamp bolt (5).
Tighten
Tighten the harness clamp bolt (5) to 6 N·m (53 lb in).
- Install the engine harness rosebud clip (3) to the throttle body.
- Connect the following electrical connectors:
- Connect the ETC electrical
connector (1).
- Install the captured secondary lock from the connector.
- Install the brake booster
hose (2) to the upper intake manifold fitting (1).
- Position the brake booster hose clamp.
- Install the ignition control module. Refer to
Ignition Coil Module Replacement
in Engine
Electrical.
- Install the EVAP canister
purge valve (2) to the upper intake manifold.
- Install the EVAP canister purge valve bolts (1).
Tighten
Tighten the EVAP canister purge valve bolts (1) to 10 N·m
(89 lb in).
- Connect the fuel vapor
line (4) to the EVAP canister purge valve (5).
- Connect the fuel lines (1) to the fuel rail.
- Connect the EVAP canister
purge valve switch electrical connector (2).
- Connect the fuel injector electrical connectors (1) to the fuel
injectors.
- Install the manifold vacuum
source (1) to the upper intake manifold.
- Install the manifold vacuum source screws (2).
Tighten
Tighten the manifold vacuum source screws (2) to 10 N·m
(89 lb in).
- Install the fuel pressure
regulator tube (2) to the following components:
| • | Manifold vacuum source (1) |
| • | Fuel pressure regulator valve (3) |
- Connect the engine harness
vacuum tube (1) to the vacuum port.
- Connect the MAP sensor
electrical connector (2).
- Connect the fuel injector electrical connectors (1) to the fuel
injectors.
- Install the drive belt tensioner. Refer to
Drive Belt Tensioner Replacement
.
- Install the air intake
duct.
- Connect the IAT sensor
electrical connector.
- Refill the engine coolant. Refer to
Cooling System Draining and Filling
in Engine Cooling.
Intake Manifold Replacement Lower
Removal Procedure
- Remove the upper intake
manifold. Refer to
Intake Manifold Replacement
.
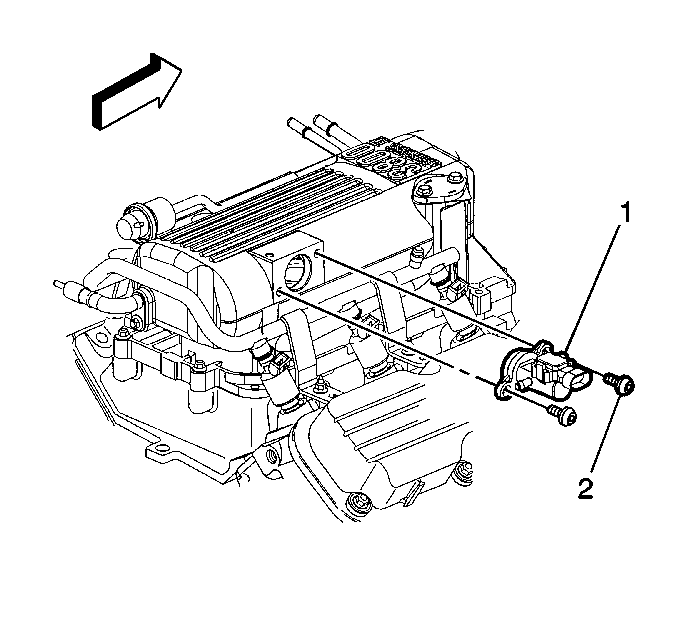
- Remove the coolant temperature sensor.
- Remove the O-ring seals
(3, 4), if necessary.
- Remove the lower intake manifold bolts (1).
- Remove the lower intake manifold (2).
- Remove the lower intake
manifold seals (1).
- Remove the lower intake manifold gaskets (2).
Installation Procedure
- Install the lower intake
manifold gaskets (2).
- Install the lower intake manifold seals (1).
Apply silicone sealer GM P/N 12345366 or equivalent to the ends for
the manifold seals (2).
- Install the lower intake
manifold (2).
- Apply thread lock compound GM P/N 12345493 or equivalent to the
bolt threads before installing.
- Install the lower intake manifold bolts (1).
Tighten
Tighten the lower manifold bolts (1) to 15 N·m (11 lb ft).
- Remove the coolant temperature
sensor.
Tighten
Tighten the coolant temperature sensor to 25 N·m (18 lb ft).
- Remove the upper intake manifold. Refer to
Intake Manifold Replacement
.
