For 1990-2009 cars only
Removal Procedure
- Disconnect the negative battery cable.
- Remove the engine assembly. Refer to Engine Replacement .
- Remove the timing belt. Refer to Timing Belt Replacement .
- Remove the cylinder head with the intake manifold, the exhaust manifold, and distributor/adaptor attached. Refer to Cylinder Head Replacement .
- Remove the power steering/air conditioning belt.
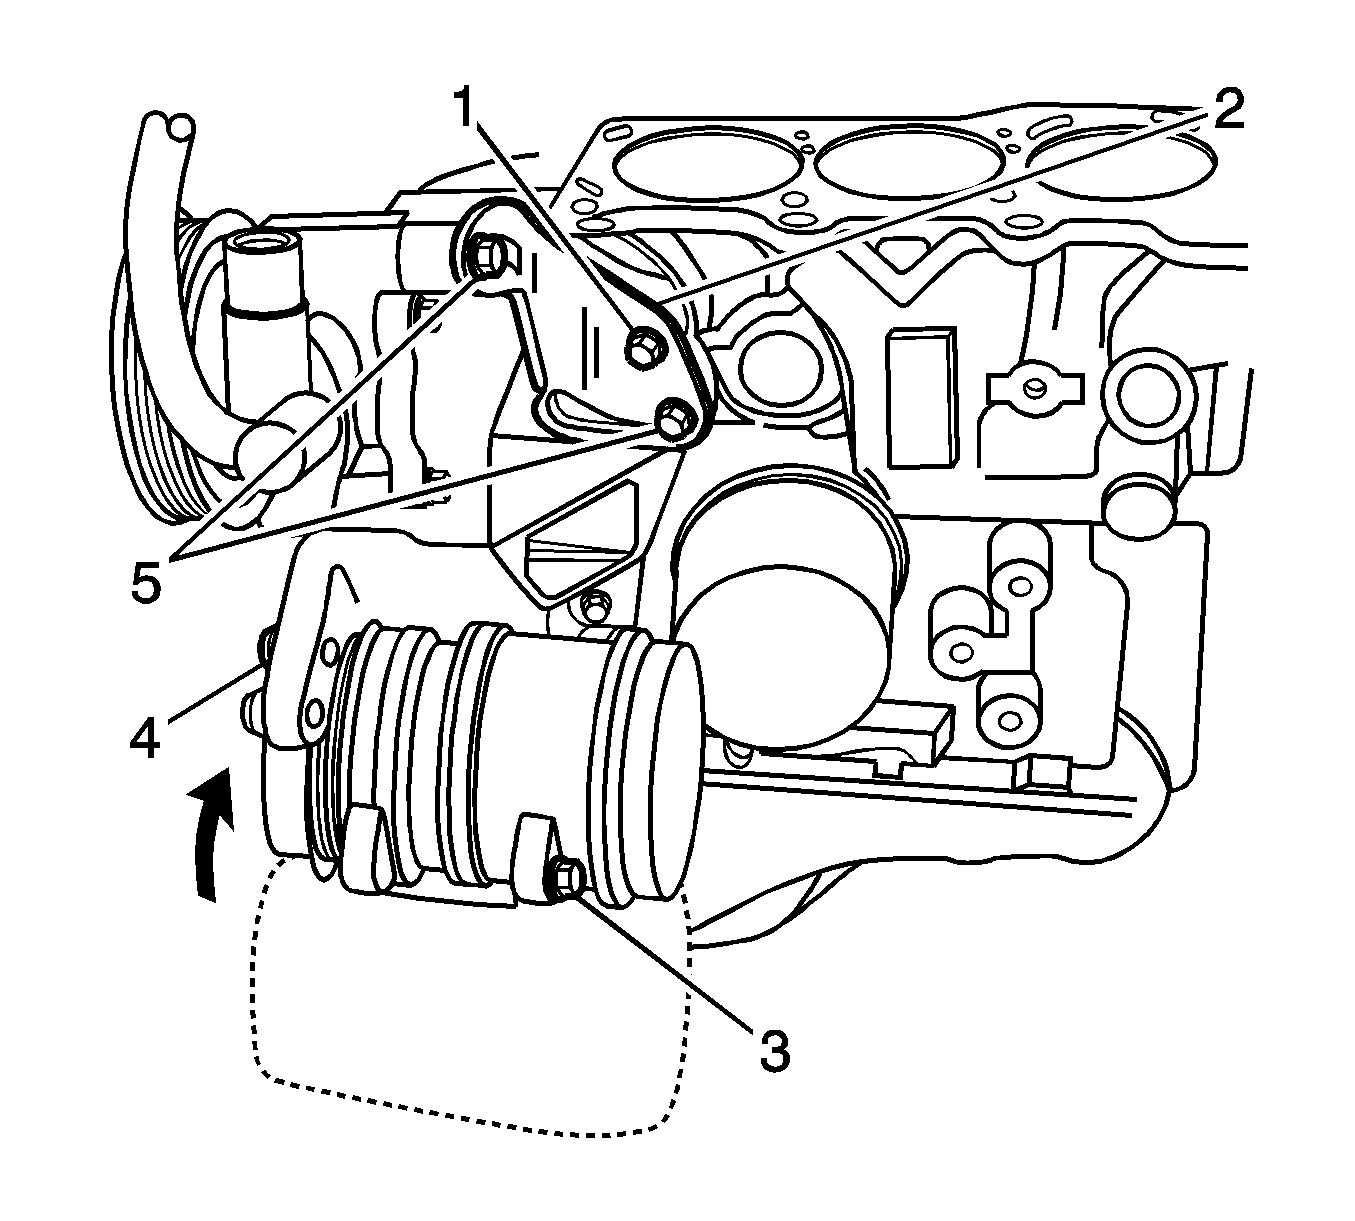
- Remove the power steering pump bracket with the bracket bolt/nut and adjusting bolt (1).
- Remove the air conditioning (A/C) compressor/power steering pump and the bracket with the bolts (2).
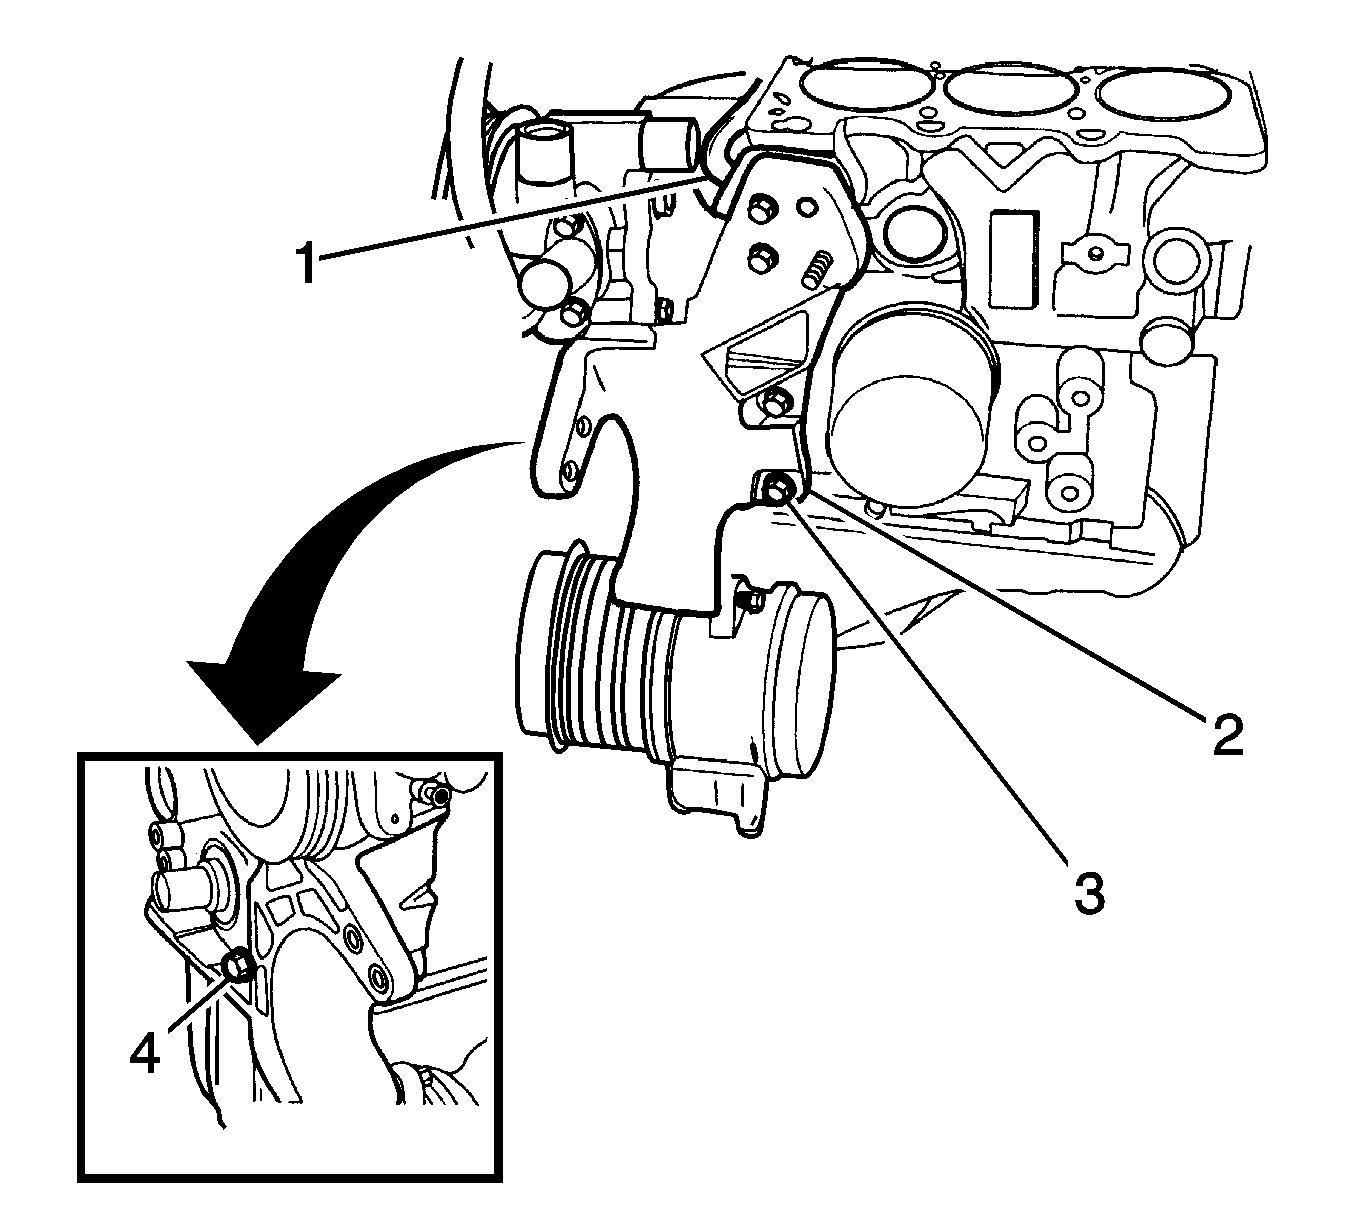
- Remove the engine mount bracket.
- Remove the generator belt (2).
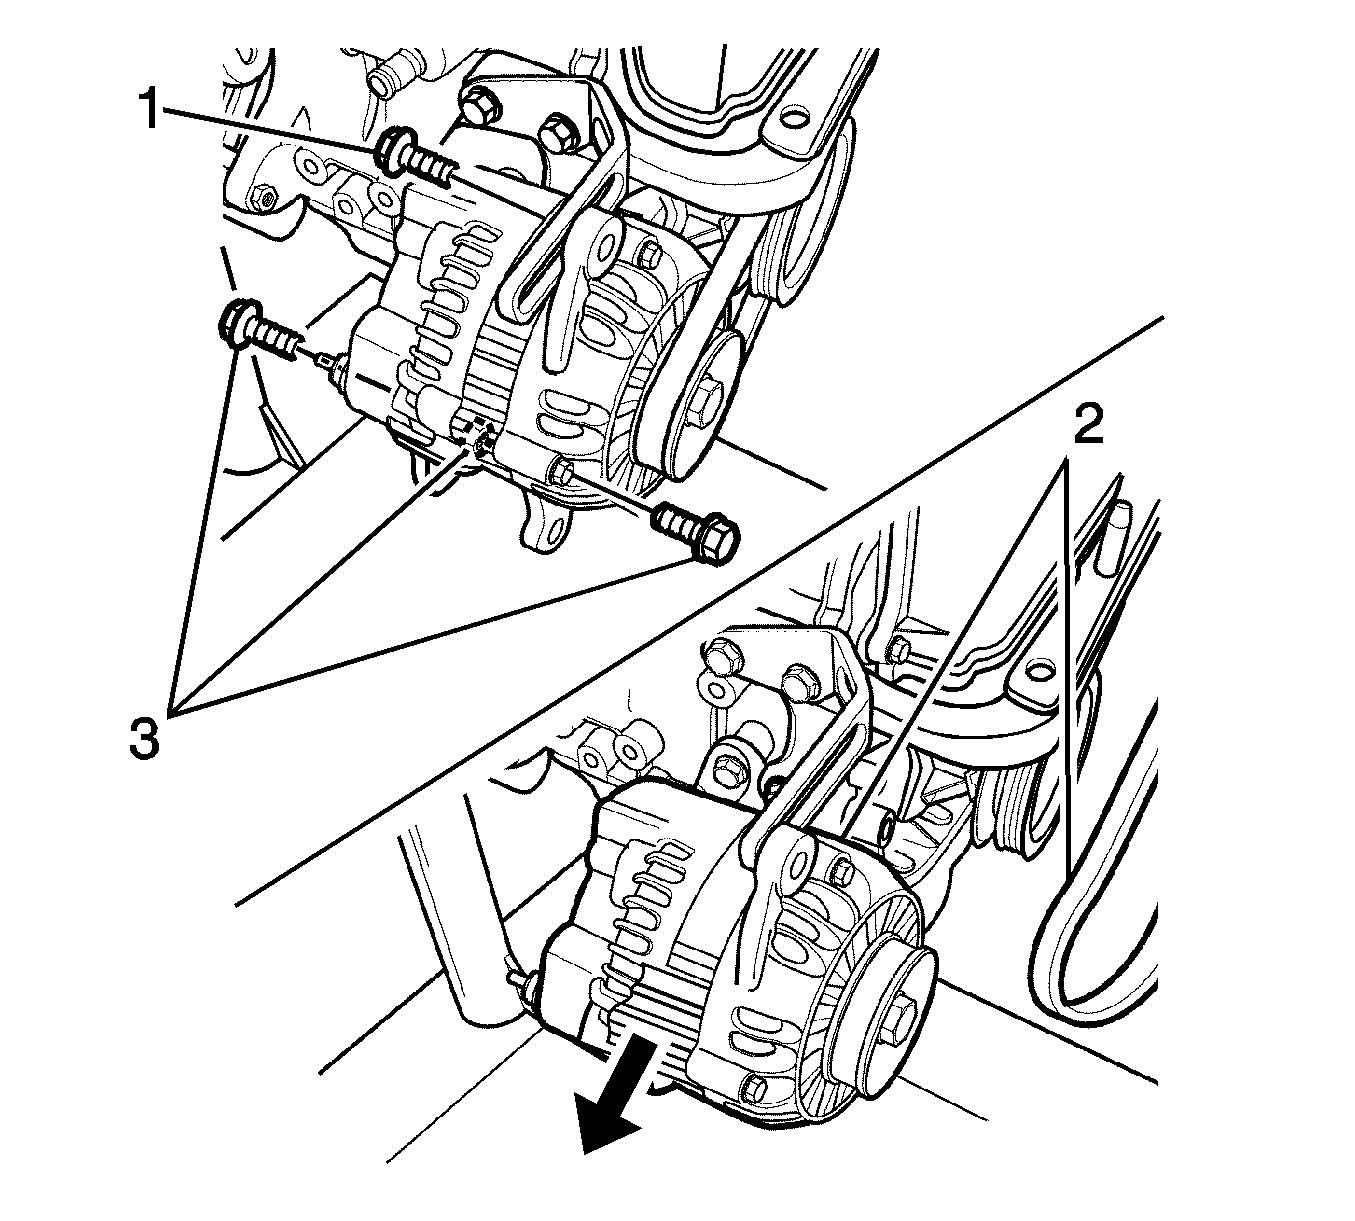
- Remove the generator with the bolts and the nut (3).
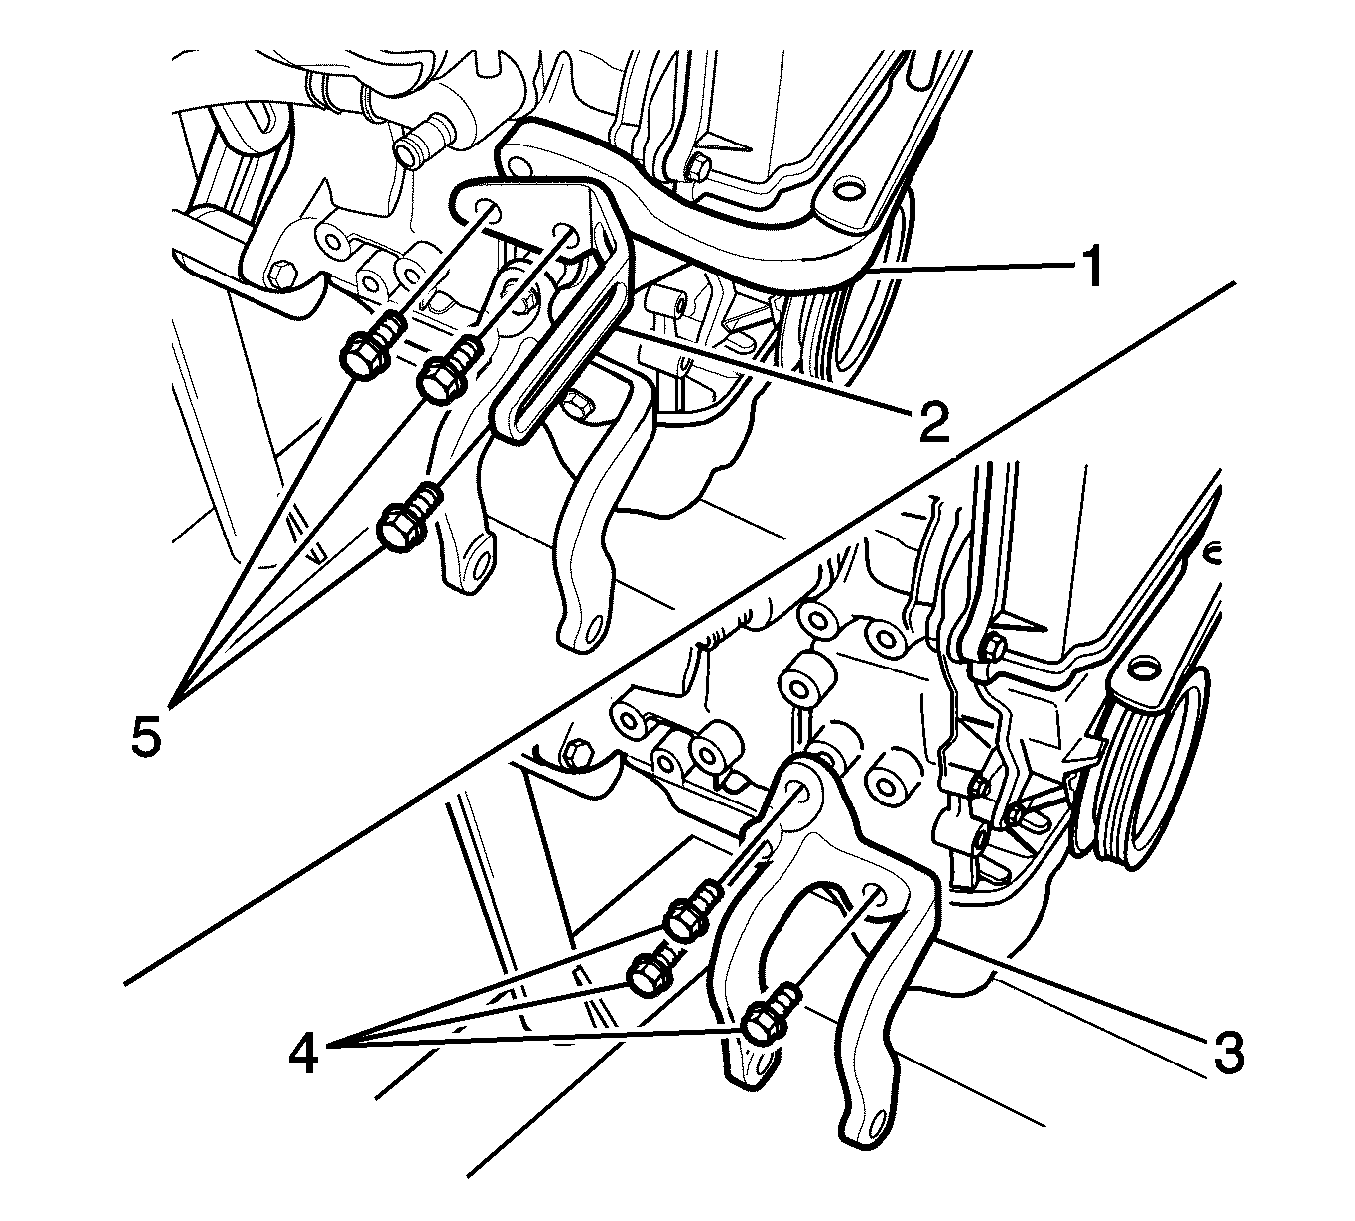
- Remove the upper engine mount bracket and the generator shackle with the bolts (5).
- Remove the lower engine mount bracket and the generator with the bolts (4).
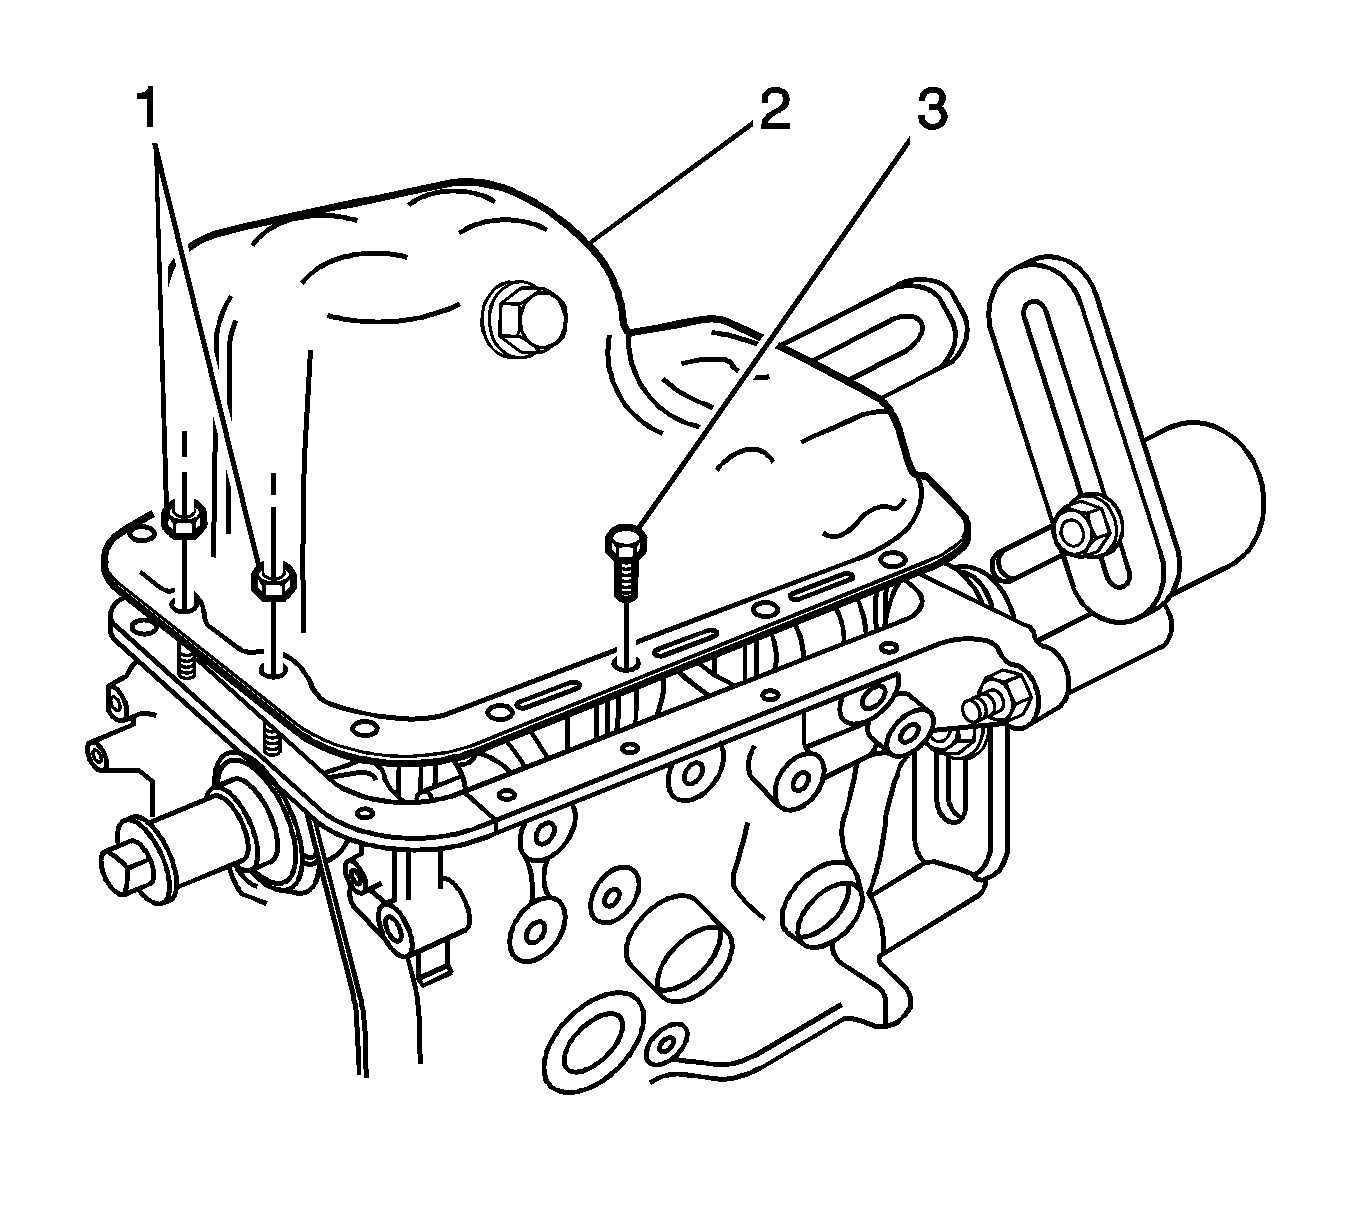
- Remove the oil pan bolts (3) and nuts (1).
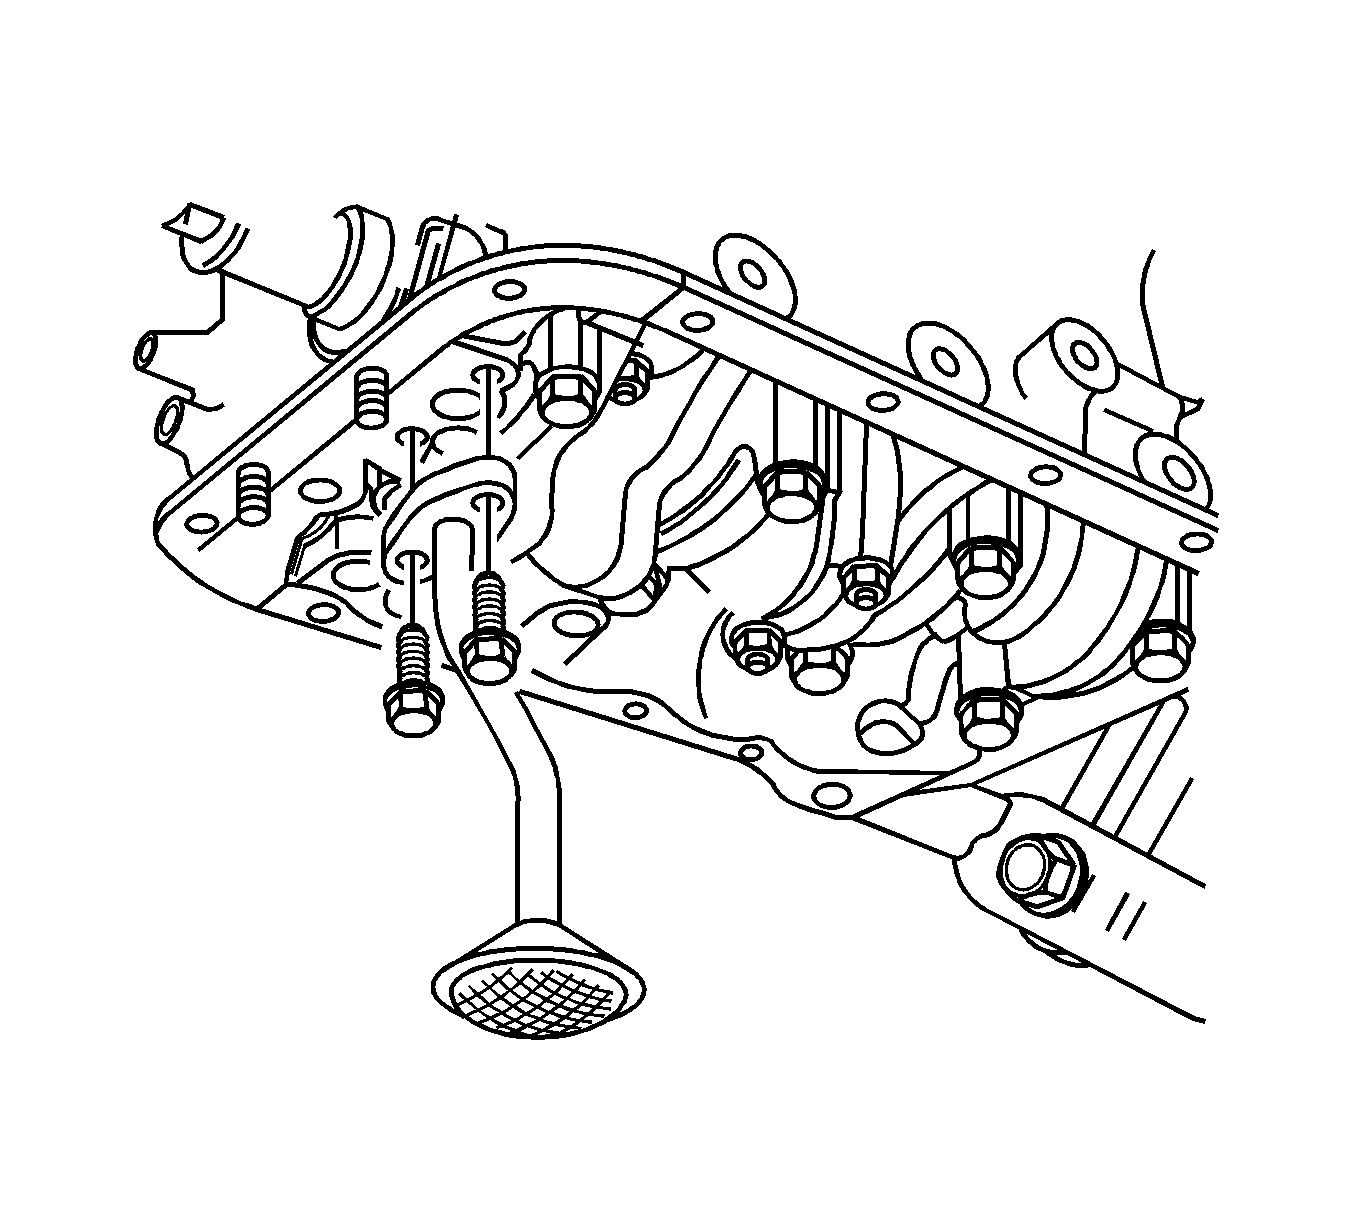
- Remove the oil pump pickup tube bolts.
- Remove the connecting rod cap and the bearing. Refer to Piston, Connecting Rod, and Bearing Cleaning and Inspection .
- Remove the piston.
- Use a piston ring expander to remove the piston rings. Do not expand the piston rings beyond the expansion necessary for removal.
- Remove the piston pin from the piston and connecting rod assembly.
- Remove the piston pin from the opposite side of the piston.
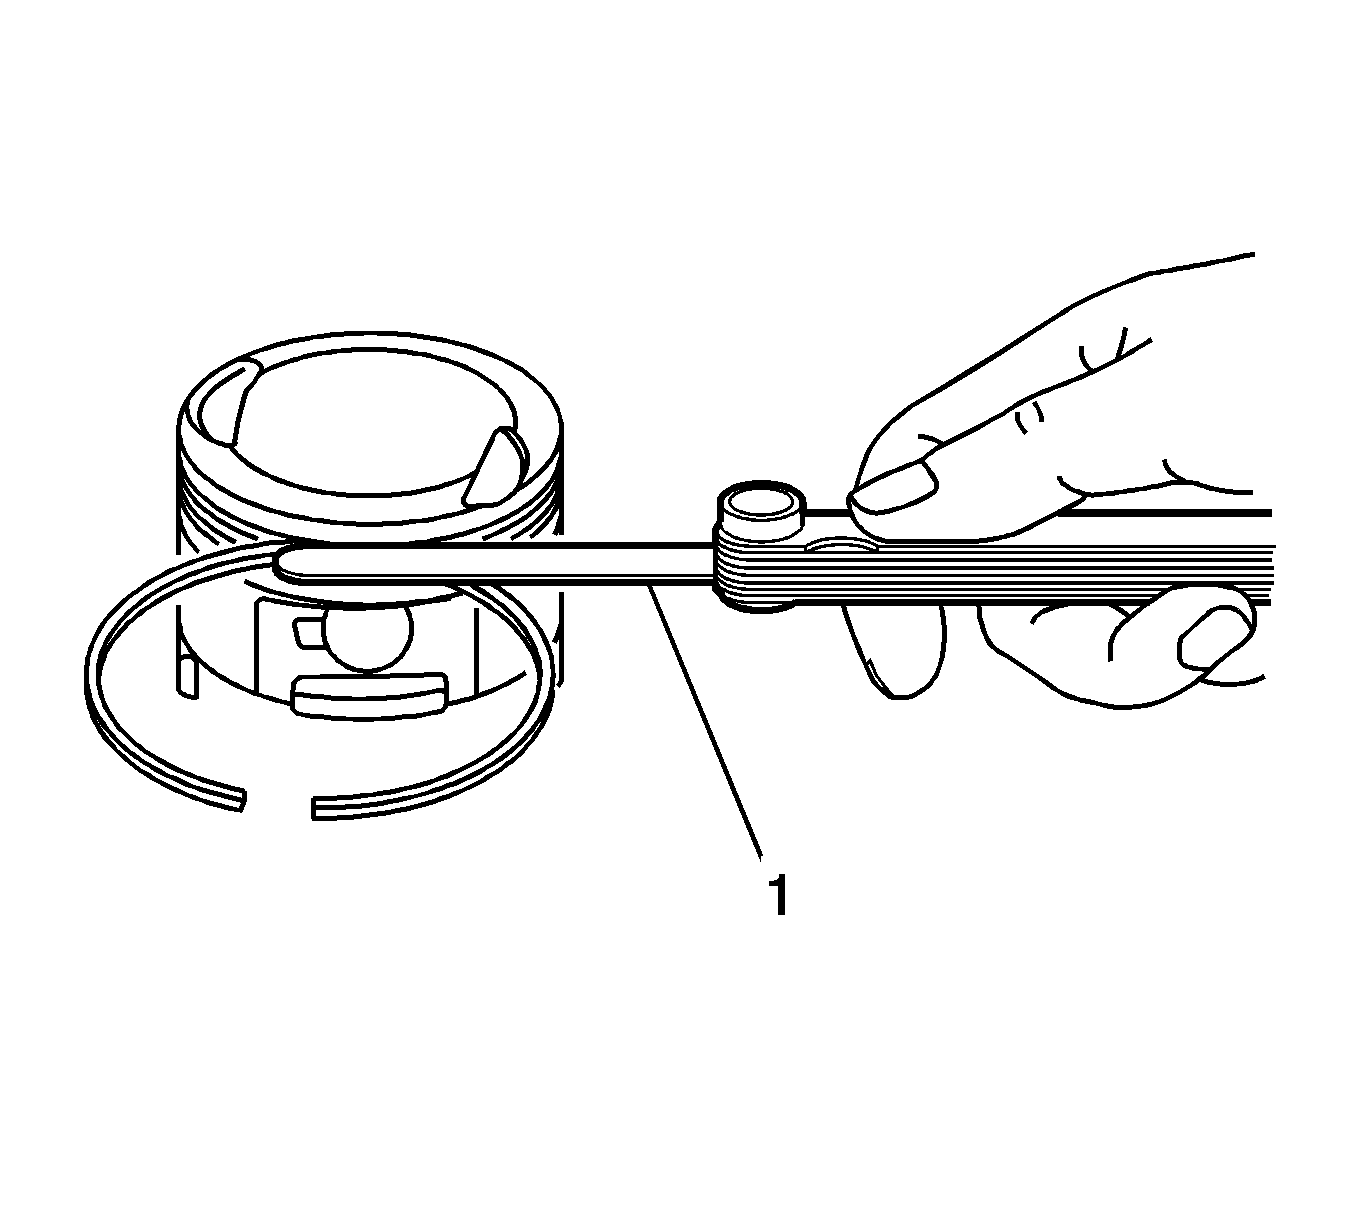
- Remove the piston pin guide (7) through the piston (8) and the connecting rod (5).
Caution: Refer to Battery Disconnect Caution in the Preface section.
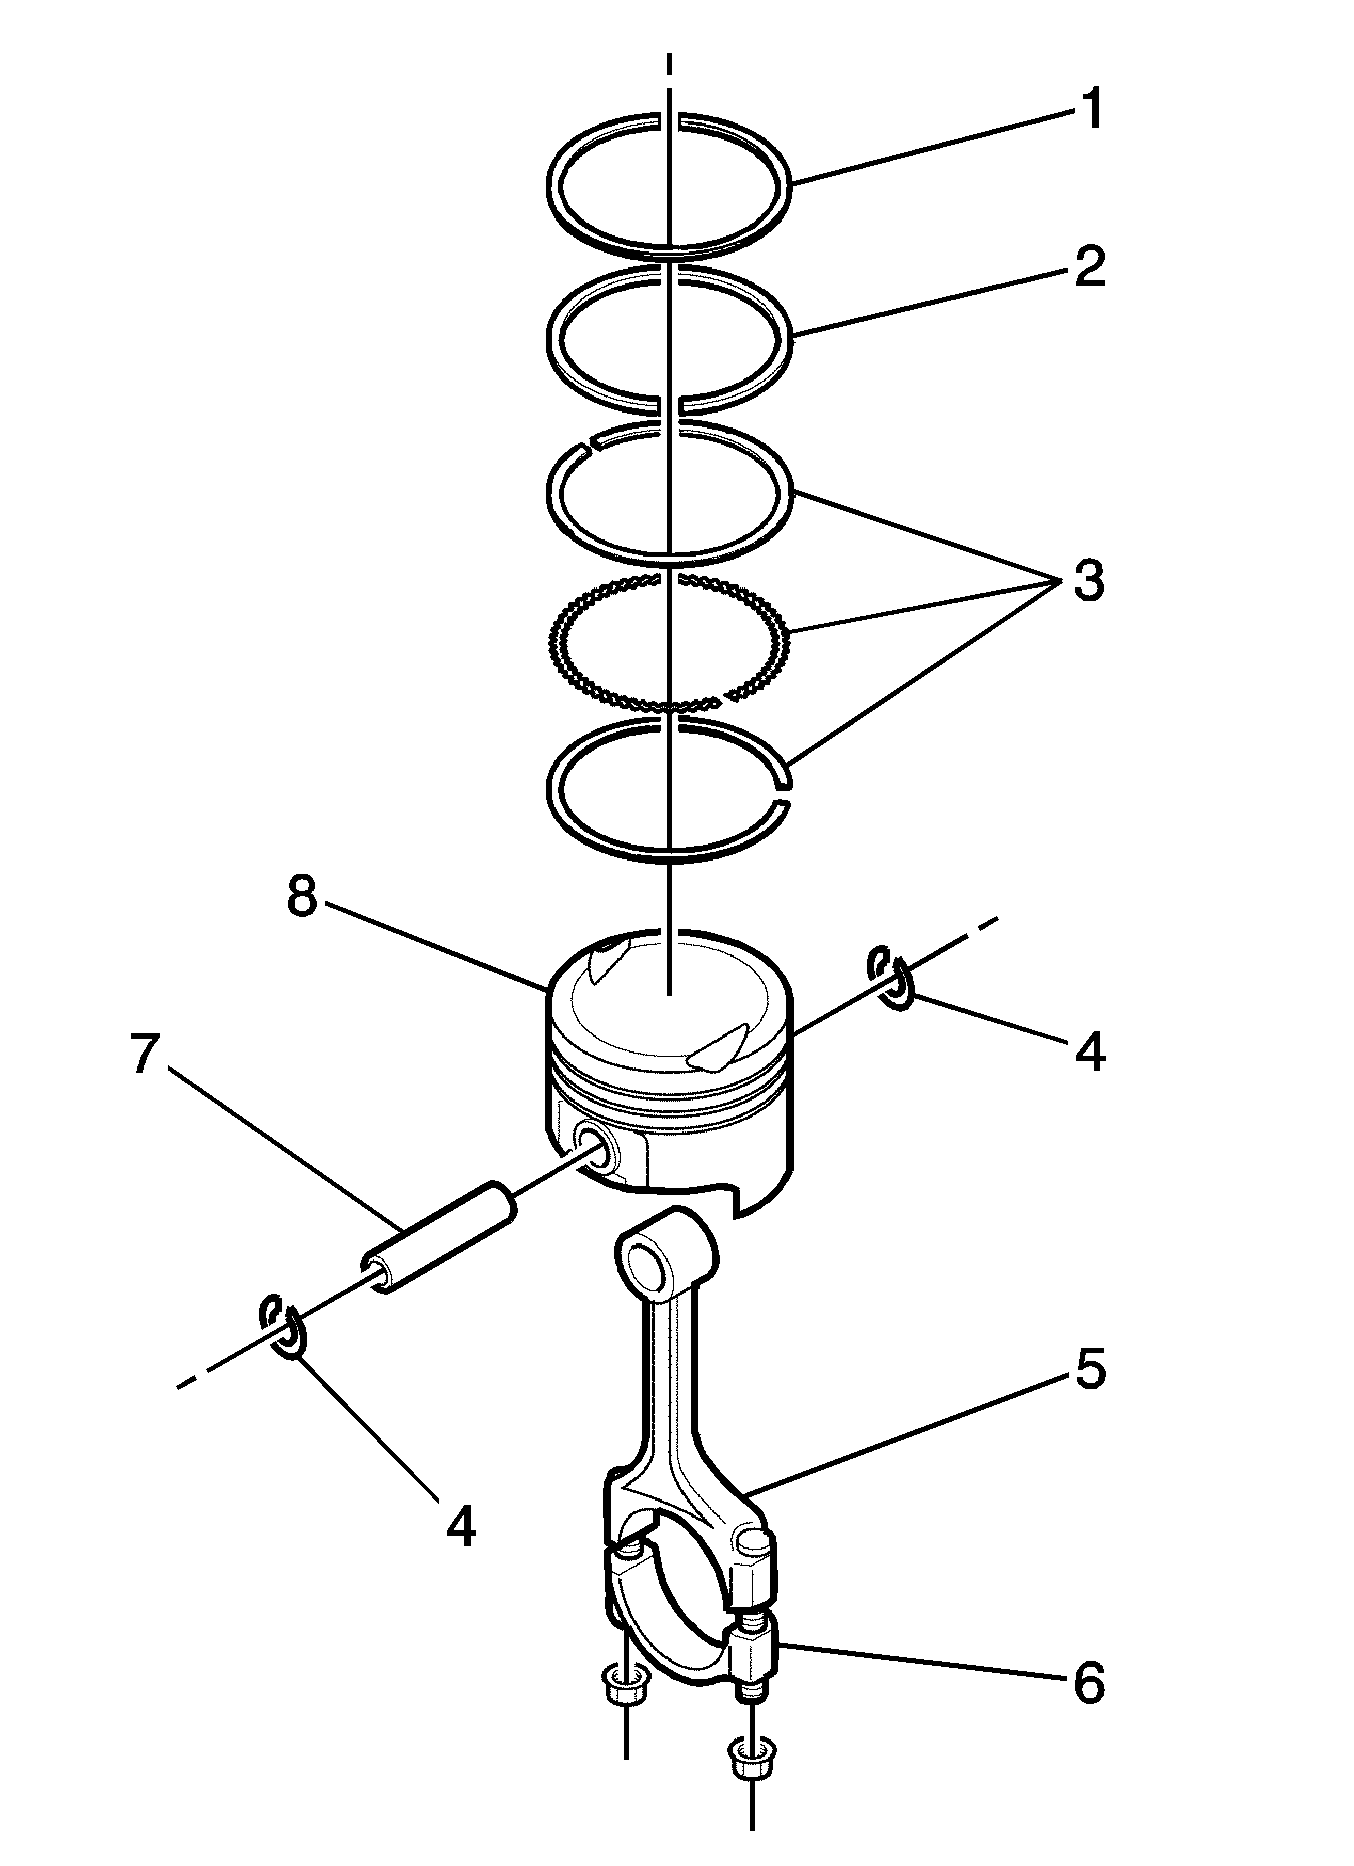
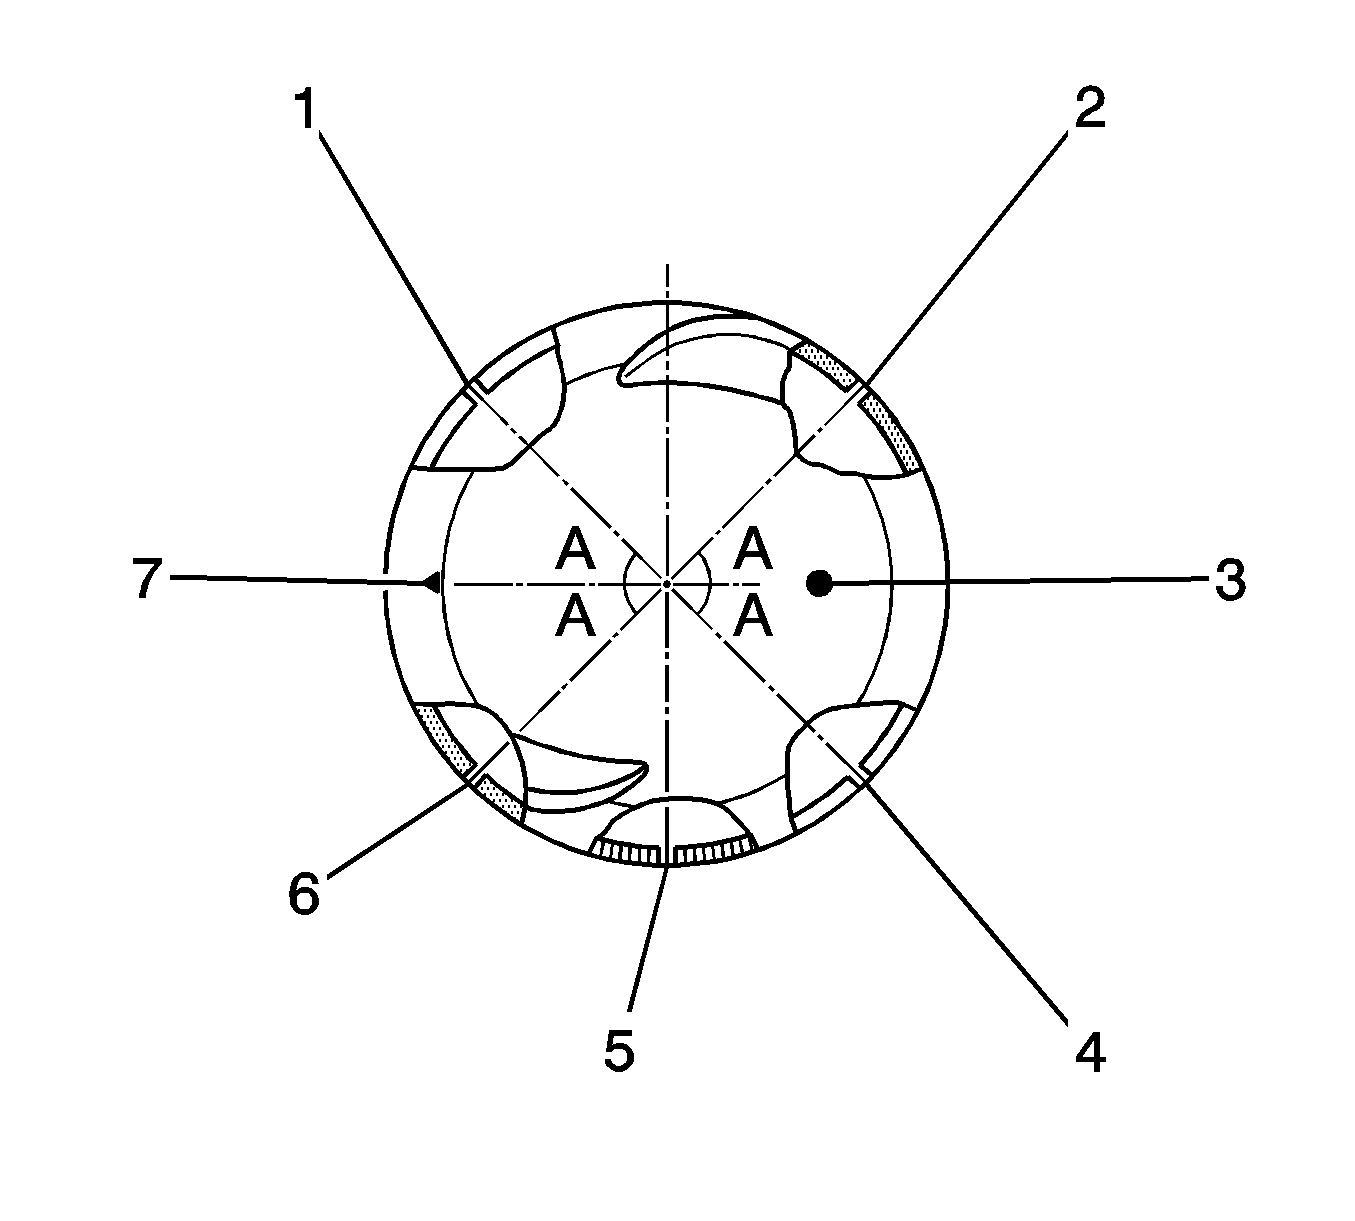
| 17.1. | Remove the top compression ring (1) to the top ring groove of the piston. |
| 17.2. | Remove the second compression ring (2) to the middle ring groove of the piston. |
| 17.3. | Remove the piston oil ring, the expander, and the second piston oil ring (3) to the bottom ring groove of the piston. |
Installation Procedure
- Align the notch on the piston and the connecting rod so that the proper sides will be facing the front of the engine.
- Install the piston pin guide (7) through the piston (8) and the connecting rod (5).
- Coat the piston pin with clean oil.
- Install the piston pin into the opposite side of the piston.
- Install the piston pin into the piston and connecting rod assembly.
- Select a set of new piston rings.
- Measure the piston ring gap using a feeler gage.
- If the piston ring gap is below specifications, increase the piston ring gap by carefully filing off excess material.
- Measure the piston ring side clearance (1) using a feeler gage. Refer to Engine Mechanical Specifications .
- If the piston ring is too thick, try another piston ring.
- If no piston ring that fits to specifications can be found, the piston ring may be ground to size using emery paper placed on a sheet of glass.
- Install a piston oil ring, the expander, and the second piston oil ring (3) to the bottom ring groove of the piston.
- Install the second compression ring (2) to the middle ring groove of the piston.
- Install the top compression ring (1) to the top ring groove of the piston.
- Use a piston ring expander to install the piston rings. Do not expand the piston rings beyond the expansion necessary for installation.
- Stagger the piston oil rings (1, 4), the oil ring rail (5) gaps, the second compression ring (6), and the top compression ring (2) in relation to the notch on the top of the piston.
- Lubricate the cylinder wall and the piston rings with clean engine oil.
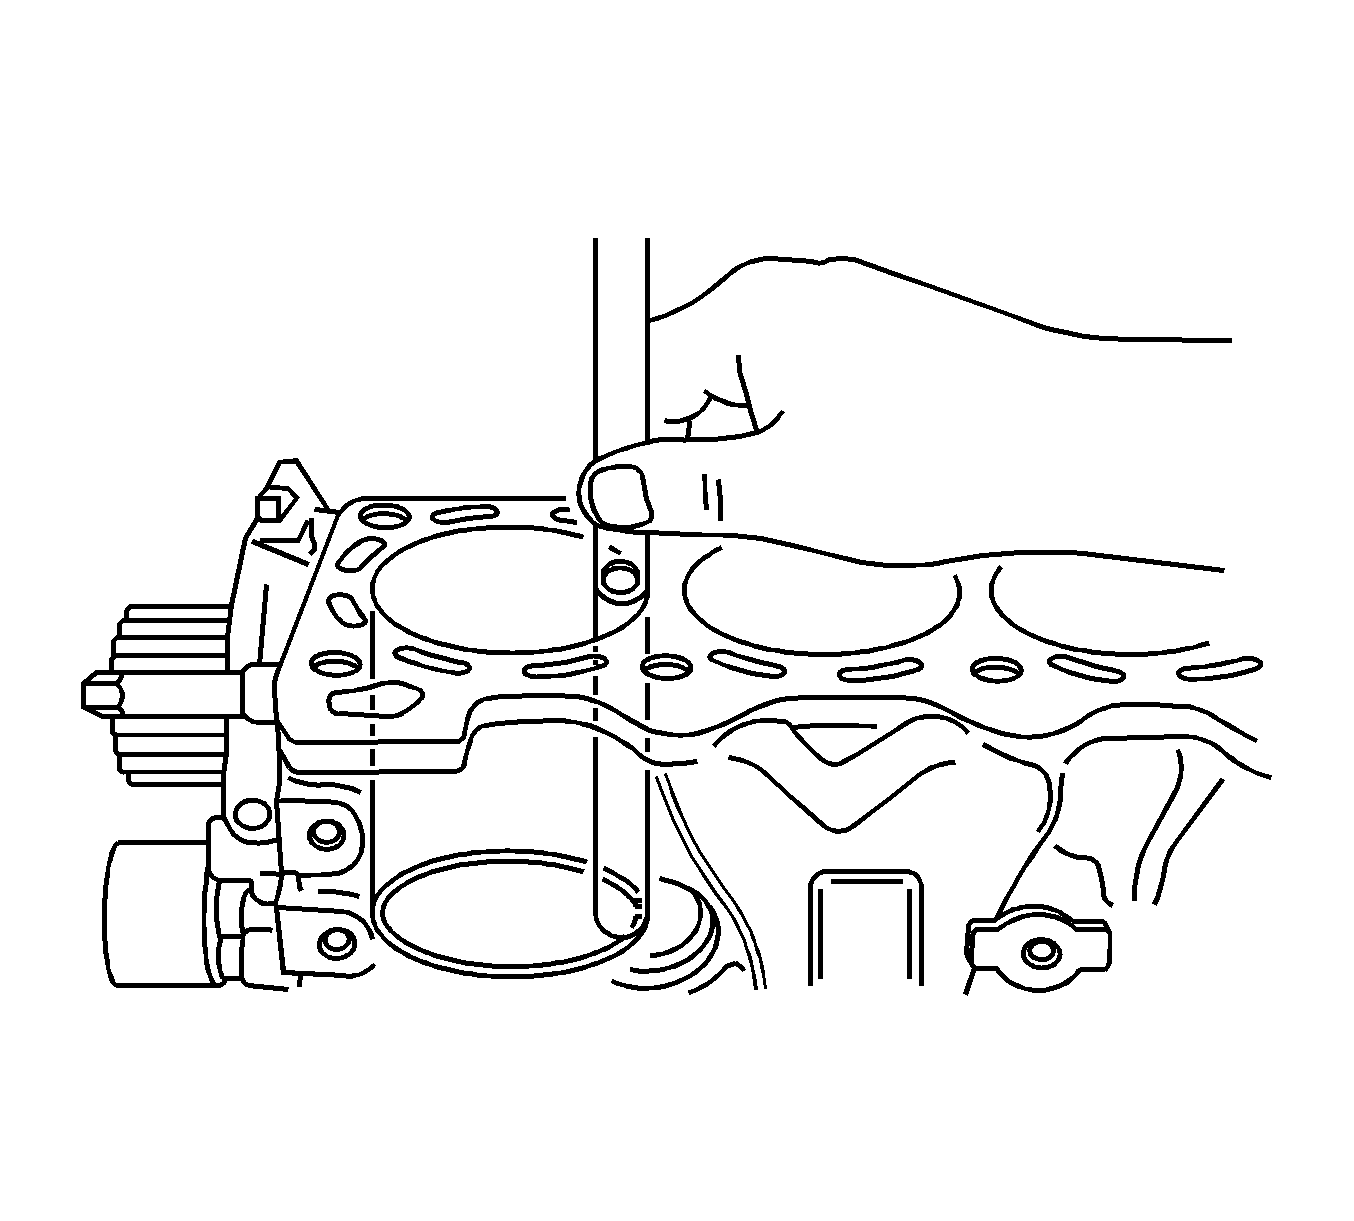
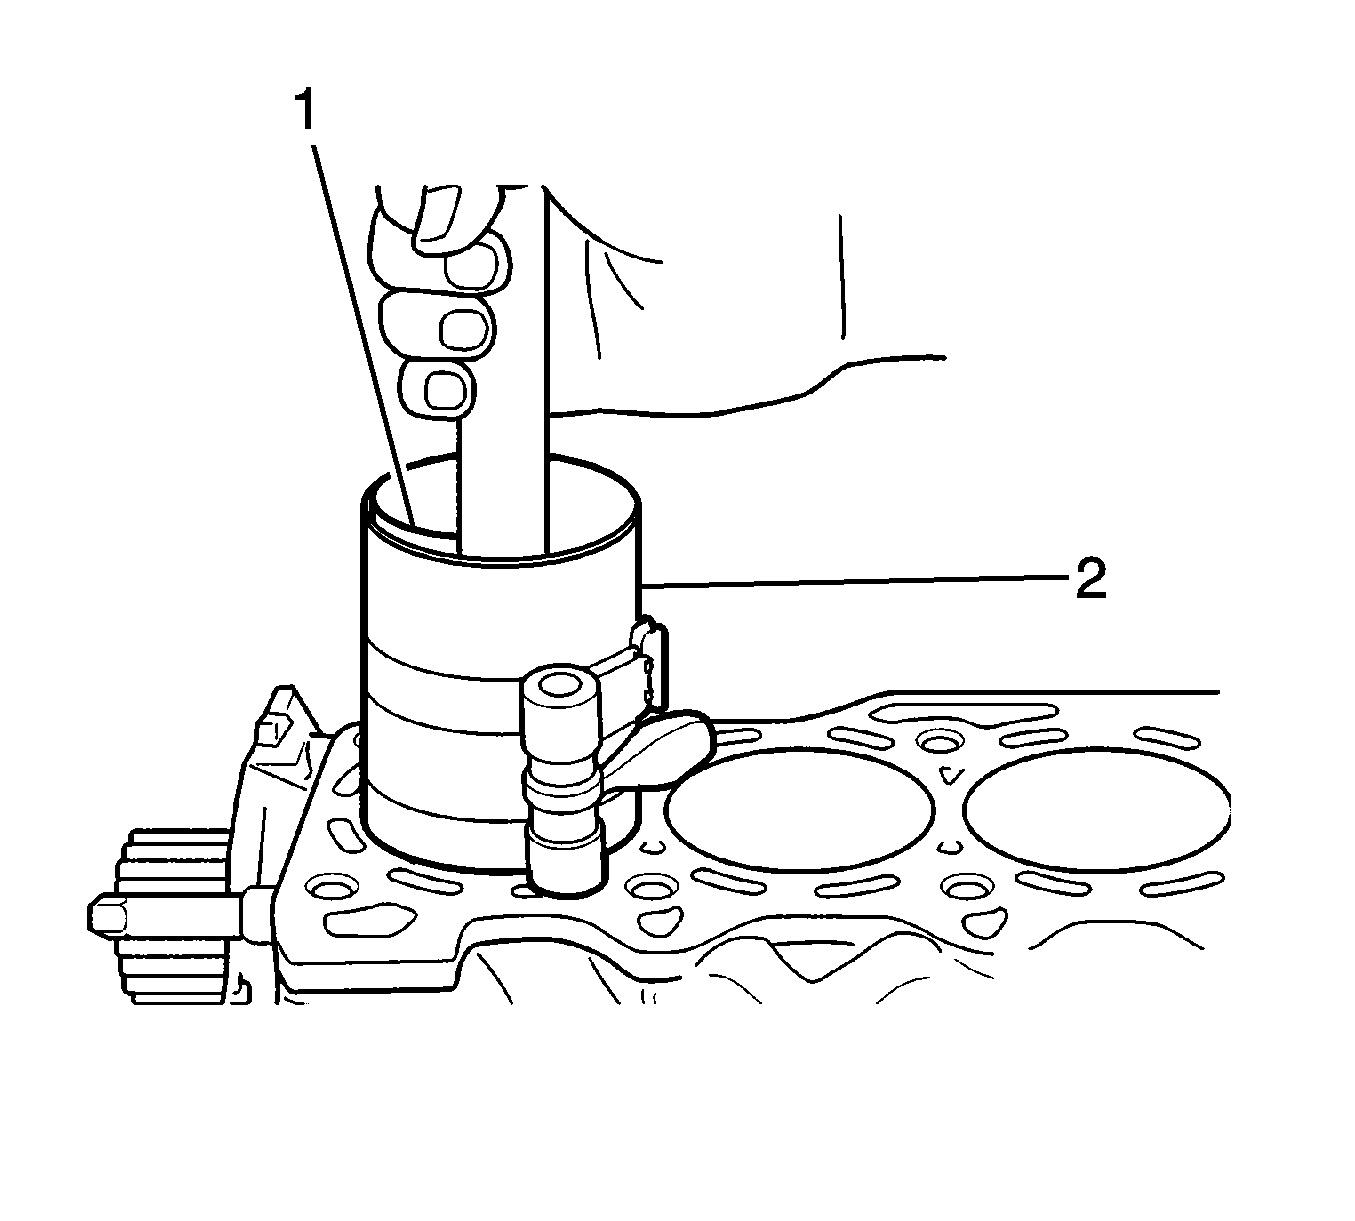
- Install the piston using a ring compressor (1) and a wood handle. Guide the lower connecting rod end to prevent damaging the crankshaft journal.
- Install the connecting rod cap and the bearing. Refer to Piston, Connecting Rod, and Bearing Cleaning and Inspection .
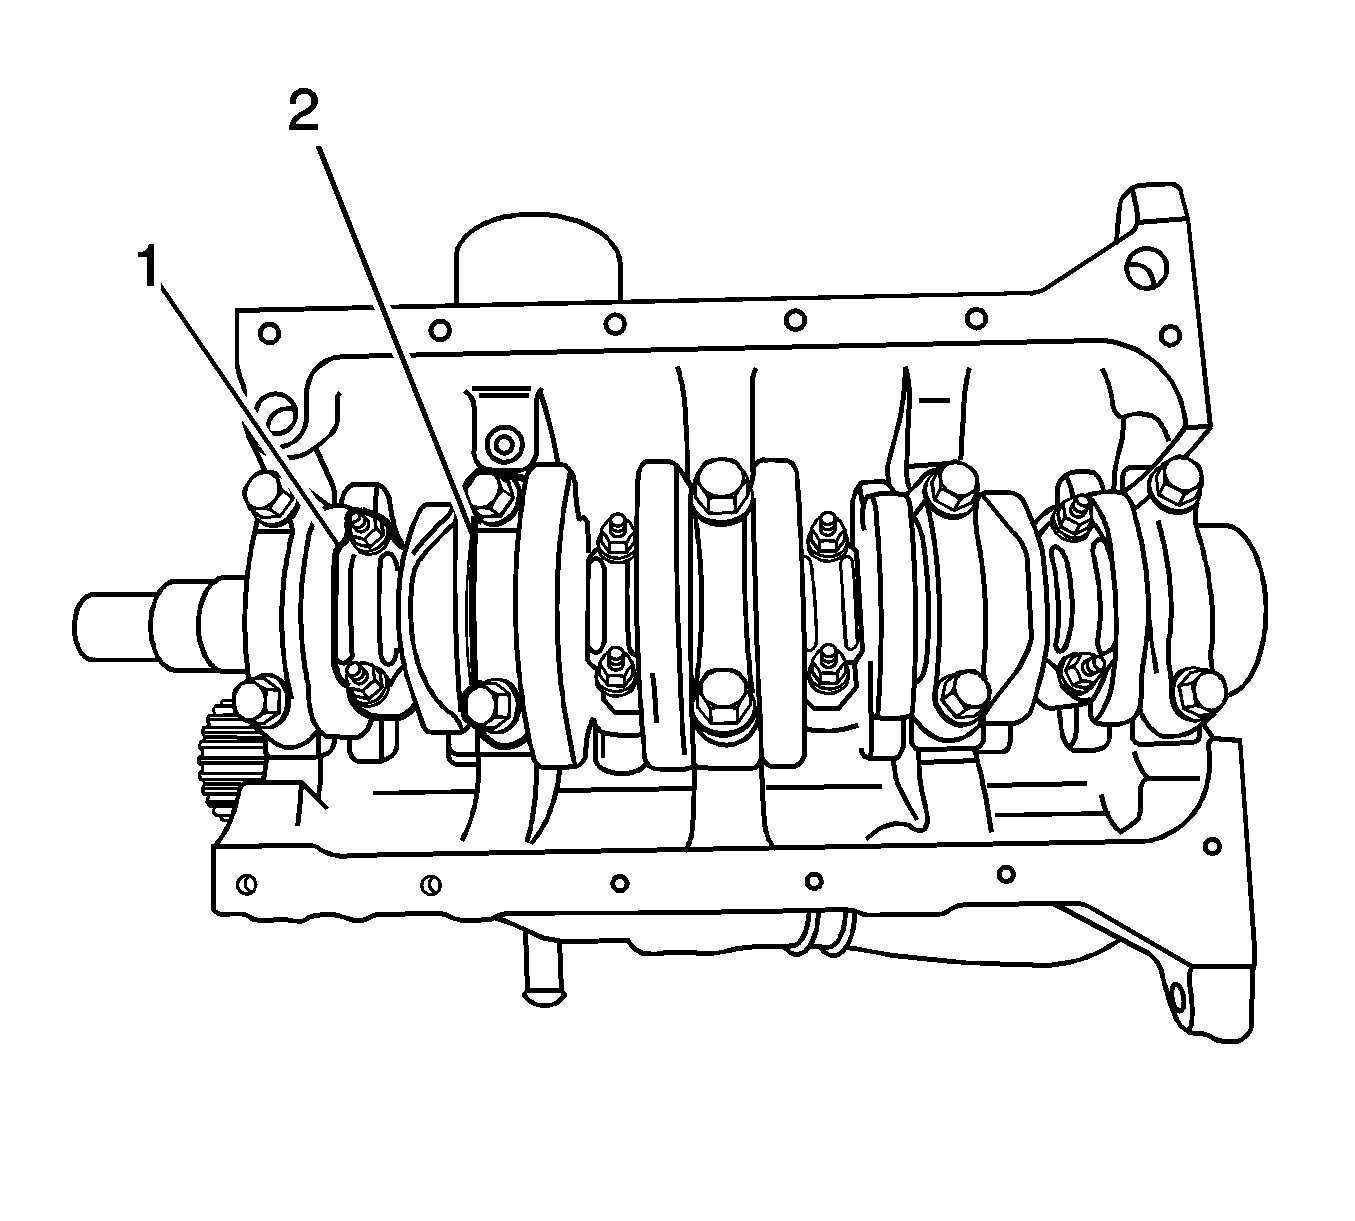
- Install the connecting rod bearing cap nuts (1).
- Install the oil pump/pickup tube.
- Install the oil pump pickup tube bolts.
- Install the oil pan (2).
- Install the oil pan bolts (3) and nuts (1).
- Install the lower engine mount bracket and the generator with the bolts (4).
- Install the upper engine mount bracket and the generator shackle with the bolts (5).
- Install the generator with the bolts and the nut (3).
- Install the generator belt (2).
- Install the engine mount bracket.
- Install the air conditioning (A/C) compressor/power steering pump and the bracket with the bolts (2).
- Install the power steering pump bracket with the bracket bolt/nut and adjusting bolt (1).
- Install the power steering/air conditioning belt.
- Install the cylinder head with the intake manifold, the exhaust manifold, and distributor/adaptor attached. Refer to Cylinder Head Replacement .
- Install the timing belt. Refer to Timing Belt Replacement .
- Install the engine assembly to the engine compartment. Refer to Engine Replacement .
- Connect the negative battery cable.
- Start the engine and operate all systems.
- Operate the idle air control valve reset procedure, as necessary.
Notice: Avoid installing the bearing caps incorrectly. Cylinder head and camshaft damage may result.
Notice: Refer to Fastener Notice in the Preface section.
Tighten
Tighten the connecting rod bearing cap nuts to 33 N·m (24 lb ft).
Tighten
Tighten the oil pump pickup tube bolts to 10 N·m (89 lb in).
Tighten
Tighten the oil pan bolts and nuts to 10 N·m (89 lb in).
Tighten
| • | Tighten the upper engine mount bracket 38 N·m (28 lb ft). |
| • | Tighten the generator shackle bolts 38 N·m (28 lb ft). |
Tighten
Tighten the generator lower bolts and the nut to 23 N·m (17 lb ft).
Tighten
Tighten the generator belt tension adjusting bolt to 23 N·m (17 lb ft).
Tighten
| • | Tighten the engine mount bracket bolts (4) to 20 N·m (15 lb ft). |
| • | Tighten the A/C compressor/power steering pump bracket bolts (2) to 38 N·m (28 lb ft). |
Tighten
| • | Tighten the adjusting bolt 22 N·m (16 lb ft) |
| • | Tighten the power steering rear bracket nut 22 N·m (16 lb ft) |
