For 1990-2009 cars only
Removal Procedure
Notice: Use care when removing and installing the headliner. If reusing the headliner lay the headliner down flat on a clean surface. Excessive bending will damage the headliner.
- Lower the headliner. Refer to Headlining Trim Panel Replacement in Interior Trim.
- Cycle the glass panel to the rear.
- Remove the 8 fasteners (2) from the cover plates. Start with the rear most fastener on both sides.
- Cycle the glass panel to the flush or closed position.
- Remove the power run roof motor. Refer to Power Sunroof Motor Replacement .
- Remove the 2 transmission fasteners (1) at the rear of the sunroof housing.
- Remove the sunroof module (1) by lifting up and forward.
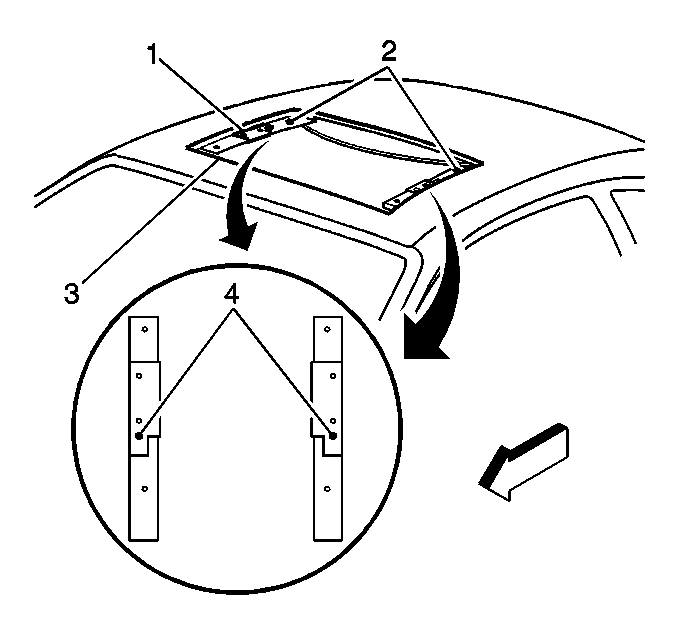
Important: Do not remove the fine-thread machine fasteners (4) second from the rear. Identify the fasteners from the inside of the vehicle.
Important:
• To prevent damage to the finish, mask the roof panel in front
of the sunroof opening using masking tape and paper. • Handle the module by the glass panel. Do not squeeze the module
or bend the components.
Installation Procedure
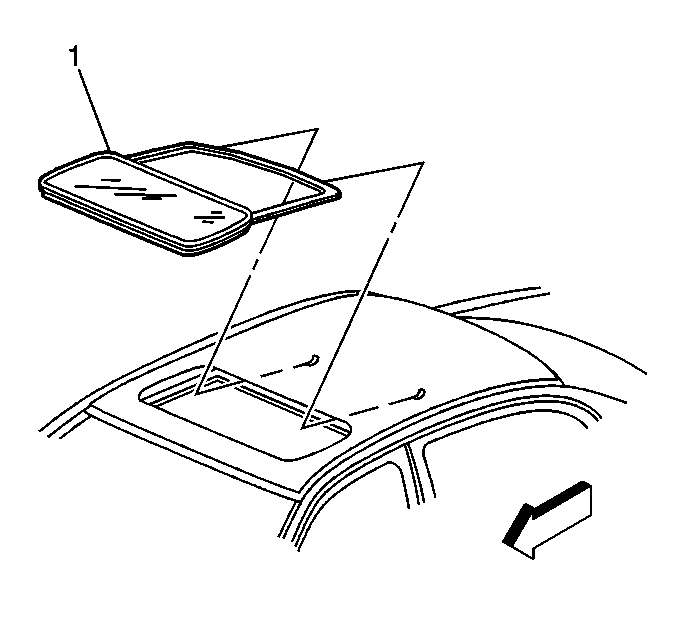
- Insert the rear of the module through the roof opening. Index the module on the raised guides on the track.
- Slide the module (1) into the sunroof opening. Do not damage the finish at the front of the opening.
- Verify that the module (1) is under the clips. This will prevent noise during travel over road irregularities.
- Lower the glass panel into the opening.
- Install the 2 fasteners (1) in the transmission.
- Install the power sun roof motor. Refer to Power Sunroof Motor Replacement .
- Cycle the glass fully to the rear.
- Cycle the glass forward 3 mm (0.125 in) in order to remove the load from the bumpers.
- Install the 2 rear fasteners (one per side) in the module (3) in order to align the unit.
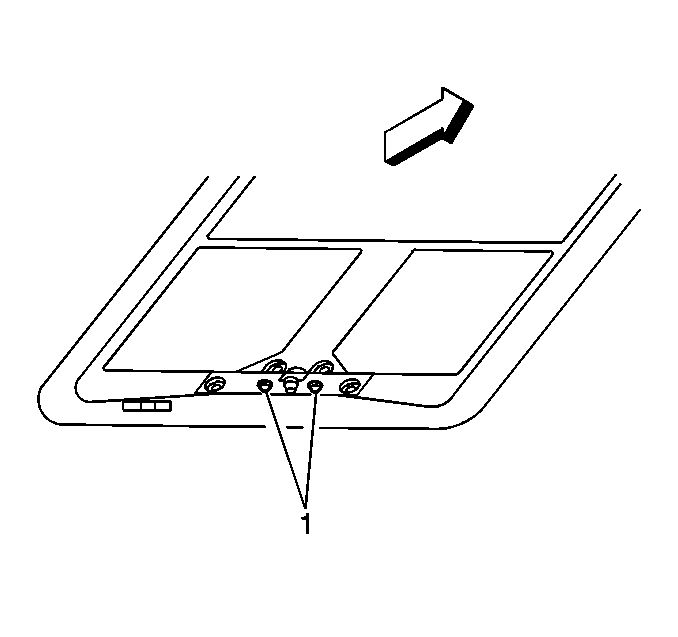
- Install the 6 fasteners (2).
- Inspect for the following conditions:
- Install the headliner. Refer to Headlining Trim Panel Replacement in Interior Trim.
As you slide the module under the rear retaining clips, you will feel resistance during the last 6-9 cm (2-3 in) of travel.
| • | Proper operation |
| • | Proper fit |
| • | Synchronization |
