Tools Required
J 36660-A Electronic Torque Angle Meter
Removal Procedure
- Remove the intake manifold. Refer to Intake Manifold Replacement .
- Disconnect the right (rear) exhaust manifold from the cylinder head. Refer to Exhaust Manifold Replacement - Right Side .
- Adjust the water crossover pipe for access. Refer to Engine Coolant Crossover Pipe Replacement in Engine Cooling.
- Remove the camshaft covers. Refer to Camshaft Cover Replacement - Left Side and Camshaft Cover Replacement - Right Side .
- Install the J 42038 on the camshafts.
- Remove the primary camshaft drive chain. Refer to Primary Camshaft Drive Chain Replacement .
- Remove the right (rear) cylinder head camshafts. Refer to Camshaft Replacement - Right Side .
- Remove the valve rocker arms.
- Remove the lifters.
- Remove the coolant temperature sensor from the right (rear) cylinder head. Refer to Engine Coolant Temperature Sensor Replacement in Engine Controls-3.5L.
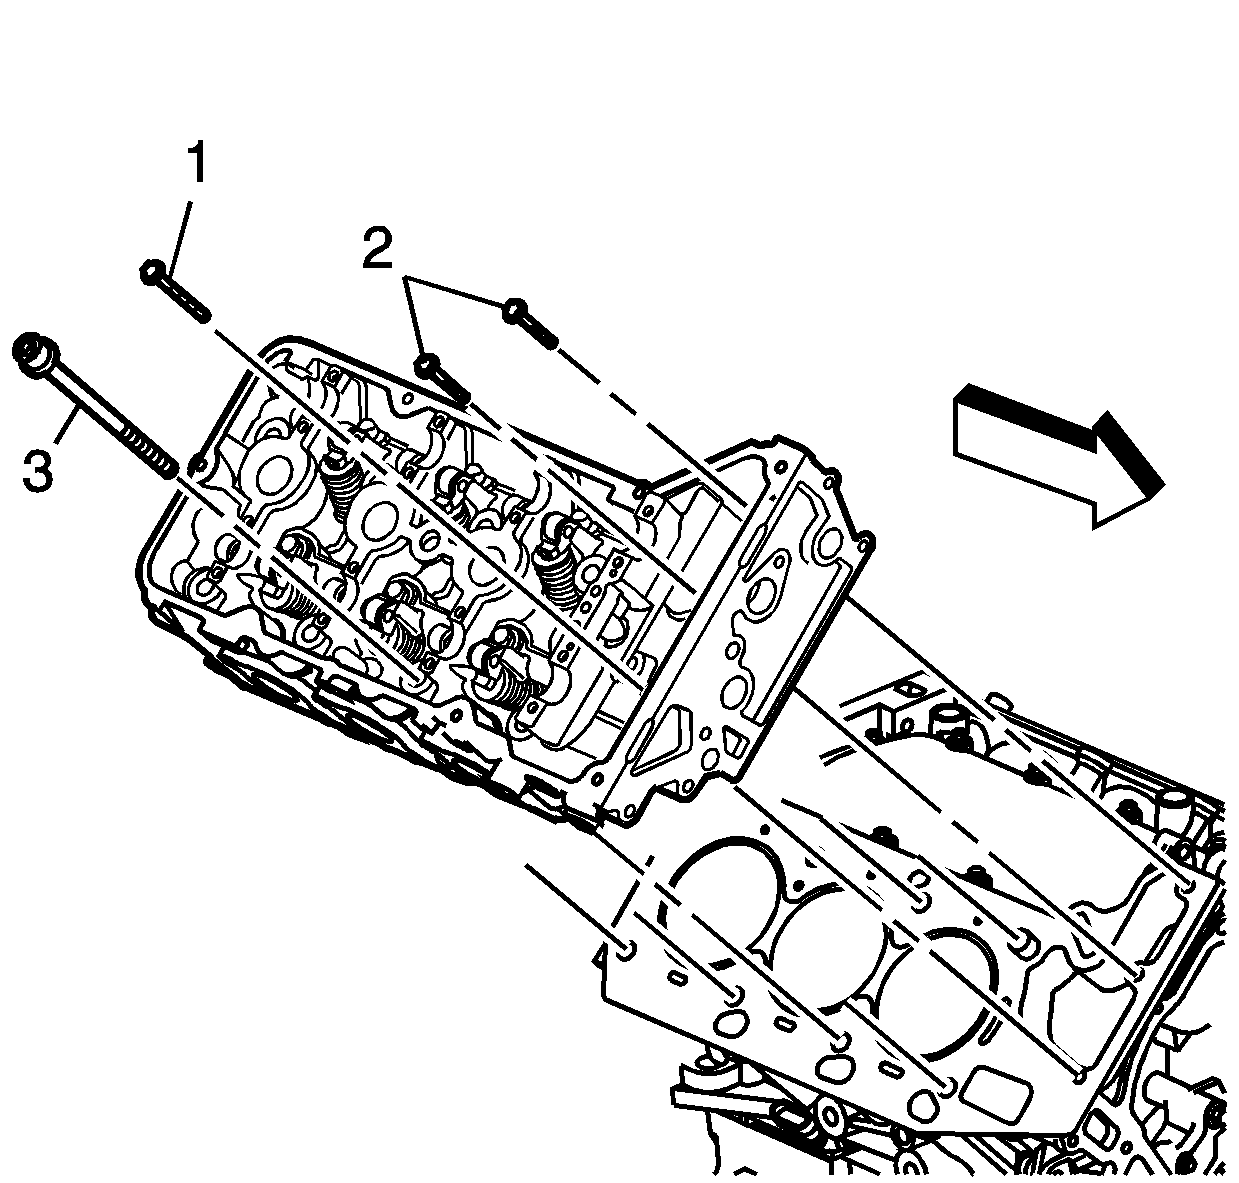
- Remove the M6 external drive bolts (1,3) from the front portion of the cylinder head. Note the location of the longer M6 bolt (1).
- Remove and discard the M11 internal drive cylinder head bolts (2).
- Remove the cylinder head. Ensure that no dowel guide pins are stuck in the cylinder head.
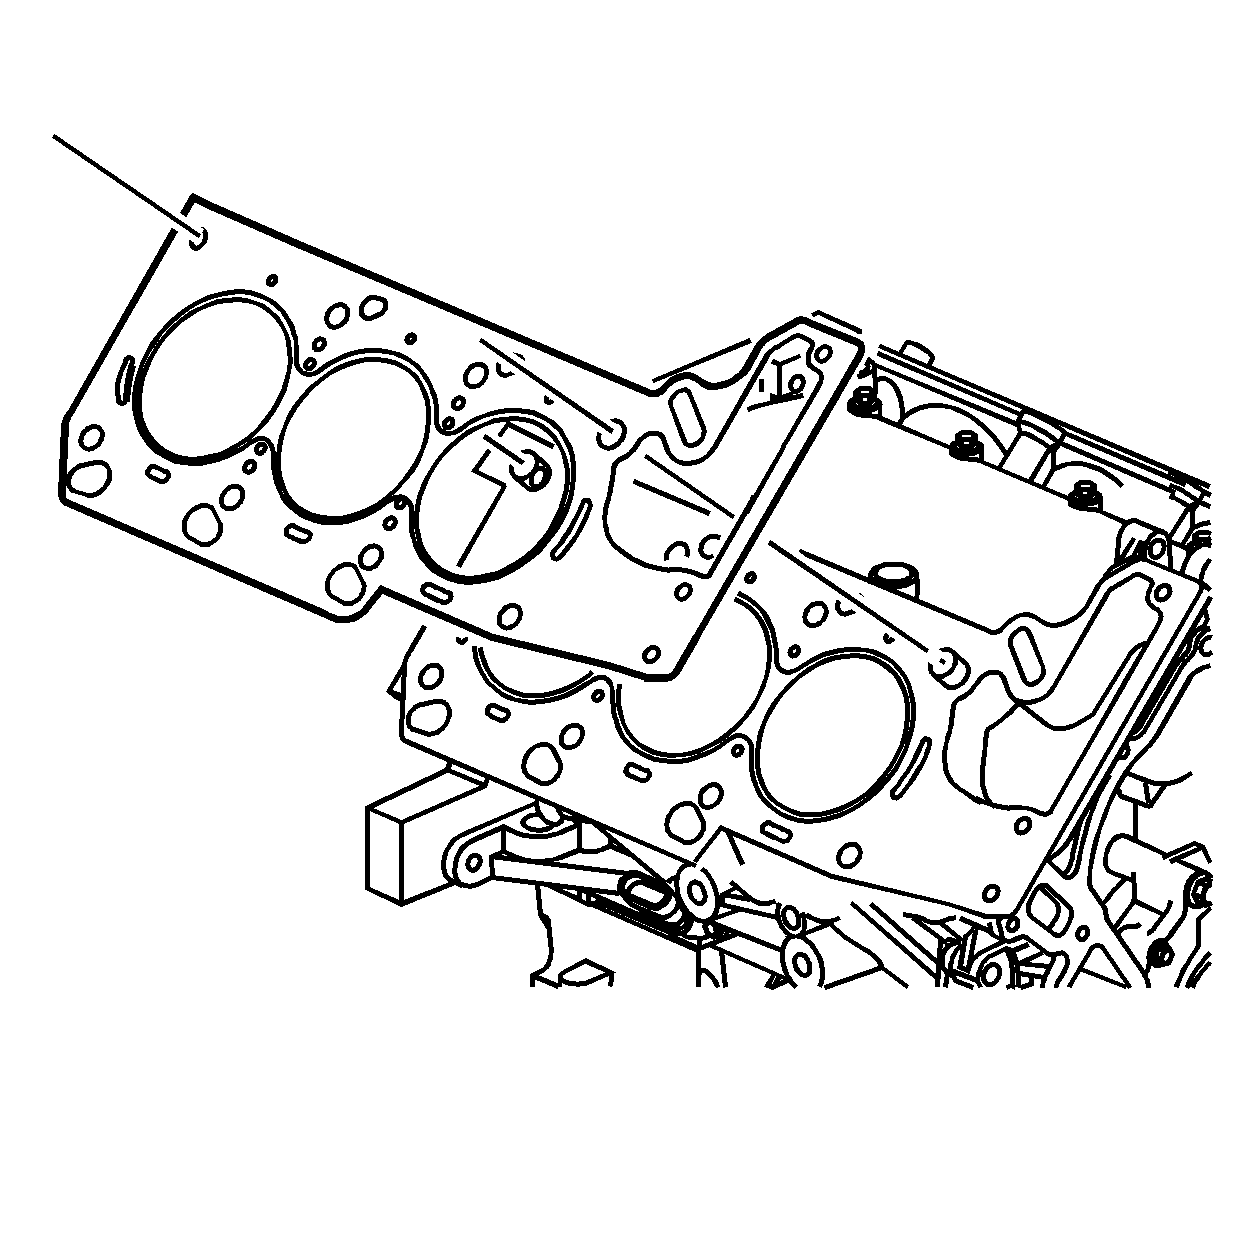
- Remove the cylinder head gasket. Make sure all of the gasket material is removed.
- Place the cylinder head on a flat, clean surface with the combustion chambers face-up in order to prevent damage to the deck face.
- To disassemble the cylinder head refer to Cylinder Head Disassemble .
- To clean and inspect the cylinder head refer to Cylinder Head Cleaning and Inspection .
- To inspect the valve springs refer to Valve Spring Inspection and Measurement .
- To grind the seats and valves refer to Valve and Seat Grinding .
- To assemble the cylinder head refer to Cylinder Head Assemble .
Important: Do NOT remove the right (rear) exhaust manifold. Disconnect from the right (rear) cylinder head and connection at the left (front) exhaust manifold and move aside.
Important: Place the valve train parts in a rack in order to make sure that they are installed in the same location from which they were removed.
Important: Place the valve train parts in a rack in order to make sure that they are installed in the same location from which they were removed.
Installation Procedure
- Ensure all the cylinder head locating pins are securely mounted in the cylinder block deck face.
- Install a new cylinder head gasket using the deck face locating pins for retention.
- Align the cylinder head with the deck face locating pins.
- Place the cylinder head in position on the deck face.
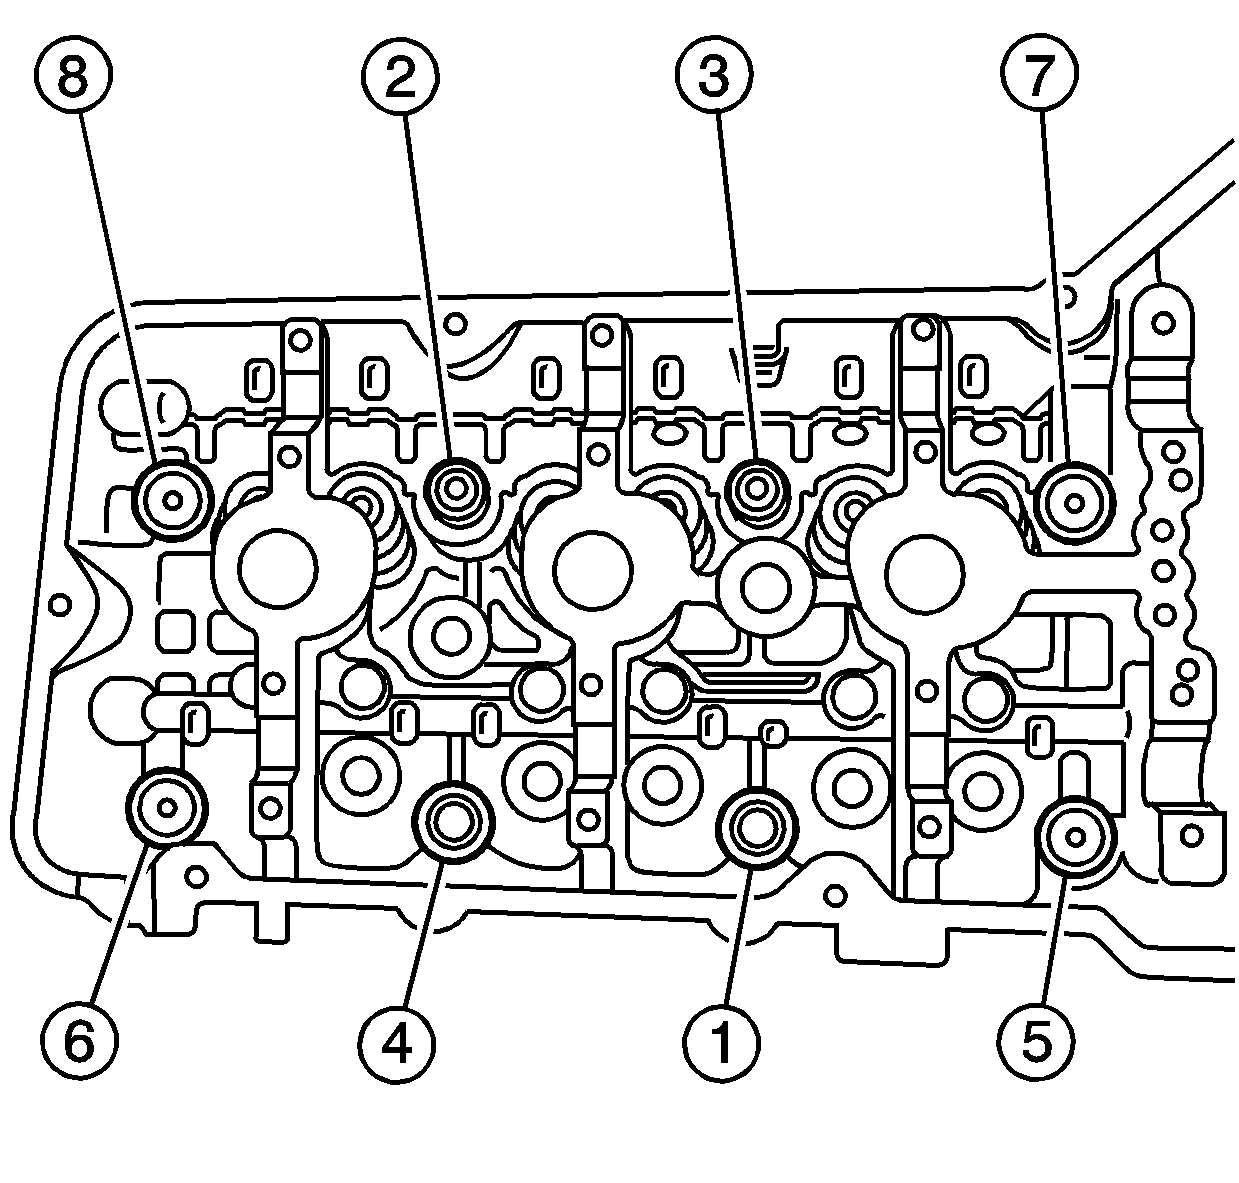
- Install new M11 cylinder head bolts (2).
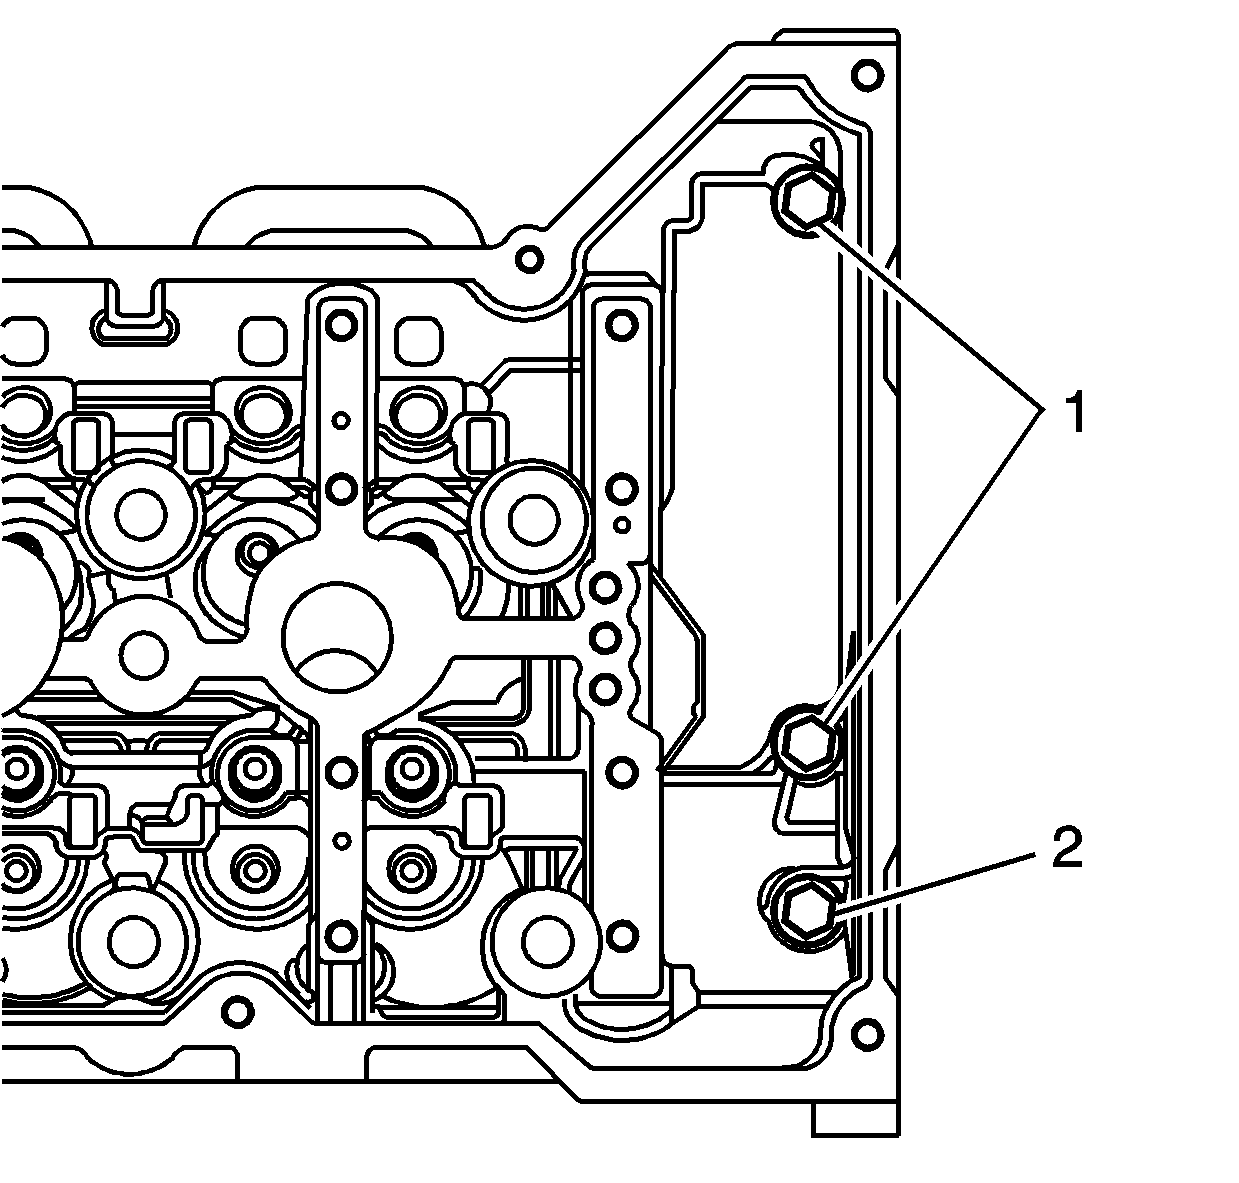
- Install the M6 bolts at the front of the cylinder head. Install the longer M6 bolt (1) in the outboard location as shown. Install the two shorter M6 bolts (3) in the locations shown.
- Tighten the M11 bolts.
- Tighten the M11 cylinder head bolts to 40 N·m + 100 degrees (30 lb ft + 100 degrees) in the sequence shown using the J 36660-A .
- Repeat the sequence turning each bolt an additional 100 degrees (200 degrees total) using the J 36660-A .
- Tighten the long M6 bolt (2).
- Tighten the 2 shorter M6 bolts (1).
- Install the coolant temperature sensor into the right (rear) cylinder head. Refer to Engine Coolant Temperature Sensor Replacement in Engine Controls-3.5L.
- Install the lifters.
- Install the rocker arms.
- Install the right (rear) cylinder head camshafts. Refer to Camshaft Replacement - Right Side .
- Install the primary camshaft drive chain. Refer to Primary Camshaft Drive Chain Replacement .
- Remove the J 42038 from the camshafts.
- Install the camshaft covers. Refer to Camshaft Cover Replacement - Left Side and Camshaft Cover Replacement - Right Side .
- Install the water crossover pipe. Refer to Engine Coolant Crossover Pipe Replacement in Engine Cooling.
- Connect the right (rear) exhaust manifold to the cylinder head. Refer to Exhaust Manifold Replacement - Right Side .
- Install the intake manifold. Refer to Intake Manifold Replacement .
Important: DO NOT reuse the old M11 cylinder head bolts.
Notice: Use the correct fastener in the correct location. Replacement fasteners must be the correct part number for that application. Fasteners requiring replacement or fasteners requiring the use of thread locking compound or sealant are identified in the service procedure. Do not use paints, lubricants, or corrosion inhibitors on fasteners or fastener joint surfaces unless specified. These coatings affect fastener torque and joint clamping force and may damage the fastener. Use the correct tightening sequence and specifications when installing fasteners in order to avoid damage to parts and systems.
Tighten
Tighten
Tighten the long M6 cylinder head bolt to 12 N·m (106 lb in).
Tighten
Tighten the 2 shorter M6 cylinder head bolts to 12 N·m
(106 lb in).
