Removal Procedure
- Disconnect the battery ground (negative) cable. Refer to Battery Negative Cable Disconnection and Connection in Engine Electrical.
- Remove the engine mount strut. Refer to Engine Mount Strut Replacement in Engine Mechanical - 3.5L.
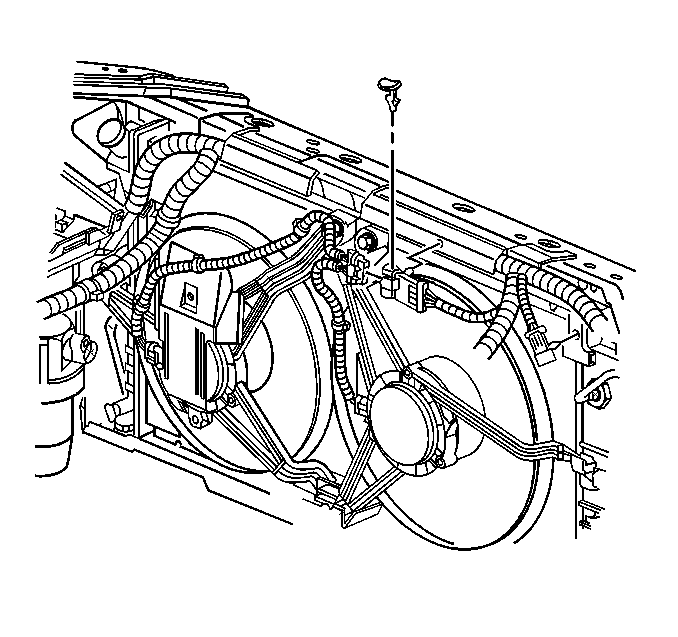
- Disconnect the cooling fan wiring harness from the engine wiring harness.
- Reposition the wiring harness at the upper radiator support.
- Remove the air cleaner assembly. Refer to Air Cleaner Assembly Replacement in Engine Controls - 3.5L.
- Remove the cooling fan shroud bolts.
- Remove the LH radiator bracket.
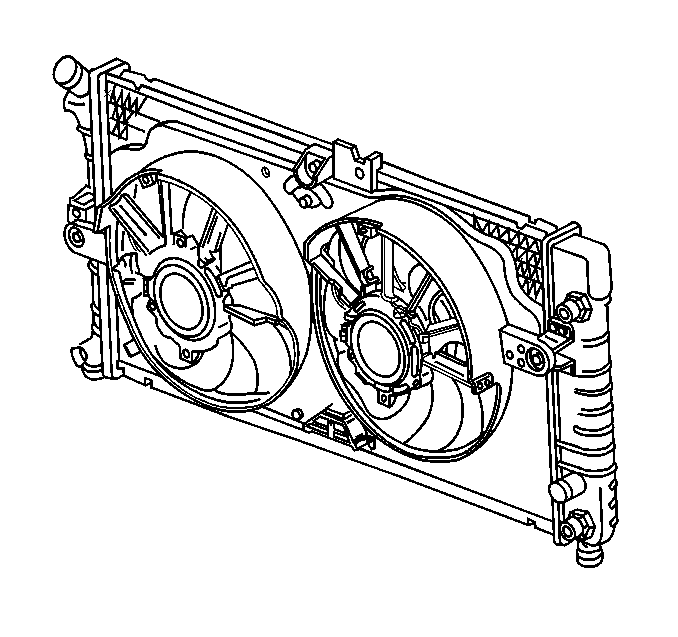
- Remove the cooling fan shroud with the electric cooling fan motors and cooling fan.
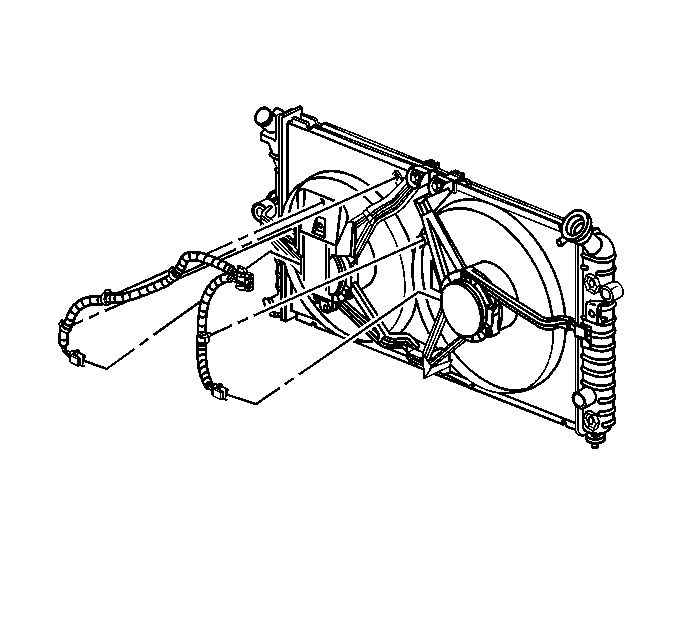
- Disconnect the cooling fan wiring harness from each cooling fan motor.
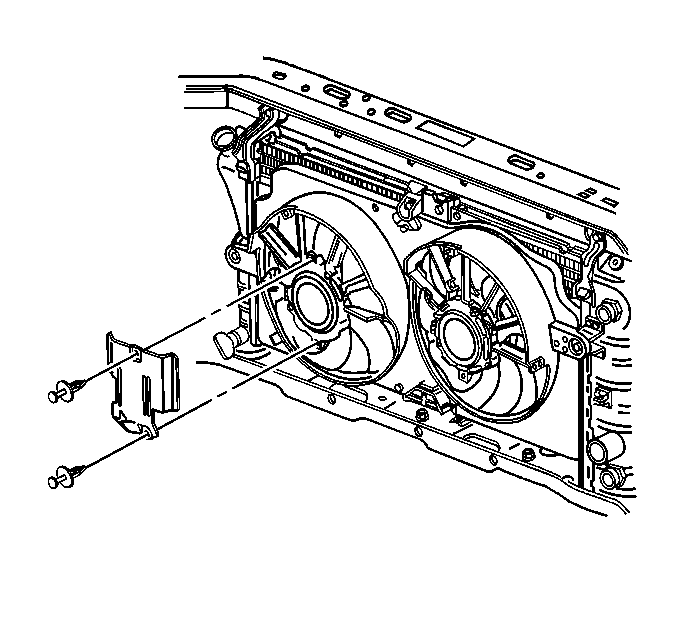
- Remove the cooling fan heat shield.
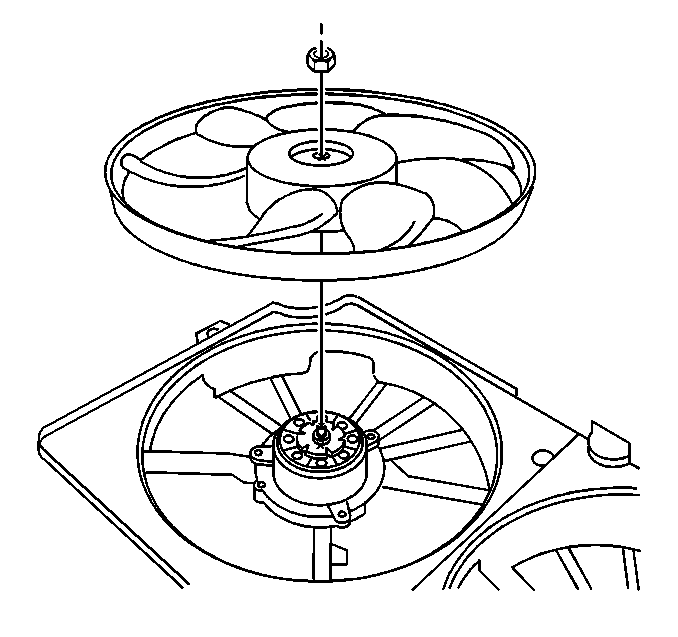
- Remove the cooling fan blade nut(s).
- Remove the cooling fan blade(s).
- Inspect the cooling fan(s) for the following conditions:
Caution: Keep hands, tools, and clothing away from the electric engine coolant fans in order to help prevent personal injury. These fans are electric and can turn on whether or not the engine is running. The fans can start automatically with the ignition in the ON position.
| 13.1. | Bent or cracked cooling fan blades |
| 13.2. | Smoothness of the cooling fan blade mating surfaces |
| 13.3. | Remove burrs or other imperfections as necessary |
Installation Procedure
- Install the cooling fan blade(s).
- Install the cooling fan blade nut(s).
- Connect the cooling fan heat shield.
- Connect the cooling fan wiring harness to each cooling fan motor.
- Install the cooling fan shroud with the electric cooling fan motors and cooling fans.
- Install the LH radiator bracket and bolt.
- Connect the cooling fan shroud bolts.
- Install the air cleaner assembly. Refer to Air Cleaner Assembly Replacement in Engine Controls - 3.5L.
- Install the wiring harness at the upper radiator support.
- Connect the cooling fan wiring harness to the engine wiring harness.
- Install the engine mount strut bracket to the upper radiator support. Refer to Engine Mount Strut Replacement in Engine Mechanical - 3.5L.
- Connect the battery ground (negative) cable. Refer to Battery Negative Cable Disconnection and Connection in Engine Electrical.
Notice: Use the correct fastener in the correct location. Replacement fasteners must be the correct part number for that application. Fasteners requiring replacement or fasteners requiring the use of thread locking compound or sealant are identified in the service procedure. Do not use paints, lubricants, or corrosion inhibitors on fasteners or fastener joint surfaces unless specified. These coatings affect fastener torque and joint clamping force and may damage the fastener. Use the correct tightening sequence and specifications when installing fasteners in order to avoid damage to parts and systems.
Tighten
Tighten the cooling fan nut to 6 N·m (53 lb in).
Tighten
Tighten the radiator bracket bolt to 10 N·m (89 lb in).
Tighten
Tighten the cooling fan shroud bolts to 6 N·m (53 lb in).

