For 1990-2009 cars only
Tools Required
J 43653 Flywheel Holding Tool
Removal Procedure
- Disconnect the negative battery cable. Refer to Battery Negative Cable Disconnection and Connection in Engine Electrical.
- Remove the air cleaner outlet duct.
- Remove the air cleaner inlet duct, (3.4L only).
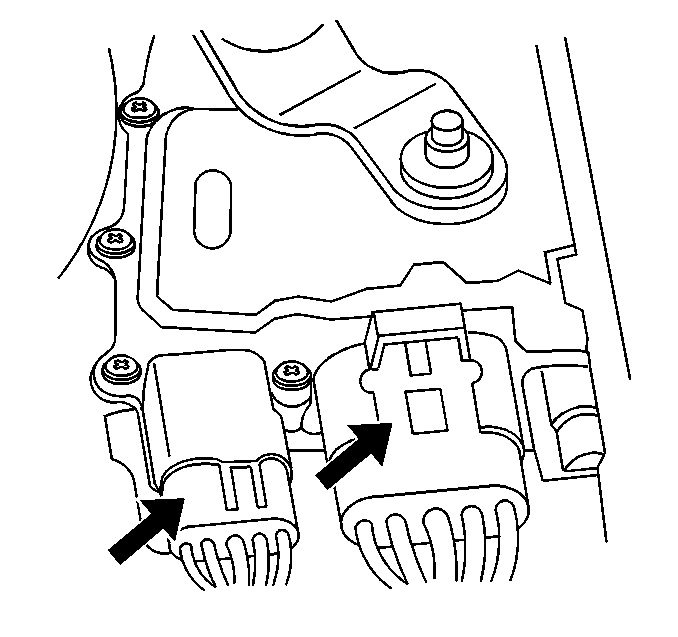
- Disconnect the transaxle wiring harness from the transaxle and the PNP switch.
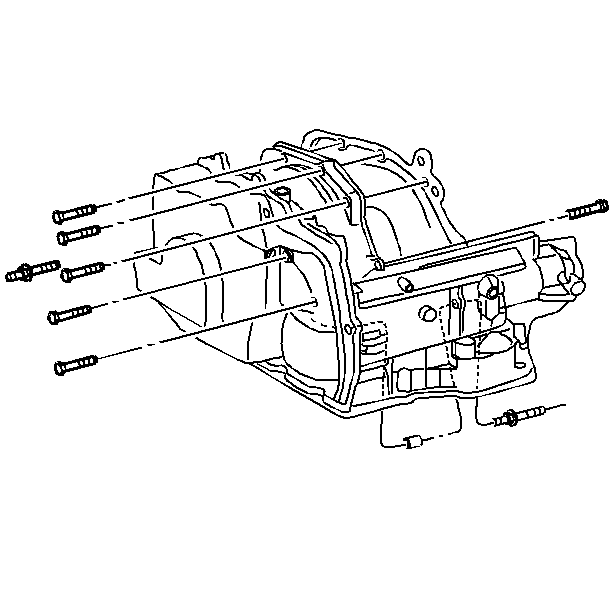
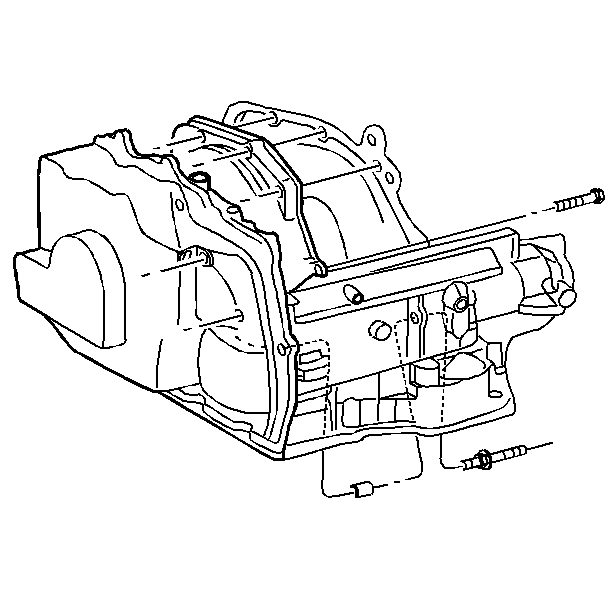
- Remove the upper transmission to engine bolts and stud.
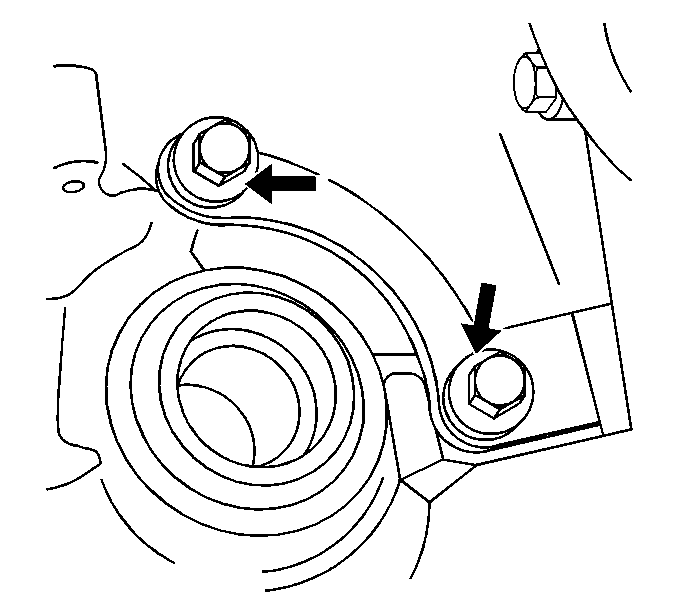
- Remove the 2 bolts from the front torque reaction mount to the transmission.
- Remove the frame. Refer to Frame Replacement in Frame and Underbody.
- Remove the rear torque reaction mount.
- Remove the 2 bolts from the transmission brace.
- Disconnect the shift cable from the shift linkage.
- Disconnect the cable from the bracket.
- Remove the flywheel inspection cover.
- Remove the starter. Refer to Starter Motor Replacement in Engine Electrical.
- Mark the relationship of the flywheel to the torque converter for reassembly.
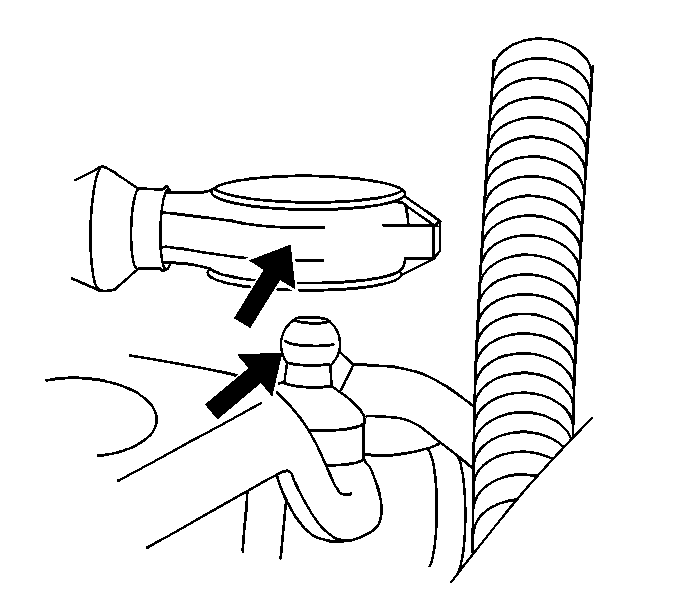
- Use the J 43653 to prevent the crankshaft from rotating.
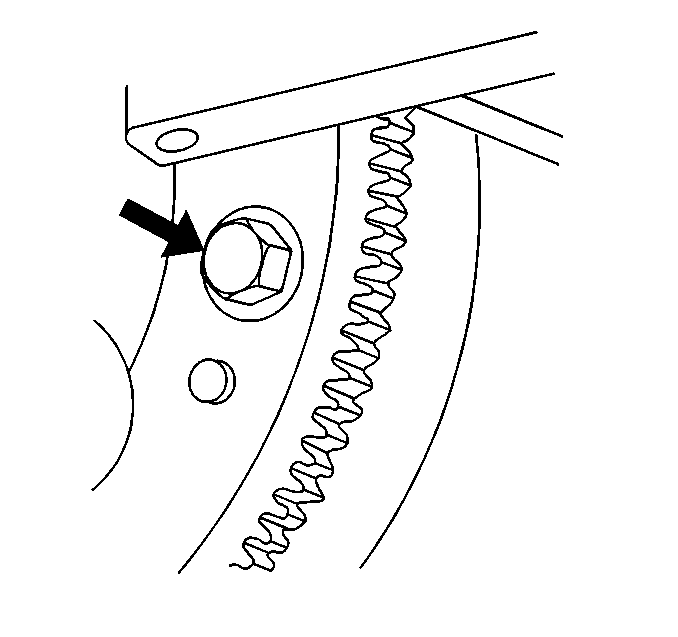
- Remove the torque converter to flywheel bolts.
- Remove the transmission cooler lines by removing the nut holding the bracket to the transaxle case.
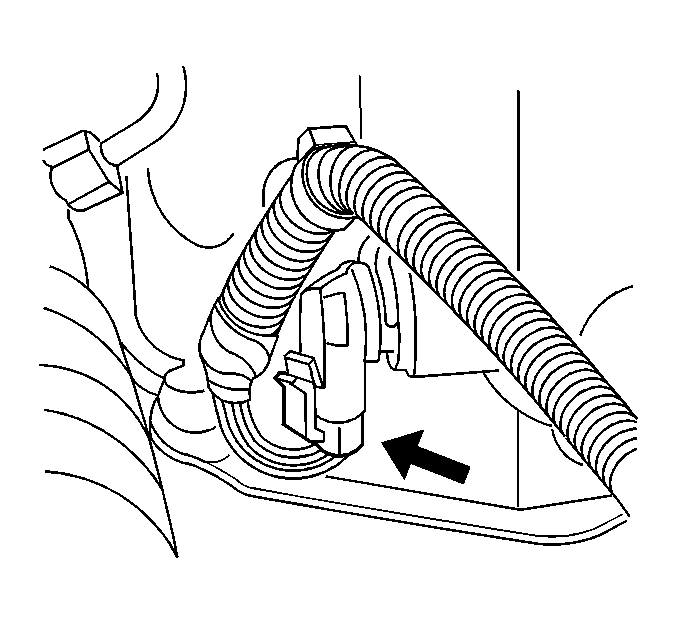
- Disconnect the VSS wiring harness from the sensor.
- Disconnect the wheel drive shafts from the transaxle. Refer to Wheel Drive Shaft Replacement in Front Wheel Drive Shafts
- Disconnect the 02 wiring harness from the sensor.
- Remove the body to transmission mount bolts.
- Remove the oil pan to drain the transmission. Refer to Oil Pan Replacement .
- Install the oil pan. Refer to Oil Pan Replacement .
- Support the transmission with a suitable jack.
- Remove the transaxle to engine nut.
- Separate the engine and the transaxle.
- Remove the transaxle from the vehicle.
- Remove the PNP switch.
- Remove the shifter cable bracket.
- Remove the transmission mount bracket.
- Remove the lower transmission to engine stud.
- Flush the transmission cooler and lines. Refer to Transmission Fluid Cooler Flushing and Flow Test .

Installation Procedure
- Install the PNP switch.
- Install the shifter cable bracket.
- Install the lower transmission to engine stud.
- Install the transmission mount bracket.
- Position the transaxle in the vehicle.
- Install the lower transmission to engine bolts and nuts.
- Connect the transaxle cooler pipes to the transaxle.
- Install the transaxle mount to body bolts.
- Remove the transmission jack.
- Use the J 43653 to prevent the crankshaft from rotating.
- Install the torque converter to flywheel bolts.
- Install the wheel drive shafts to the transaxle. Refer to Wheel Drive Shaft Replacement in Front Wheel Drive Shafts.
- Connect the wiring harness to the VSS.
- Install the starter. Refer to Starter Motor Replacement in Engine Electrical.
- Install the flywheel inspection cover bolts.
- Install the 2 bolts to the front torque reaction mount to the transmission.
- Install the rear torque reaction mount.
- Install the transmission to engine brace bolts.
- Install the frame. Refer to Frame Replacement in Frame and Underbody.
- Install the upper transmission to engine bolts and stud.
- Install the engine wiring harness grounds to the transaxle to engine mount stud and nut.
- Remove the engine support fixture. Refer to Engine Support Fixture in Engine Mechanical - 2.2L (L61) or Engine Support Fixture in Engine Mechanical - 3.4L.
- Install the shift linkage to the transmission.
- Connect the electrical connectors to the PNP switch and transaxle.
- Connect the negative battery cable. Refer to Battery Negative Cable Disconnection and Connection in Engine Electrical.
- Inspect the transmission fluid level.
- Reset the TAP values. Refer to Transmission Adaptive Functions .
Notice: Refer to Fastener Notice in the Preface section.
Tighten
Tighten the bolts and nuts to 90 N·m (66 lb ft).
Tighten
Tighten the cooler pipes to 8 N·m (71 lb in).
Tighten
Tighten the bolts to 90 N·m (66 lb ft).
Tighten
Tighten the torque converter bolts to 62 N·m (46 lb ft).
Tighten
Tighten the bolts to 10 N·m (89 lb in).
Tighten
Tighten the bolts to 90 N·m (66 lb ft).
Tighten
Tighten the bolts to 90 N·m (66 lb ft).
Tighten
Tighten the bolts to 72 N·m (53 lb ft).
Tighten
Tighten all of the bolts to 90 N·m (66 lb ft).
Tighten
Tighten the nut to 8 N·m (71 lb in).
Important: It is recommended that transmission adaptive pressure (TAP) information be reset.
Resetting the TAP values using a scan tool will erase all learned values in all cells. As a result, The ECM, PCM or TCM will need to relearn TAP values. Transmission performance may be affected as new TAP values are learned.