For 1990-2009 cars only
Removal Procedure - Front Door
- Remove the check link to pillar retaining bolt. Refer to Front Side Door Check Link Replacement .
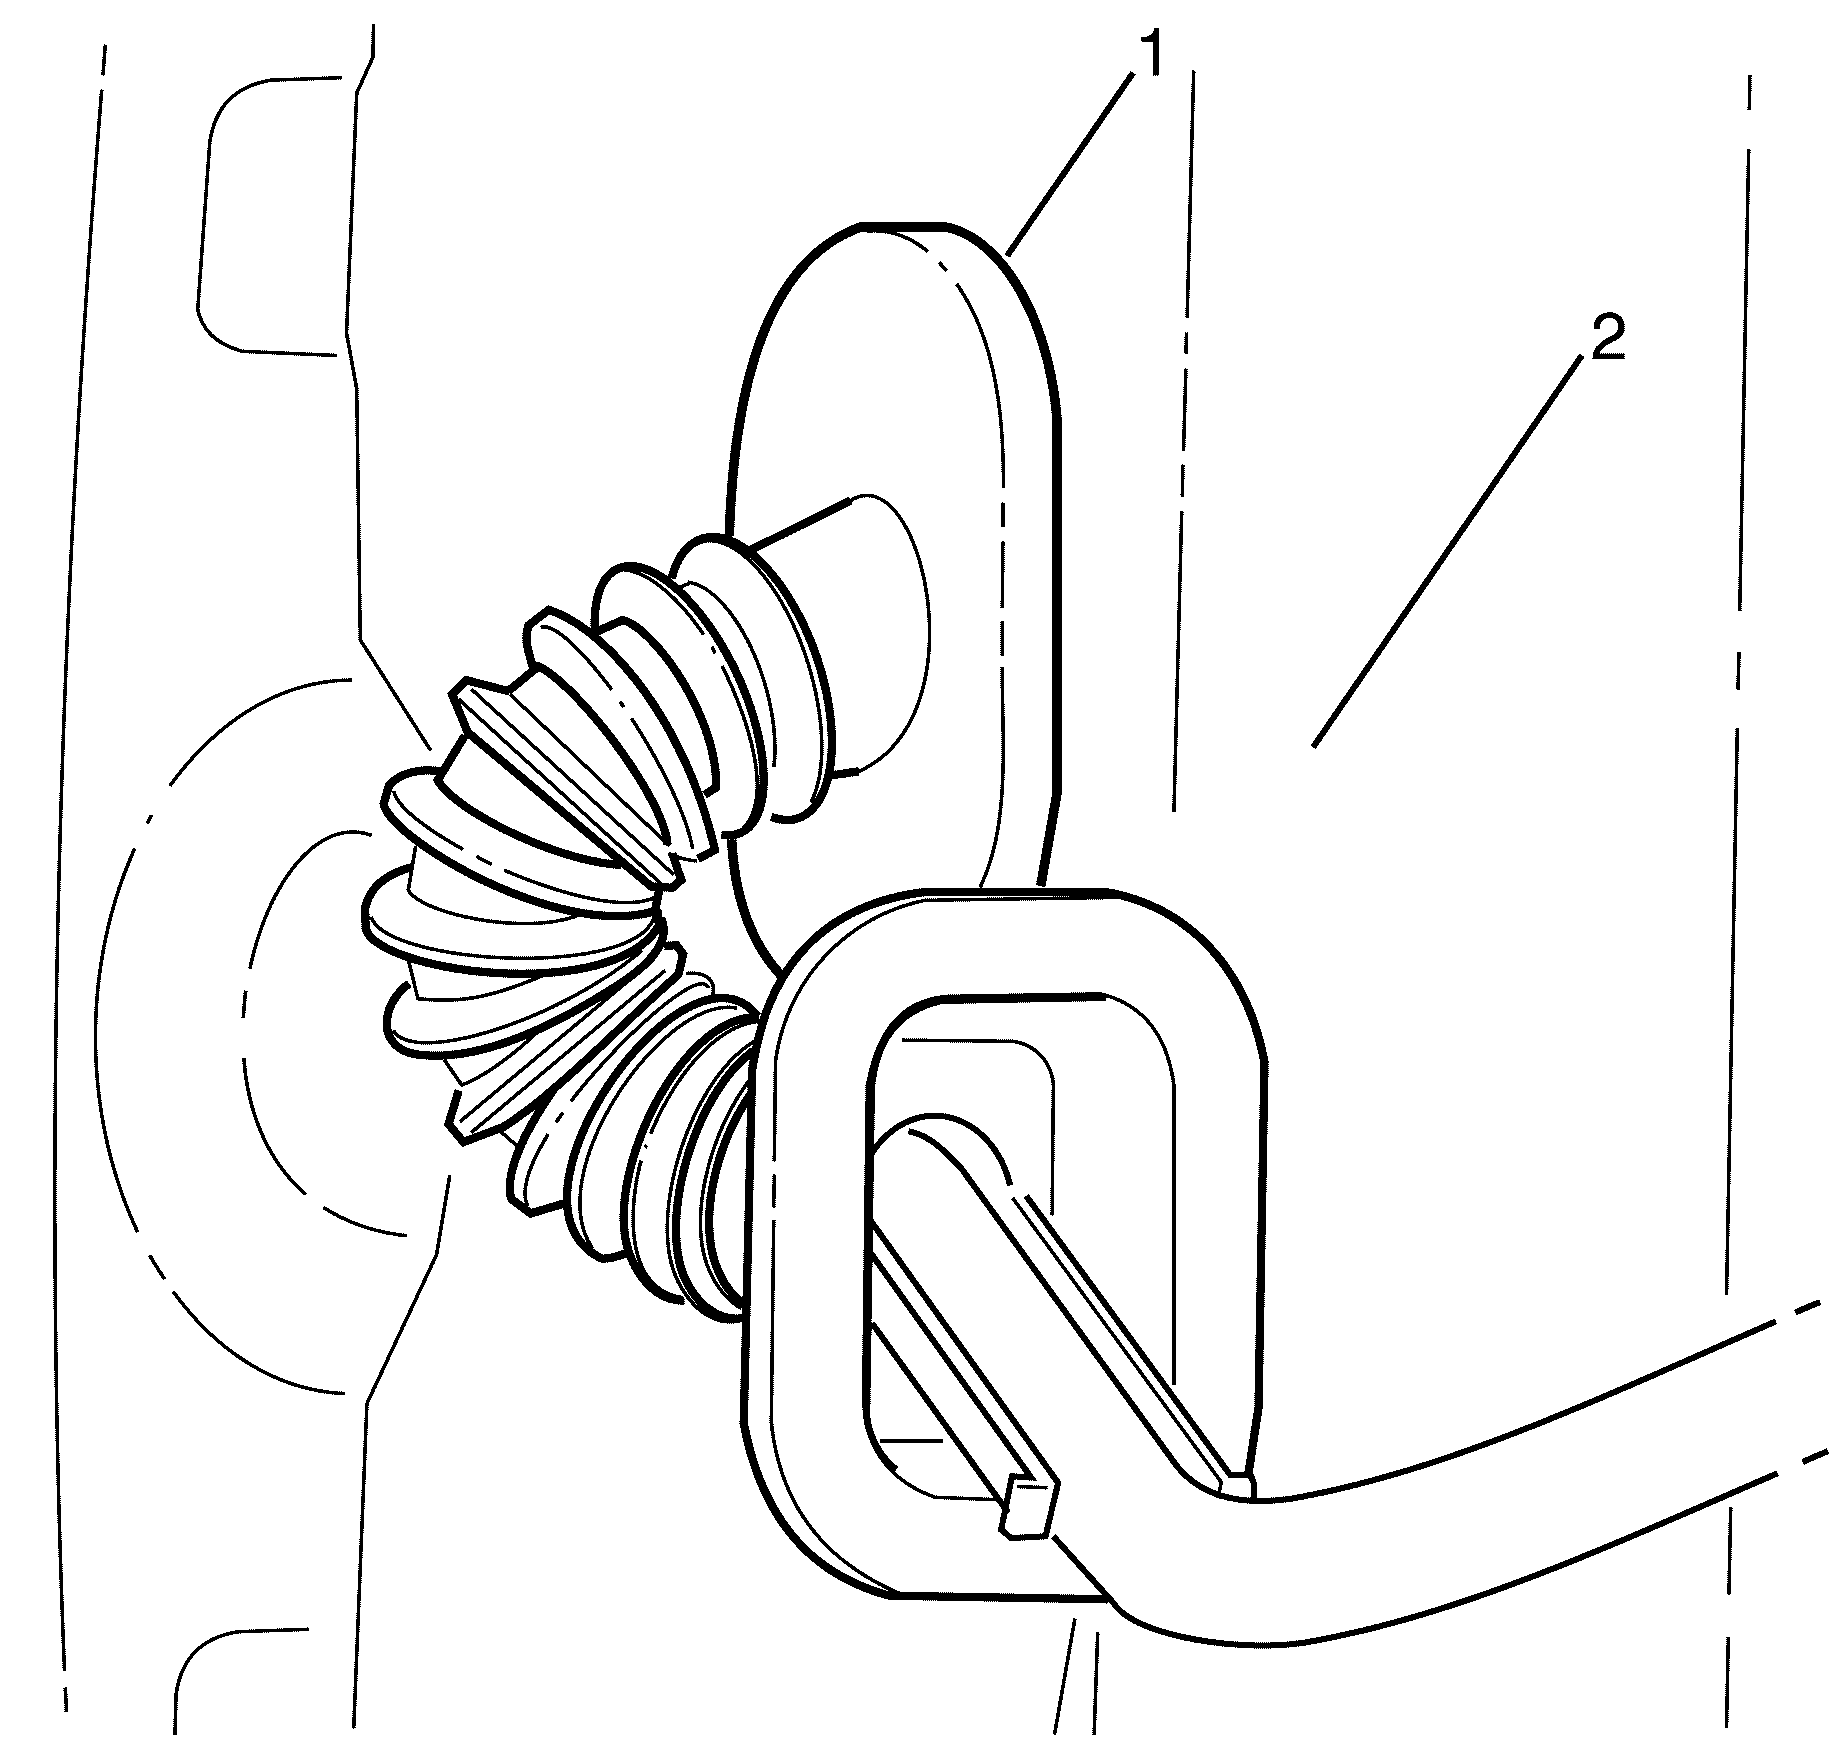
- Remove the rubber conduit (1) from the pillar (2).
- Disconnect the door wiring harness to body wiring harness electrical connector.
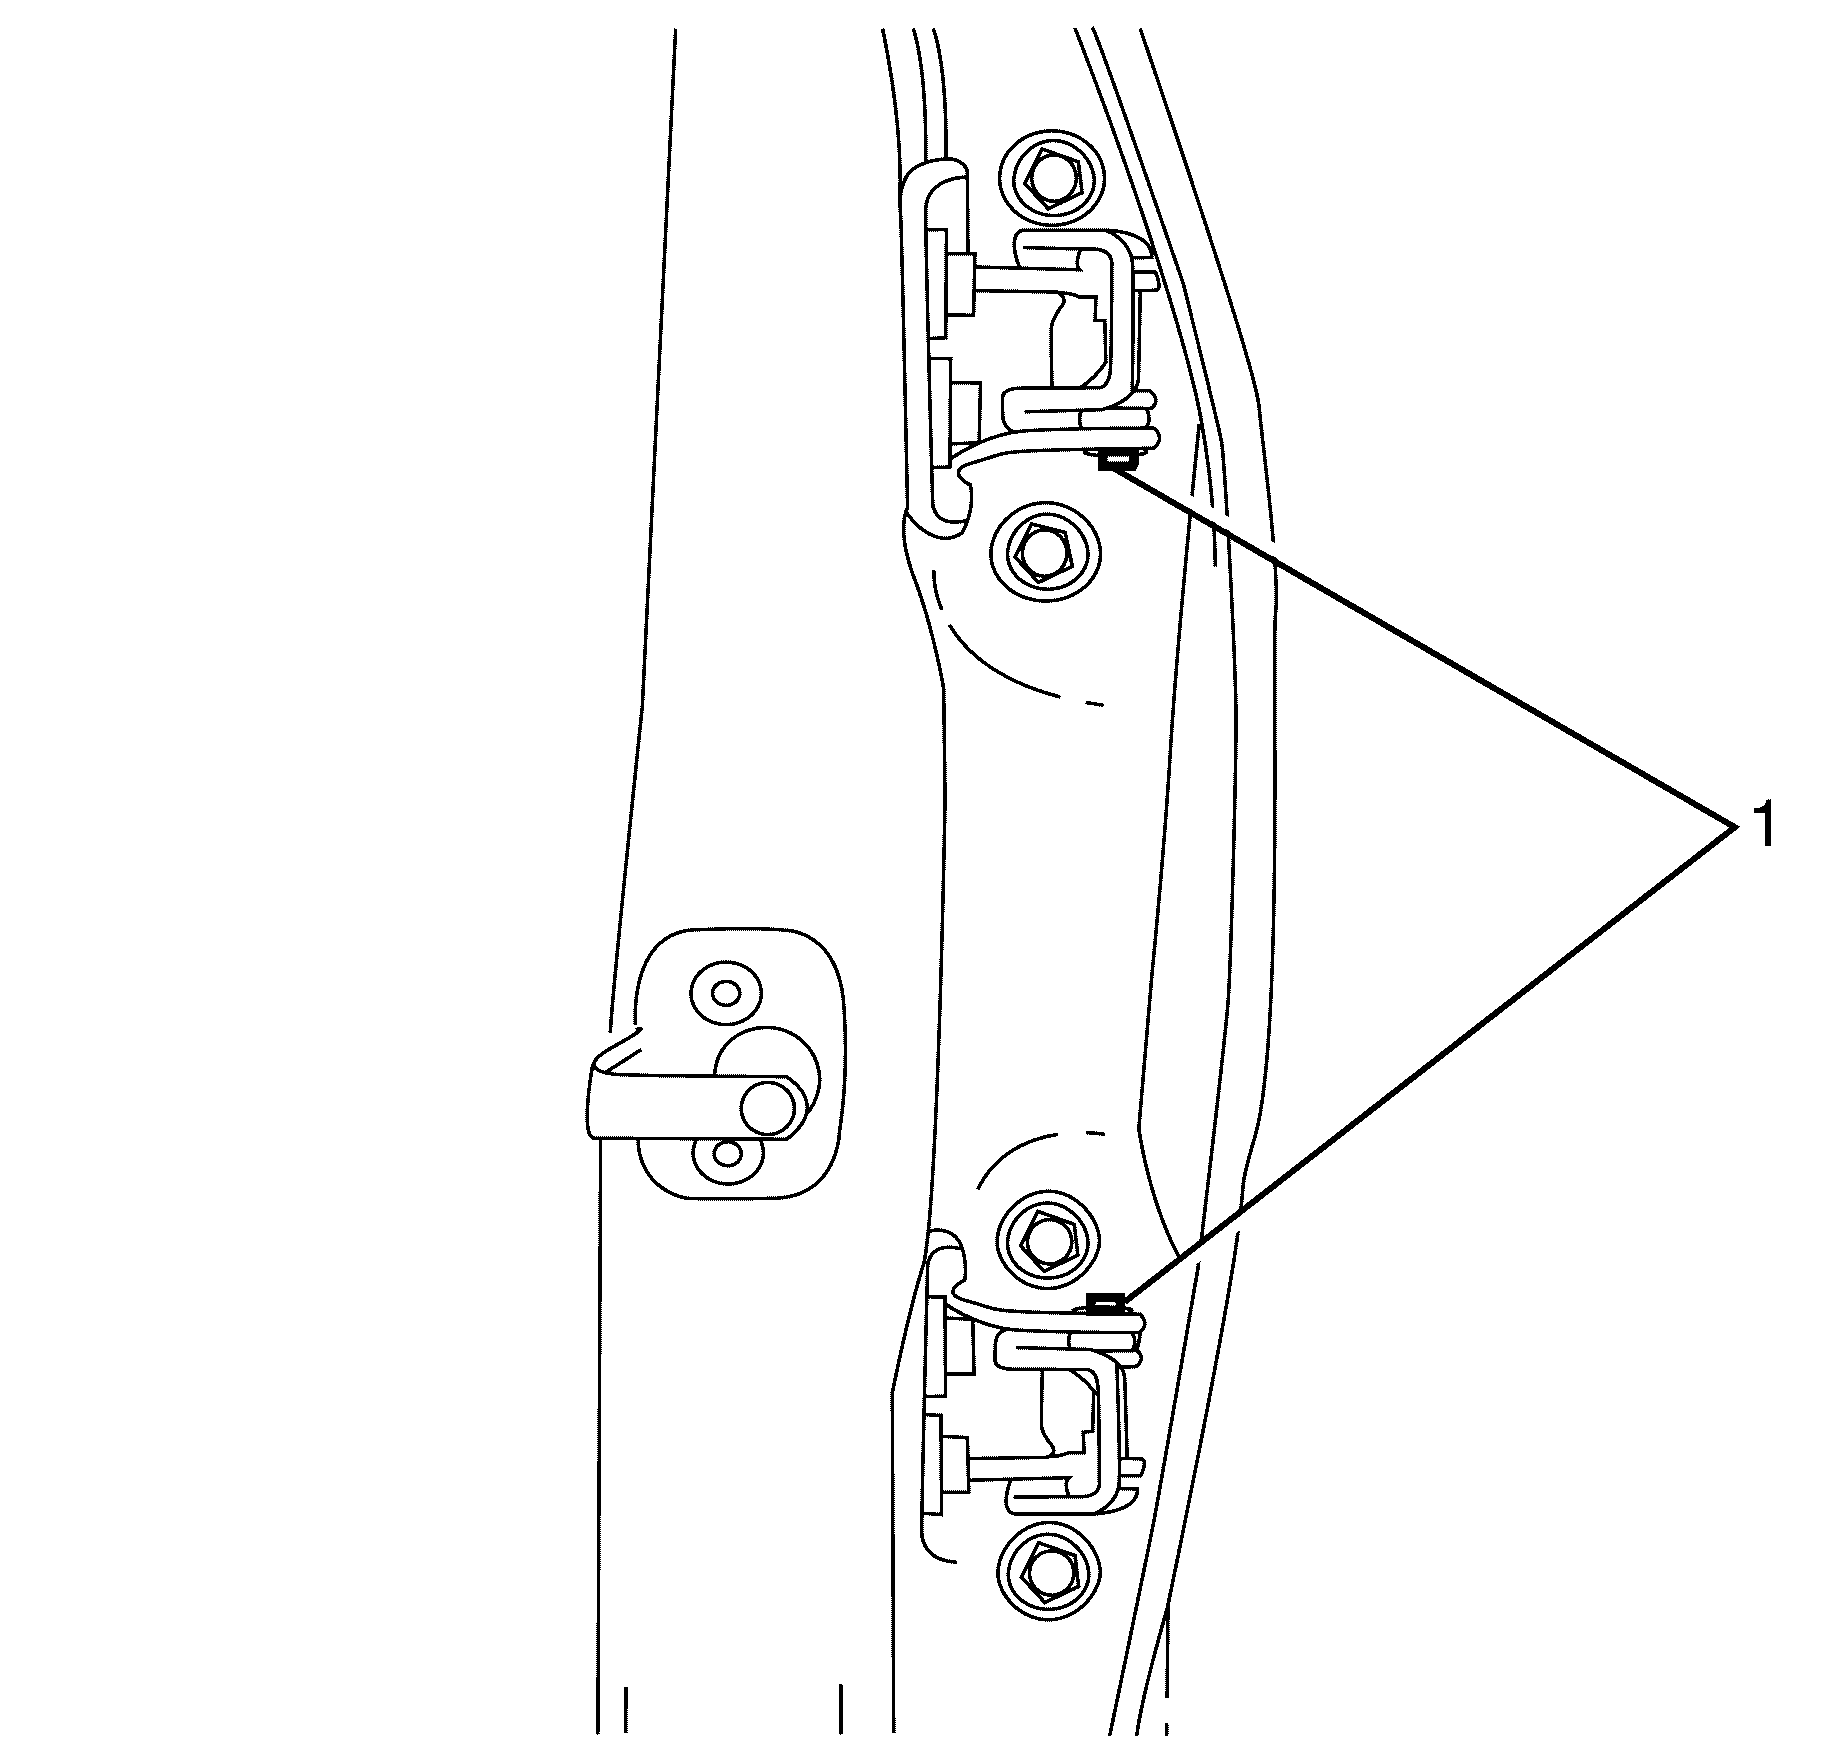
- The keeper bolts (1) are located in the door hinges with the top door hinge keeper bolt facing downwards and the lower door hinge keeper bolt facing upwards.
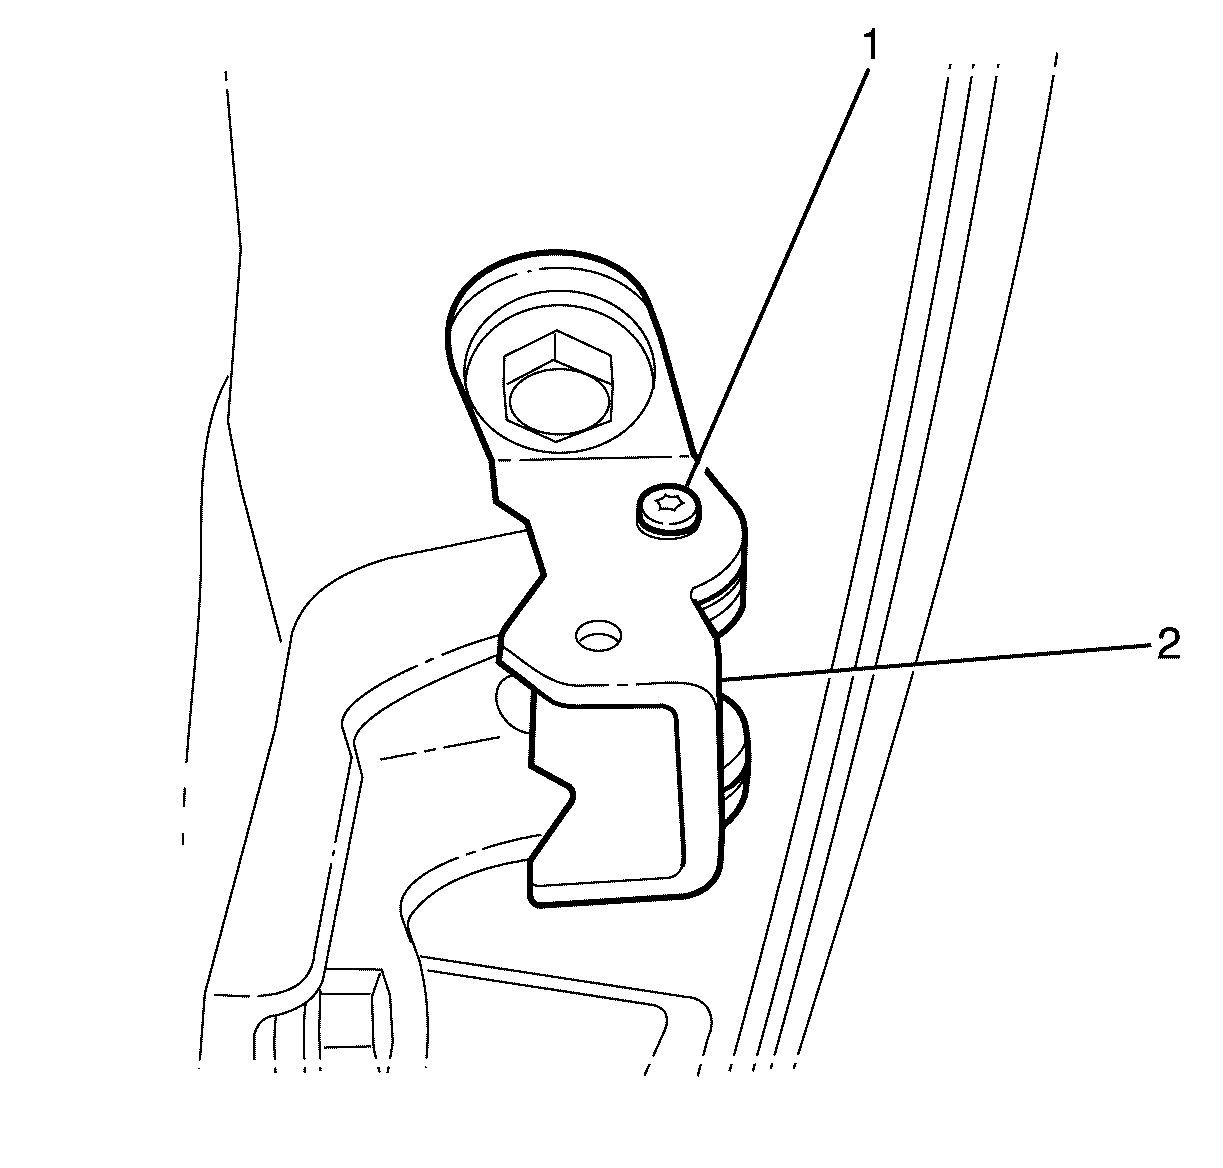
- Remove the keeper bolts (1) from the door hinges (2).
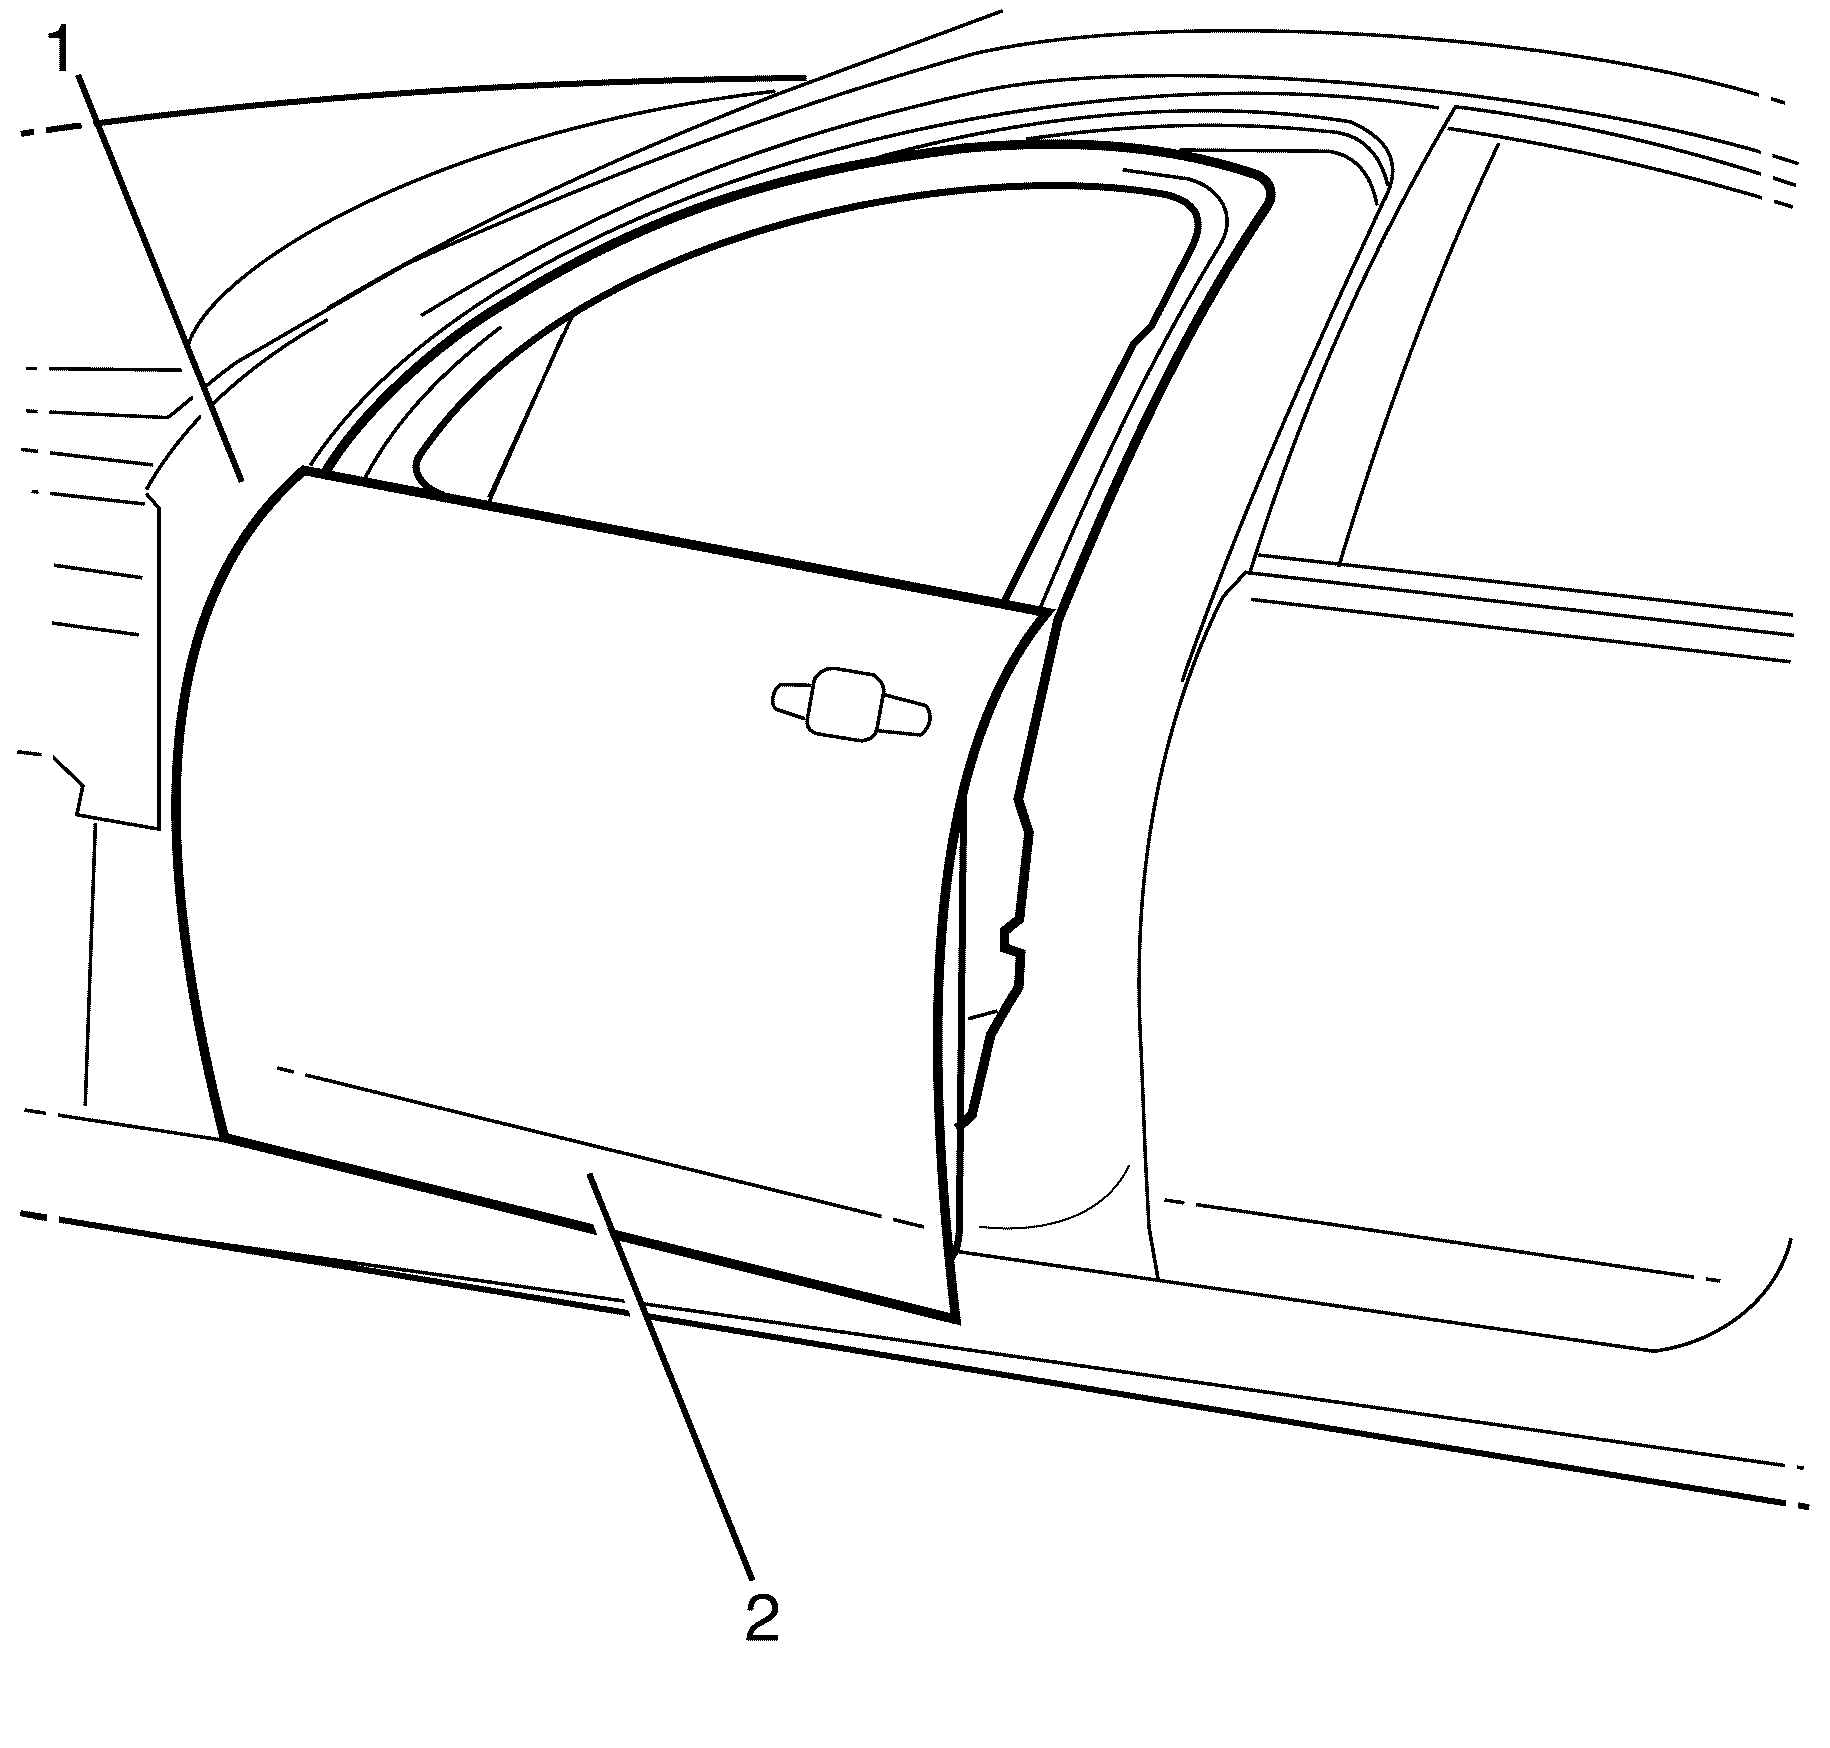
- Remove the door (2) from the vehicle (1) with the aid of an assistant.

Important: Pull the rubber conduit (1) from the pillar (2) to expose the door to body wiring harness plug.


Important: The keeper bolts (1) are single use parts and must be discarded after use.
Discard the bolts.

Important: The door (1) can only be removed when it is opened to 50 degrees.
Important: Lift the door (1) upwards and outwards to disengage it from the vehicle (2).
Installation Procedure - Front Door
- Install the door (2) to the vehicle (1) with the aid of an assistant.
- The keeper bolts (1) are located in the door hinges with the top door hinge keeper bolt facing downwards and the lower door hinge keeper bolt facing upwards.
- Install the NEW keeper bolts (1) to the door hinges (2).
- Connect the door wiring harness to body wiring harness electrical connector.
- Install the rubber conduit (1) to the pillar (2).
- Install the check link to pillar retaining bolt. Refer to Front Side Door Check Link Replacement .

Important: The door (1) can only be installed when it is opened to 50 degrees.
Important: Lower the door (1) downwards and inwards to engage it to the vehicle (2).

Notice: Refer to Fastener Notice in the Preface section.

Important: Do Not over tighten the NEW keeper bolts as this will cause the door hinges to squeak.
Tighten
Tighten the bolts to 3 N-m (27 lb in).

Disassembly Procedure - Front Door
- Remove the door trim panel. Refer to Front Side Door Trim Panel Replacement .
- Remove the speaker. Refer to Radio Front Side Door Lower Speaker Replacement in Entertainment.
- Remove the water deflector. Refer to Front Side Door Water Deflector Replacement .
- Remove the outside rearview mirror. Refer to Power Mirror Replacement .
- Remove the window inner belt sealing strip. Refer to Front Side Door Window Inner Sealing Strip Replacement in Doors.
- Remove the window outer belt sealing strip. Refer to Front Side Door Window Belt Outer Sealing Strip Replacement in Doors.
- Remove the window. Refer to Front Side Door Window Replacement .
- Remove the front door upper auxiliary weatherstrip. Refer to Front Side Door Upper Auxiliary Weatherstrip Replacement .
- Remove the front door garnish molding. Refer to Front and Rear Side Door Window Garnish Molding Replacement .
- Remove the inner window sealing strip. Refer to Front Door Opening Weatherstrip Replacement .
- Remove the door frame applique. Refer to Front Door Frame Applique Replacement .
- Remove the window inner weatherstrip. Refer to Front Side Door Window Inner Weatherstrip Replacement .
- Remove the window regulator. Refer to Front Side Door Window Regulator Replacement .
- Remove the outside door handle. Refer to Front Side Door Outside Handle Replacement .
- Remove the door latch. Refer to Front Side Door Latch Replacement .
- Remove the door bottom auxiliary sealing strip. Refer to Front Side Door Bottom Auxiliary Sealing Strip Replacement .
- Remove the door wiring harness. Refer to Front Side Door Wiring Harness Replacement .
- Remove the door window channel. Refer to Front Side Door Window Front Channel and Rear Channel Replacement .
- Remove the door check link. Refer to Front Side Door Check Link Replacement .
- Remove all of the plastic nuts, grommets and retainers from the door.
Assembly Procedure - Front Door
- Install all the plastic nuts, grommets and retainers into the door shell that were removed during disassembly.
- Install the door check link. Refer to Front Side Door Check Link Replacement .
- Install the door window channel. Refer to Front Side Door Window Front Channel and Rear Channel Replacement .
- Install the door wiring harness. Refer to Front Side Door Wiring Harness Replacement .
- Install the door bottom auxiliary sealing strip. Refer to Front Side Door Bottom Auxiliary Sealing Strip Replacement .
- Install the door latch. Refer to Front Side Door Latch Replacement .
- Install the outside door handle. Refer to Front Side Door Outside Handle Replacement .
- Install the window regulator. Refer to Front Side Door Window Regulator Replacement .
- Install the window inner weatherstrip. Refer to Front Side Door Window Inner Weatherstrip Replacement .
- Install the door frame applique. Refer to Front Door Frame Applique Replacement .
- Install the window. Refer to Front Side Door Window Replacement .
- Install the inner window sealing strip. Refer to Front Door Opening Weatherstrip Replacement .
- Install the window outer belt seal strip.. Refer to Front Side Door Window Belt Outer Sealing Strip Replacement in Doors.
- Install the outside rearview mirror. Refer to Power Mirror Replacement .
- Install the window inner belt seal strip. Refer to Front Side Door Window Belt Inner Sealing Strip Replacement in Doors.
- Install the front door garnish molding. Refer to Front and Rear Side Door Window Garnish Molding Replacement
- Install the front door upper auxiliary weatherstrip. Refer to Front Side Door Upper Auxiliary Weatherstrip Replacement .
- Install the water deflector. Refer to Front Side Door Water Deflector Replacement .
- Install the speaker. Refer to Radio Front Side Door Lower Speaker Replacement in Entertainment.
- Install the door trim panel. Refer to Front Side Door Trim Panel Replacement t in Doors.
- Inspect for correct door adjustment. Refer to Door Adjustment .
