For 1990-2009 cars only
Tools Required
J 41476 J 41476 Front and Rear Cover Alignment Tool
Removal Procedure
- Remove the engine assembly. Refer to Engine Replacement.
- Remove the oil level indicator tube. Refer to Oil Level Indicator and Tube Removal.
- Remove the left and right exhaust manifolds. Refer to Exhaust Manifold Replacement - Left Side and Exhaust Manifold Replacement - Right Side.
- Remove the intake manifold. Refer to Intake Manifold Removal.
- Remove the coolant air bleed pipe. Refer to Coolant Air Bleed Pipe Assembly Replacement.
- Remove the left and right valve rocker arm covers. Refer to Valve Rocker Arm and Push Rod Replacement and Valve Stem Oil Seal and Valve Spring Replacement.
- Remove the valve rocker arms and push rods. Refer to Oil Level Indicator and Tube Replacement.
- Remove the left and right cylinder heads. Refer to Cylinder Head Replacement - Left Side and Cylinder Head Replacement - Right Side.
- Remove the valve lifters. Refer to Valve Lifter Replacement.
- Remove the water pump. Refer to Water Pump Removal.
- Remove the crankshaft balancer. Refer to Crankshaft Balancer Removal.
- Remove the engine front cover. Refer to Engine Front Cover Replacement.
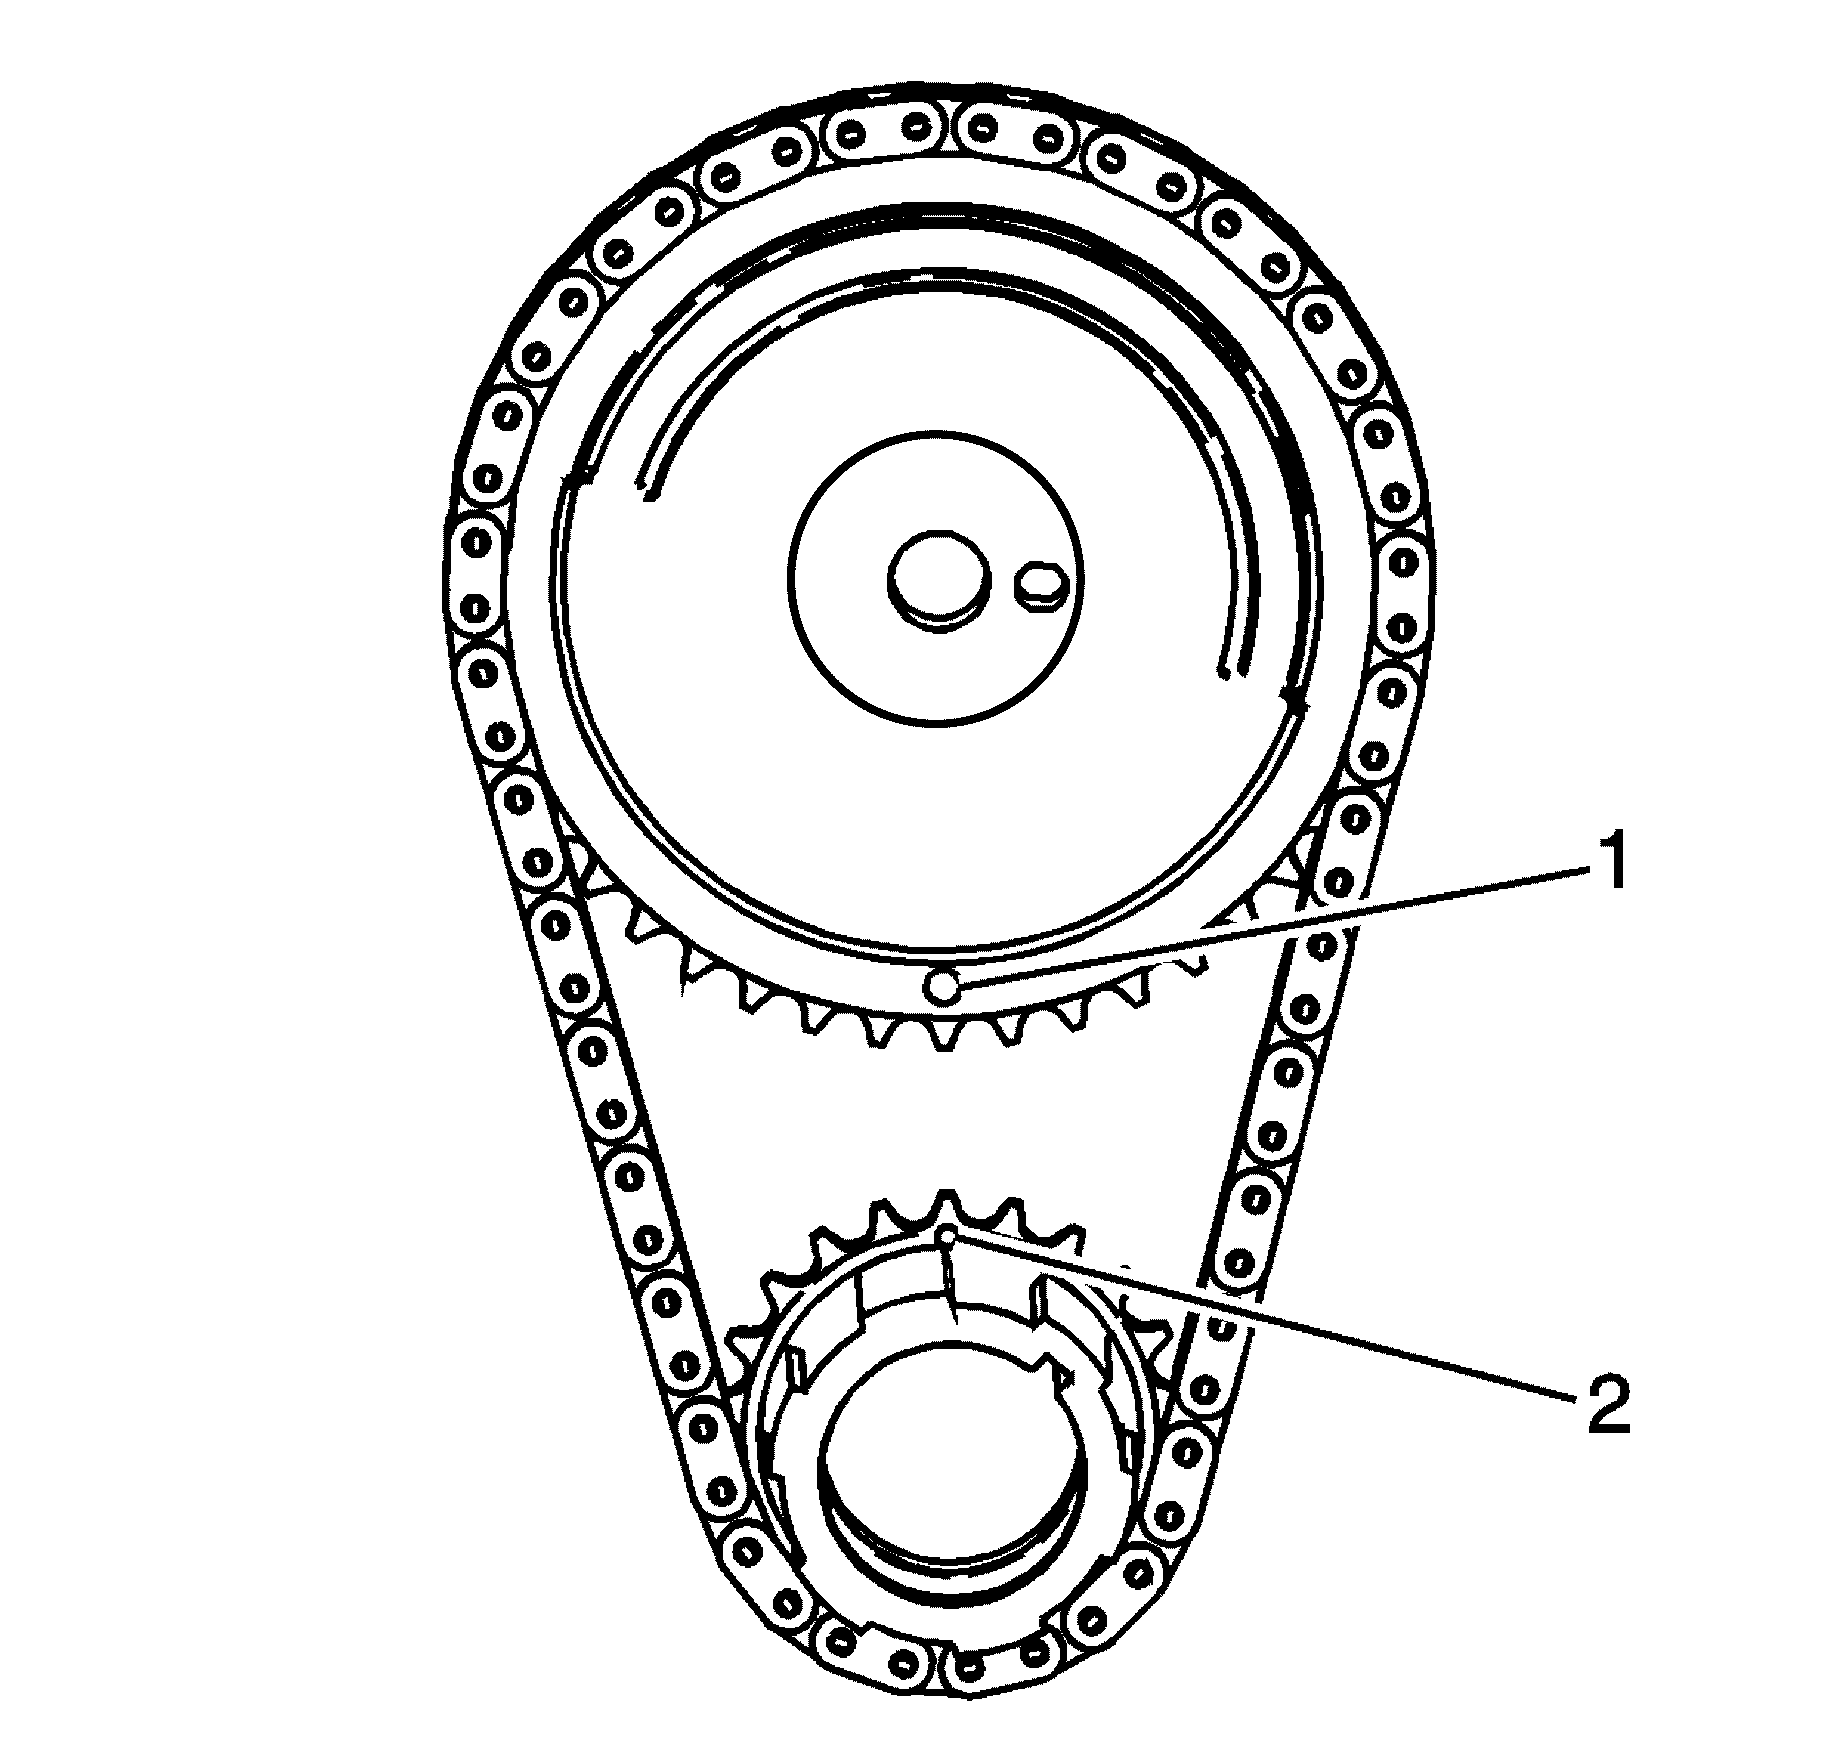
- Inspect the sprockets for correct alignment. The mark on the camshaft sprocket (1) should be located in the 6 o'clock position and the mark on the crankshaft sprocket (2) should be located in the 12 o'clock position.
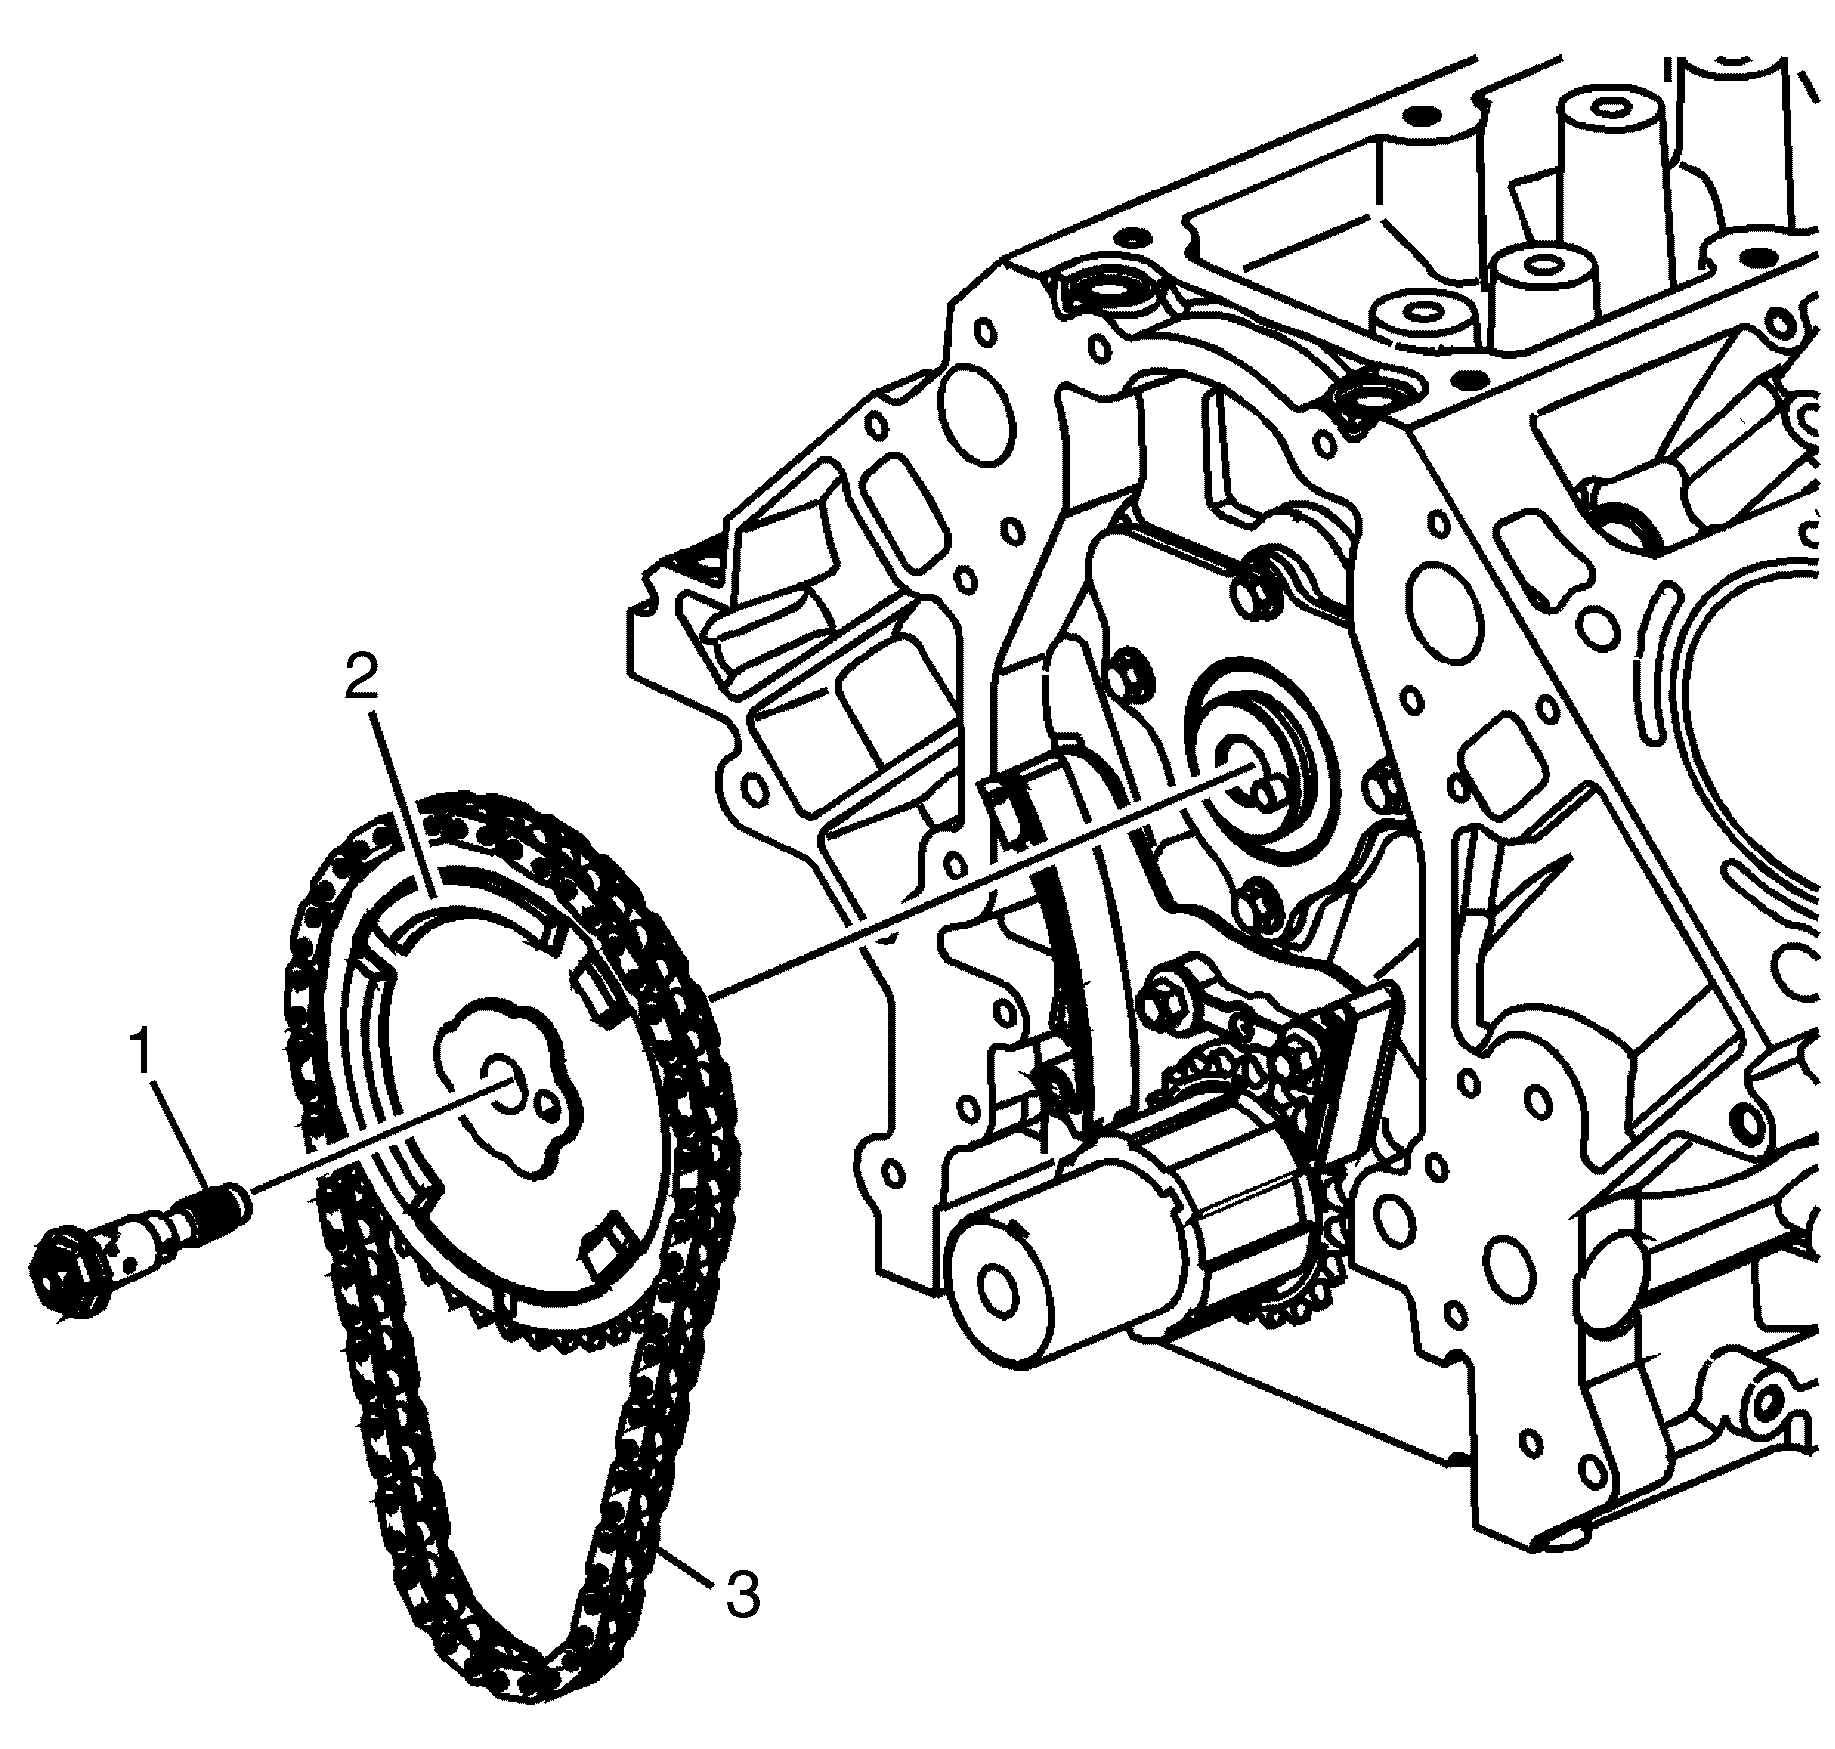
- Remove the camshaft sprocket bolt (1).
- Remove the camshaft sprocket (2) and timing chain (3).
- Remove the camshaft. Refer to Camshaft Removal.
Notice: Do not turn the crankshaft assembly after the timing chain has been removed in order to prevent damage to the piston assemblies or the valves.
Installation Procedure
- Install the camshaft. Refer to Camshaft Installation.
- Align the camshaft sprocket alignment mark (1, 2), in the 6 o'clock position.
- Install the camshaft sprocket (1) and timing chain (2).
- Install the camshaft sprocket to camshaft retaining bolt (1).
- Install the engine front cover. Refer to Engine Front Cover Replacement.
- Install a NEW crankshaft front oil seal. Refer to Crankshaft Front Oil Seal Installation.
- Install the crankshaft balancer. Refer to Crankshaft Balancer Installation.
- Install the valve lifters. Refer to Valve Lifter Replacement.
- Install the right side and left side cylinder heads. Refer to Cylinder Head Installation - Left Side and Cylinder Head Installation - Right Side.
- Install the valve rocker arms and push rods. Refer to Valve Rocker Arm and Push Rod Replacement.
- Install the right and left valve rocker arm covers. Refer to Valve Rocker Arm Cover Replacement - Left Side and Valve Rocker Arm Cover Replacement - Right Side.
- Install the coolant air bleed pipe. Refer to Coolant Air Bleed Pipe Assembly Replacement.
- Install the intake manifold. Refer to Intake Manifold Installation.
- Install the water pump. Refer to Water Pump Installation.
- Install the left and right exhaust manifolds. Refer to Exhaust Manifold Replacement - Left Side and Exhaust Manifold Replacement - Right Side.
- Install the oil level indicator tube. Refer to Oil Level Indicator and Tube Installation.
- Install the engine assembly. Refer to Engine Replacement.
Important: If camshaft replacement is required, the valve lifters must also be replaced.
Notice: Refer to Fastener Notice in the Preface section.
Tighten
Tighten the bolt to 25 N·m(18 lb ft).
