Tools Required
| • | KM-468 Holding Tool. |
| • | J-22912-01 Press Plates. |
| • | J 22610 Keystone Pliars. |
| • | 7208 Rear Axle Remover. |
Removal Procedure
- Raise and support the vehicle. Refer to Lifting and Jacking the Vehicle.
- Remove the rear tyre and wheel assemblies. Refer to Tire and Wheel Removal and Installation.
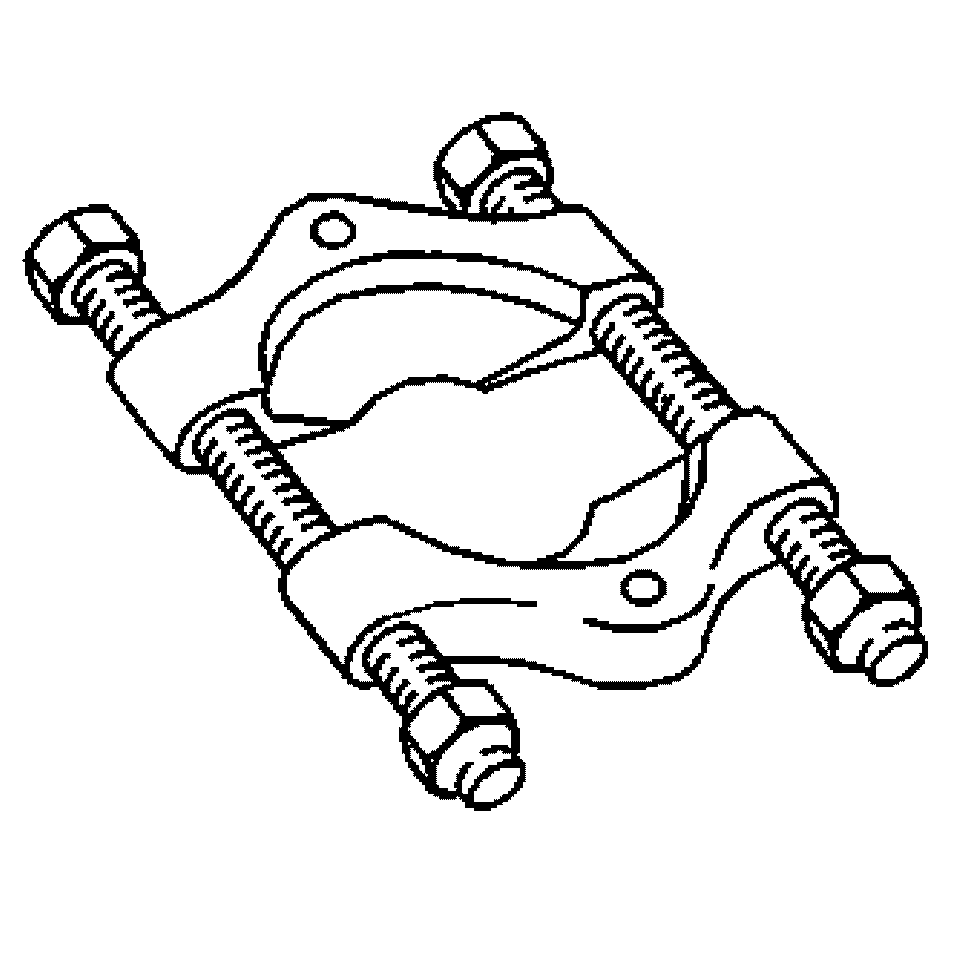
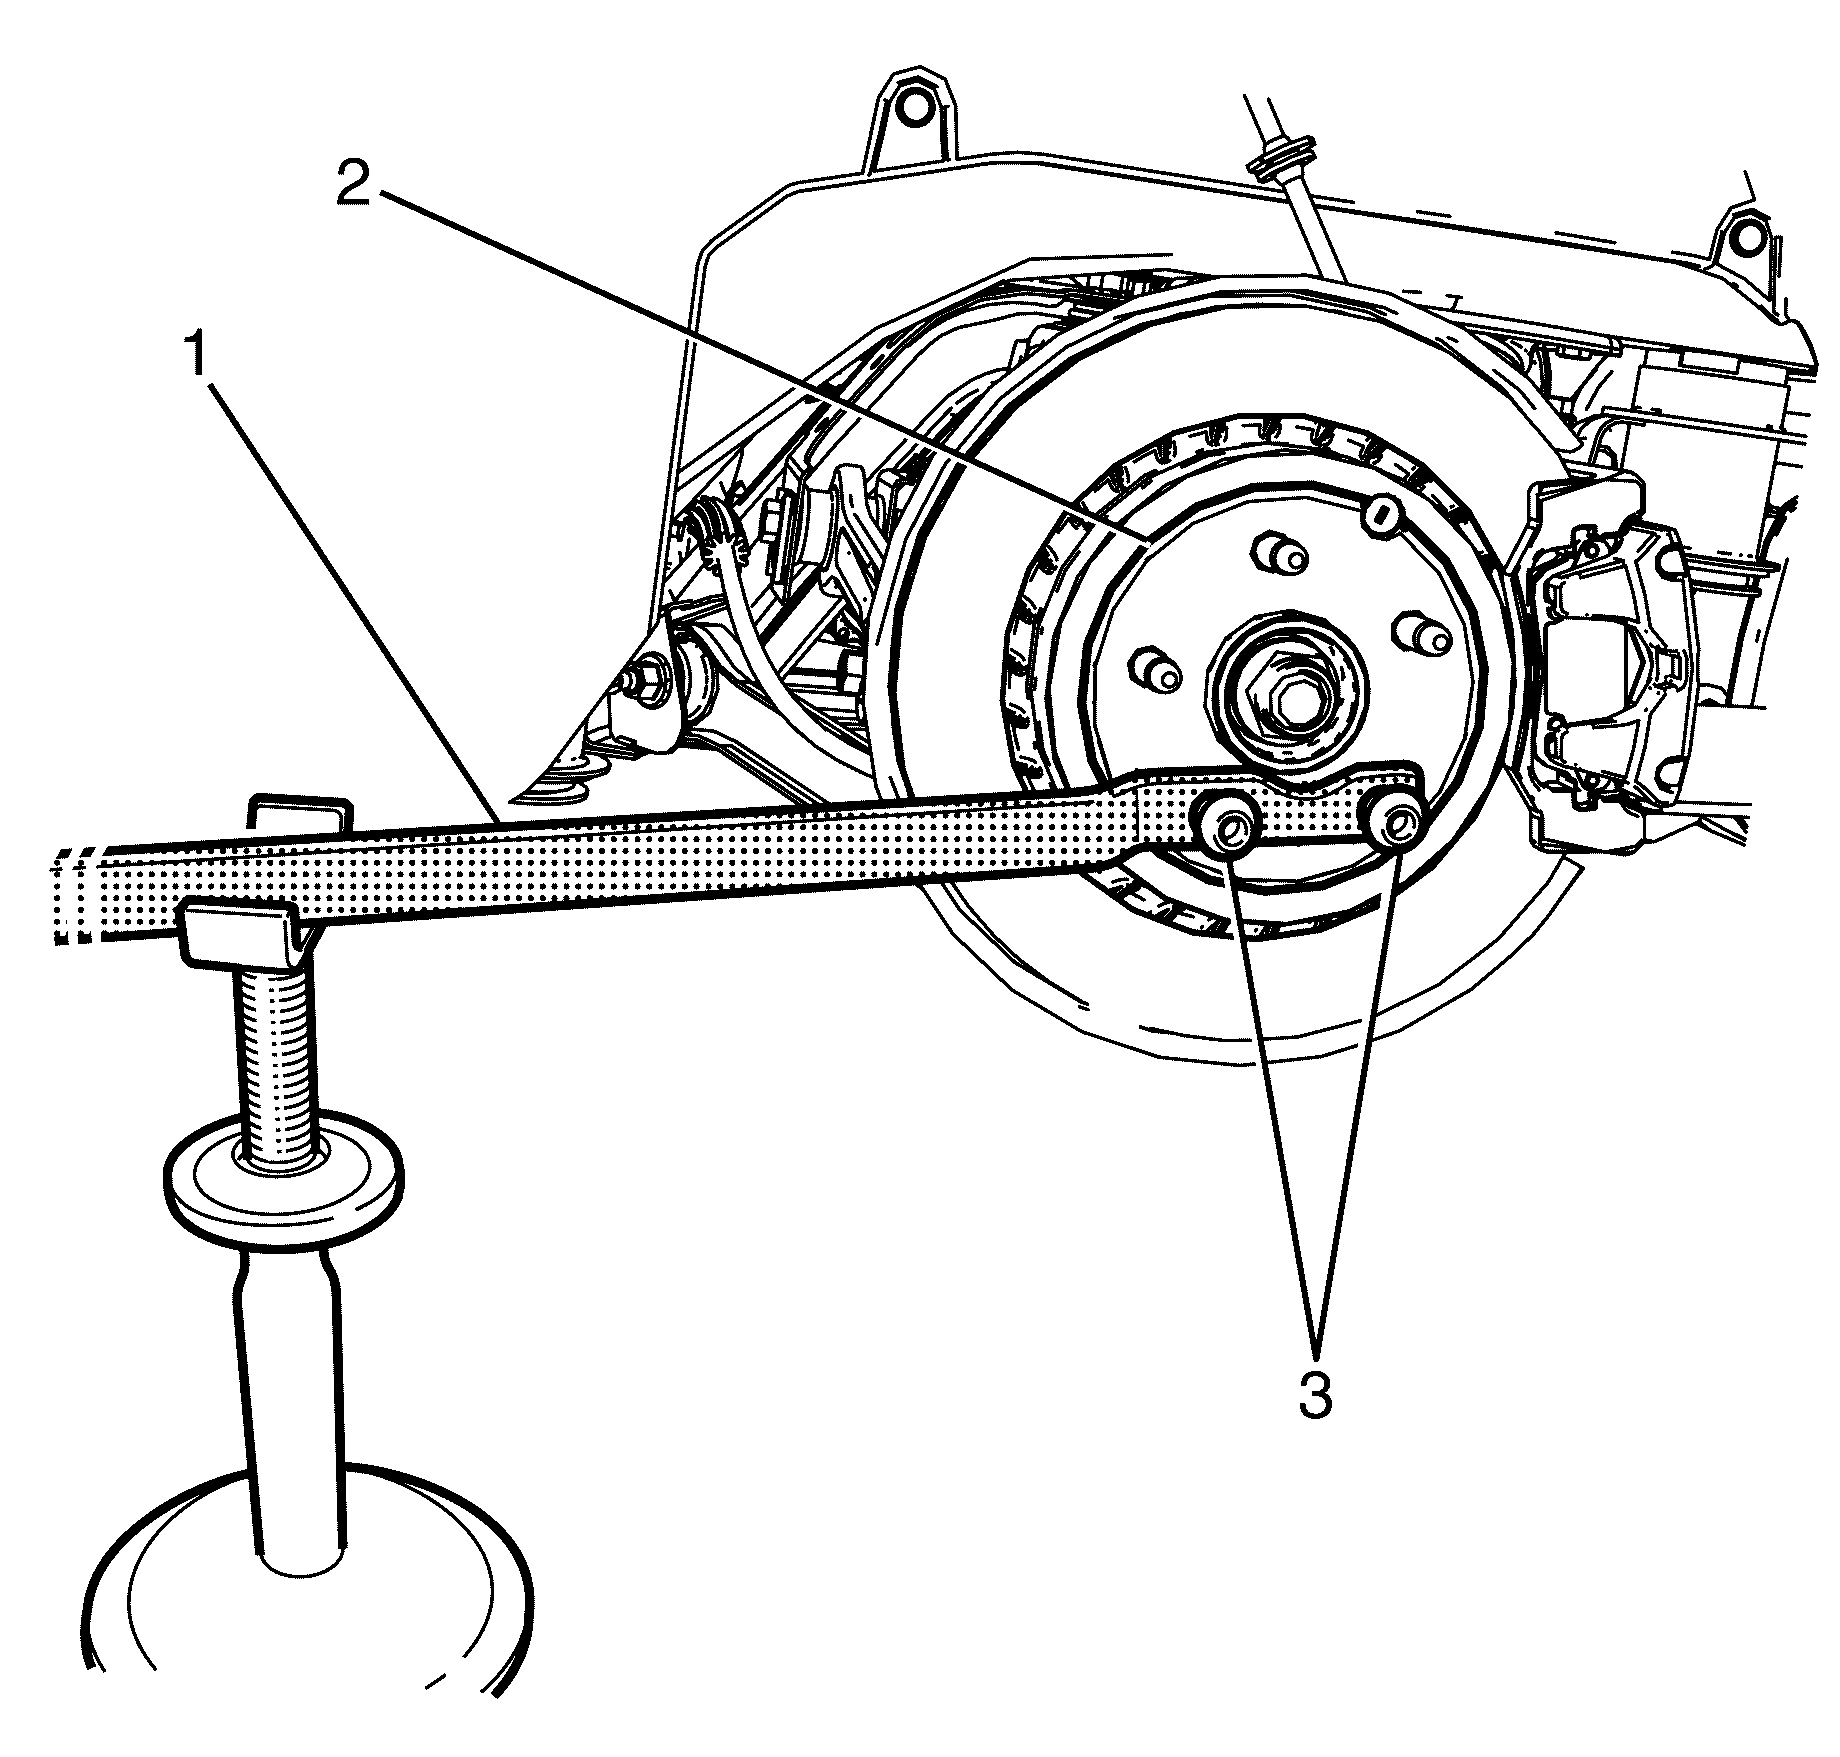
- Install the KM-468 (1) to the wheel hub (2) with two inverted wheel nuts (3).
- Support the KM-468 (1) outer end on a safety stand.
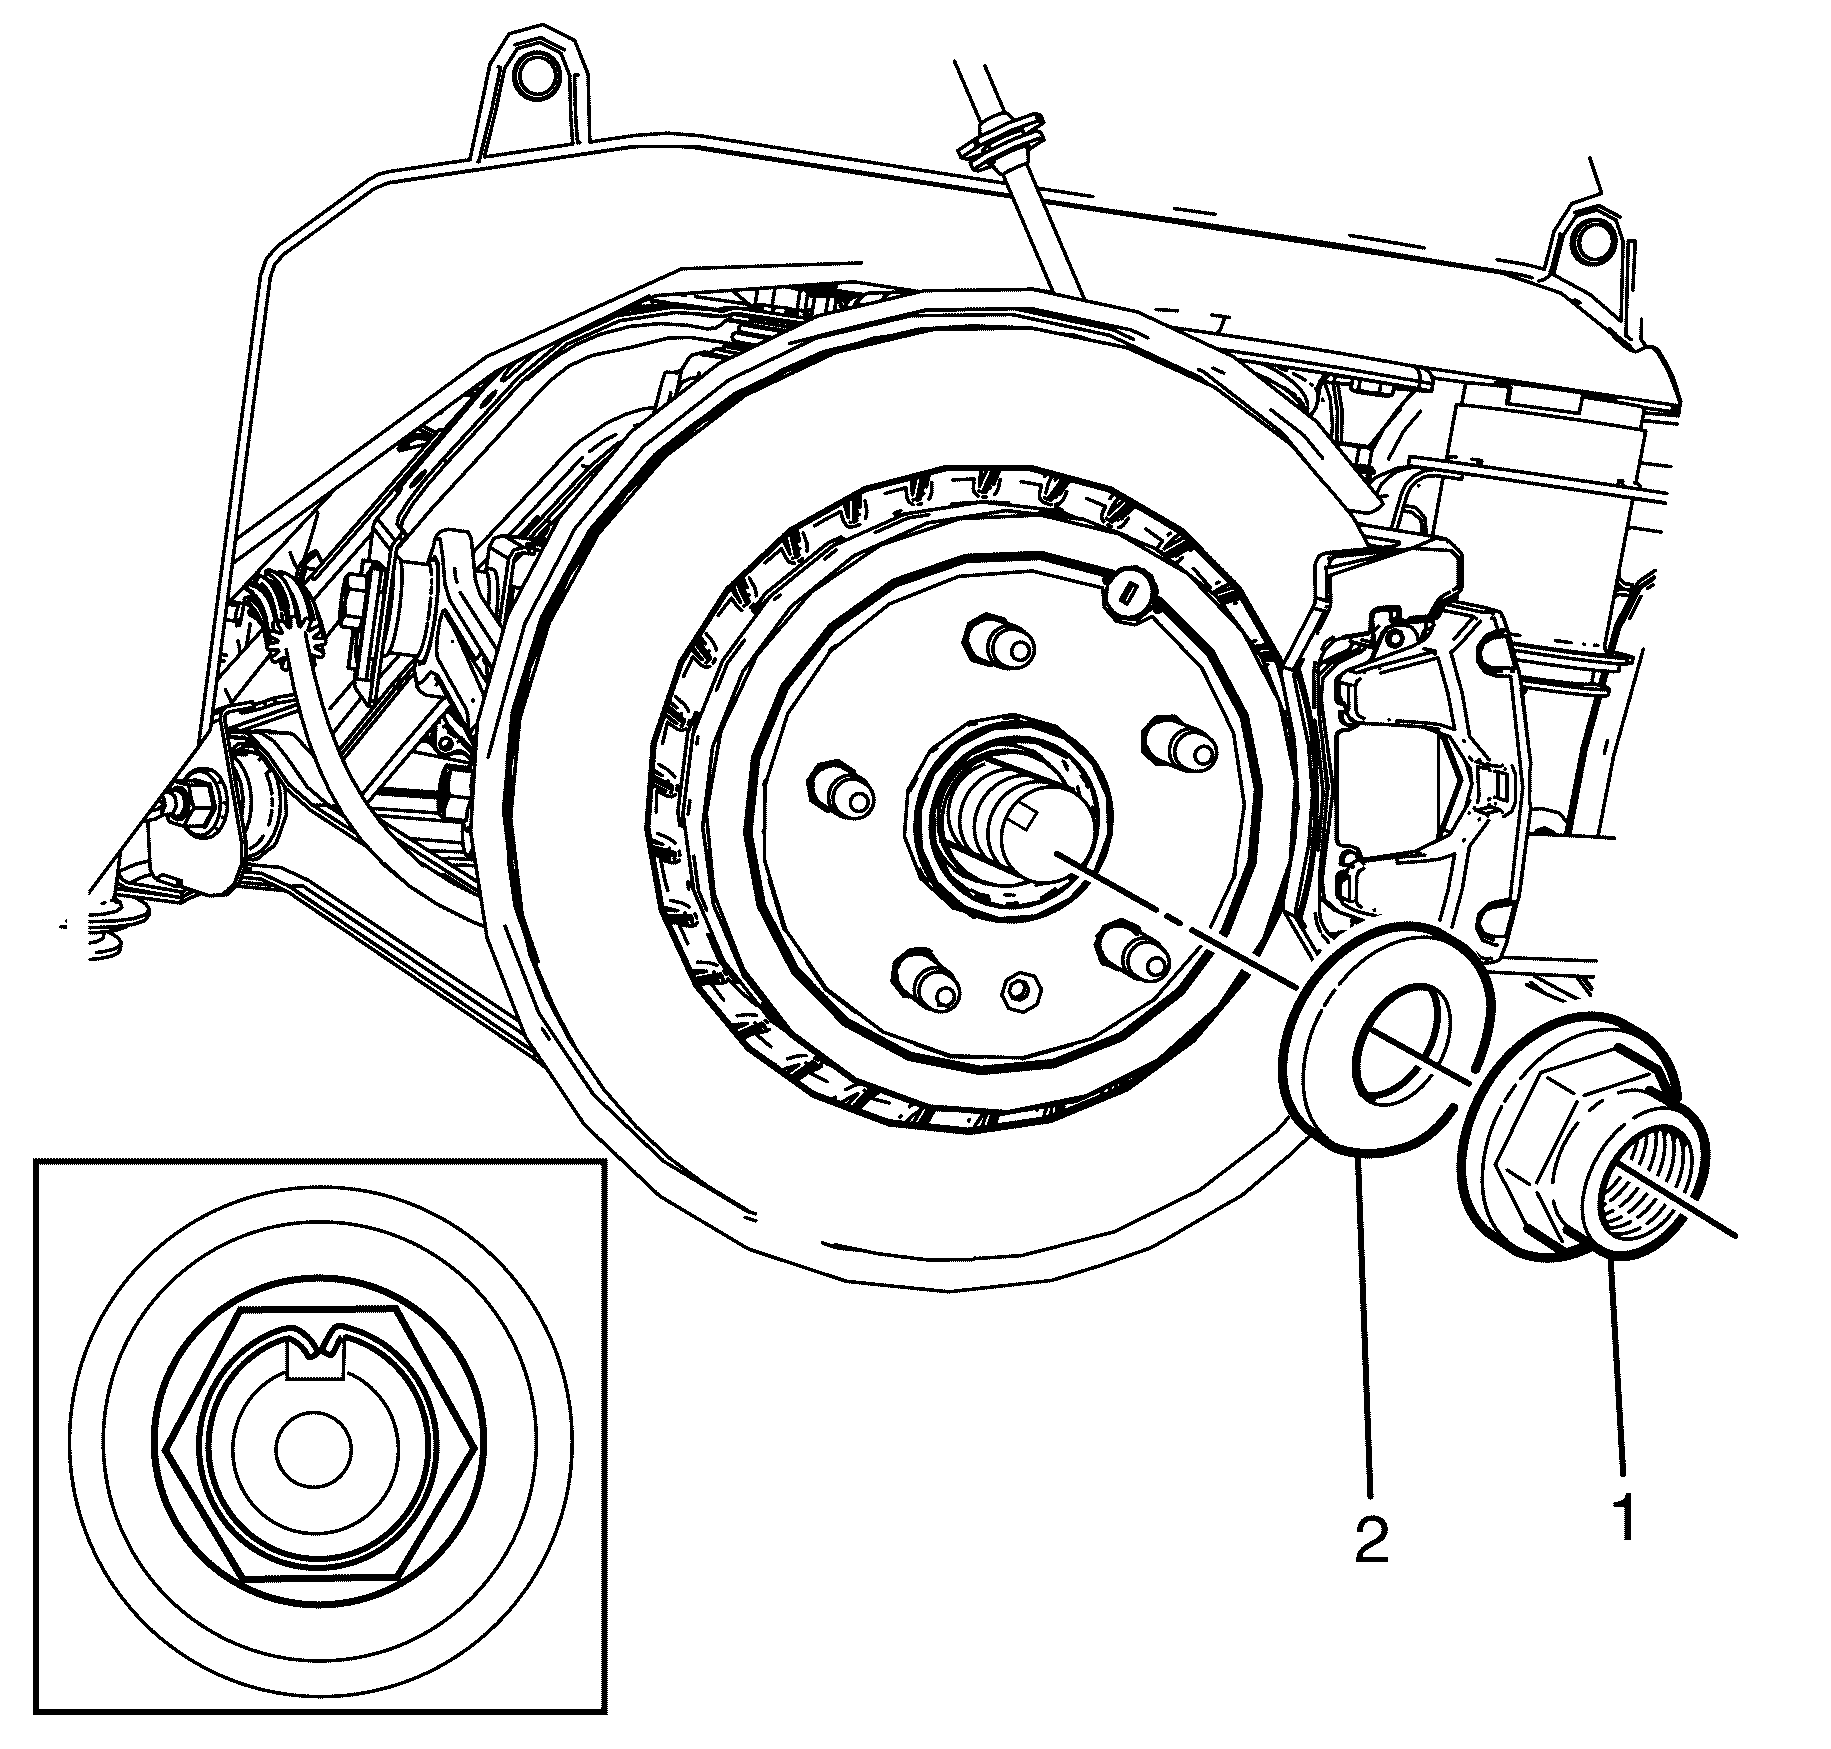
- Remove the wheel drive shaft retaining nut (1).
- Remove the wheel drive shaft washer (2).
- Remove the KM-468 from the wheel hub.
- Disconnect the wheel speed sensor electrical connector (1).
- Detach the wheel speed sensor wiring harness mounting clip (2) from the knuckle (3).
- Detach the rear park brake cable and clevis (1) from the park brake actuator (2).
- Remove the outer cable (4) from the rear knuckle (3).
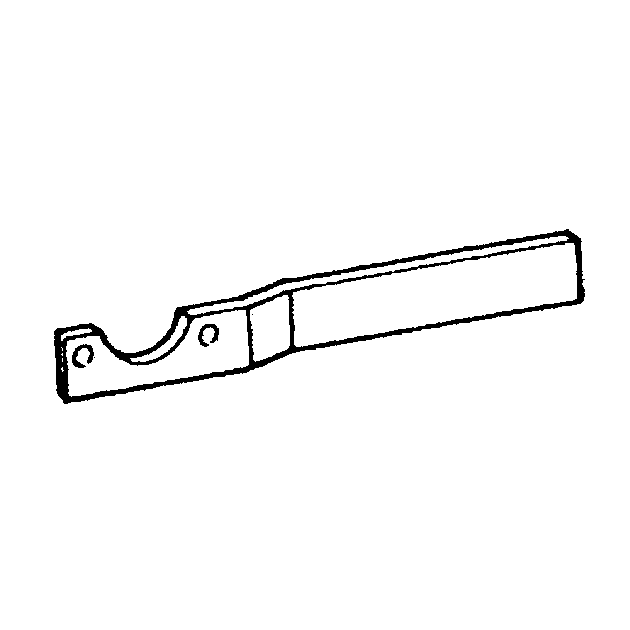
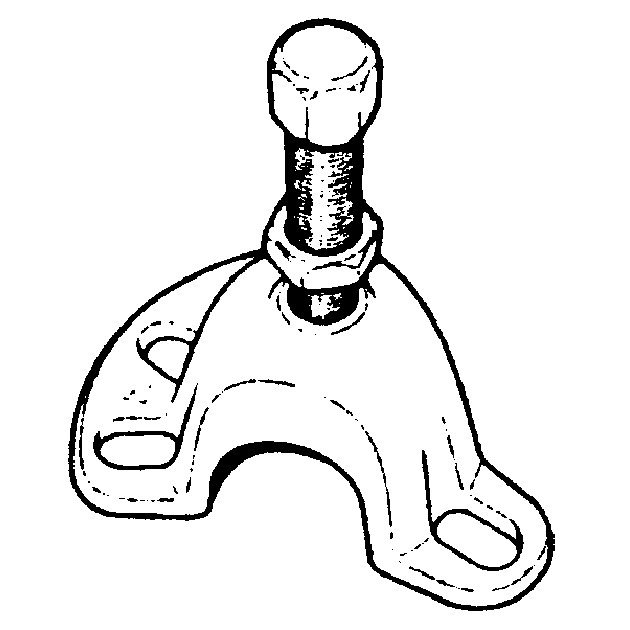
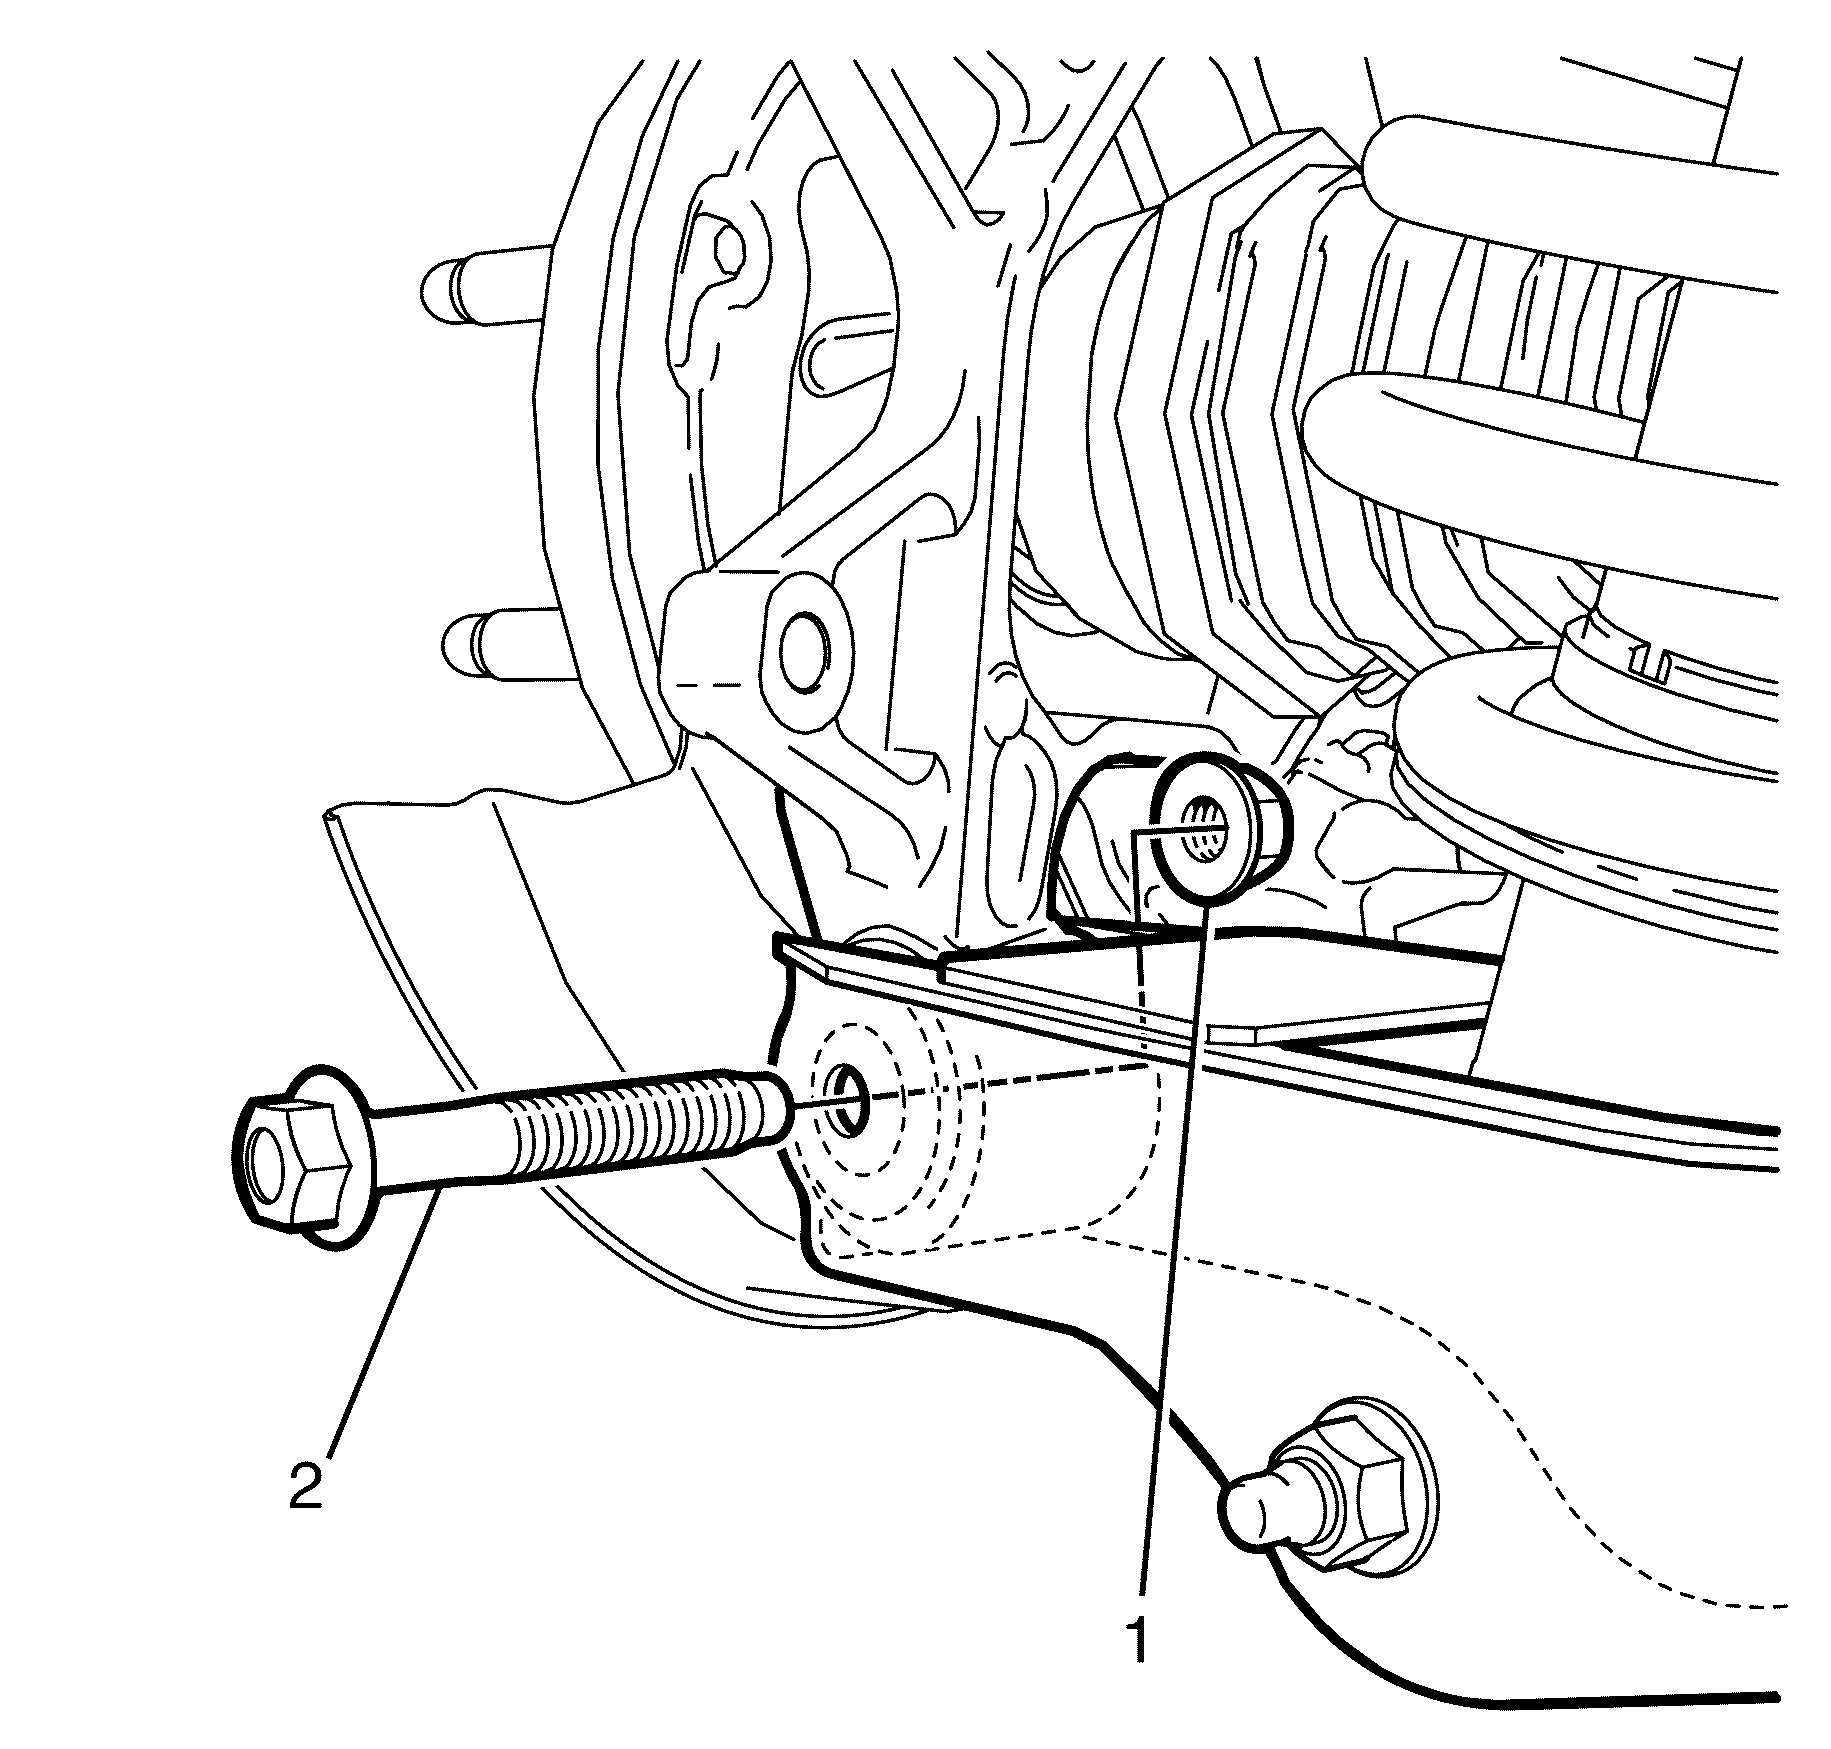
- Remove the lower control arm to knuckle retaining bolt (2) and nut (1).
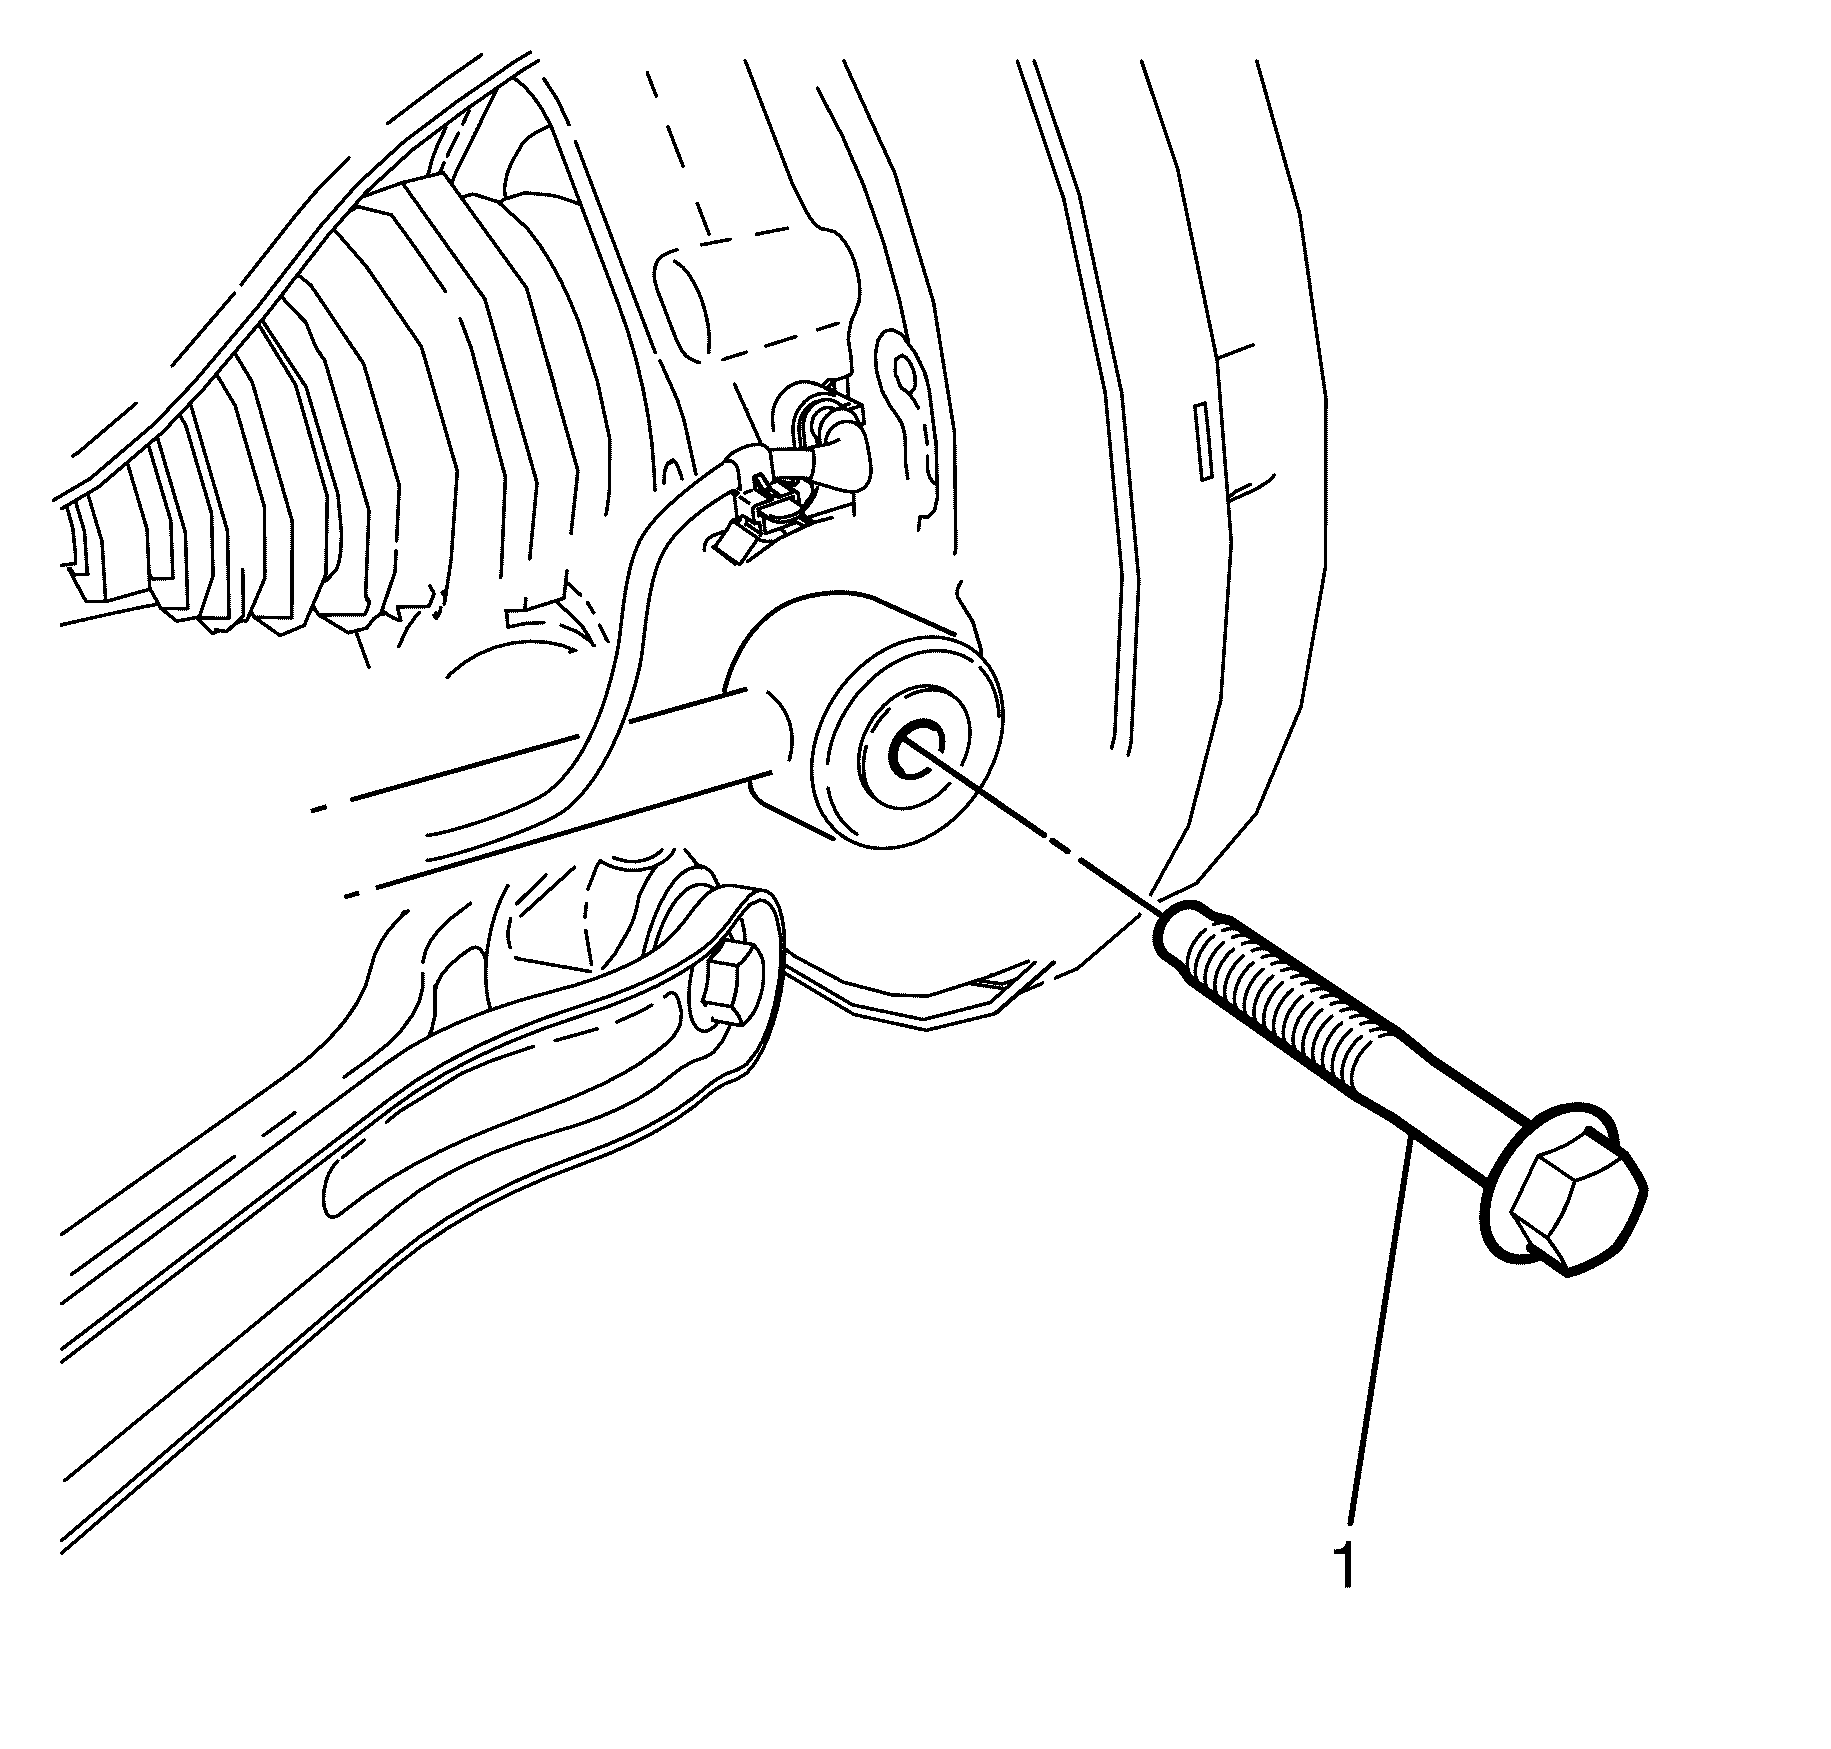
- Remove the I-Link to knuckle retaining bolt (1) and washer (2).
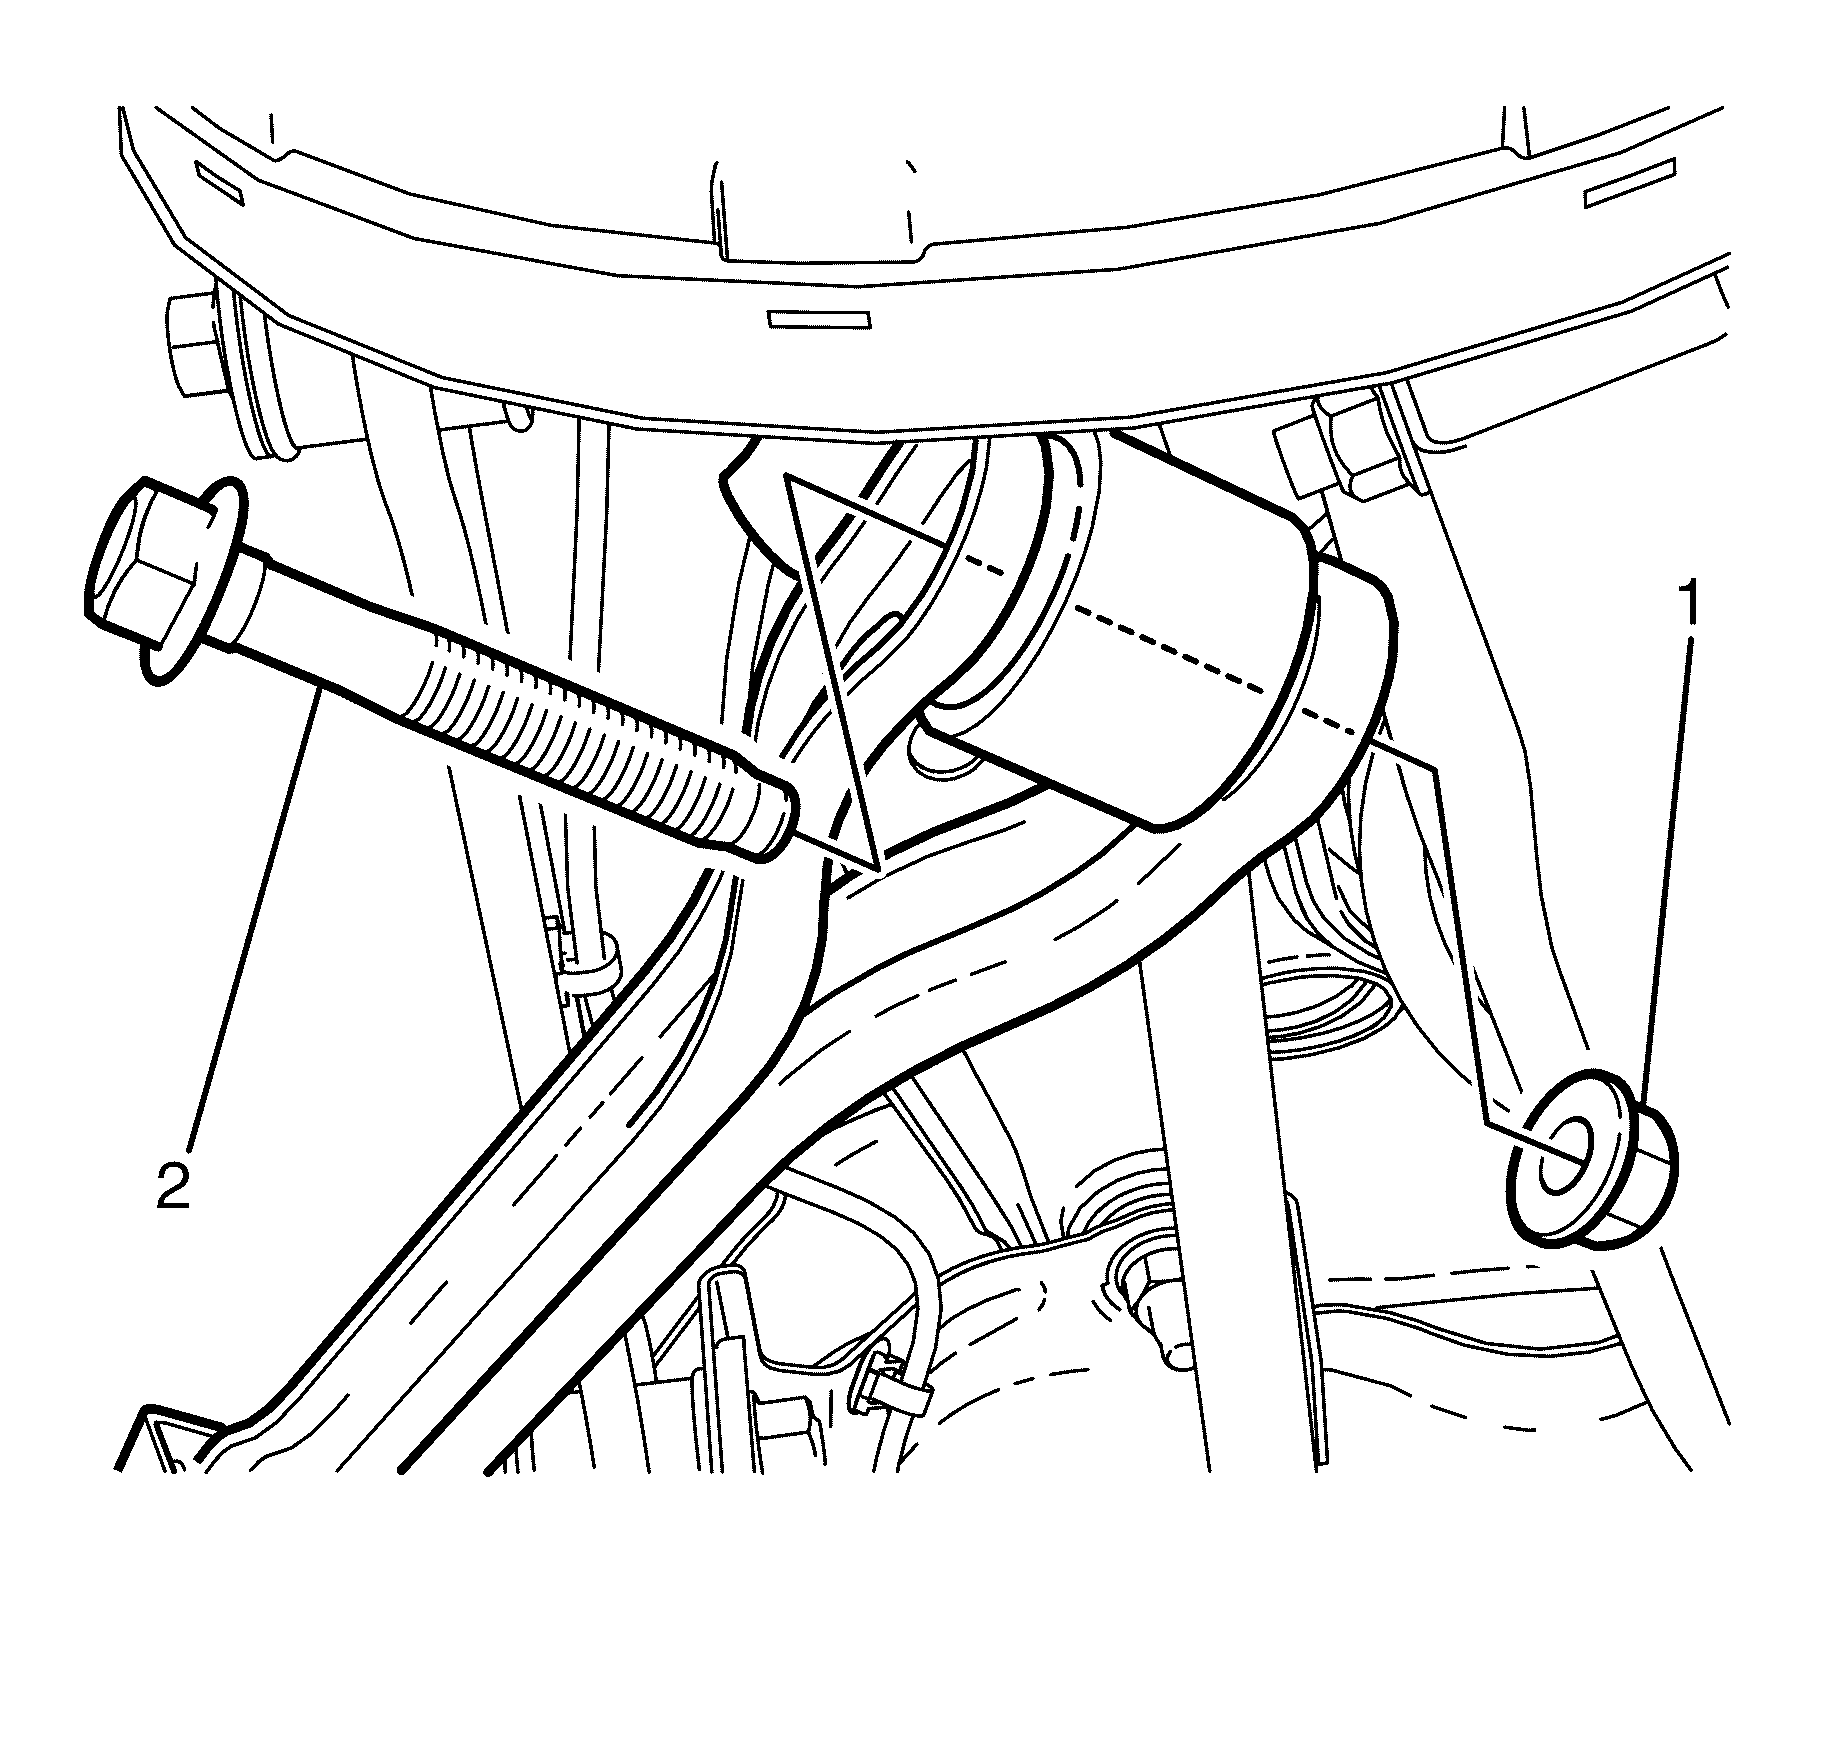
- Remove the Y-Link to the knuckle retaining bolt (2) and nut (1).
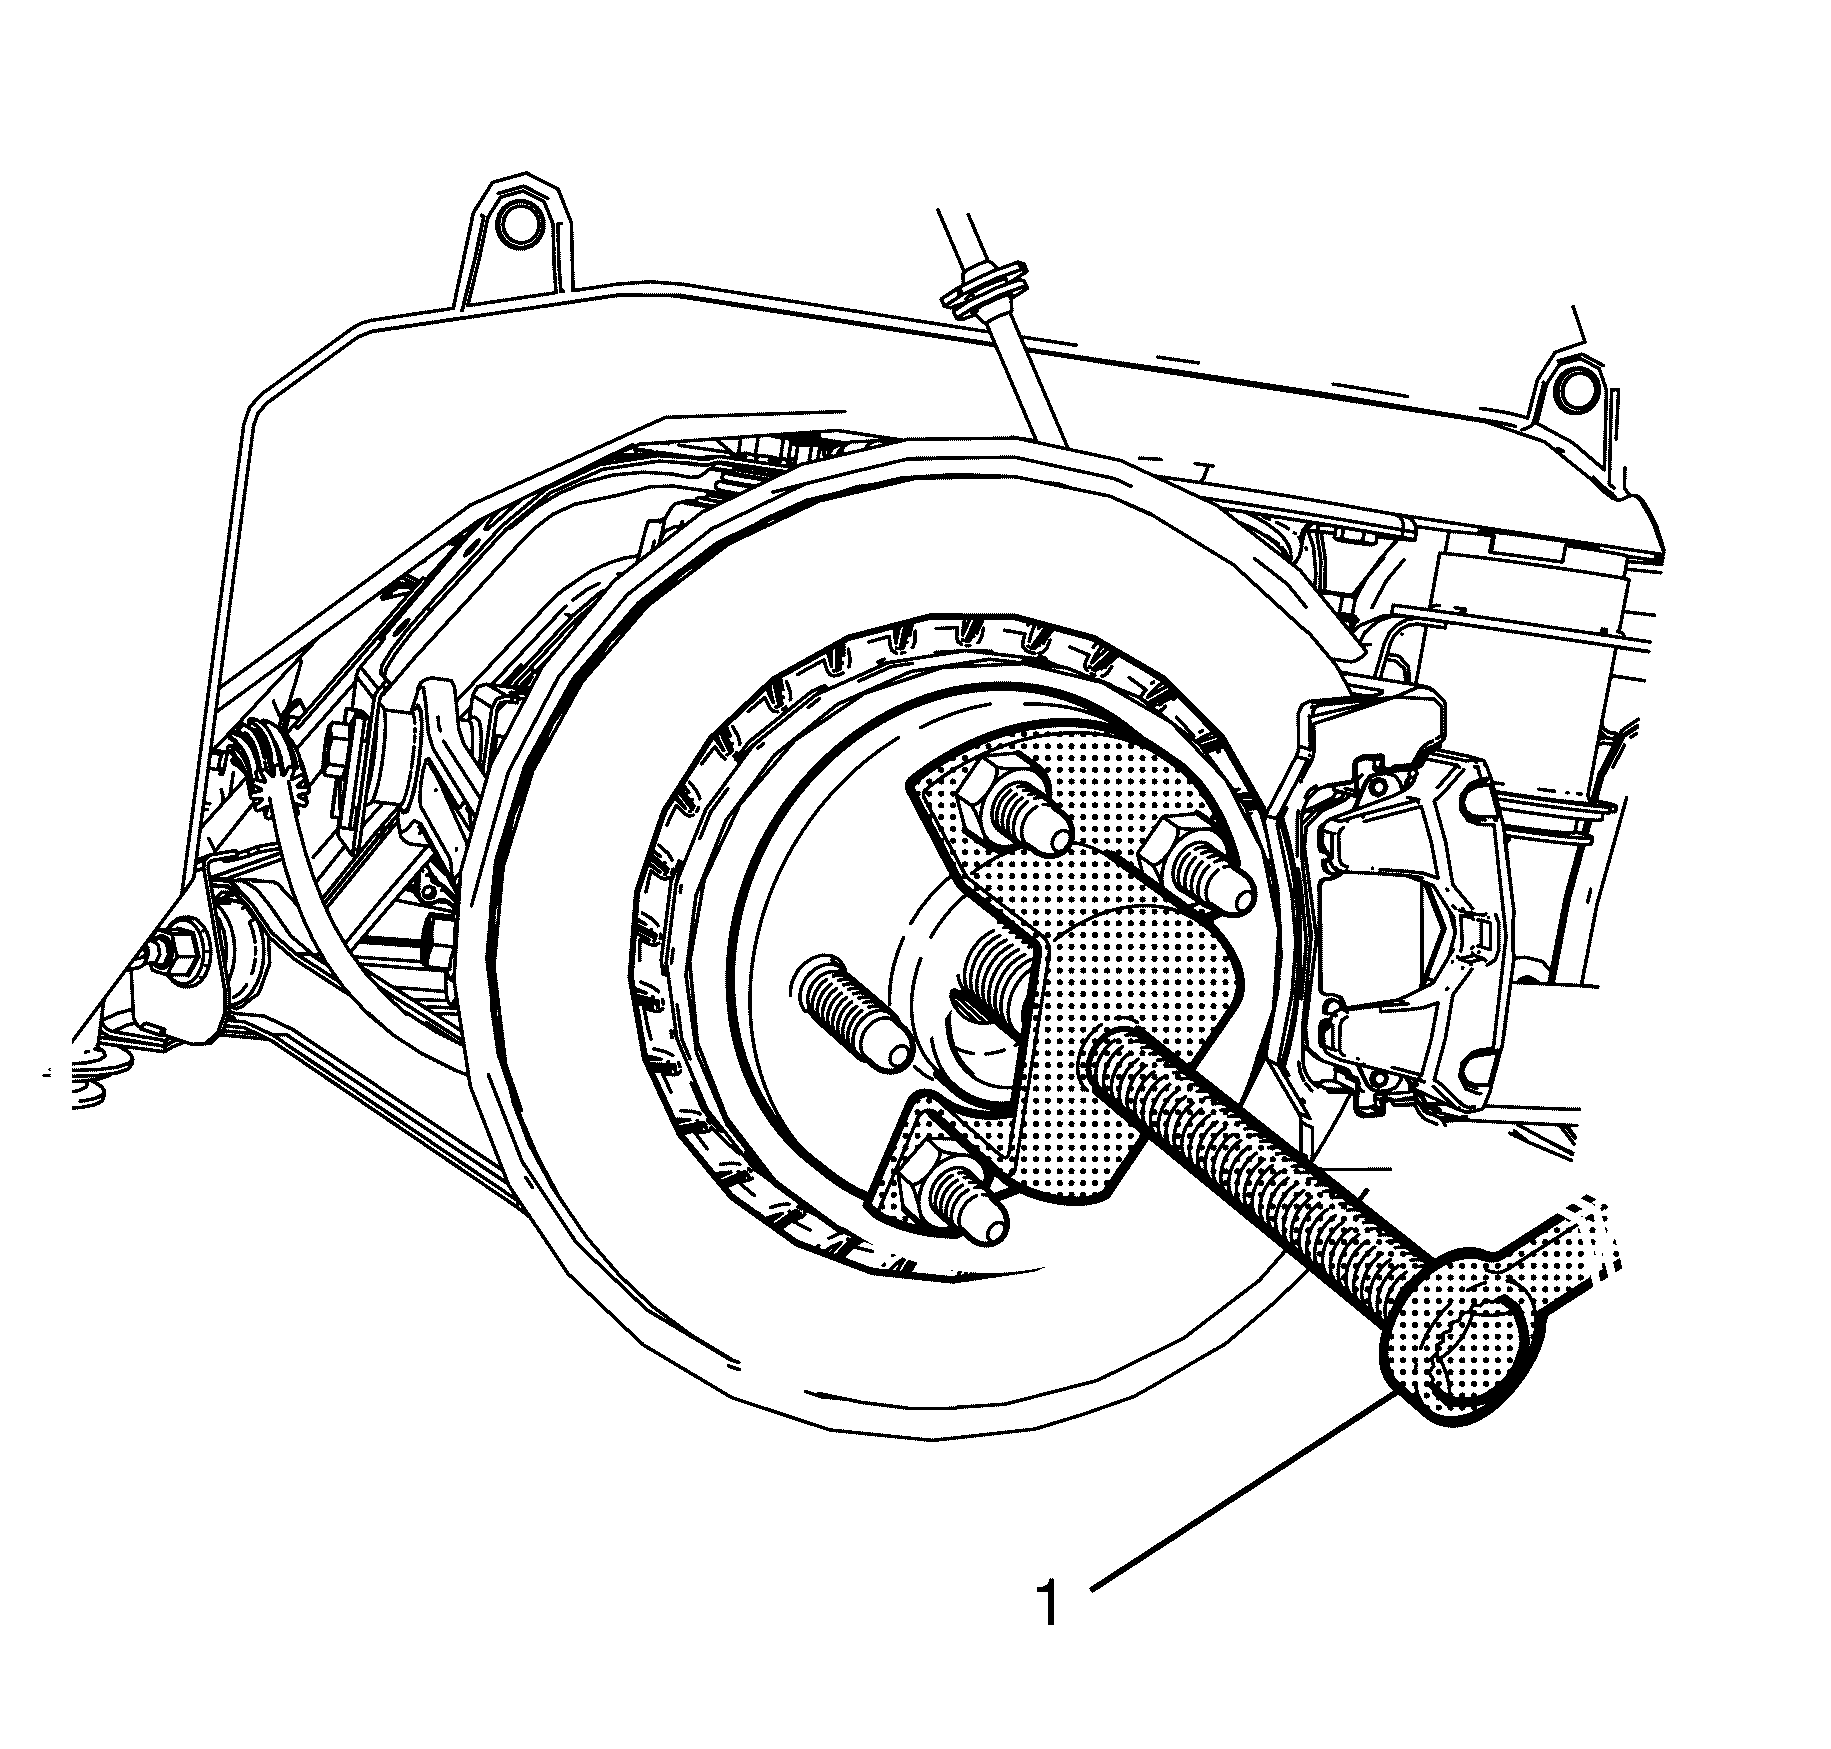
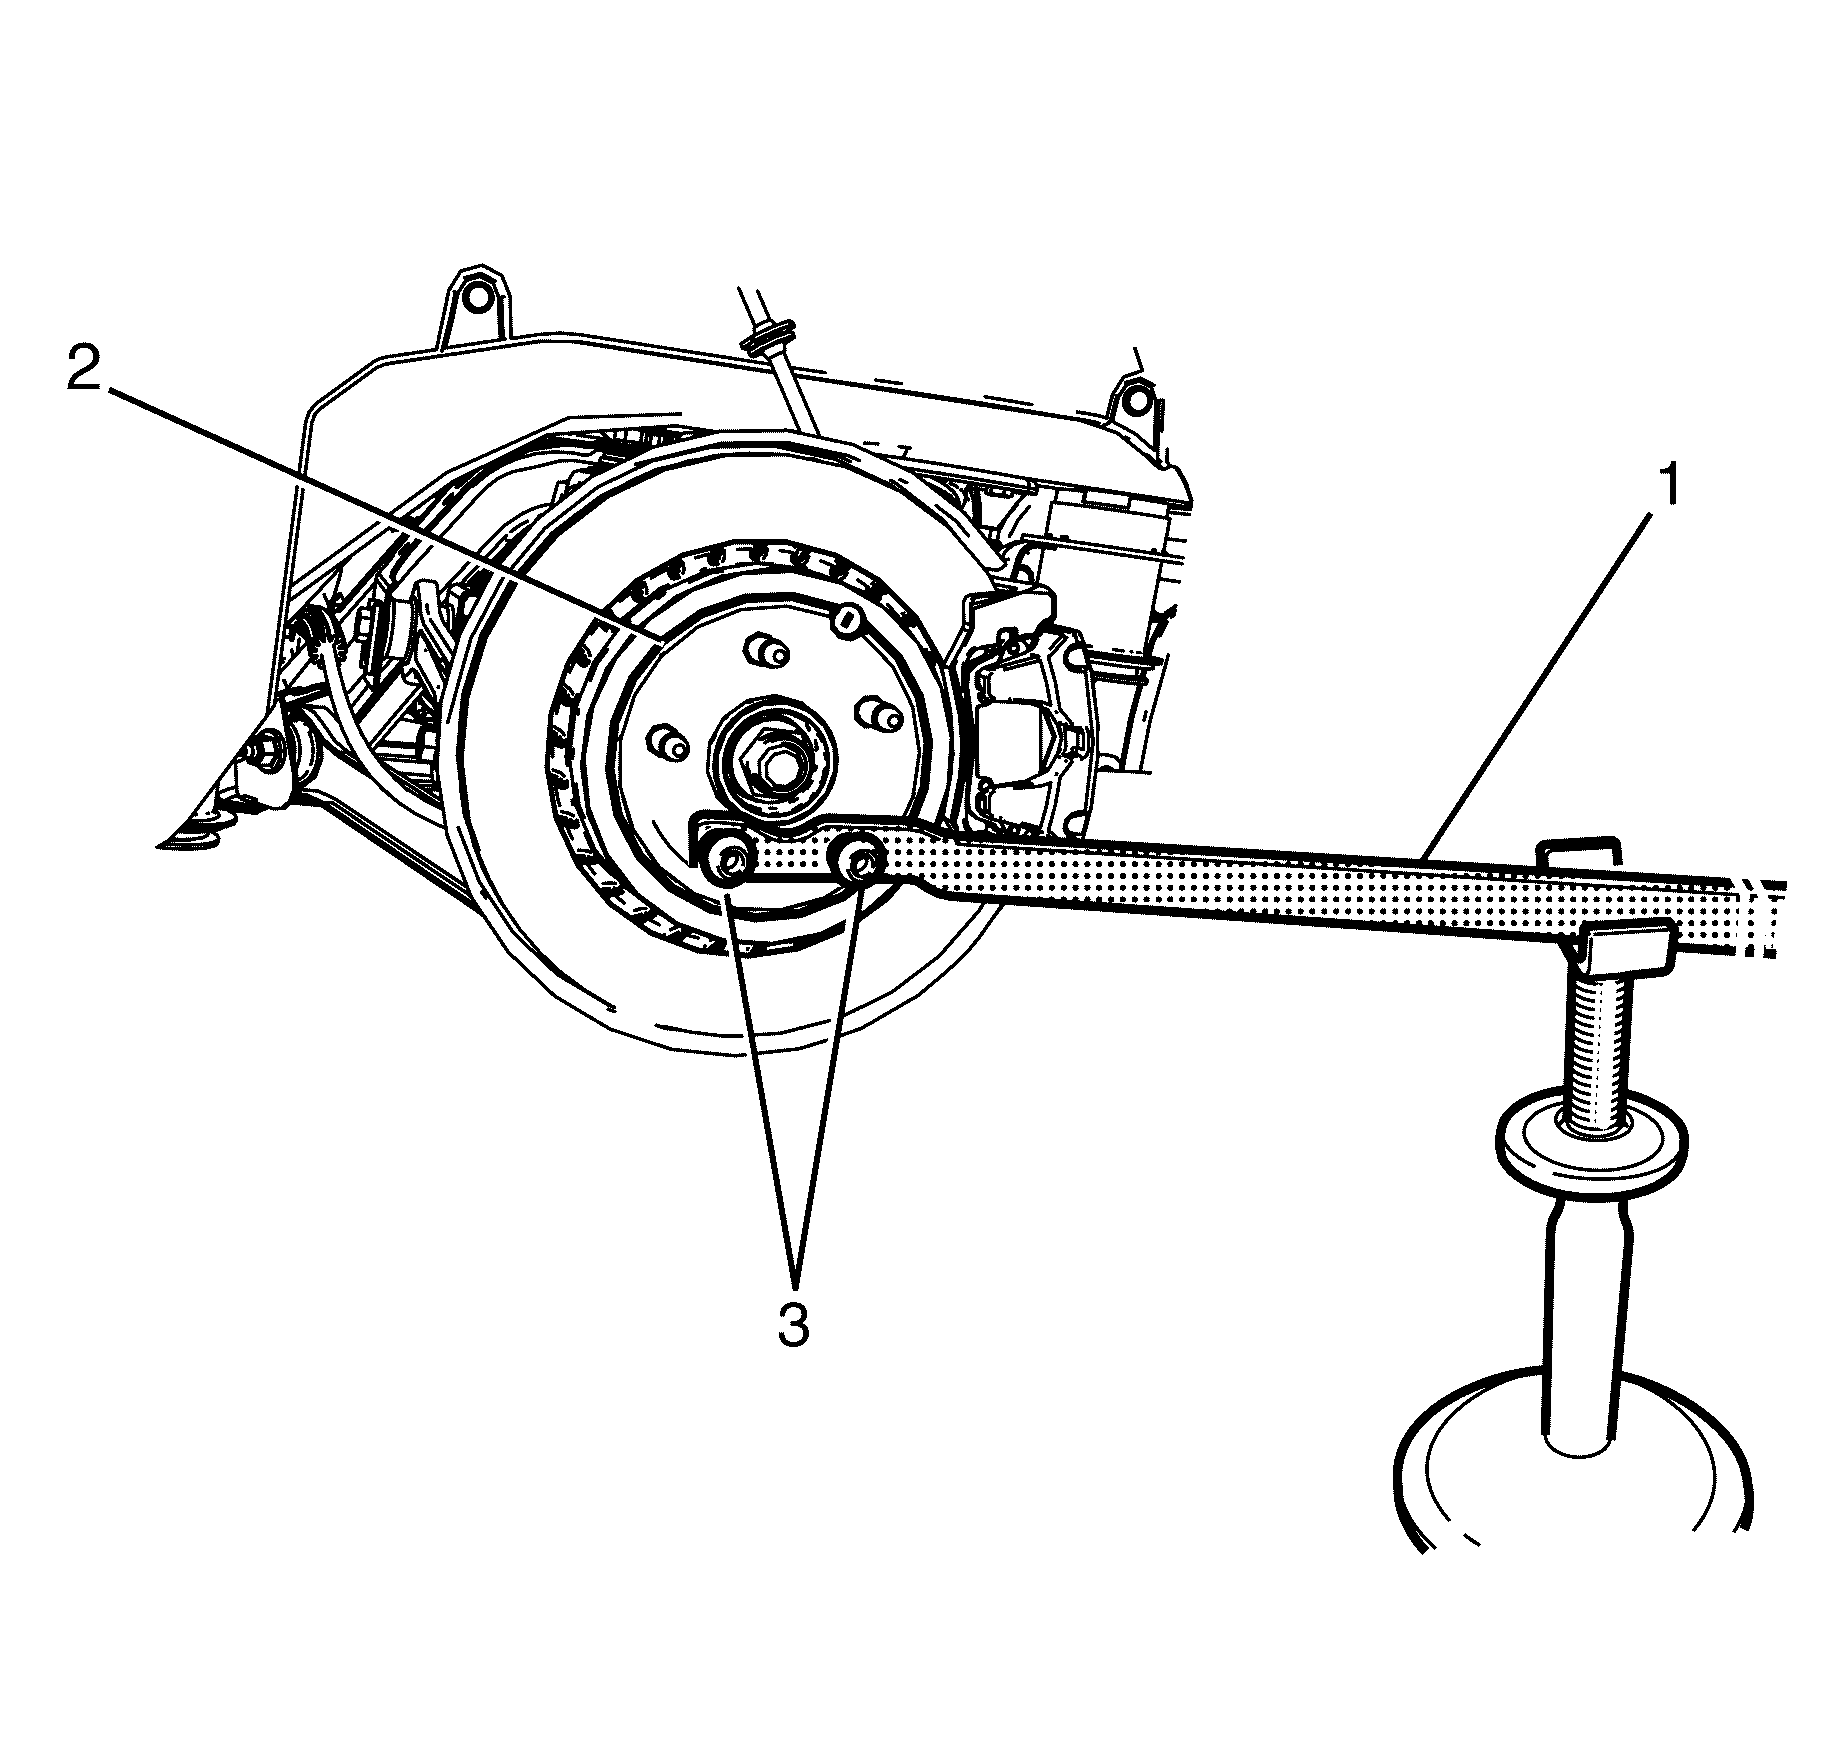
- Use 7208 to remove the wheel drive shaft (1) from the wheel hub assembly (2).
- Place a suitable container under the differential in order to collect draining fluid.
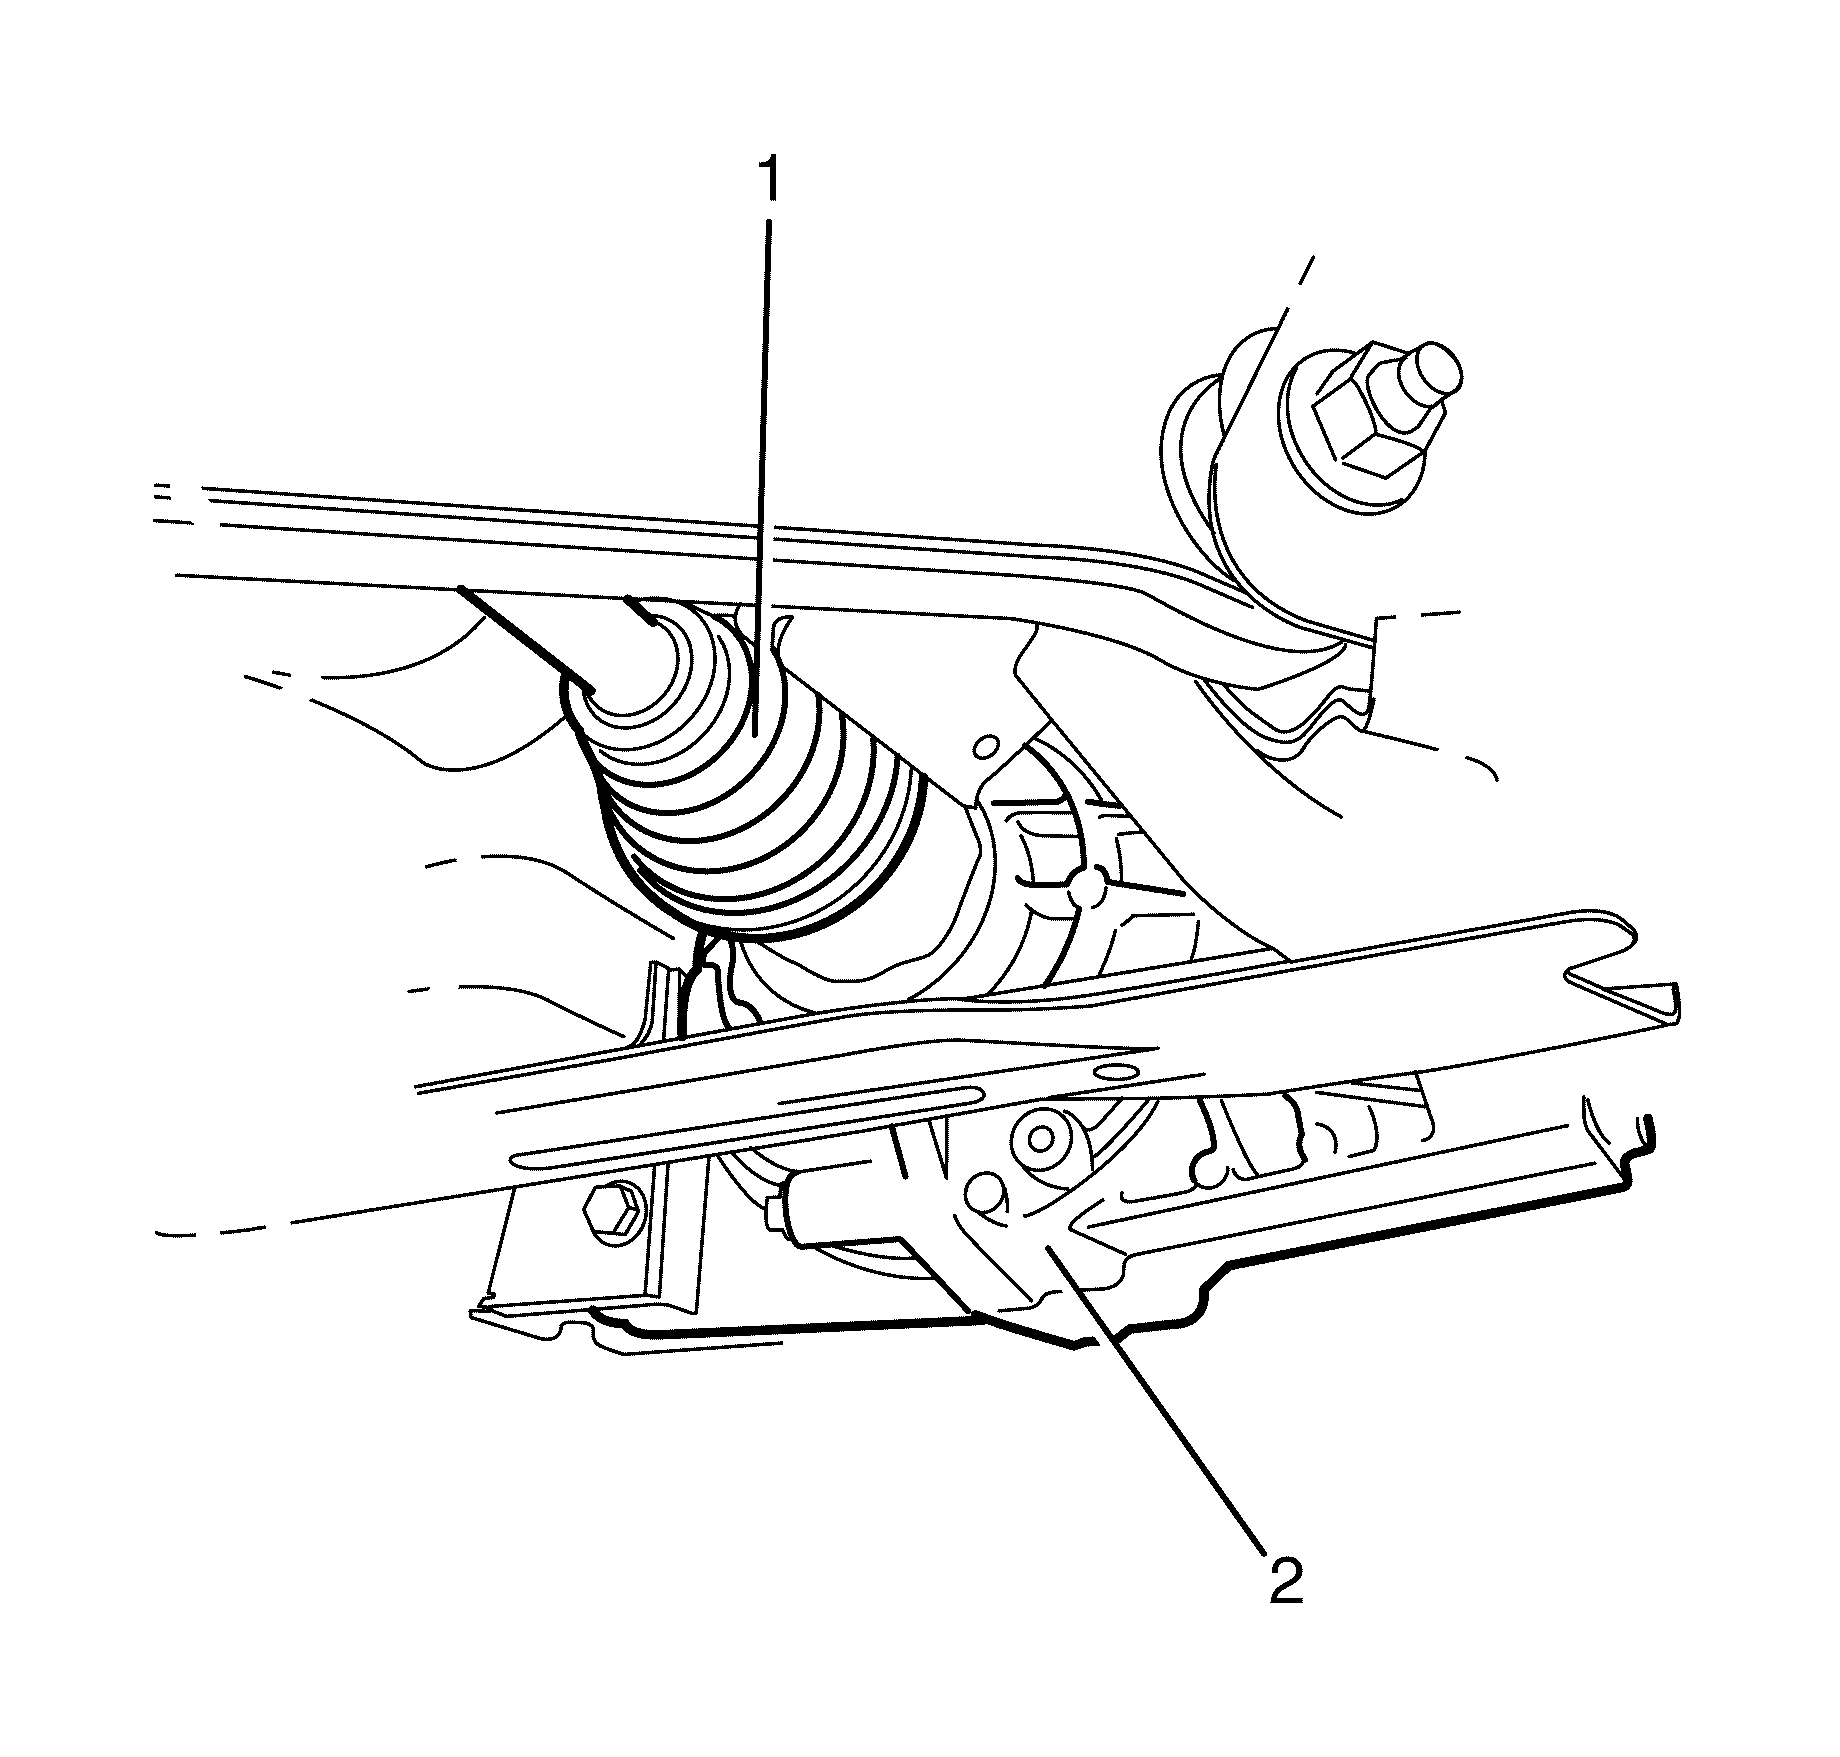
- Disconnect the wheel drive shaft (1) from the differential (2).
- Remove the wheel drive shaft (1) from the vehicle.
- Remove the snap ring (1) from the inner constant velocity joint (2).
- Inspect the wheel drive shaft assembly for excessive wear and/or damage. Inspect the following:
Caution: Refer to Safety Glasses Caution in the Preface section.
Caution: Refer to Vehicle Lifting Caution in the Preface section.
Important: Use a suitable tool to release the crimping on the wheel drive shaft retaining nut.
Important: The wheel drive shaft retaining nut (1) must be discarded after removal.
Discard the nut.
Discard the washer.
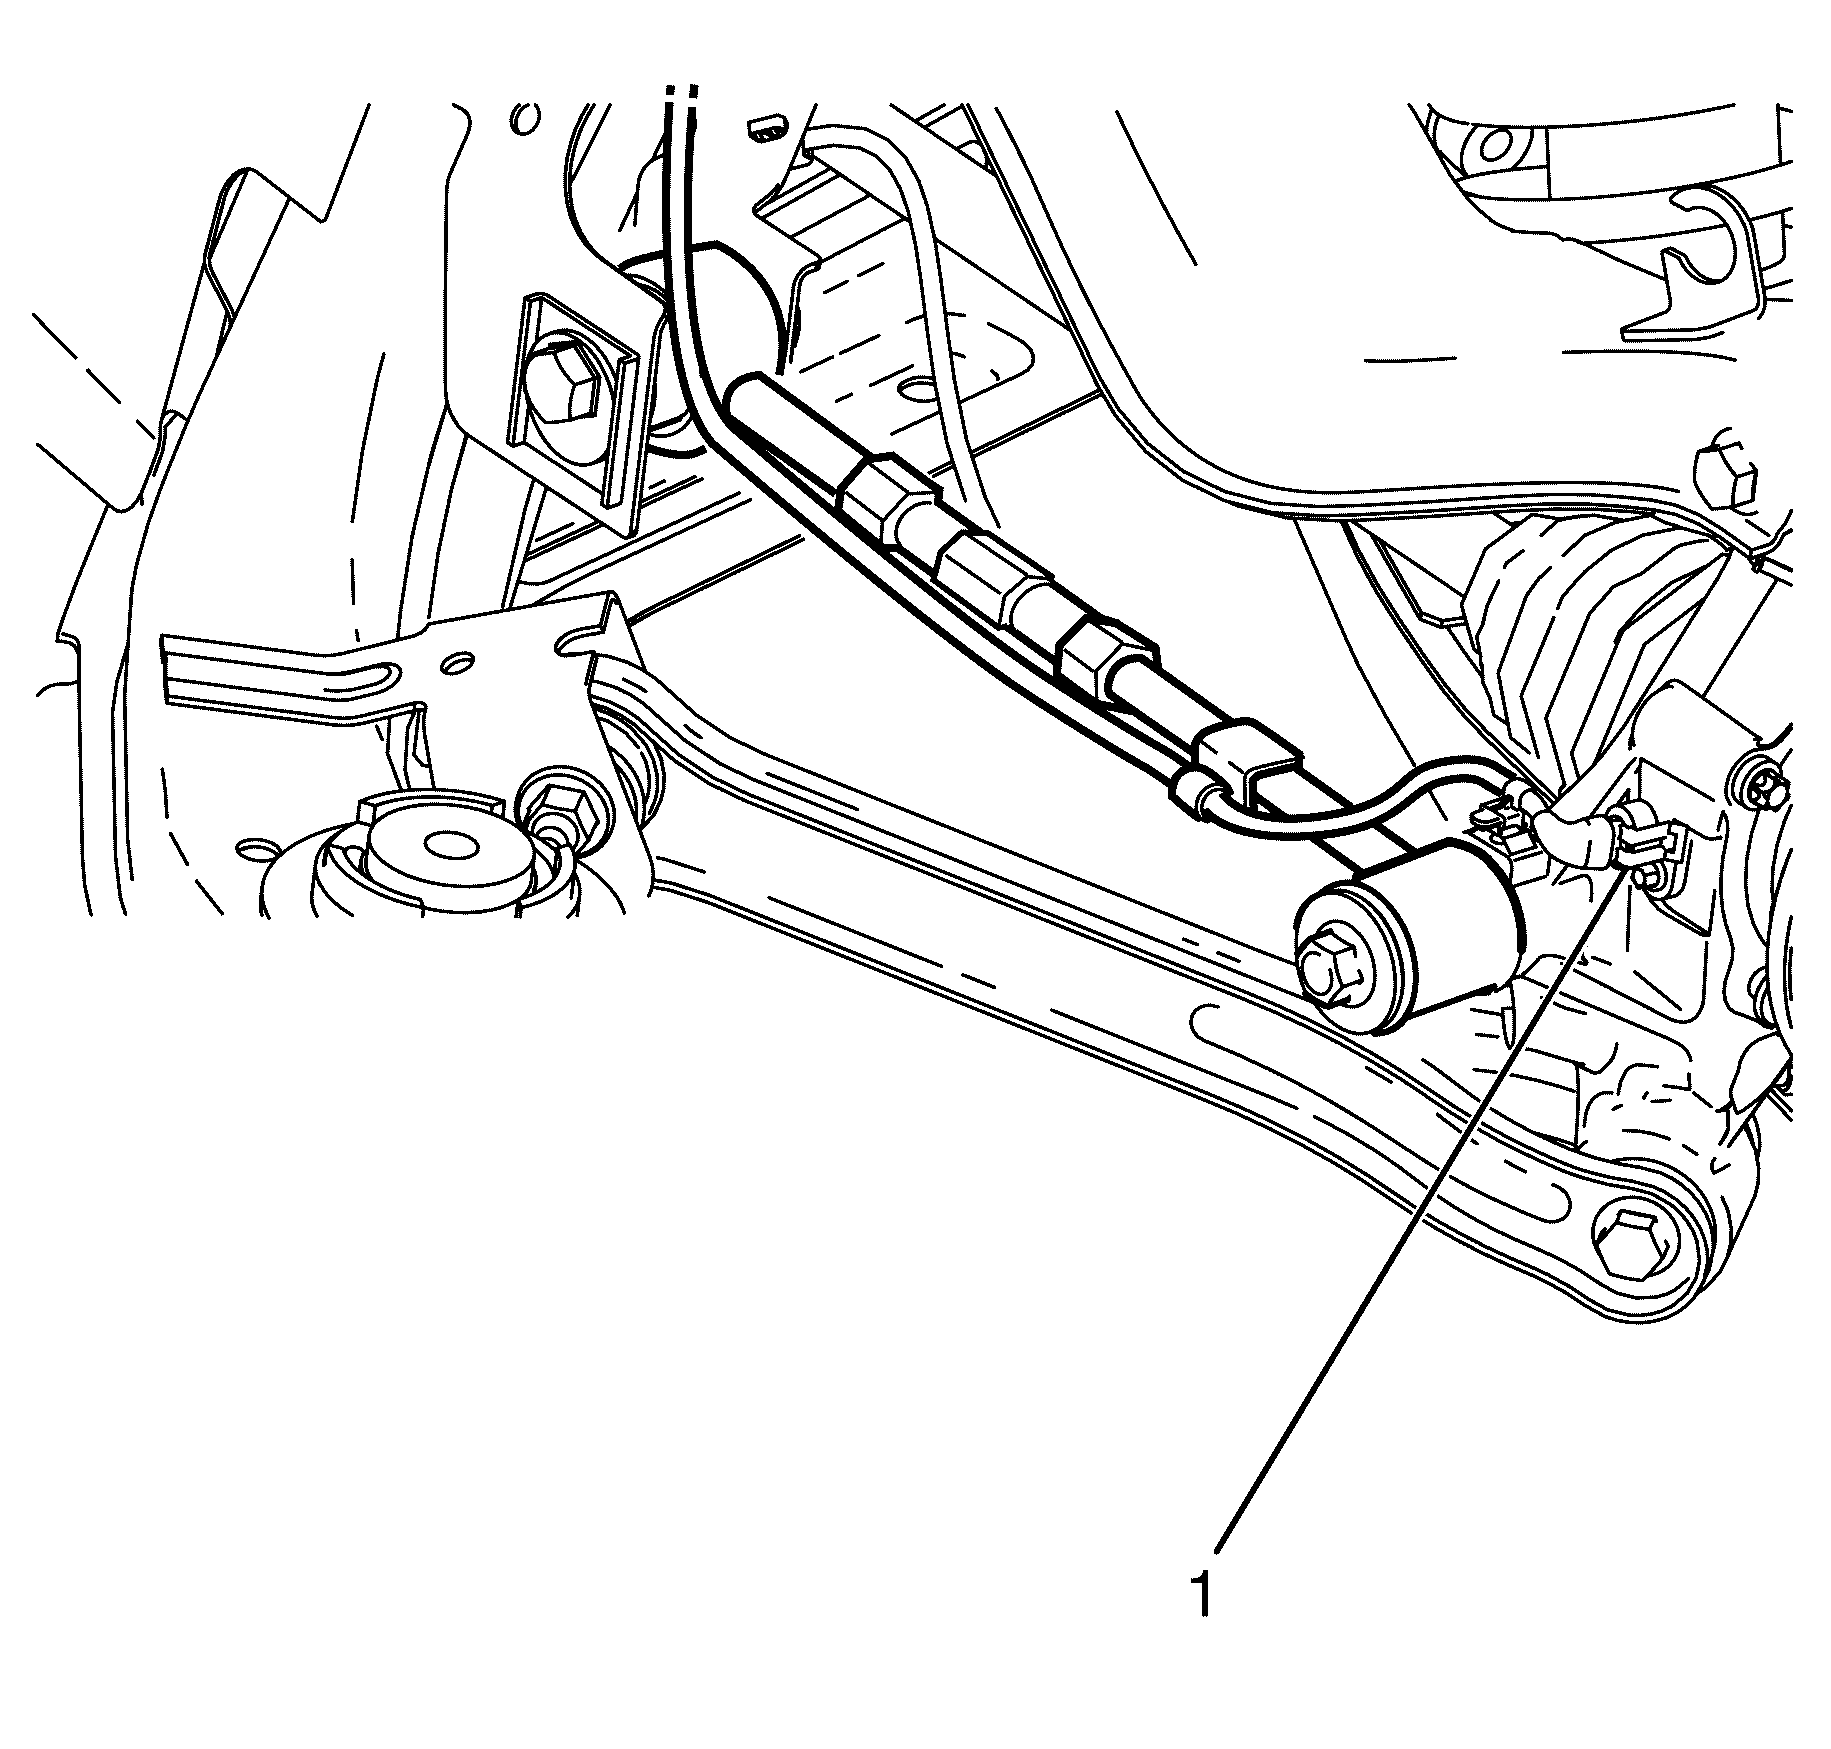
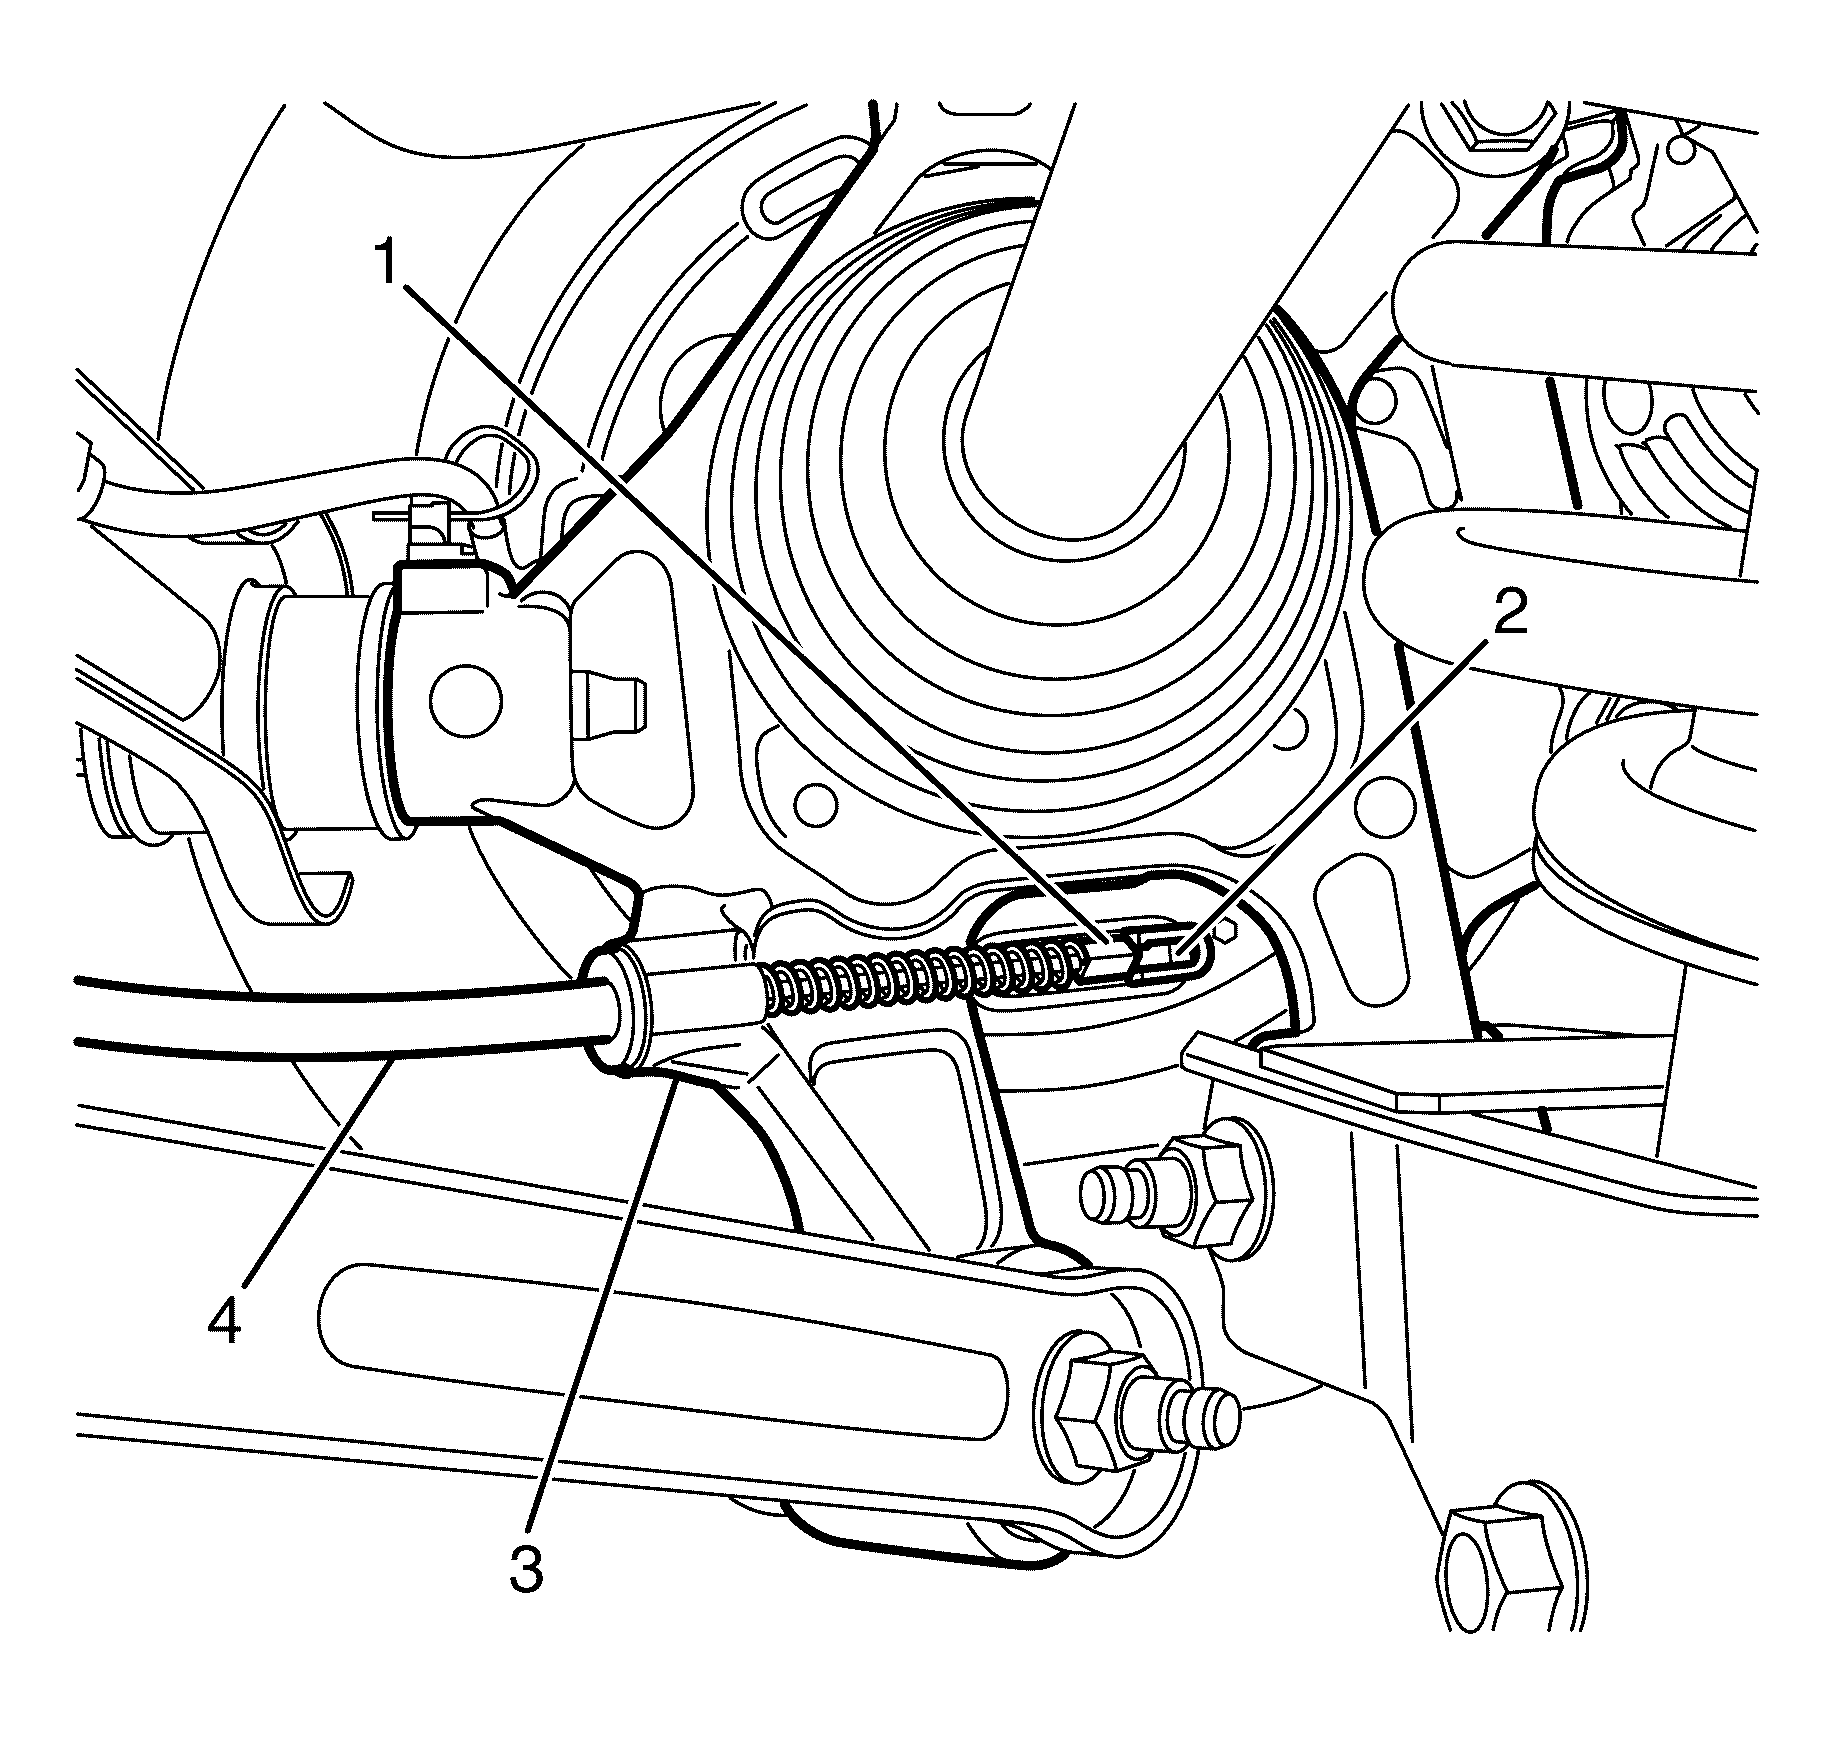
Important: Using a suitable tool, detach the rear park brake cable and clevis (1) from the park brake actuator (2) by pivoting the rear park brake cable and clevis (1) rearward.
Important: Remove the outer cable (4) from the rear knuckle (3) by pulling the outer cable (4) forward.
Important: Nuts with micro-encapsulated thread sealant must be discarded after removal.
Discard the nut.
Discard the nut.
Important: Do not hammer the end of the wheel drive shaft to remove use 7208 .
Important: Do not pull on the interconnecting shaft as it will pull apart the inboard joint.
Important: Do not damage the axle seal when disconnecting the wheel drive shaft (1) from the differential (2). Cuts or abrasions will damage the axle seal and result in lubricant leakage from this area.
Important: Use a suitable tool to pry the inner constant velocity joint out of the differential to release the snap ring.
Important: Support the wheel drive shaft when removing as the rear subframe may cut the inner constant velocity boot.
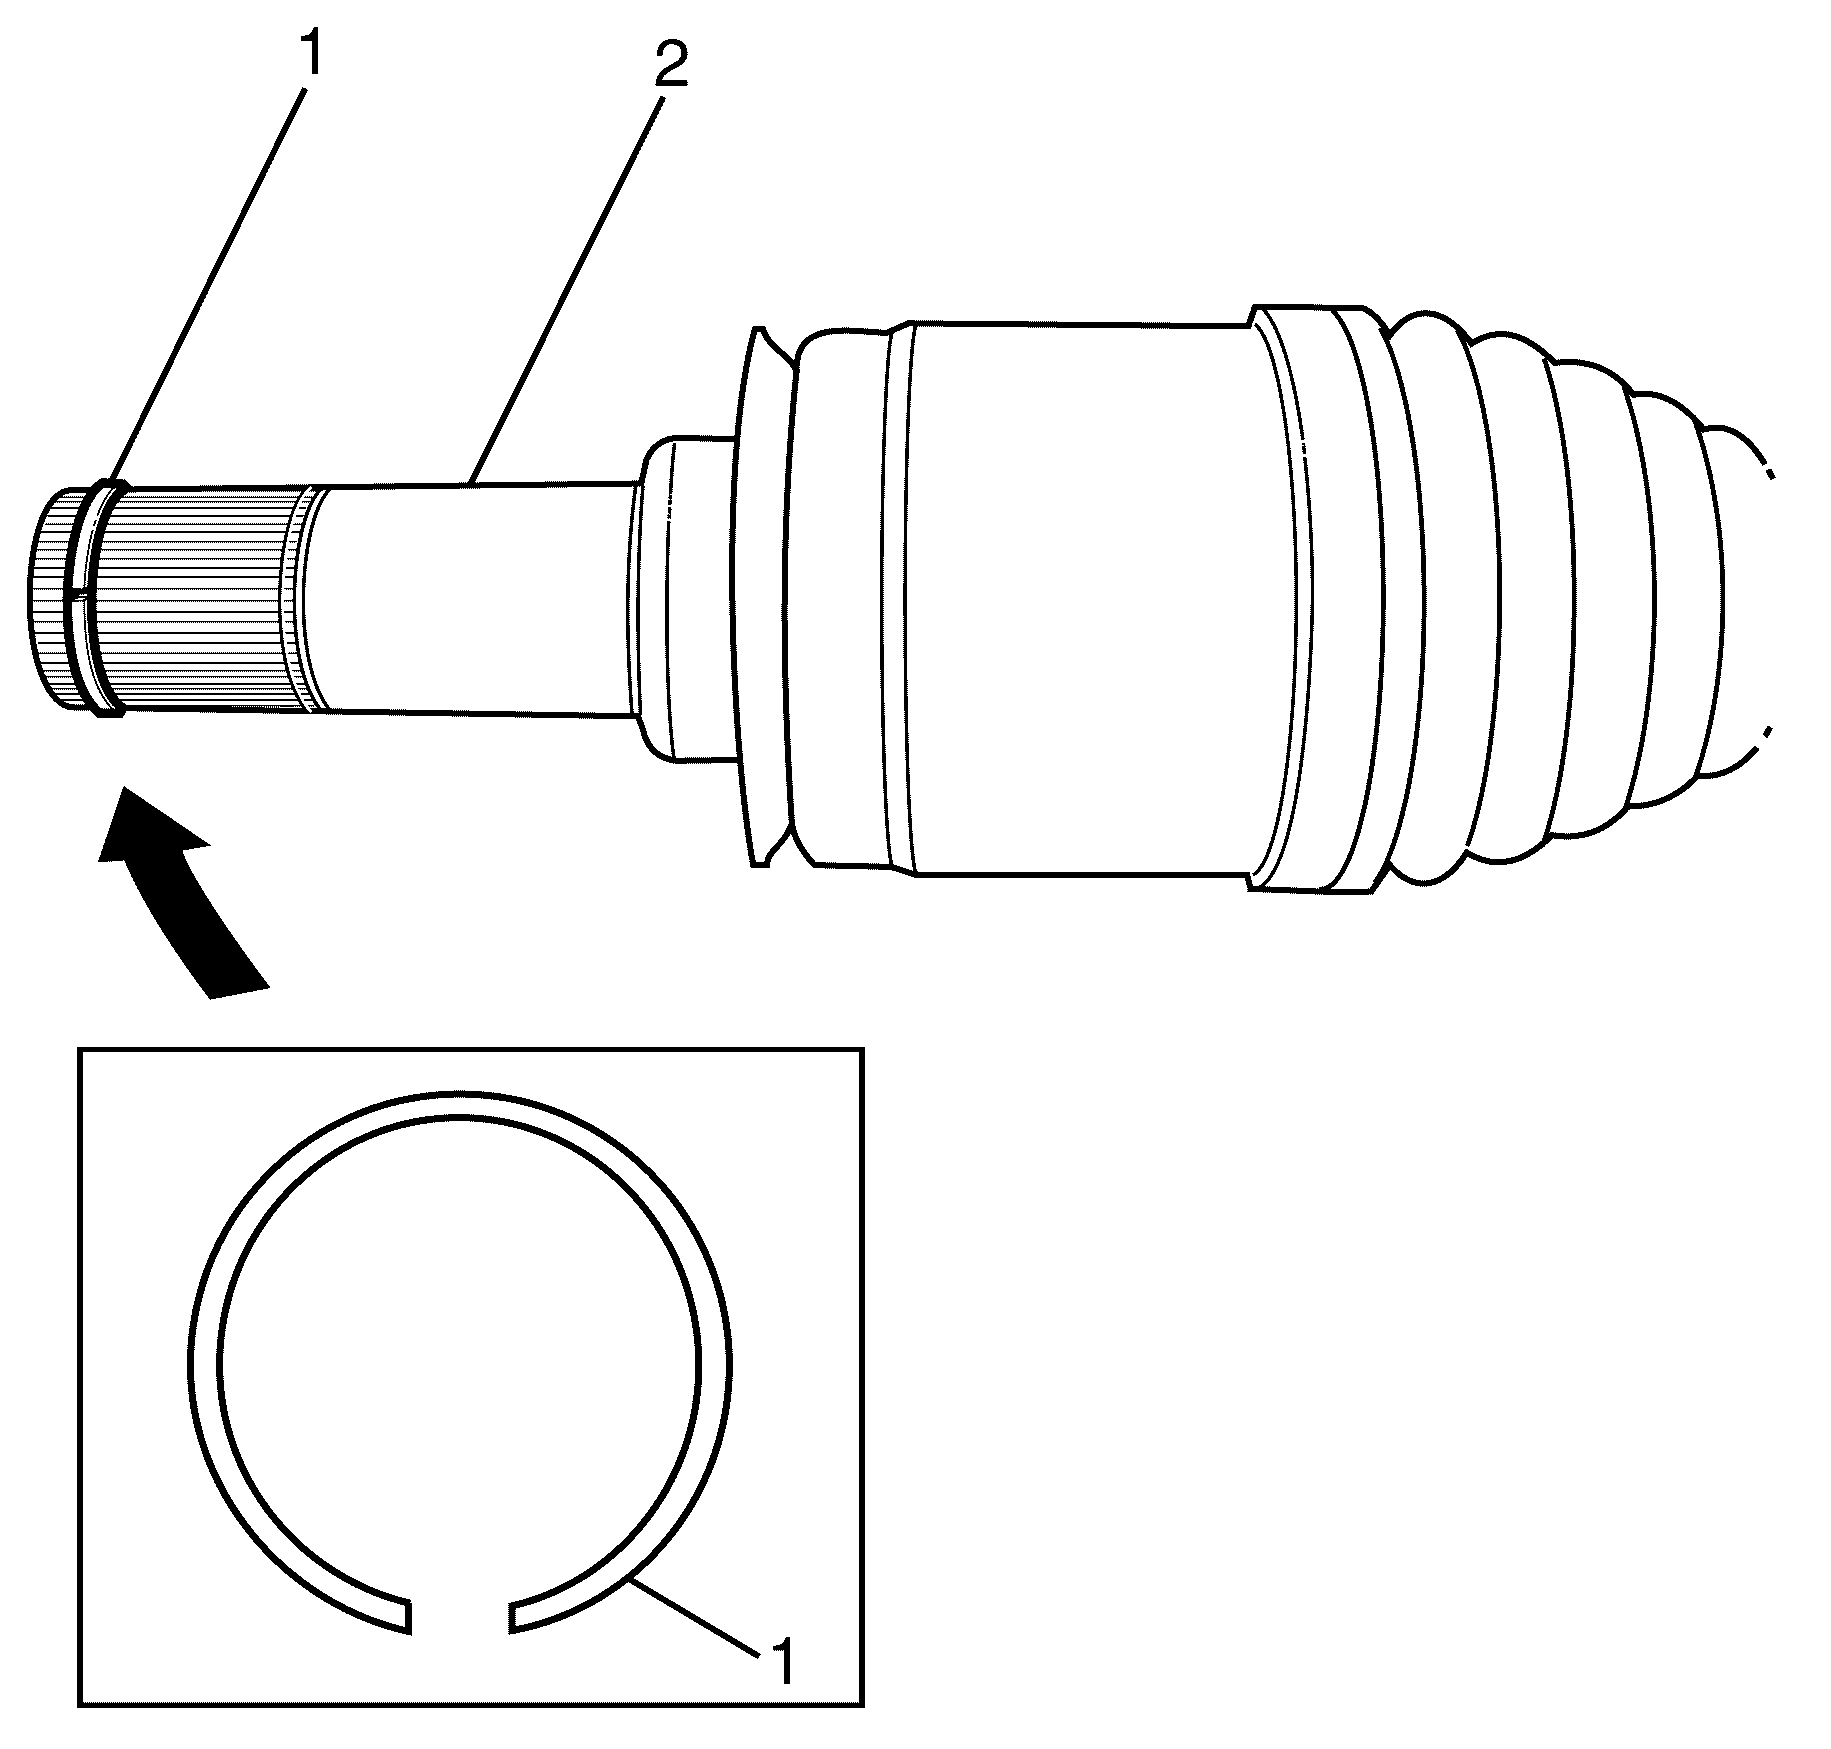
Important: The snap ring (1) is a single use part and must be discarded after removal.
Discard the snap ring.
| • | Wheel Drive Shaft. |
| • | Inner Joint Boot. For replacement refer to Rear Wheel Drive Shaft Inner Joint Boot Replacement. |
| • | Inner Constant Velocity Joint. For replacement refer to Wheel Drive Shaft Inner Joint and Boot Replacement. |
| • | Outer Joint Boot. For replacement refer to Rear Wheel Drive Shaft Outer Joint Boot Replacement. |
| • | Outer Constant Velocity Joint. For replacement refer to Wheel Drive Shaft Outer Joint and Boot Replacement. |
Installation Procedure
- Install the NEW snap ring (1) to the wheel drive inner constant velocity joint (2).
- Install the wheel drive shaft (1) to the differential (2).
- Position the wheel drive shaft through the wheel hub assembly.
- Install the lower control arm to knuckle retaining bolt (2) and NEW nut (1).
- Install the rear park brake cable (4) into the rear knuckle (3).
- Attach the rear park brake cable and clevis (1) to the park brake actuator (2).
- Install the I-Link to knuckle retaining bolt (1) and washer (2).
- Install the Y-Link to the knuckle retaining bolt (2) and NEW nut (1).
- Connect the wheel speed sensor electrical connector (1).
- Install the NEW wheel drive shaft washer (2) to the wheel hub assembly.
- Install the NEW wheel drive shaft nut (1) to the wheel hub assembly.
- Install the KM-468 (1) to the wheel hub assembly (2) with two inverted wheel nuts (3).
- Support the KM-468 (1) outer end on a safety stand.
- Preferred Method
- Remove the KM-468 (1).
- Use a suitable tool to crimp the NEW wheel drive shaft nut to the wheel drive shaft keyway.
- Install the rear wheel. Refer to Tire and Wheel Removal and Installation.
- Check the differential fluid level. Refer to Rear Axle Lubricant Level Inspection.
- Remove the safety stands.
- Lower the vehicle to the ground.
Important: The gap in the snap ring (1) must be at the bottom.
Important: Do not damage the axle seal when installing the wheel drive shaft (1) to the differential (2). Cuts or abrasions will damage the axle seal and result in subsequent lubricant leakage from this area.
Important: Pull the wheel hub assembly outwards to position the wheel drive shaft through the wheel hub assembly.
Notice: Refer to Fastener Notice in the Preface section.
Tighten
Tighten the bolt and nut to 105 N·m
(77 lb ft).
Make sure that the rear park brake cables (4) are properly seated.
Important: Attach the rear park brake cable and clevis (1) to the park brake actuator (2) by pivoting the rear park brake cable and clevis (1) rearward using pliers.
Tighten
Tighten the bolt to 105 N·m (77 lb ft).
Tighten
Tighten the bolt and nut to 170 N·m
(126 lb ft).
Important: The wheel speed sensor cable must be secured to protect it from damage.
Notice: Refer to Fastener Notice in the Preface section.
Important: There are two suitable methods of tightening the wheel drive shaft retaining nut. DO NOT EXCEED THE SPECIFIED TIGHTENING VALUES, otherwise premature bearing failure may result.
Tighten
Tighten the nut on first pass to 150 N·m
(111 lb ft).
Loosen
Loosen the nut on second pass by 180 Degrees.
Tighten
Tighten the nut on third pass to 425 N·m
(313 lb ft)
Crimp nut.
Alternate Method
Tighten
Tighten the nut on first pass to 150 N·m
(111 lb ft).
Loosen
Loosen the nut on second pass by 180 Degrees.
Tighten
Tighten the nut on the third pass to 50 N·m
(37 lb ft)
Tighten
Tighten the nut on the forth pass by 45 Degrees
Crimp nut.
