Tools Required
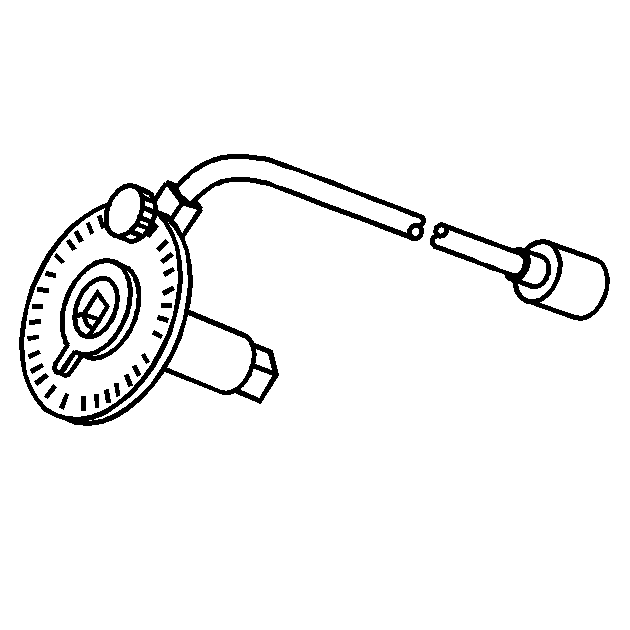
KM-470-B Angular Torque Gage
Crankshaft - Inspection Procedure
- Coat the crankshaft bearings with engine oil.
- Install the upper crankshaft bearings into the engine block crankshaft journals.
- Install the lower crankshaft bearings into the crankshaft bearing caps.
- Install the crankshaft.
- Inspect the crankshaft end play with the crankshaft bearings installed.
- Check for permissible crankshaft end play. Refer to Engine Mechanical Specifications .
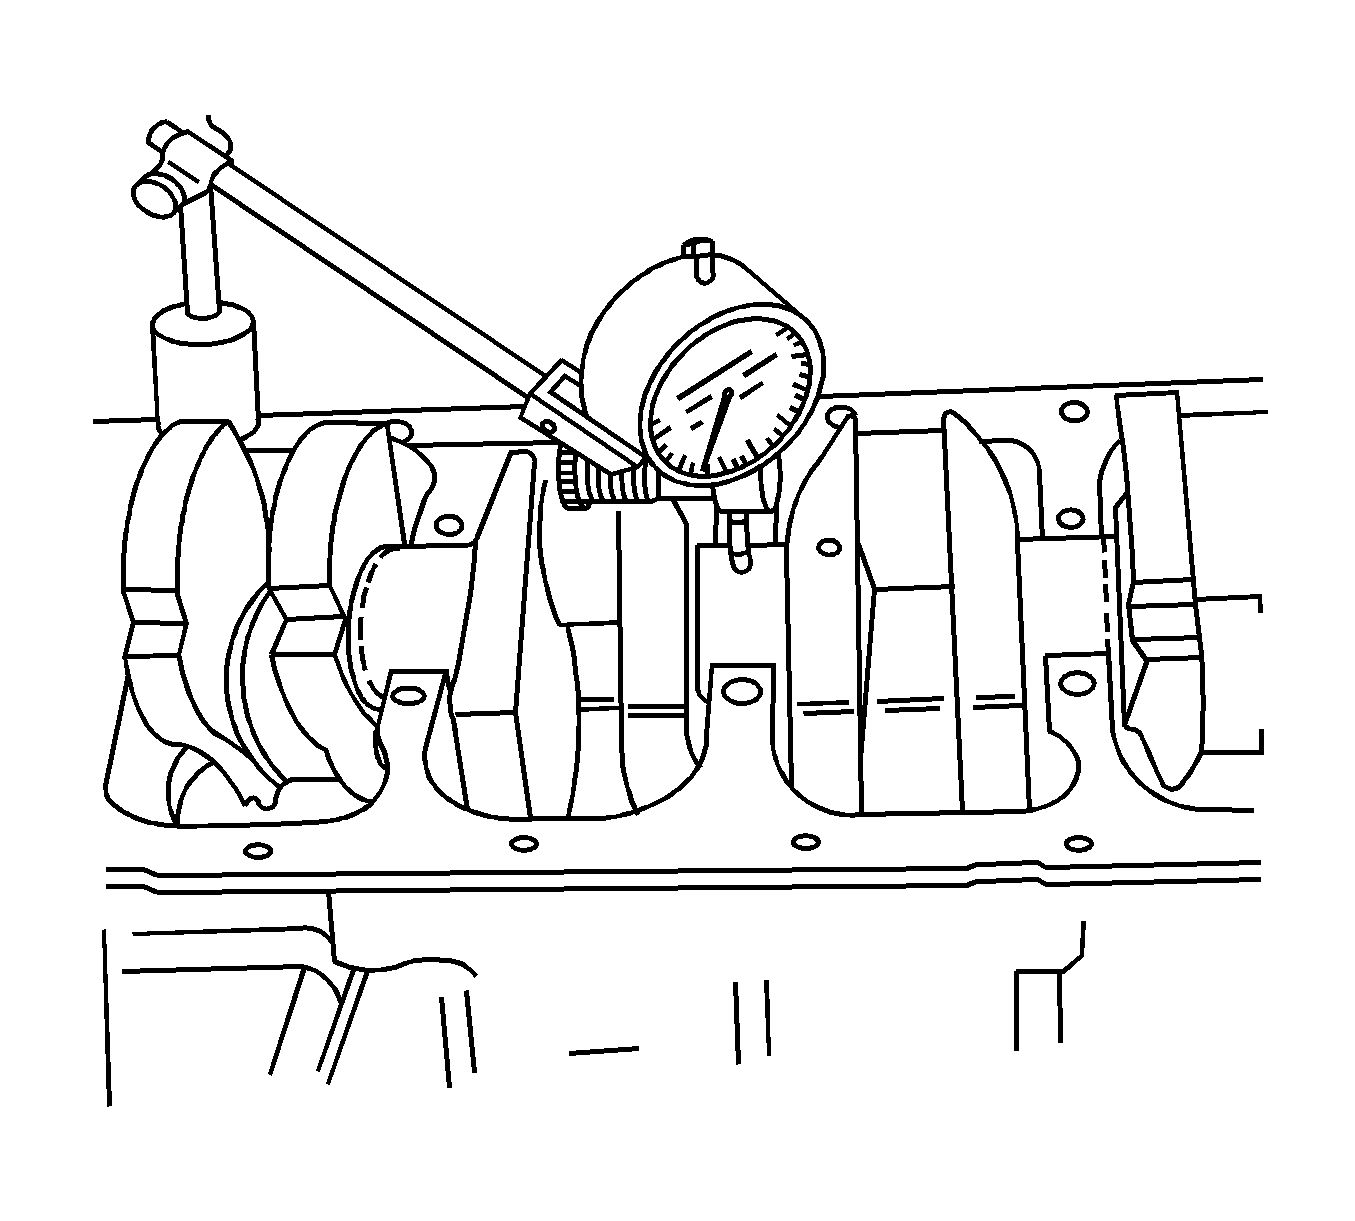
- With the crankshaft mounted on the front and rear crankshaft bearings, check the middle crankshaft journal for permissible out-of-round (runout). Refer to Engine Mechanical Specifications .
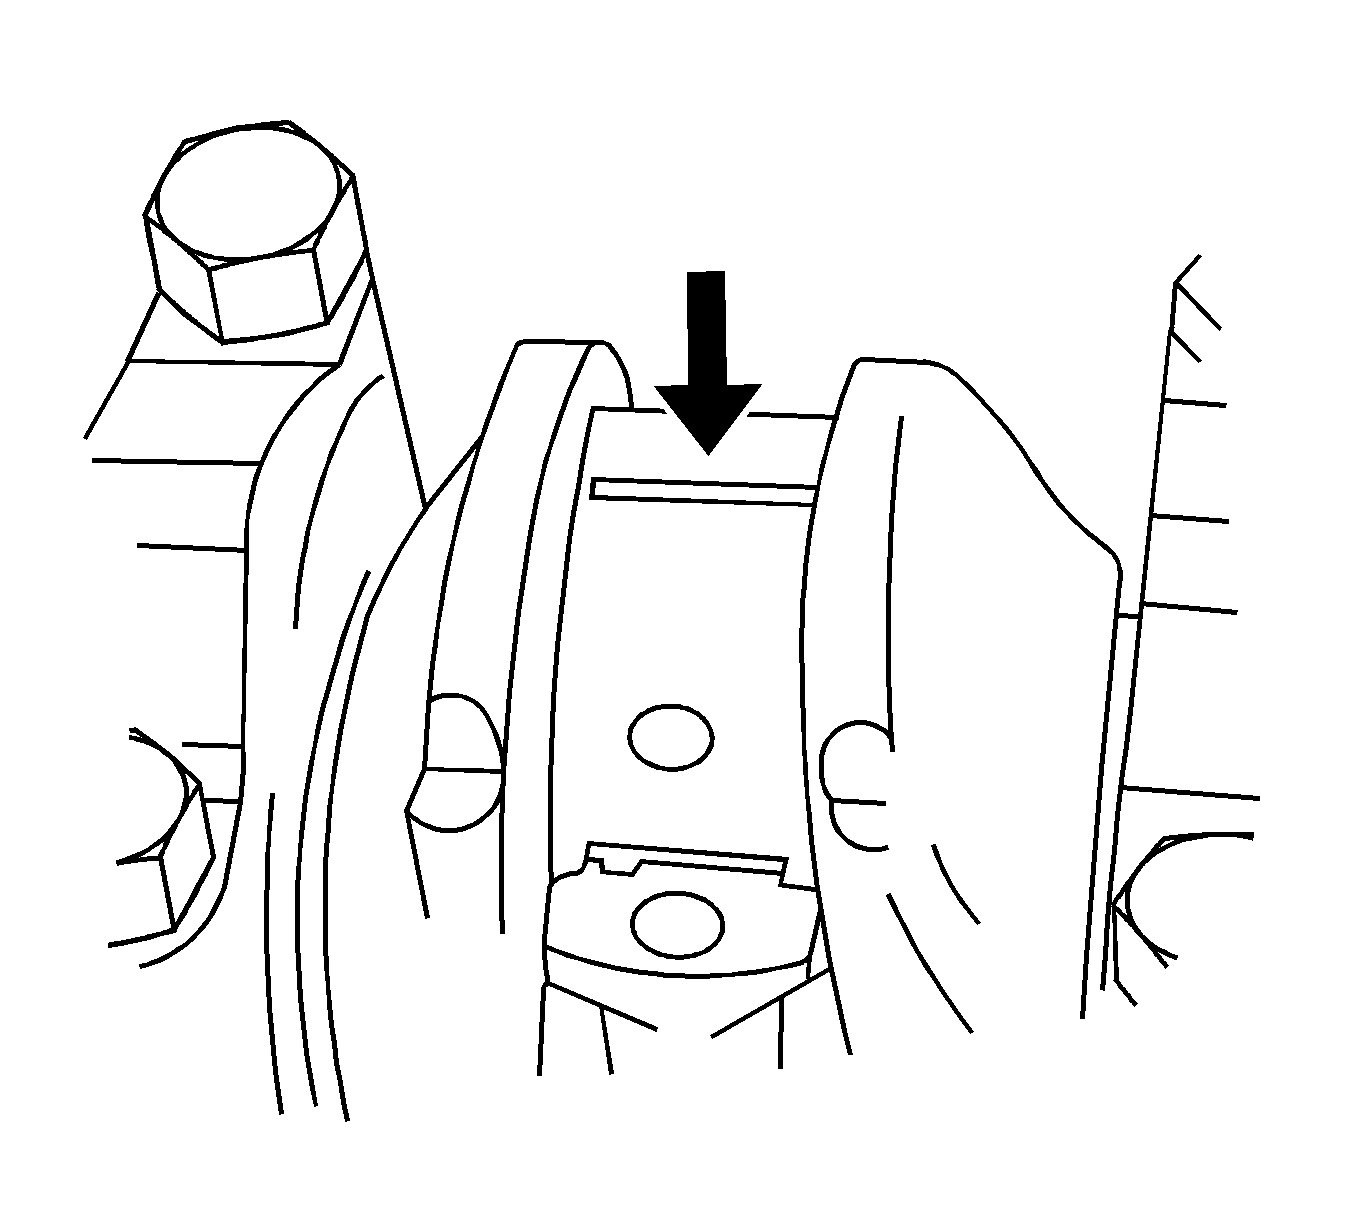
- Inspect all crankshaft bearing clearances using a commercially available plastic gaging (ductile plastic threads).
- Cut the plastic gaging threads to the length of the bearing width. Lay them axially between the crankshaft journals and the crankshaft bearings.
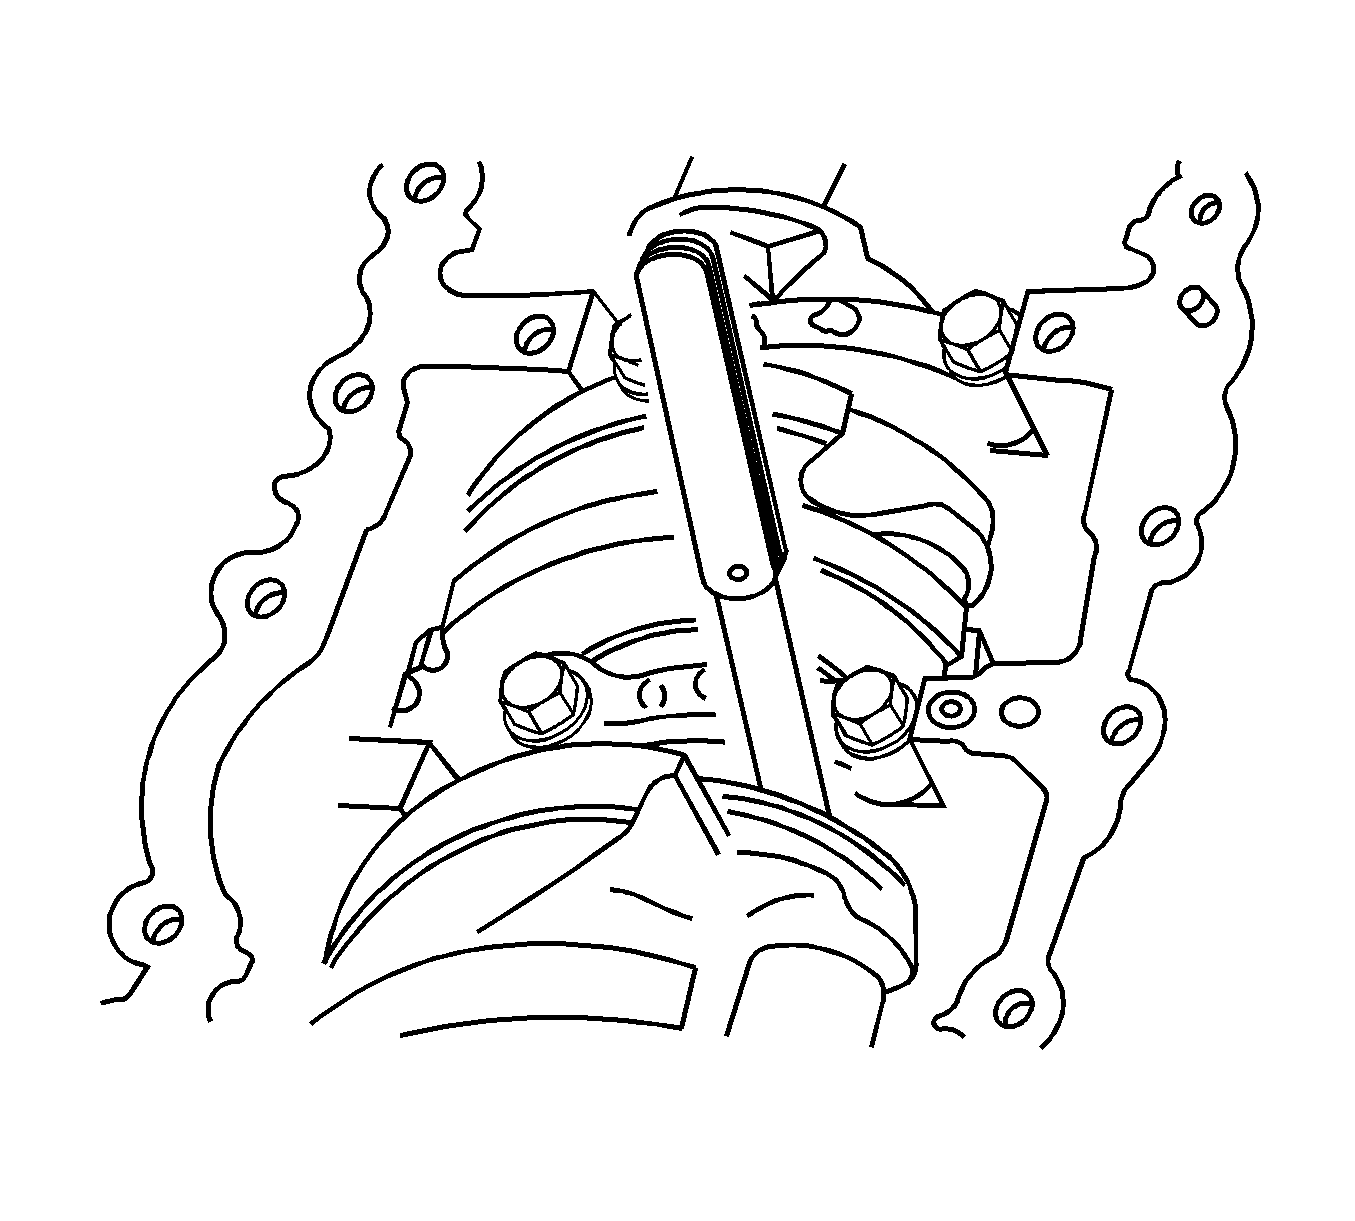
- Install the crankshaft bearing caps.
- Install the crankshaft bearing cap bolts.
- Remove the crankshaft bearing caps.
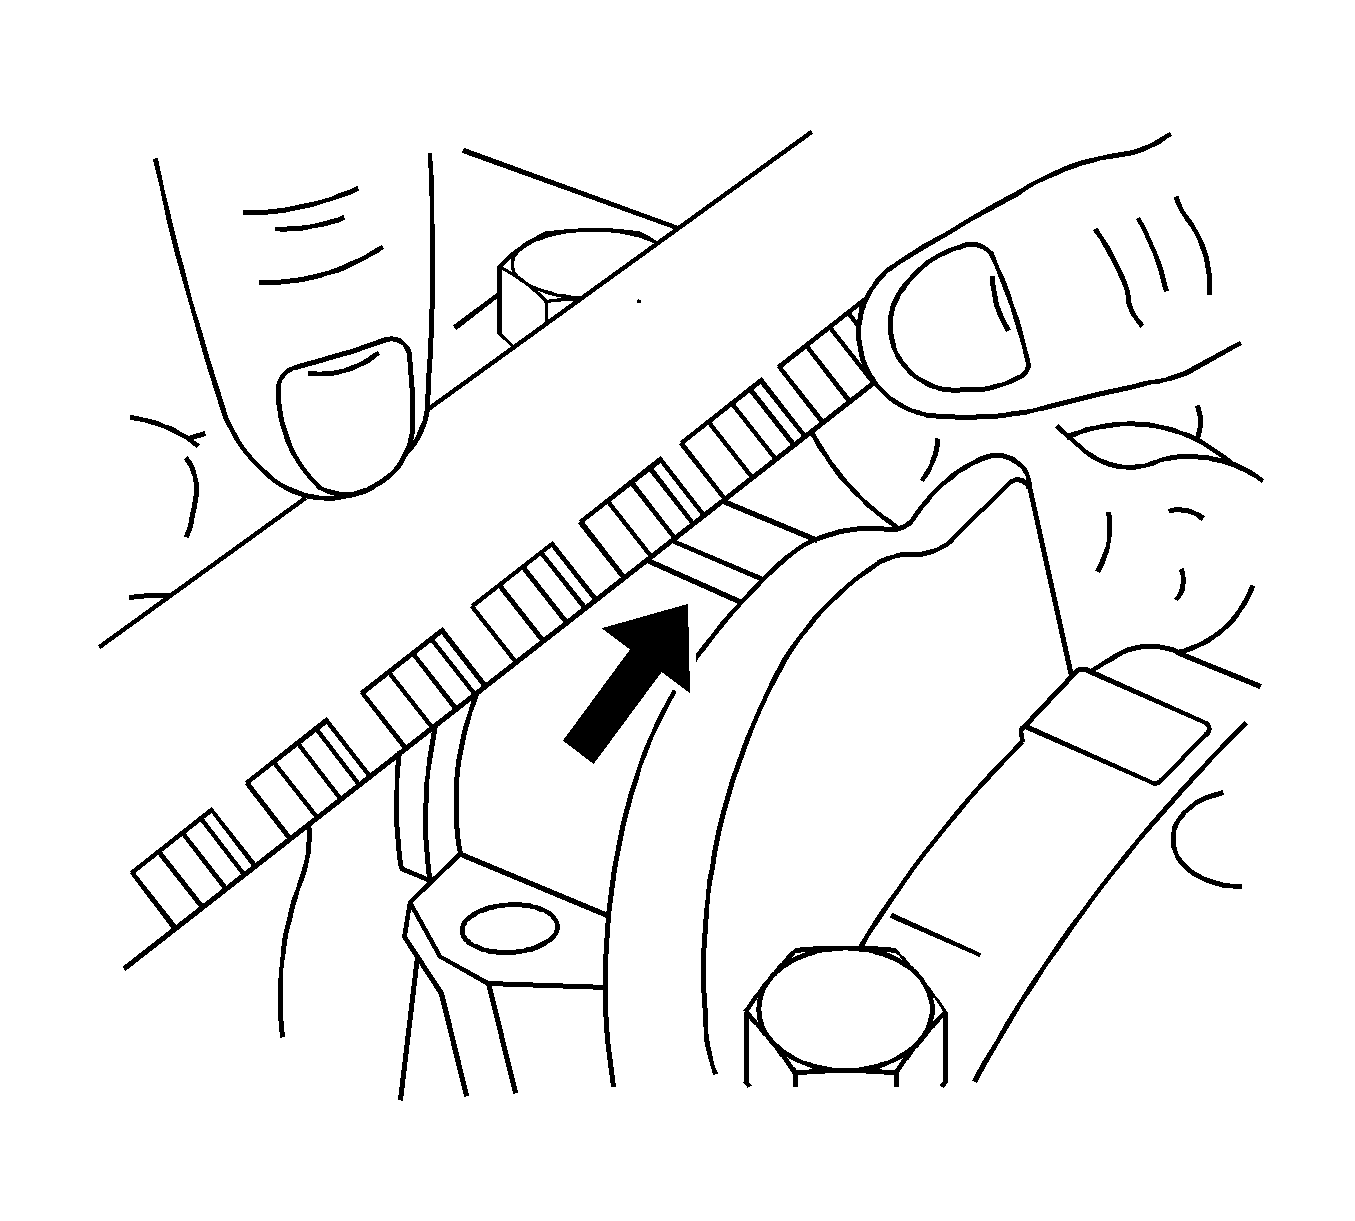
- Measure the width of the flattened plastic thread of the plastic gaging using a ruler. (Plastic gauging is available for different tolerance ranges.)
- Inspect the bearing clearances for permissible tolerance ranges. Refer to Engine Mechanical Specifications .
Important: Grease the crankshaft journals and lubricate the crankshaft bearings slightly so that the plastic gaging thread does not tear when the crankshaft bearing caps are removed.
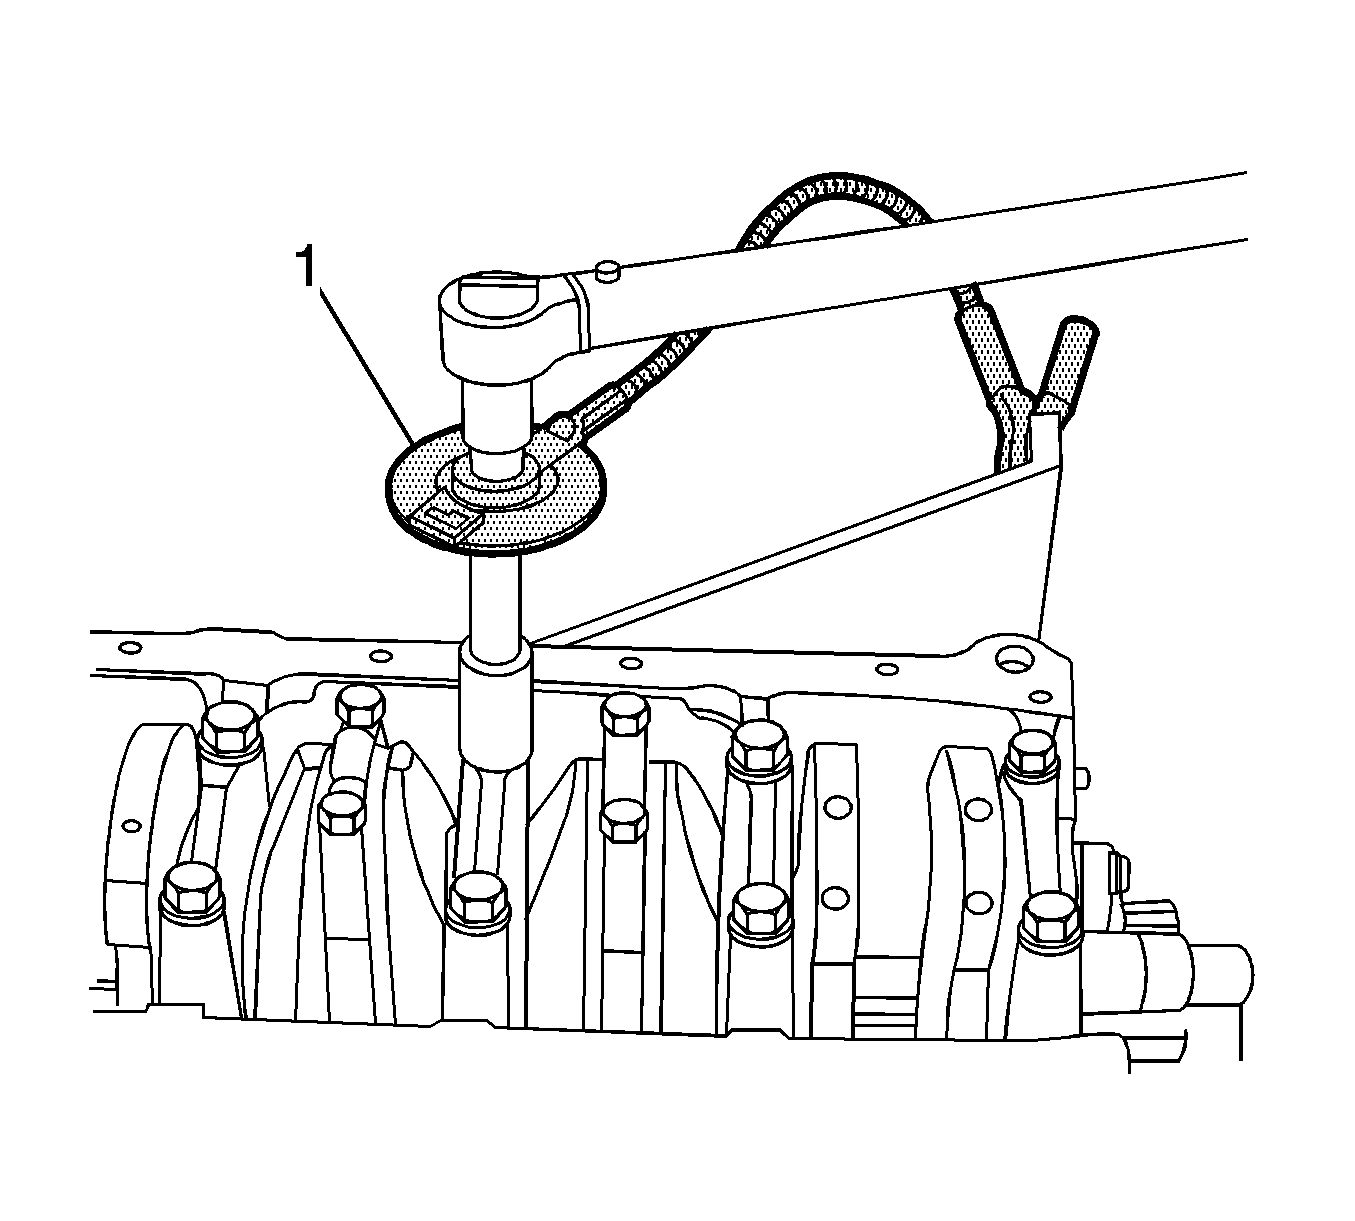
Tighten
Tighten the crankshaft bearing cap bolts to 50 N·m (37 lb ft). Using
KM-470-B
(1), tighten the crankshaft bearing cap bolts
another 45 degrees plus 15 degrees.
Connecting Rods - Inspection Procedure
- Coat the connecting rod bearings with engine oil.
- Install the upper connecting rod bearings into the connecting rod journals.
- Install the lower connecting rod bearings into the connecting rod bearing caps.
- Inspect all of the connecting rod bearing clearances using a commercially available plastic gaging (ductile plastic threads).
- Cut the plastic gaging threads to the length of the bearing width. Lay them axially between the connecting rod journals and the connecting rod bearings.
- Install the connecting rod bearing caps.
- Install the connecting rod bearing cap bolts.
- Remove the connecting rod bearing caps.
- Measure the width of the flattened plastic thread of the plastic gauging using a ruler. (Plastic gaging is available for different tolerance ranges.)
- Inspect the bearing clearance for permissible tolerance ranges. Refer to Engine Mechanical Specifications .
Important: Grease the connecting rod journals and lubricate the connecting rod bearings slightly so that the plastic gaging thread does not tear when the connecting rod bearing caps are removed.
Notice: Refer to Fastener Notice in the Preface section.
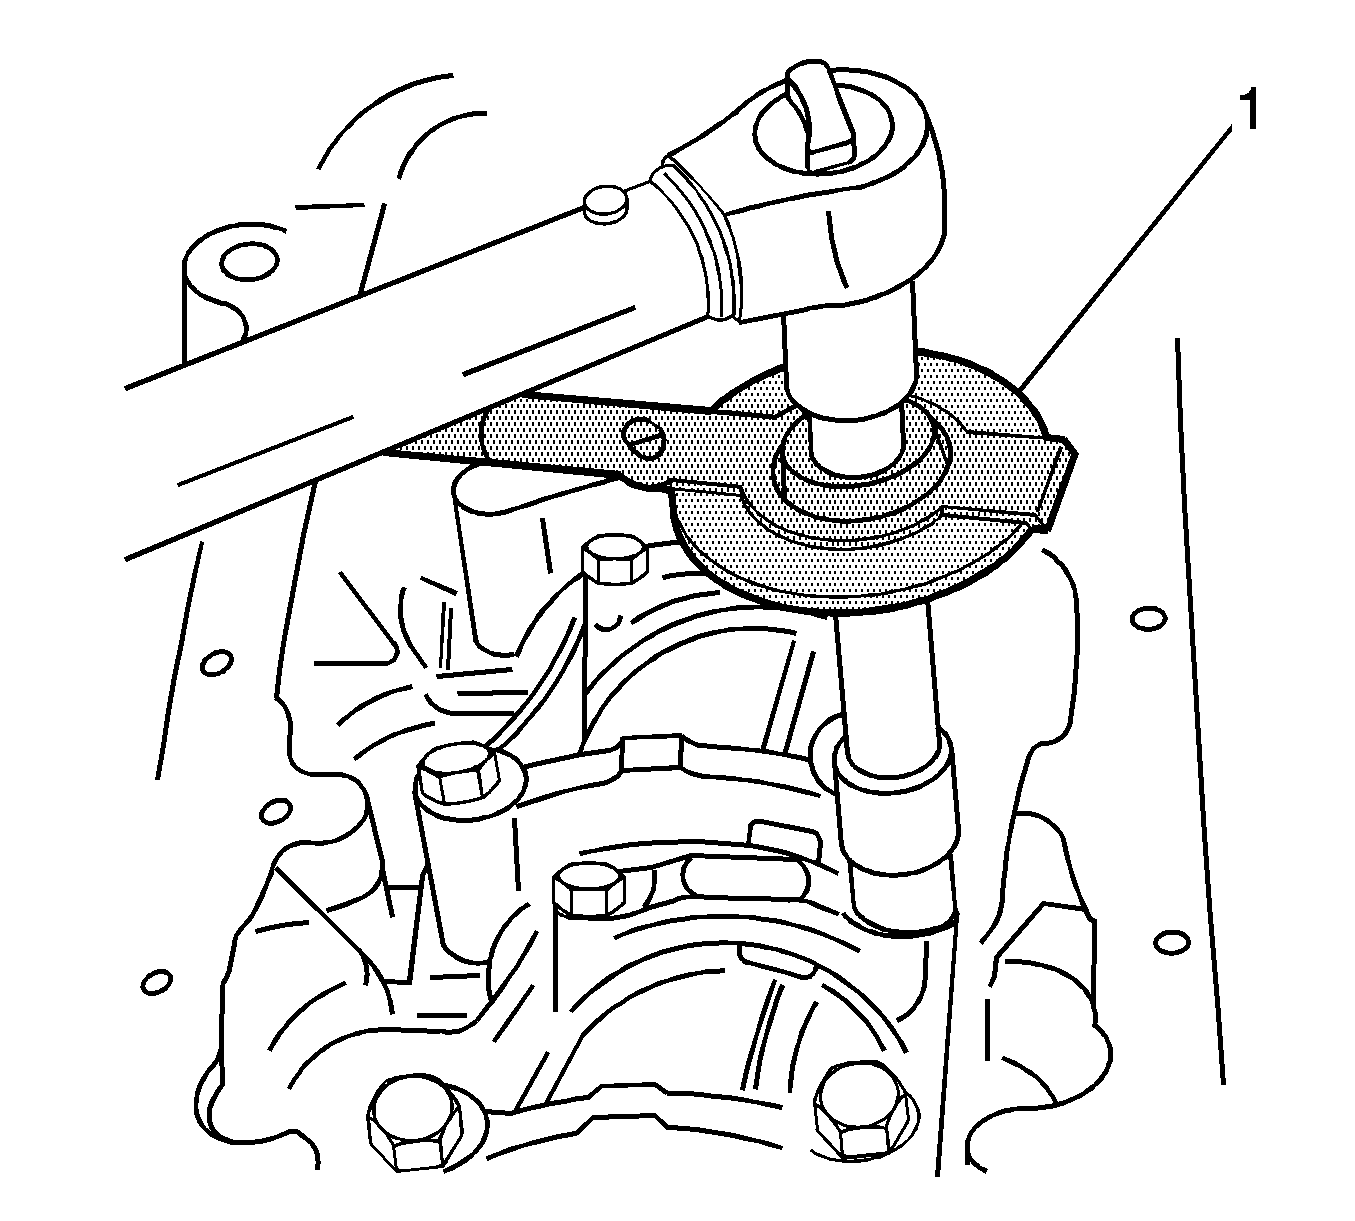
Tighten
Tighten the connecting rod bearing cap bolts to 35 N·m (26 lb ft). Using
KM-470-B
(1), tighten the connecting rod bearing cap bolts another
45 degrees plus 15 degrees.
