Removal Procedure
- Disconnect the battery negative cable. Refer to Battery Replacement in Engine Electrical.
- Remove the upper fan shroud. Refer to Fan Shroud Replacement in Engine Cooling.
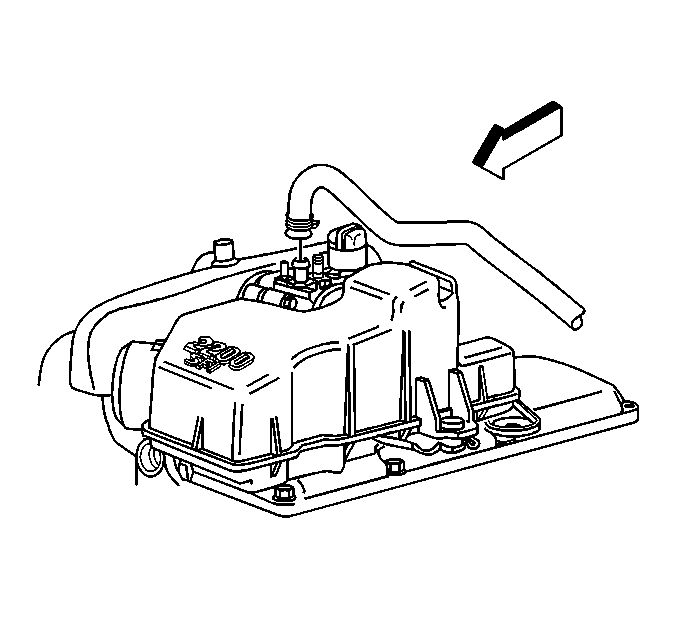
- Disconnect the vacuum brake booster hose.
- Remove the air cleaner outlet resonator. Refer to Air Cleaner Outlet Resonator Replacement in Engine Controls.
- Disconnect the following electrical connectors:
- Disconnect the vacuum hoses from the throttle body.
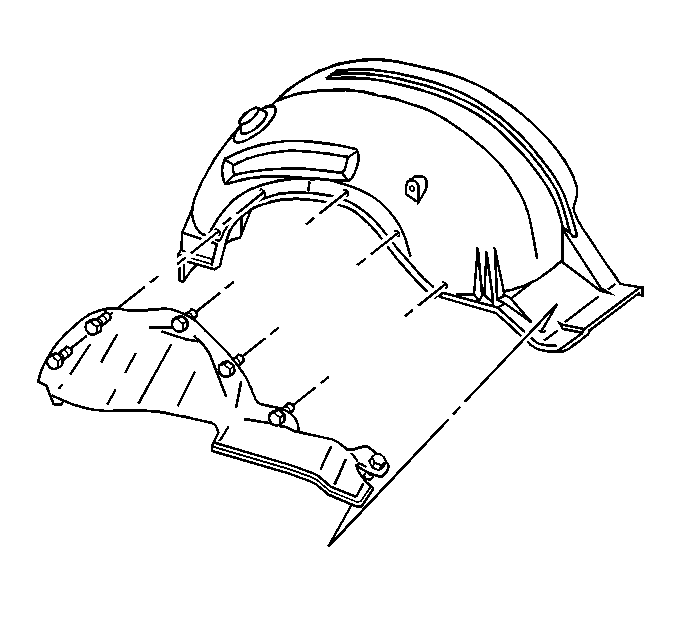
- Remove the right fender wheelhouse extension.
- Remove the following retainers from the intake manifold:
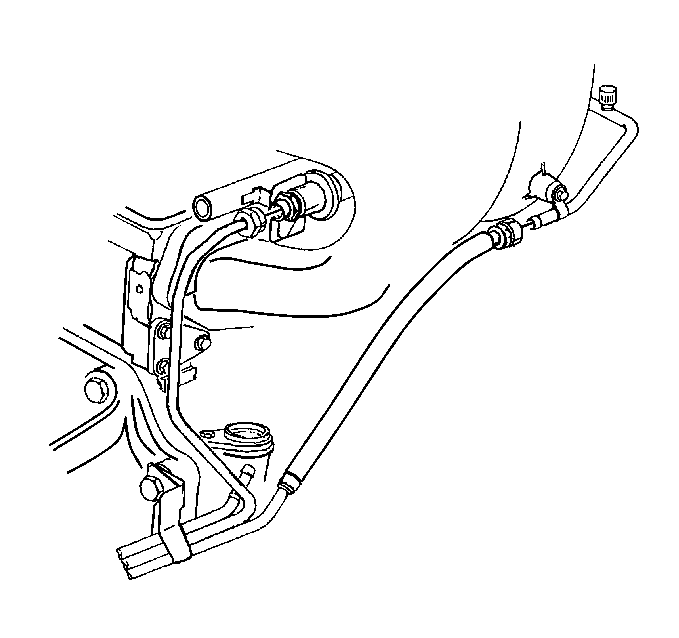
- Disconnect the fuel pipes from the fuel rail. Refer to Fuel Injection Fuel Rail Assembly Replacement in Engine Controls.
- Remove the accelerator control cable from the throttle body. Refer to Accelerator Control Cable Replacement in Engine Controls.
- Remove the cruise control cable from the throttle body. Refer to Cruise Control Cable Replacement in Cruise Control.
- Remove the spark plug wires from the spark plugs. Refer to Spark Plug Wire Harness Replacement in Engine Electrical.
- Remove the spark plug wire harness retainer from the heater hose pipe and set aside the spark plug wire harness.
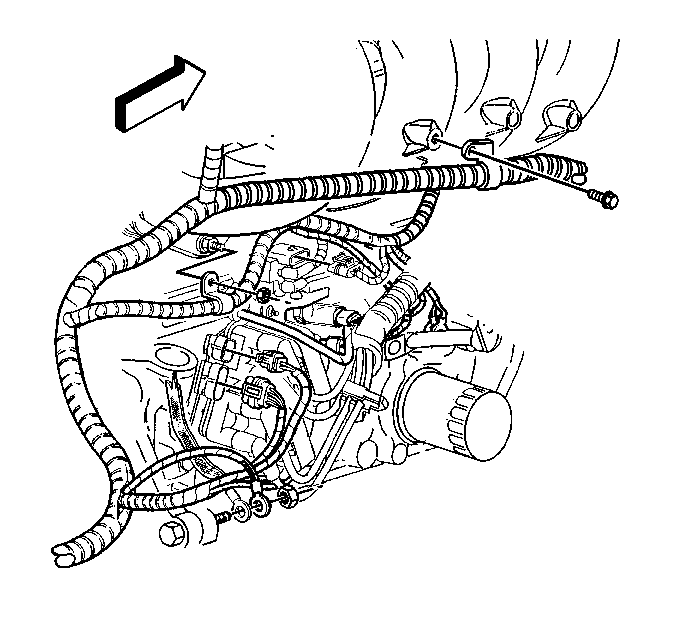
- Working through the wheelhouse, remove the generator rear brace from the engine.
- Remove the engine wiring harness bracket at the back of the engine using the following procedure:
- Remove the intake manifold assembly. Refer to Intake Manifold Removal .
- Clean all sealing surfaces. Refer to Intake Manifold Cleaning and Inspection .

| • | Idle air control (IAC) motor |
| • | Manifold absolute pressure (MAP) sensor |
| • | Throttle position (TP) sensor |
| • | Fuel injector harness connector. |

If necessary, mark the hoses in their original locations to ensure they are properly re-connected.
| • | Engine harness bracket |
| • | Transmission fluid level indicator tube, if equipped |
| • | Fuel system evaporator pipe |

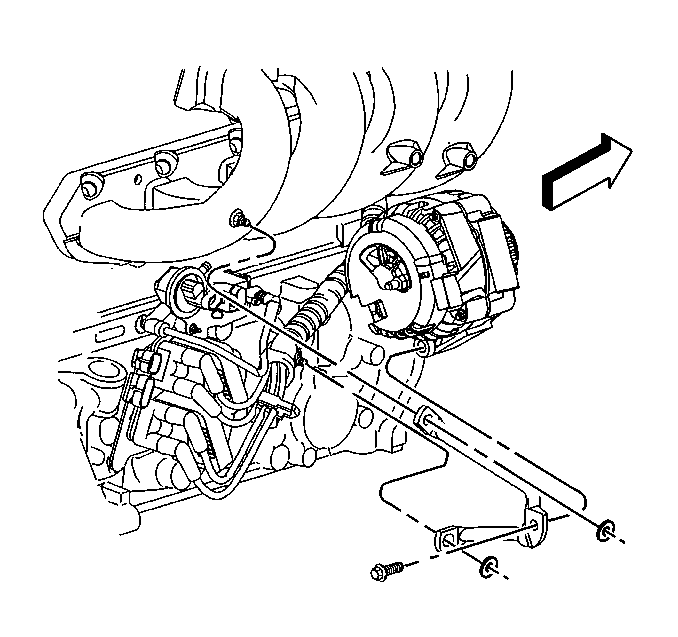
| • | Remove the nuts holding the brace to the intake stud and the engine block. |
| • | Remove the bolt holding the brace to the rear of the generator. |

| 15.1. | Loosen the bolt at the rear of the cylinder head. |
| 15.2. | Remove the two bolts that secure the bracket to the valve rocker arm cover. |
| 15.3. | Slide the bracket off of the bolt at the rear of the cylinder head. |

Installation Procedure
- Install the intake manifold assembly. Refer to Intake Manifold Installation .
- Install the engine wire harness bracket to the rear of the engine using the following procedure:
- Tighten the bolts in the following order:
- Tighten the two bolts to the valve rocker arm cover to 10 N·m (89 lb in).
- Tighten the bolt at the rear of the cylinder head to 25 N·m (18 lb ft).
- Working through the wheelhouse, install the generator rear brace.
- Install the nuts holding the brace to the intake manifold stud and the stud on the engine.
- Install the bolt holding the brace to the rear of the generator.
- Position the spark plug wire harness.
- Install the spark plug wire harness retainer on the heater hose pipe.
- Install the spark plug wires to the spark plugs. Refer to Spark Plug Wire Harness Replacement in Engine Electrical.
- Install the accelerator control cable to the throttle body. Refer to Accelerator Control Cable Replacement in Engine Controls.
- Install the cruise control cable to the throttle body. Refer to Cruise Control Cable Replacement in Cruise Control.
- Connect the fuel pipes. Refer to Fuel Injection Fuel Rail Assembly Replacement in Engine Controls.
- Install the following retainers:
- Connect the vacuum hoses to the throttle body in their original locations.
- Connect the following electrical connectors:
- Install the right fender wheelhouse extension.
- Install the air cleaner outlet resonator. Refer to Air Cleaner Outlet Resonator Replacement in Engine Controls.
- Install the upper fan shroud. Refer to Fan Shroud Replacement in Engine Cooling.
- Connect the vacuum brake booster hose.
- Connect the battery negative cable. Refer to Battery Replacement in Engine Electrical.
Notice: Use the correct fastener in the correct location. Replacement fasteners must be the correct part number for that application. Fasteners requiring replacement or fasteners requiring the use of thread locking compound or sealant are identified in the service procedure. Do not use paints, lubricants, or corrosion inhibitors on fasteners or fastener joint surfaces unless specified. These coatings affect fastener torque and joint clamping force and may damage the fastener. Use the correct tightening sequence and specifications when installing fasteners in order to avoid damage to parts and systems.
| 2.1. | Slide the bracket over the bolt at the rear of the cylinder head. |
| 2.2. | Install the two bolts that secure the bracket to the valve rocker arm cover. |
Tighten
Tighten
Tighten the generator rear brace nuts and bolts to 25 N·m
(18 lb ft).
| • | Engine harness bracket |
| • | Transmission fluid level indicator tube, if equipped |
| • | Fuel system evaporator pipe |
| • | Idle air control (IAC) motor |
| • | Manifold absolute pressure (MAP) sensor |
| • | Throttle position (TP) sensor |
| • | Fuel injector harness connector. |
