Air Conditioning Compressor Replacement HP2
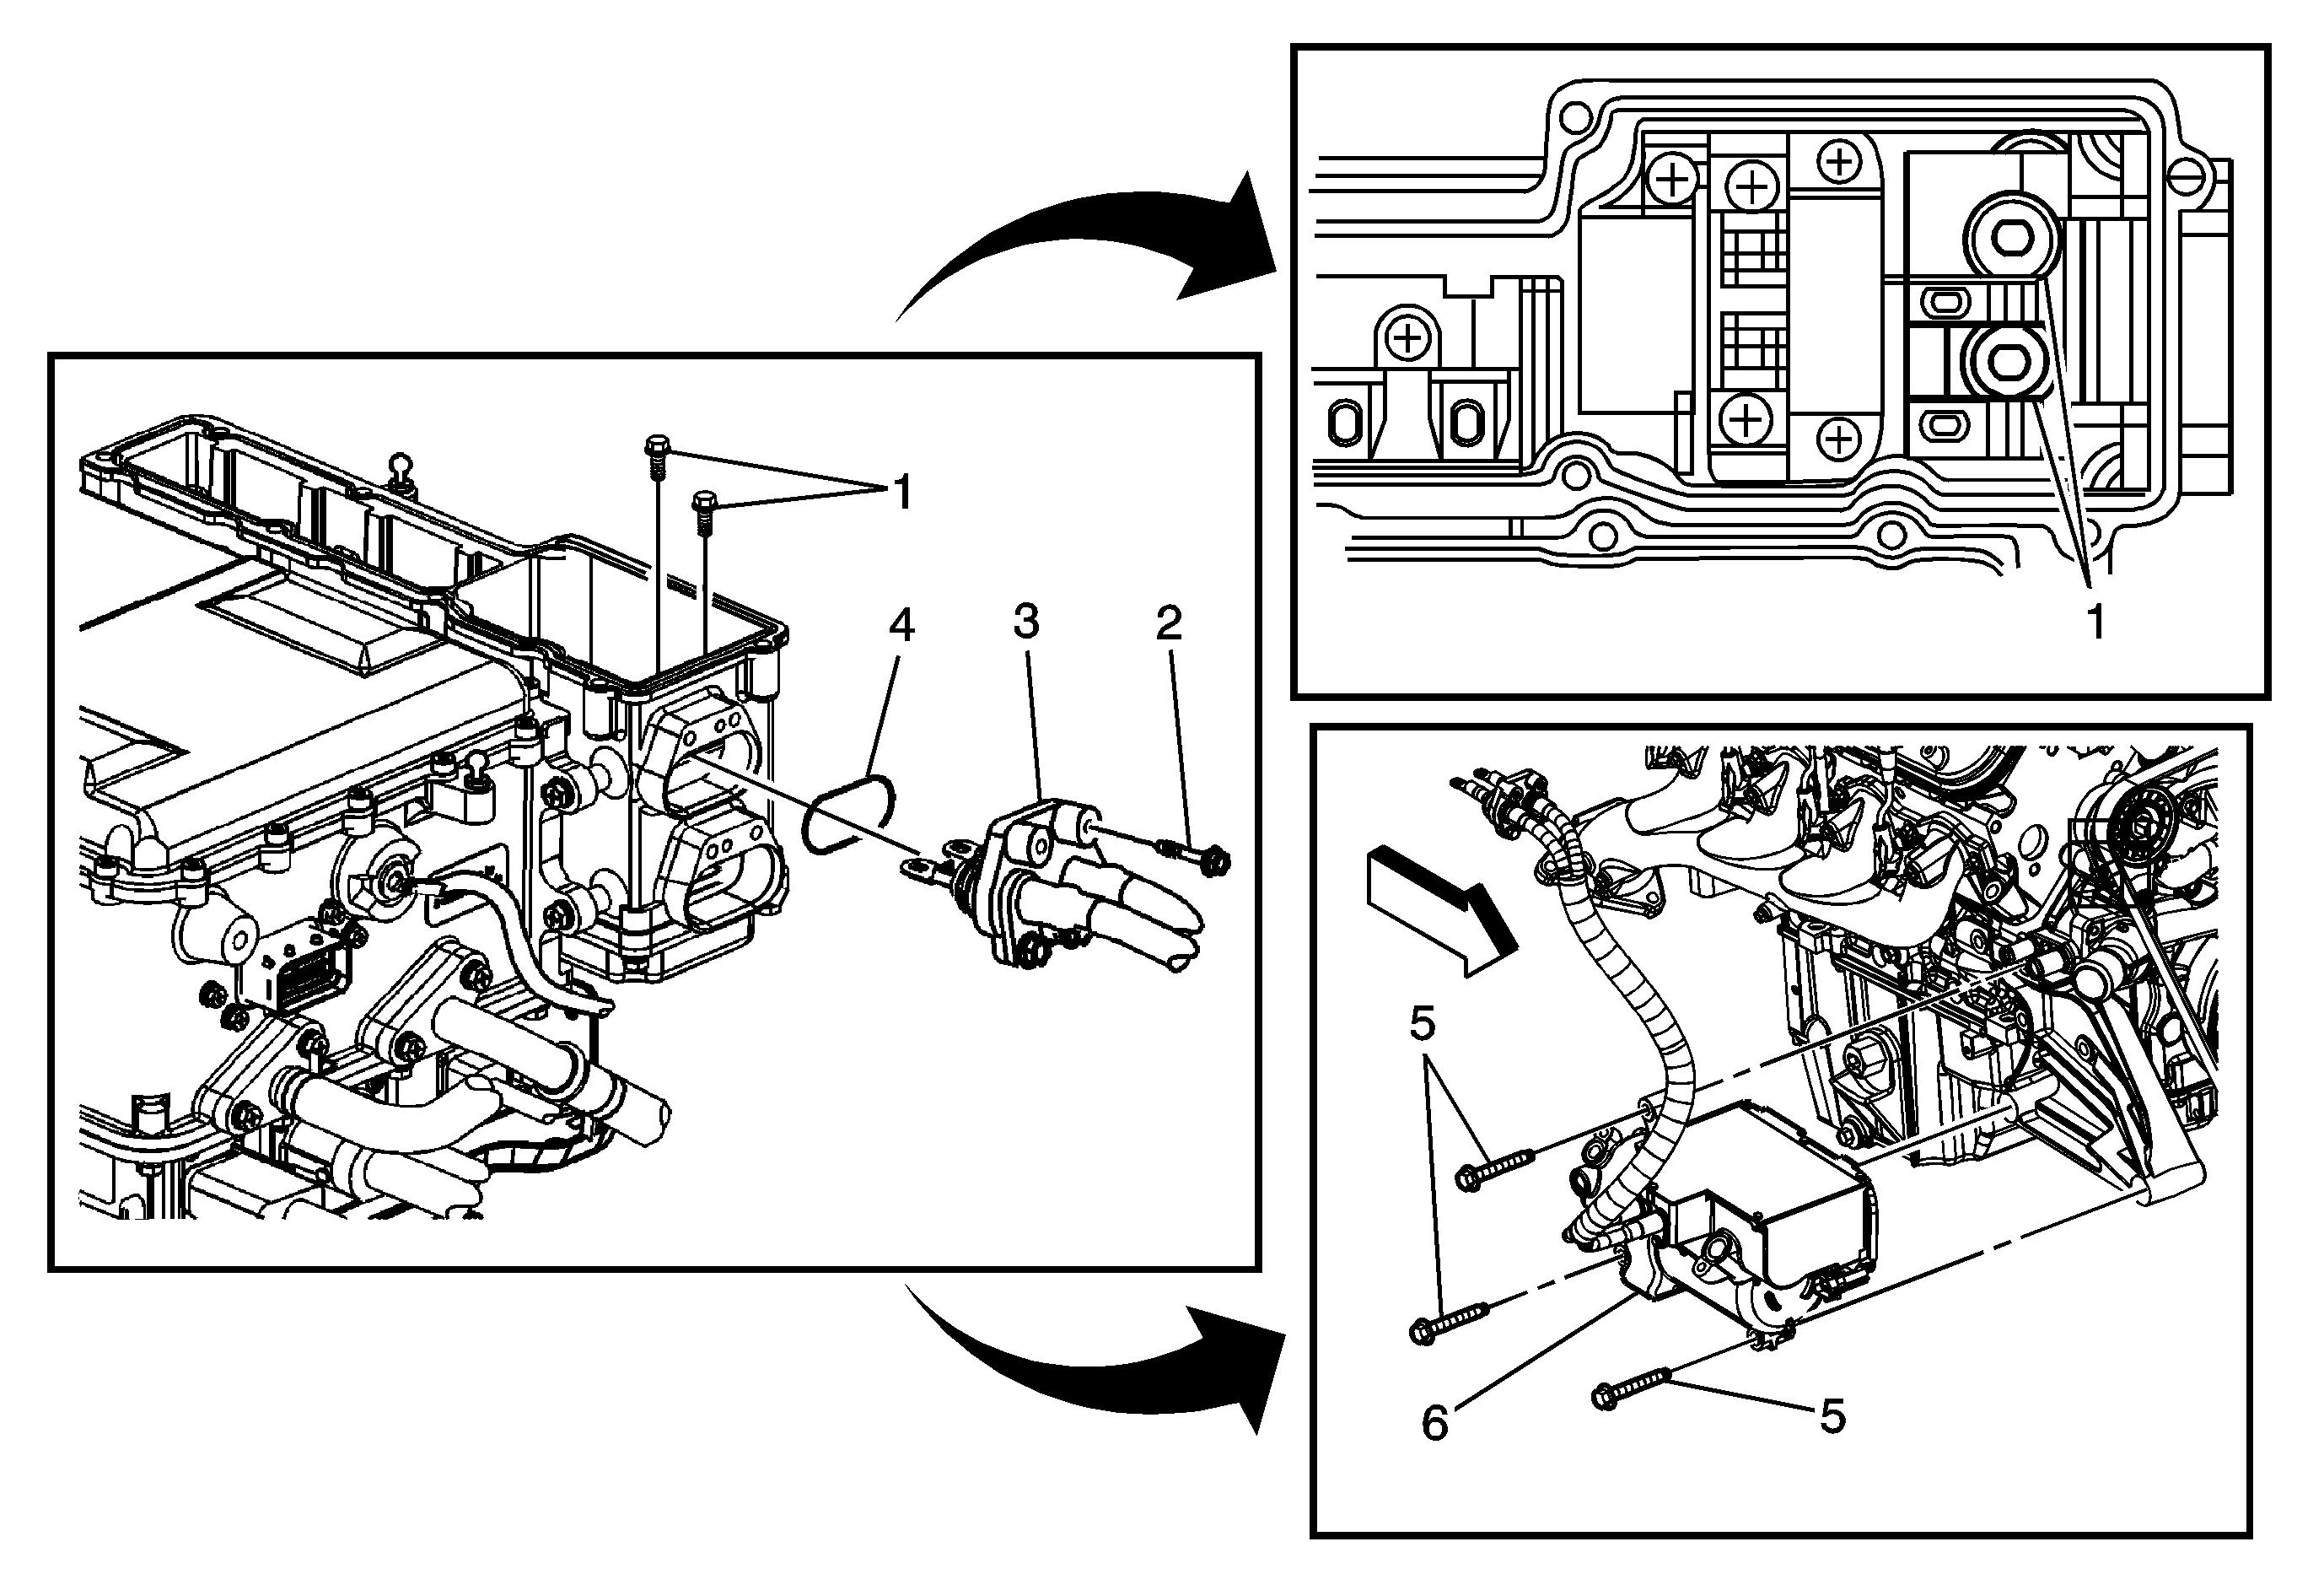
Callout | Component Name | ||||||
|---|---|---|---|---|---|---|---|
|
Danger: Always perform the High Voltage Disabling procedure prior to servicing any High Voltage component or connection. Personal Protection Equipment (PPE) and proper procedures must be followed. The High Voltage Disabling procedure will perform the following tasks:
Preliminary Procedures
| |||||||
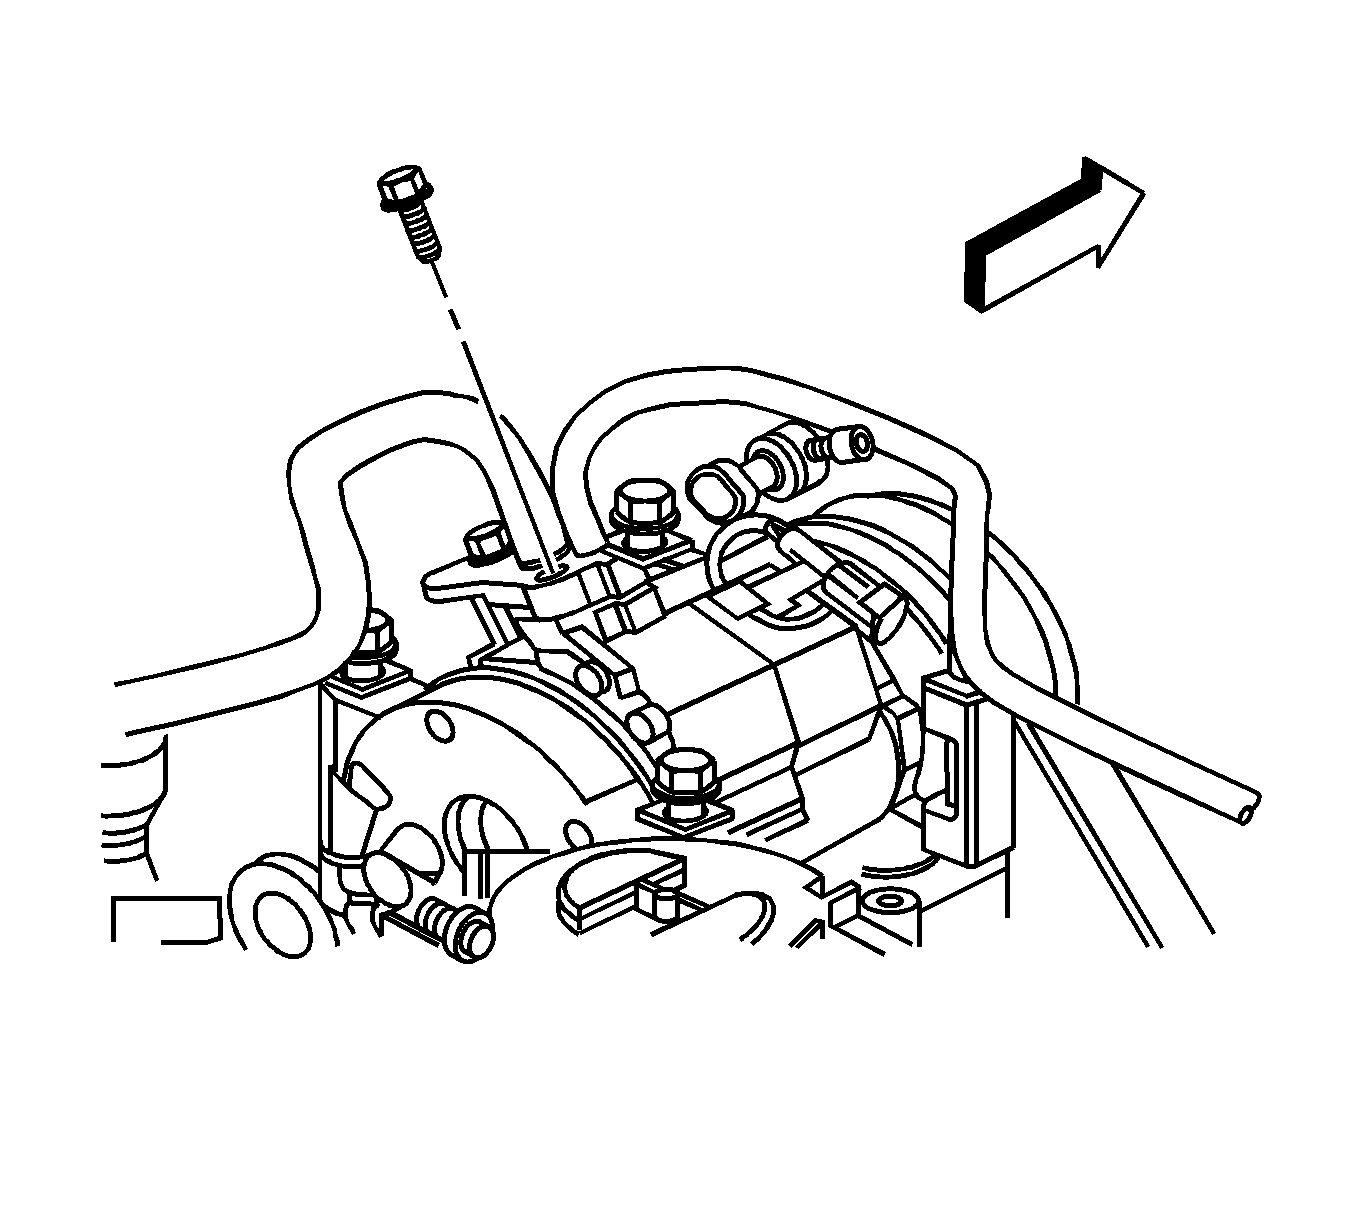
1 | A/C Compressor Cable Bolt (Qty: 2) Caution: High Voltage (HV) cables should never be removed from the mounting block. Removal of the individual HV cable from the mounting block may result in HV cable and/or component damage from improper:
Caution: Refer to Fastener Caution in the Preface section. Tighten | ||||||
2 | A/C Compressor Cable Mounting Bolt (Qty: 2) Tighten | ||||||
3 | A/C Compressor Cable | ||||||
4 | A/C Compressor Seal ProcedureRemove and discard the seal. | ||||||
5 | A/C Compressor Bolt (Qty: 3) Tighten | ||||||
6 | A/C Compressor Procedure
| ||||||
Air Conditioning Compressor Replacement LY2, LY5, LH6, L76, L92 and LMG
Special Tools
J 39400-A Halogen Leak Detector
Removal Procedure
- Recover the refrigerant. Refer to Refrigerant Recovery and Recharging.
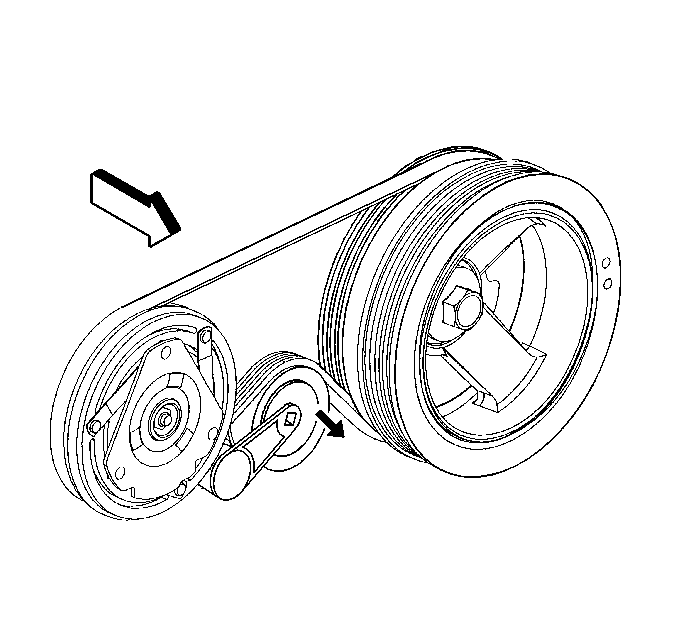
- Install a ratchet into the air conditioning (A/C) belt tensioner adapter opening.
- Remove the air cleaner resonator outlet duct. Refer to Air Cleaner Resonator Outlet Duct Replacement.
- Rotate the A/C belt tensioner clockwise in order to relieve the tension on the belt.
- Remove the A/C belt from the A/C compressor.
- Slowly release the tension on the A/C belt tensioner.
- Remove the discharge hose bolt from the A/C compressor.
- Remove the discharge hose from the A/C compressor.
- Remove the suction hose bolt from the A/C compressor.
- Remove the suction hose from the A/C compressor.
- Discard the sealing washers. Cap all of the openings.
- Disconnect the electrical connections.
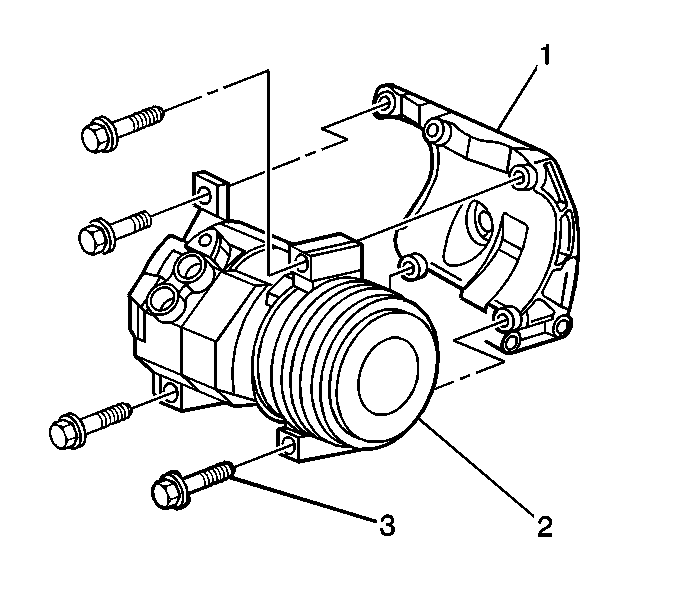
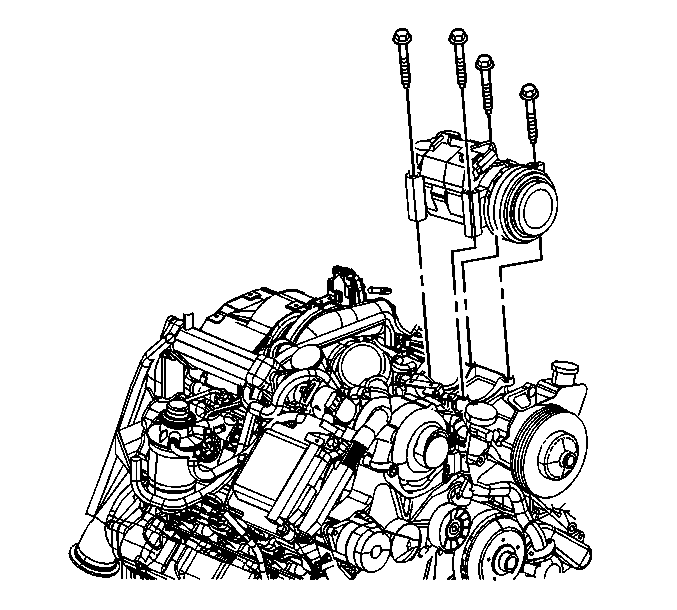
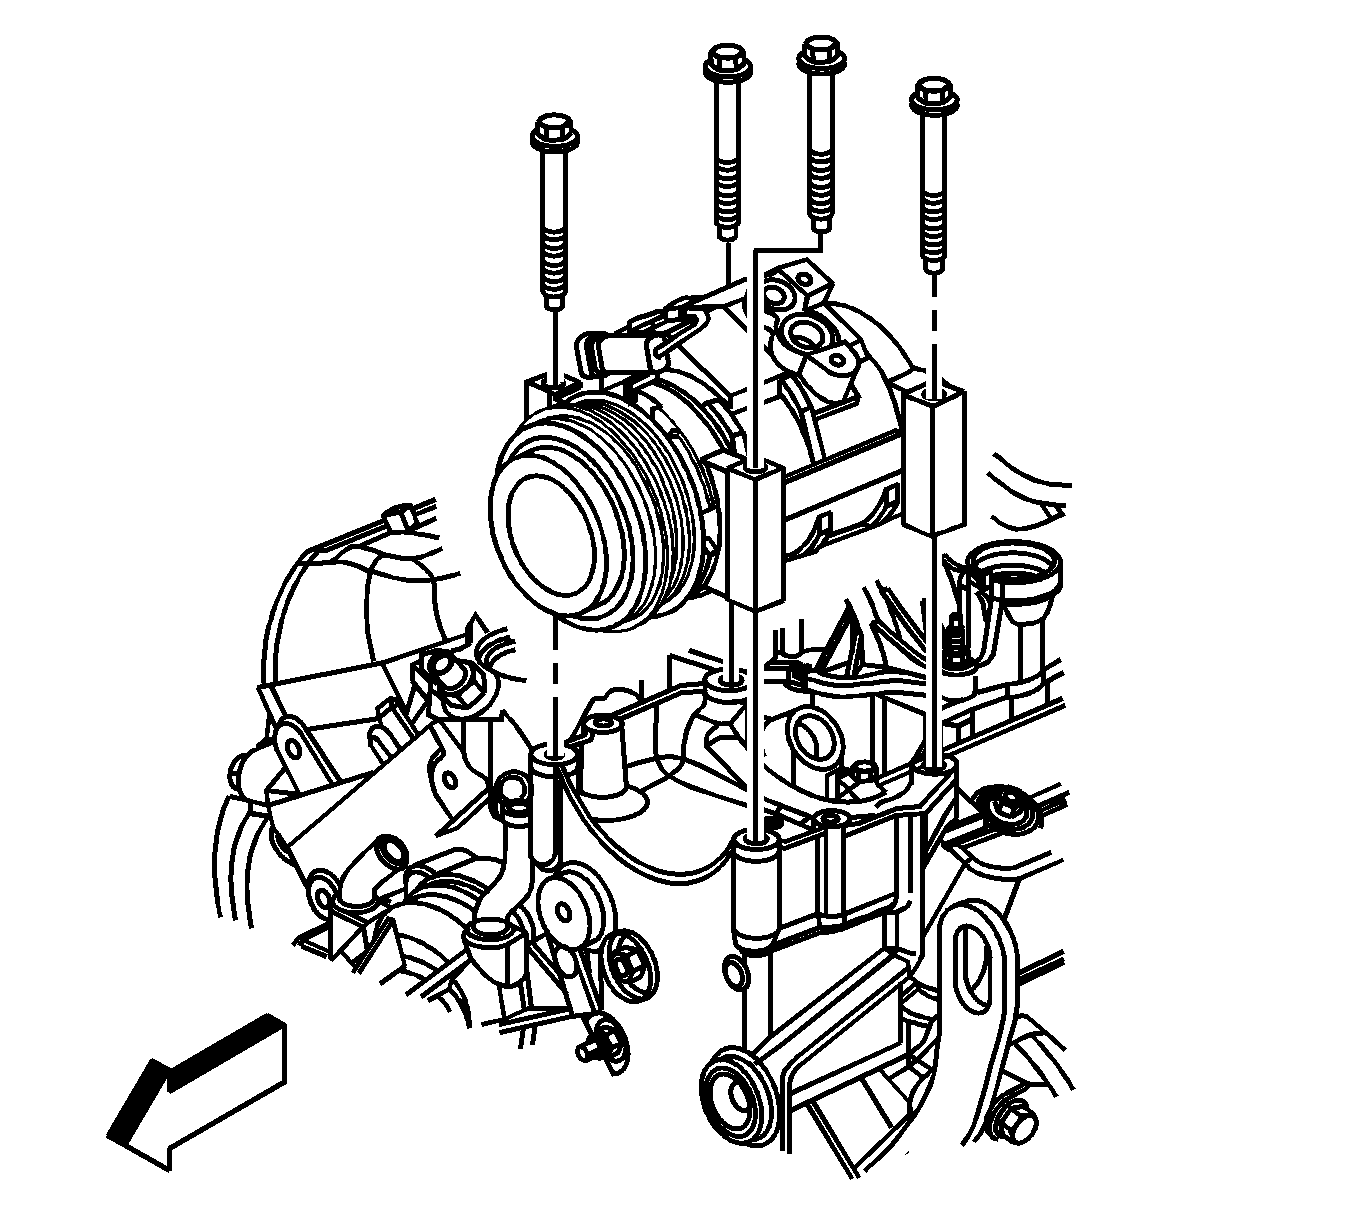
- Remove the A/C compressor mounting bolts. The lower right bolt (3) will stay with the compressor due to a lack of clearance.
- Remove the A/C compressor (2) from the bracket (1).
- If replacing the A/C compressor. Refer to Air Conditioning Compressor Oil Balancing.
Installation Procedure
- Install the A/C compressor (2) to the bracket (1) through the fender well. Insert the mounting bolt (3) into the lower right mounting boss before installing the A/C compressor.
- Install the A/C compressor to the bracket. Insert the mounting bolt into the lower right mount before installing the A/C compressor.
- Install the A/C compressor mounting bolts and tighten to 50 N·m (37 lb ft).
- Connect the electrical connector to the A/C compressor.
- Install the A/C discharge hose to the compressor using new sealing washers. Refer to Sealing Washer Replacement.
- Install the A/C discharge hose bolt to the A/C compressor and tighten to 16 N·m (12 lb ft).
- Install the A/C suction hose to the compressor using new sealing washers. Refer to Sealing Washer Replacement.
- Install the A/C suction hose bolt to the A/C compressor and tighten to 16 N·m (12 lb ft).
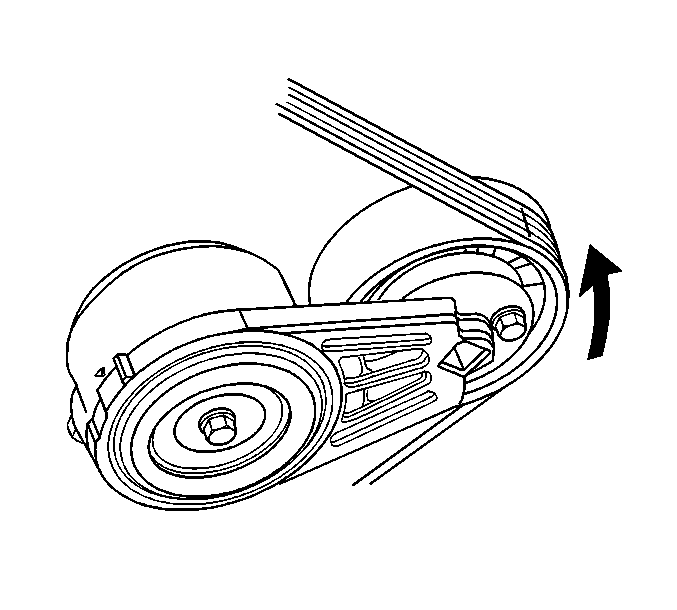
- Install the A/C drive belt. Refer to Air Conditioning Compressor Belt Replacement.
- Evacuate and recharge the A/C system. Refer to Refrigerant Recovery and Recharging.
- Install the air cleaner resonator outlet duct. Refer to Air Cleaner Resonator Outlet Duct Replacement.
- Leak test the fittings of the component using the J 39400-A .
Caution: Refer to Fastener Caution in the Preface section.
Air Conditioning Compressor Replacement LLY/LMM
Special Tools
J 39400-A Halogen Leak Detector
Removal Procedure
- Recover the refrigerant. Refer to Refrigerant Recovery and Recharging.
- Install a ratchet into the belt tensioner adapter opening.
- Rotate the belt tensioner counterclockwise in order to relieve the tension on the belt.
- Remove the belt from the A/C compressor.
- Slowly release the tension on the belt tensioner.
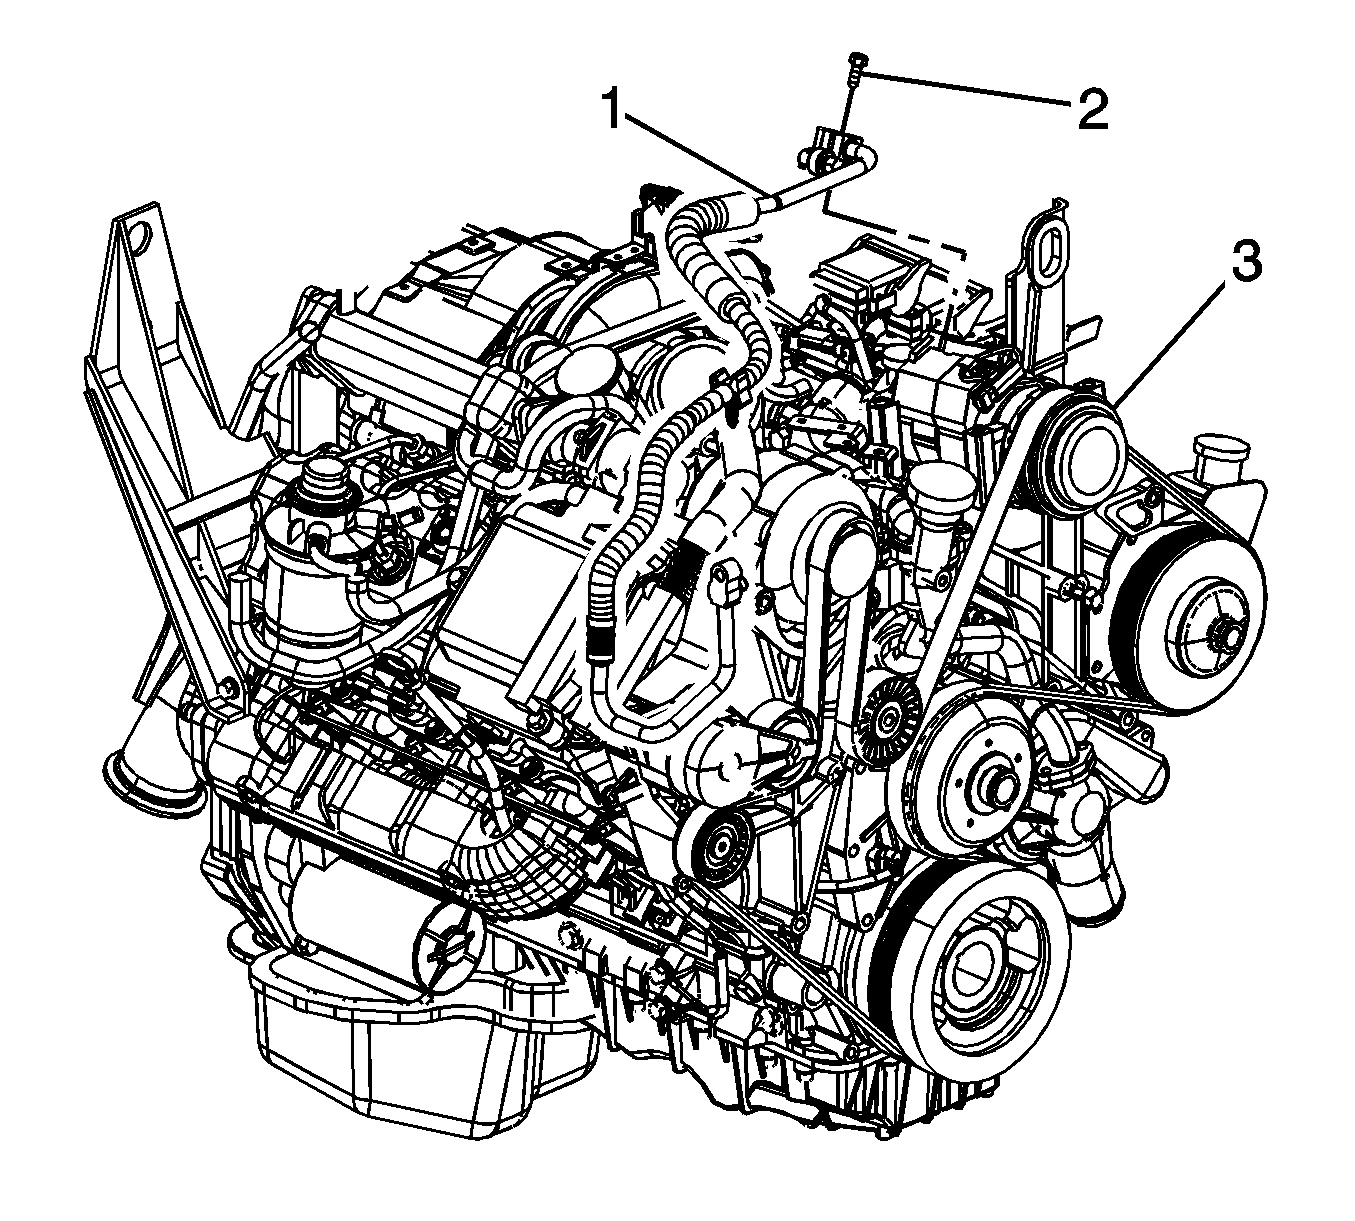
- Remove the discharge hose bolt (2) from the A/C compressor (3).
- Remove the discharge hose (1) from the A/C compressor (3).
- Remove the suction hose bolt (2) from the A/C compressor (3).
- Remove the suction hose (1) from the A/C compressor (3).
- Discard the sealing washers. Cap all of the openings.
- Disconnect the electrical connections.
- Remove the A/C compressor mounting bolts.
- If replacing the A/C compressor. Refer to Air Conditioning Compressor Oil Balancing.
Installation Procedure
- Remove the caps or tape from the hose and line ends.
- Install the A/C compressor.
- Install the A/C compressor mounting bolts.
- Connect the electrical connection.
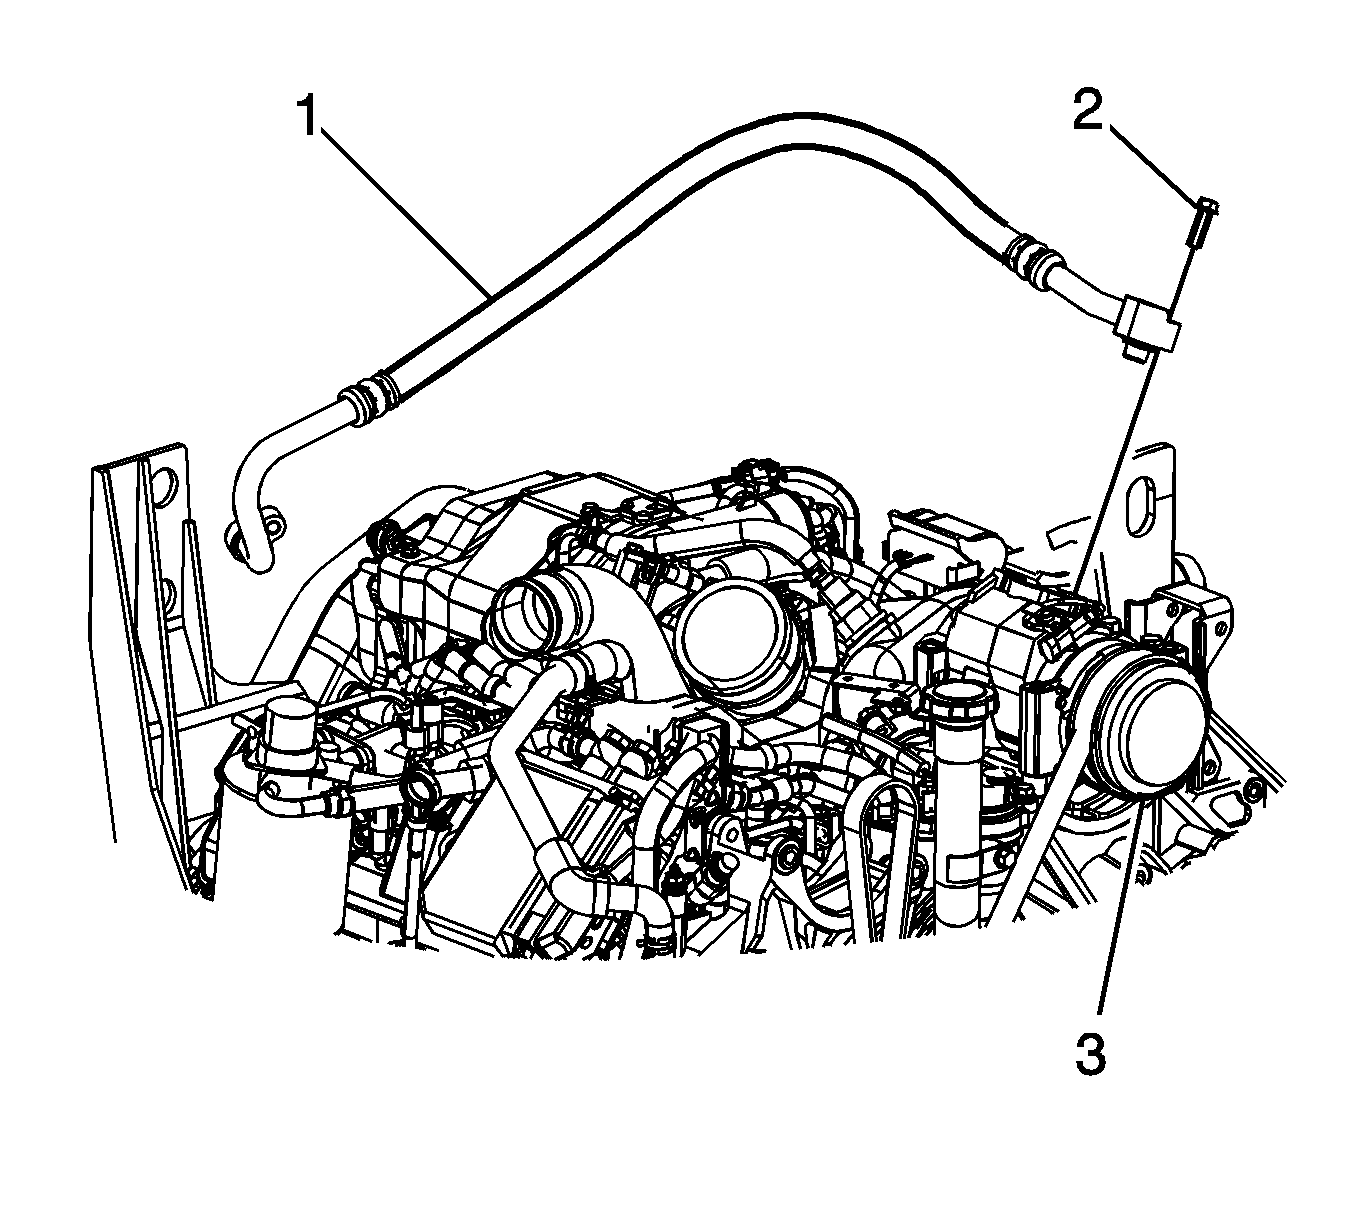
- Install the A/C discharge hose (1) to the compressor (3) using new sealing washers.
- Install the A/C discharge hose bolt (2) to the A/C compressor (3).
- Install the A/C suction hose (1) to the compressor (3) using new sealing washers.
- Install the A/C suction hose bolt (2) to the A/C compressor (3).
- Install the drive belt. Refer to Drive Belt Replacement.
- Evacuate and recharge the A/C system. Refer to Refrigerant Recovery and Recharging.
- Leak test the fittings of the component using the J 39400-A .
Caution: Refer to Fastener Caution in the Preface section.
Tighten
Tighten the bolts to 50 N·m (37 lb ft).
Tighten
Tighten the bolt to 16 N·m (12 lb ft).
Tighten
Tighten the bolt to 16 N·m (12 lb ft).
Air Conditioning Compressor Replacement LU3
Special Tools
J 39400-A Halogen Leak Detector
Removal Procedure
- Recover the refrigerant. Refer to Refrigerant Recovery and Recharging.
- Install a ratchet into the belt tensioner adapter opening.
- Rotate the belt tensioner counterclockwise in order to relieve the tension on the belt.
- Remove the belt from the A/C compressor.
- Slowly release the tension on the belt tensioner.
- Remove the discharge and suction hose bolt from the A/C compressor.
- Remove the discharge and suction hose from the A/C compressor.
- Discard the sealing washers. Cap all of the openings.
- Disconnect the electrical connections.
- Remove the A/C compressor mounting bolts.
- If replacing the A/C compressor. Refer to Air Conditioning Compressor Oil Balancing.
Installation Procedure
- Remove the caps or tape from the hose and line ends.
- Install the A/C compressor.
- Install the A/C compressor mounting bolts.
- Connect the electrical connection.
- Install the A/C discharge and suction hose to the compressor using new sealing washers.
- Install the A/C discharge and suction hose bolt to the A/C compressor.
- Install the drive belt. Refer to Drive Belt Replacement.
- Evacuate and recharge the A/C system. Refer to Refrigerant Recovery and Recharging.
- Leak test the fittings of the component using the J 39400-A .
Caution: Refer to Fastener Caution in the Preface section.
Tighten
Tighten the bolts to 50 N·m (37 lb ft).
Tighten
Tighten the bolt to 16 N·m (12 lb ft).
