For 1990-2009 cars only
Discharge Hose Replacement LY2, LMF, L76 and L92
Special Tools
J 39400-A Halogen Leak Detector
Removal Procedure
- Recover the refrigerant. Refer to Refrigerant Recovery and Recharging.
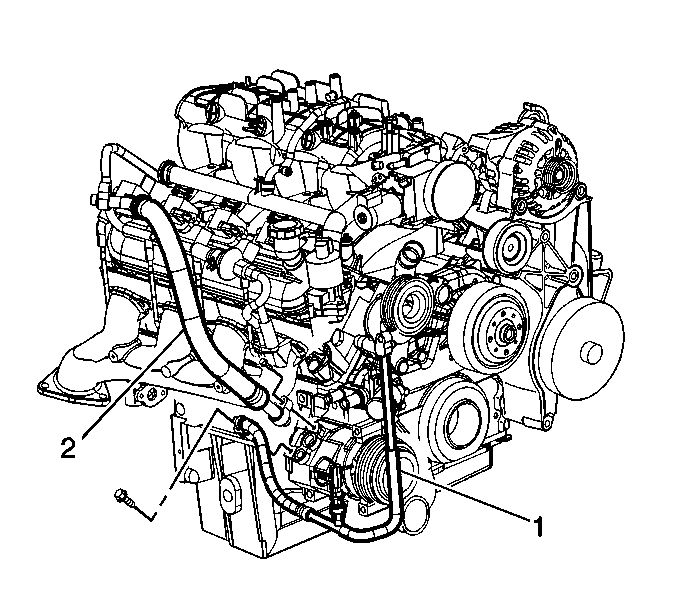
- Remove the discharge hose mounting bolt (2) from the A/C compressor.
- Remove the discharge hose (1) from the A/C compressor.
- Remove the upper radiator baffle. Refer to Radiator Air Upper Baffle and Deflector Replacement.
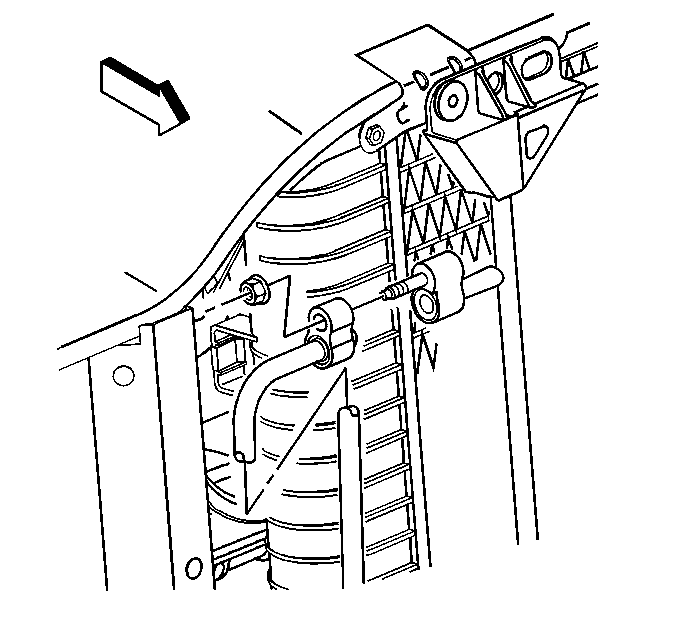
- Remove the discharge hose nut from the condenser.
- Remove the discharge hose from the condenser.
- Disconnect the electrical connector from the A/C recirculation switch.
- Remove the discharge hose from the vehicle.
- Discard all of the used sealing washers. Cap the system openings.
Installation Procedure
- Install the discharge hose (1) to the vehicle.
- Install the discharge hose to the condenser using new sealing washers. Refer to Sealing Washer Replacement.
- Install the discharge hose nut to the condenser and tighten to 16 N·m (12 lb ft).
- Install the upper air baffle. Refer to Radiator Air Upper Baffle and Deflector Replacement.
- Connect the electrical connector to the A/C recirculation switch.
- Install the discharge hose (1) to the A/C compressor using new sealing washers. Refer to Sealing Washer Replacement.
- Install the discharge hose mounting bolt and tighten to 16 N·m (12 lb ft).
- Evacuate and recharge the A/C system. Refer to Refrigerant Recovery and Recharging.
- Leak test the fittings of the component using the J 39400-A .
Caution: Refer to Fastener Caution in the Preface section.
Discharge Hose Replacement LMM
Special Tools
J 39400-A Halogen Leak Detector
Removal Procedure
- Recover the refrigerant. Refer to Refrigerant Recovery and Recharging.
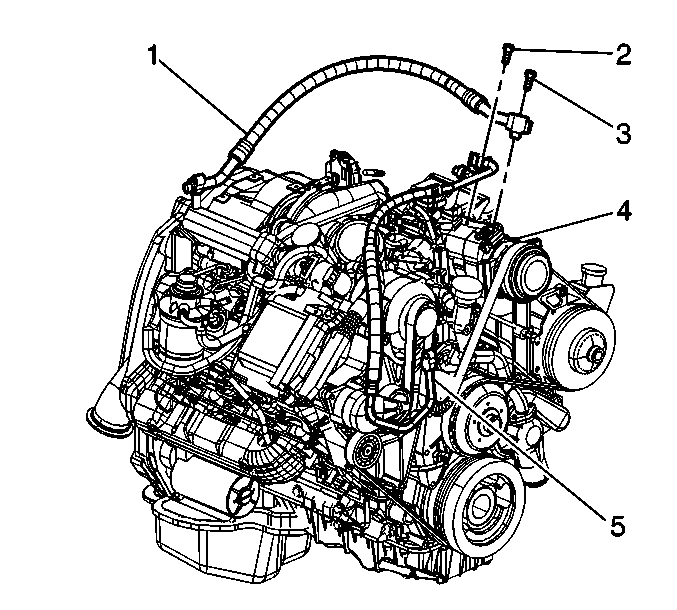
- Remove the discharge hose mounting bolt (2) from the A/C compressor.
- Remove the discharge hose (5) from the A/C compressor.
- Remove the upper radiator air baffle. Refer to Radiator Air Upper Baffle and Deflector Replacement.
- Remove the discharge hose nut from the condenser.
- Remove the discharge hose from the condenser.
- Disconnect the A/C recirculation switch from the discharge hose.
- Remove the discharge hose from the vehicle.
- Discard all of the used sealing washers. Cap the system openings.
Discard the bolt.
Discard the nut.
Installation Procedure
- Install the discharge hose to the vehicle.
- Connect the A/C recirculation switch to the discharge hose.
- Install the discharge hose to the condenser using new sealing washers.
- Install the NEW discharge hose nut to the condenser.
- Install the upper radiator air baffle. Refer to Radiator Air Upper Baffle and Deflector Replacement.
- Install the discharge hose (5) to the compressor using new sealing washers.
- Install the NEW discharge hose mounting bolt (2) to the A/C compressor.
- Evacuate and recharge the A/C system. Refer to Refrigerant Recovery and Recharging.
- Leak test the fittings of the component using the J 39400-A .
Caution: Refer to Fastener Caution in the Preface section.
Tighten
Tighten the nut to 16 N·m (12 lb ft).
Tighten
Tighten the bolt to 16 N·m (12 lb ft).
