Removal Procedure
- Remove the oil pan. Refer to Oil Pan Replacement .
- Remove the transmission assembly. Refer to Transmission Replacement in Automatic Transmission - 4L60-E.
- Remove the engine flywheel. Refer to Engine Flywheel Replacement .
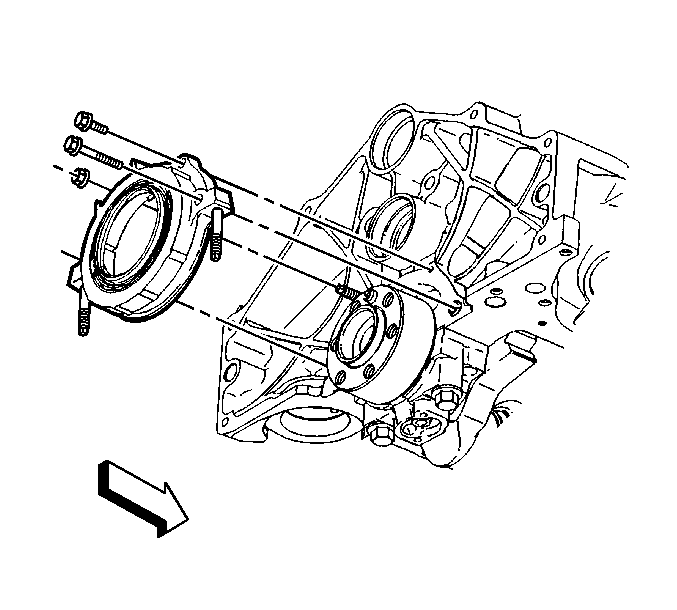
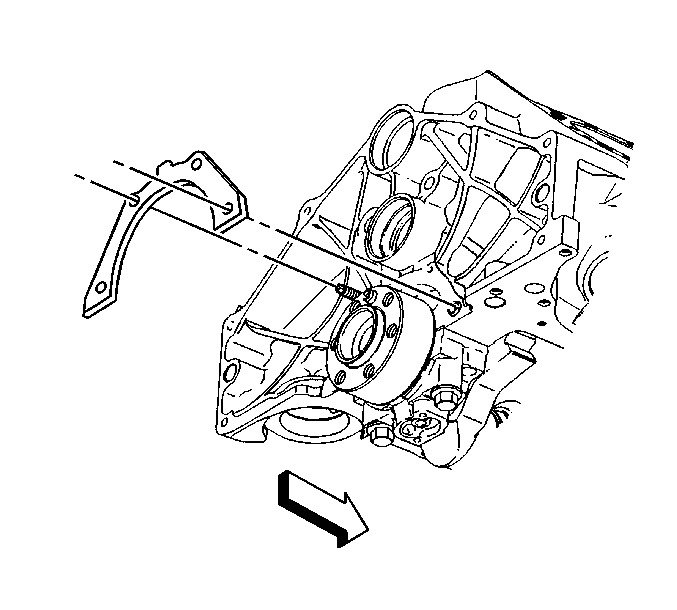
- Remove the bolts and the nut holding the crankshaft rear oil seal housing to the engine.
- Remove the crankshaft rear oil seal housing.
- Remove and discard the crankshaft rear oil seal housing gasket.
- Clean all the sealing surfaces.
- Inspect the crankshaft rear oil seal housing for warping, cracks, wear, or damage.
Important: Do not remove the crankshaft rear oil seal housing if only replacing the crankshaft rear oil seal.
Installation Procedure
- Install a NEW crankshaft rear oil seal housing gasket.
- Install the NEW crankshaft rear oil seal housing with the oil seal to the engine block using the following procedure.
- Install the three bolts and the one nut to the crankshaft rear oil seal housing.
- Install the engine flywheel. Refer to Engine Flywheel Replacement .
- Install the transmission assembly. Refer to Transmission Replacement in Automatic Transmission - 4L60-E.
- Install the oil pan. Refer to Oil Pan Replacement .
Important: When installing a new crankshaft rear oil seal housing the seal will come with the housing. Use the following procedure. Refer to Crankshaft Rear Oil Seal Replacement if reusing the housing.
Important: Do not oil or grease the seal lip or the crankshaft seal area.
| 2.1. | Leave the sleeve in the crankshaft rear oil seal and use the sleeve as a guide to ease the seal lip over the end of the crankshaft. |
| 2.2. | Push the crankshaft rear oil seal housing with the seal, fully onto the crankshaft until the crankshaft rear oil seal housing is against the crankshaft rear oil seal gasket and the engine. |
Notice: Use the correct fastener in the correct location. Replacement fasteners must be the correct part number for that application. Fasteners requiring replacement or fasteners requiring the use of thread locking compound or sealant are identified in the service procedure. Do not use paints, lubricants, or corrosion inhibitors on fasteners or fastener joint surfaces unless specified. These coatings affect fastener torque and joint clamping force and may damage the fastener. Use the correct tightening sequence and specifications when installing fasteners in order to avoid damage to parts and systems.
Tighten
Tighten the crankshaft rear oil seal housing bolts and nut to 12 N·m
(106 lb in).
