Removal Procedure
Caution: Refer to Brake Dust Caution in the Preface section.
Caution: Refer to ABS Component Handling Caution in the Preface section.
Important: The wheel hub and speed sensor are serviced as an assembly. The are not service as individual items.
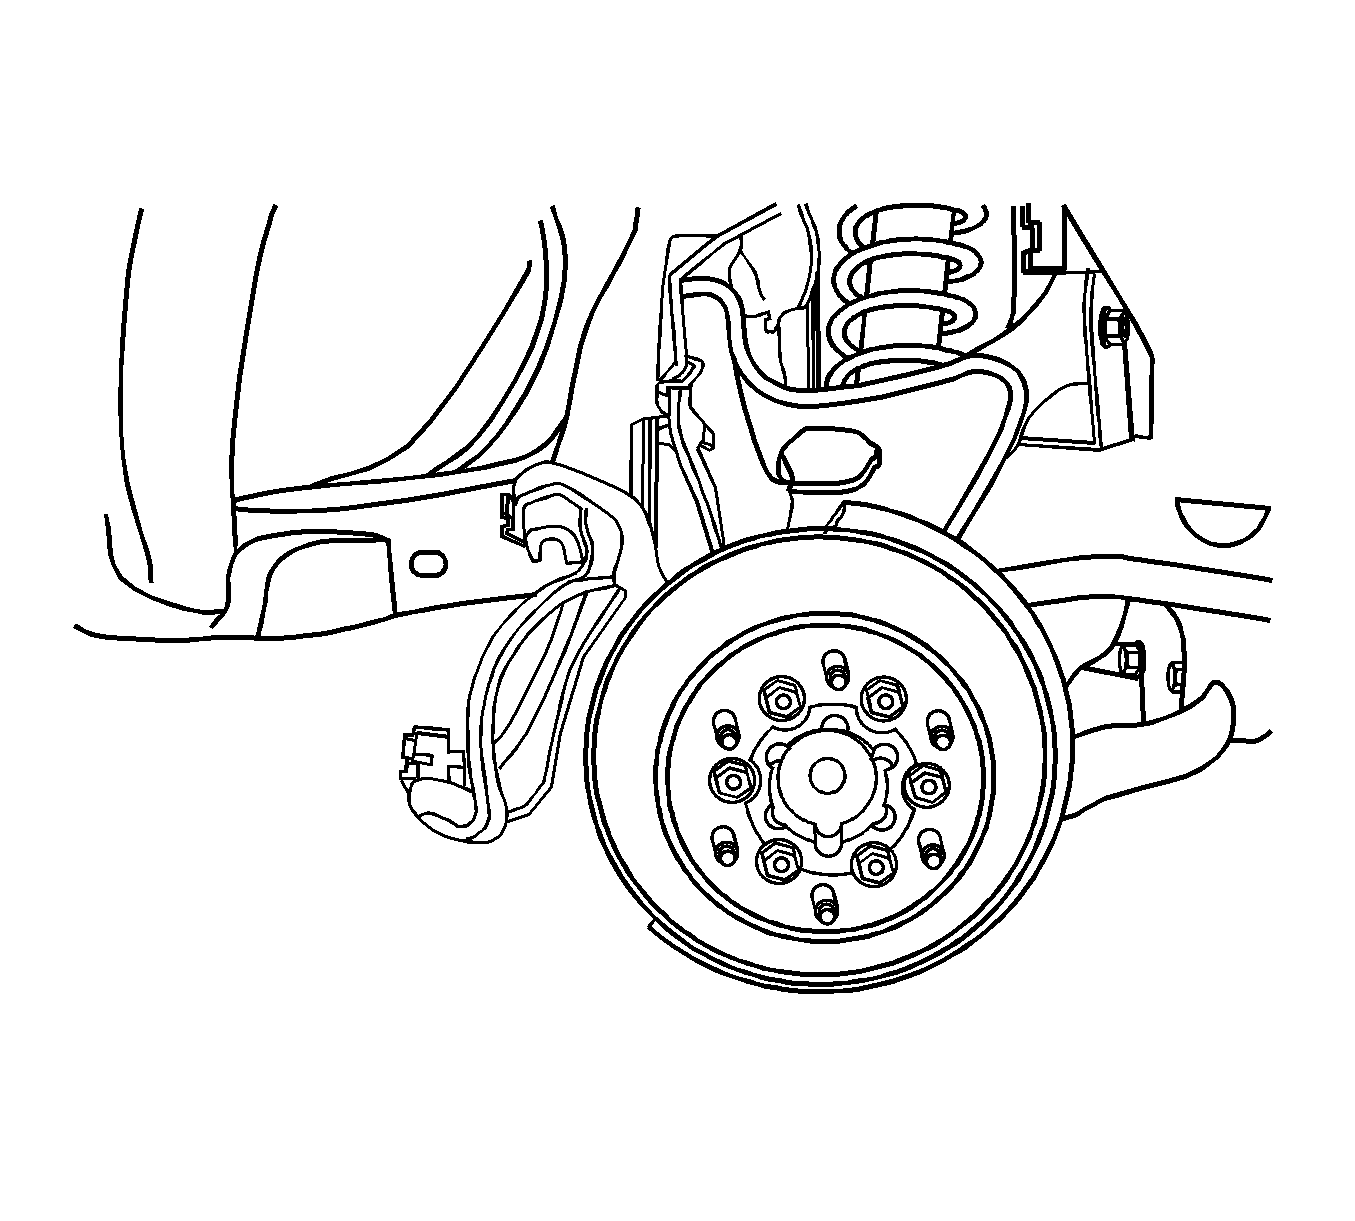
- Raise the vehicle. Refer to Lifting and Jacking the Vehicle .
- Remove the front brake caliper. Refer to Brake Caliper Replacement .
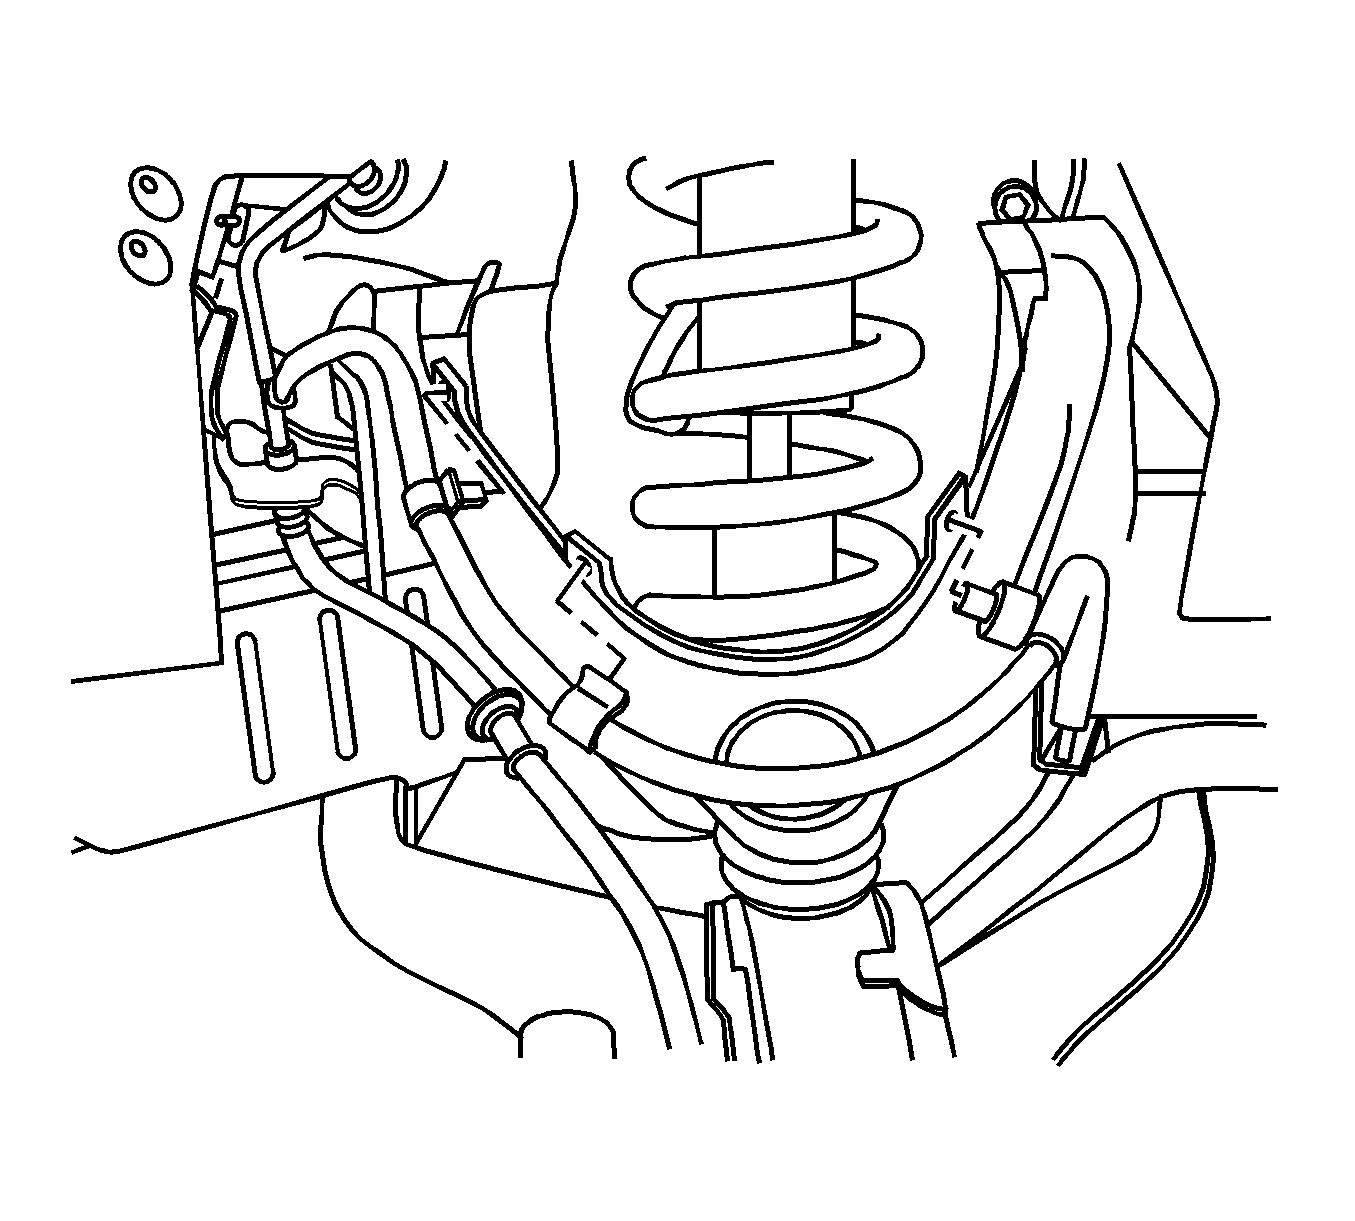
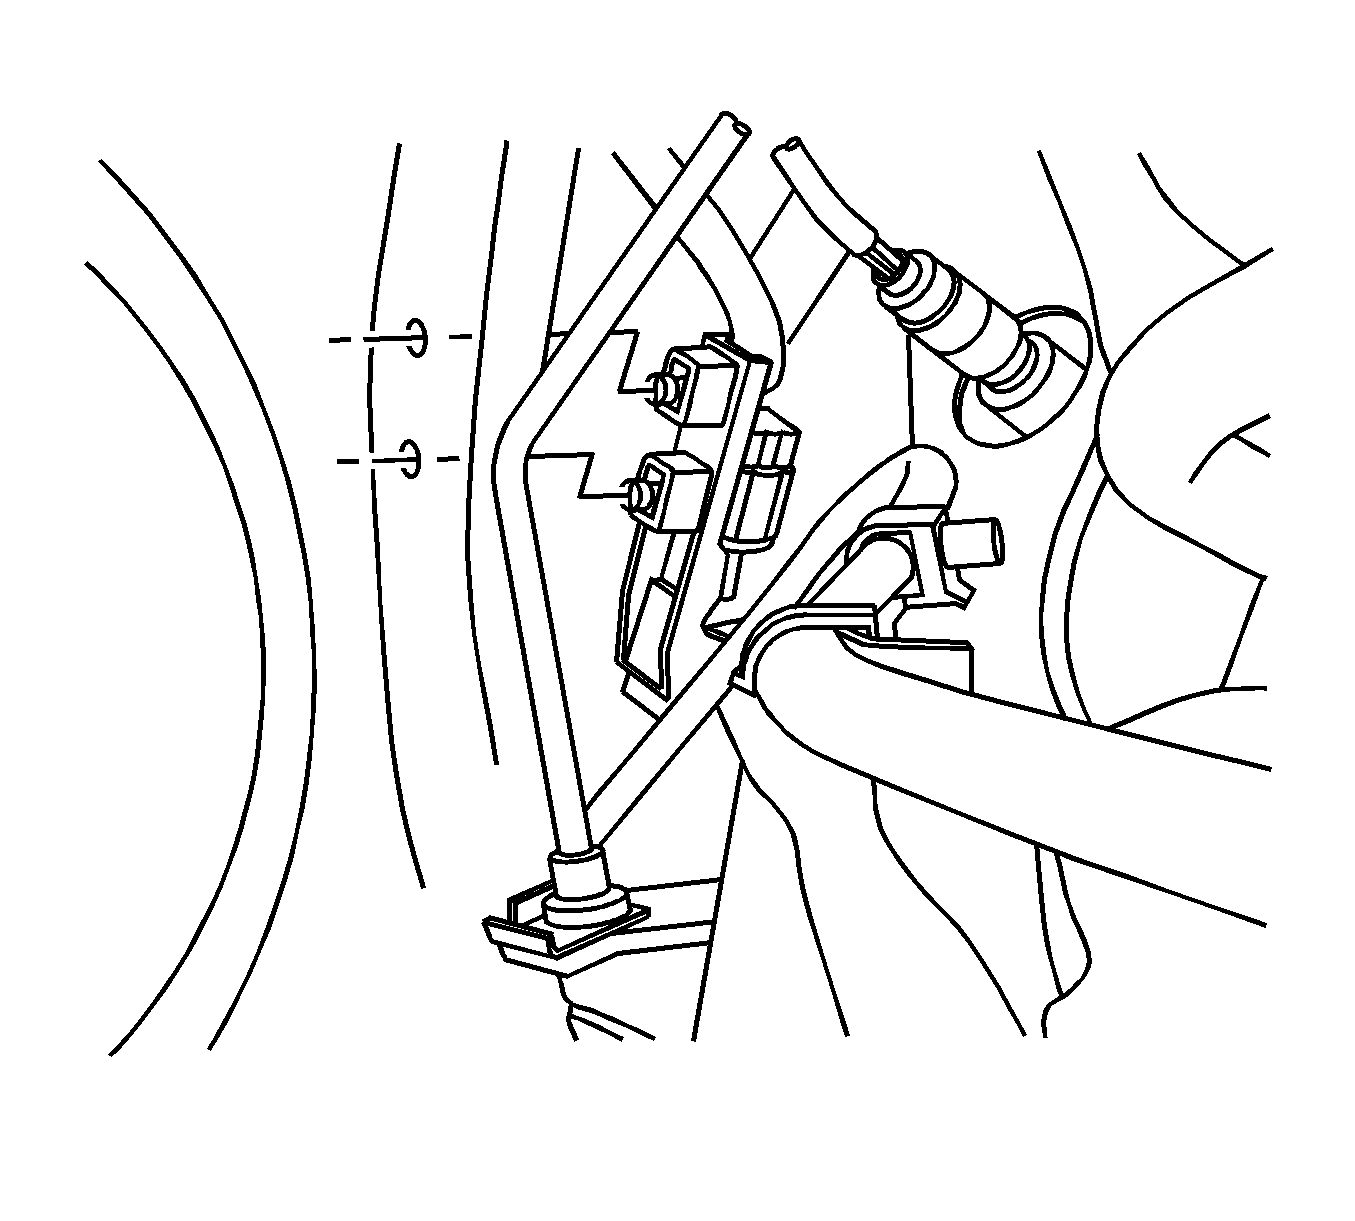
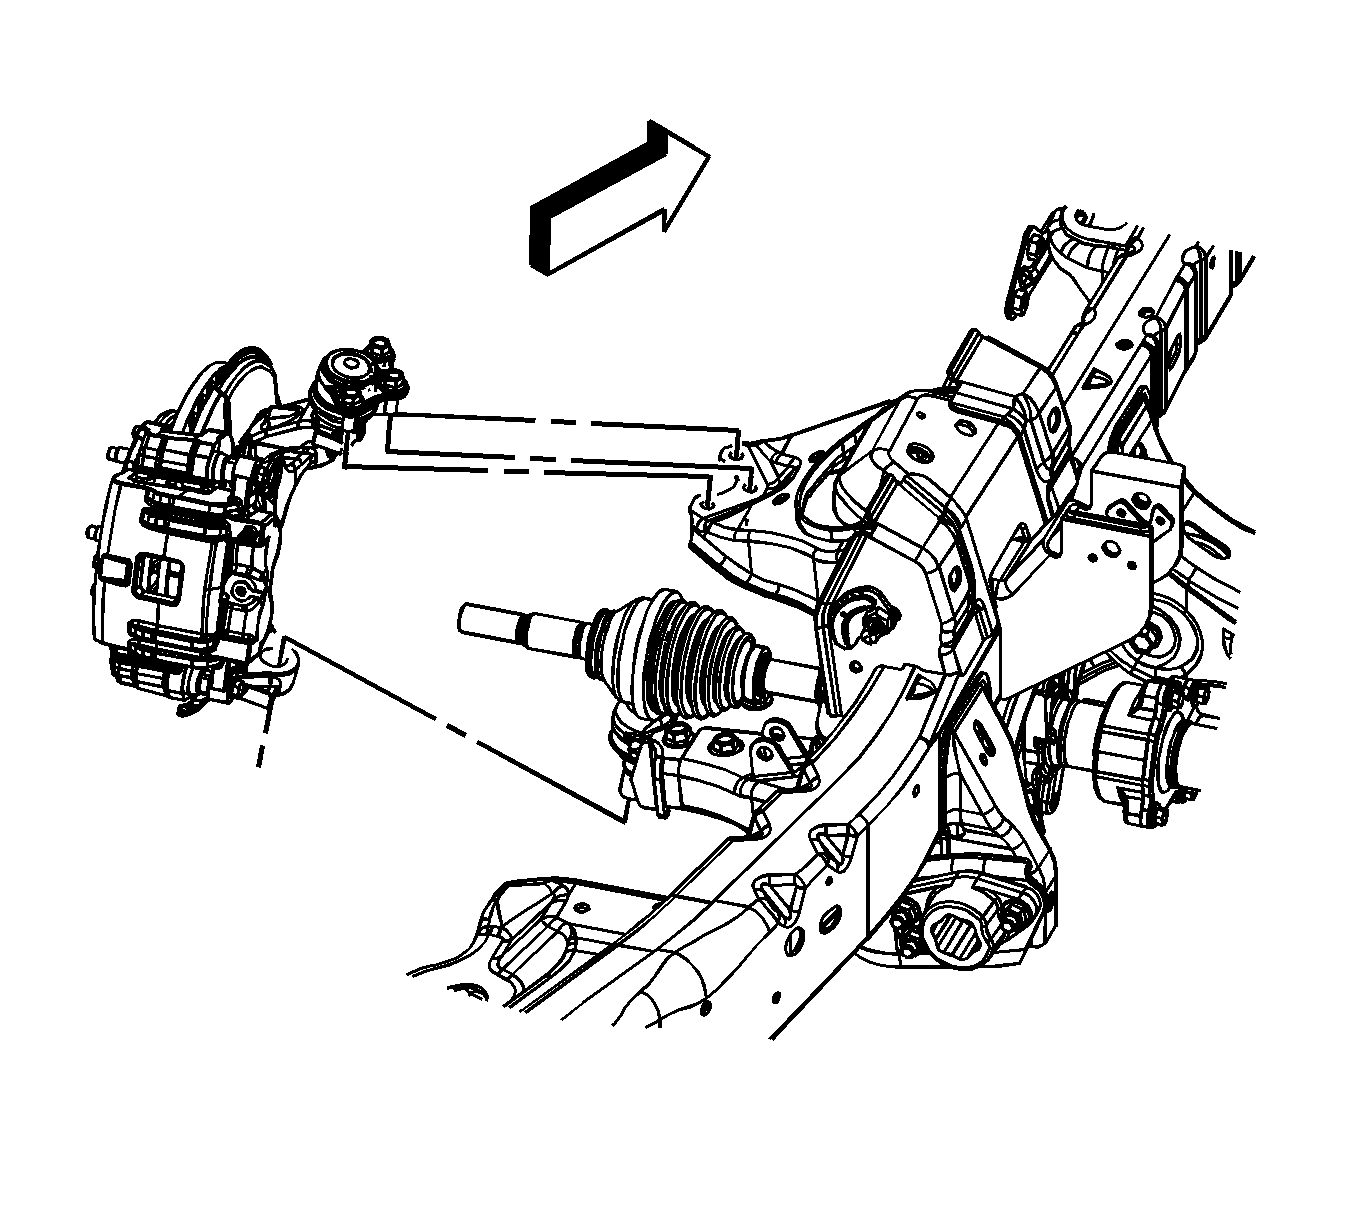
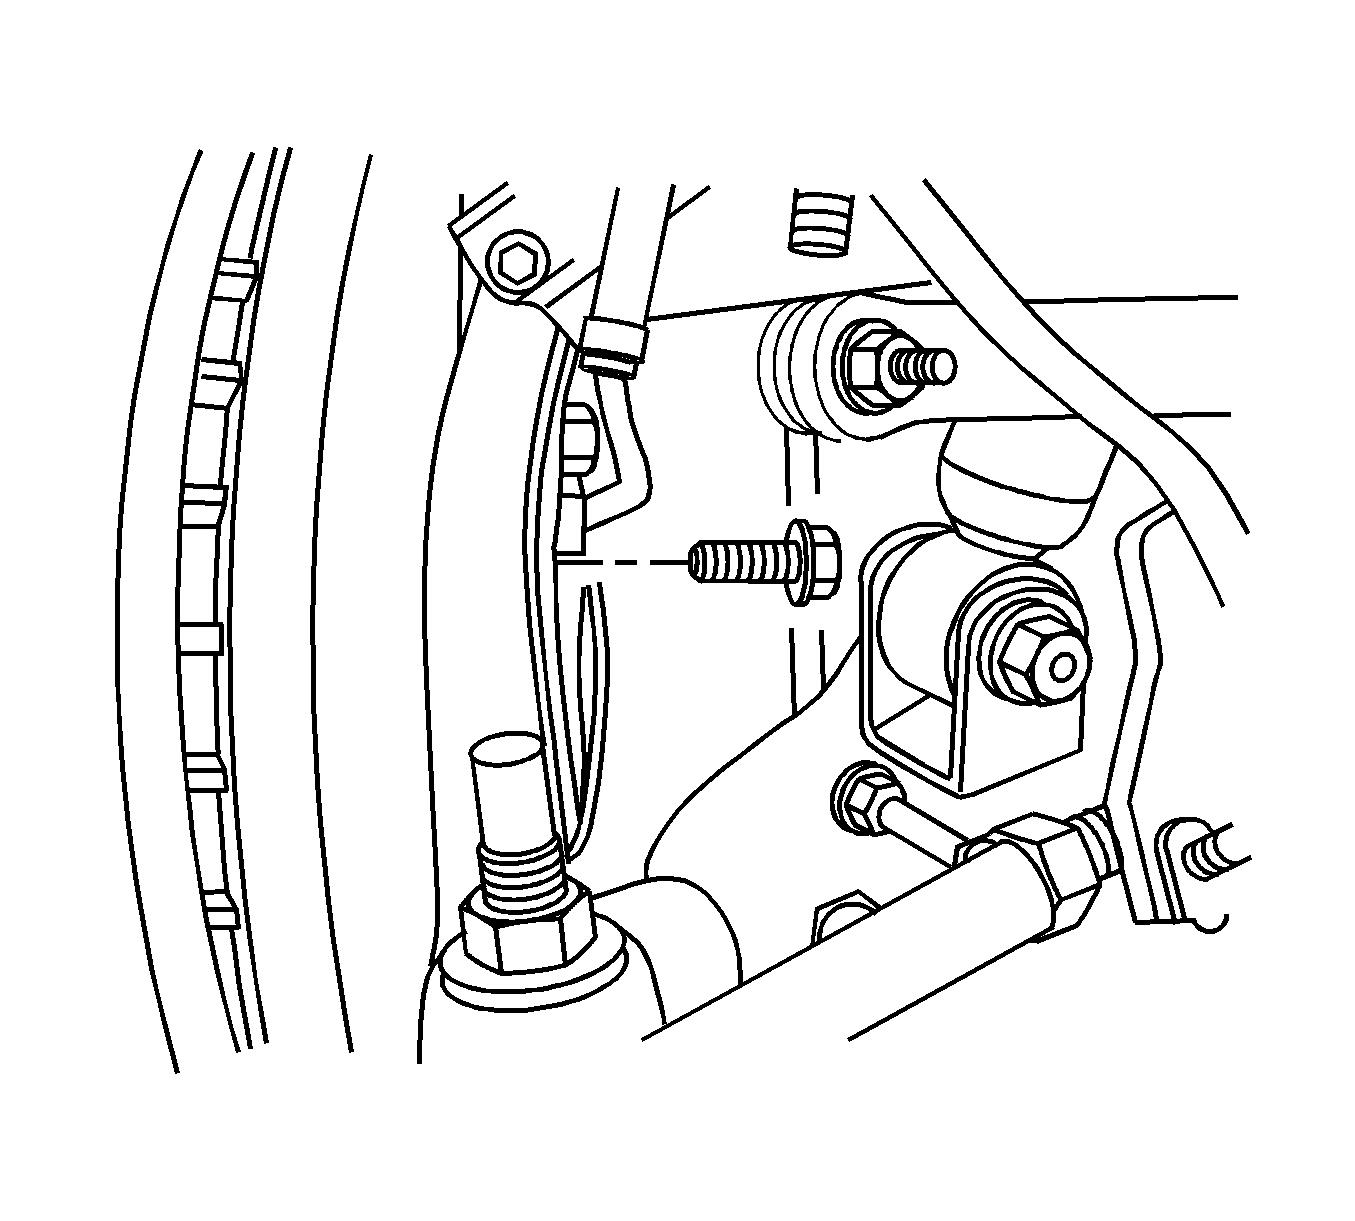
- Remove the antilock brake system (ABS) speed sensor wiring harness from the upper control arm.
- Remove the front retaining bolt for the speed sensor bracket at the upper control arm.
- Remove the speed senor bracket from the upper control arm.
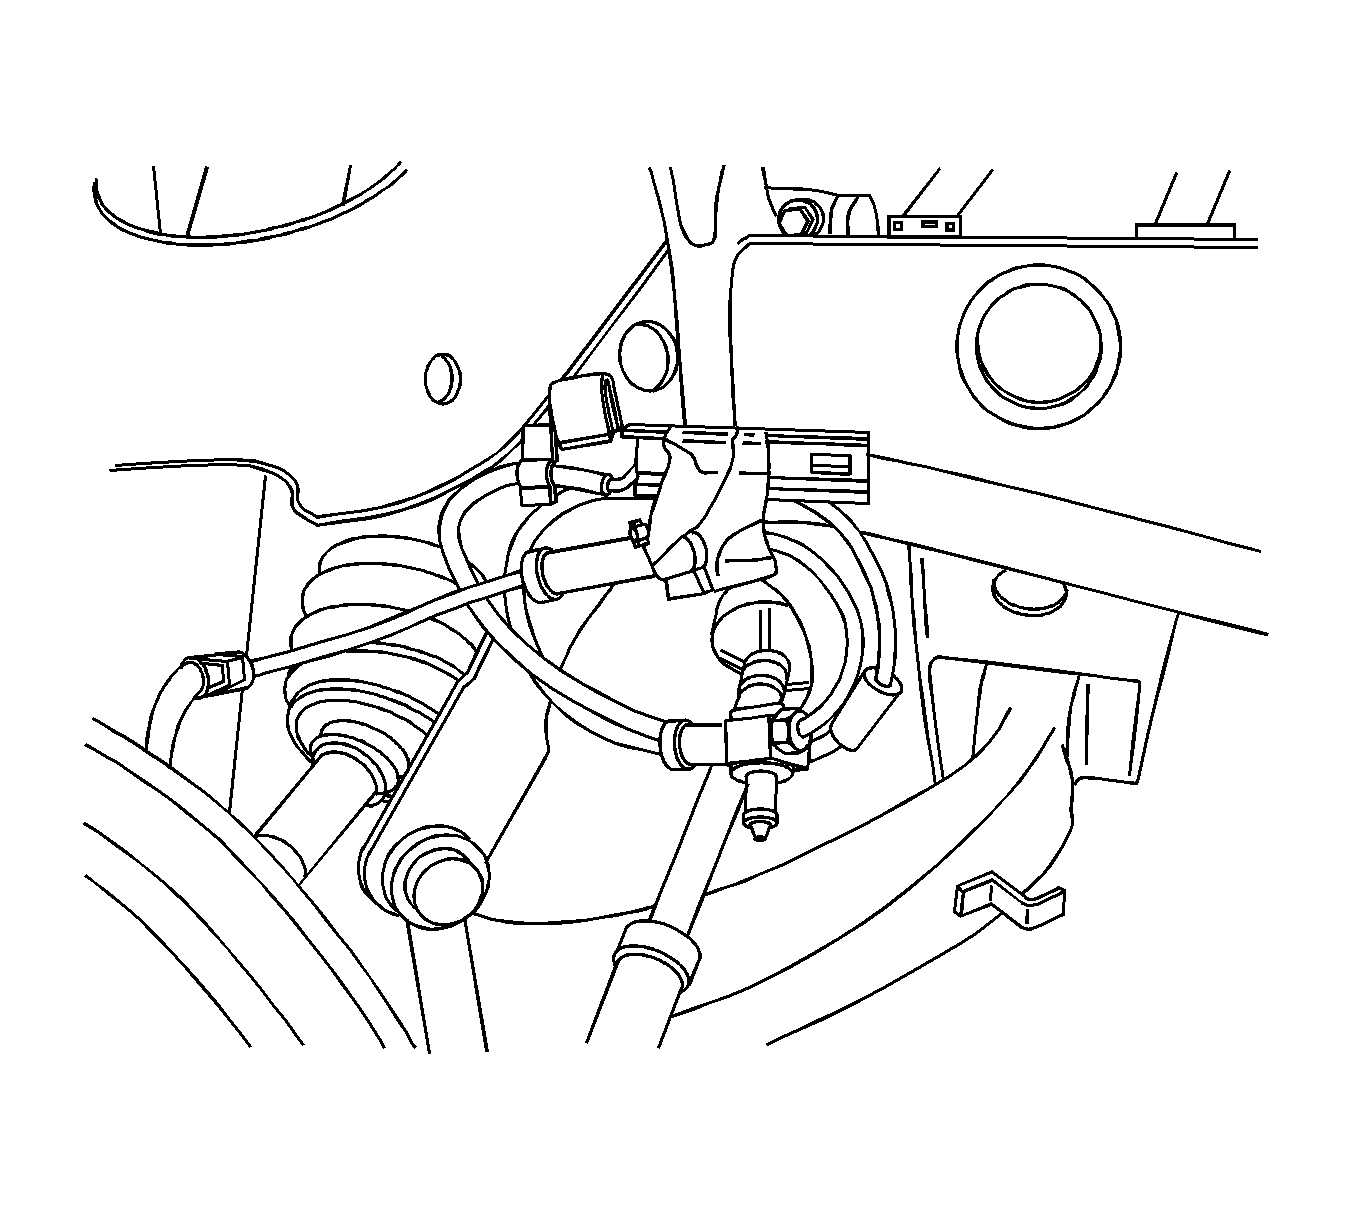
- Remove the speed sensor electrical connector from the body .
- Using white or bright colored paint, mark the location of the speed sensor wiring harness to the steering knuckle.
- To ensure the ease of removal, bundle speed sensor wiring harness so not to have it entangled in any of the suspension components.
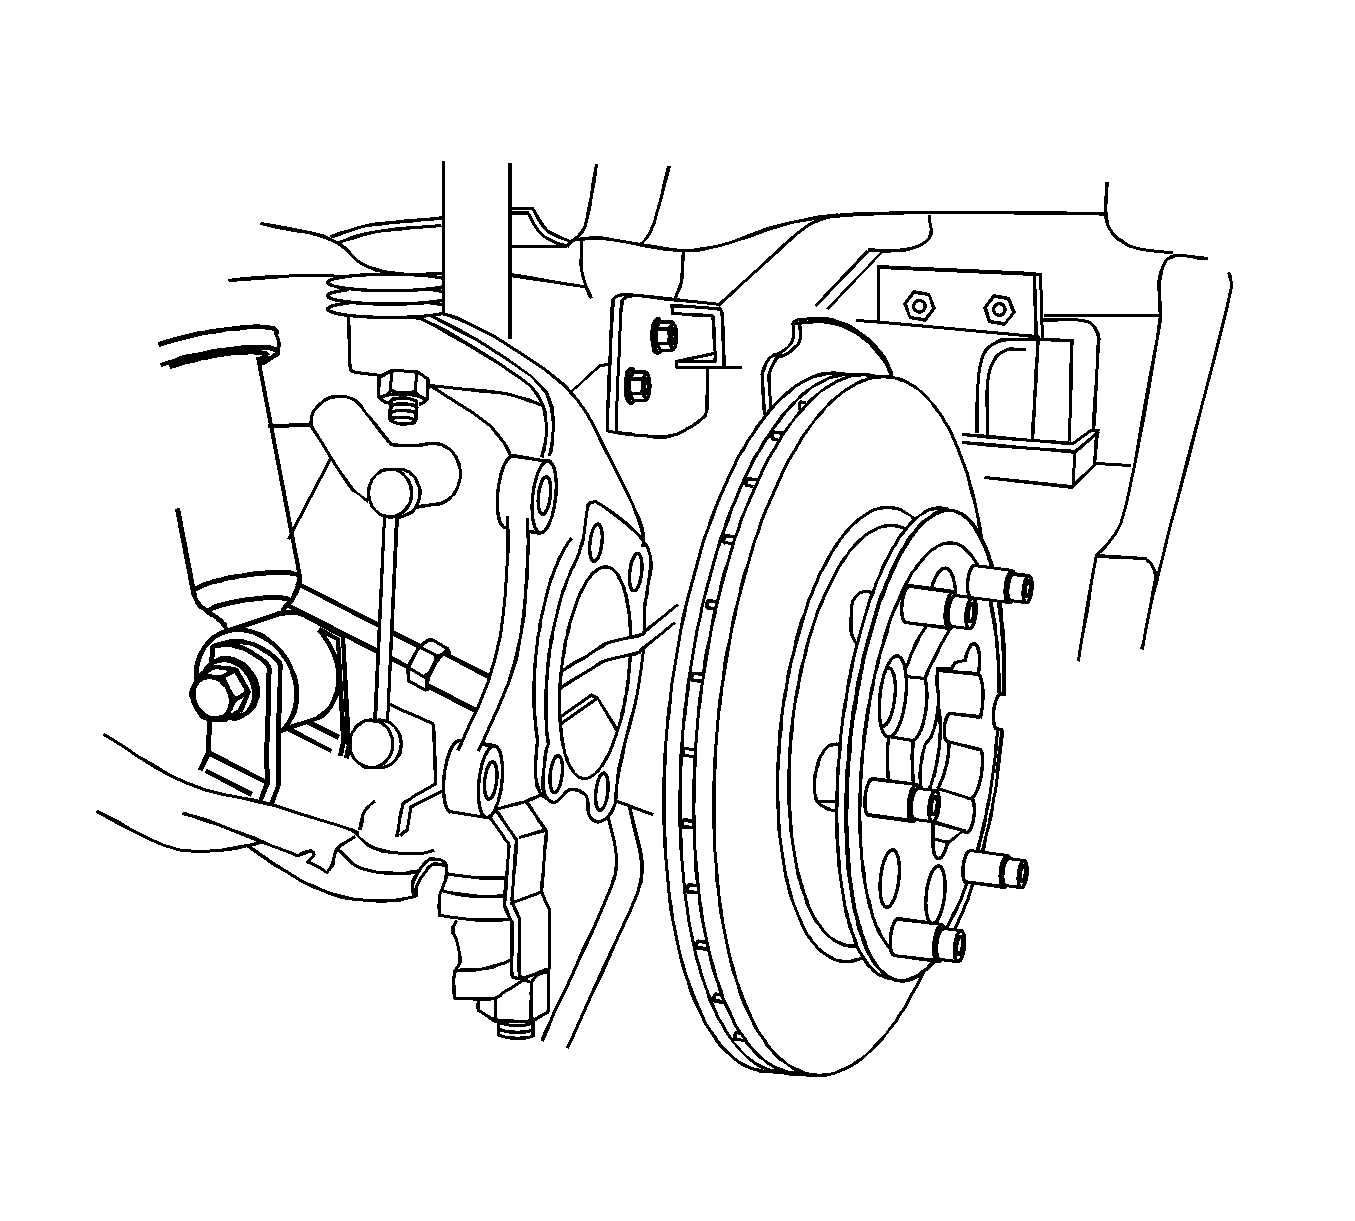
- Remove the steering knuckle assembly. Refer to Steering Knuckle Replacement .
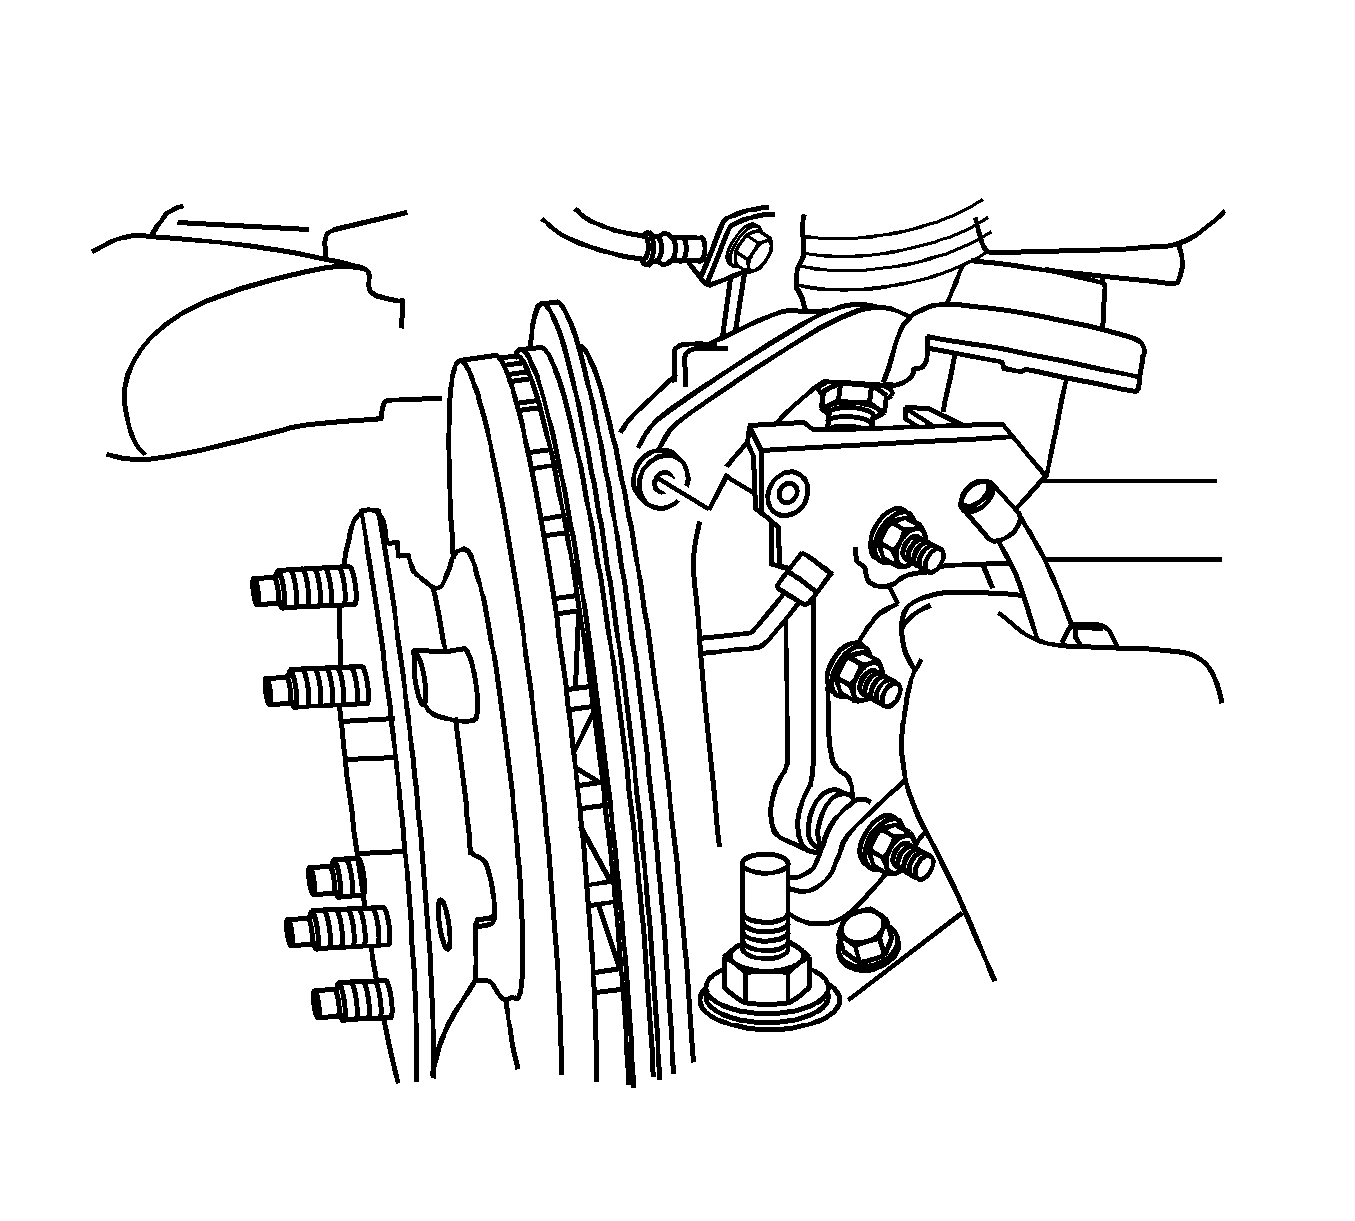
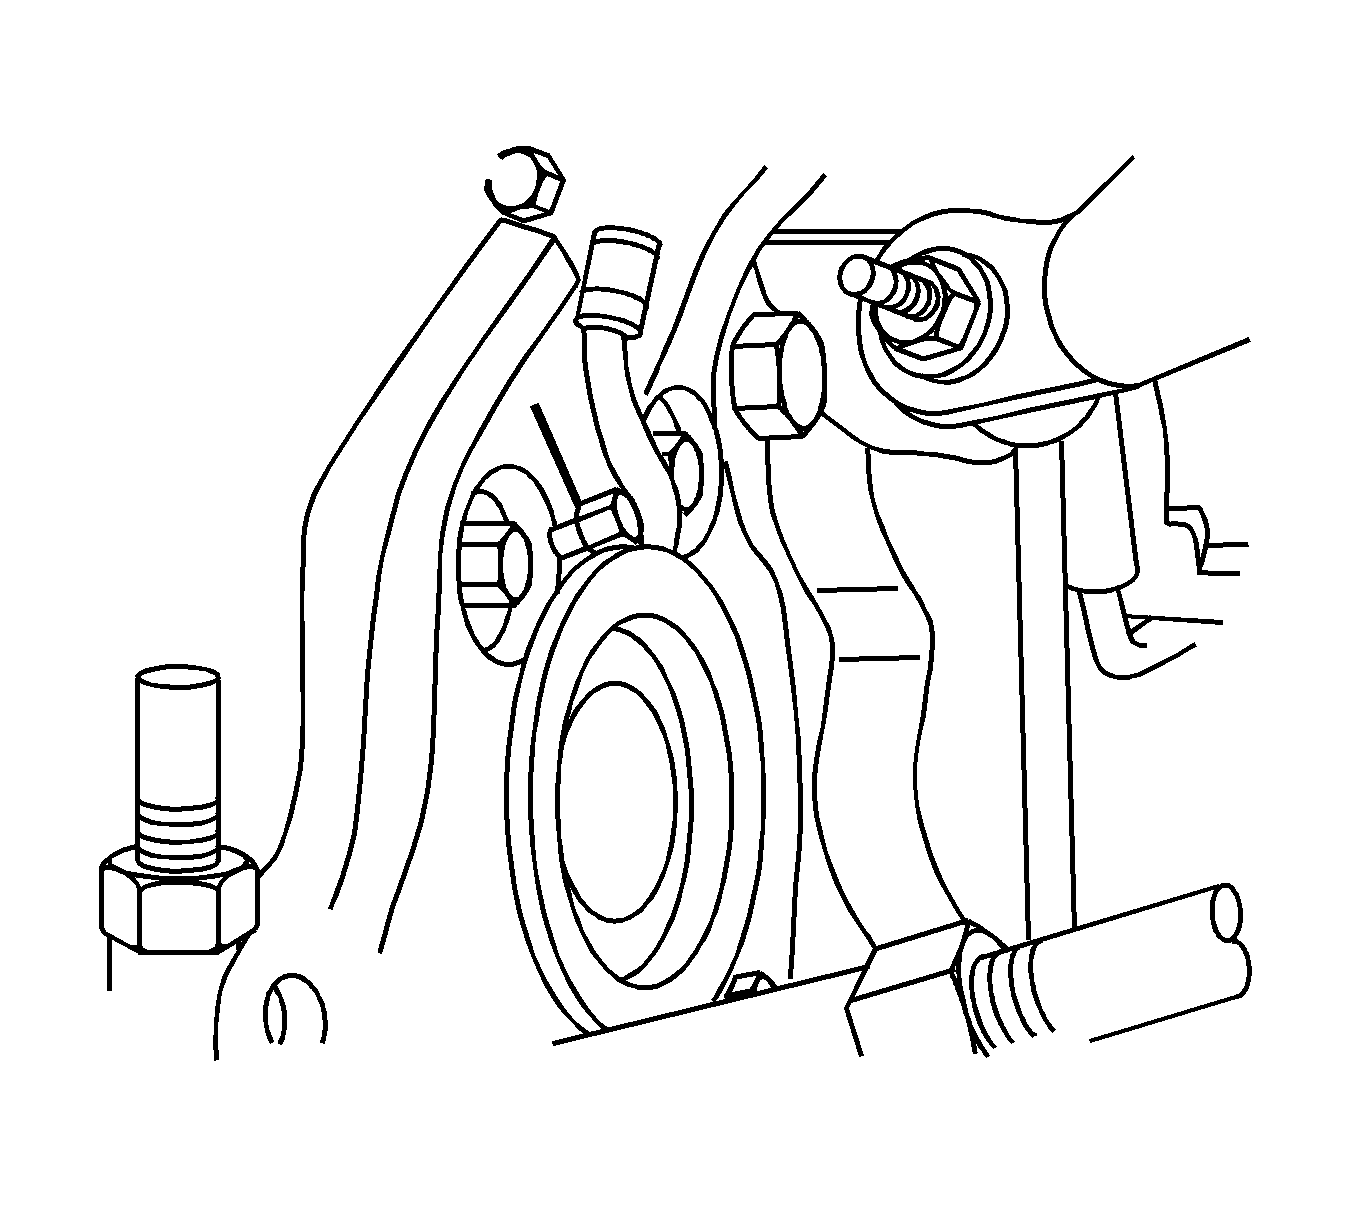
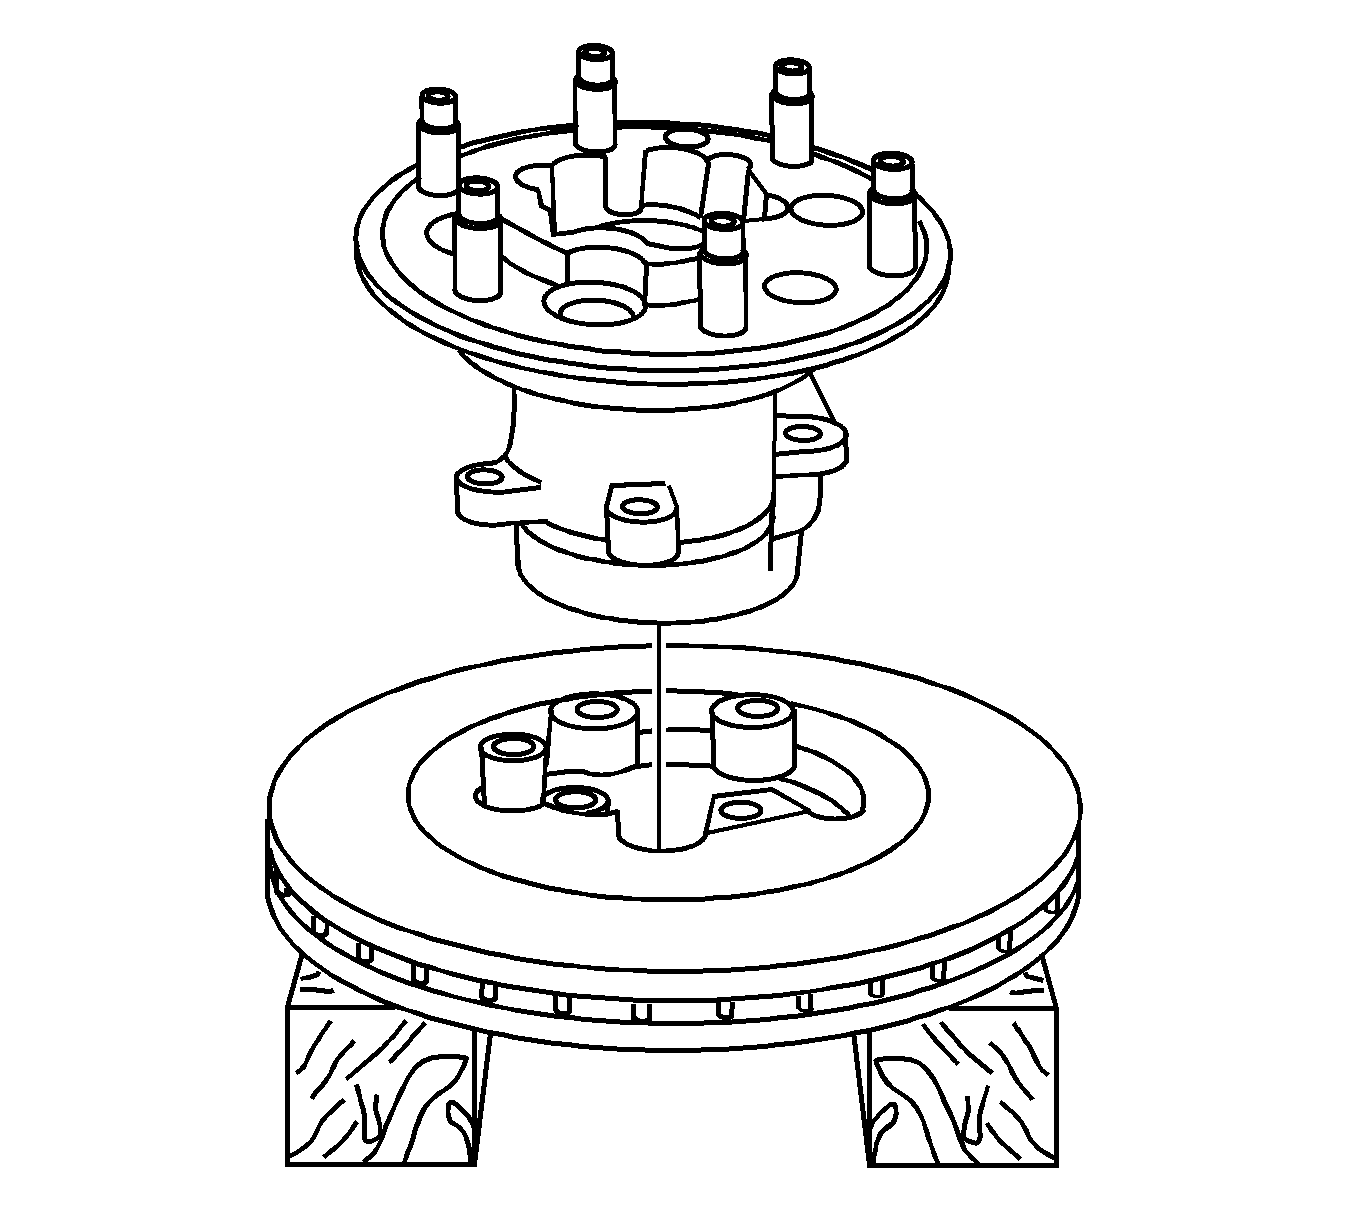
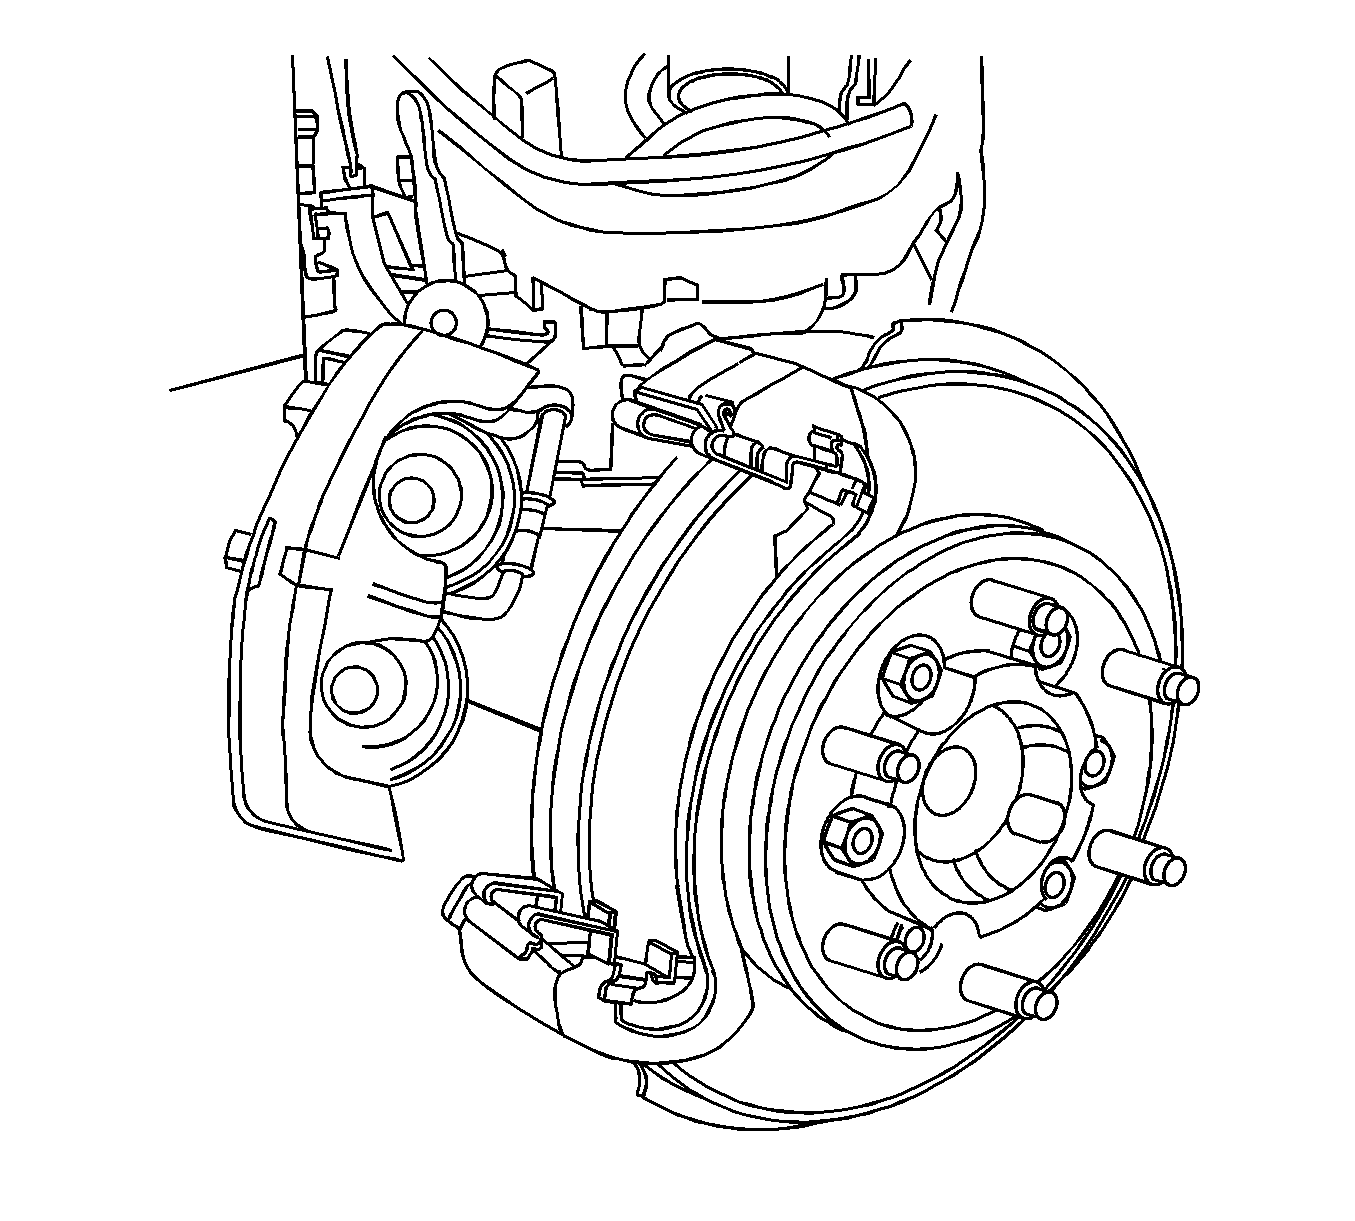
- Remove the mounting bolts for the wheel bearing/hub, brake rotor assembly.
- Remove the wheel bearing/hub, brake rotor assembly from the steering knuckle.
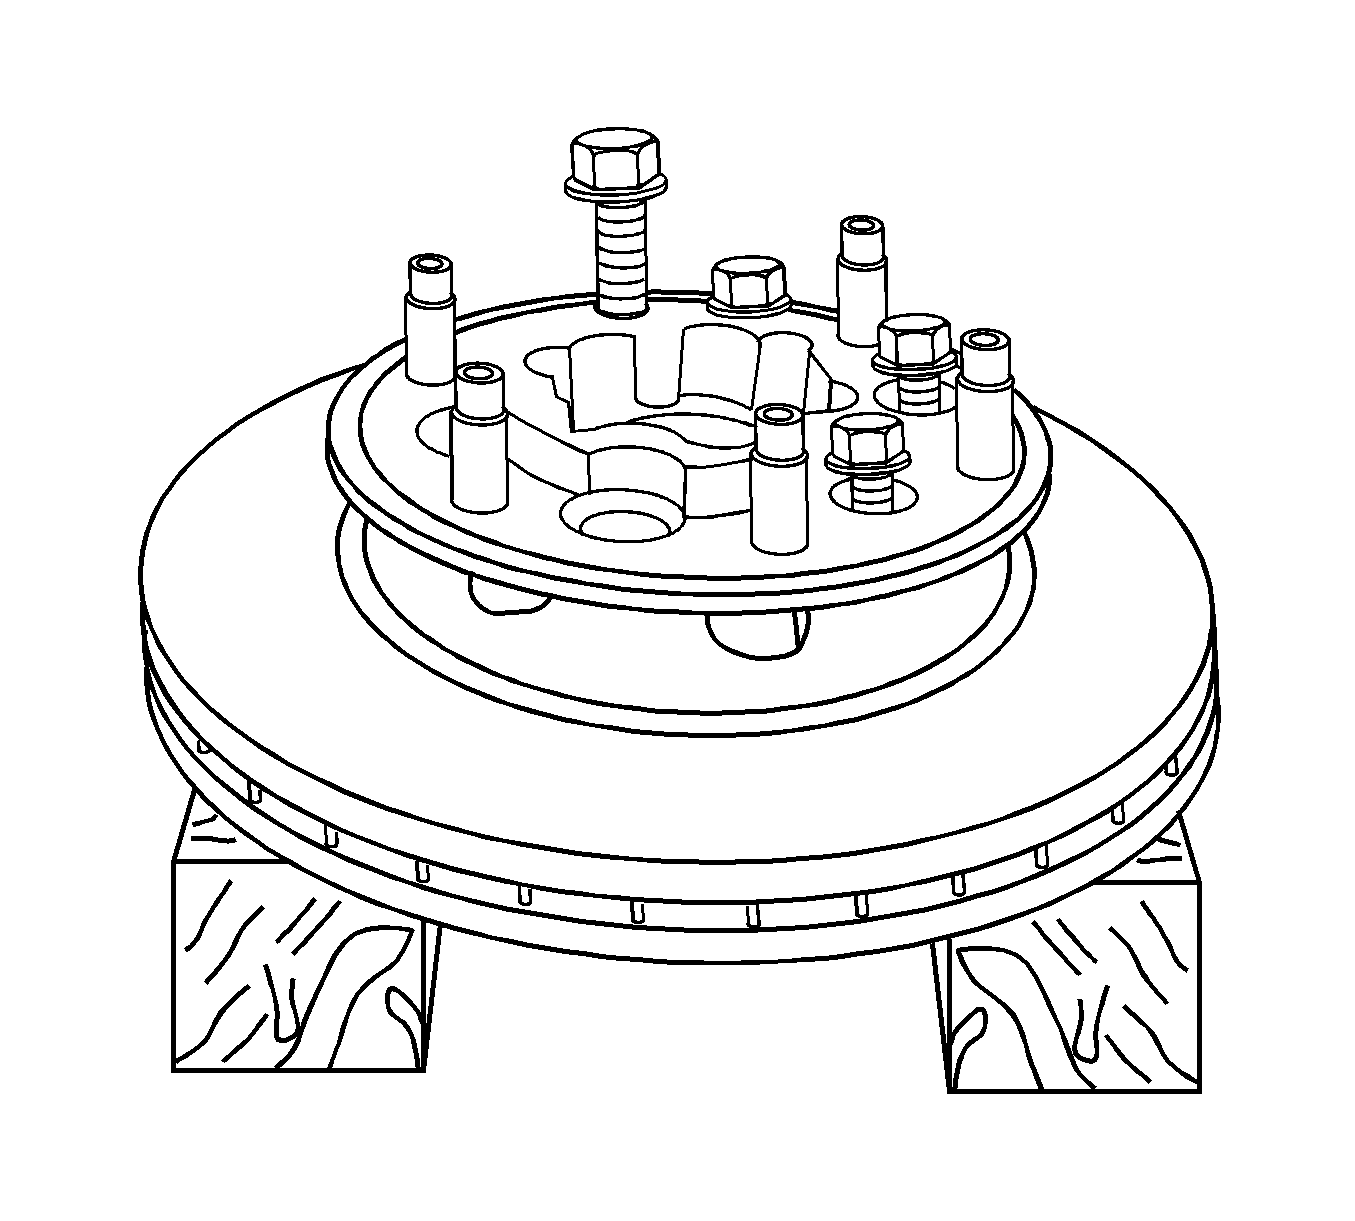
- Remove the mounting bolt from the wheel bearing/hub, to the brake rotor.
- Remove the wheel bearing/hub from the brake rotor.
- Clean the contact area between the wheel bearing/hub and the brake rotor.
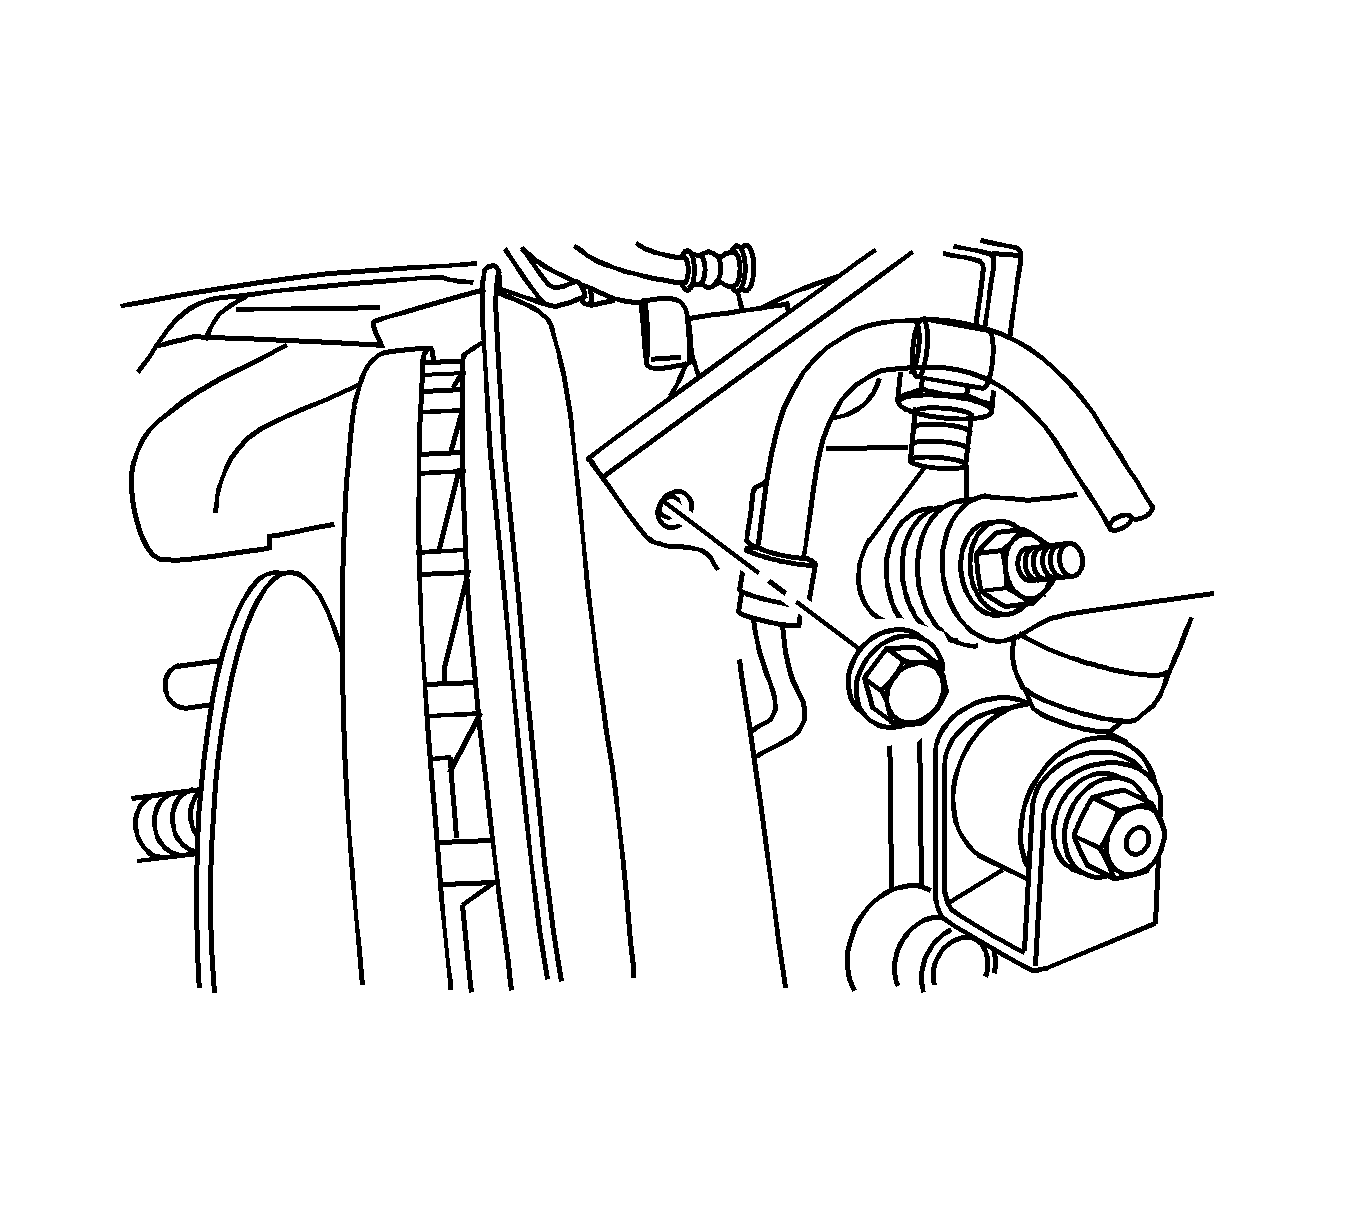
Important: Mark the holes used to mount the speed sensor electrical connector before removing. This will ensure the proper location of the speed sensor electrical connector for installation.
Important: The following service procedure is to ensure that the speed sensor wiring harness is properly positioned so that the length of the wiring harness is correct for installation. Failure to do so could cause damage to the speed sensor wiring harness.
Important: The following service procedure applies to those vehicles that are equipped with 4 wheel drive ONLY.
Important: Perform the following service procedure with the brake rotor on a flat surface.
Important: The splash shield will come off the steering knuckle when the wheel bearing/hub, brake rotor is removed.
Installation Procedure
- Position the wheel bearing/hub assembly on the brake rotor.
- Install the mounting bolts from the wheel bearing/hub assembly to the brake rotor.
- Tighten the bolts in crisscross pattern.
- Install the backing plate to the wheel bearing/hub, brake rotor assembly.
- Install the steering knuckle assembly. Refer to Steering Knuckle Replacement .
- Install the wheel bearing/hub, brake rotor assembly in the steering knuckle.
- Align the wheel speed sensor wiring harness with the reference mark on the steering knuckle.
- Install the wheel bearing/hub, brake rotor mounting bolts.
- Install the brake caliper mounting bracket to the steering knuckle.
- Install the mounting bolts for the brake caliper mounting bracket.
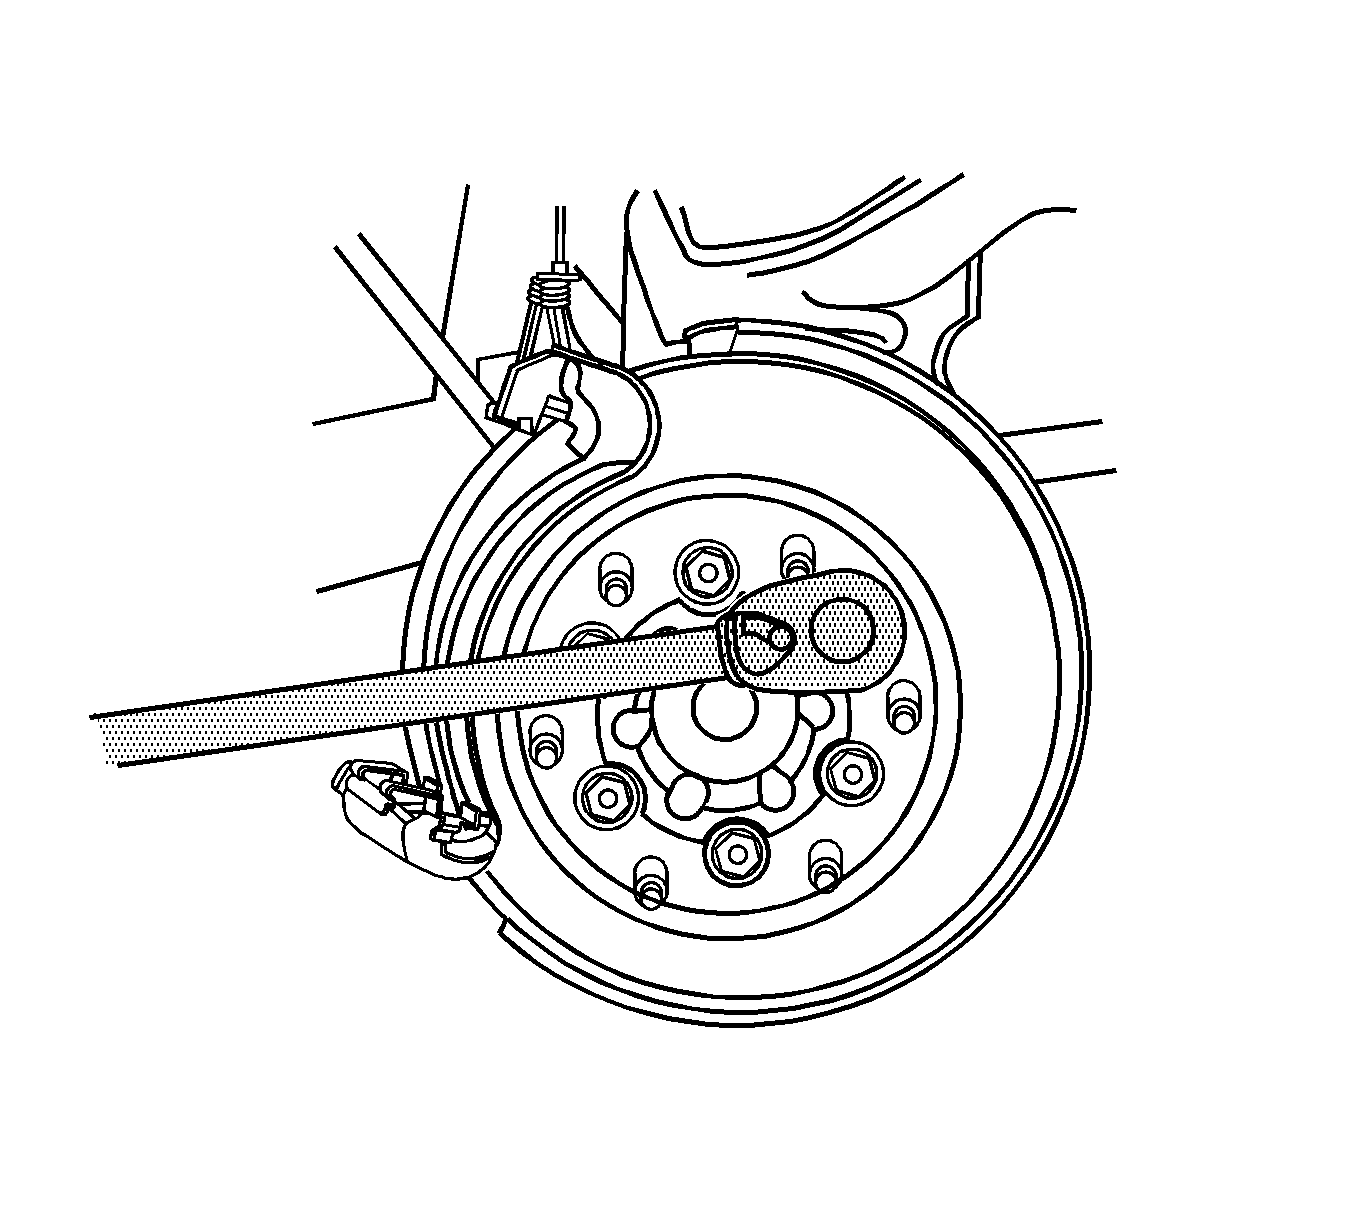
- Position a large screwdriver or pry bar in the cooling fins of the brake rotor and the brake caliper mounting bracket.
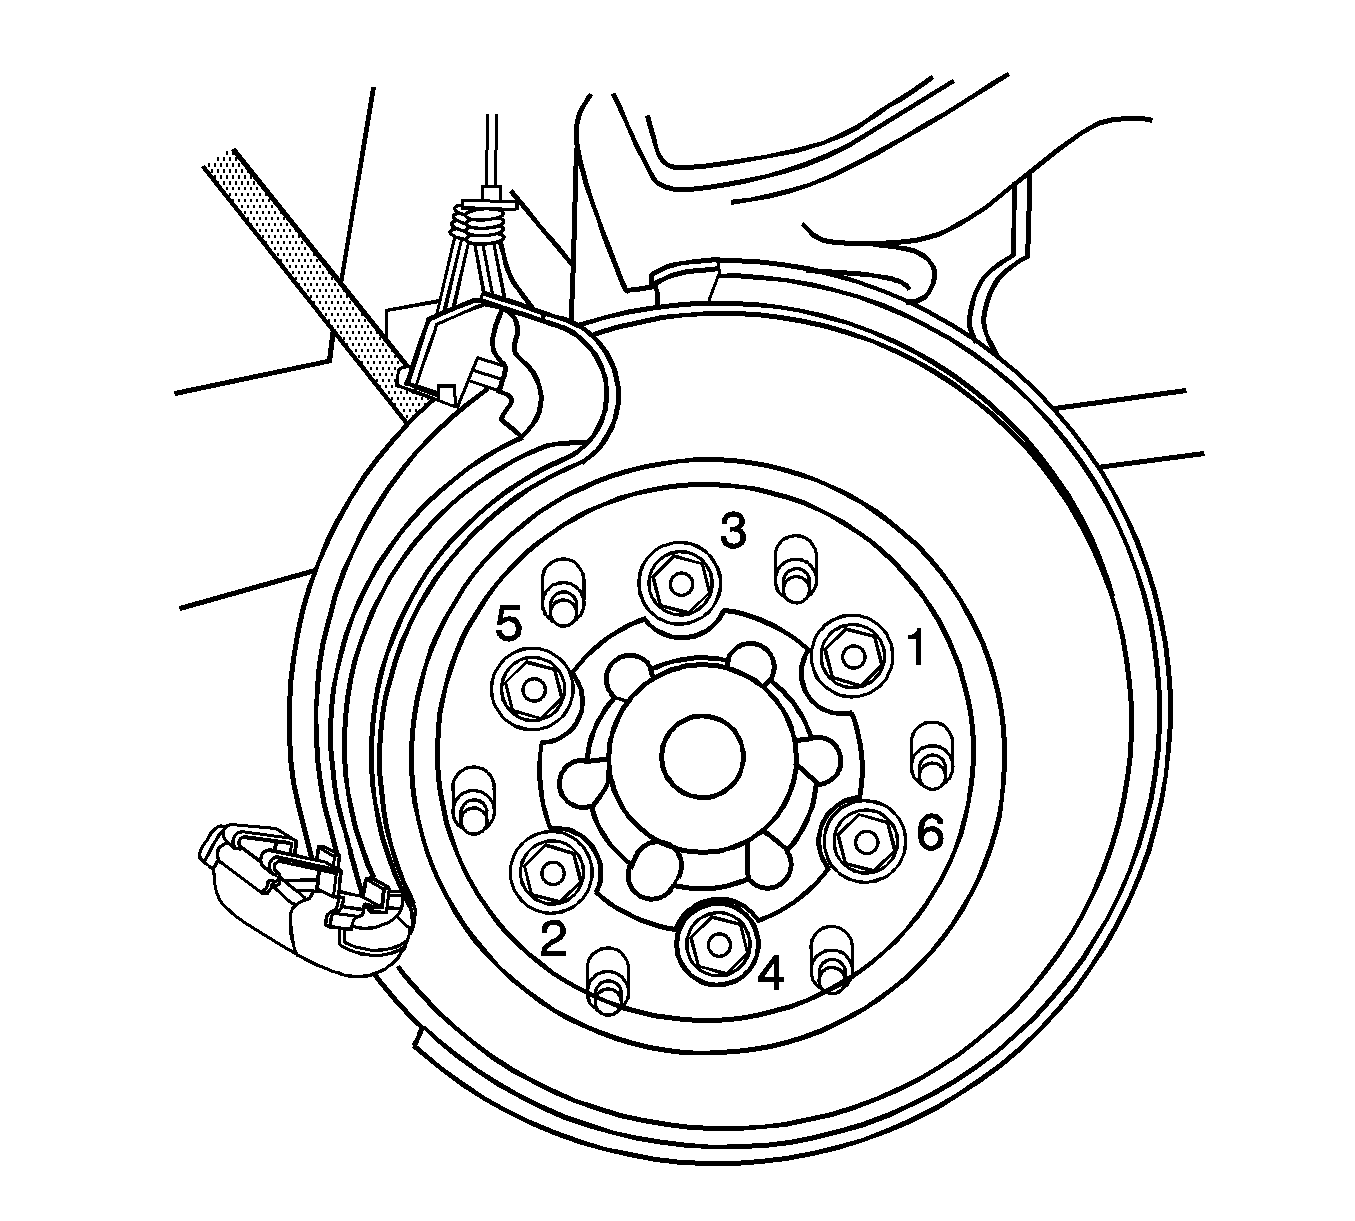
- Tighten the mounting bolts for the brake rotor in sequence.
- Using a torque wrench, tighten the mounting bolts.
- Install the brake caliper assembly. Refer to Brake Caliper Replacement .
- Remove the tape from the speed sensor wiring harness.
- Install the wheel speed sensor wiring harness bracket to the upper control arm.
- Install the front retaining bolt for the speed sensor wiring harness.
- Install the speed sensor wiring harness retainers in the upper control arm.
- Reconnect the wheel speed sensor electrical connector.
- Install the wheel speed sensor to the body.
- Lower the vehicle. Refer to Lifting and Jacking the Vehicle .
Notice: Refer to Fastener Notice in the Preface section.
Important: The following service procedure is to be performed on a flat surface and to ensure that the brake rotor is securely attached to the hub assembly prior to the final torquing procedure. DO NOT use air tools of any type for this procedure.
Tighten
Tighten the mounting bolts to 20 N·m (15 lb ft).
Important: The following service procedure applies to those vehicles that are equipped with 4 wheel drive ONLY.
Important: When performing the following service procedure, DO NOT use air tools of any type to torque the brake rotor to hub bolts.
Tighten
Tighten the mounting bolts to 125 N·m (92 lb ft).

Tighten
Tighten the mounting bolts to 175 N·m (129 lb ft).
Important: The following service procedure is to ensure that the brake rotor is seated properly on the wheel bearing/hub assembly.
Tighten
Tighten the mounting bolts to 110 N·m (81 lb ft).
Tighten
Tighten to retaining bolt to 20 N·m (14 lb ft).
