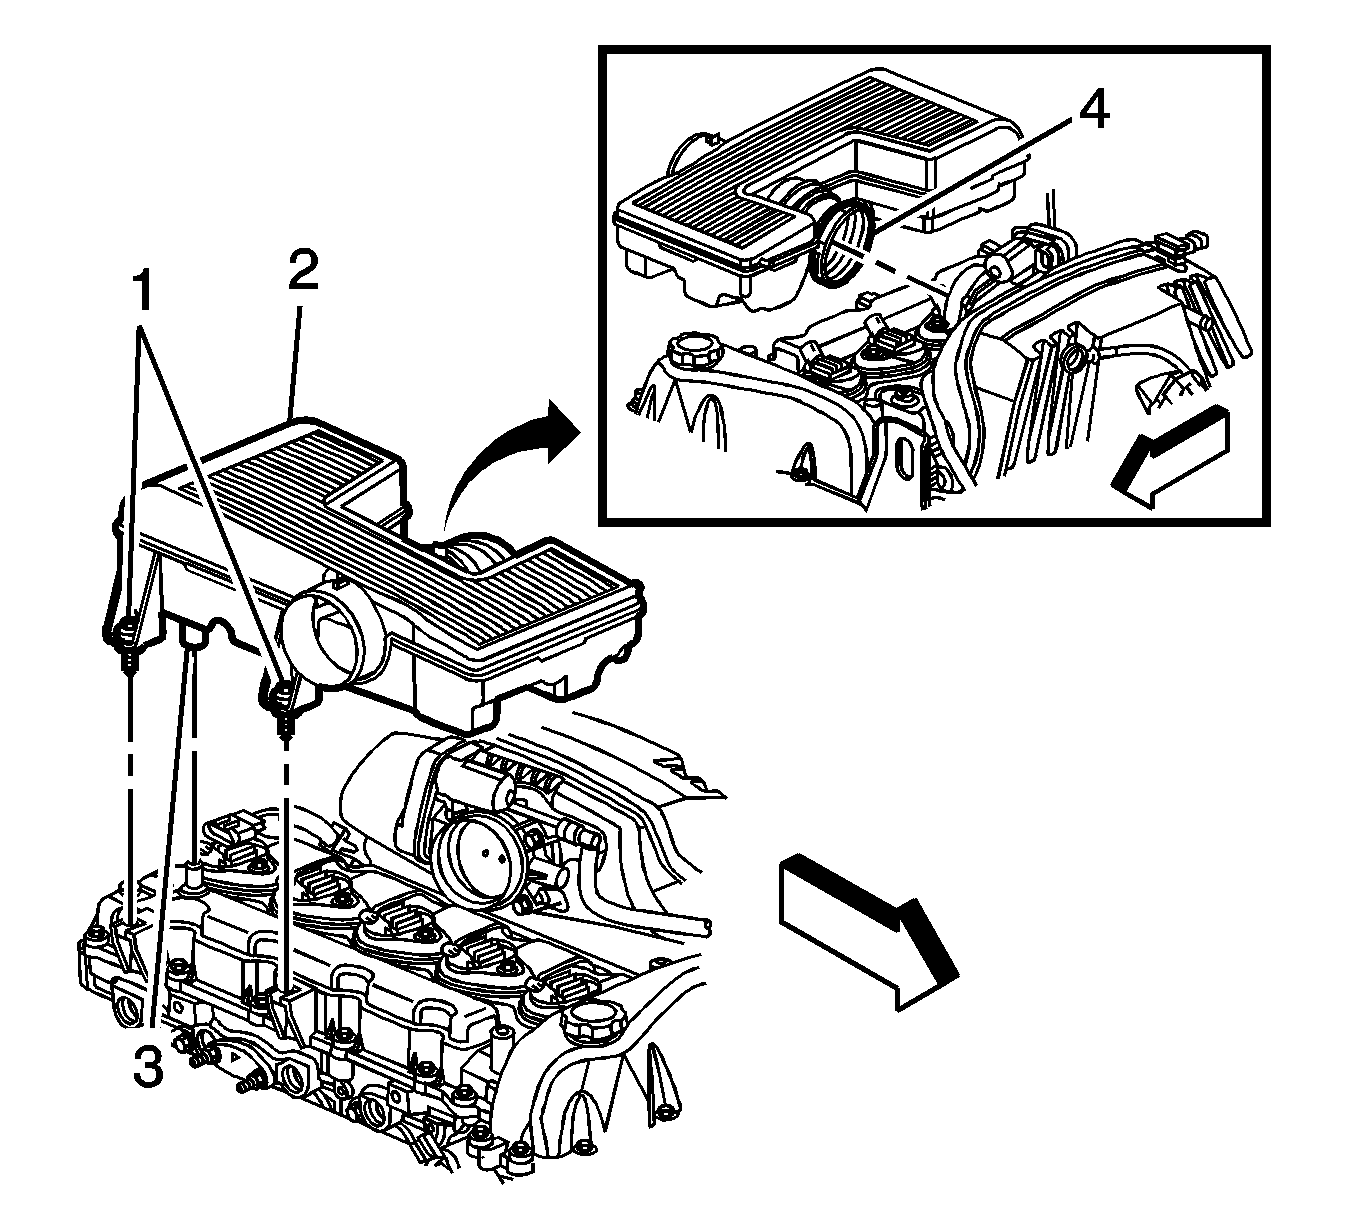
Removal Procedure
- Remove the air cleaner outlet duct. Refer to
Air Cleaner Resonator and Outlet Duct Replacement
.
- Loosen the air cleaner resonator outlet duct clamp (4).
- Remove the 2 air cleaner resonator bolts (1).
- Complete the following in order to remove the air cleaner resonator (2) and outlet duct from the engine:
| 4.1. | Lift upward on the assembly. |
| 4.2. | Disconnect the following: |
| - | The crankcase ventilation hose (3) from the camshaft cover |
| - | The outlet duct (4) from the throttle body |
| 4.3. | Remove the assembly (2) from the engine. |
Installation procedure
- Complete the following in order to install the air cleaner resonator (2) and outlet duct to the engine:
| 1.1. | Position the outlet duct (4) over the throttle body assembly. |
| 1.2. | Install the crankcase ventilation hose (3) to the camshaft cover port. |
| 1.3. | Align the air cleaner outlet resonator bolts (1) with the captured nuts on the camshaft cover. |
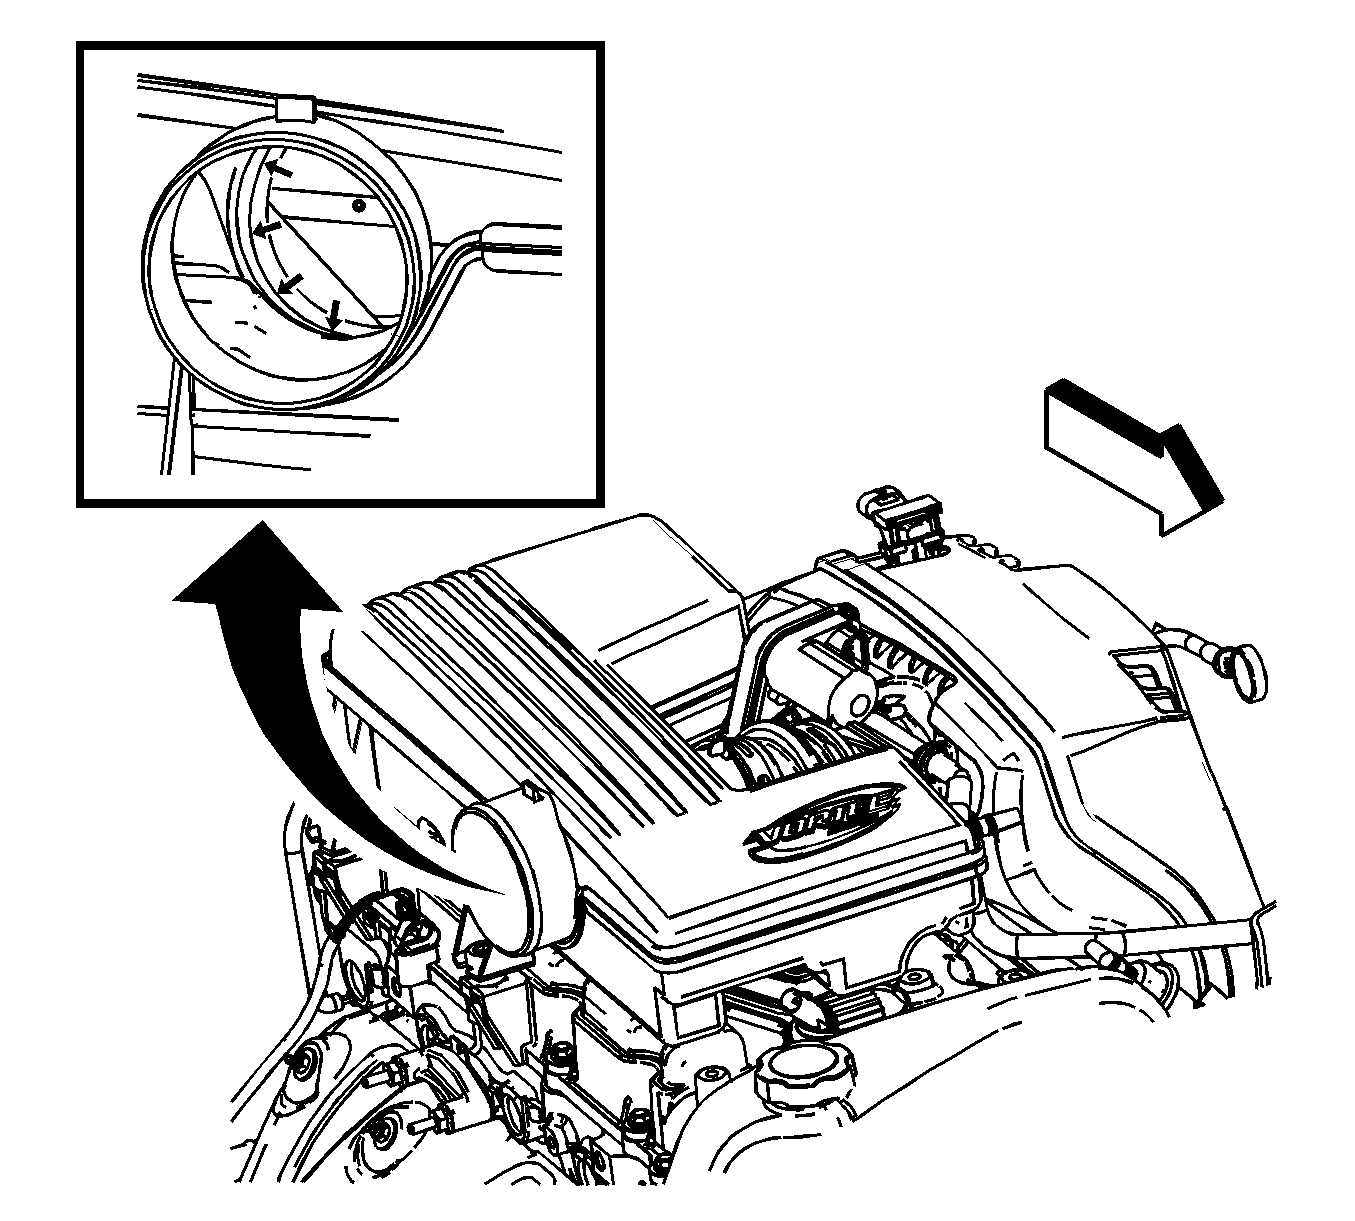
Important: Ensure the outlet duct is properly installed to the throttle body assembly.
- View into the air cleaner resonator to ensure the outlet duct is not rolled under at the throttle body assembly.
Notice: Refer to Fastener Notice in the Preface section.
- Properly position the air cleaner resonator outlet duct clamp (4).
Tighten
Tighten the clamp (4) to 6 N·m (53 lb in).
- Install the 2 air cleaner outlet resonator to camshaft cover bolts (1).
Tighten
Tighten the bolts to 6 N·m (53 lb in).
- Install the air cleaner outlet duct. Refer to
Air Cleaner Resonator and Outlet Duct Replacement
.
