Shock Absorber Replacement 2WD, Z85, ZQ8
Tools Required
J 45400 Strut Spring Compressor
Removal Procedure
Notice: The front shock absorbers of the vehicle are multifunctional. In addition to contributing to a smooth ride they also provide the only stop to the front suspension when fully extended. Therefore, when servicing the shock absorber, service replacement shock absorbers must be equivalent to original shock absorbers in both extended length and strength. Use of shocks not complying to original equipment or strength could result in suspension over-travel or shock breakage. Suspension over-travel may result in suspension component breakage.
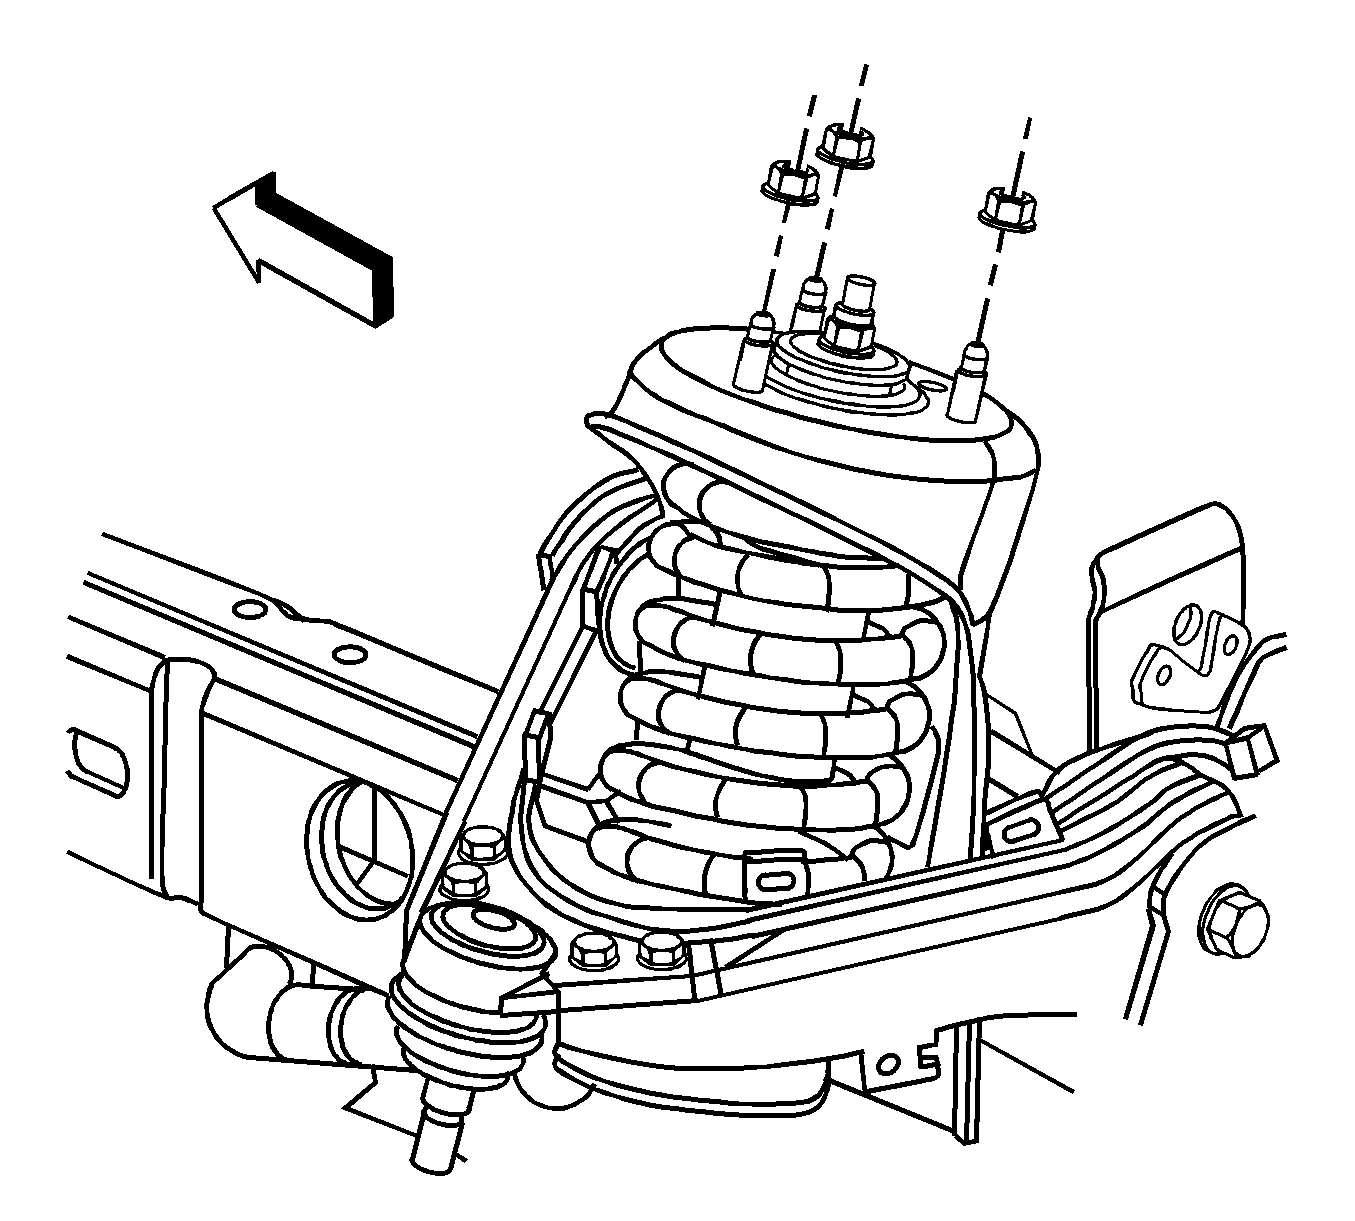
- Remove the absorber/spring assembly upper mounting nuts.
- Raise and support the vehicle. Refer to Lifting and Jacking the Vehicle .
- Remove the tire and wheel. Refer to Tire and Wheel Removal and Installation .
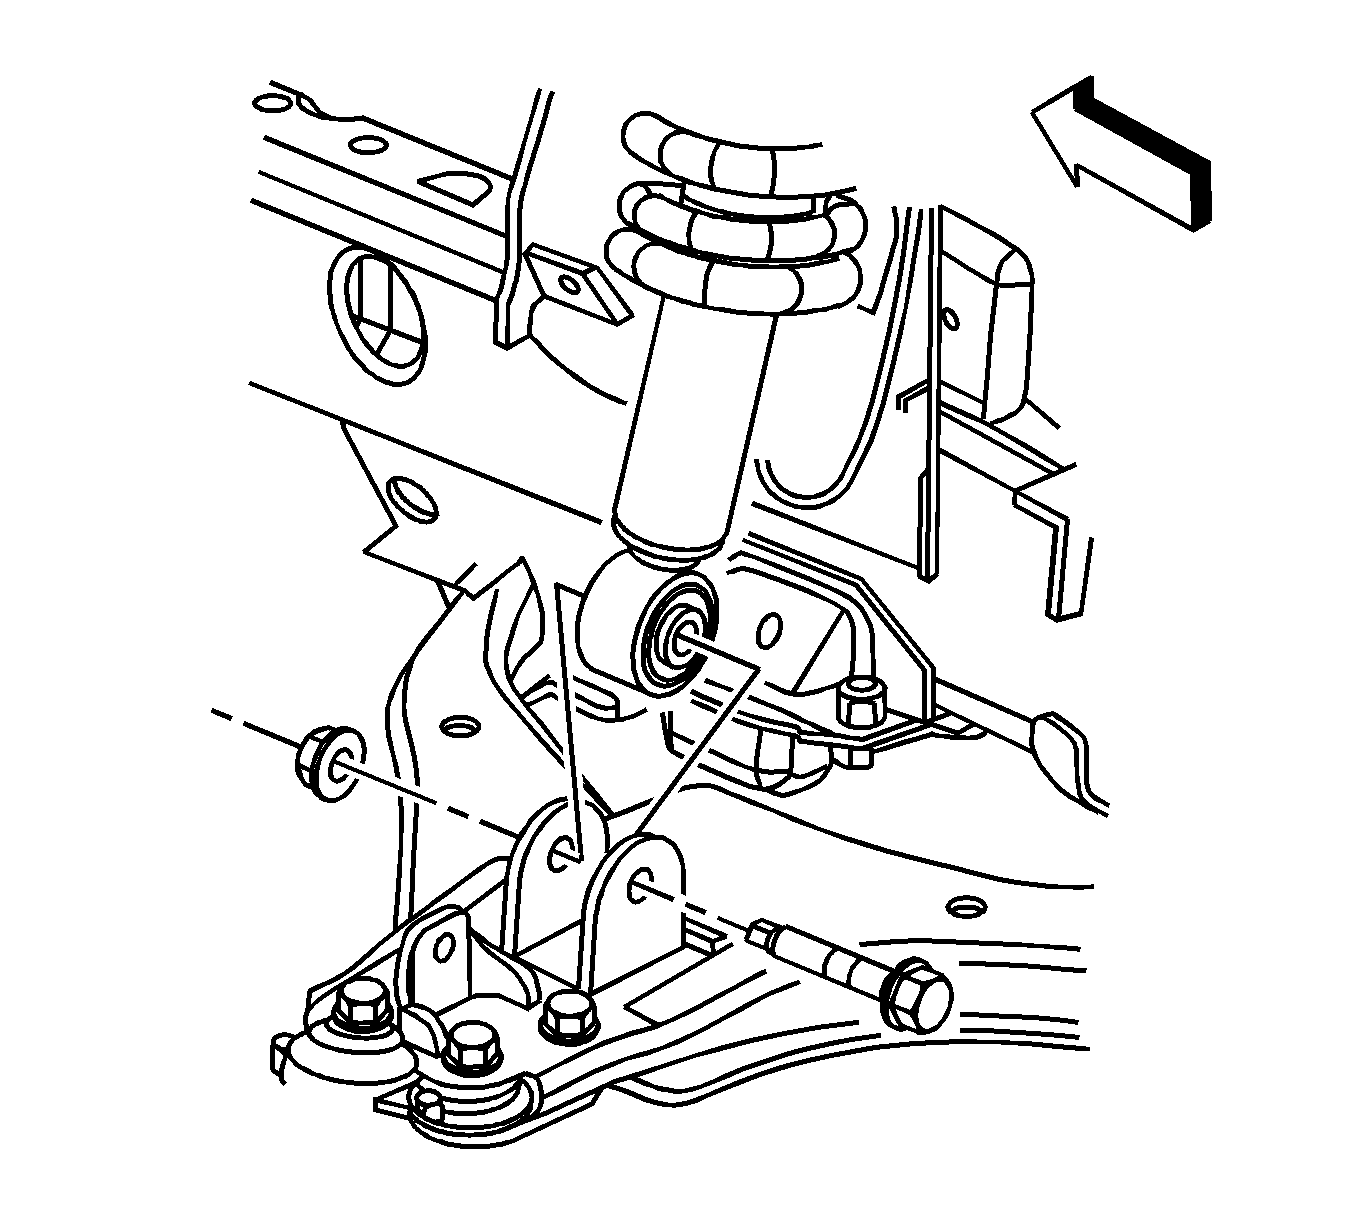
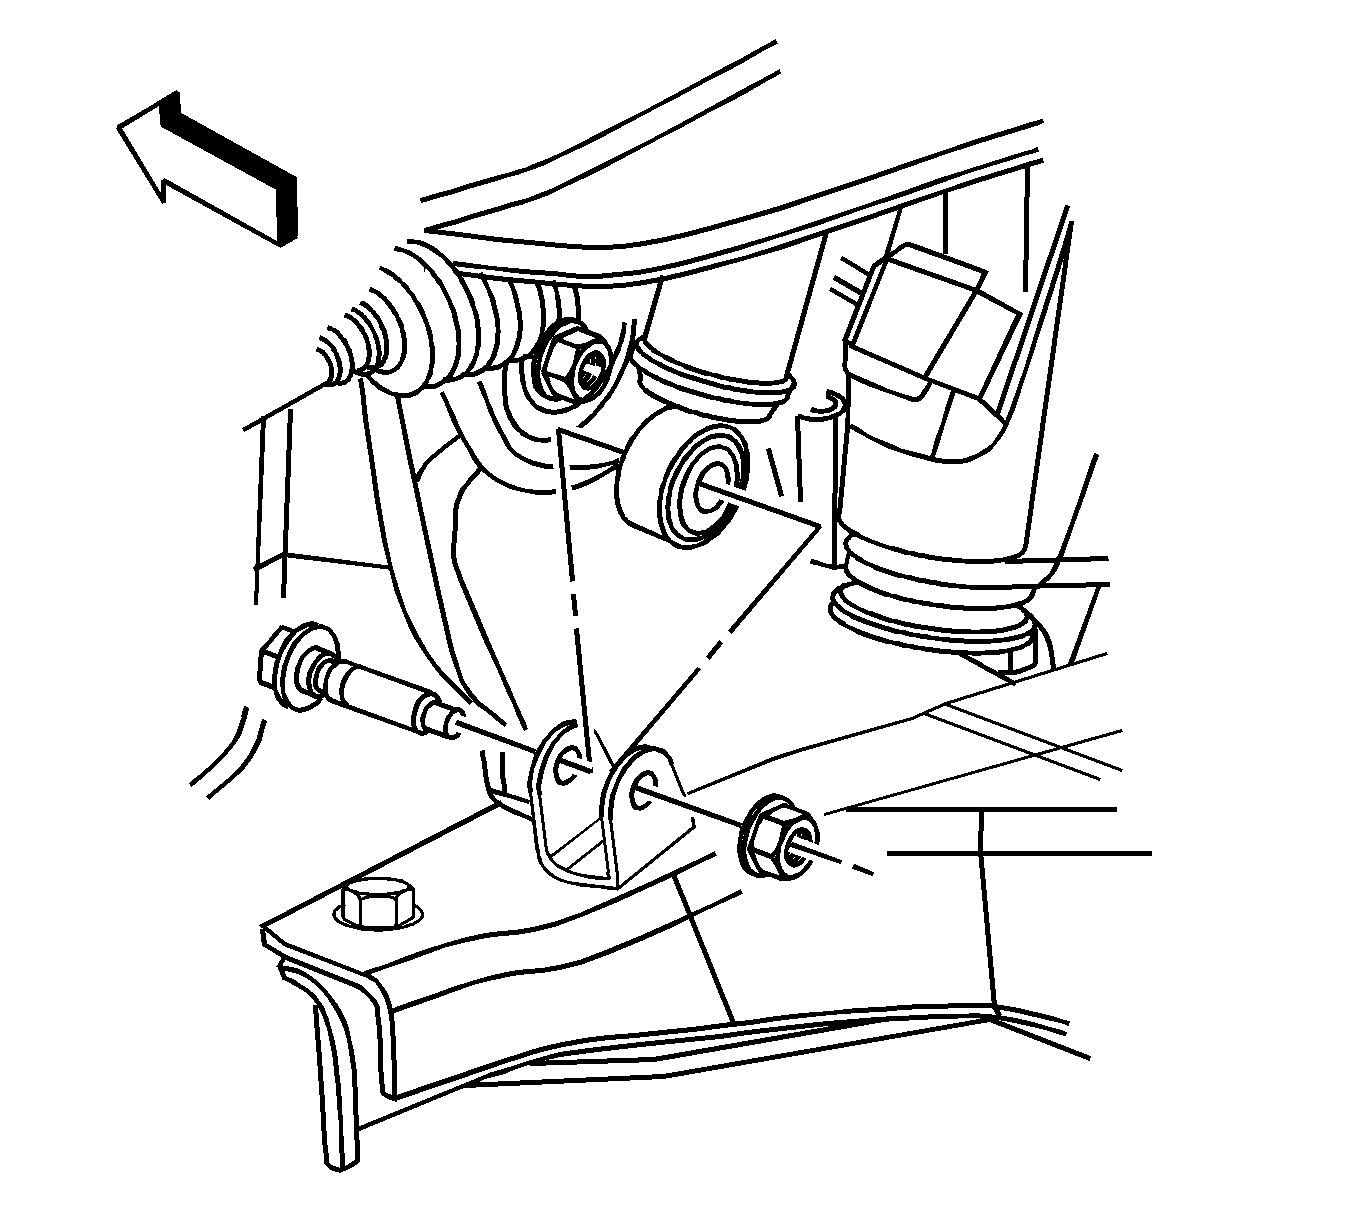
- Remove the absorber/spring assembly bolt and nut.
- Remove the front stabilizer link. Refer to Stabilizer Shaft Link Replacement .
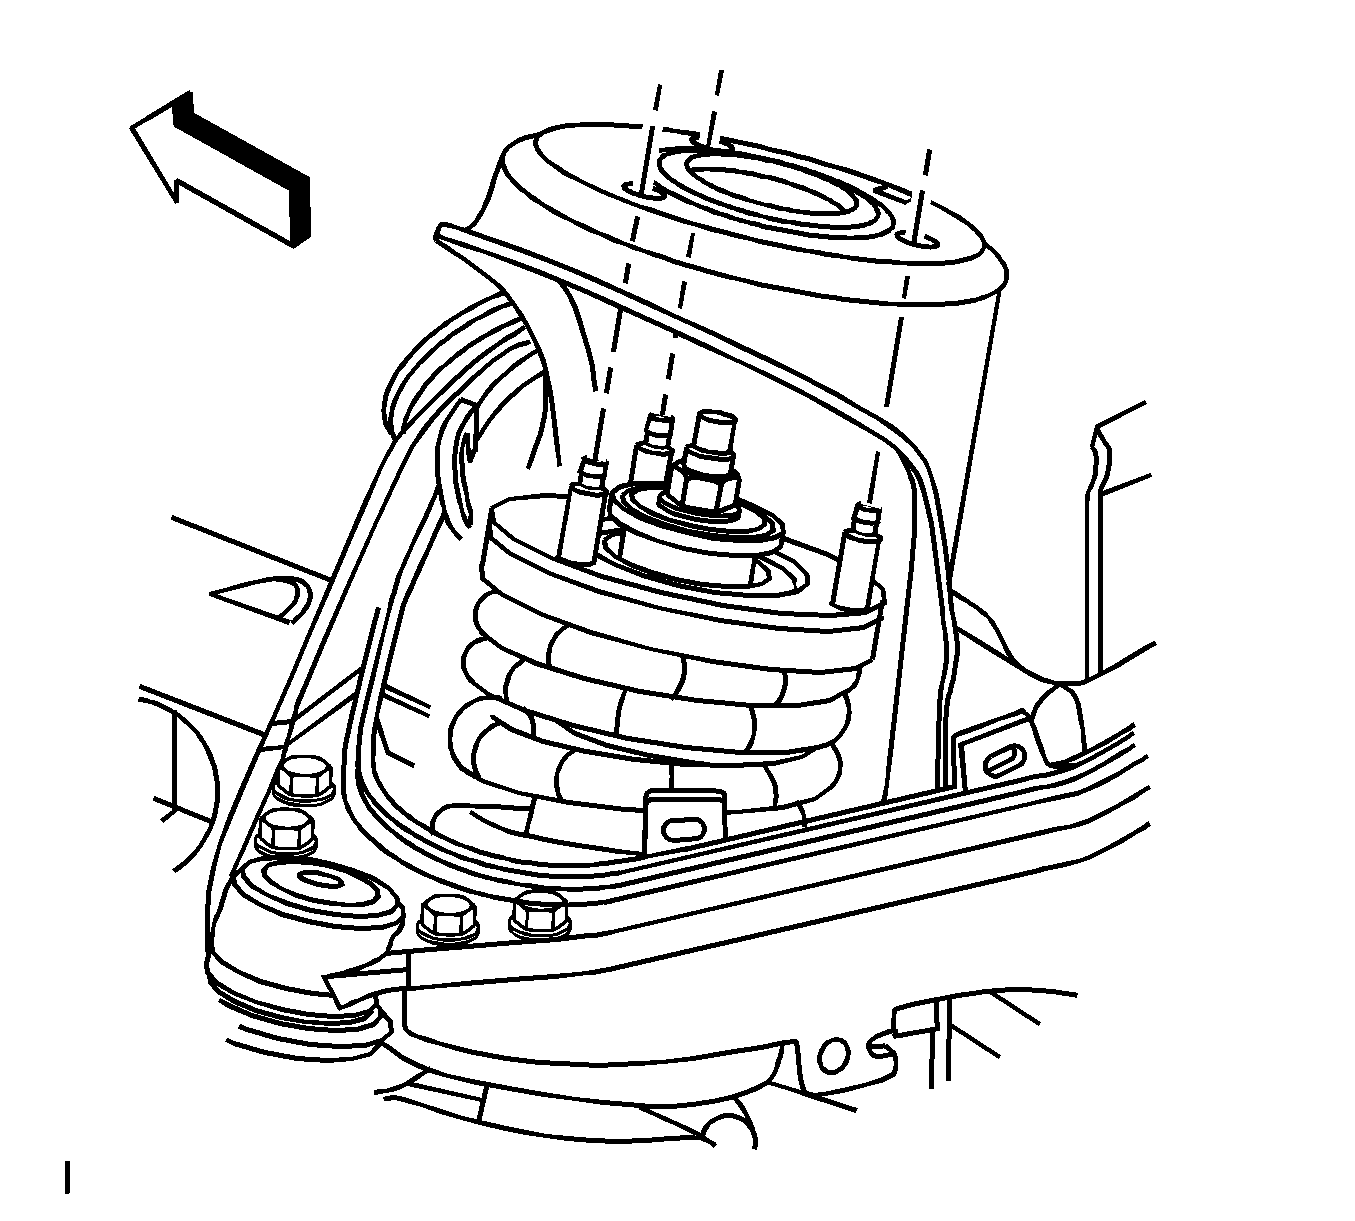
- Remove the absorber/spring assembly from the vehicle.
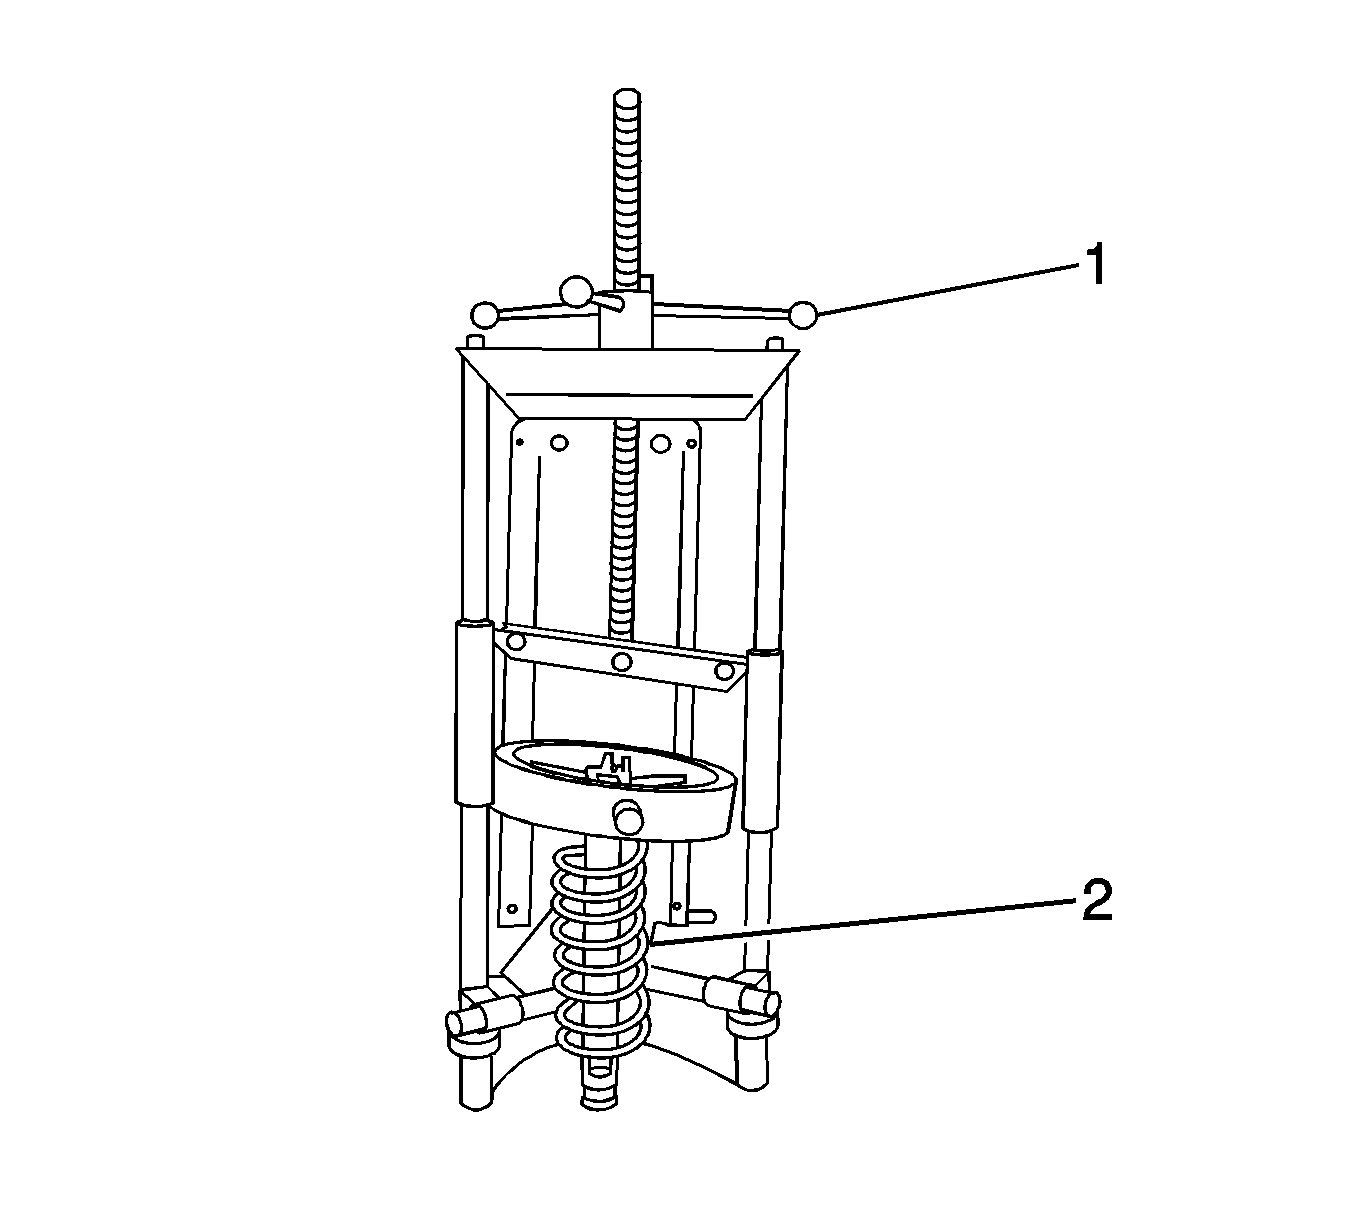
- Install the absorber/spring assembly (2) into the J 45400 (1).
- Turn the spring compressor forcing screw (1) until the coil spring (2) is compressed.
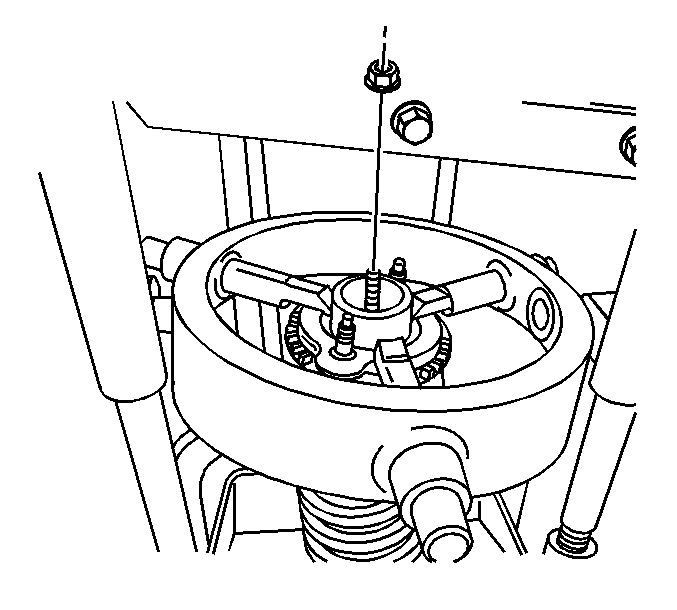
- Remove the absorber upper retaining nut, bushings, and washers.
- Remove the absorber from the assembly.
- Do not remove the spring from the J 45400 .
Notice: Use care when handling the coil springs in order to avoid chipping or scratching the coating. Damage to the coating will result in premature failure of the coil springs.
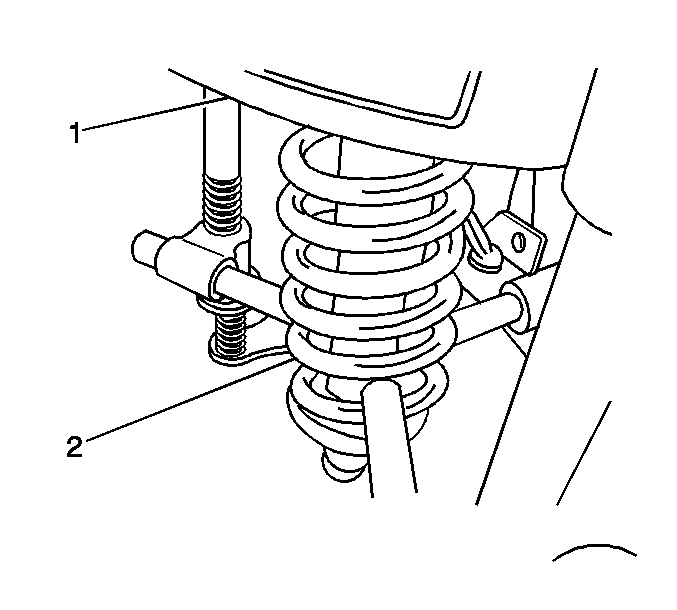
Important: The spring is compressed when the shock absorber moves freely.
Installation Procedure
- Install the absorber to the J 45400 (1).
- Install the absorber bushings and washers (2).
- Install the absorber retaining nut.
- Remove the absorber/spring assembly (2) from the J 45400 (1).
- Install the absorber/spring assembly to the vehicle.
- Install the absorber/spring assembly bolt and nut.
- Install the front stabilizer link. Refer to Stabilizer Shaft Link Replacement .
- Install the tire and wheel. Refer to Tire and Wheel Removal and Installation .
- Lower the vehicle.
- Install the absorber/spring assembly upper mounting nuts.

Notice: Refer to Fastener Notice in the Preface section.

Important: Ensure that the absorber bushings and tennon align correctly with the mounting bracket before securing the retaining nut.
Tighten
Tighten the shock absorber retaining nut to 20 N·m (15 lb ft).


Tighten
Tighten the absorber/spring assembly bolt to 110 N·m (81 lb ft).

Tighten
Tighten the absorber/spring assembly nuts to 27 N·m (20 lb ft).
Shock Absorber Replacement 4WD, 2WD Z71
Removal Procedure
Notice: The front shock absorbers of the vehicle are multifunctional. In addition to contributing to a smooth ride they also provide the only stop to the front suspension when fully extended. Therefore, when servicing the shock absorber, service replacement shock absorbers must be equivalent to original shock absorbers in both extended length and strength. Use of shocks not complying to original equipment or strength could result in suspension over-travel or shock breakage. Suspension over-travel may result in suspension component breakage.
- Raise and support the vehicle. Refer to Lifting and Jacking the Vehicle .
- Support the lower control arm with a suitable stand.
- Hold the tennon end with a wrench while removing the nut.
- Remove the nut.
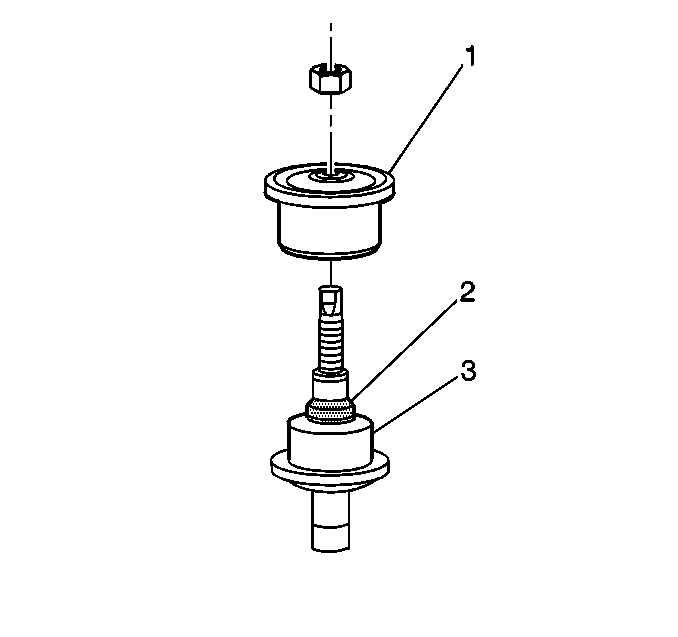
- Remove the upper insulator (1). Do not discard the plastic pilot ring (2).
- Remove the shock absorber mounting bolts at the lower control arm.
- Remove the shock absorber through the lower control arm from below.
Installation Procedure
- Support the lower control arm with a suitable jack in order to align the tennon with the mounting hole.
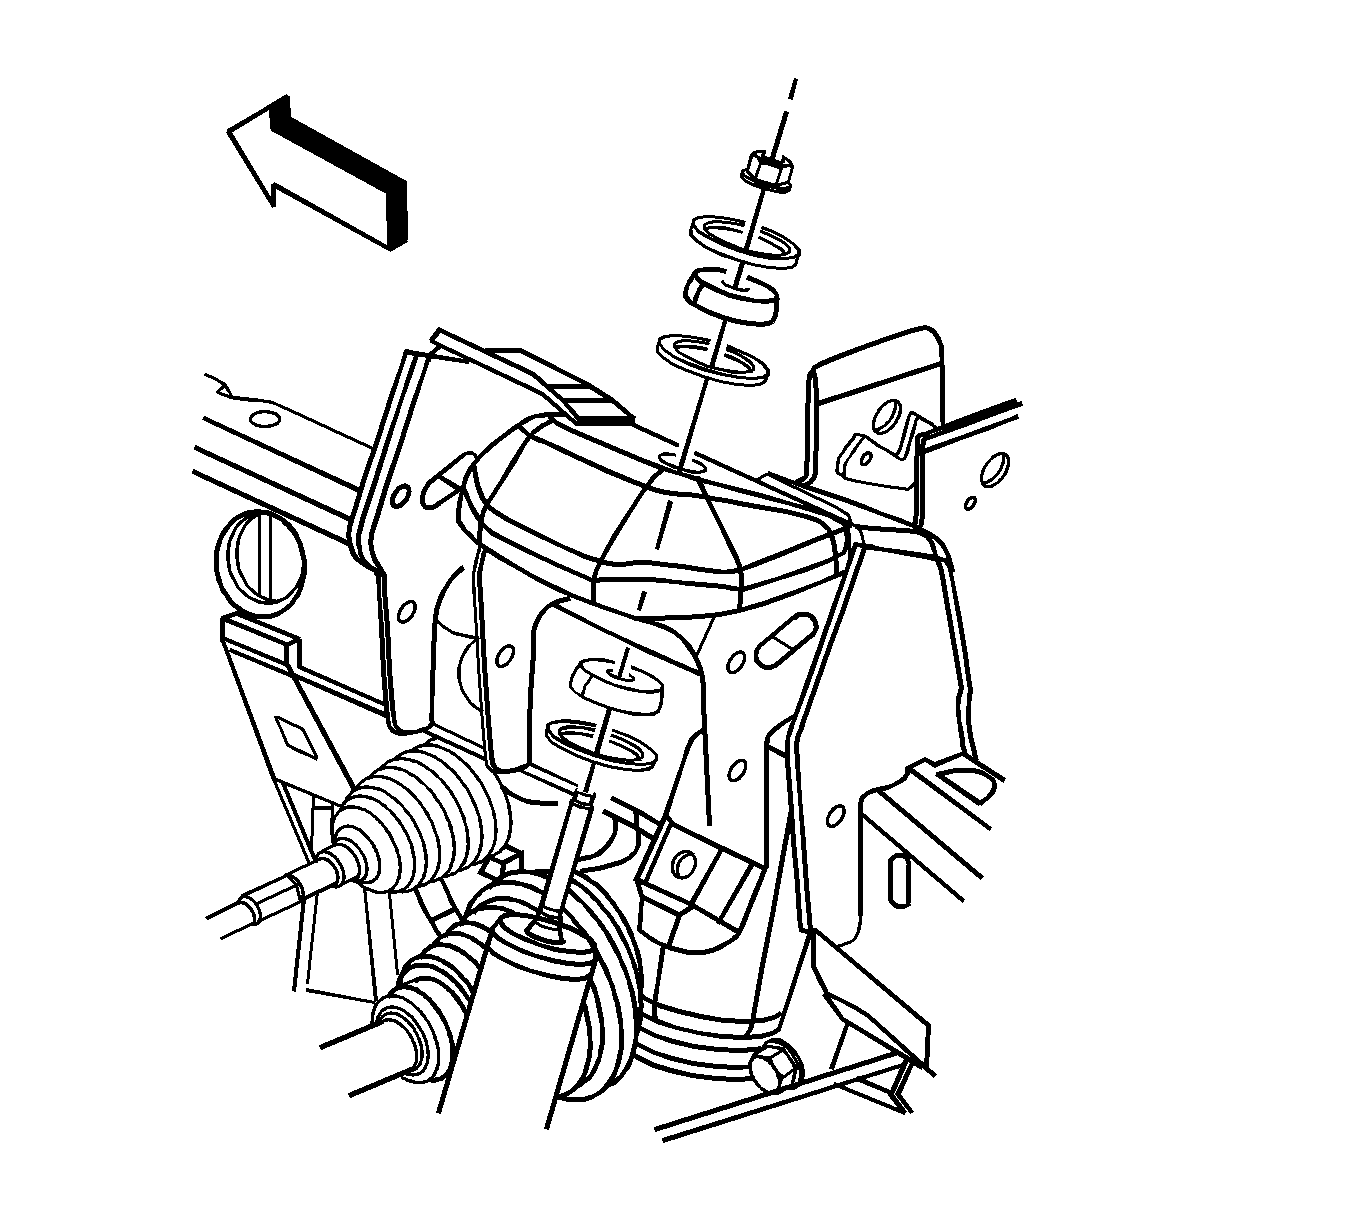
- Install the shock absorber through the lower control arm from below. Insert the tennon through the mounting hole in the upper spring pocket.
- Align the shock absorber with the mounting holes in the lower control arm.
- Install the shock absorber mounting bolts to the lower control arm.
- Install the upper insulator to the shock absorber.
- Install the nut to the tennon end.
- Hold the tennon end with a wrench while torquing the nut.
- Remove the support stand.
- Lower the vehicle

Notice: Use the correct fastener in the correct location. Replacement fasteners must be the correct part number for that application. Fasteners requiring replacement or fasteners requiring the use of thread locking compound or sealant are identified in the service procedure. Do not use paints, lubricants, or corrosion inhibitors on fasteners or fastener joint surfaces unless specified. These coatings affect fastener torque and joint clamping force and may damage the fastener. Use the correct tightening sequence and specifications when installing fasteners in order to avoid damage to parts and systems.
Tighten
Tighten the bolts to 70 N·m (52 lb ft).

Important: The upper insulator (1) must be installed above the shock mounting bracket on the frame. The plastic pilot ring (2) will assist the alignment of the isolators.

Tighten
Tighten the nut to 24 N·m (18 lb ft).
