Special Tools
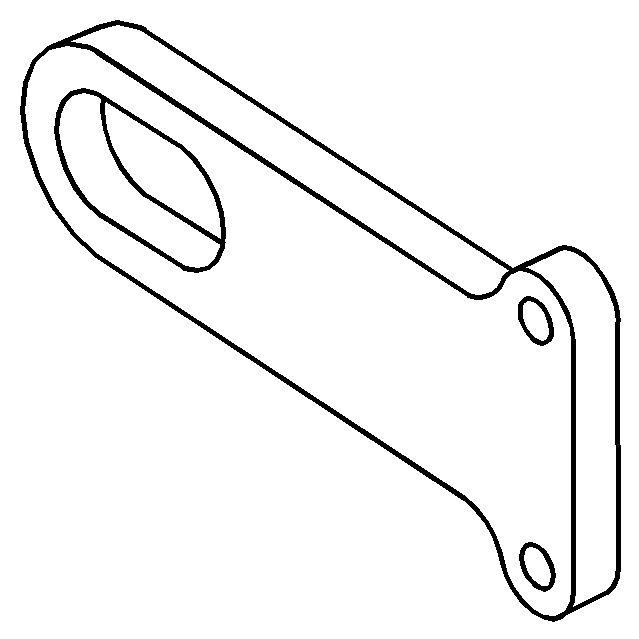
J 44220 Engine Lift Bracket
Removal Procedure
- Remove the hood. Refer to
Hood Replacement.
- Disconnect the negative battery cable. Refer to
Battery Negative Cable Disconnection and Connection.
- Drain engine coolant. Refer to
Cooling System Draining and Filling.
- Recover the refrigerant. Refer to
Refrigerant Recovery and Recharging.
Note: Keep drain plug removed during engine removal and installation.
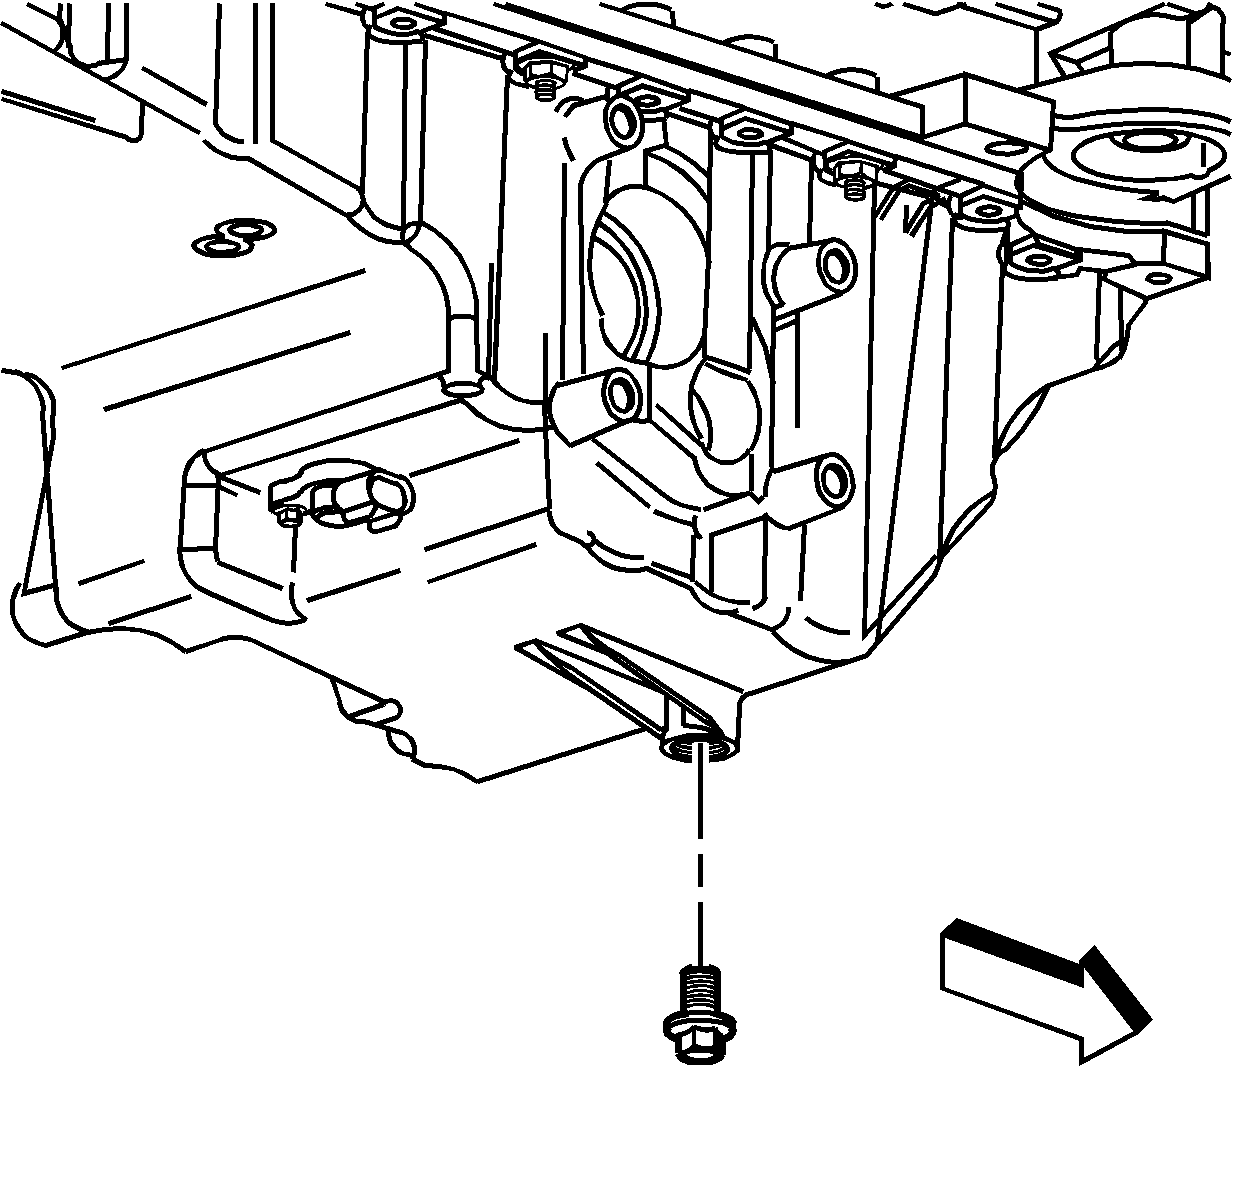
- Remove the oil pan drain plug and drain the oil.
- Install a suitable plug into the oil pan after draining to prevent any oil leakage during the rest of the procedure.
- Remove the air cleaner assembly. Refer to
Air Cleaner Assembly Replacement.
- Remove the throttle body. Refer to
Throttle Body Assembly Replacement.
- Remove the manifold absolute pressure (MAP) sensor. Refer to
Manifold Absolute Pressure Sensor Replacement.
- Remove the washer solvent container. Refer to
Windshield Washer Solvent Container Replacement.
- Remove the grille. Refer to
Grille Replacement.
- Remove the headlamp housing. Refer to
Headlamp Housing Panel Replacement.
- Remove the radiator support brace. Refer to
Radiator Support Diagonal Brace Replacement.
- Remove the hood latch. Refer to
Hood Latch Support Replacement.
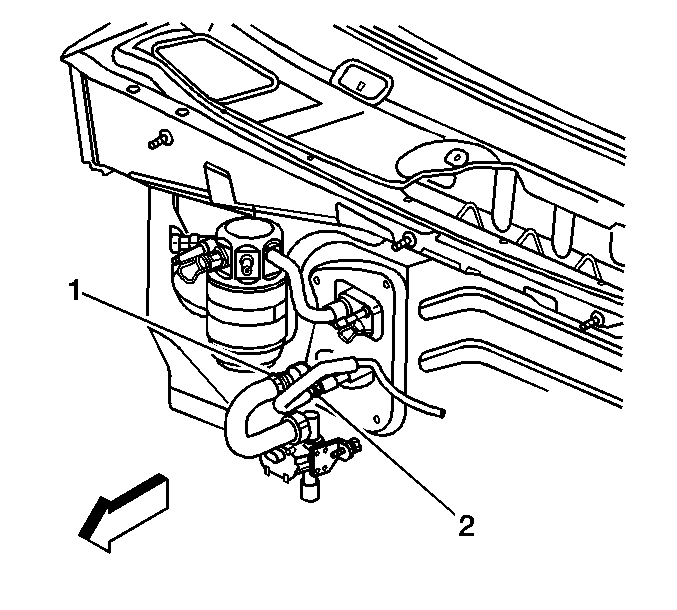
- Disconnect A/C lines at the condenser.
- Disconnect the transmission cooler lines at the engine, not the radiator.
- Remove the cooling fan and the shroud tilting the radiator forward, and the cooling fan and the shroud rearward for clearance. Refer to
Cooling Fan and Shroud Replacement.
- Remove the radiator with condenser and transmission cooler lines. Refer to
Radiator Replacement.
- Remove the drive belt. Refer to
Drive Belt Replacement.
- Remove the power steering pump bolts and lay the pump aside.
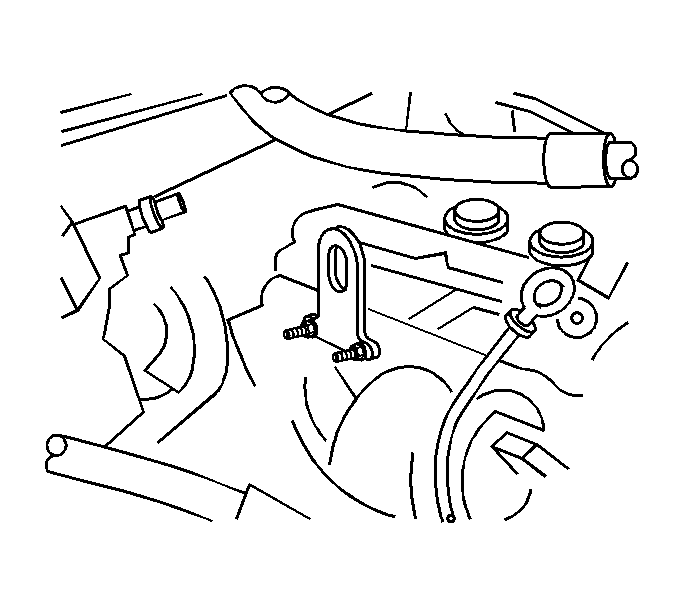
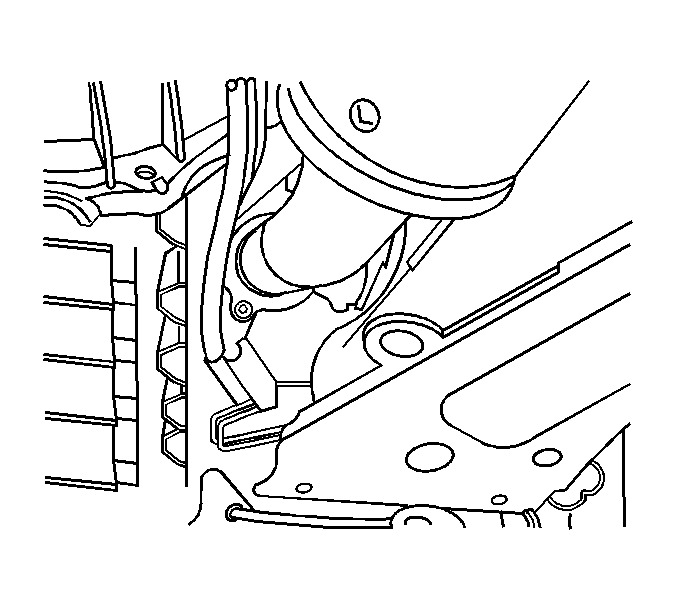
- Ensure the heater hoses (1, 2) at the heater core are disconnected.
- Remove the secondary air injection (AIR) reaction solenoid valve. Refer to
Secondary Air Injection Solenoid Valve Replacement.
- Install the lift hook
J 44220 to the AIR port on the engine head.
- Disconnect the oxygen sensor electrical connector.
- Disconnect the A/C line at the accumulator.
- Disconnect the front axle actuator electrical connector.
- Disconnect the camshaft phaser actuator valve electrical connector.
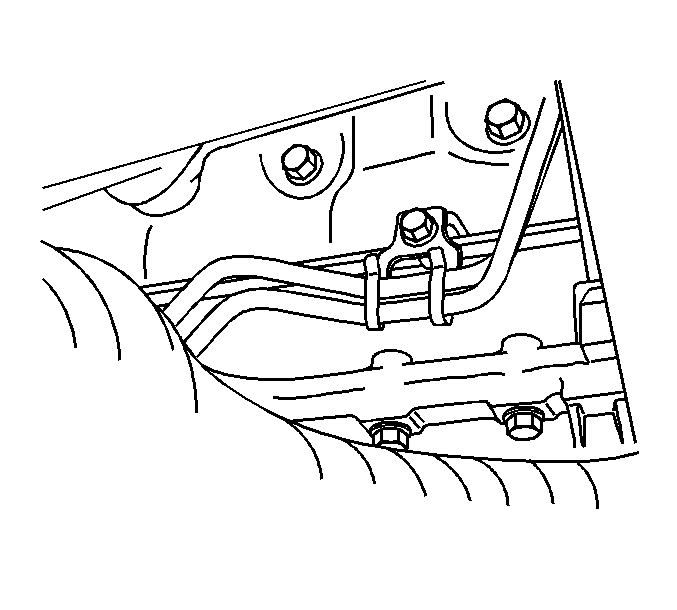
- Unclip the transmission cooler lines from right side of the engine block.
- Disconnect the ignition coil harness connectors.
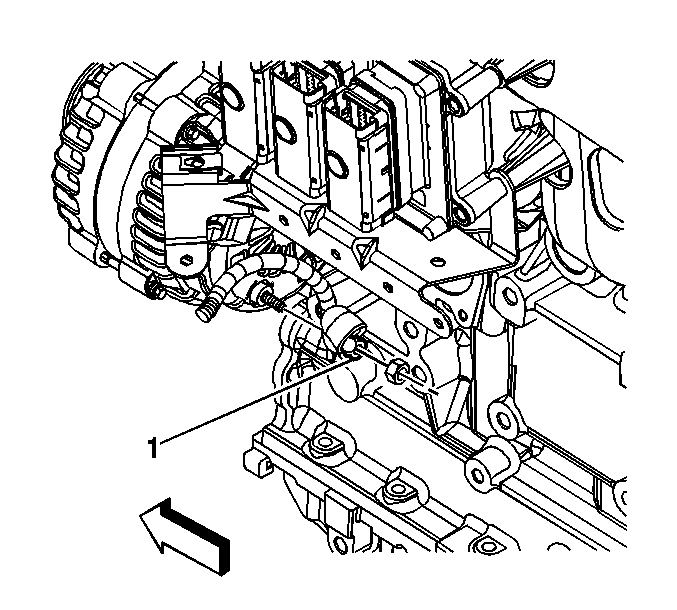
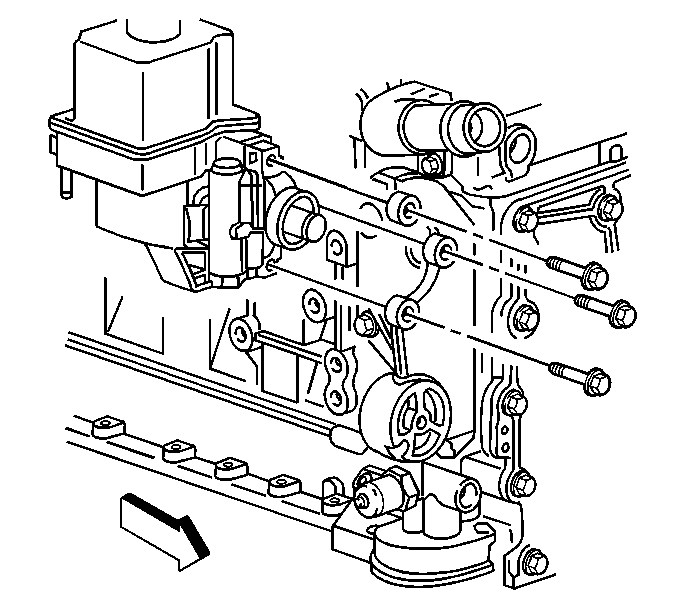
- Carefully disconnect harness retainer at clips (1) and remove.
- Remove power brake hose at booster.
- Remove the engine control module (ECM). Refer to
Engine Control Module Replacement.
- Remove all harnesses from the engine harness bracket.
- Disconnect the front differential vent hose from the engine harness bracket.
- Remove the engine harness bracket bolt and remove bracket.
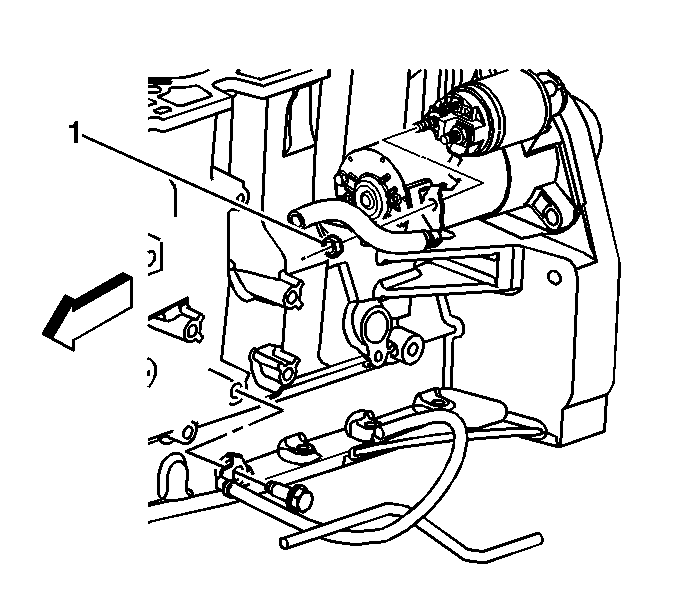
- Disconnect starter electrical connections (1).
- Disconnect the A/C pressure sensor and clutch electrical connector.
- Disconnect generator electrical connector and battery lead (1).
- Disconnect the knock sensor electrical connector.
- Disconnect the crankshaft sensor electrical connector.
- Disconnect the camshaft sensor electrical connector.

- Remove 4 grounds on the left side of the block (1).
- Raise the vehicle. Refer to
Lifting and Jacking the Vehicle.
- Remove the wheel drive shafts, left and right. Refer to
Wheel Drive Shaft Replacement.
- Remove the propeller shaft from the front axle pinion yoke. Refer to
Front Propeller Shaft Replacement.
- Remove the engine protection shield. Refer to
Engine Protection Shield Replacement.
- Disconnect the exhaust pipe from the exhaust manifold and slide the exhaust pipe backward slightly.
- Remove the fuel tank shield, if equipped. Refer to
Fuel Tank Shield Replacement.
- Disconnect the AIR pipes from the AIR pump.
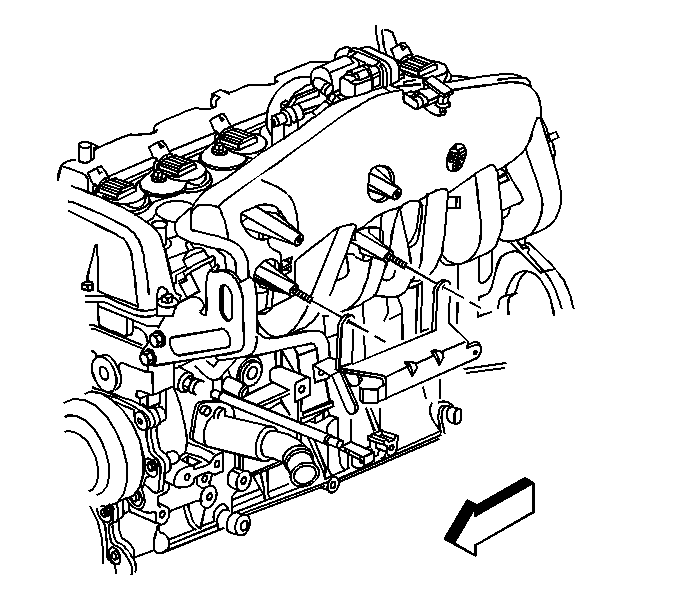
- Remove the torque converter bolt access cover.
- Remove the torque converter bolts.
- Place a jack on the transmission oil pan for support.
- Remove the transmission support. Refer to
Transmission Support Replacement.
- Lower the transmission enough to reach the top bell housing bolts.
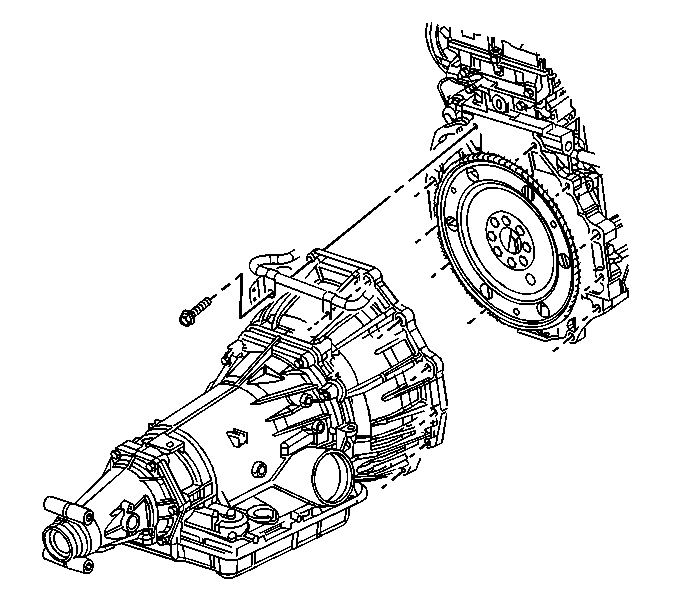
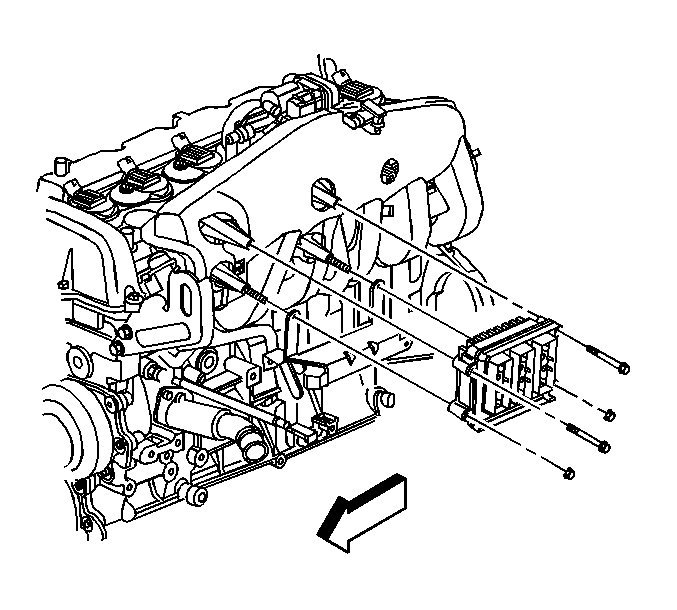
- Remove the top 4 bell housing bolts. There may be 2 harness clips that will need to be removed in order to have access to 2 of the top bolts.
- Raise the transmission.
- Reinstall the transmission support using only 2 through bolts.
- Remove the remaining bell housing bolts, for a total of 11 bolts.
- Remove the left and right engine lower mount nuts.
- Disconnect the oil pressure switch electrical connector.
- Lower the vehicle.
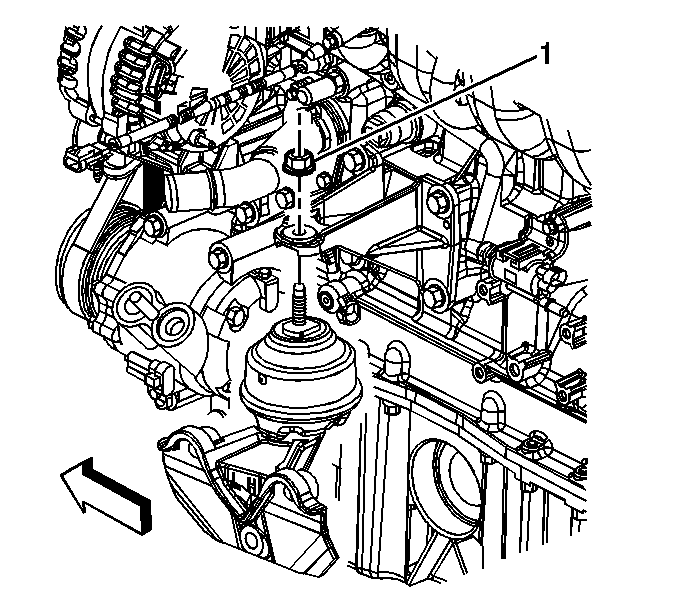
- Remove the left upper engine mount nut (1).
- Remove the right upper engine mount nut (1).
- Install the engine hoist.
- Raise the engine out of the compartment slowly keeping the transmission supported.
- Remove both engine mounts for clearance.
- Remove the fasteners securing the AIR pipes to the back of the engine head.
- Remove the AIR pipes from the vehicle.
- Continue raising the engine out of the vehicle.
- Install the engine to the engine stand.
Installation Procedure
- Remove the engine from the engine stand.
- Slowly install the engine into the engine compartment aligning the engine mounts with the brackets.
- Install the AIR pipes to the engine.
- Install the fasteners securing the AIR pipes to the back of the engine head.
- When the engine mounts are aligned, install the engine mounts, putting the mount up through the engine mount brackets before inserting into the chassis mount brackets.
Caution: Refer to Fastener Caution in the Preface section.
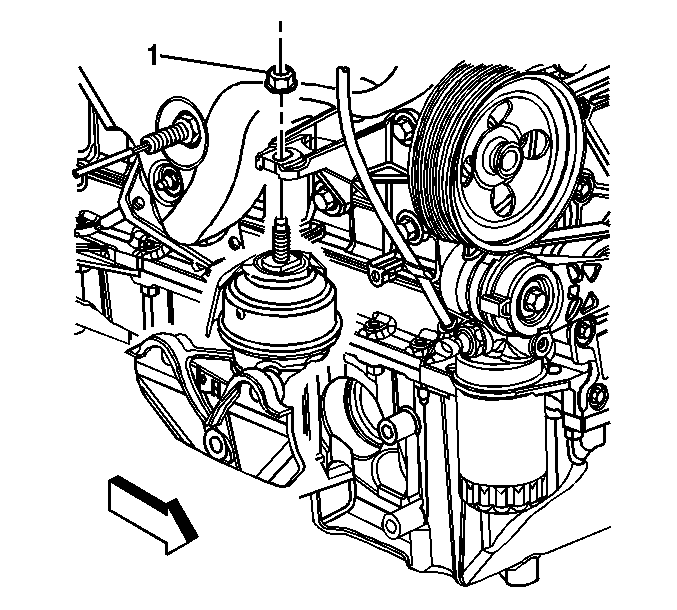
- Lower the engine onto the mounts and install the upper engine mount nuts (1) and tighten to
70 N·m (51 lb ft).
- Remove the engine hoist.
- Lay the radiator into the radiator support, but do not install the radiator completely.
- Raise the vehicle. Refer to
Lifting and Jacking the Vehicle.
- Install all of the lower bell housing bolts, excluding the top 4.
- Remove the 2 through bolts securing the transmission support.
- Lower the transmission.
- Install the top 4 bell housing bolts and tighten to
50 N·m (37 lb ft).
- Raise the transmission.
- Install the transmission support. Refer to
Transmission Support Replacement.
- Install the 3 torque converter bolts and tighten to
60 N·m (44 lb ft).
- Install the torque converter bolt cover.
- Install the fuel tank shield, if removed. Refer to
Fuel Tank Shield Replacement.
- Connect the AIR pipes to the AIR pump.
- Install the engine protection shield. Refer to
Engine Protection Shield Replacement.
- Install the propeller shaft to the front axle pinion yoke. Refer to
Front Propeller Shaft Replacement.
- Connect the exhaust pipe to the manifold and secure the pipe with the bolts and tighten to
50 N·m (37 lb ft).
- Connect the oil pressure sensor electrical connector.
- Install the oil pan drain plug and tighten to
26 N·m (19 lb ft).
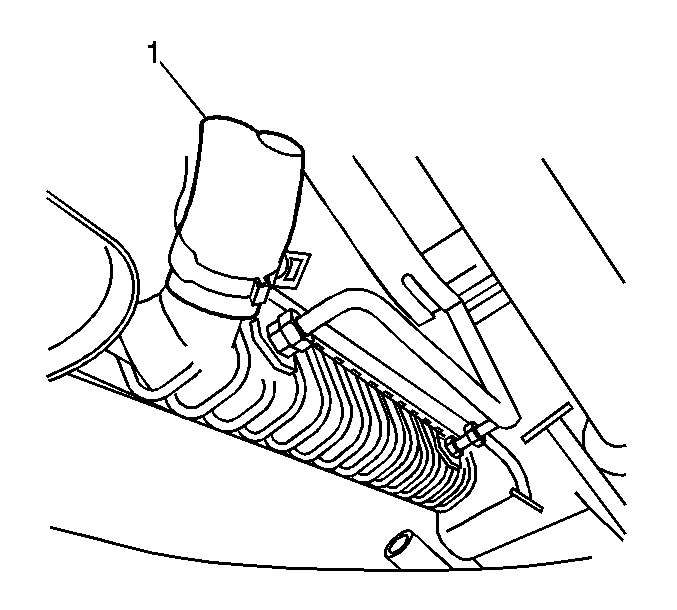
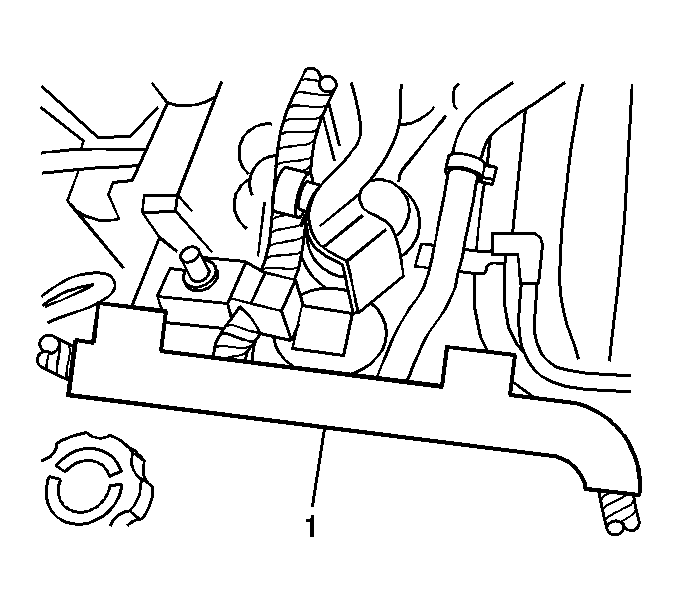
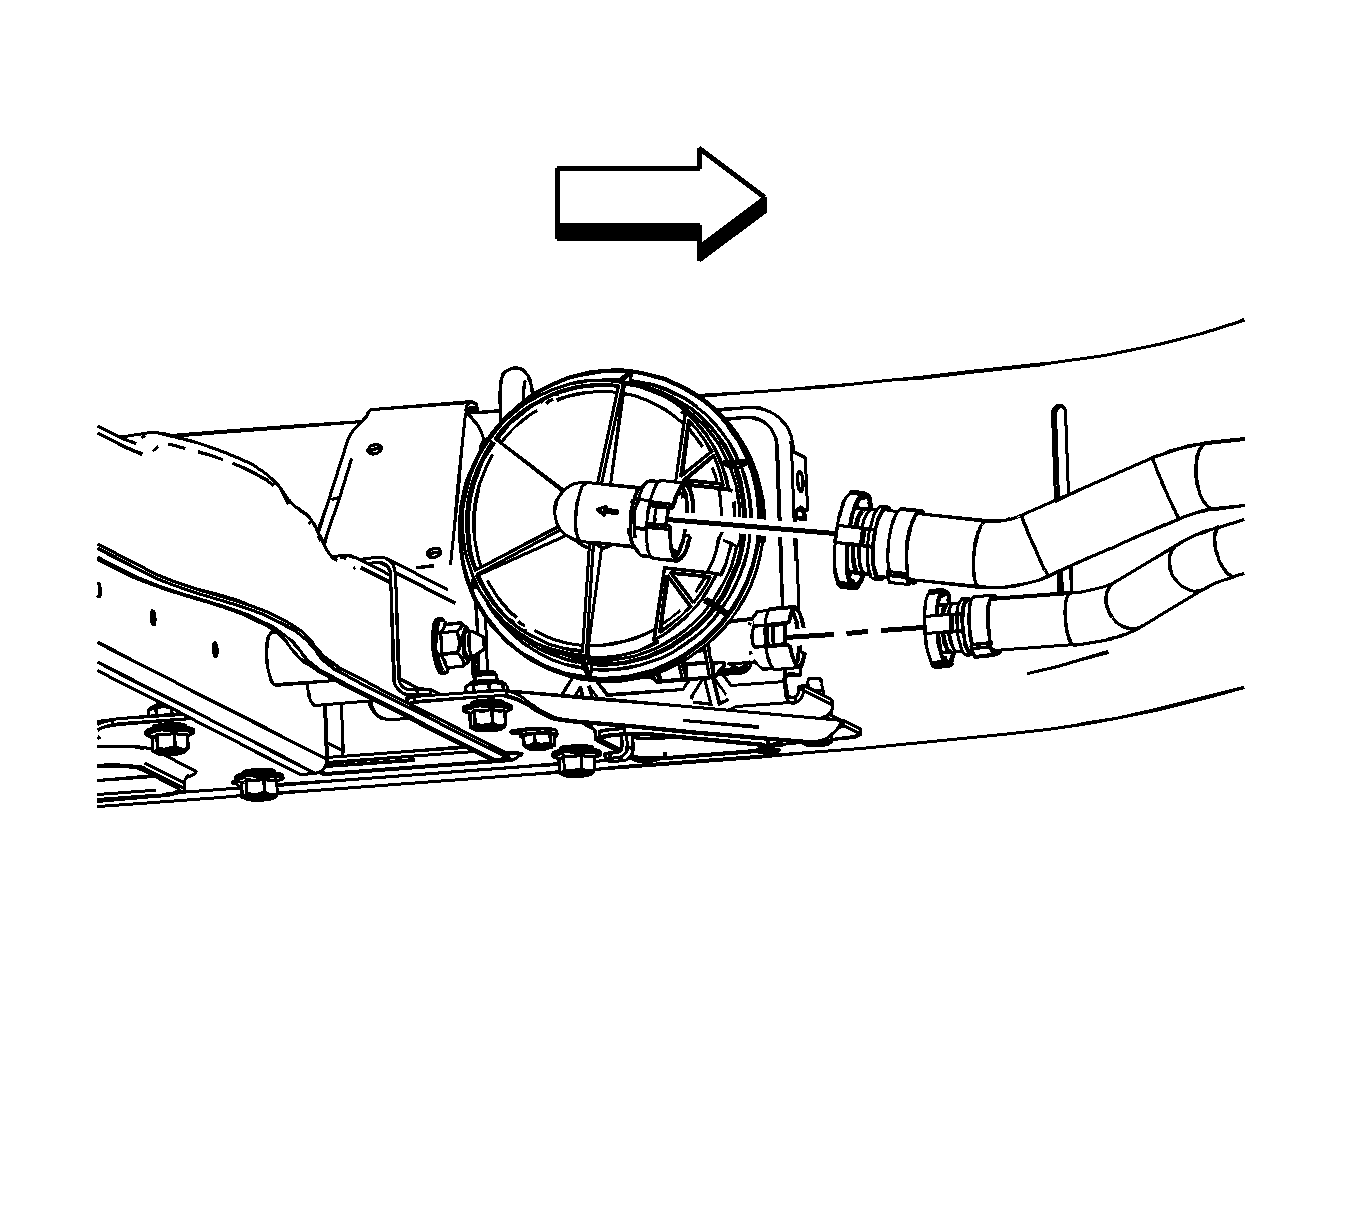
- Install the lower radiator hose (1).
- Install the left and right wheel drive shafts. Refer to
Wheel Drive Shaft Replacement.
- Lower the vehicle.
- Install the 4 grounds on the left side of the block (1).
- Install the camshaft sensor electrical connectors.
- Install the crankshaft sensor electrical connector.
- Install the knock sensor electrical connector.
- Install the generator electrical connector and battery lead (1). Tighten the generator battery lead nut to
9 N·m (80 lb in).
- Install the A/C pressure sensor and clutch electrical connector.
- Install starter electrical connectors and battery lead (1) and tighten to
9 N·m (80 lb in).
- Install the engine harness bracket and bolt and tighten to
50 N·m (37 lb ft).
- Install the front differential vent hose, to the engine harness bracket.
- Install all the harnesses to the engine harness bracket.
- Install the ECM. Refer to
Engine Control Module Replacement.
- Install the power brake hose at booster.
- Install the harness retainer (1) to the original location.
- Install the ignition coil harness electrical connectors.
- Clip the transmission cooler lines to the right side of the engine block.
- Connect the camshaft phaser actuator valve electrical connector.
- Connect the front axle actuator electrical connector.
- Connect the A/C line at the accumulator.
- Install the oxygen sensor electrical connector.
- Remove the lift hook
J 44220 .
- Install the secondary AIR solenoid valve. Refer to
Secondary Air Injection Solenoid Valve Replacement.
- Install the heater hoses to the heater core. Refer to
Heater Inlet Hose Replacement and
Heater Outlet Hose Replacement.
- Install the power steering pump.
- Install the power steering pump bolts and tighten to
25 N·m (18 lb ft).
- Install the drive belt. Refer to
Drive Belt Replacement.
- Install cooling fan and shroud, tilting the radiator forward for clearance.
- Finish installing the radiator. Refer to
Radiator Replacement.
- Install transmission cooler lines together.
- Install the MAP sensor. Refer to
Manifold Absolute Pressure Sensor Replacement.
- Install the throttle body. Refer to
Throttle Body Assembly Replacement.
- Install the hood latch. Refer to
Hood Latch Support Replacement.
- Install the head lamp housing. Refer to
Headlamp Housing Panel Replacement.
- Install the grill. Refer to
Grille Replacement.
- Install the washer solvent container. Refer to
Windshield Washer Solvent Container Replacement.
- Install the air cleaner assembly. Refer to
Air Cleaner Assembly Replacement.
- Connect the negative battery cable. Refer to
Battery Negative Cable Disconnection and Connection.
- Install the hood. Refer to
Hood Replacement.
- Service the engine oil.
- Fill the cooling system. Refer to
Cooling System Draining and Filling.
- Recharge the refrigerant. Refer to
Refrigerant Recovery and Recharging.
- Perform the CKP system variation learn procedure. Refer to
Crankshaft Position System Variation Learn.
| | Note: After an overhaul, the engine should be tested. Use the following procedure after the engine is installed in the vehicle.
|
| • | Disable the ignition system. |
| • | Crank the engine several times. Listen for unusual noises or evidence that parts are binding. |
| • | Enable the ignition system. |
| • | Start the engine and listen for unusual noises. |
| • | Check the vehicle oil pressure gage or light and confirm that the engine has acceptable oil pressure. |
| • | Run the engine speed at about 1000 RPM until the engine has reached normal operating temperature. |
| • | Listen for a sticking lifter and other unusual noises. |
| • | Inspect for fuel, oil and/or coolant leaks while the engine is running. |
| • | Perform a final inspection for the proper engine oil and coolant levels. |
- Install the hood. Refer to
Hood Replacement.
