Removal Procedure
- Remove the crankshaft pulley. Refer to Crankshaft Pulley Replacement in Engine Mechanical.
- Remove the retaining clips and the engine wiring harness from the timing belt cover.
- Remove the coolant pump pulley.
- Remove the eight bolts and the one nut that secures the timing belt cover.
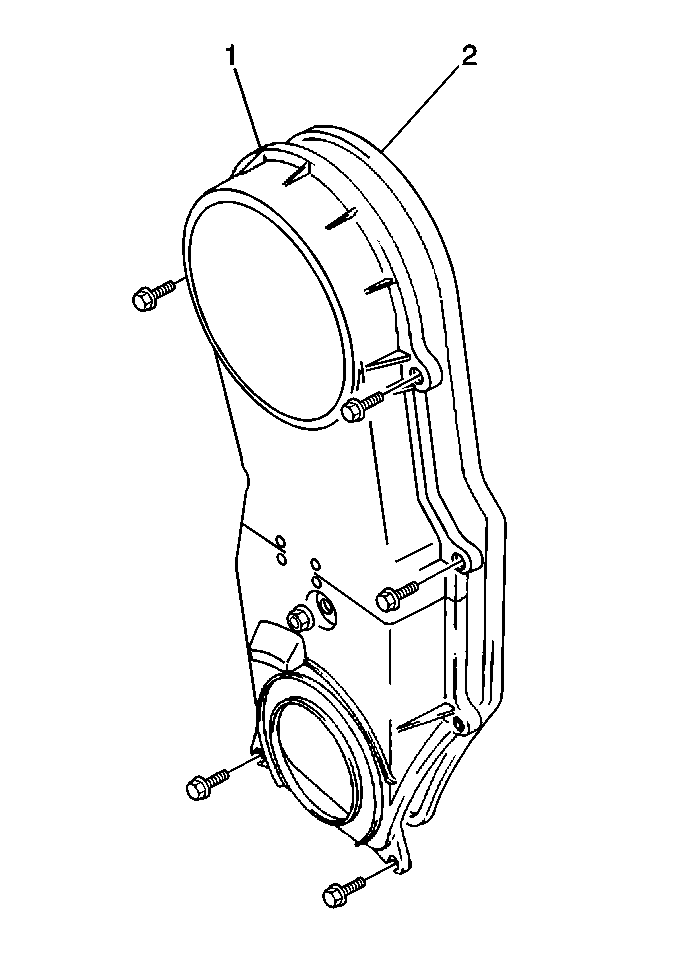
- Remove the timing belt cover (1) from the vehicle.
- Rotate the crankshaft clockwise until the timing marks are aligned.
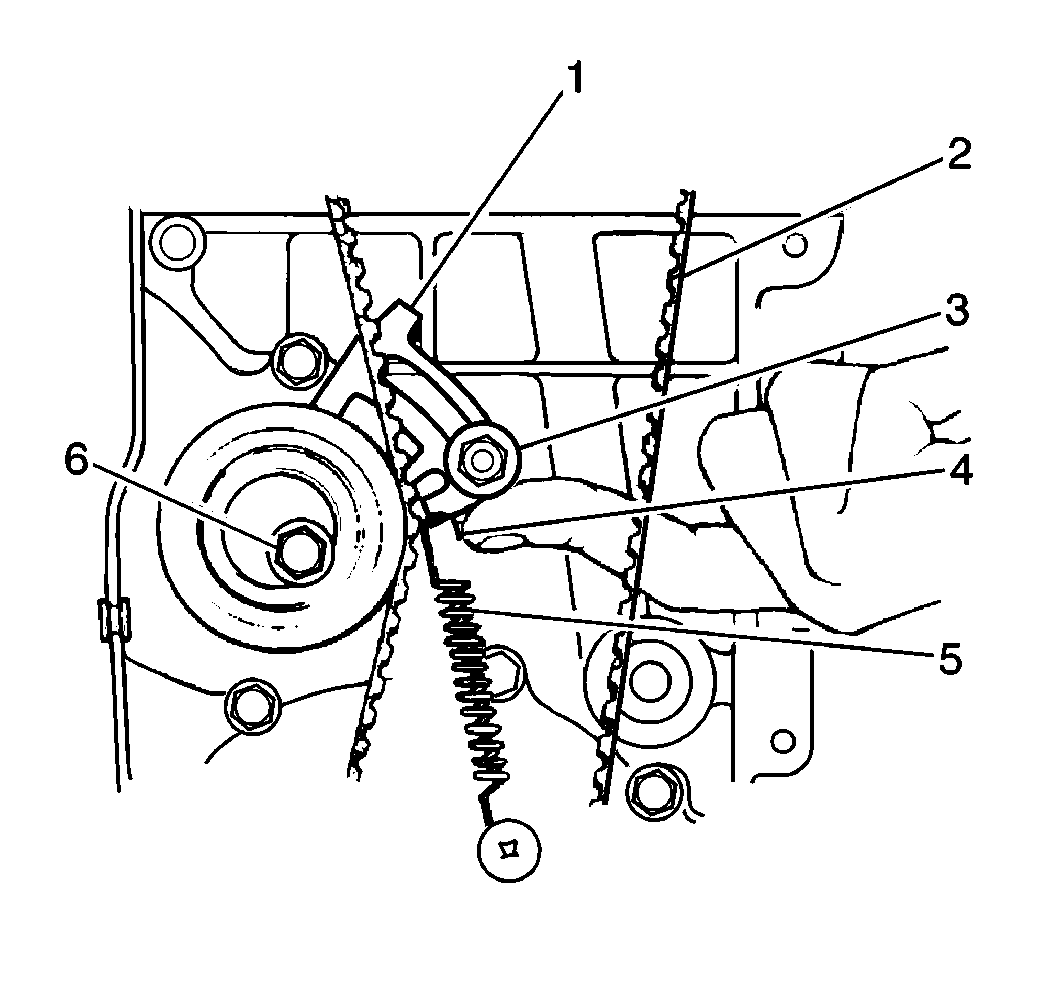
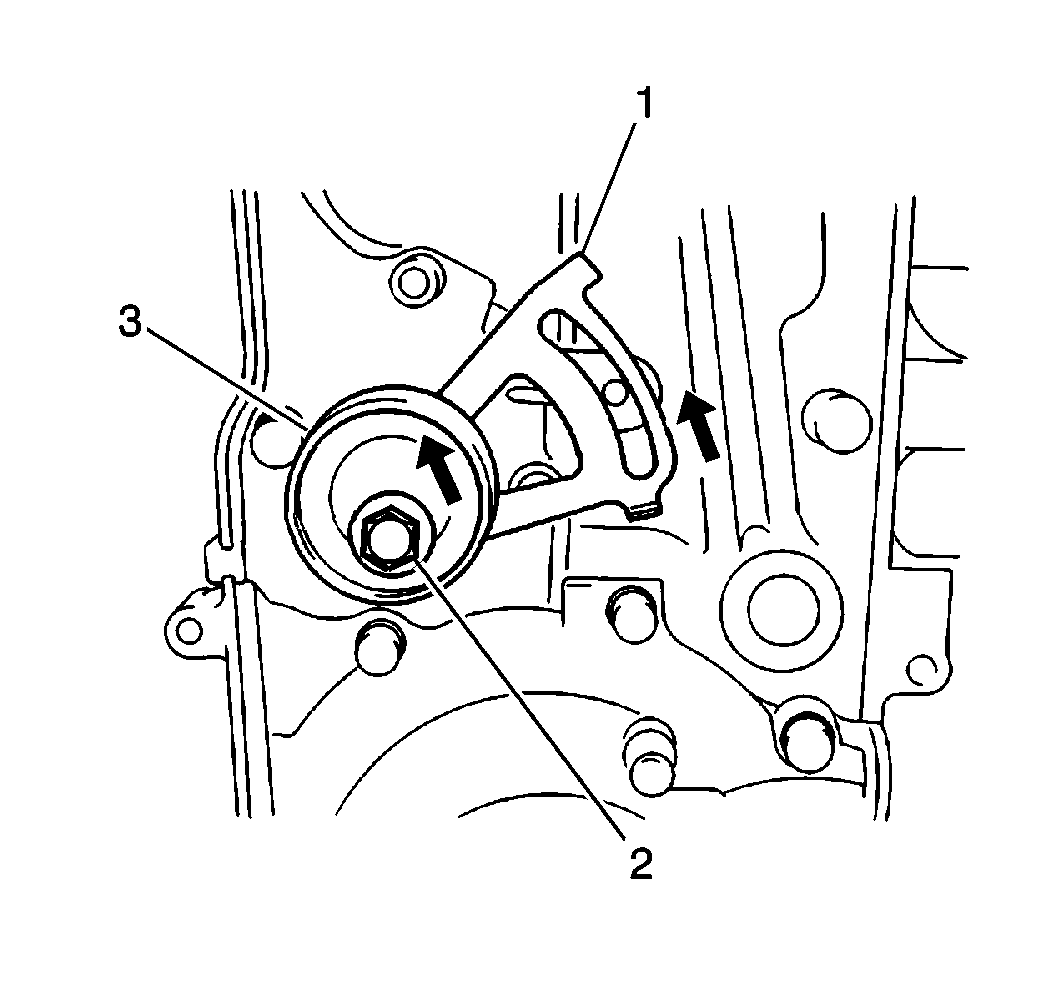
- Loosen the tensioner bolt (6) and the stud (3).
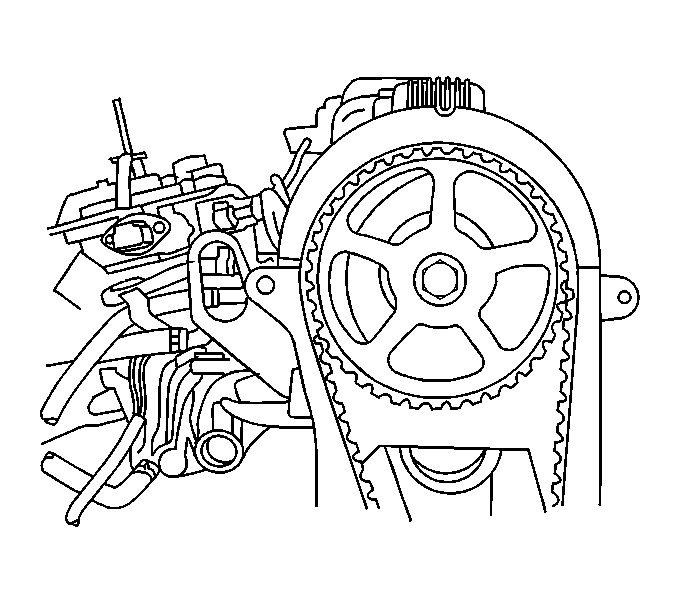
- Remove the belt from the crankshaft timing gear and the camshaft timing gear after pushing up the tensioner plate (1) fully by finger.
- Remove the tensioner and the tensioner plate (1).
- Remove the tensioner spring (5) and the spring damper (4).
- Inspect the timing belt (2) for wear or cracks. Replace the belt as necessary.
- Inspect the timing belt tensioner for smooth rotation.
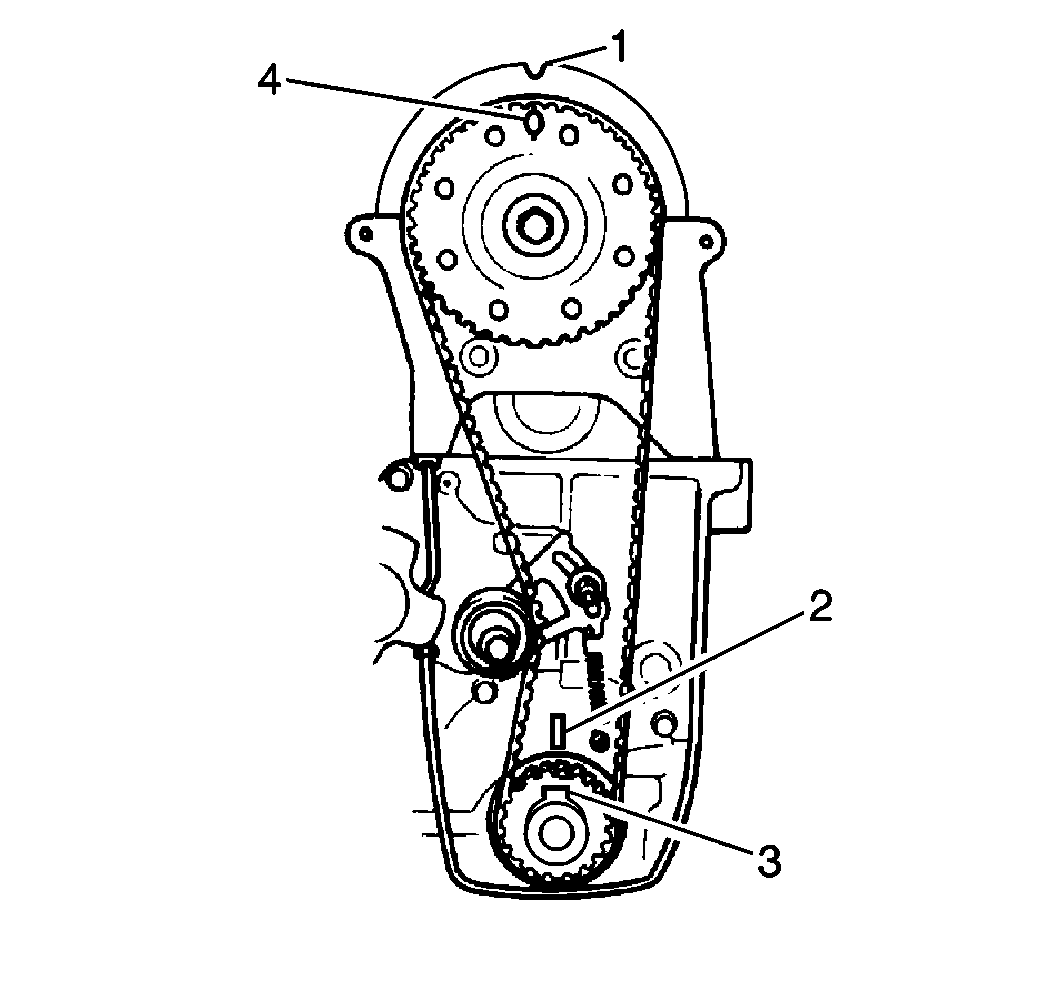
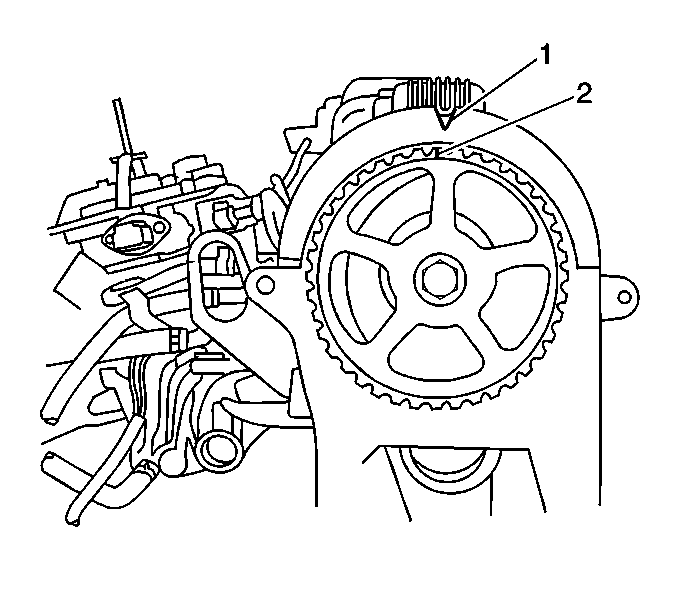
Important: Prior to disassembly, align the timing marks on the camshaft gear (1,4) and the crankshaft gear (2,3) by turning the crankshaft before removing the timing belt.
Notice: After timing belt is removed, never turn camshaft and crankshaft independently. If turned, interference may occur among pistons and valves, and parts related to pistons and valves may be damaged.
Installation Procedure
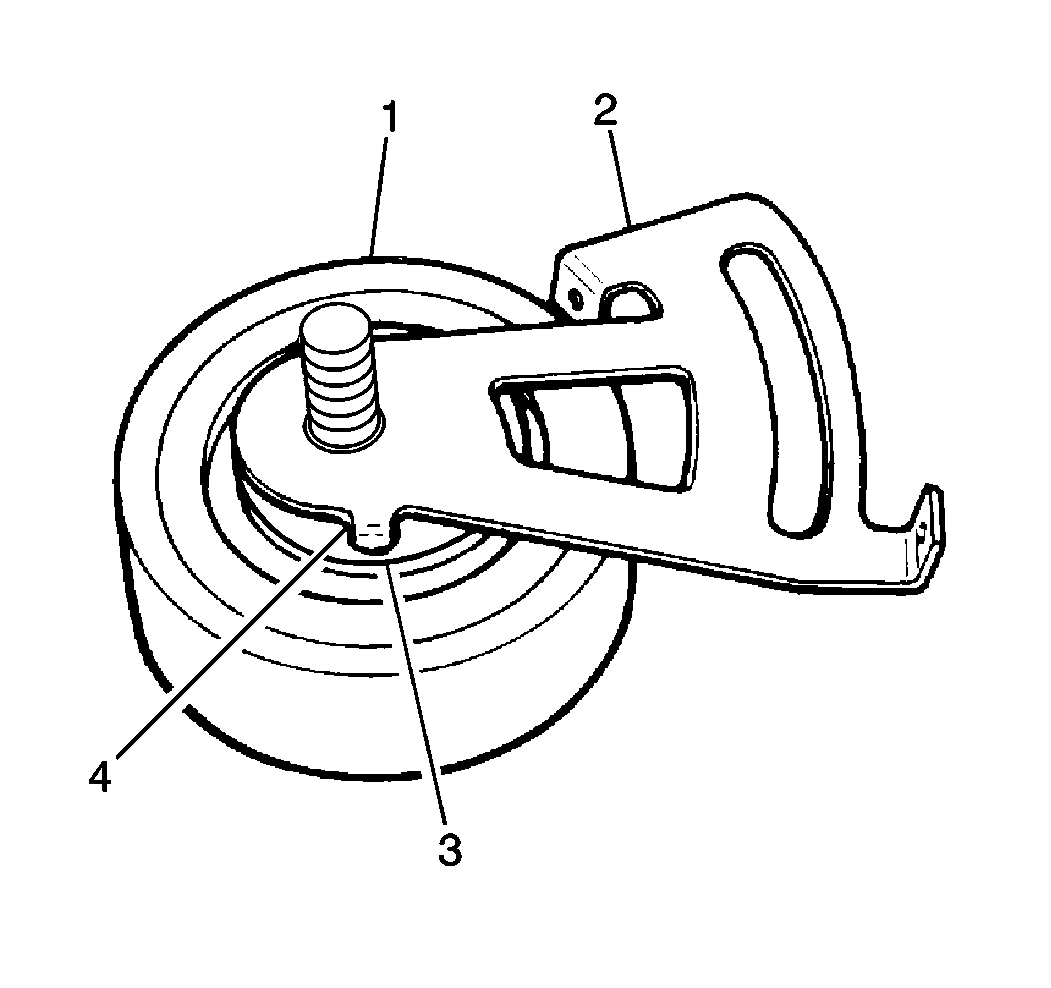
- Connect the tensioner plate (2) to the timing belt tensioner (1).
- Insert the tensioner plate lug (4) into the timing belt tensioner hole (3).
- Install the timing belt tensioner and the tensioner plate (1) to the cylinder block. Secure the assembly with one bolt (6) and one stud (3). Do not tighten fully.
- Ensure that the plate (1) movement in the direction of the arrow causes the tensioner (3) to move in the same direction. If the tensioner does not move in the same direction, remove the tensioner and the tensioner plate and reinsert the tensioner plate lug in the timing plate tensioner hole.
- Ensure that the timing mark on the camshaft timing gear is aligned with the V mark on the cylinder head cover.
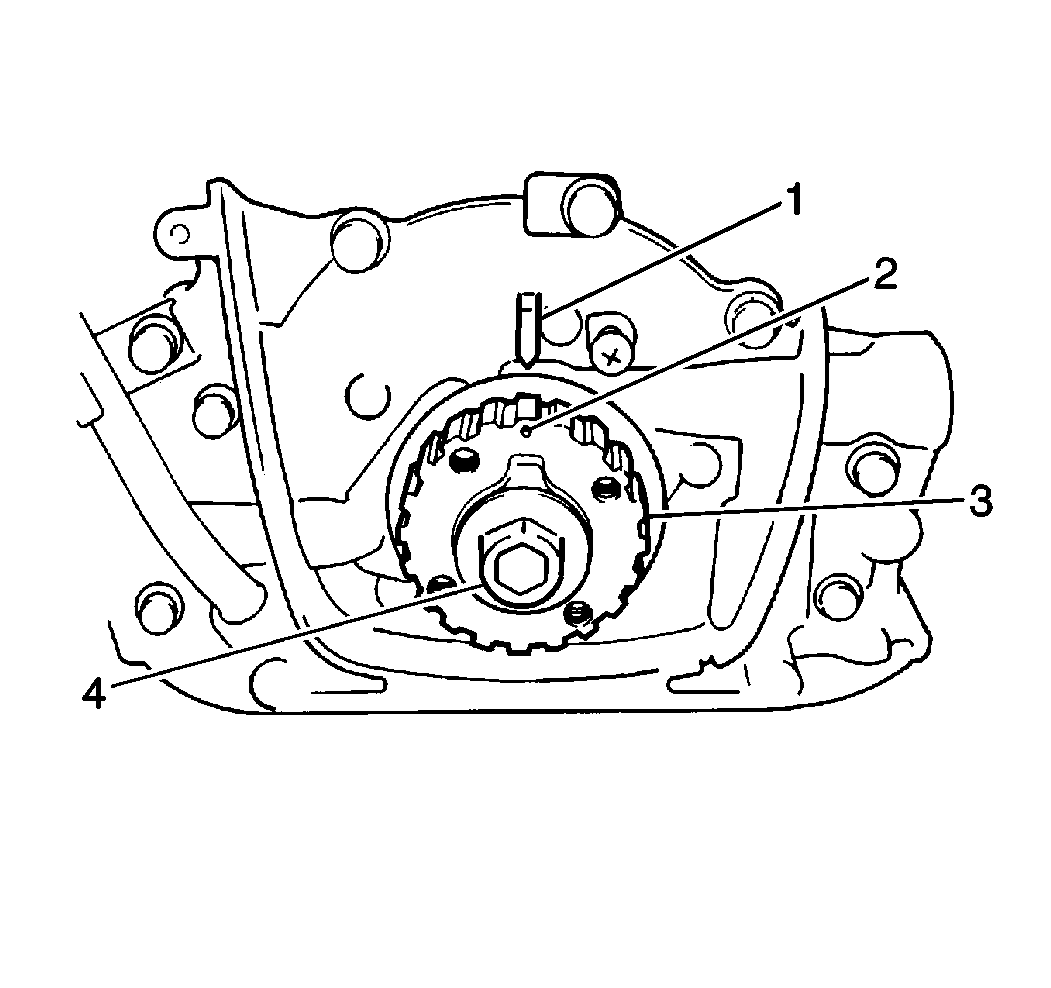
- Ensure that the punch mark on the crankshaft timing gear (2) is aligned with the arrow mark on the oil pump case (1).
- Push up on the tensioner plate (1) and install the timing belt (2) on the two pulleys in such a way that the drive side of the belt is free from any slack.
- Install the tensioner spring (5) and the spring damper (4). Hand tighten the tensioner stud only.
- Turn the crankshaft one and a half rotations clockwise after installing the timing belt. This will take up slack in the timing belt.
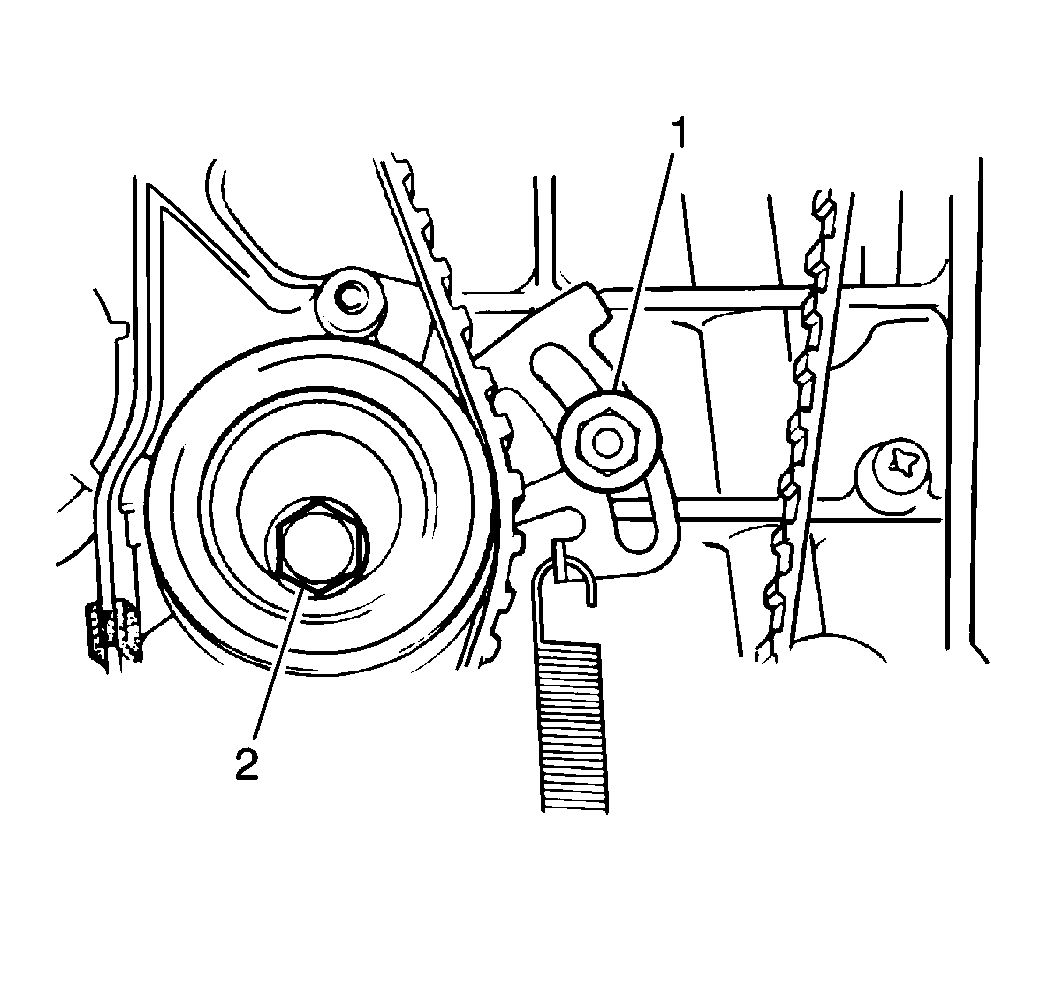
- Tighten the timing belt tensioner stud (1).
- Install the timing belt tensioner bolt (2).
- Turn the crankshaft a half rotation clockwise to confirm that the two sets of marks are aligned.
- Confirm that the camshaft marks (1,2) are aligned properly.
- Confirm that the crankshaft marks (1,2) are aligned properly.
- Install the timing belt cover (1). Secure the timing belt cover with the eight bolts and the one nut.
- Install the coolant pump pulley. Secure the coolant pump pulley with the four bolts.
- Install the crankshaft pulley. Refer to Crankshaft Pulley Replacement in Engine Mechanical.
Important:
• Match the arrow mark on the timing belt with the rotating direction
of the crankshaft, when installing the timing belt. • With the timing belt in this position, the number one piston is
at top dead center of the compression stroke.
Notice: Use the correct fastener in the correct location. Replacement fasteners must be the correct part number for that application. Fasteners requiring replacement or fasteners requiring the use of thread locking compound or sealant are identified in the service procedure. Do not use paints, lubricants, or corrosion inhibitors on fasteners or fastener joint surfaces unless specified. These coatings affect fastener torque and joint clamping force and may damage the fastener. Use the correct tightening sequence and specifications when installing fasteners in order to avoid damage to parts and systems.
Tighten
Tighten the timing belt tensioner stud to 11 N·m (97 lb in).
Tighten
Tighten the timing belt tensioner bolt to 27 N·m (20 lb ft).
Important: Ensure that the seal is between the coolant pump and the oil pump case, before installing the timing belt cover.
Tighten
Tighten the timing belt cover nut and bolts to 11 N·m (97 lb in).
Tighten
Tighten the coolant pump pulley bolts to 24 N·m (18 lb ft).
