Steering Column Replacement Electronic Power Steering (EPS)
Removal Procedure
- Disable the SIR system. Refer to SIR Disabling and Enabling .
- Disconnect the negative battery cable. Refer to Battery Negative Cable Disconnection and Connection .
- Remove the steering wheel. Refer to Steering Wheel Replacement .
- Remove the SIR coil assembly. Refer to Inflatable Restraint Steering Wheel Module Coil Replacement .
- Remove the multifunction turn signal. Refer to Turn Signal Multifunction Switch Replacement .
- Remove the multifunction turn signal switch housing. Refer to Multifunction Turn Signal Switch Housing Replacement .
- Remove the steering column knee bolster. Refer to Knee Bolster Replacement .
- Remove the steering column shaft pinch bolt from the intermediate steering shaft. Refer to Intermediate Steering Shaft Replacement .
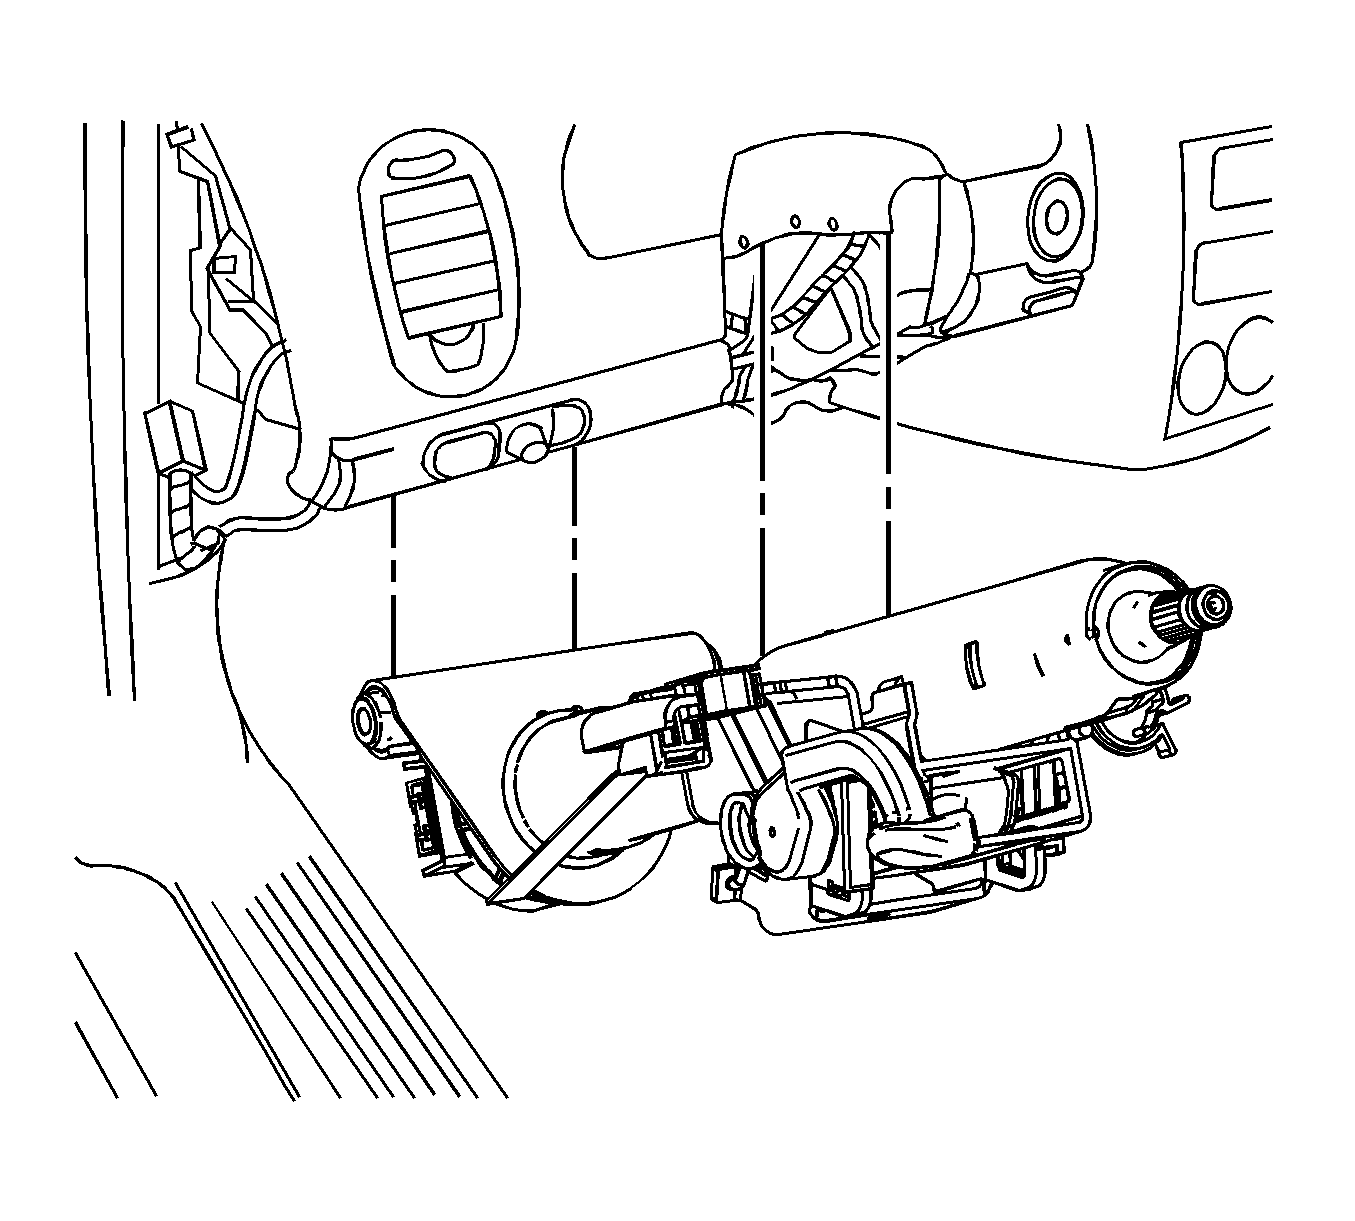
- Disconnect the steering column electrical connectors open the steering column wire harness retainer clip.
- Remove the adjustable pedal bracket assembly and reposition leaving the brake pedal cable and motor attached, if vehicle is equipped with adjustable pedals. Refer to Accelerator Pedal Bracket Replacement .
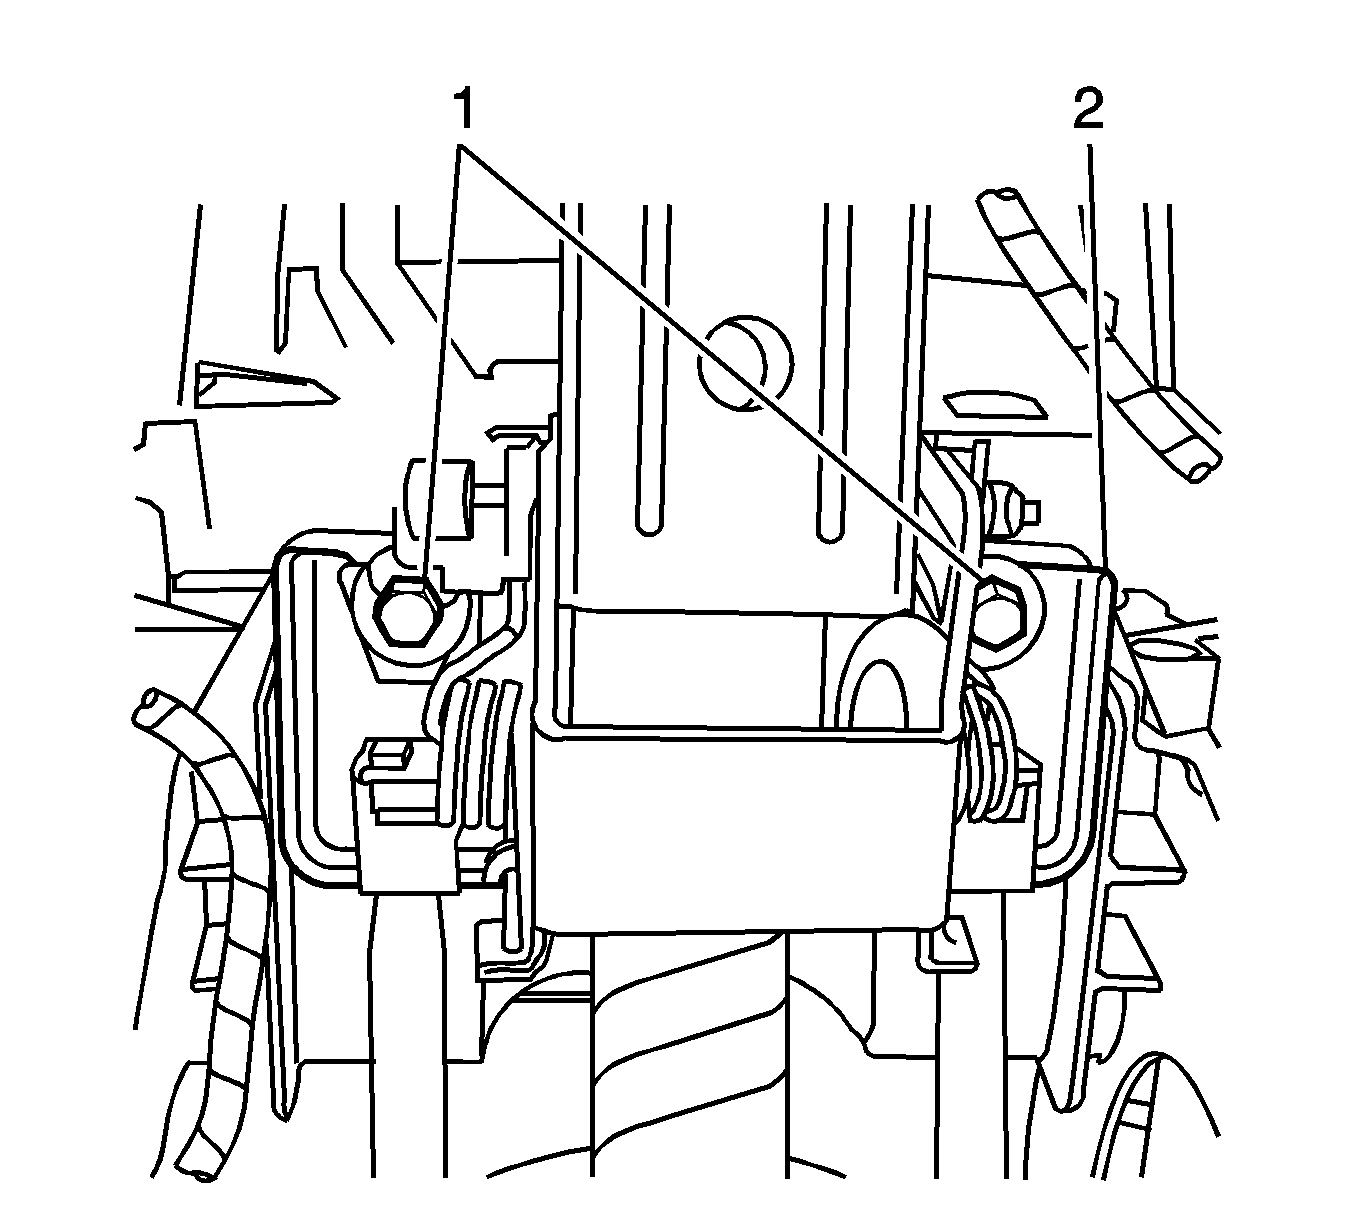
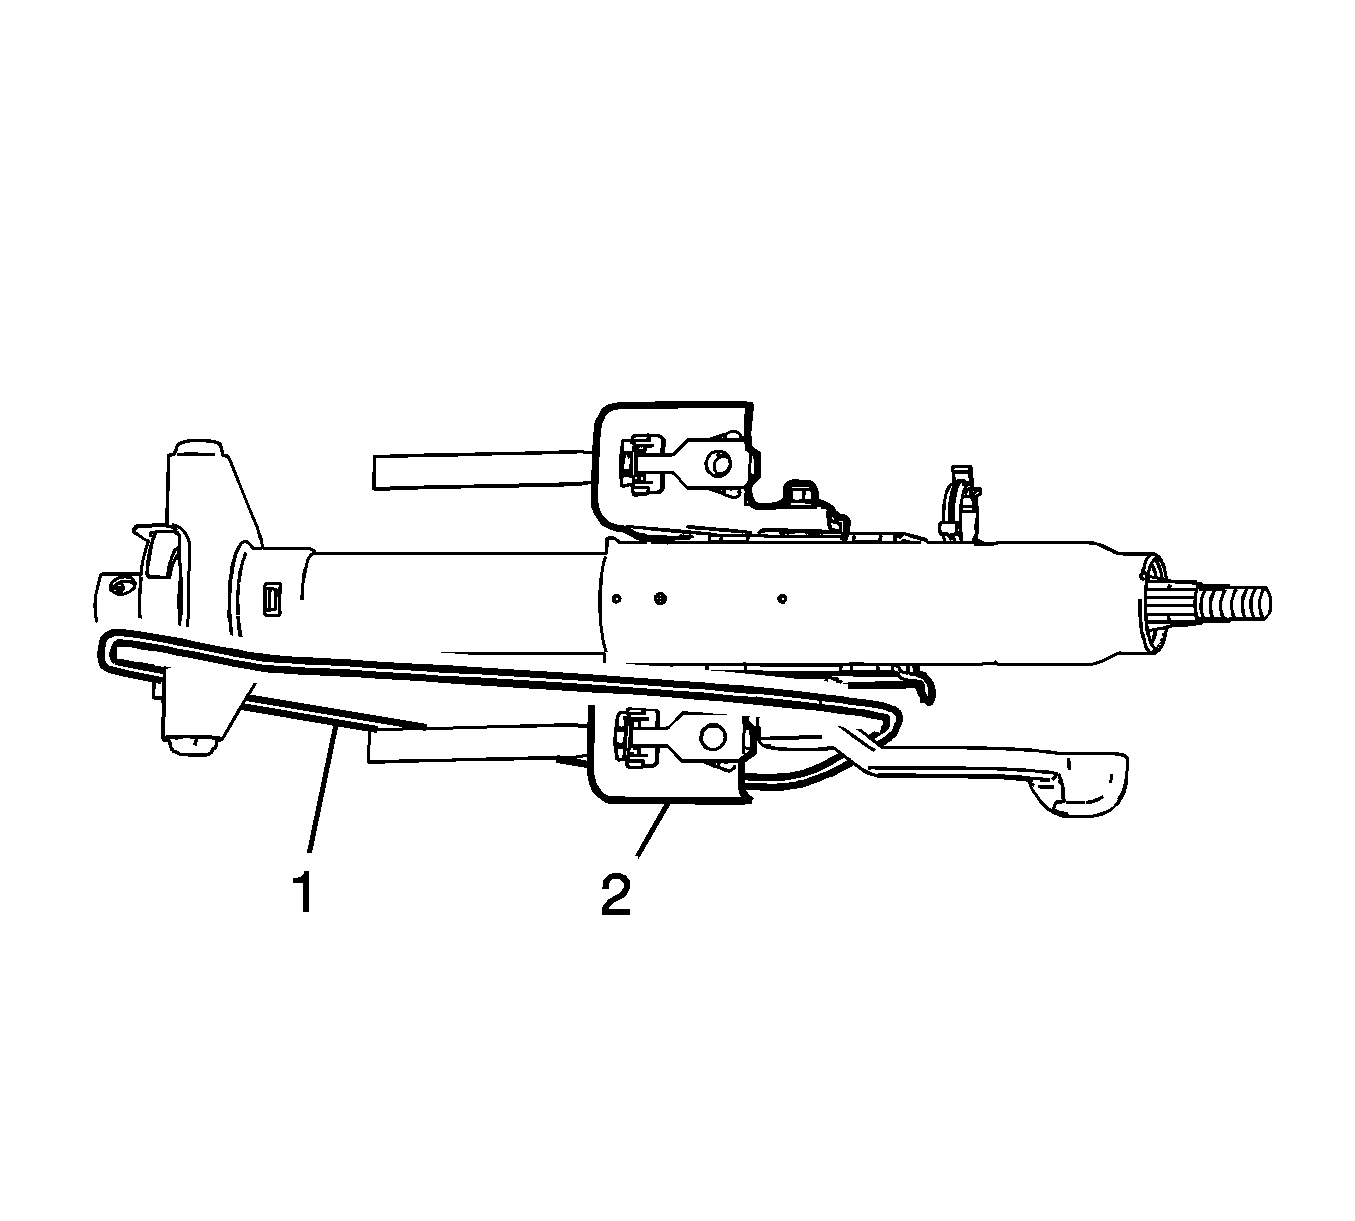
- Remove the upper steering column mounting bolts (1).
- Remove the lower steering column mounting bolt.
- Remove the steering column from the vehicle.
- If replacing the column, remove the motor/module assembly from the steering column. Refer to Power Steering Assist Motor Replacement .
Caution: Refer to SIR Caution in the Preface section.
Caution: Refer to Battery Disconnect Caution in the Preface section.
Notice: Secure the steering wheel utilizing a strap to prevent rotation. Locking of the steering column will prevent damage and a possible malfunction of the SIR system. The steering wheel must be secured
in position before disconnecting the following components:
• The steering column • The intermediate shaft • The steering gear
Notice: Once the steering column is removed from the vehicle, the column is extremely susceptible to damage. Dropping the column assembly on the end could collapse the steering shaft or loosen the plastic injections, which maintain column rigidity. Leaning on the column assembly could cause the jacket to bend or deform. Any of the above damage could impair the columns collapsible design. Do NOT hammer on the end of the shaft, because hammering could loosen the plastic injections, which maintain column rigidity. If you need to remove the steering wheel, refer to the Steering Wheel Replacement procedure in this section.
Important: In the event of a deployment, inspect the coil wire for any of the following signs of damage due to excessive heat:
• Scorching • Melting • Other damage
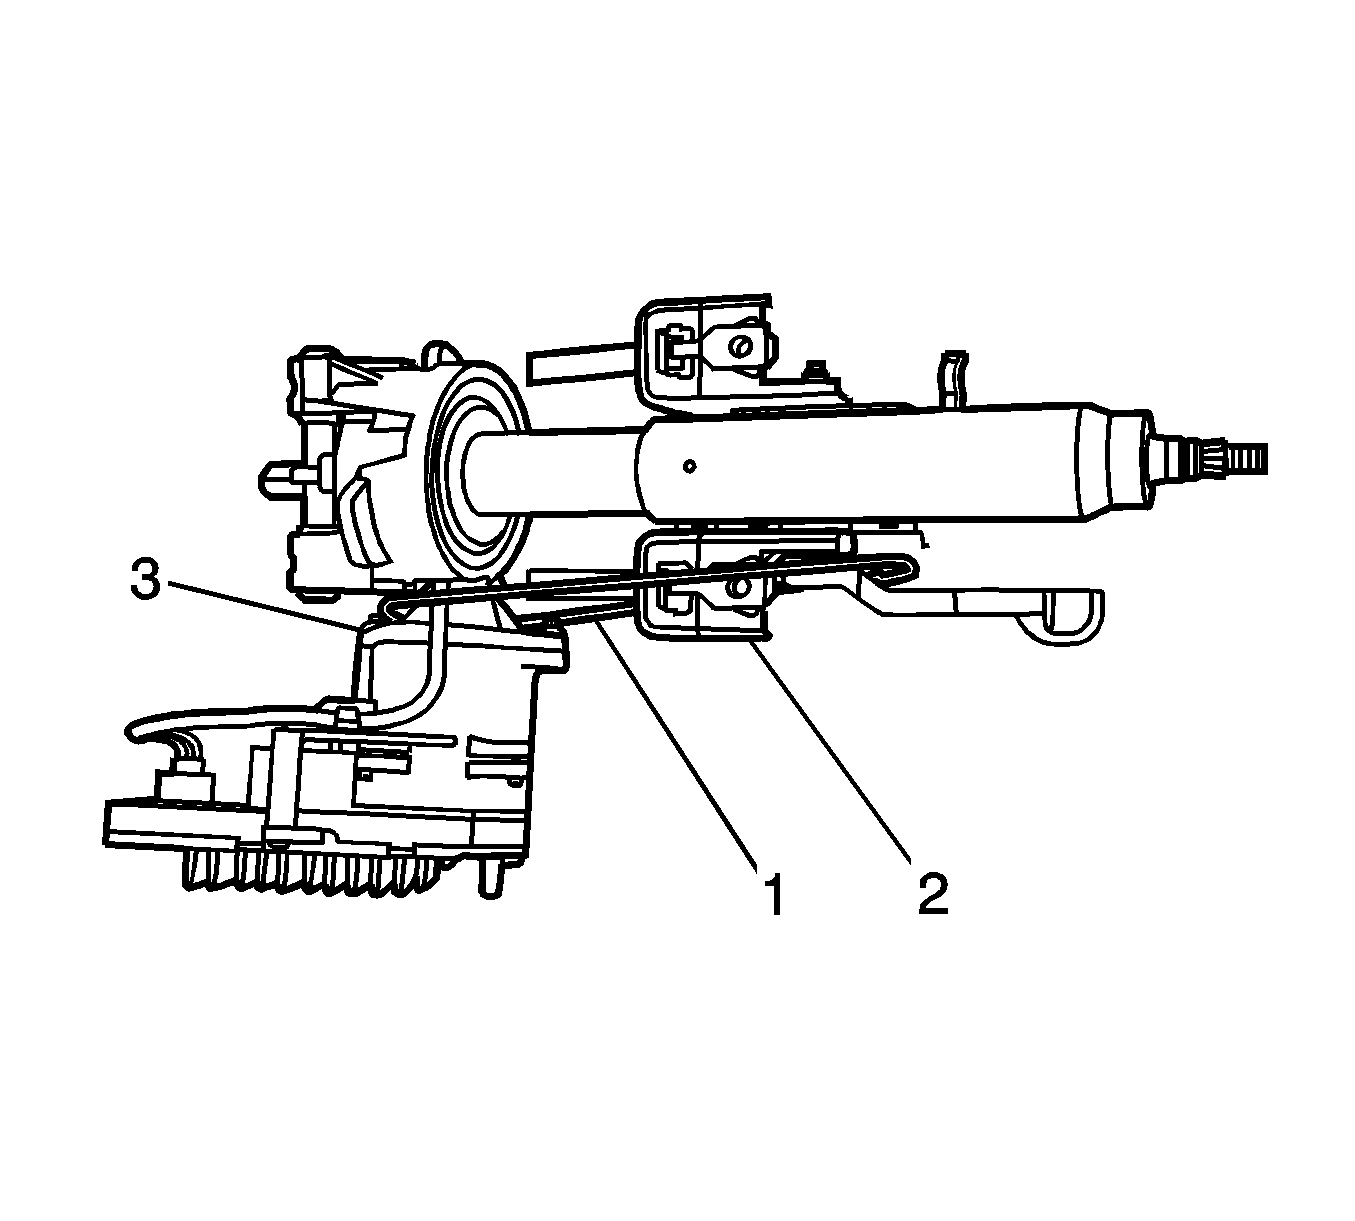
Important: Install tie straps (1) between the rake bracket assembly (2) and the neck of the assist mechanism housing (3) to prevent jacket assembly pull-apart. The steering column rake lever MUST be in the LOCK (FULL UP) position during steering column removal and installation to ensure that the rake lever bracket remains rigid. Install a tie strap around the lever and the jacket assembly to keep the lever in the LOCK position. Do not bend the steering column energy absorbing straps located on the upper steering column mounting bracket.
Important: DO NOT disconnect the adjustable brake pedal cable.
Installation Procedure
- If removed, install the motor/module assembly to the steering column. Refer to Power Steering Assist Motor Replacement .
- Position the steering column in the vehicle.
- Slide the lower end of the steering column shaft into the intermediate steering shaft. Refer to Intermediate Steering Shaft Replacement .
- Loosely install the lower steering column mounting bolt .
- Loosely install the upper steering column mounting bolts (1).
- Align the energy absorbing straps with the bolt holes in the steering column. Loosely install the upper steering column bolts (1).
- Tighten the steering column fasteners in the following sequence:
- Tighten the lower bolt to 27 N·m (18 lb ft).
- Tighten the left side upper bolt to 27 N·m (18 lb ft).
- Tighten the right side upper bolt to 27 N·m (18 lb ft).
- Connect the steering column electrical connectors and close the wire harness retainer clip on the steering column.
- Remove the tie strap (1) from between the rake lever bracket assembly (2) and the neck of the assist mechanism housing (3).
- Install the adjustable pedal bracket assembly, if equipped with adjustable pedals. Refer to Accelerator Pedal Bracket Replacement .
- Install the steering column knee bolster. Refer to Knee Bolster Replacement .
- Install the multifunction turn signal switch housing. Refer to Multifunction Turn Signal Switch Housing Replacement .
- Install the multifunction turn signal. Refer to Turn Signal Multifunction Switch Replacement .
- Install the SIR coil assembly. Refer to Inflatable Restraint Steering Wheel Module Coil Replacement .
- Install the steering wheel. Refer to Steering Wheel Replacement .
- Connect the negative battery cable. Refer to Battery Negative Cable Disconnection and Connection .
- Enable the SIR system. Refer to SIR Disabling and Enabling .
- Perform the control module setup. Refer to Control Module References for programming and setup information.
- Inspect all of the steering column components for correct operation.
Important: Do not bend the steering column energy absorbing straps located on the upper steering column mounting bracket during installation.
Important: Do not bend the steering column energy absorbing straps located on the upper steering column mounting bracket during installation.
Notice: Refer to Fastener Notice in the Preface section.
Caution: In order to ensure the intended function of the steering
column in a vehicle during a crash and in order to avoid personal injury to
the driver, perform the following:
• Tighten the steering column lower fasteners before you tighten
the steering column upper fasteners. Failure to do this can damage the steering
column. • Tighten the steering column fasteners to the specified torque.
Overtightening the upper steering column fasteners could affect the steering
column collapse.
Tighten
Remove the wire strap from around the rake lever and the jacket assembly.
Steering Column Replacement Hydraulic Power Steering (HPS)
Removal Procedure
- Disable the SIR system. Refer to SIR Disabling and Enabling .
- Disconnect the negative battery cable. Refer to Battery Negative Cable Disconnection and Connection .
- Remove the steering wheel. Refer to Steering Wheel Replacement .
- Remove the SIR coil assembly. Refer to Inflatable Restraint Steering Wheel Module Coil Replacement .
- Remove the multifunction turn signal. Refer to Turn Signal Multifunction Switch Replacement .
- Remove the multifunction turn signal switch housing. Refer to Multifunction Turn Signal Switch Housing Replacement .
- Remove the steering column knee bolster. Refer to Knee Bolster Replacement .
- Remove the steering column shaft pinch bolt from the intermediate steering shaft. Refer to Intermediate Steering Shaft Replacement .
- Disconnect the steering column electrical connectors open the steering column wire harness retainer clip.
- Remove the adjustable pedal bracket assembly and reposition leaving the brake pedal cable and motor attached, if vehicle is equipped with adjustable pedals. Refer to Accelerator Pedal Bracket Replacement .
- Remove the upper steering column mounting bolts (1).
- Remove the lower steering column mounting bolt.
- Remove the steering column from the vehicle.
Caution: Refer to SIR Caution in the Preface section.
Caution: Refer to Battery Disconnect Caution in the Preface section.
Notice: Secure the steering wheel utilizing a strap to prevent rotation. Locking of the steering column will prevent damage and a possible malfunction of the SIR system. The steering wheel must be secured
in position before disconnecting the following components:
• The steering column • The intermediate shaft • The steering gear
Notice: Once the steering column is removed from the vehicle, the column is extremely susceptible to damage. Dropping the column assembly on the end could collapse the steering shaft or loosen the plastic injections, which maintain column rigidity. Leaning on the column assembly could cause the jacket to bend or deform. Any of the above damage could impair the columns collapsible design. Do NOT hammer on the end of the shaft, because hammering could loosen the plastic injections, which maintain column rigidity. If you need to remove the steering wheel, refer to the Steering Wheel Replacement procedure in this section.
Important: The wheels on the vehicle must be straight ahead before disconnecting the steering column or intermediate shaft. Do NOT rotate the steering column after disconnecting the steering column or intermediate shaft. Doing so will cause the SIR coil assembly to become uncentered, which may cause damage to the coil assembly.
Important: In the event of a deployment, inspect the coil wire for any of the following signs of damage due to excessive heat:
• Scorching • Melting • Other damage
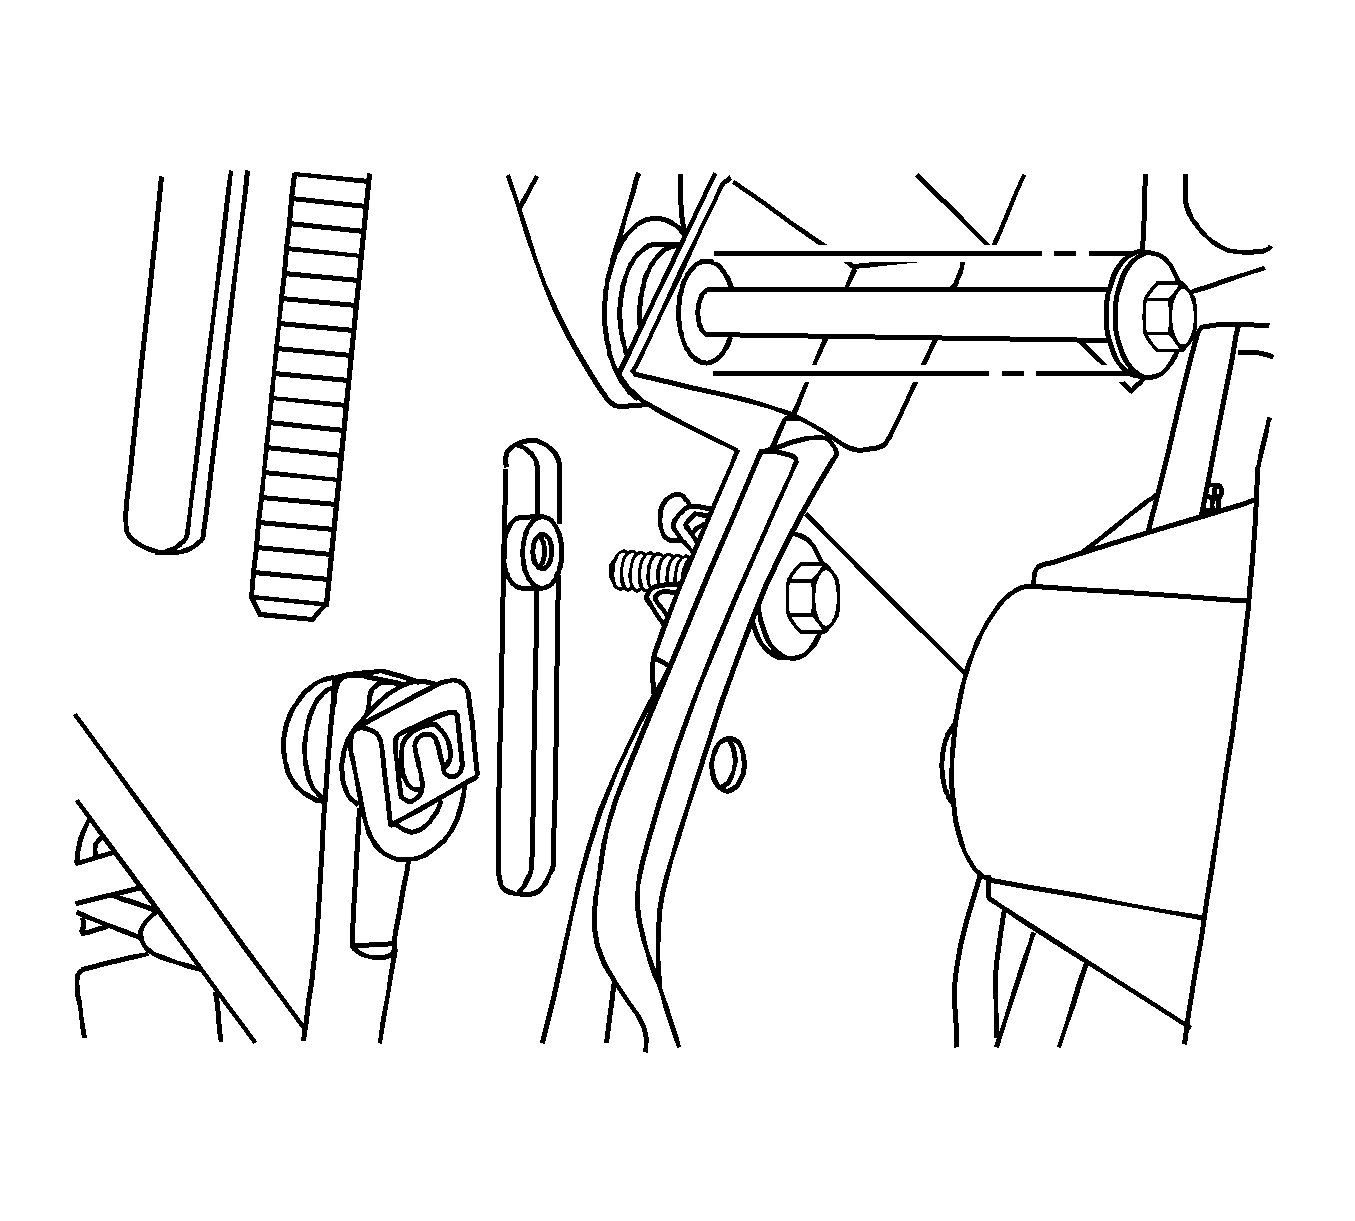
Important: Install tie straps (1) between the rake bracket assembly (2) and the base of the steering column to prevent jacket assembly pull-apart. The steering column rake lever MUST be in the LOCK (FULL UP) position during steering column removal and installation to ensure that the rake lever bracket remains rigid. Install a tie strap around the lever and the jacket assembly to keep the lever in the LOCK position. Do not bend the steering column energy absorbing straps located on the upper steering column mounting bracket.
Important: DO NOT disconnect the adjustable brake pedal cable.
Installation Procedure
- Position the steering column in the vehicle.
- Slide the lower end of the steering column shaft into the intermediate steering shaft. Refer to Intermediate Steering Shaft Replacement .
- Loosely install the lower steering column mounting bolt .
- Loosely install the upper steering column mounting bolts (1).
- Align the energy absorbing straps with the bolt holes in the steering column. Loosely install the upper steering column bolts (1).
- Tighten the steering column fasteners in the following sequence:
- Tighten the lower bolt to 27 N·m (18 lb ft).
- Tighten the left side upper bolt to 27 N·m (18 lb ft).
- Tighten the right side upper bolt to 27 N·m (18 lb ft).
- Connect the steering column electrical connectors and close the wire harness retainer clip on the steering column.
- Remove the tie strap (1) from the steering column (2).
- Install the adjustable pedal bracket assembly, if equipped with adjustable pedals. Refer to Accelerator Pedal Bracket Replacement .
- Install the steering column knee bolster. Refer to Knee Bolster Replacement .
- Install the multifunction turn signal switch housing. Refer to Multifunction Turn Signal Switch Housing Replacement .
- Install the multifunction turn signal. Refer to Turn Signal Multifunction Switch Replacement .
- Install the SIR coil assembly. Refer to Inflatable Restraint Steering Wheel Module Coil Replacement .
- Install the steering wheel. Refer to Steering Wheel Replacement .
- Connect the negative battery cable. Refer to Battery Negative Cable Disconnection and Connection .
- Enable the SIR system. Refer to SIR Disabling and Enabling .
- Inspect all of the steering column components for correct operation.
- Refer to Control Module References for programming and setup information.
Important: Do not bend the steering column energy absorbing straps located on the upper steering column mounting bracket during installation.
Important: Do not bend the steering column energy absorbing straps located on the upper steering column mounting bracket during installation.
Notice: Refer to Fastener Notice in the Preface section.
Caution: In order to ensure the intended function of the steering
column in a vehicle during a crash and in order to avoid personal injury to
the driver, perform the following:
• Tighten the steering column lower fasteners before you tighten
the steering column upper fasteners. Failure to do this can damage the steering
column. • Tighten the steering column fasteners to the specified torque.
Overtightening the upper steering column fasteners could affect the steering
column collapse.
Tighten
Remove the wire strap from around the rake lever and the jacket assembly.
