Draining Procedure (3.6L Engine)
- Disconnect the battery ground cable from the battery. Refer to Battery Negative Cable Disconnection and Connection .
- Ensure engine is below 50 C before removing the Coolant pressure cap.
- Raise and support the vehicle. Refer to Lifting and Jacking the Vehicle .
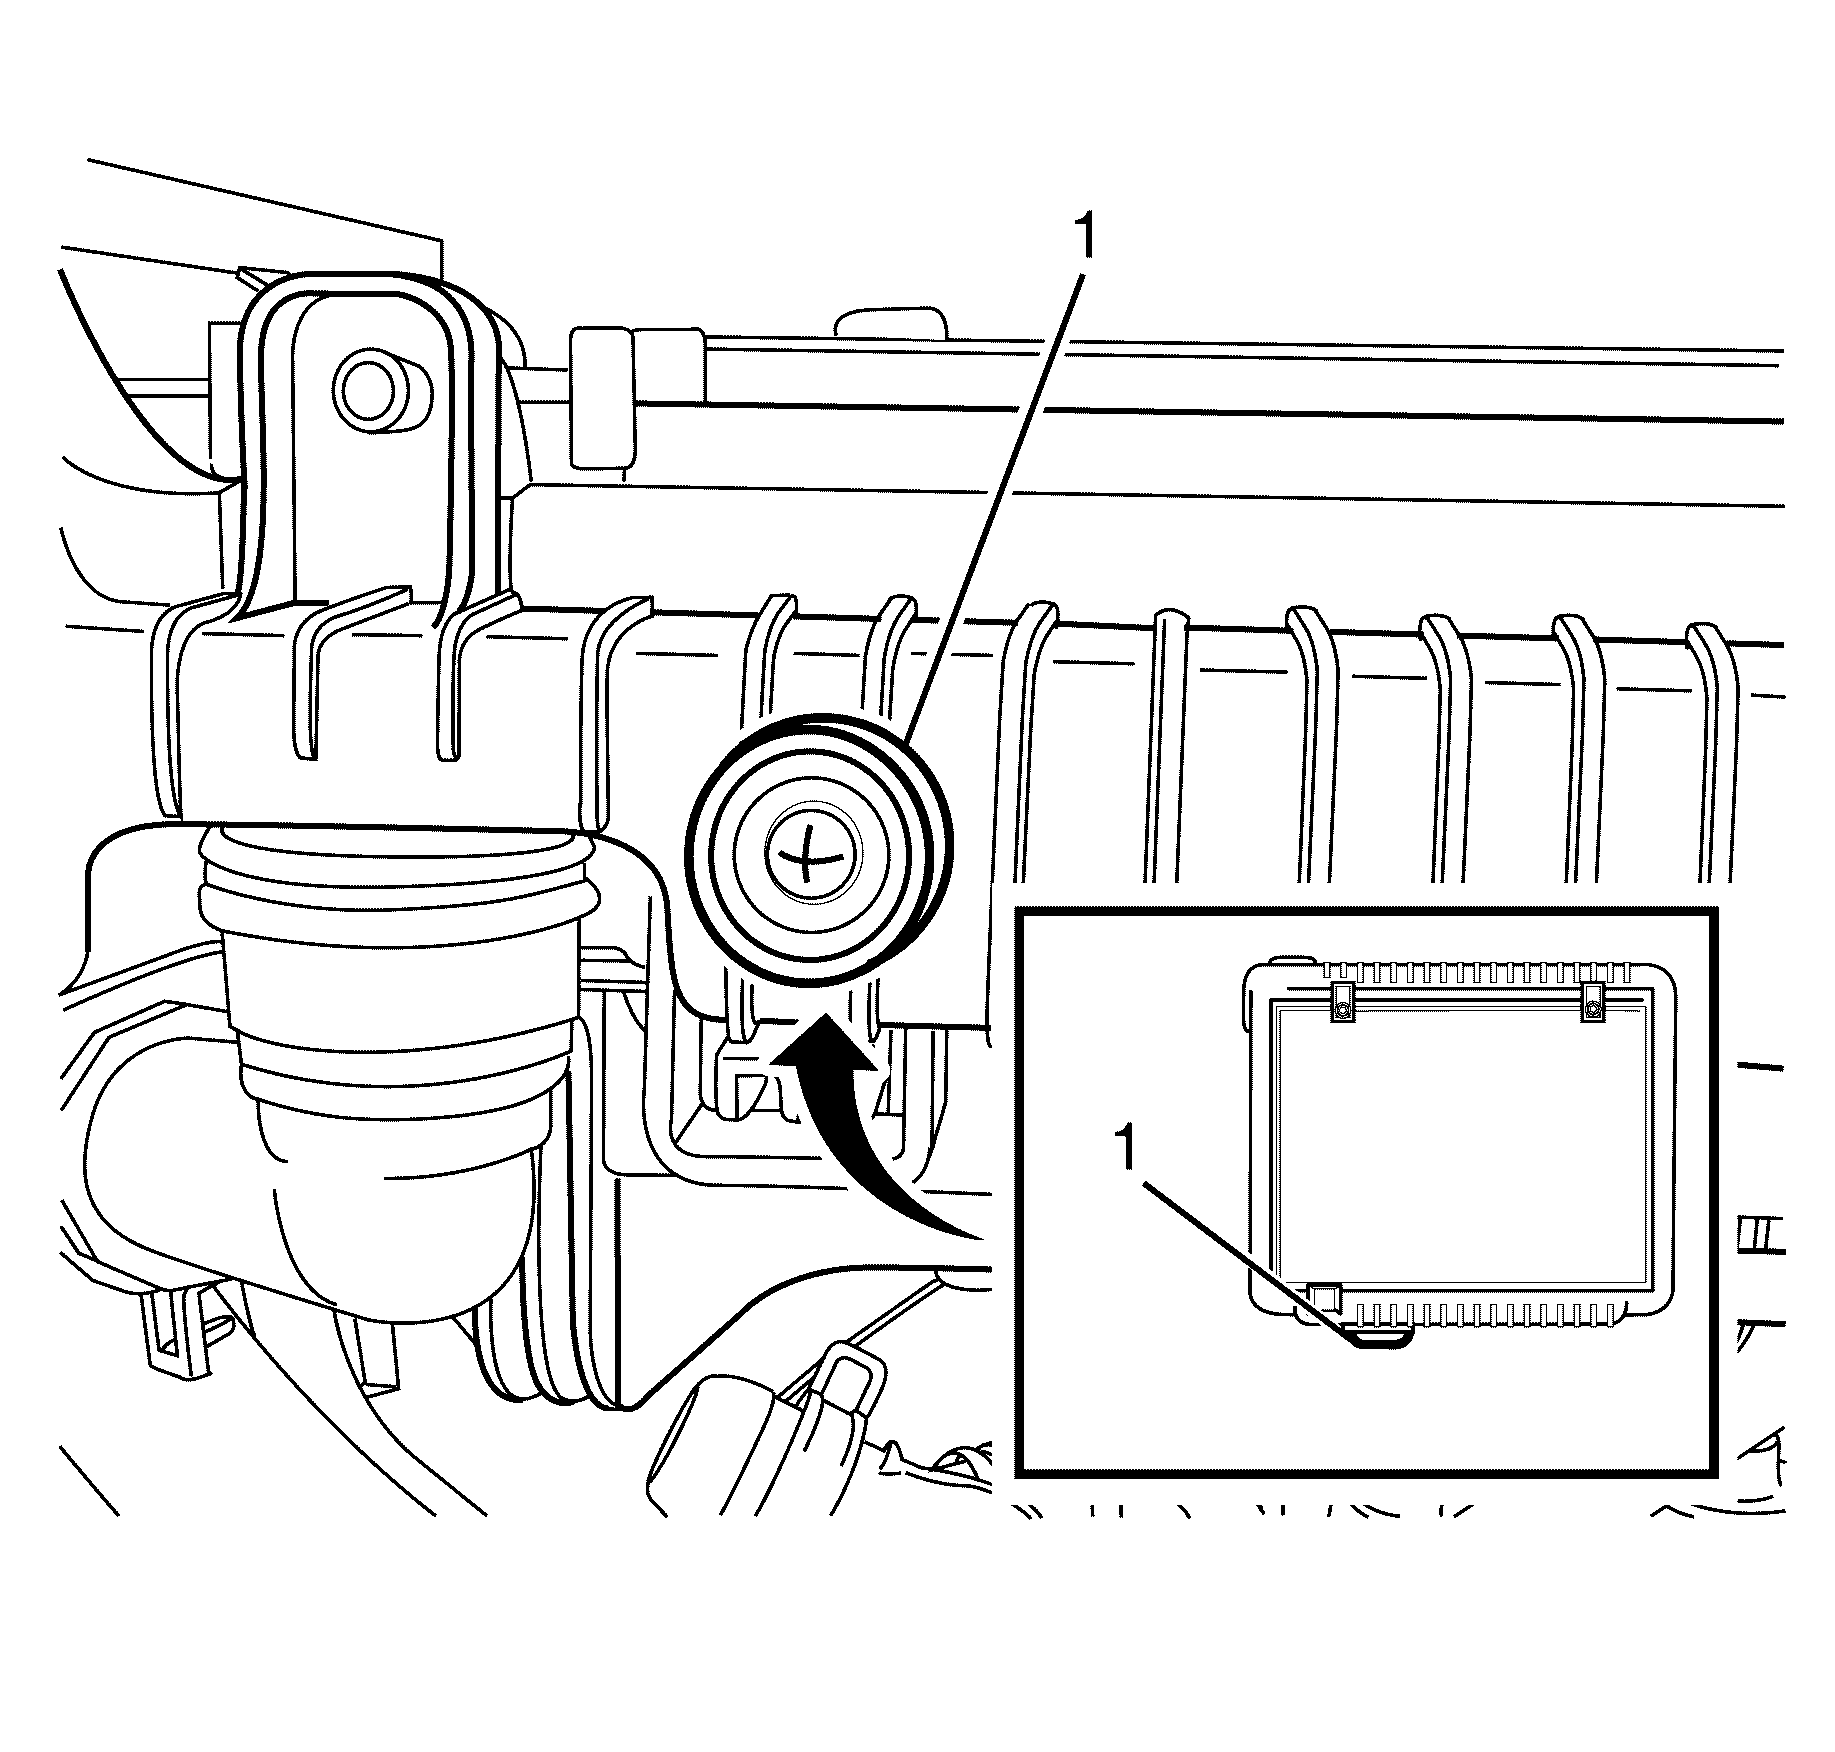
- Place a drain pan under the drain cock (1).
- Loosen the drain cock until coolant flows out of the radiator.
- Inspect the engine coolant for the following conditions:
Caution: Refer to Battery Disconnect Caution in the Preface section.
Caution: Refer to Radiator Cap Removal Caution in the Preface section.
Caution: Refer to Safety Glasses Caution in the Preface section.
Caution: Refer to Vehicle Lifting Caution in the Preface section.
Important: If drain cock is not being replaced do not remove it from the radiator.
| • | Discolored appearance -- follow the flush procedure. Refer to Coolant System Flushing . |
| • | Normal in appearance -- follow the filling procedure. Refer to Cooling System Draining and Filling . |
Filling Procedure
- Tighten the drain cock (1).
- Lower the vehicle.
- With the engine off, remove the coolant filler cap.
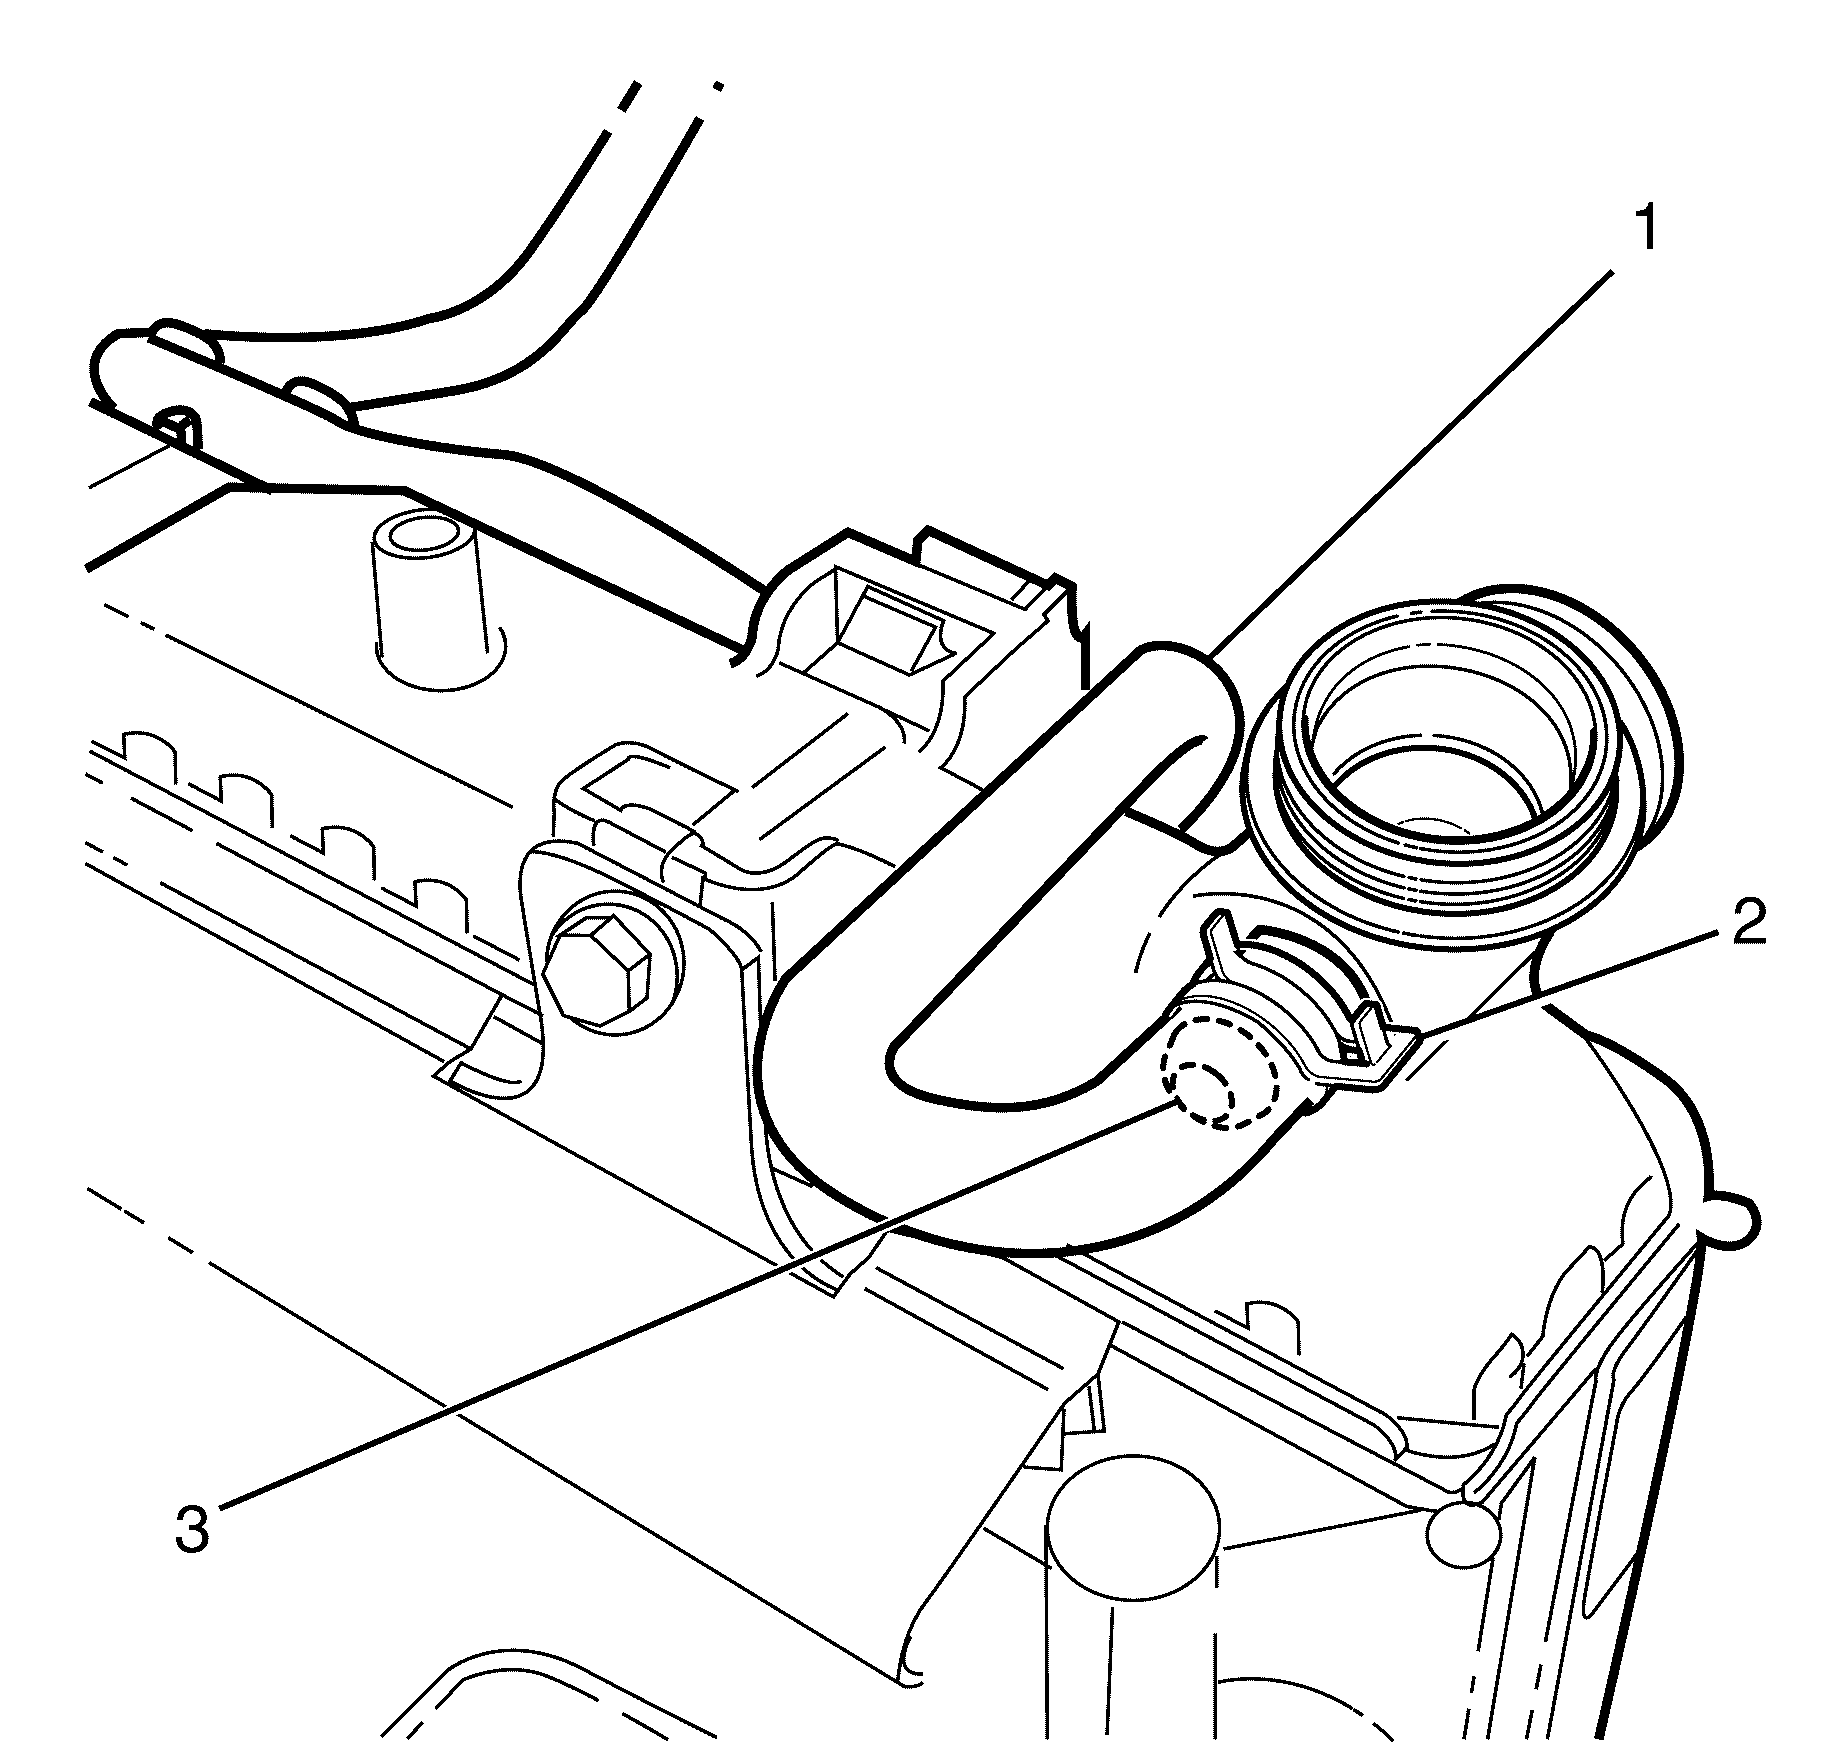
- Remove the engine coolant air bleed hose (1) by releasing retaining hose clamp (2) and remove it from the radiator spigot (3).
- Slowly fill the cooling system with a mixture of 50/50 dex cool and water until coolant flows out of air bleed hose spigot. Refit air bleed hose.
- Continue to fill the system until full. Wait several seconds and "top up" if levels drops.
- Start engine.
- With engine idling top up coolant until full, wait for several seconds and "top up" if level drops.
- Stop engine, wait several seconds and "top up" if level drops.
- When full, fit coolant filler cap and switch off engine.
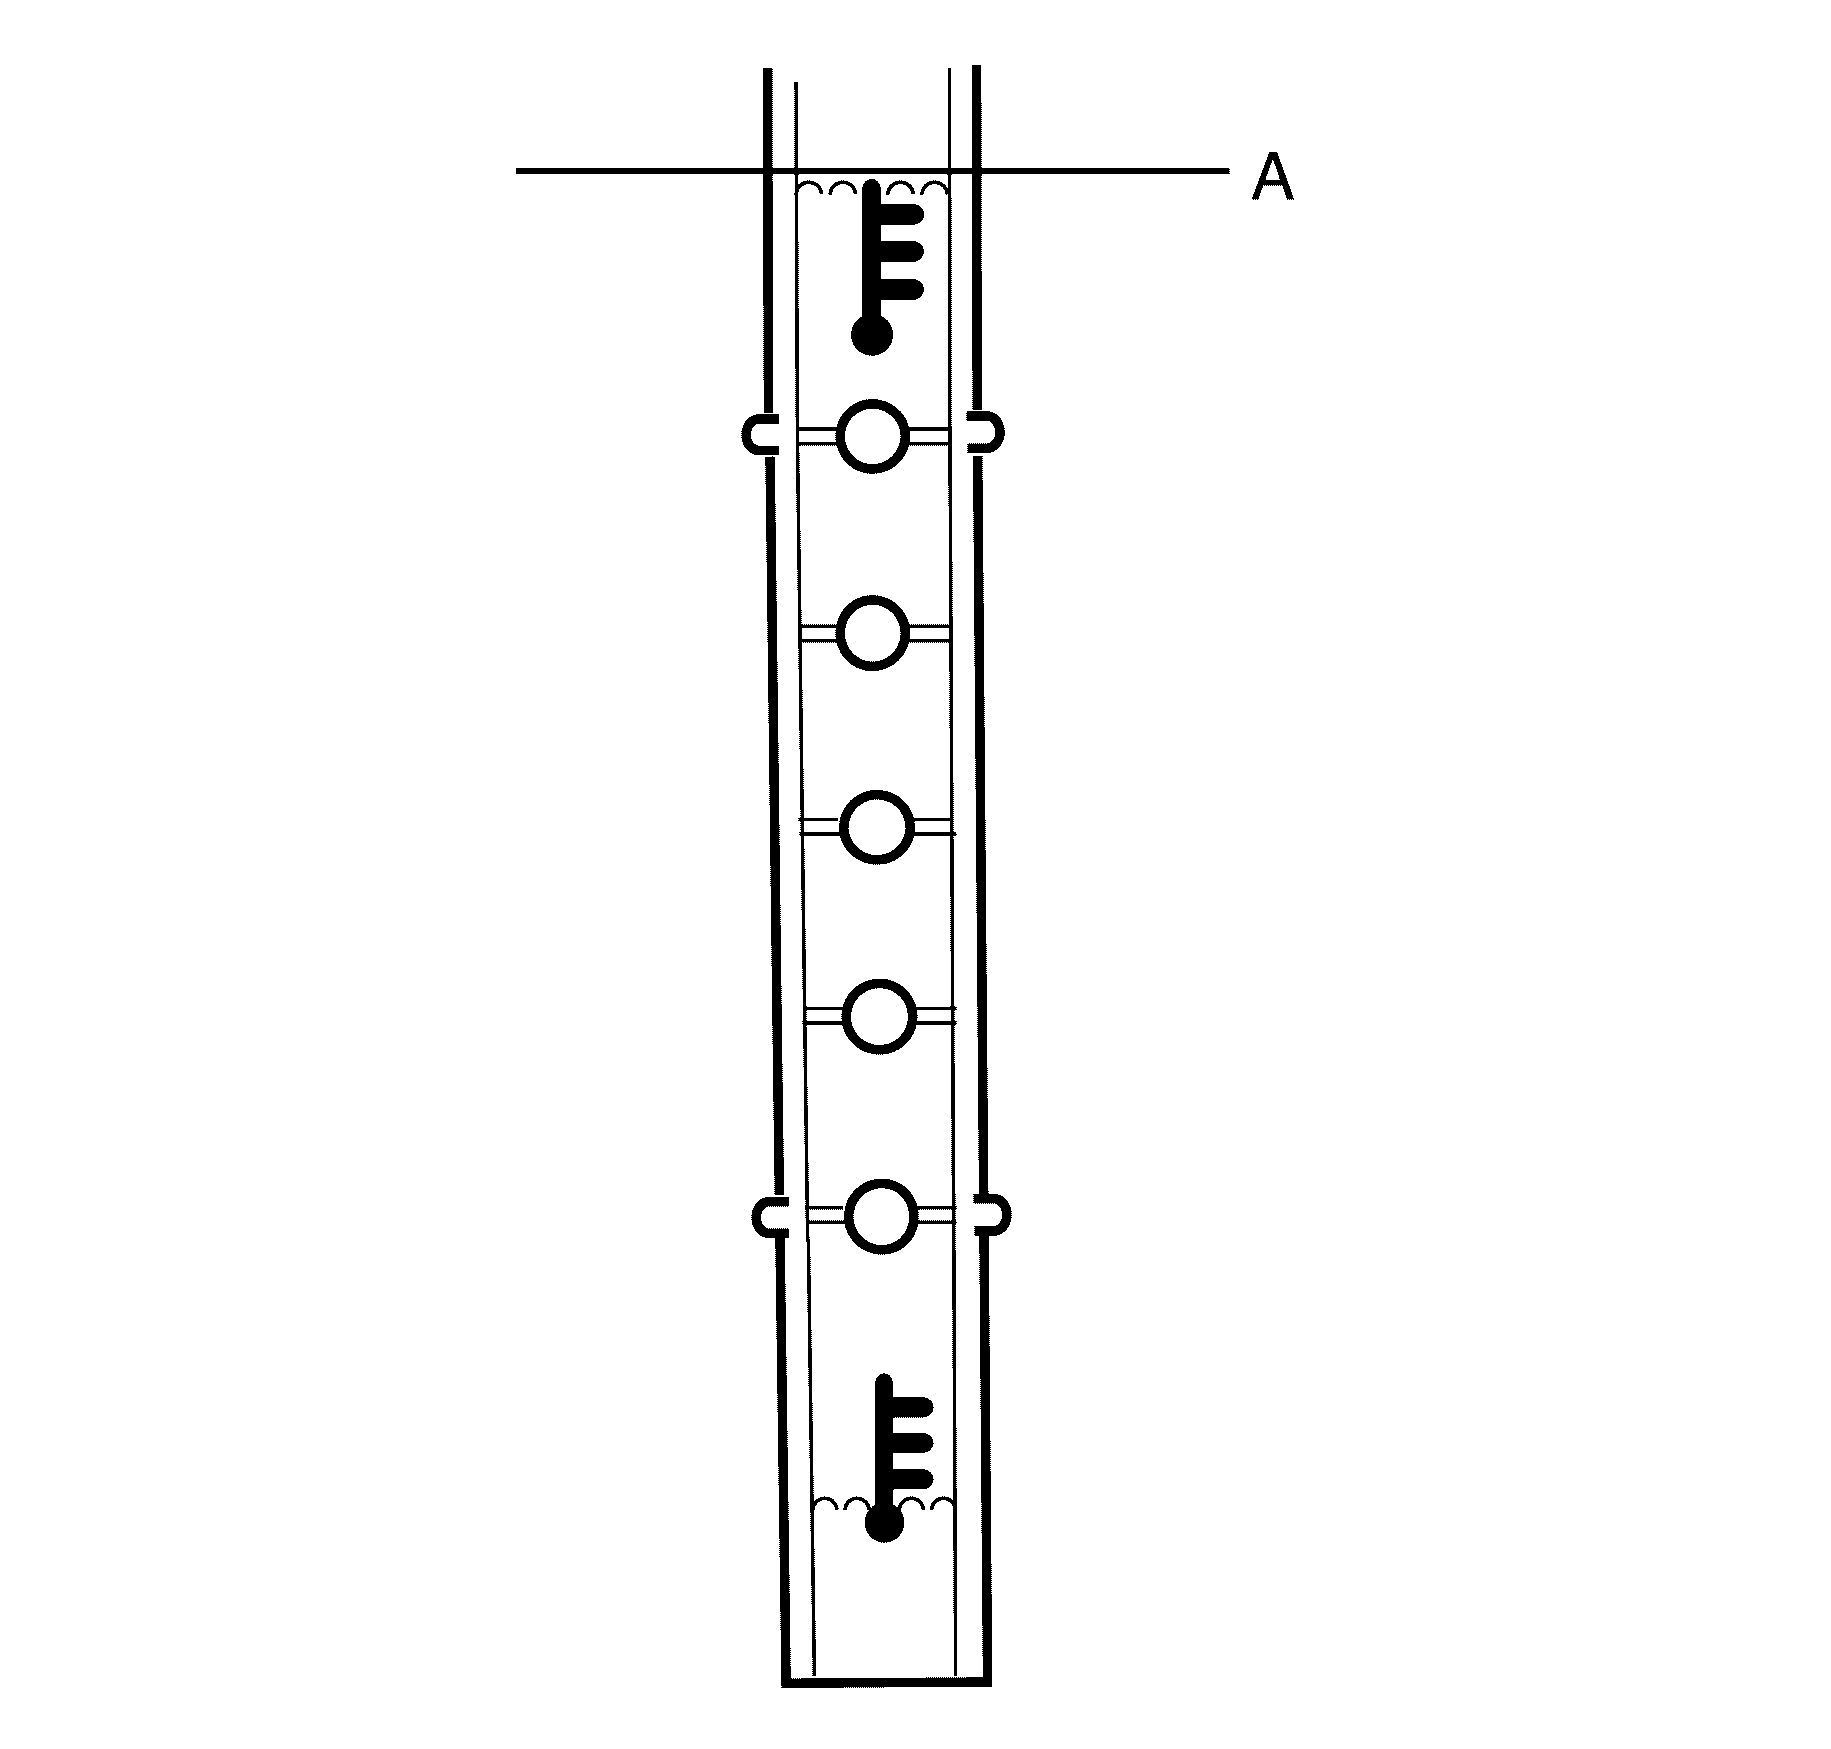
- Check coolant in coolant recovery reservoir. Adjust coolant in the reservoir to the top of the graphic mark (A) on the dipstick.
Notice: Refer to General Repair Instructions in the Preface section.
Draining Procedure (6.0L Engine)
- Disconnect the battery ground cable from the battery. Refer to Battery Negative Cable Disconnection and Connection .
- Ensure engine is below 50 C before removing the Coolant pressure cap.
- Raise and support the vehicle. Refer to Lifting and Jacking the Vehicle .
- Place a drain pan under the drain cock (1).
- Loosen the drain cock until coolant flows out of the radiator.
- Inspect the engine coolant for the following conditions:
Caution: Refer to Battery Disconnect Caution in the Preface section.
Caution: Refer to Radiator Cap Removal Caution in the Preface section.
Caution: Refer to Safety Glasses Caution in the Preface section.
Caution: Refer to Vehicle Lifting Caution in the Preface section.
Important: If drain cock is not being replaced do not remove it from the radiator.
| • | Discolored appearance -- follow the flush procedure. Refer to Coolant System Flushing . |
| • | Normal in appearance -- follow the filling procedure. Refer to Cooling System Draining and Filling . |
Filling Procedure
- Tighten the drain cock (1).
- Lower the vehicle.
- With the engine off, remove the coolant filler cap.
- Slowly fill the cooling system with a mixture of 50/50 Dex Cool and water until full, wait several seconds and "top up" if level drops.
- Start engine.
- With engine idling top up coolant until full, wait for several seconds and "top up" if level drops.
- When full, fit coolant filler cap and switch off engine.
- Check coolant level in coolant recovery reservoir. Adjust coolant level in the reservoir to the top of graphic mark (A) on the dipstick.
Notice: Refer to General Repair Instructions in the Preface section.
Notice: Refer to General Repair Instructions in the Preface section.
