Exhaust Manifold Replacement - Right Side LMM
Removal Procedure
- Remove the engine cover. Refer to Engine Cover Replacement.
- Remove the air cleaner. Refer to Air Cleaner Assembly Replacement.
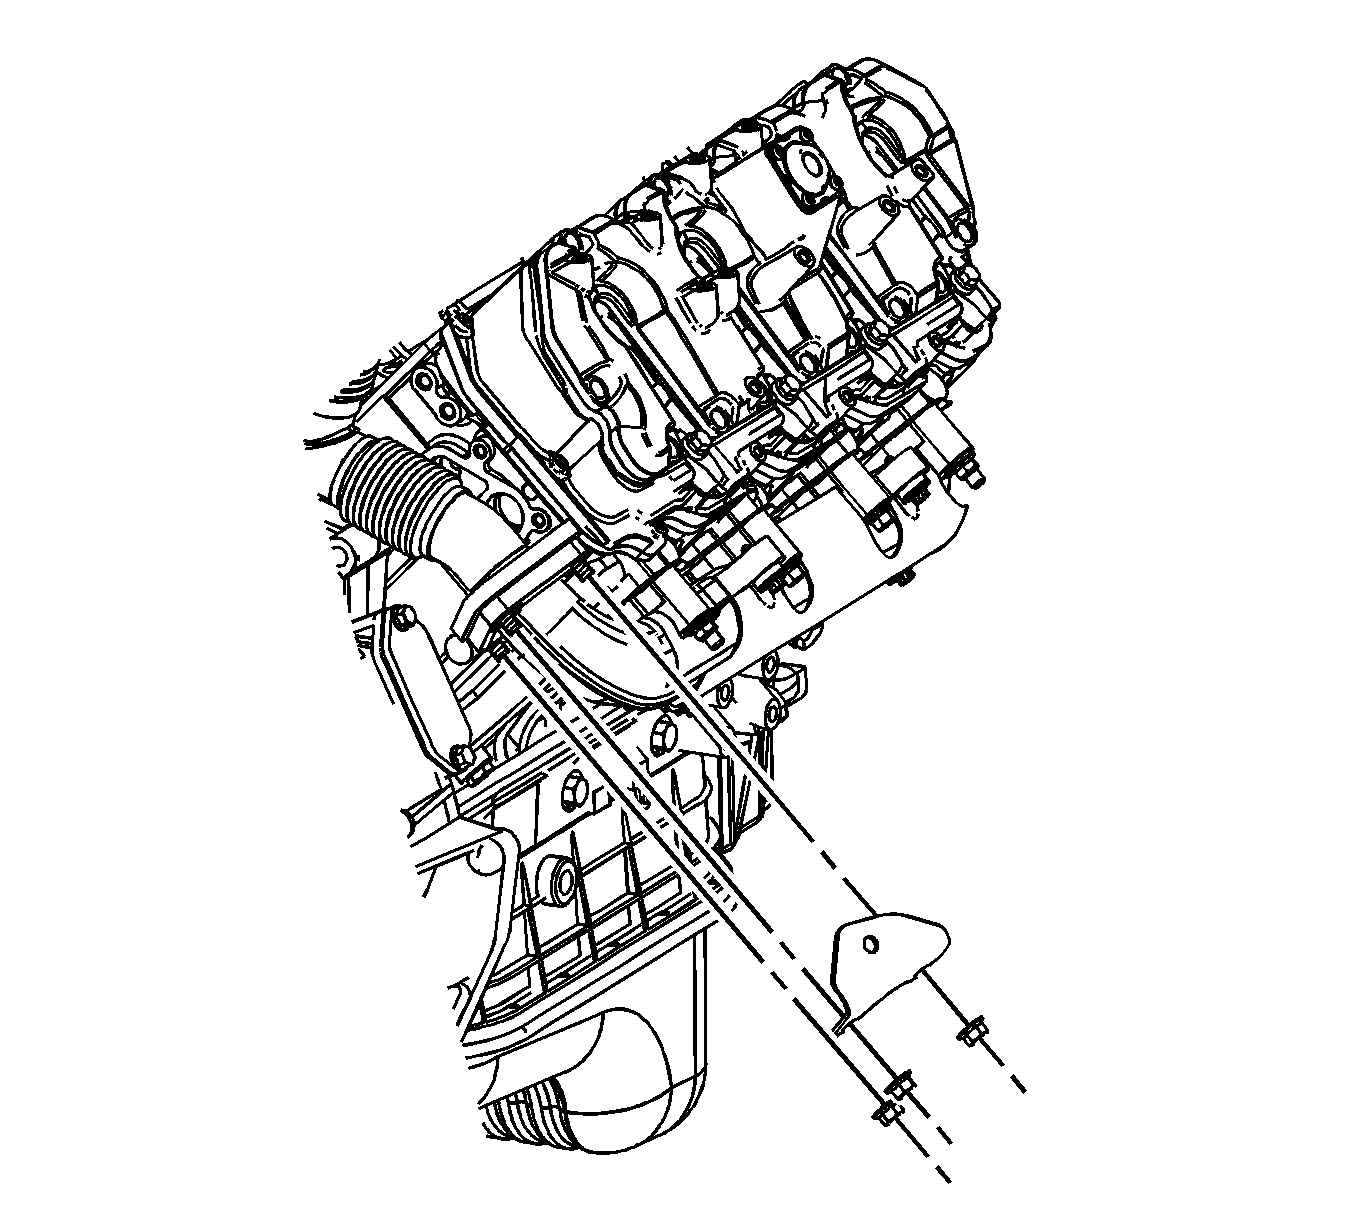
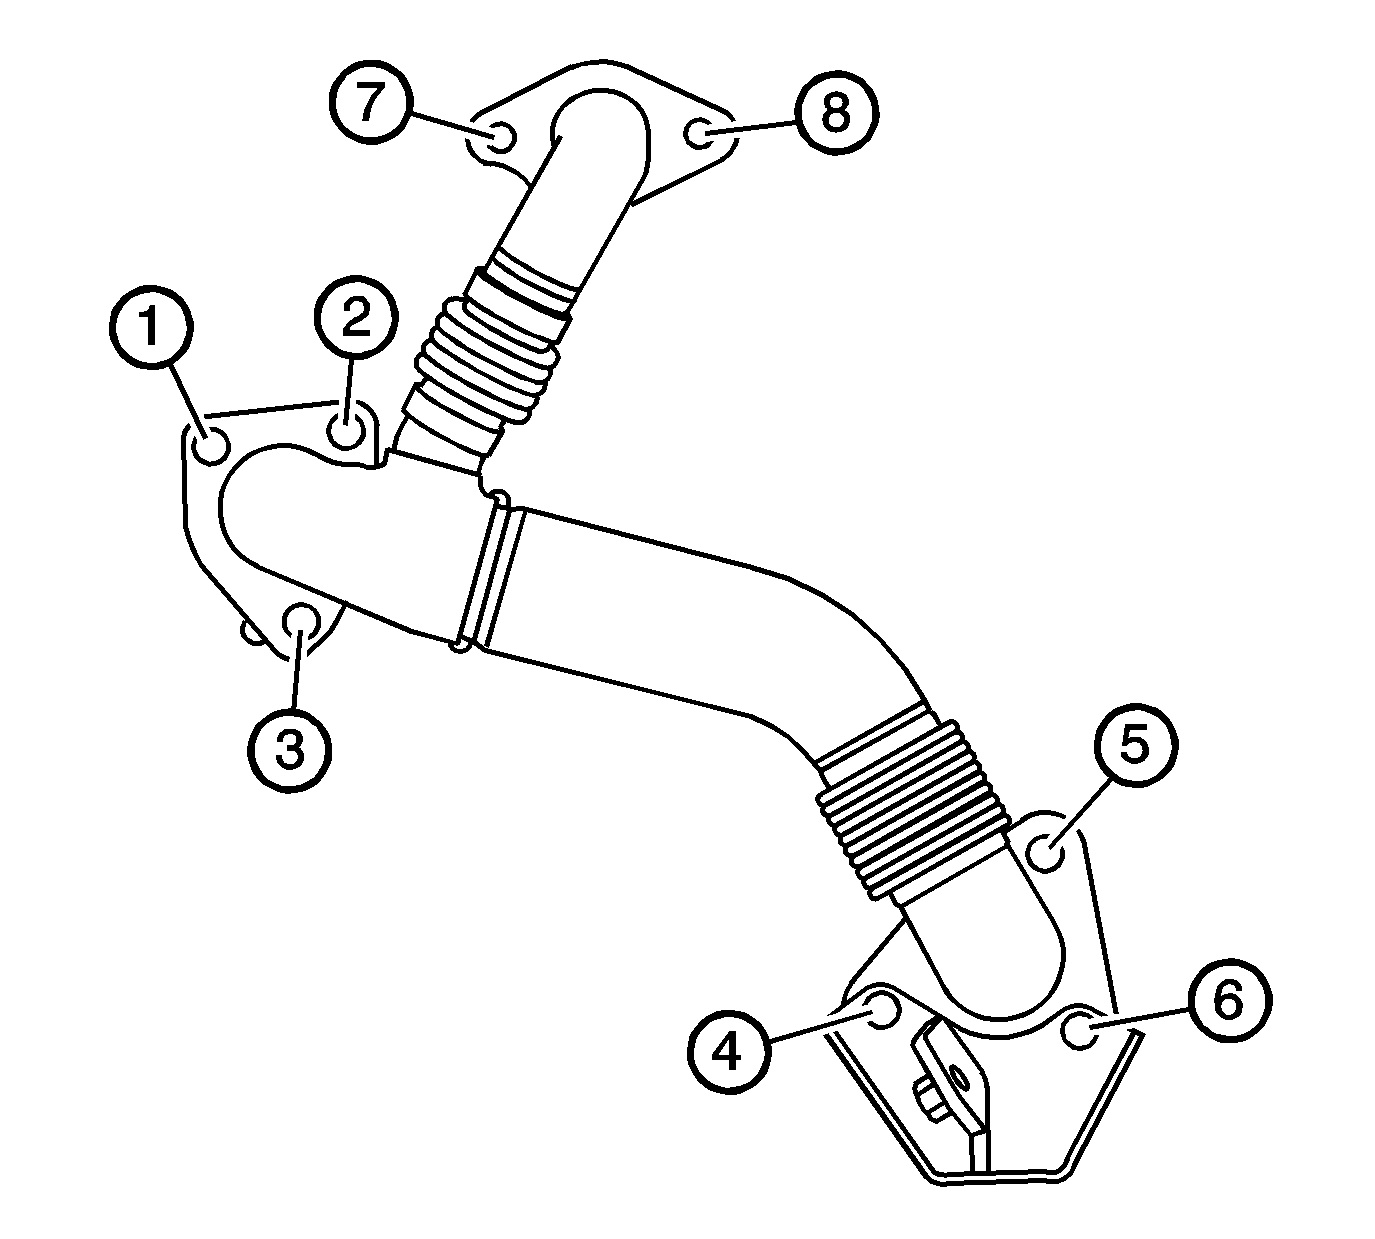
- Remove the turbocharger exhaust pipe.
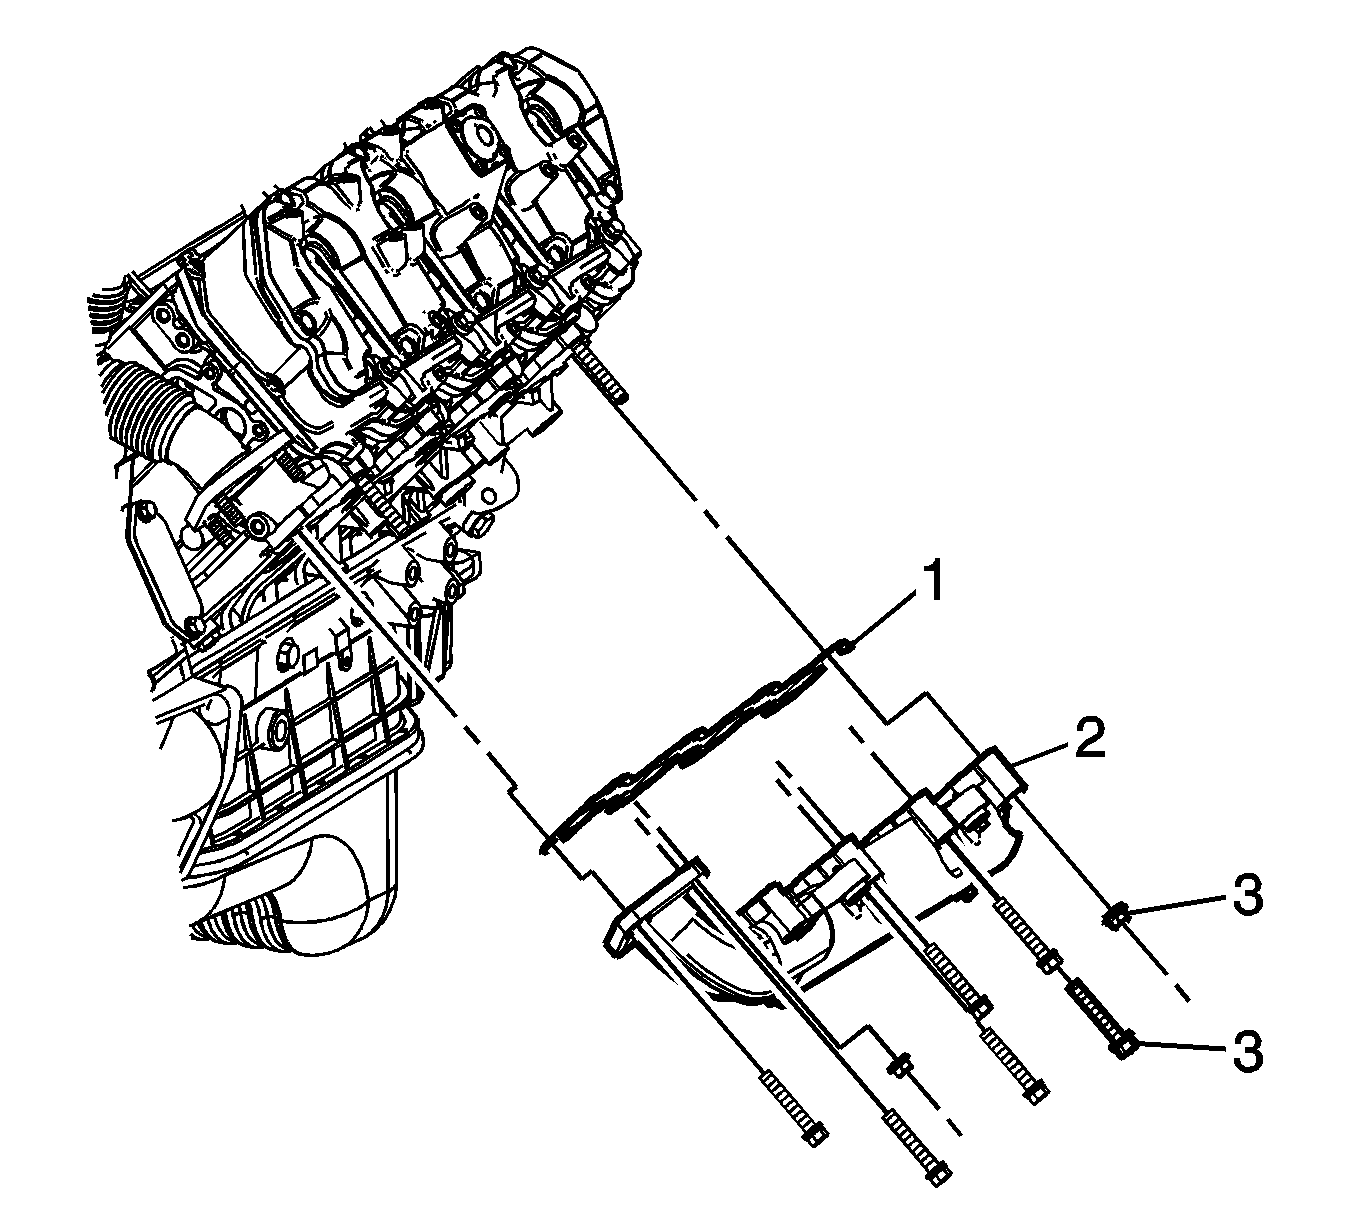
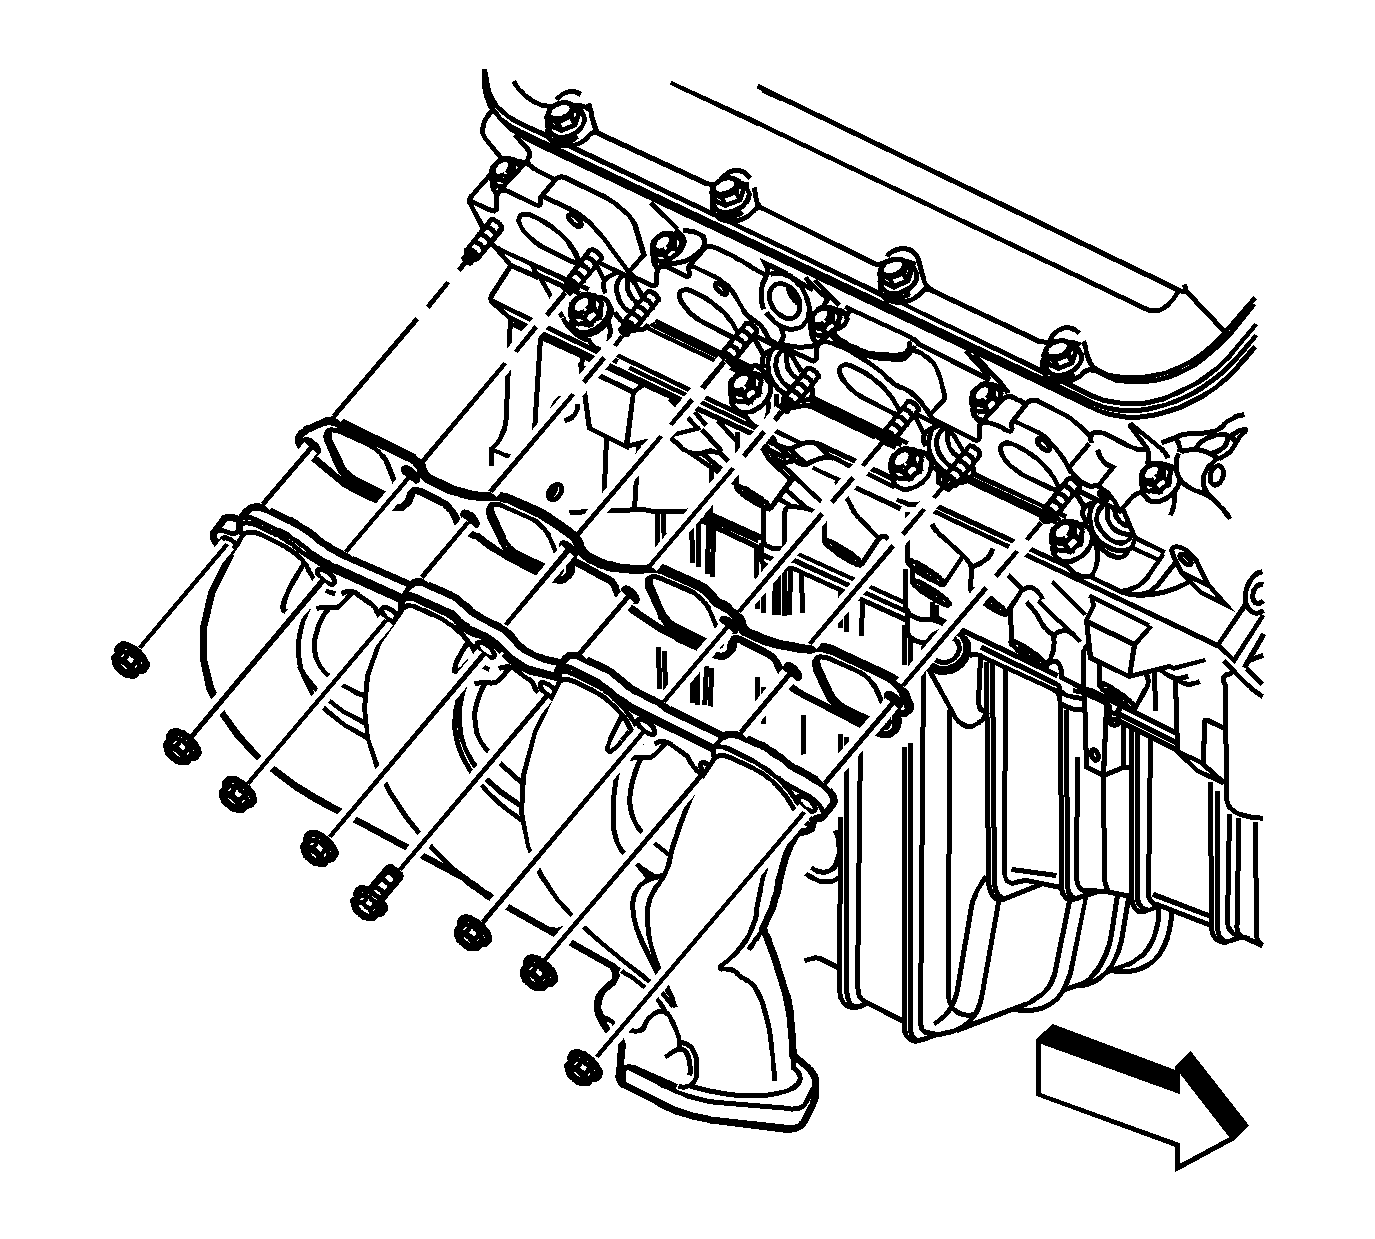
- Remove the exhaust manifold to exhaust pipe nuts and bracket.
- Remove the exhaust manifold bolts/nuts (3).
- Remove the exhaust manifold (2).
- Remove and discard the exhaust manifold gasket (1) and exhaust manifold pipe gasket.
- Remove the exhaust manifold heat shield bolts and shield, if required.
Installation Procedure
- Install the exhaust manifold heat shield and bolts, if required.
- Install a NEW exhaust manifold gasket (1) onto the studs.
- Install a NEW exhaust pipe gasket between the manifold and the exhaust pipe. Align the tab on the gasket to face outward.
- Install the exhaust manifold (2) and manifold bolts/nuts (3).
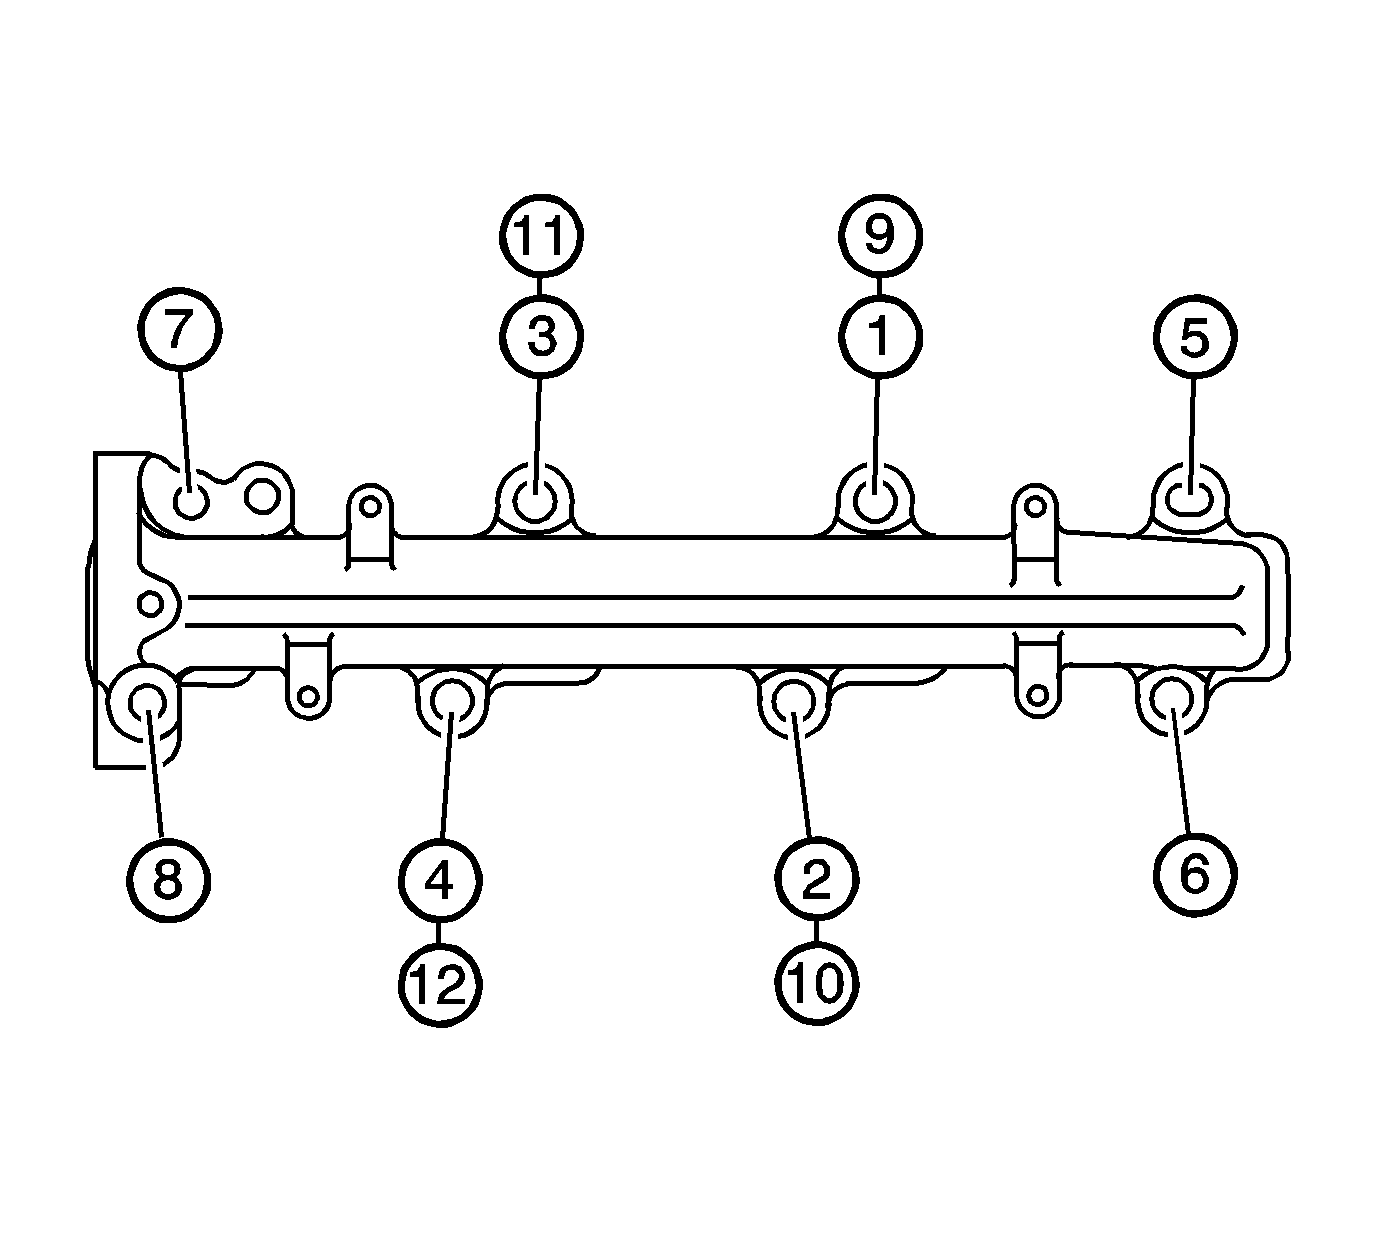
- Tighten the exhaust manifold bolts in the sequence shown.
- Install the bracket and the exhaust manifold to exhaust pipe nuts.
- Tighten the exhaust manifold to exhaust pipe nuts in the sequence shown.
- Install the turbocharger exhaust pipe.
- Install the air cleaner. Refer to Air Cleaner Assembly Replacement.
- Install the engine cover. Refer to Engine Cover Replacement.
Caution: Refer to Fastener Caution in the Preface section.
Tighten
Tighten the bolts to 10 N·m (89 lb in).
Tighten
Tighten the bolts/nuts to 38 N·m (28 lb ft).
Tighten
Tighten the nuts to 53 N·m (37 lb ft).
Exhaust Manifold Replacement - Right Side 8.1L
Removal Procedure
- Raise and suitably support the vehicle with safety stands. Refer to Lifting and Jacking the Vehicle in General Information.
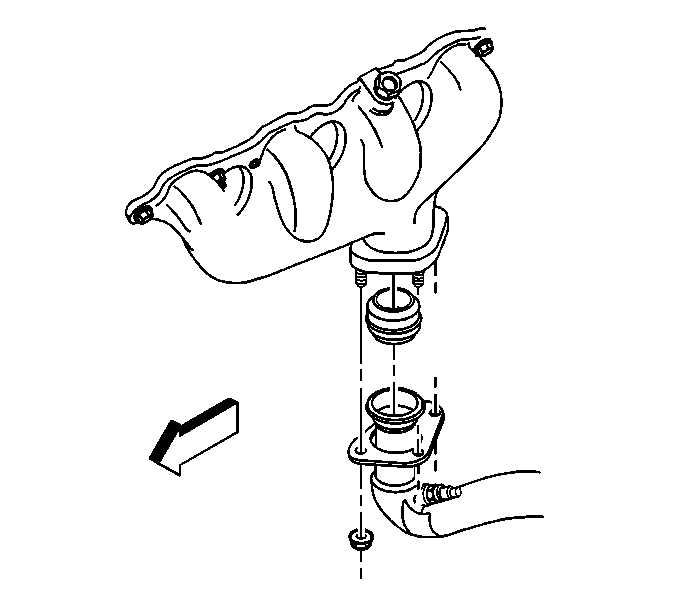
- Remove the exhaust manifold pipe nuts. The left side is shown, the right side is similar.
- Remove the exhaust pipe seal.
- Allow the muffler pipe to hang.
- Lower the vehicle.
- Remove the spark plug wires from the spark plugs and ignition coils.
- Remove the spark plugs. Refer to Spark Plug Replacement in Engine Controls - 8.1L.
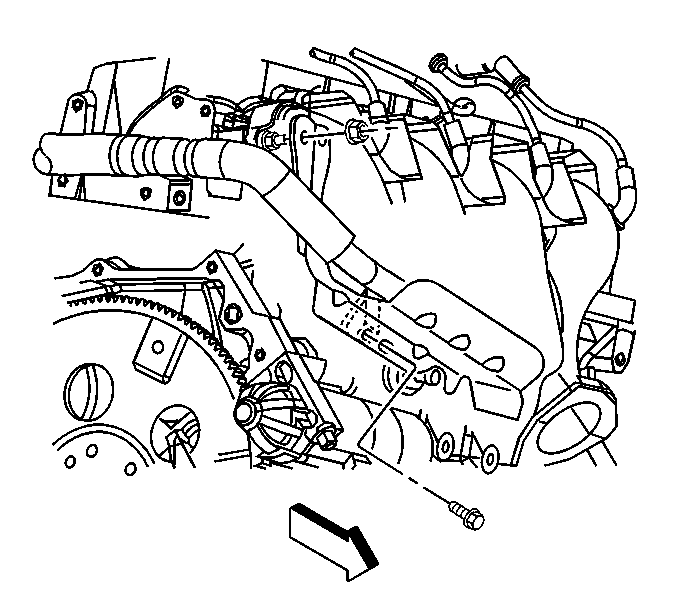
- Remove the exhaust gas recirculation (EGR) pipe bolts from the EGR adapter plate.
- Remove the EGR pipe nuts from the exhaust manifold.
- Remove the EGR pipe bracket bolt.
- Remove the EGR pipe and gaskets. Discard the gaskets.
- Remove the starter motor heat shield bolt and nut.
- Remove the starter motor heat shield.
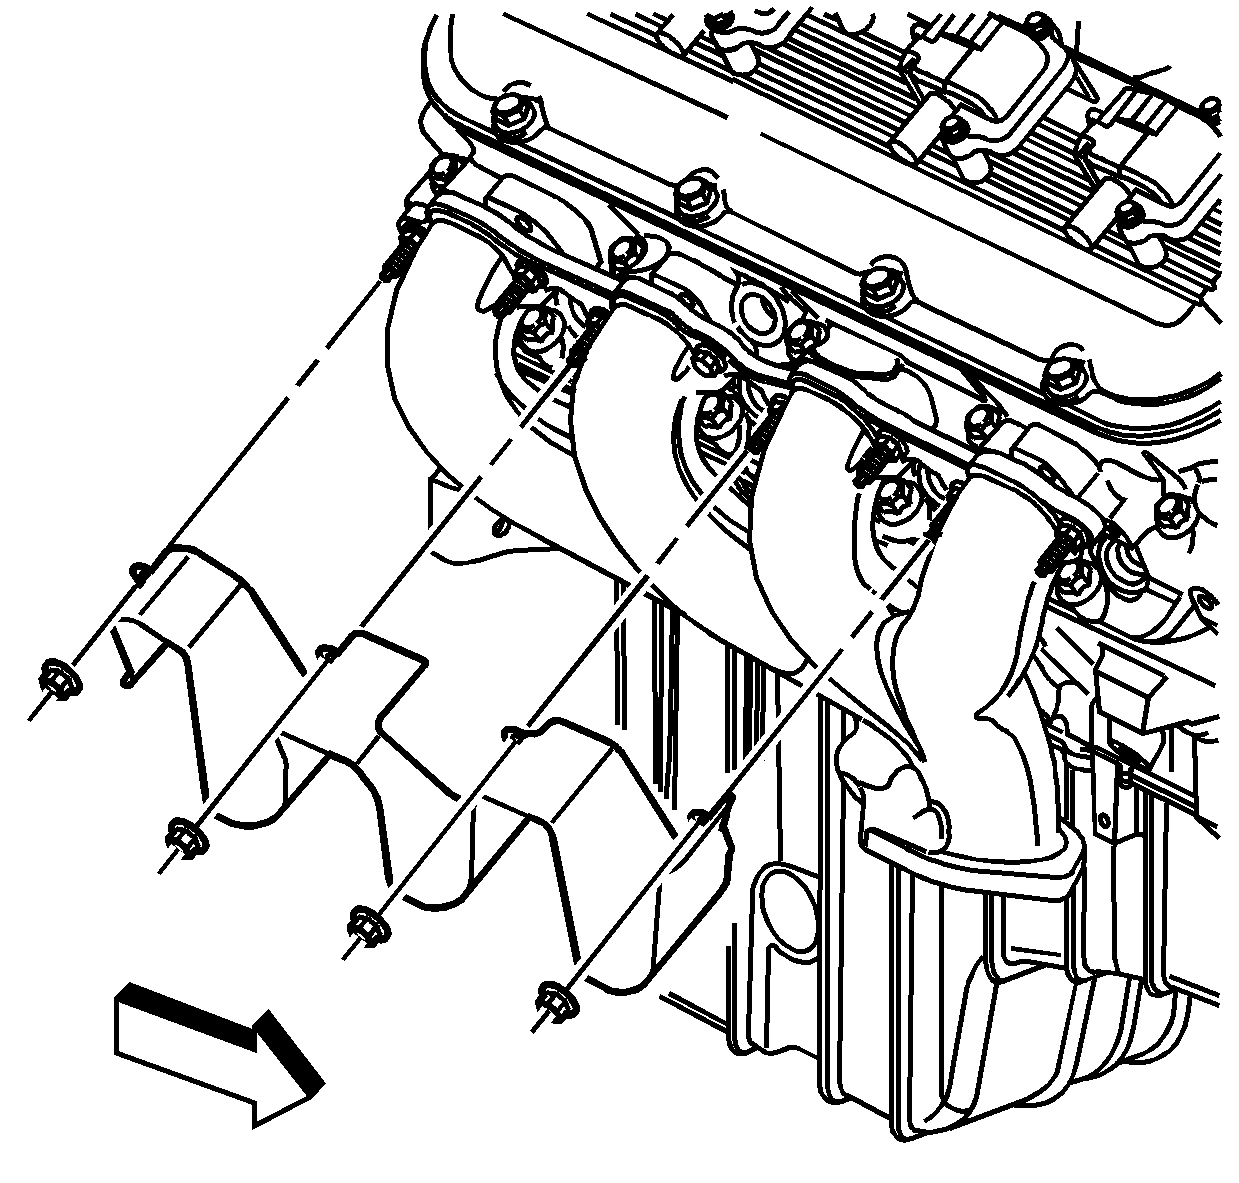
- Remove the exhaust manifold heat shield nuts.
- Remove the exhaust manifold heat shield.
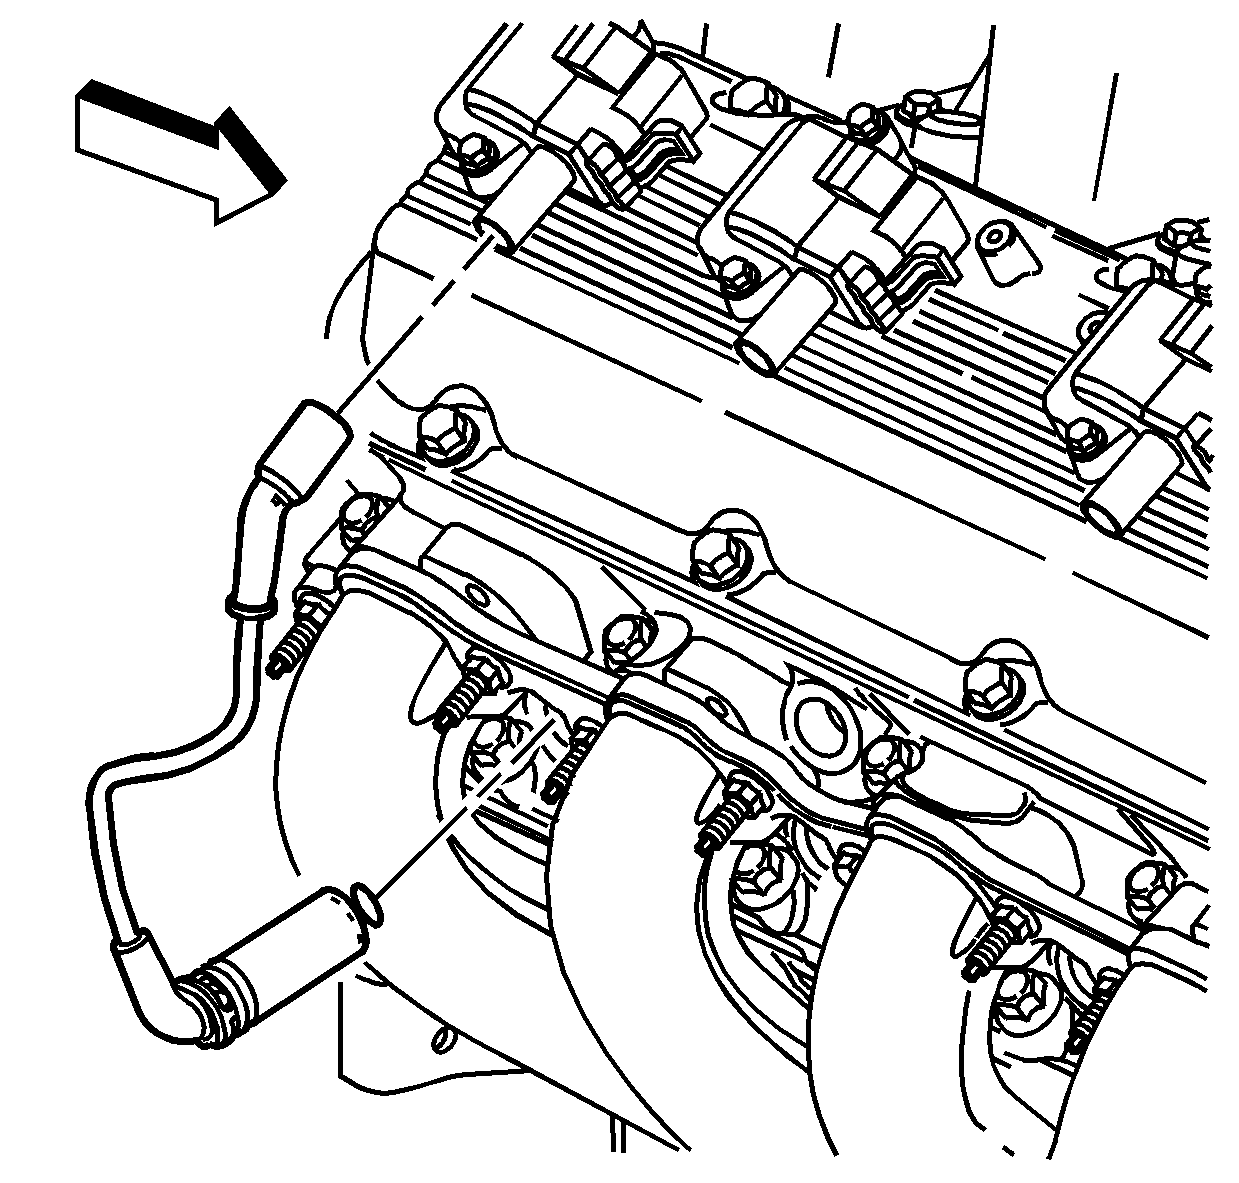
- Remove the exhaust manifold bolt and nuts.
- Remove the exhaust manifold and gasket. Discard the gasket.
- Clean and inspect the exhaust manifold.
Note: Twist the spark plug boot one-half turn in order to release the boot. Pull on the spark plug boot only. Do not pull on the spark plug wire or the wire could be damaged.

Installation Procedure
- Install a NEW exhaust manifold gasket.
- Install the exhaust manifold.
- Install the exhaust manifold bolt and nuts.
- Install the exhaust manifold heat shield.
- Install the exhaust manifold heat shield nuts.
- Install the starter motor heat shield.
- Install the starter motor heat shield bolt and nut.
- Install the EGR pipe and NEW gaskets.
- Install the EGR pipe nuts to the exhaust manifold.
- Install the EGR pipe bolts to the EGR adapter plate.
- Install the EGR pipe bracket bolt.
- Install the spark plugs. Refer to Spark Plug Replacement in Engine Controls - 8.1L.
- Install the spark plug wires to the spark plugs and ignition coils.
- Raise and suitably support the vehicle with safety stands.
- Raise the muffler pipe into position.
- Install the exhaust pipe seal.
- Install the exhaust manifold pipe nuts. The left side is shown, the right side is similar.
- Lower the vehicle.
Caution: Refer to Fastener Caution in the Preface section.
Tighten
| • | Tighten the exhaust manifold bolt to 35 N·m (26 lb ft). |
| • | Tighten the exhaust manifold nuts to 16 N·m (12 lb ft). |
Tighten
Tighten the exhaust manifold heat shield nuts to 25 N·m (12 lb ft).
Tighten
Tighten the EGR pipe nuts to 30 N·m (22 lb ft).
Tighten
Tighten the EGR pipe bolts to 30 N·m (22 lb ft).
Tighten
Tighten the EGR pipe bracket bolt to 50 N·m (37 lb ft).
Note: Fully install the spark plug wire by pushing on the exposed end of the spark plug boot. Do not push the spark plug wire on to the spark plug by using the metal heat shield.
Tighten
Tighten the exhaust manifold pipe nuts to 50 N·m (37 lb ft).
