For 1990-2009 cars only
Removal Procedure
- Remove the air cleaner. Refer to Air Cleaner Assembly Replacement.
- Drain the fuel from the fuel filter. Refer to Water-in-Fuel Draining.
- Remove the charge air cooler inlet pipe. Refer to Charge Air Cooler Inlet Pipe and Outlet Pipe Replacement.
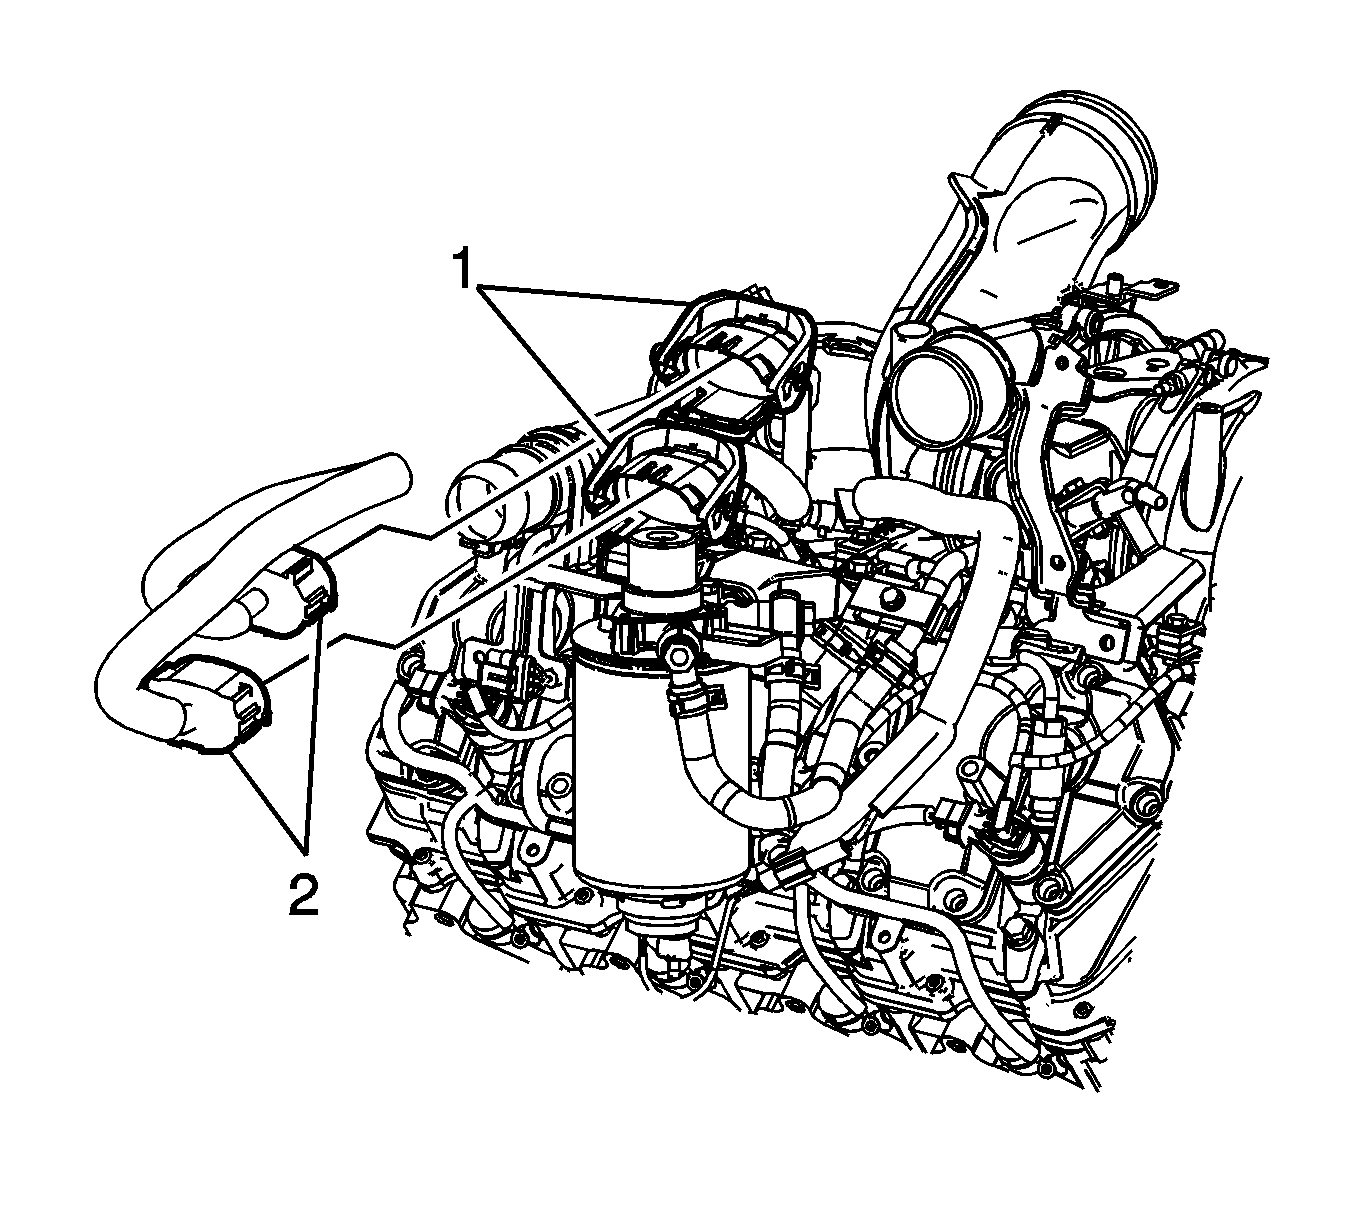
- Rotate the electrical connector lever locks (1) rearward.
- Disconnect the vehicle's engine wiring harness main electrical connectors (2) from the engine wiring harness main electrical connectors.
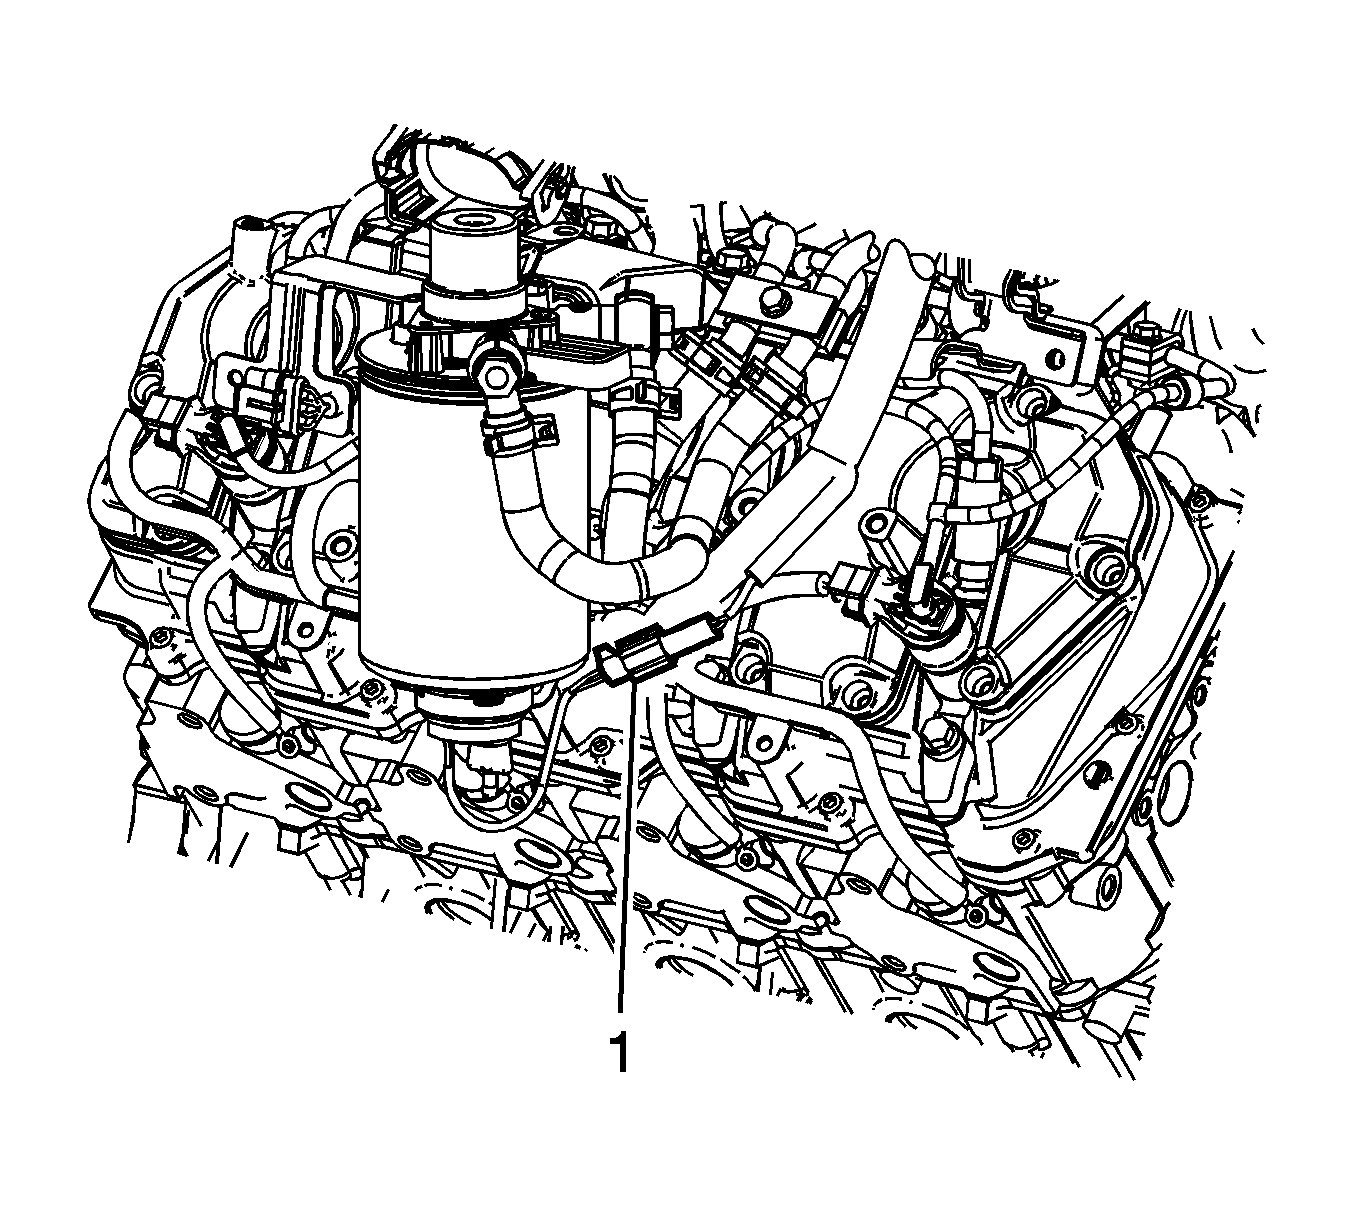
- Disconnect the water-in-fuel sensor electrical connector (1) from the engine wiring harness electrical connector.
- Remove the engine wiring harness main electrical connector bracket bolts and reposition the bracket with the main electrical connectors still attached.
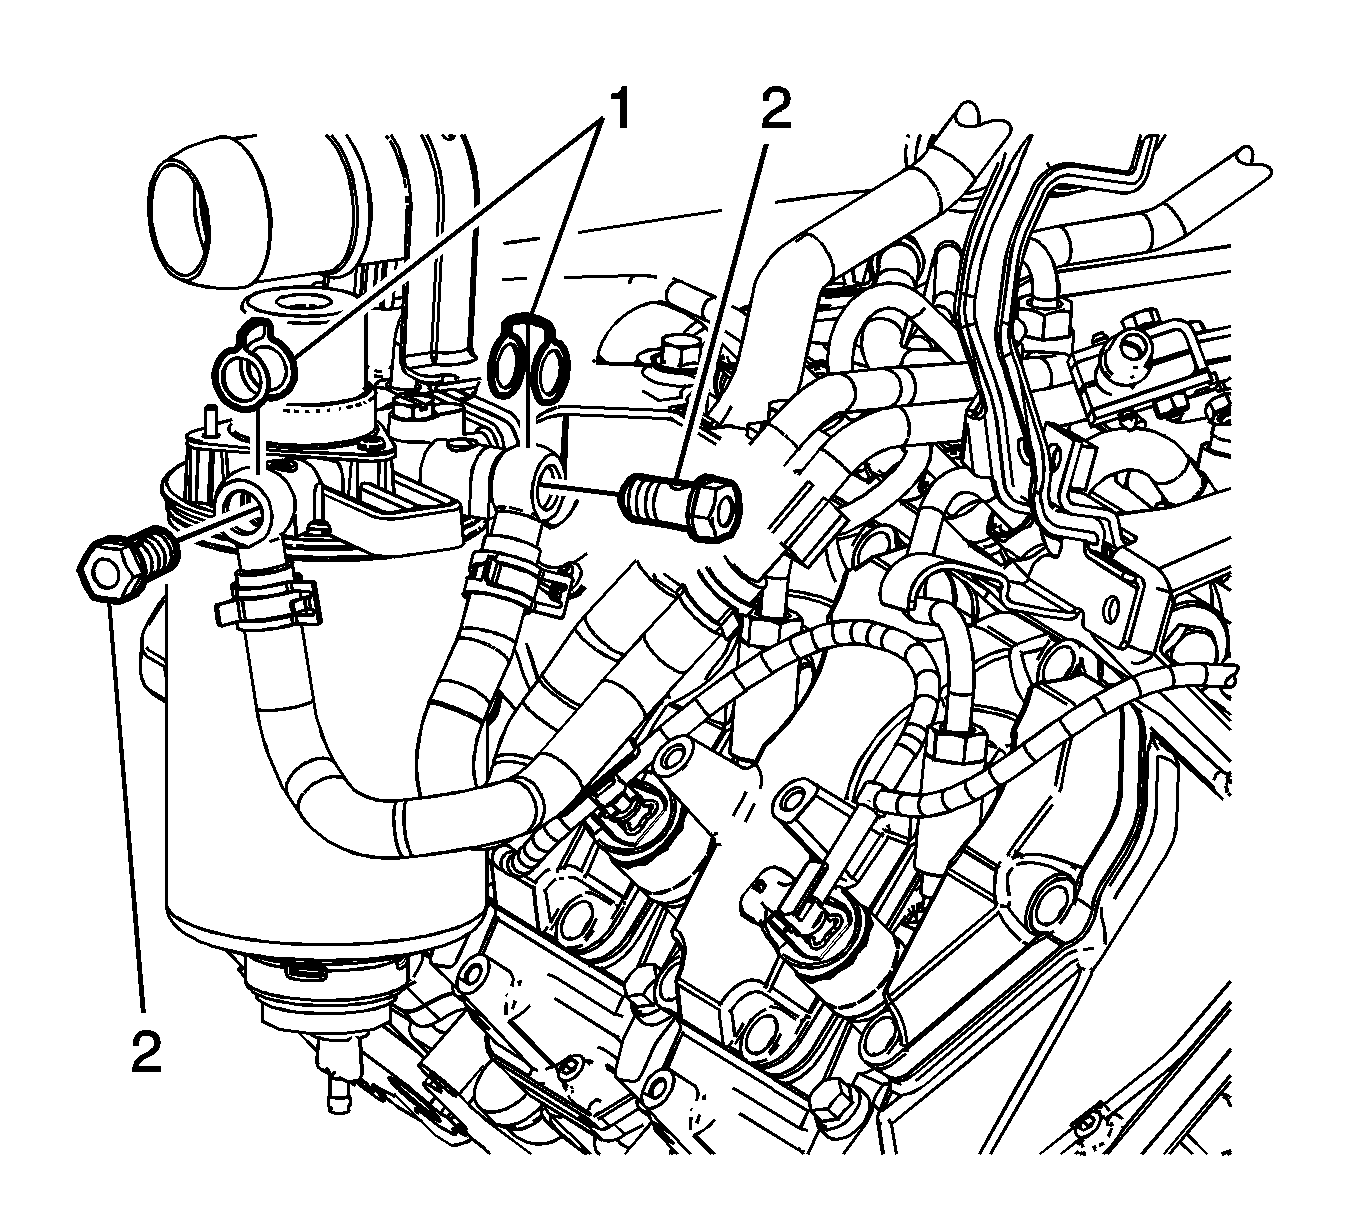
- Remove the fuel filter inlet and outlet pipe banjo bolts (2) and washers (1).
- Reposition the inlet and outlet pipes/hoses from the fuel filter/heater element housing.
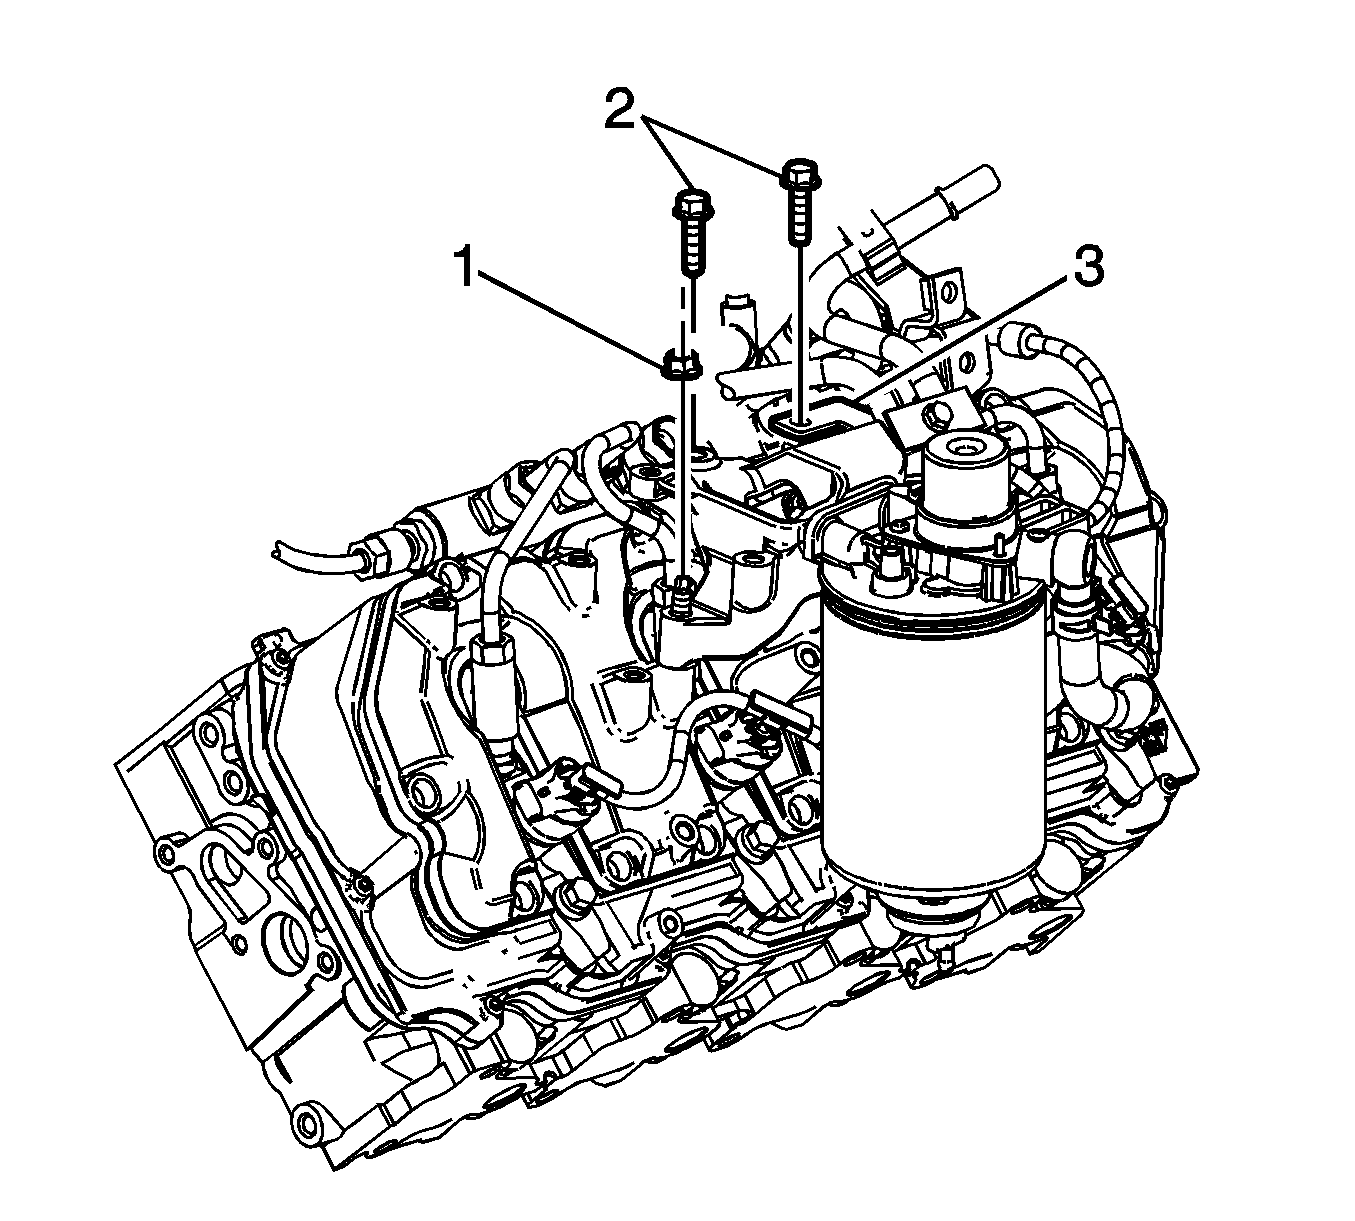
- Remove the fuel filter bracket bolts (2) and nut (1).
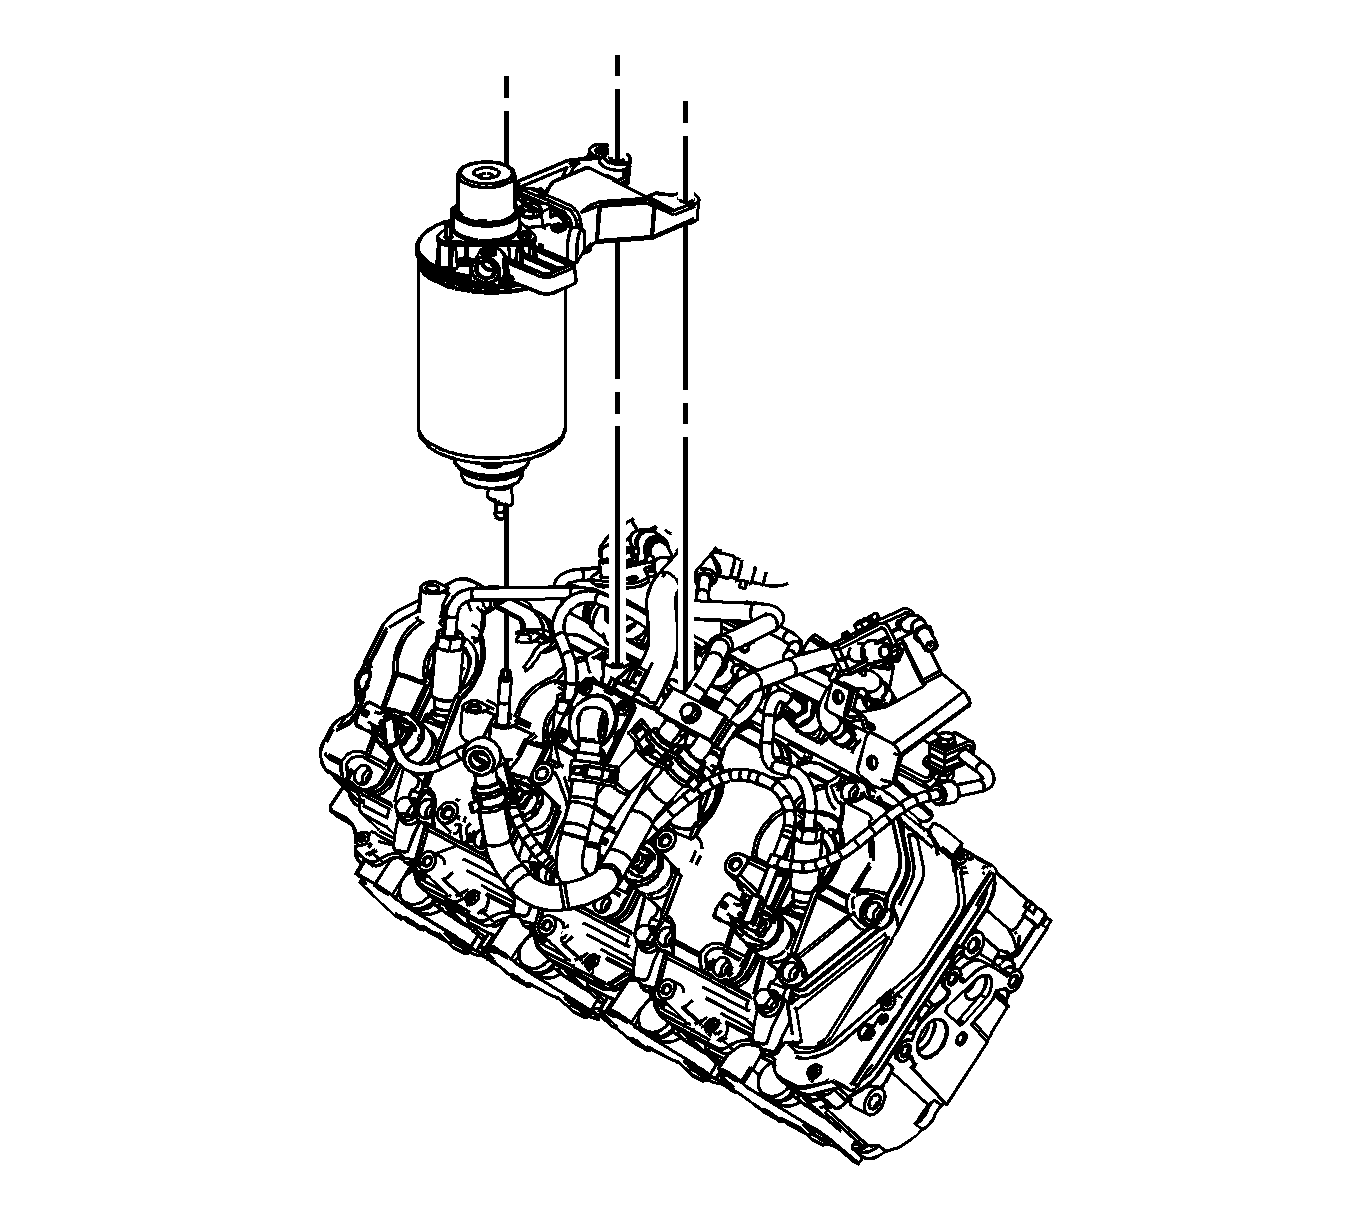
- Remove the fuel filter and bracket assembly.
- Remove the fuel filter bracket bolts (1) and bracket (2) from the fuel filter/heater element housing (3).
- Remove the fuel filter (4) from the fuel filter/heater element housing (3).
- Inspect the fuel filter, replace if necessary.

Installation Procedure
- Install the fuel filter (4) to the fuel filter/heater element housing (3).
- Install the fuel filter bracket (2) and bolts (1) to the fuel filter/heater element housing (3).
- Position the fuel filter and bracket assembly to engine.
- Install the fuel filter bracket bolts (2) and nut (1).
- Install NEW washers (1) onto the fuel inlet and outlet pipe fittings.
- Position the inlet and outlet pipes/hoses to the fuel filter/heater element housing.
- Install the fuel filter inlet and outlet pipe banjo bolts (2).
- Position the bracket with the main electrical connectors still attached and install the engine wiring harness main electrical connector bracket bolts.
- Connect the water-in-fuel sensor electrical connector (1) to the engine wiring harness electrical connector.
- Connect the vehicle's engine wiring harness main electrical connectors (2) to the engine wiring harness main electrical connectors.
- Rotate the electrical connector lever locks (1) forward.
- Install the charge air cooler inlet pipe. Refer to Charge Air Cooler Inlet Pipe and Outlet Pipe Replacement.
- Install the air cleaner. Refer to Air Cleaner Assembly Replacement.
- Prime the fuel system. Refer to Fuel System Priming.
- Start the engine. If the engine stalls, repeat step 14.
- Once the engine starts, inspect for fuel leaks.
Caution: Refer to Fastener Caution in the Preface section.
Tighten
Tighten the bolts to 20 N·m (15 lb ft).
Tighten
Tighten the bolts/nuts to 20 N·m (15 lb ft).
Note: Lubricate the NEW washers with diesel fuel before installing.
Tighten
Tighten the bolts to 26 N·m (19 lb ft).
Tighten
Tighten the bolts to 21 N·m (15 lb ft).
