For 1990-2009 cars only
Removal Procedure
- Drain the cooling system. Refer to Cooling System Draining and Filling .
- Remove the air cleaner assembly. Refer to Air Cleaner Assembly Replacement .
- Remove the charge air cooler inlet pipe. Refer to Charge Air Cooler Inlet Pipe Replacement .
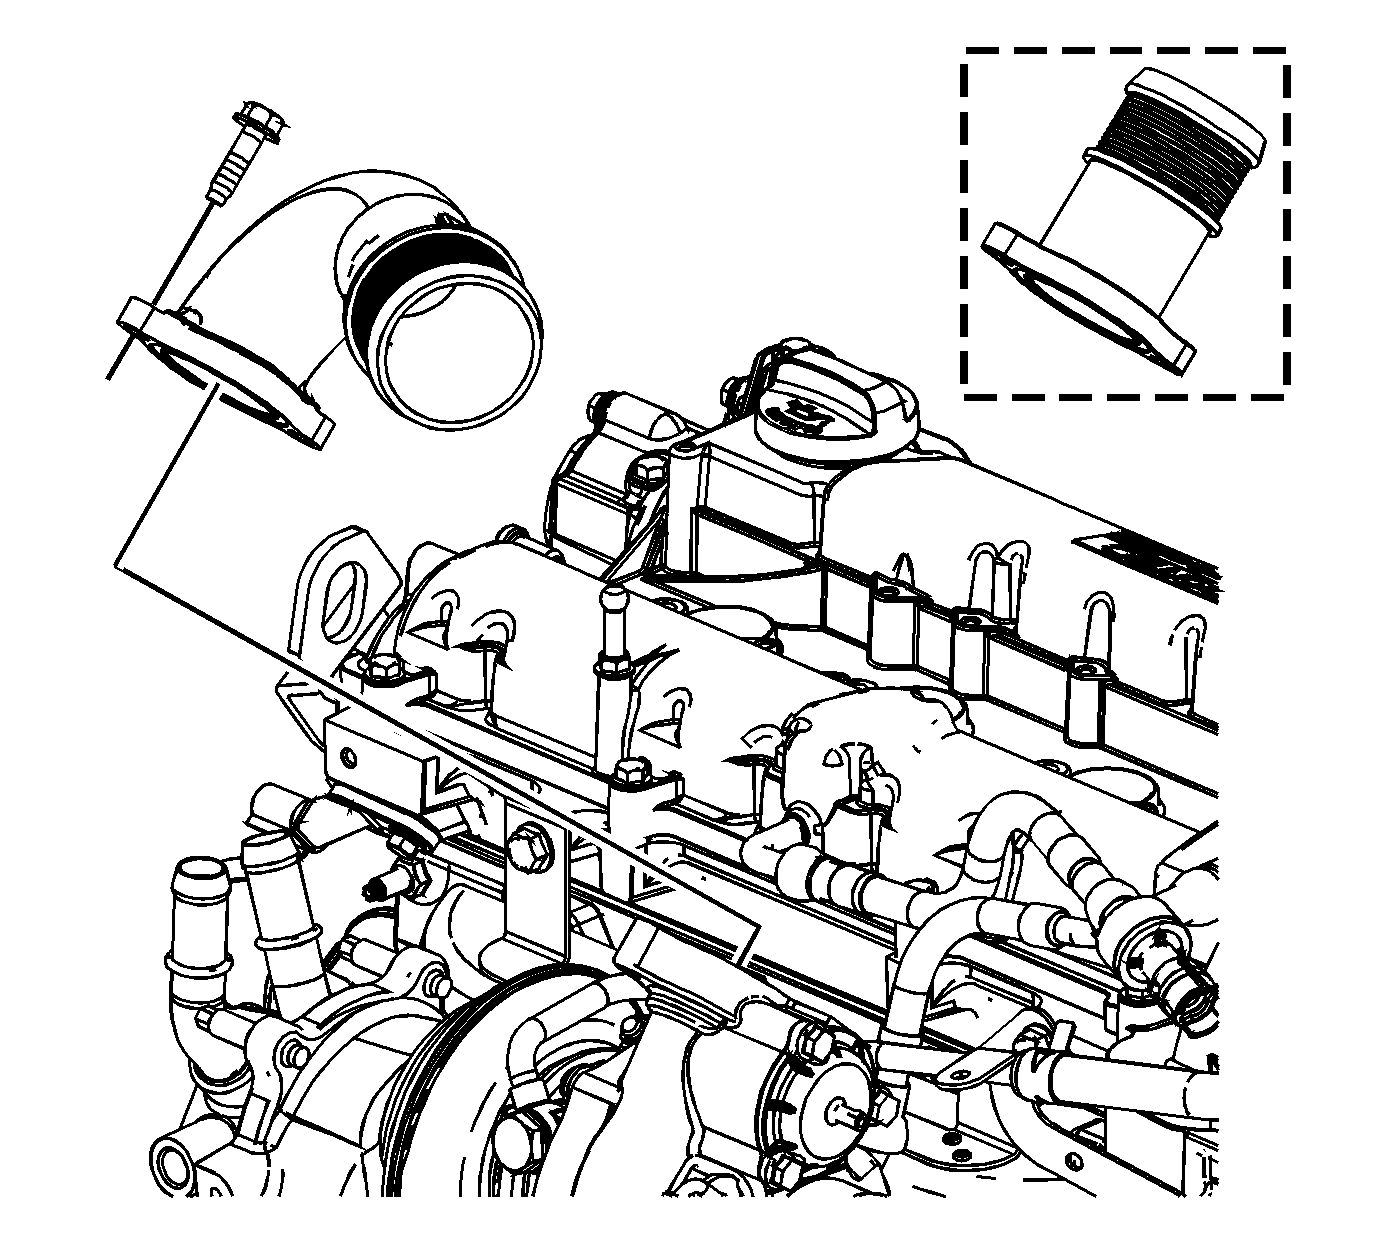
- Remove the charge air cooler pipe bolts at the turbocharger.
- Remove the charge air cooler pipe from the turbocharger.
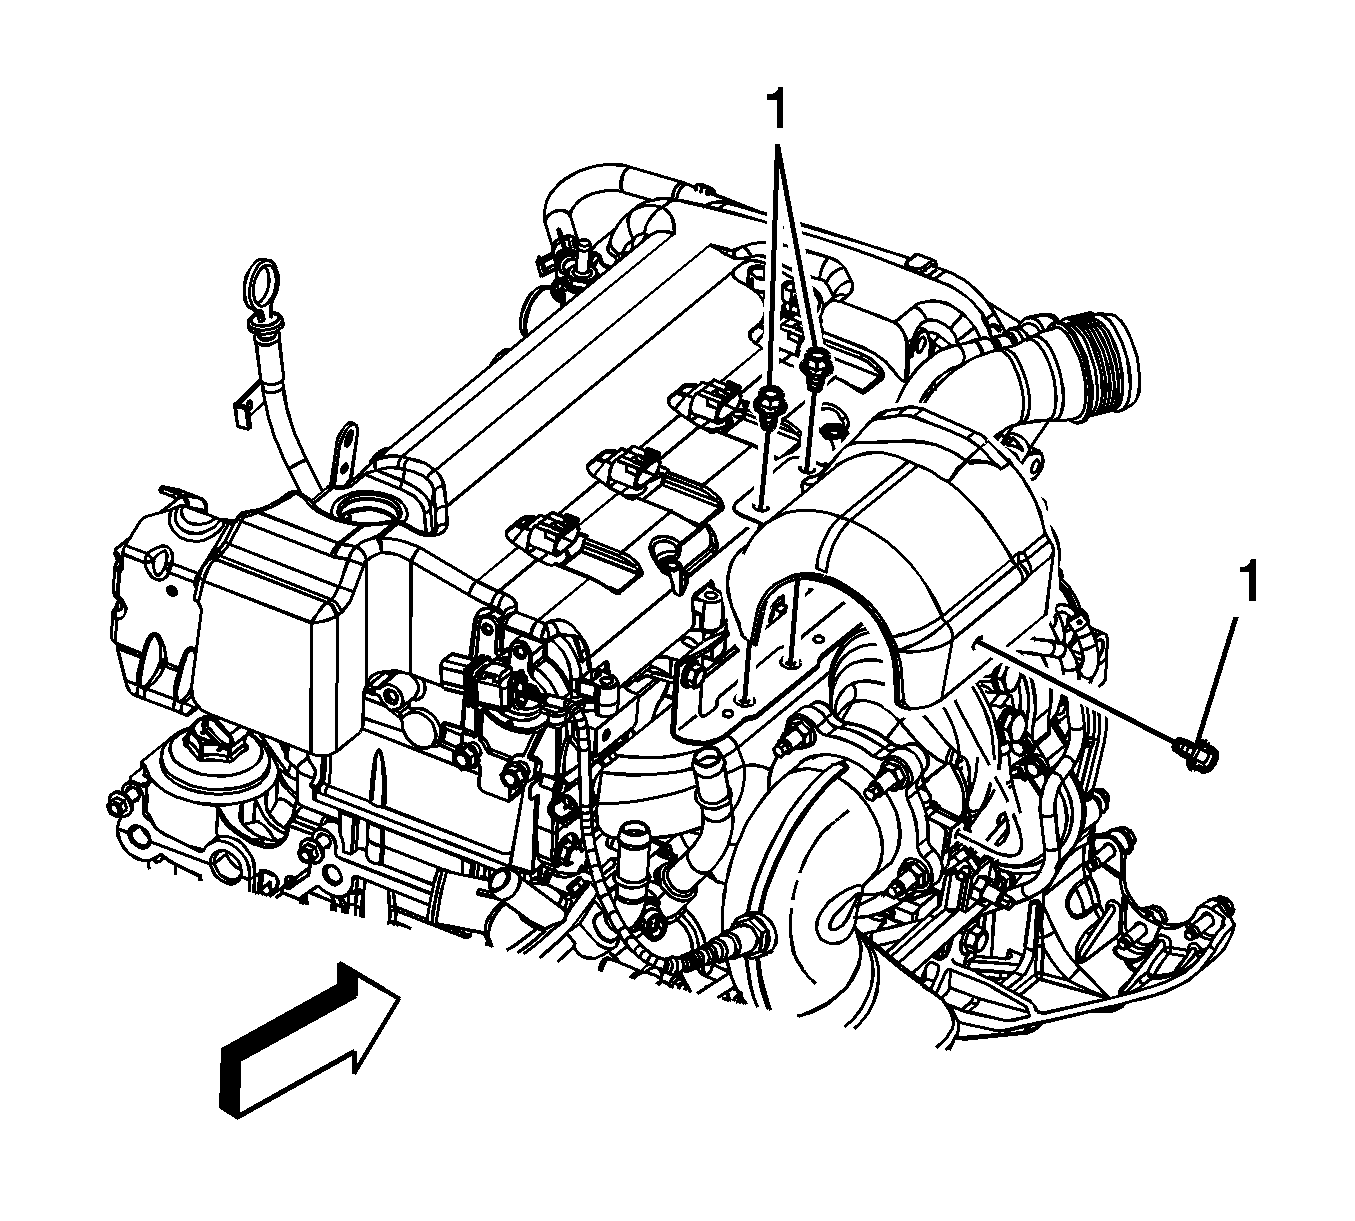
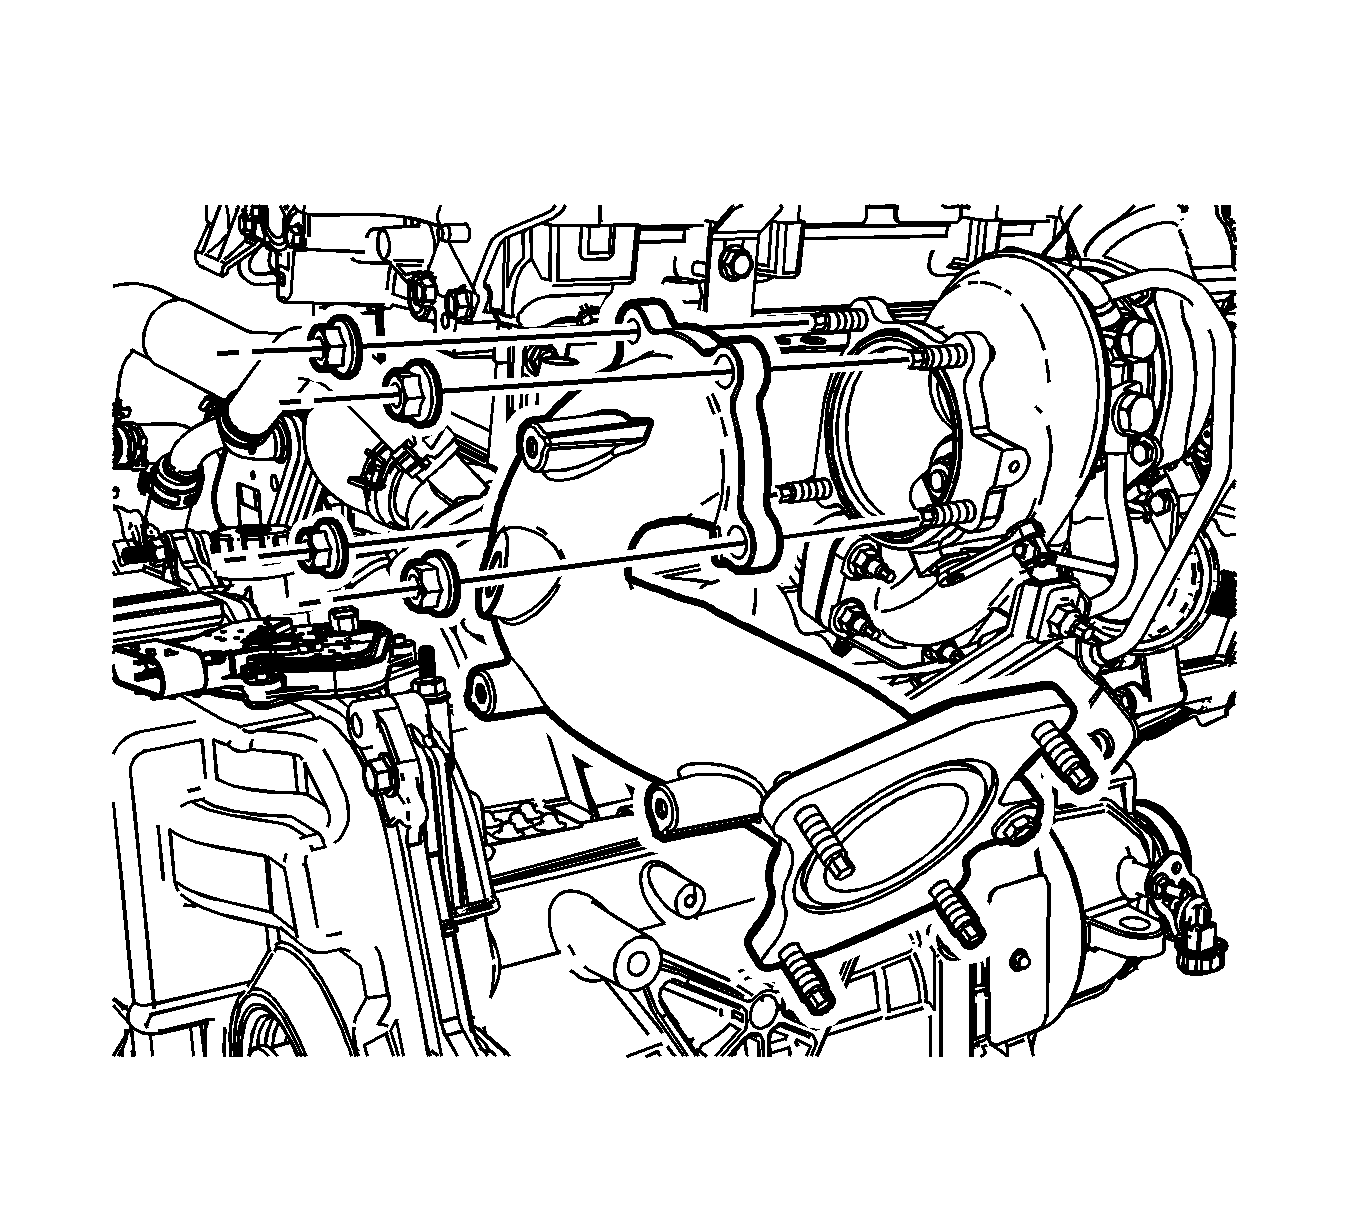
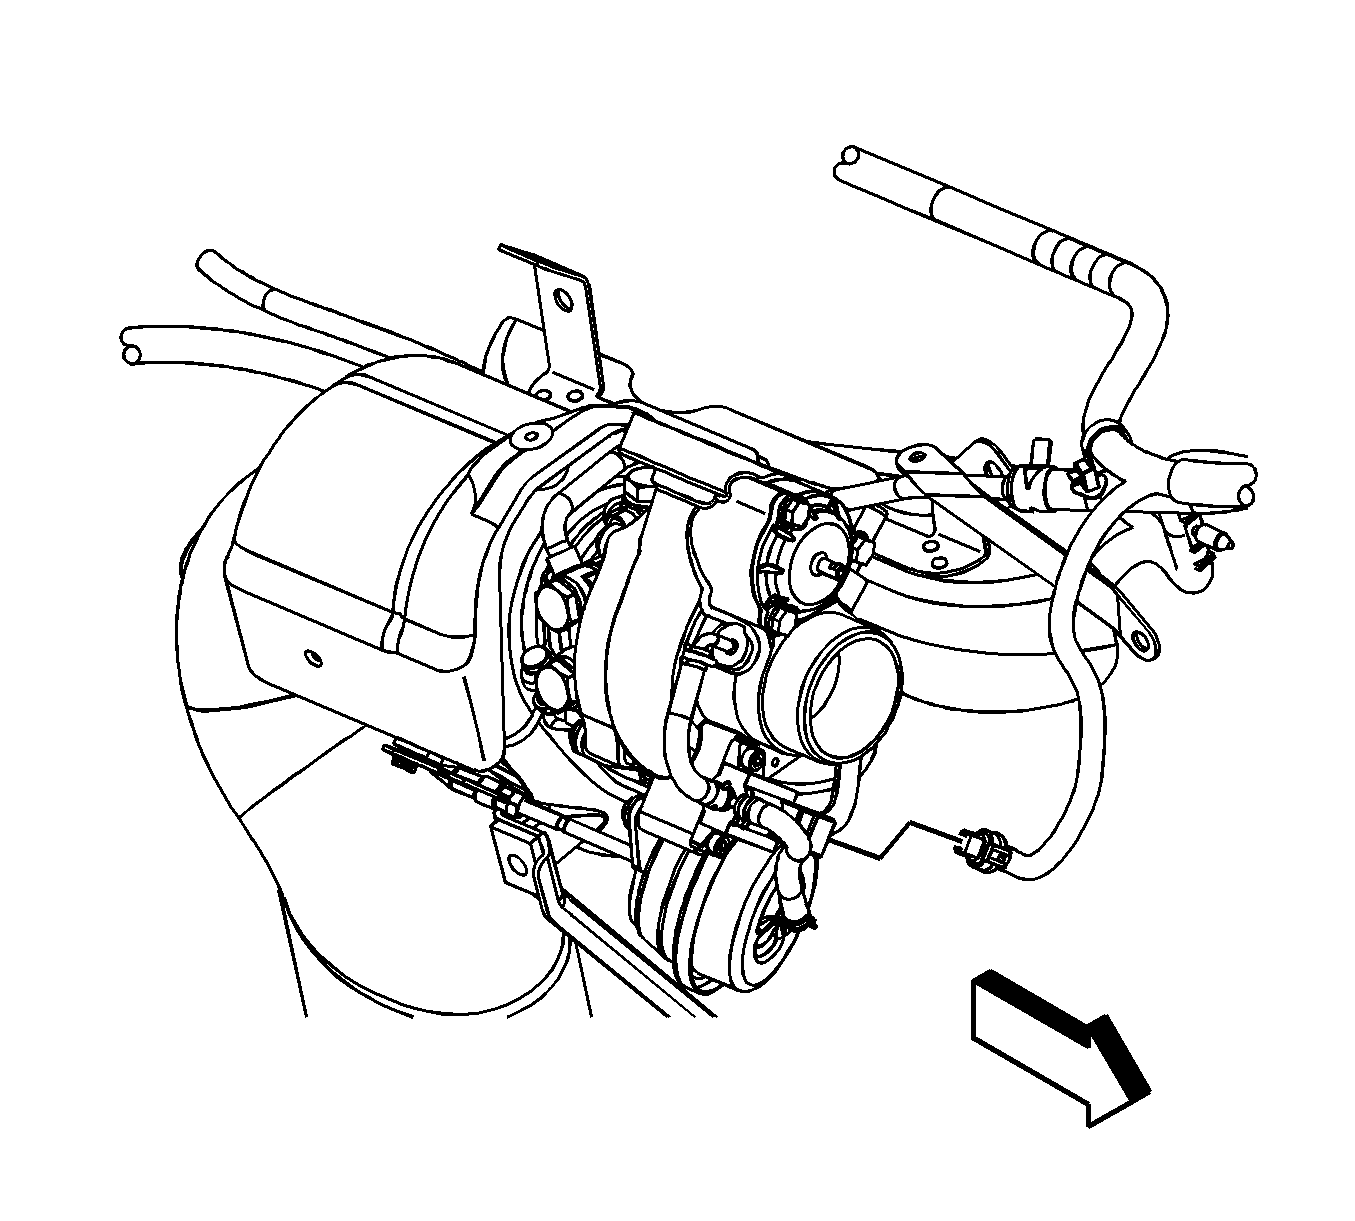
- Remove the turbocharger heat shield bolts (1) and shield.
- Remove the heated oxygen sensor (HO2S). Refer to Heated Oxygen Sensor Replacement - Sensor 1 .
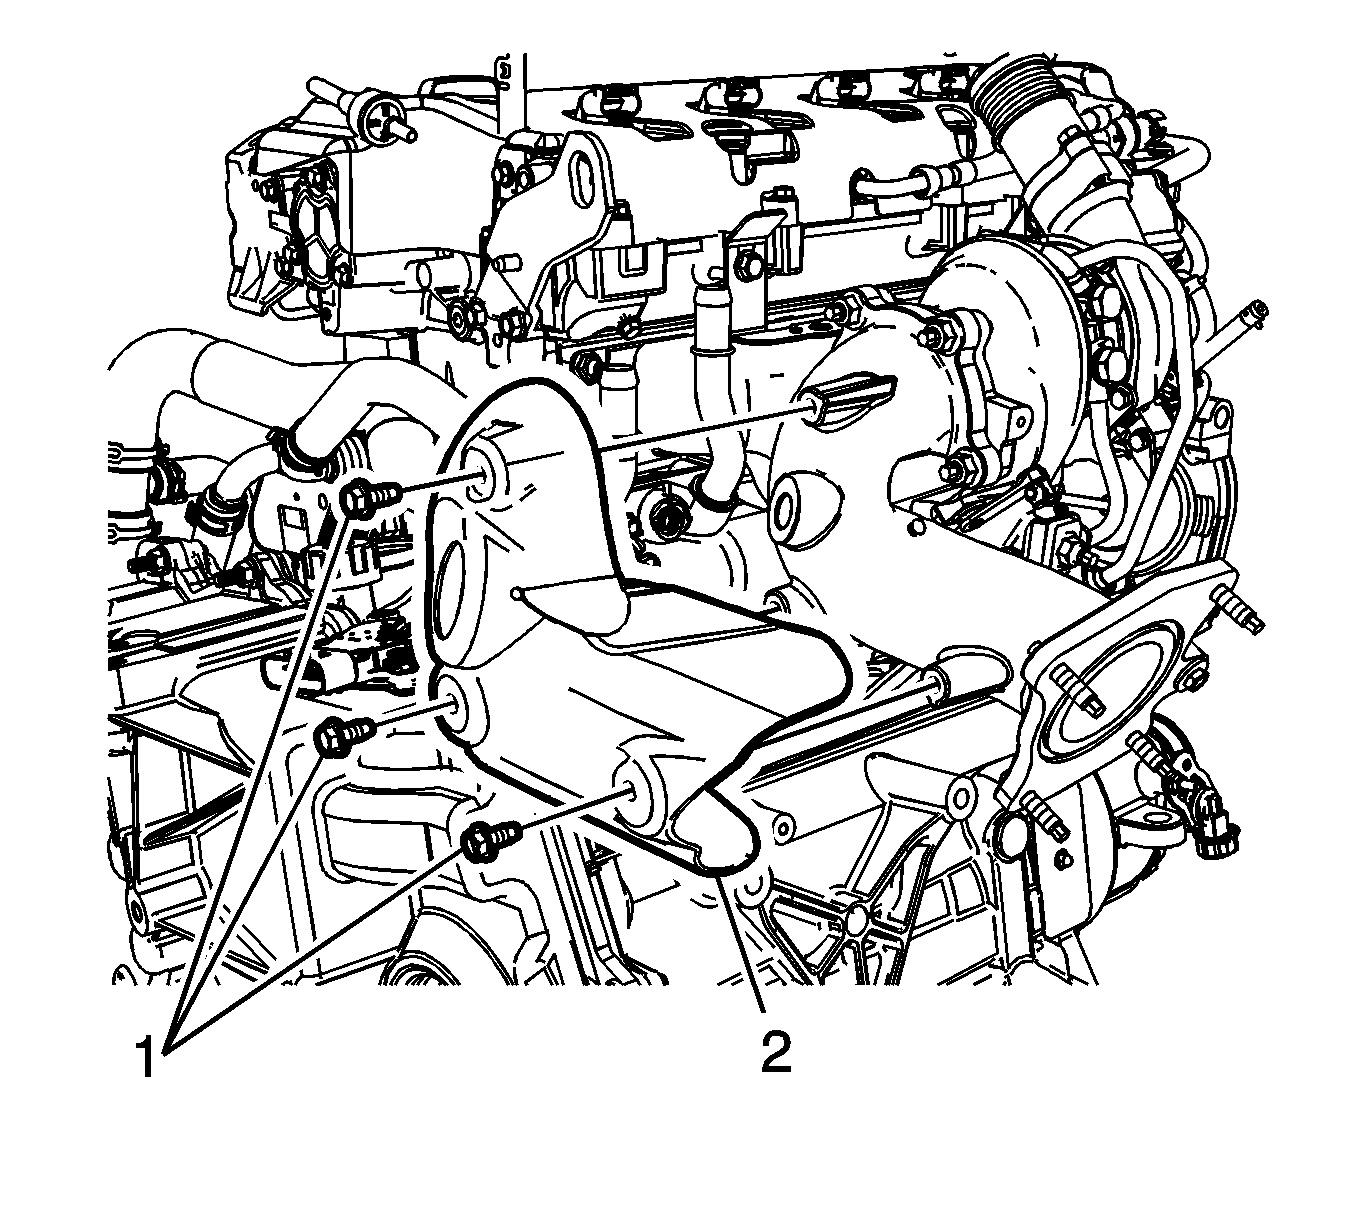
- Remove the turbocharger exhaust pipe elbow heat shield bolts (1).
- Remove the turbocharger exhaust pipe elbow heat shield (2).
- Remove the catalytic converter. Refer to Catalytic Converter Replacement .
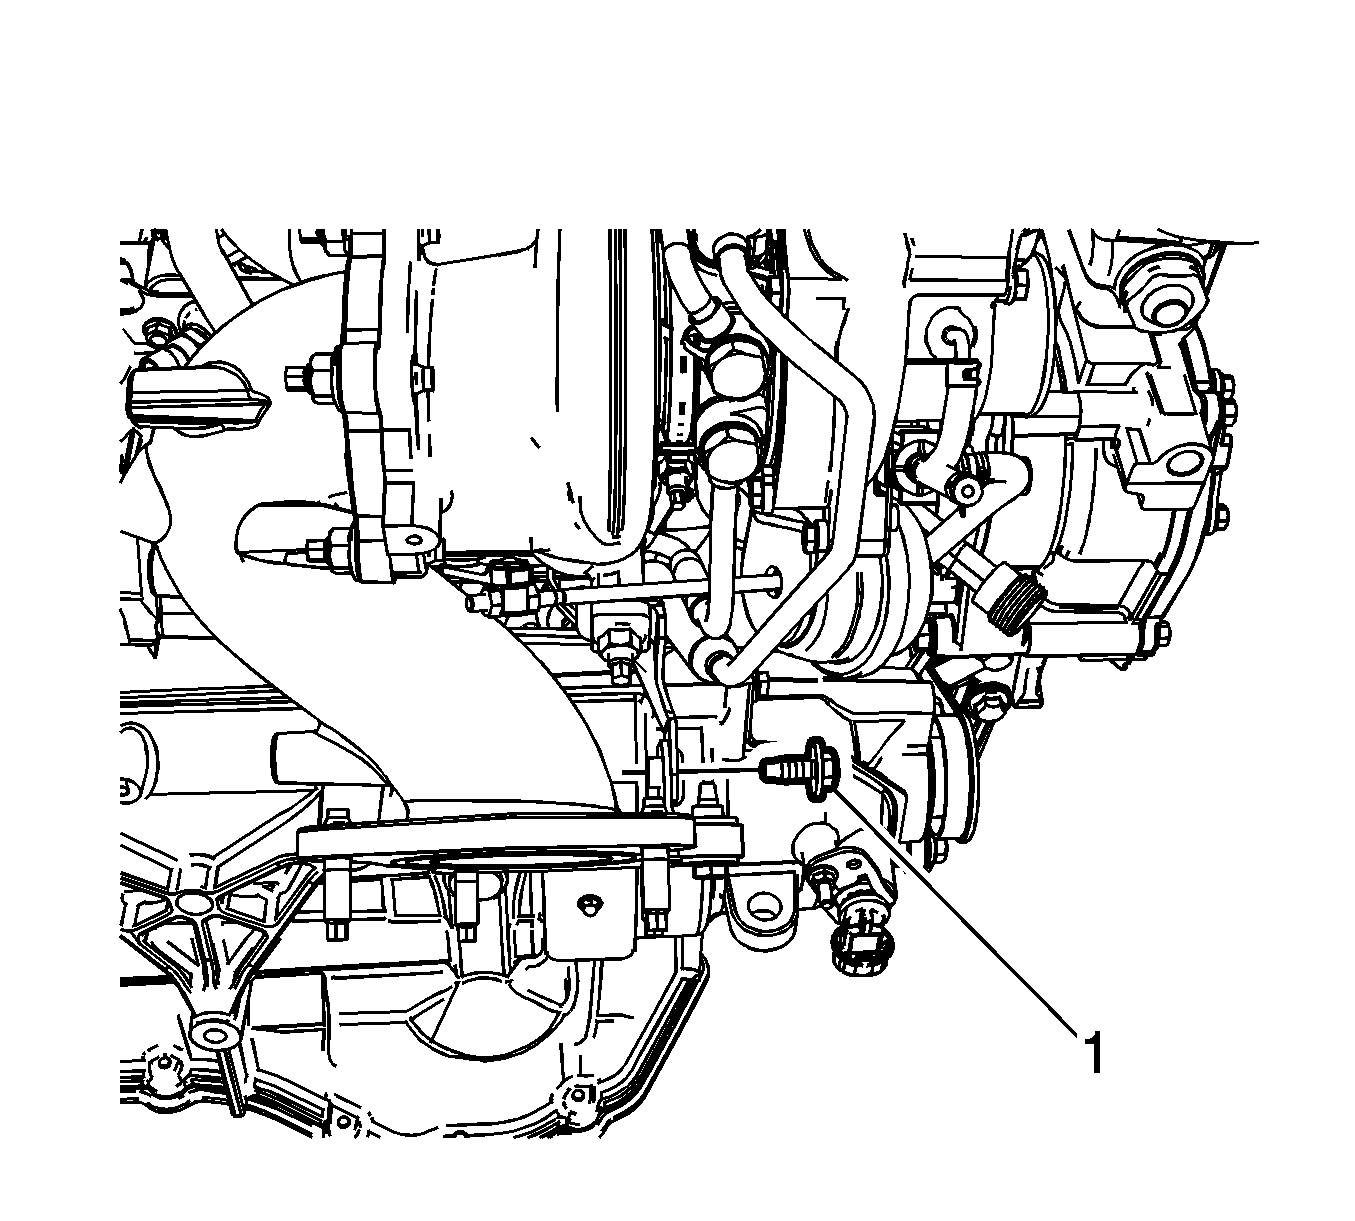
- Remove the turbocharger exhaust elbow support bracket bolt (1).
- Remove the turbocharger exhaust elbow to turbocharger retaining nuts.
- Remove the turbocharger exhaust elbow.
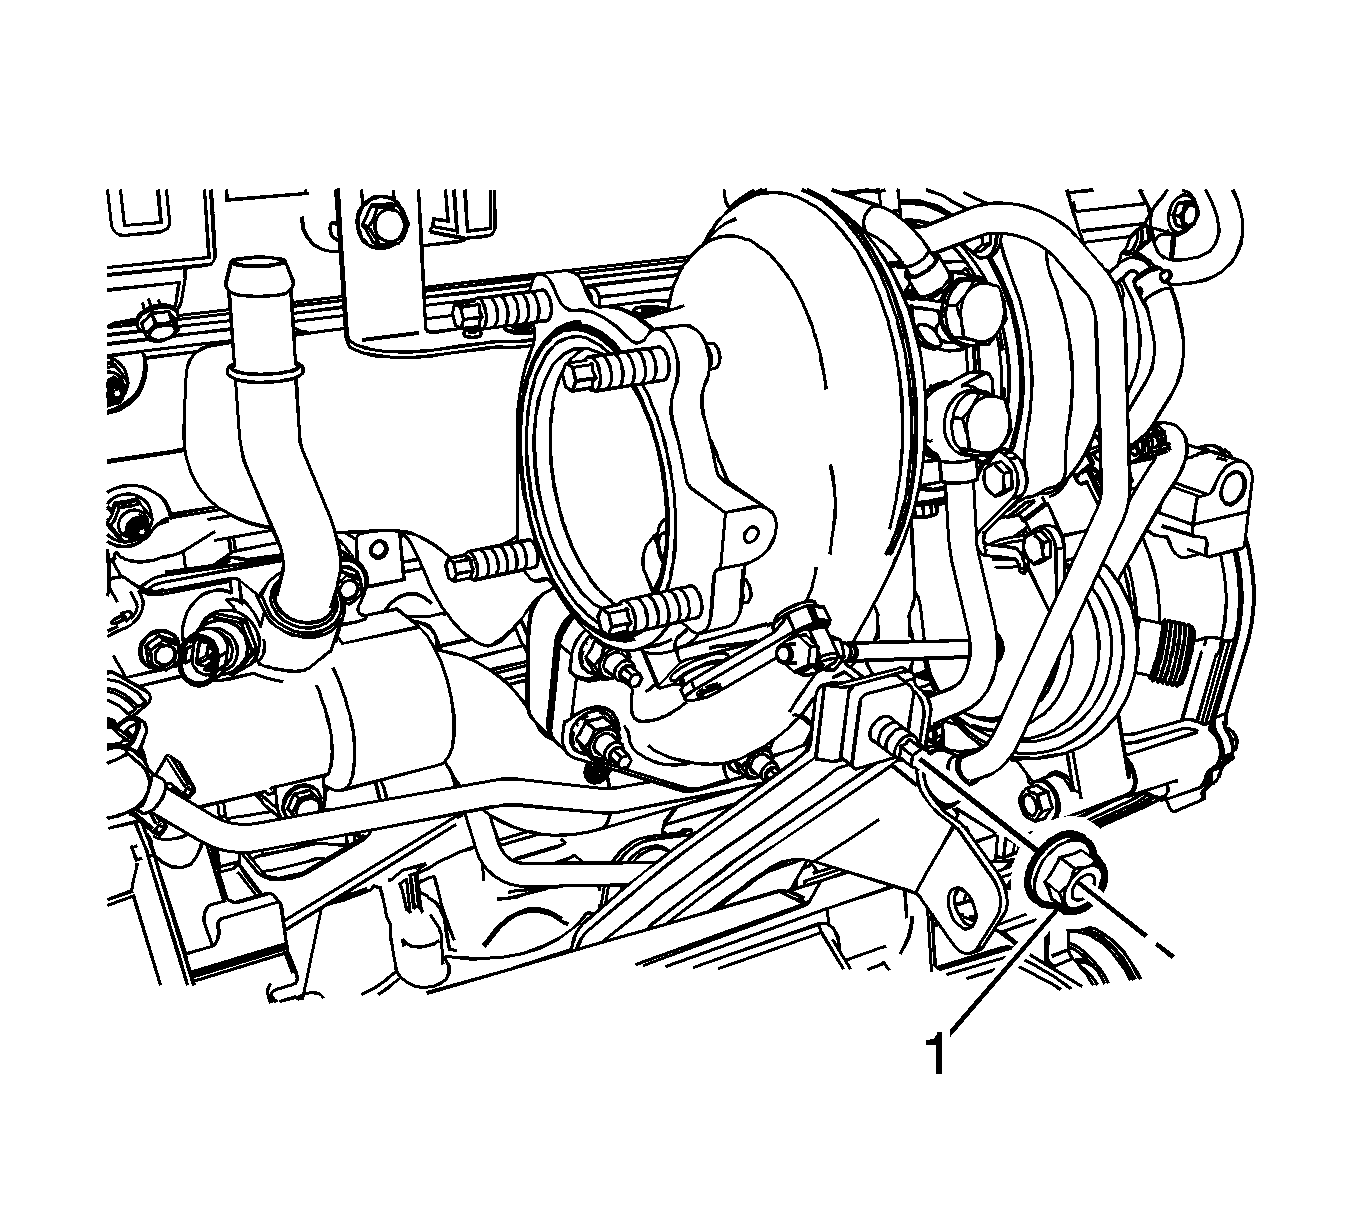
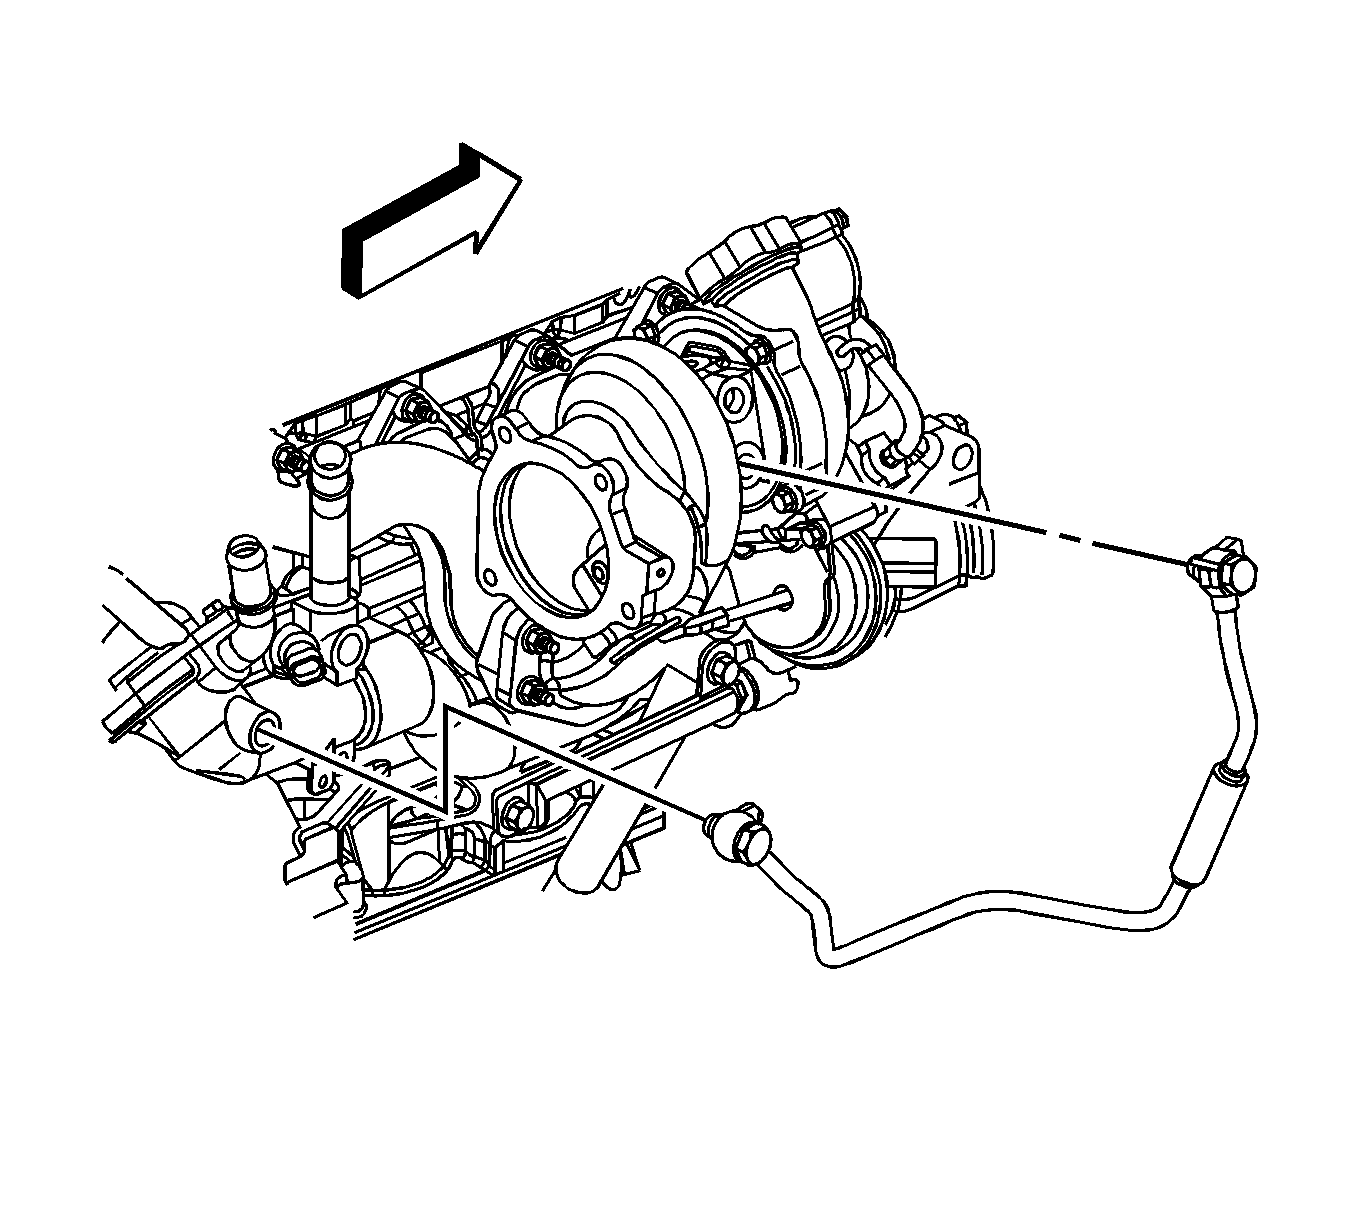
- Remove the turbocharger bracket upper retaining nut (1)
- Loosen the turbocharger bracket lower retaining nut (1) and bolt (2).
- Remove the stud (1) from the turbocharger.
- Reposition the turbocharger bracket.
- Lower the vehicle.
- Disconnect the engine wiring harness electrical connector from the turbocharger wastegate solenoid valve.
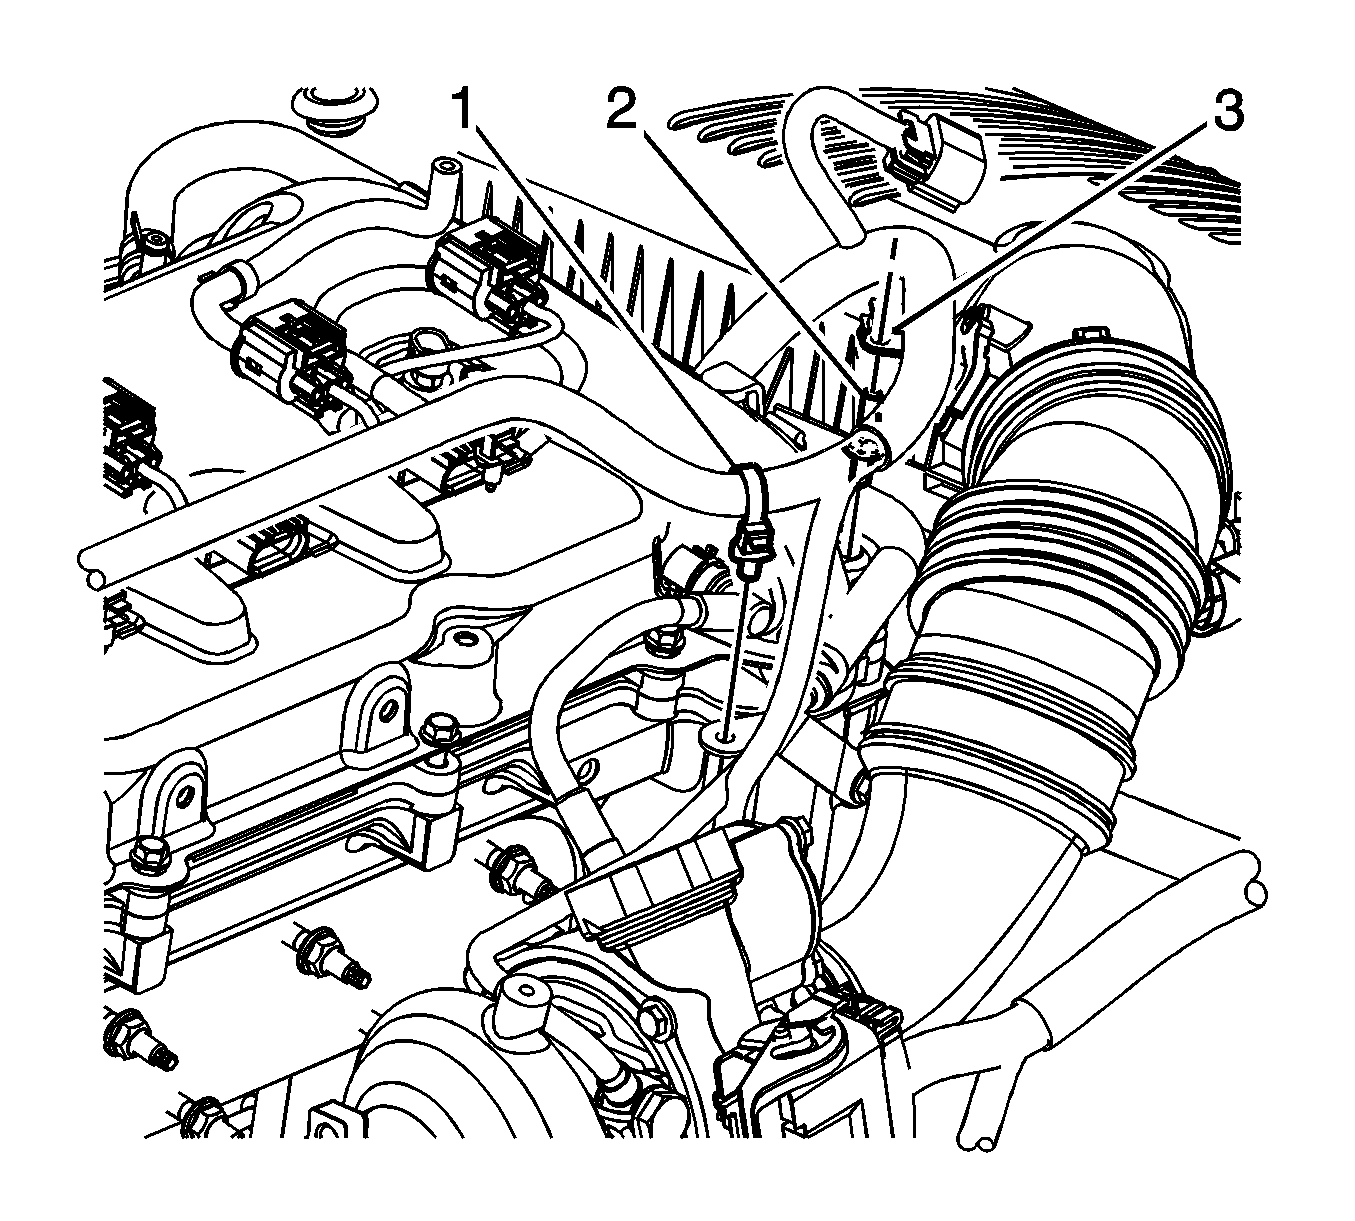
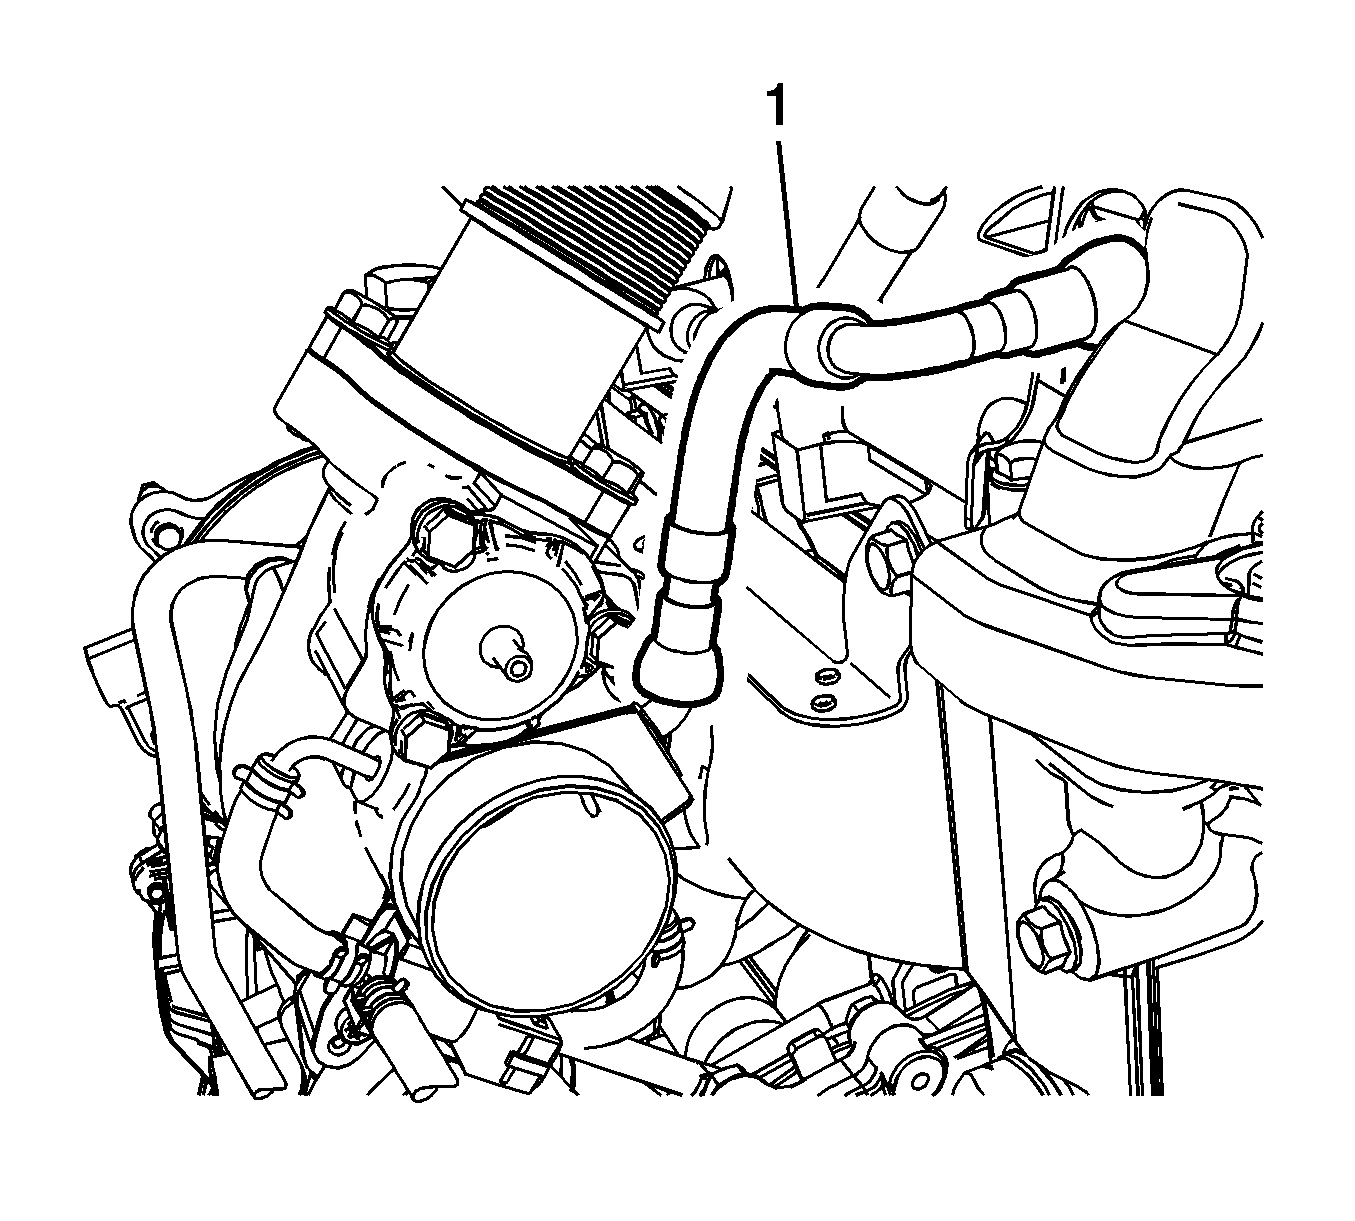
- Reposition the vacuum hose clamp (1) at the turbocharger.
- Remove the vacuum hose from the turbocharger.
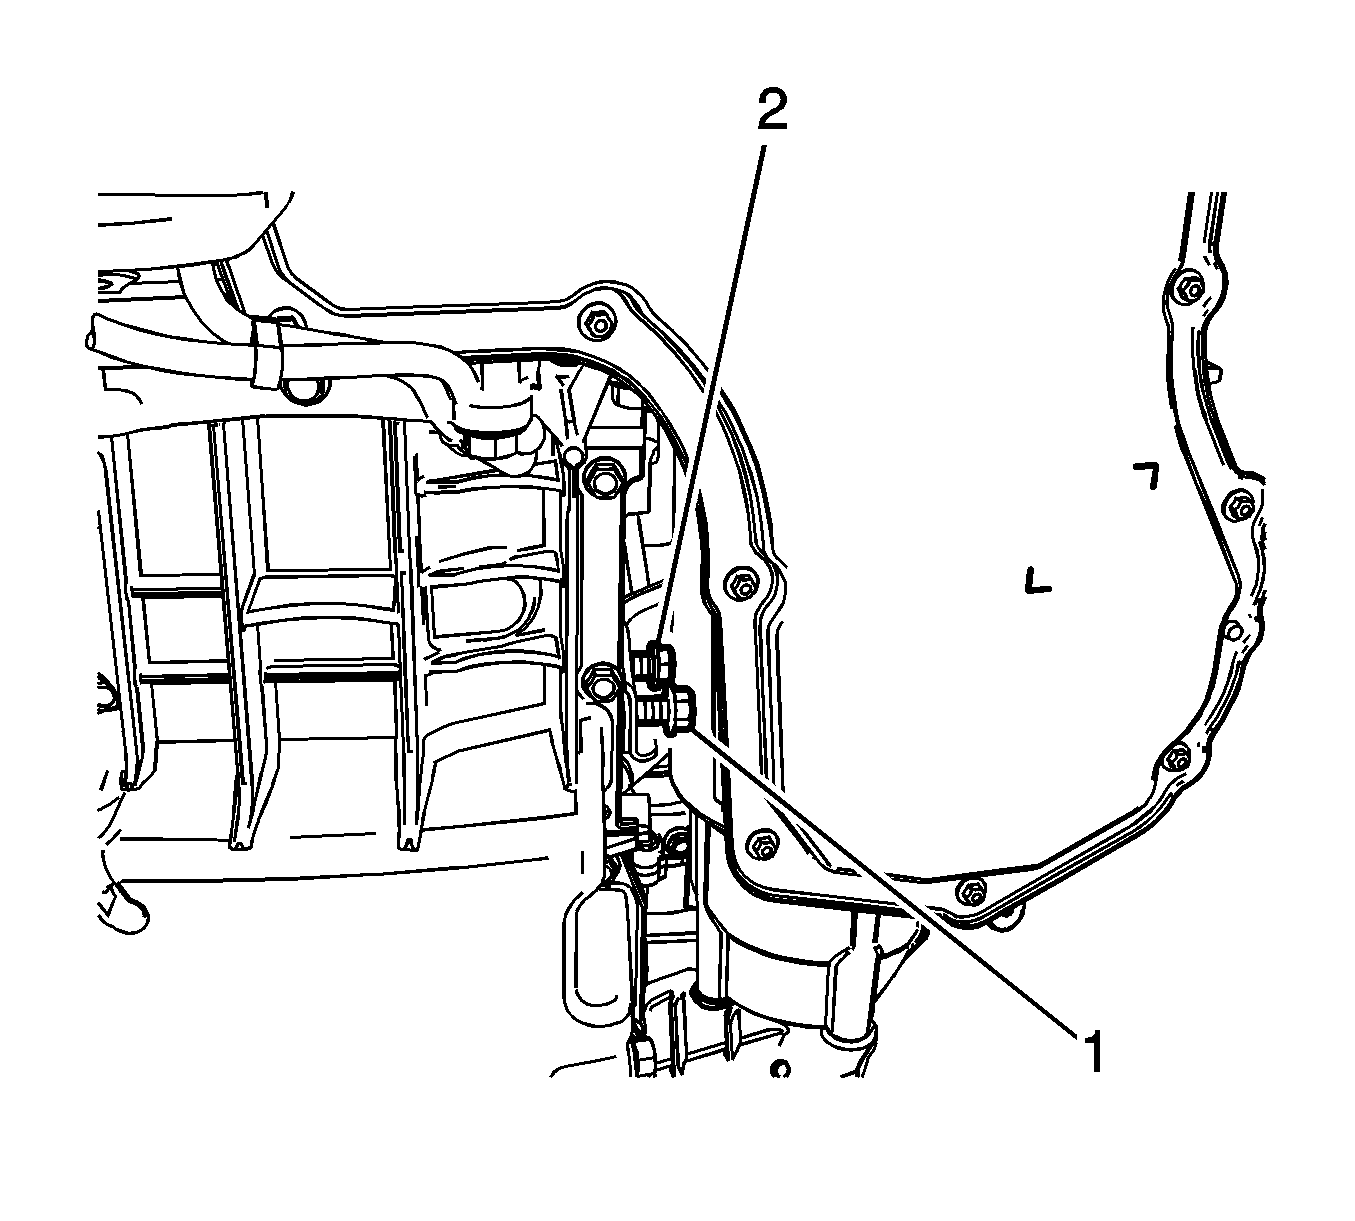
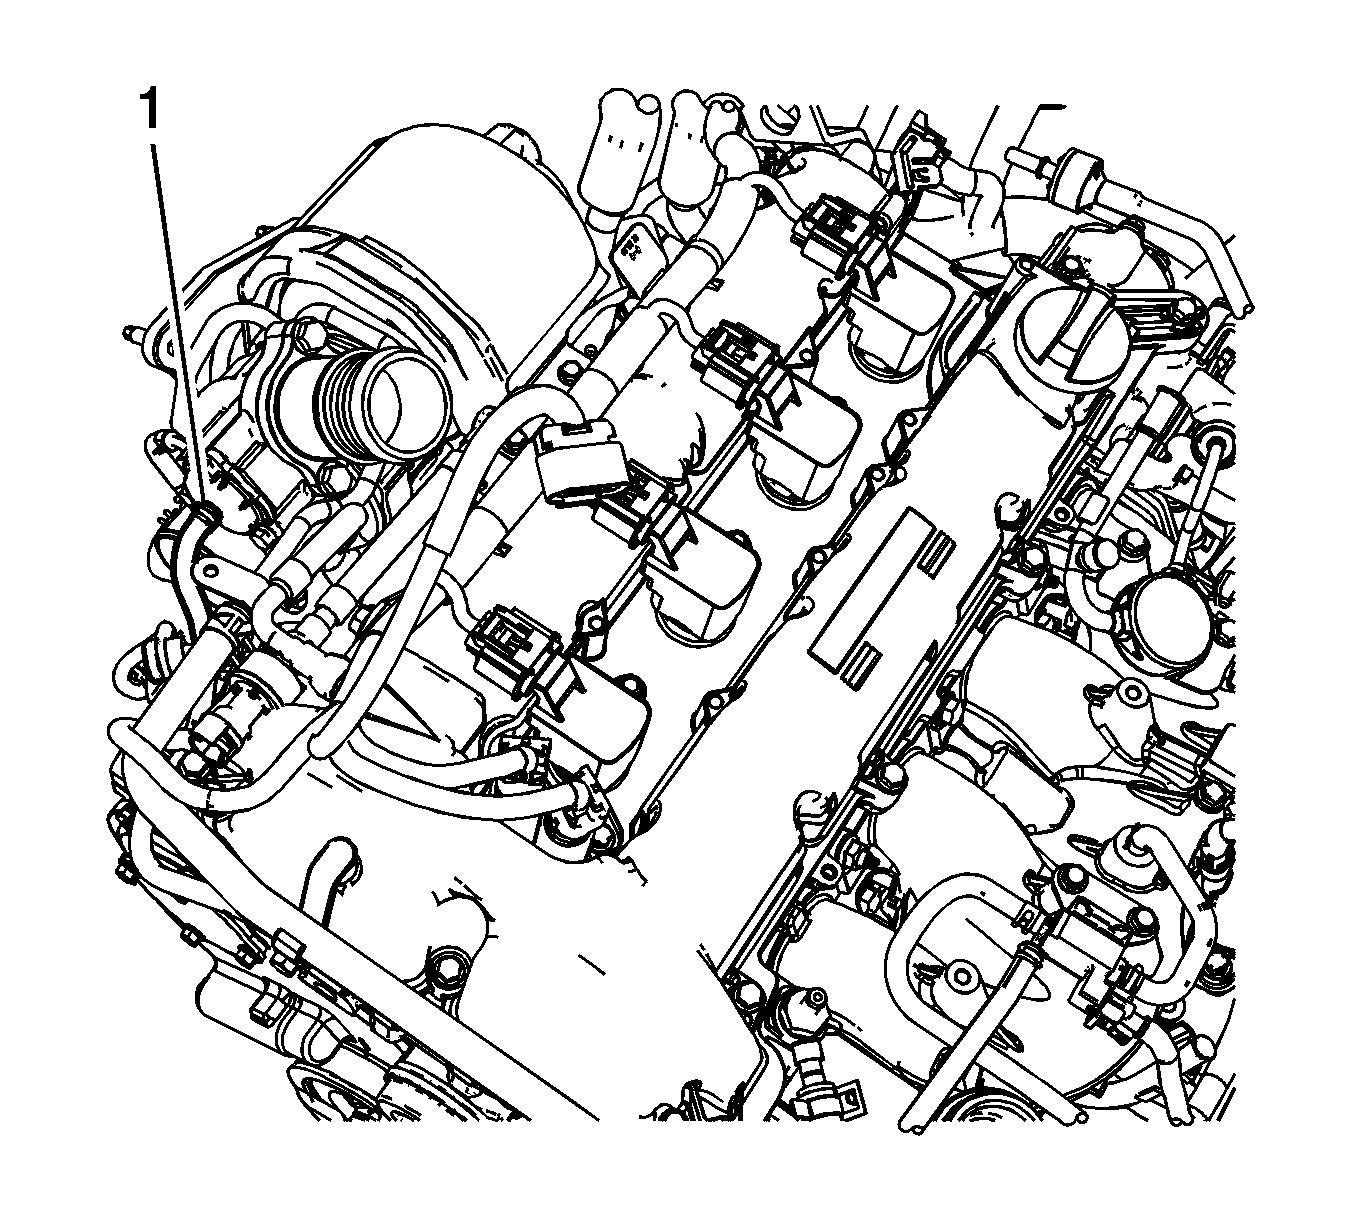
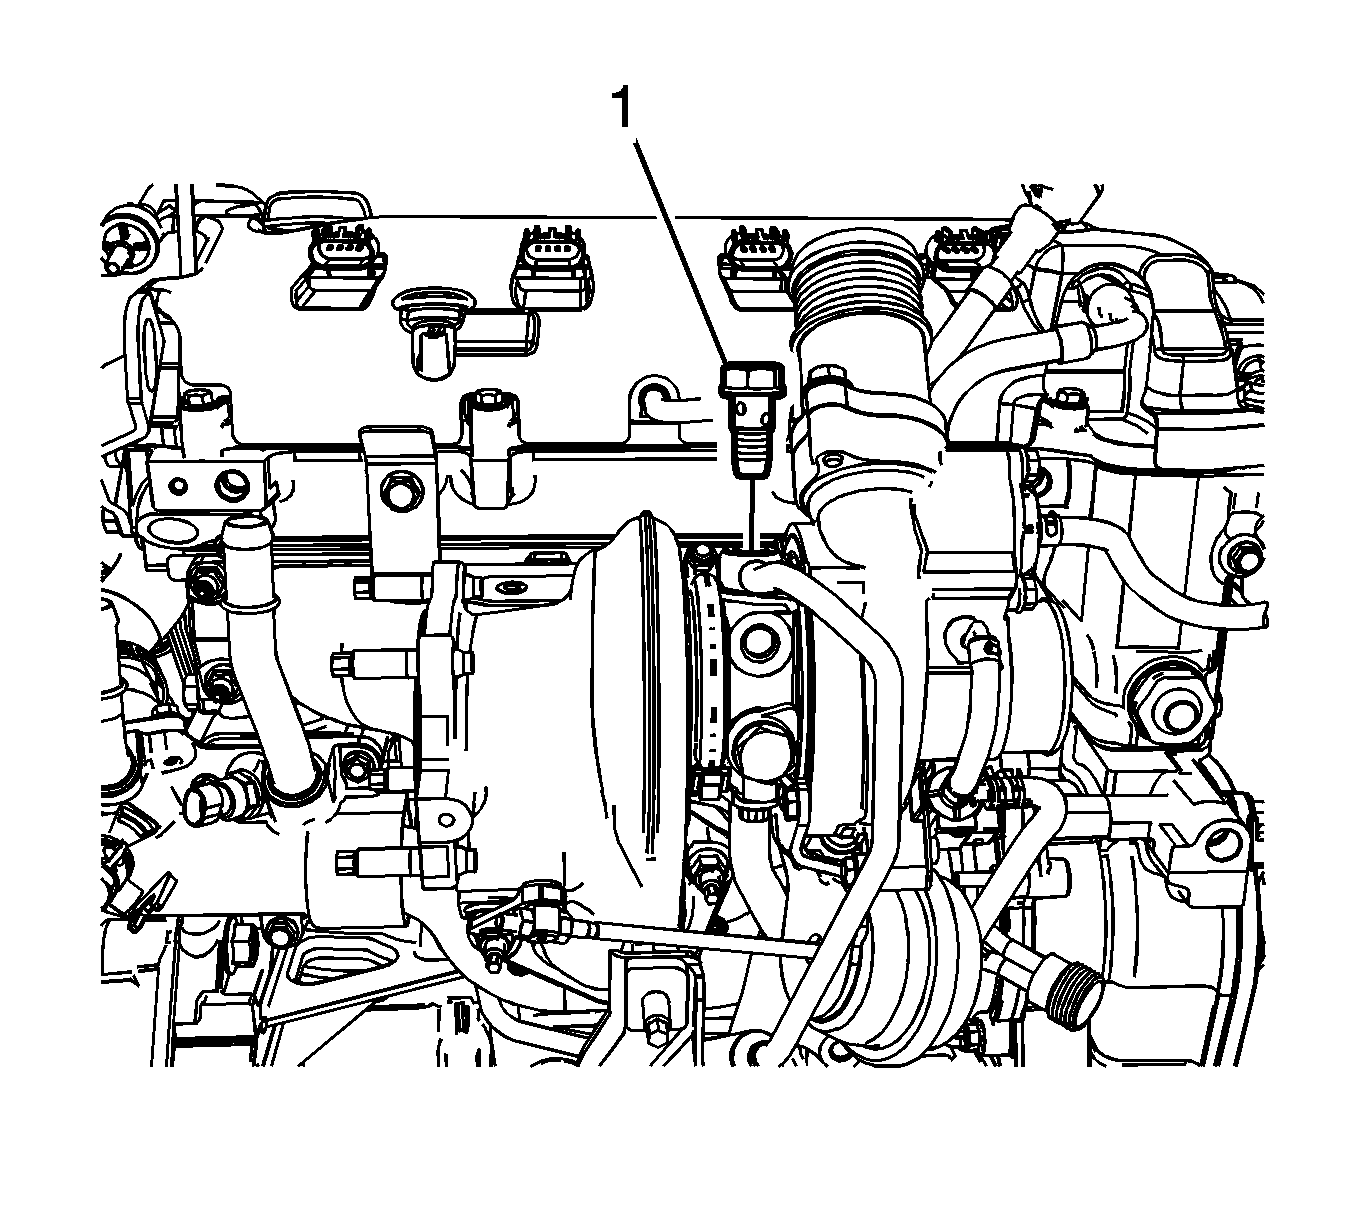
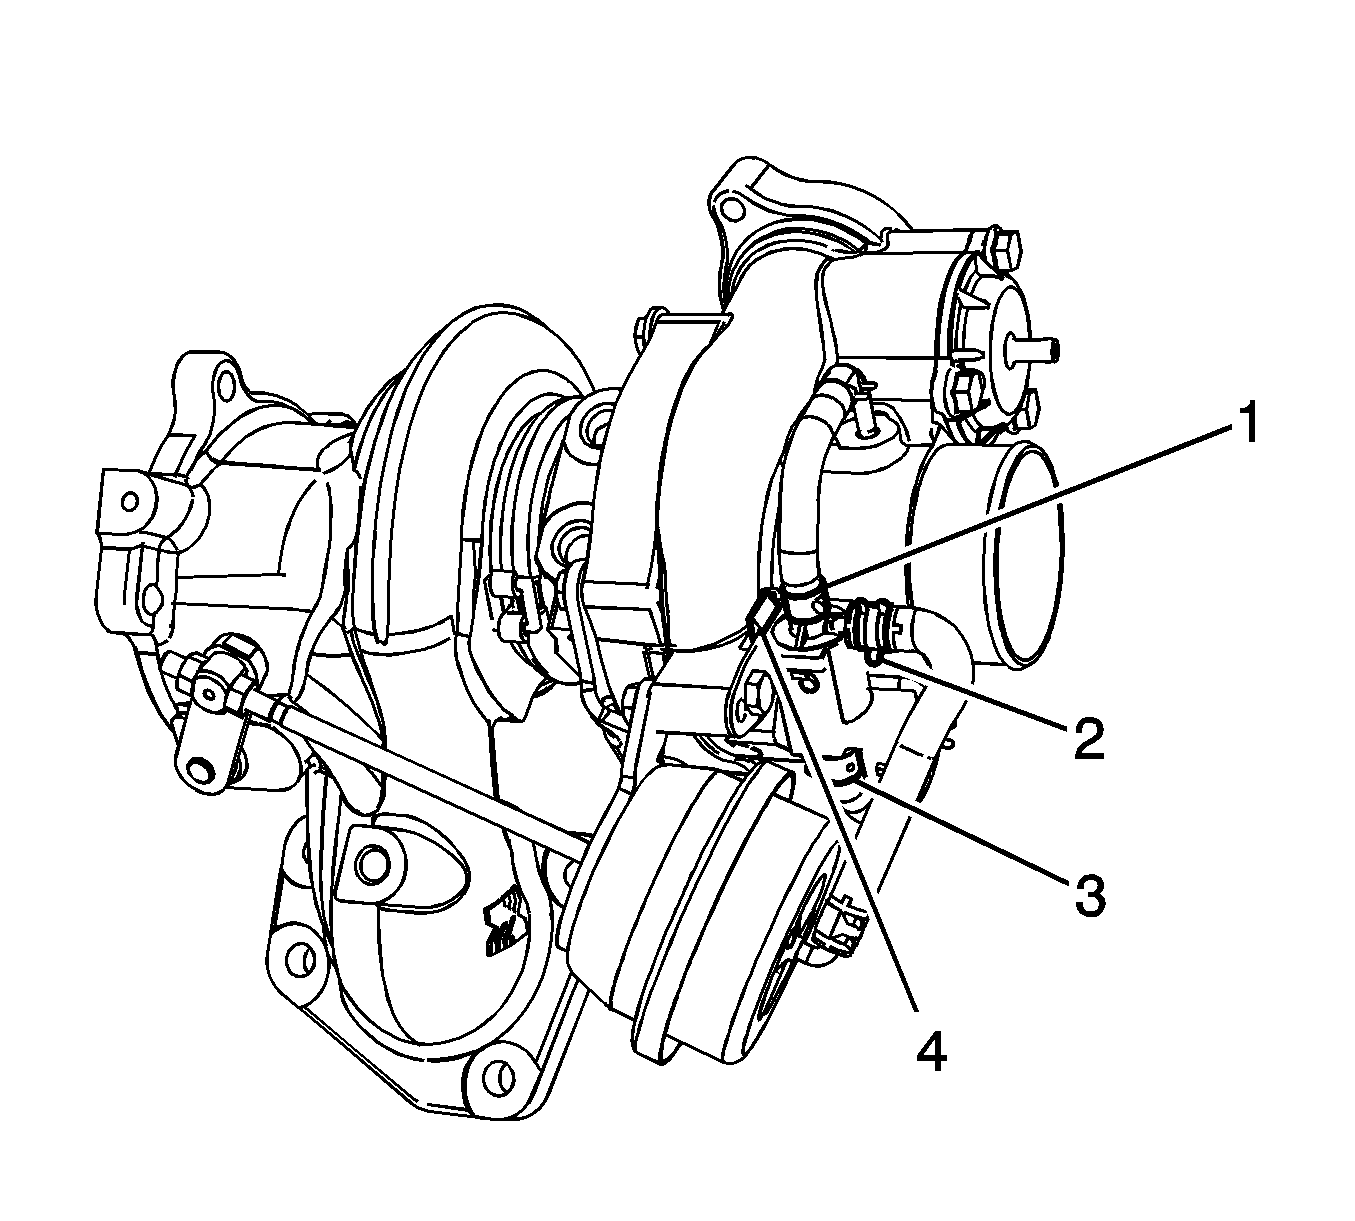
- Remove the engine wiring harness clip (1) from the turbocharger coolant feed pipe.
- Remove the turbocharger coolant feed pipe bolt (1) at the turbocharger.
- Remove and discard the turbocharger coolant feed pipe gasket.
- Remove the turbocharger coolant feed pipe bolt (3) from the cylinder head.
- Reposition the turbocharger coolant feed pipe out of the way.
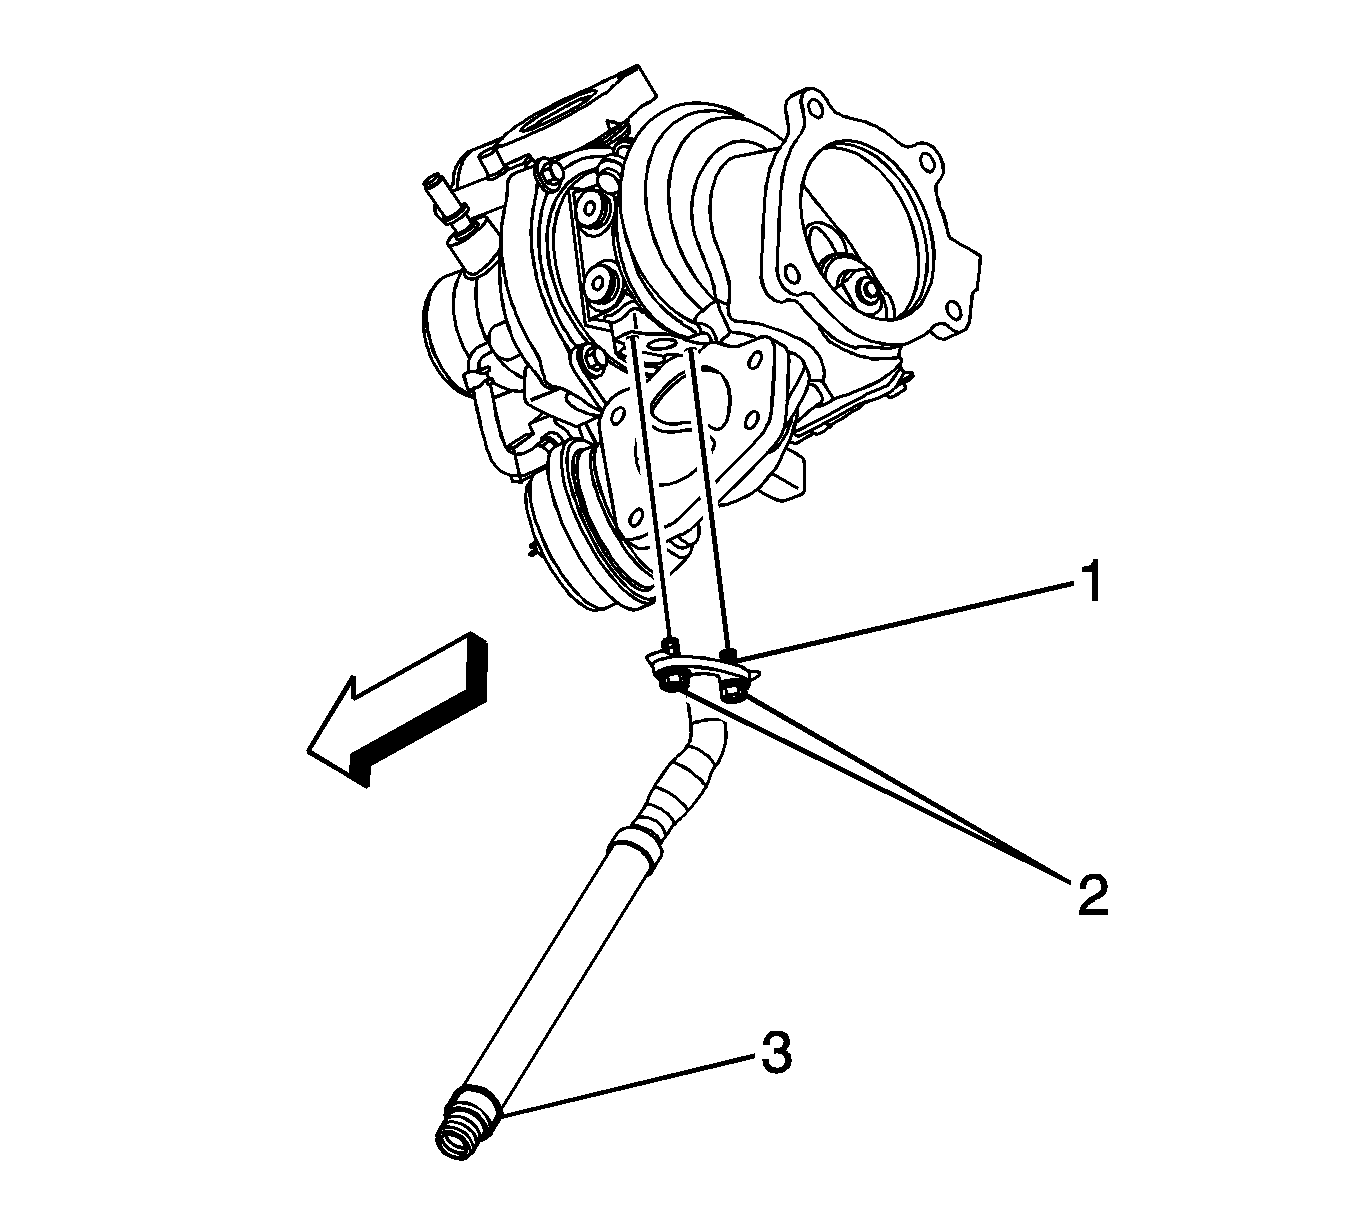
- Remove the turbocharger coolant return pipe bolts and pipe.
- Remove and discard the turbocharger coolant return pipe gaskets.
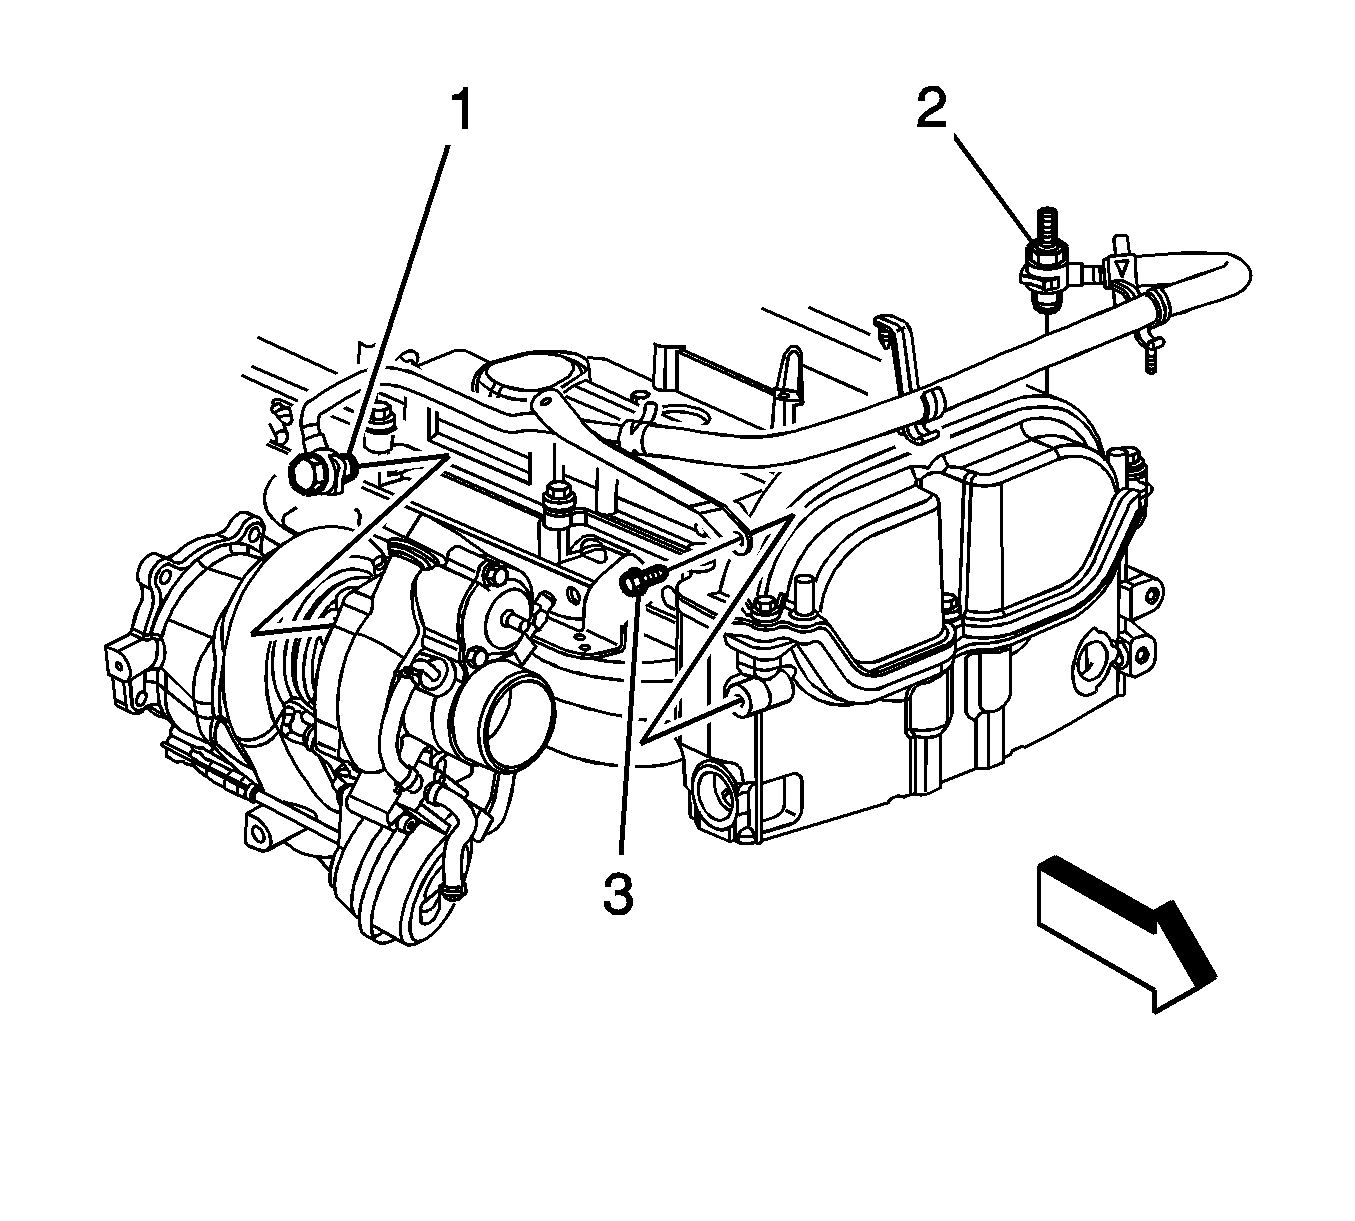
- Remove the turbocharger oil feed pipe bolt (1) at the turbocharger and position aside.
- Remove and discard the turbocharger oil feed pipe gaskets.
- Disconnect the positive crankcase ventilation (PCV) pipe (1) from the turbocharger. Refer to Metal Collar Quick Connect Fitting Service .
- Raise the vehicle.
- Remove the turbocharger nuts (2).
- Lower the vehicle.
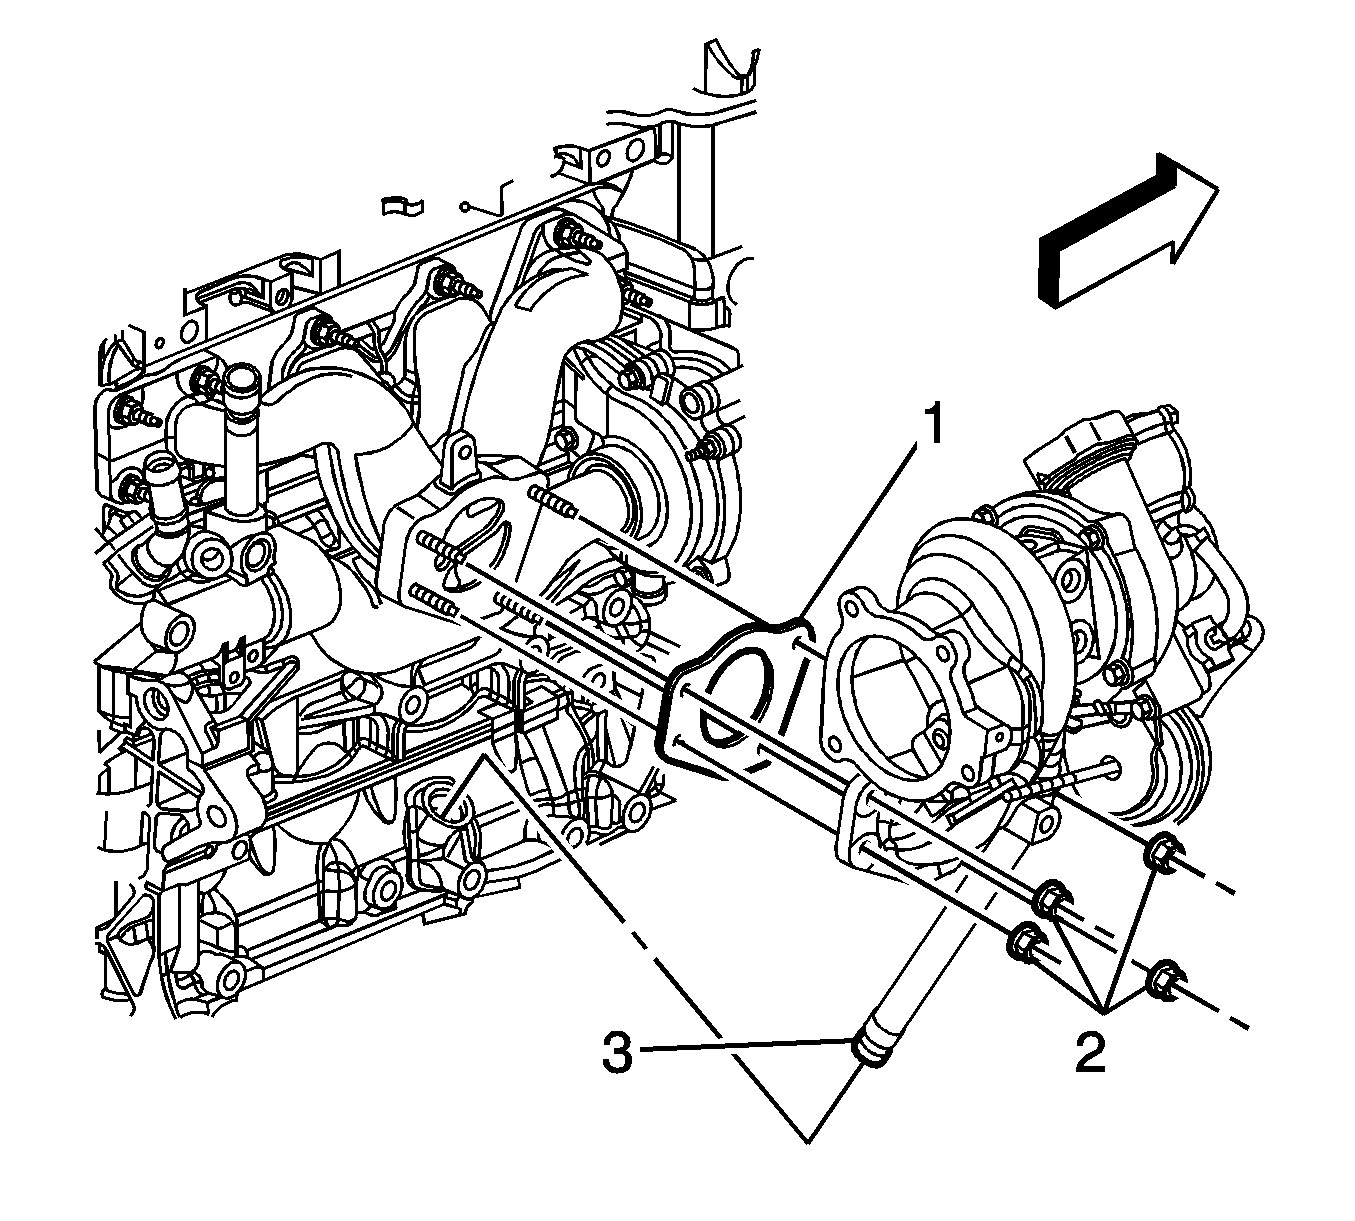
- Remove the turbocharger from the exhaust manifold studs while also removing the turbocharger oil return hose from the engine block.
- Remove and discard the turbocharger gasket (1) and oil return hose O-ring seal (3).
- If replacing the turbocharger, perform the following steps otherwise proceed to the step 7 in the Installation Procedure.
- Remove the turbocharger oil return hose bolts (2) and hose from the turbocharger.
- Remove and discard the turbocharger oil return hose gasket (1).
- Reposition the vacuum hose clamps (1, 2, and 3) at the turbocharger wastegate solenoid valve.
- Remove the vacuum hoses from the turbocharger wastegate solenoid valve.
- Gently push back the turbocharger wastegate solenoid valve retainer (4) and remove the turbocharger wastegate solenoid valve from the bracket.
Installation Procedure
- If replacing the turbocharger, perform the following steps otherwise proceed to step 7.
- Install the turbocharger wastegate solenoid valve to the bracket until the retainer (4) clips into place.
- Install the vacuum hoses to the turbocharger wastegate solenoid valve.
- Position the vacuum hose clamps (1, 2, and 3) at the turbocharger wastegate solenoid valve.
- Position a NEW turbocharger oil return hose gasket (1) on the turbocharger oil return hose.
- Install the turbocharger oil return hose and bolts (2) and tighten to 10 N·m (89 lb in) .
- Raise the vehicle.
- Install a NEW turbocharger gasket (1) onto the exhaust manifold studs.
- Lubricate and install a NEW turbocharger oil return hose O-ring seal (3).
- Install the turbocharger oil return hose to the engine block while also installing the turbocharger to the exhaust manifold studs.
- Install the turbocharger nuts (2) and tighten to 35 N·m (26 lb ft) .
- Lower the vehicle.
- Connect the positive crankcase ventilation (PCV) pipe (1) to the turbocharger.
- Install NEW gaskets onto the turbocharger oil feed pipe fittings.
- Install the turbocharger oil feed pipe and bolt (1) and tighten to 40 N·m (30 lb ft) .
- Install NEW gaskets onto the turbocharger coolant return pipe fittings.
- Install the turbocharger coolant return pipe and bolts and tighten to 40 N·m (30 lb ft) .
- Position the turbocharger coolant feed pipe to the turbocharger.
- Install NEW gaskets onto the turbocharger coolant feed pipe fitting.
- Install the turbocharger coolant feed pipe bolt (1) at the turbocharger and tighten to 40 N·m (30 lb ft) .
- Install the turbocharger coolant feed pipe bolt (3) to the cylinder head and tighten to 10 N·m (89 lb in) .
- Install the engine wiring harness clip (1) to the turbocharger coolant feed pipe.
- Install the vacuum hose to the turbocharger.
- Position the vacuum hose clamp (1) at the turbocharger.
- Connect the engine wiring harness electrical connector to the turbocharger wastegate solenoid valve.
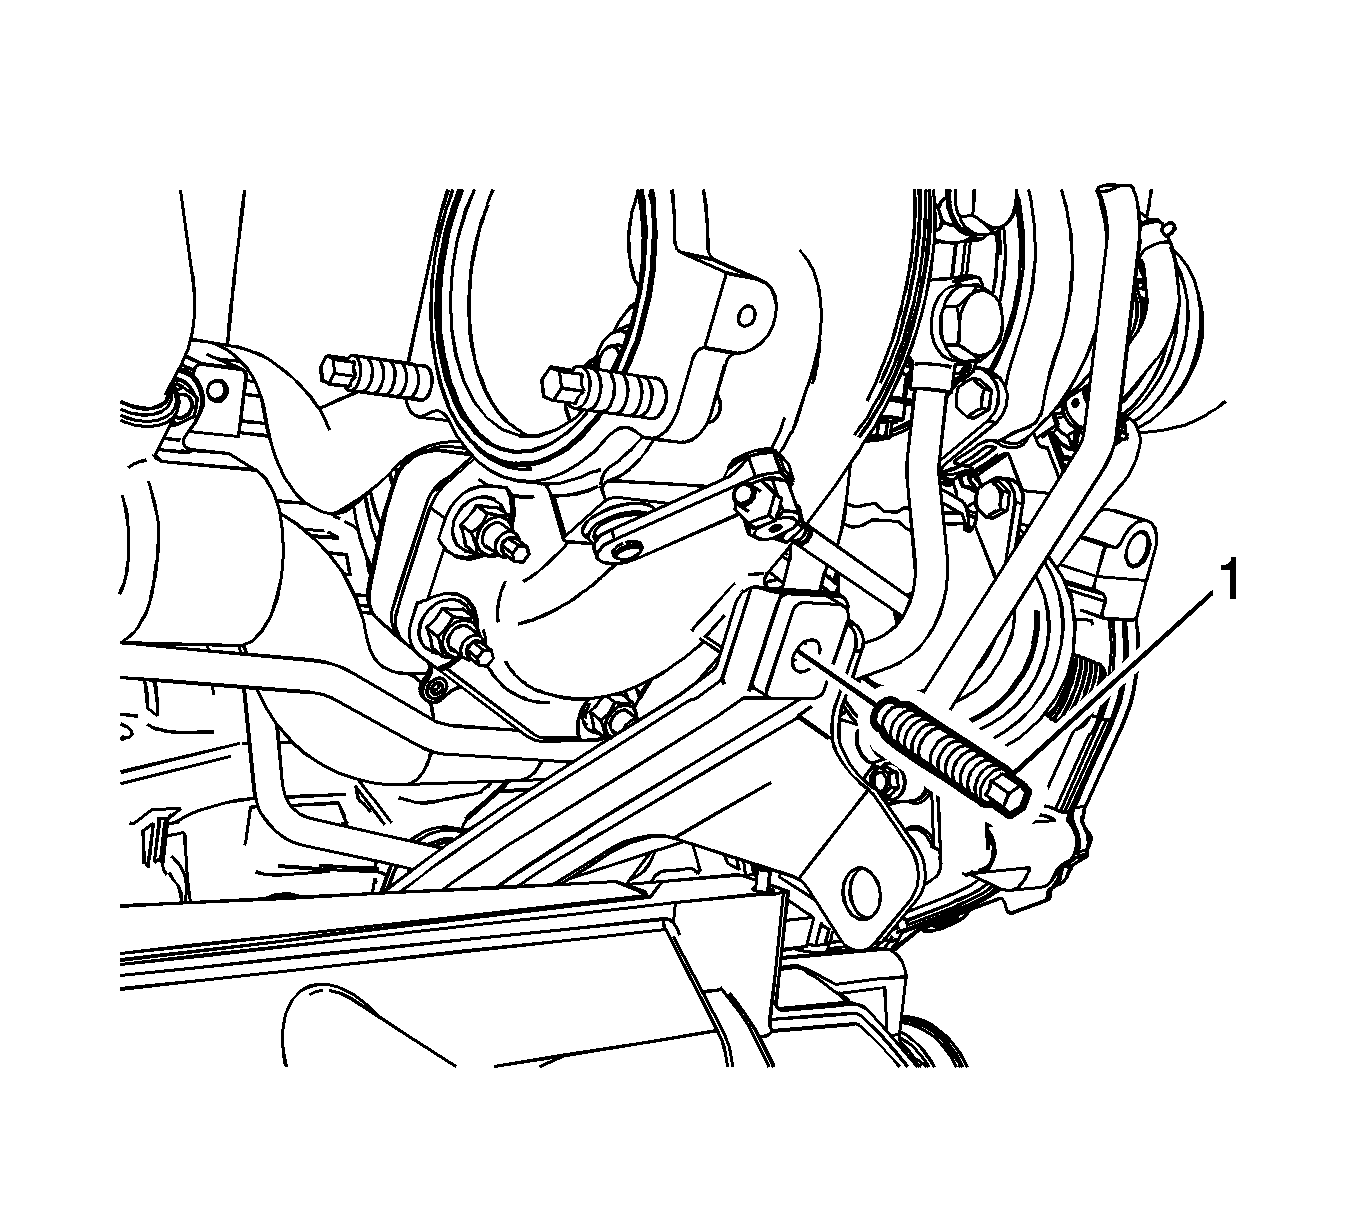
- Install a NEW stud (1) to the turbocharger.
- Tighten the turbocharger bracket lower retaining nut (1) and bolt (2).
- Install the turbocharger bracket upper retaining nut (1) and tighten to 46 N·m (34 lb ft)
- Install the turbocharger exhaust elbow.
- Install the turbocharger exhaust elbow to turbocharger retaining nuts and tighten to 50 N·m (37 lb ft) .
- Install the turbocharger exhaust elbow support bracket bolt (1) and tighten to 25 N·m (18 lb ft) .
- Install the turbocharger exhaust pipe elbow heat shield (2).
- Install the turbocharger exhaust pipe elbow heat shield bolts (1) and tighten to 10 N·m (89 lb in) .
- Lower the vehicle.
- Install the HO2S. Refer to Heated Oxygen Sensor Replacement - Sensor 1 .
- Install the turbocharger heat shield and bolts (1) and tighten to 10 N·m (89 lb in) .
- Install the charge air cooler pipe and gasket to the turbocharger.
- Install the charge air cooler pipe bolts at the turbocharger and tighten to 22 N·m (16 lb ft) .
- Install the charge air cooler inlet pipe. Refer to Charge Air Cooler Inlet Pipe Replacement .
- Install the charge air cooler inlet pipe. Refer to Charge Air Cooler Inlet Pipe Replacement .
- Install the air cleaner assembly. Refer to Air Cleaner Assembly Replacement .
- Fill the cooling system. Refer to Cooling System Draining and Filling .
Caution: Refer to Fastener Caution in the Preface section.
| • | Tighten the nut to 50 N·m (37 lb ft) . |
| • | Tighten the bolt to 58 N·m (43 lb ft) . |
