Removal Procedure
- Drain the cooling system. Refer to Cooling System Draining and Filling in Engine Cooling.
- Remove the intake manifold. Refer to Intake Manifold Replacement .
- Remove the valve rocker arms and pushrods. Refer to Valve Rocker Arm and Push Rod Replacement .
- Remove the water crossover. Refer to Engine Coolant Crossover Pipe Replacement in Engine Cooling.
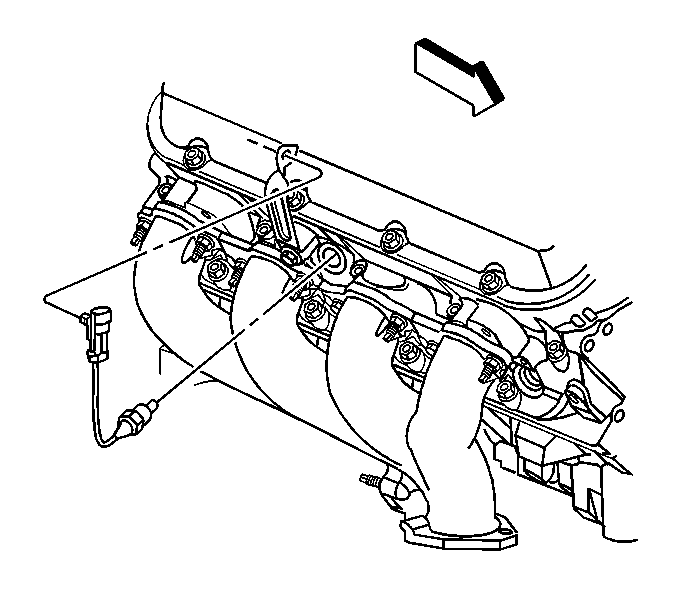
- Remove the engine coolant temperature (ECT) sensor clip from the bracket.
- Remove the ECT sensor from the cylinder head.
- Remove the ECT sensor bracket bolt and bracket.
- Remove the exhaust manifold. Refer to Exhaust Manifold Replacement - Right Side in Engine Exhaust.
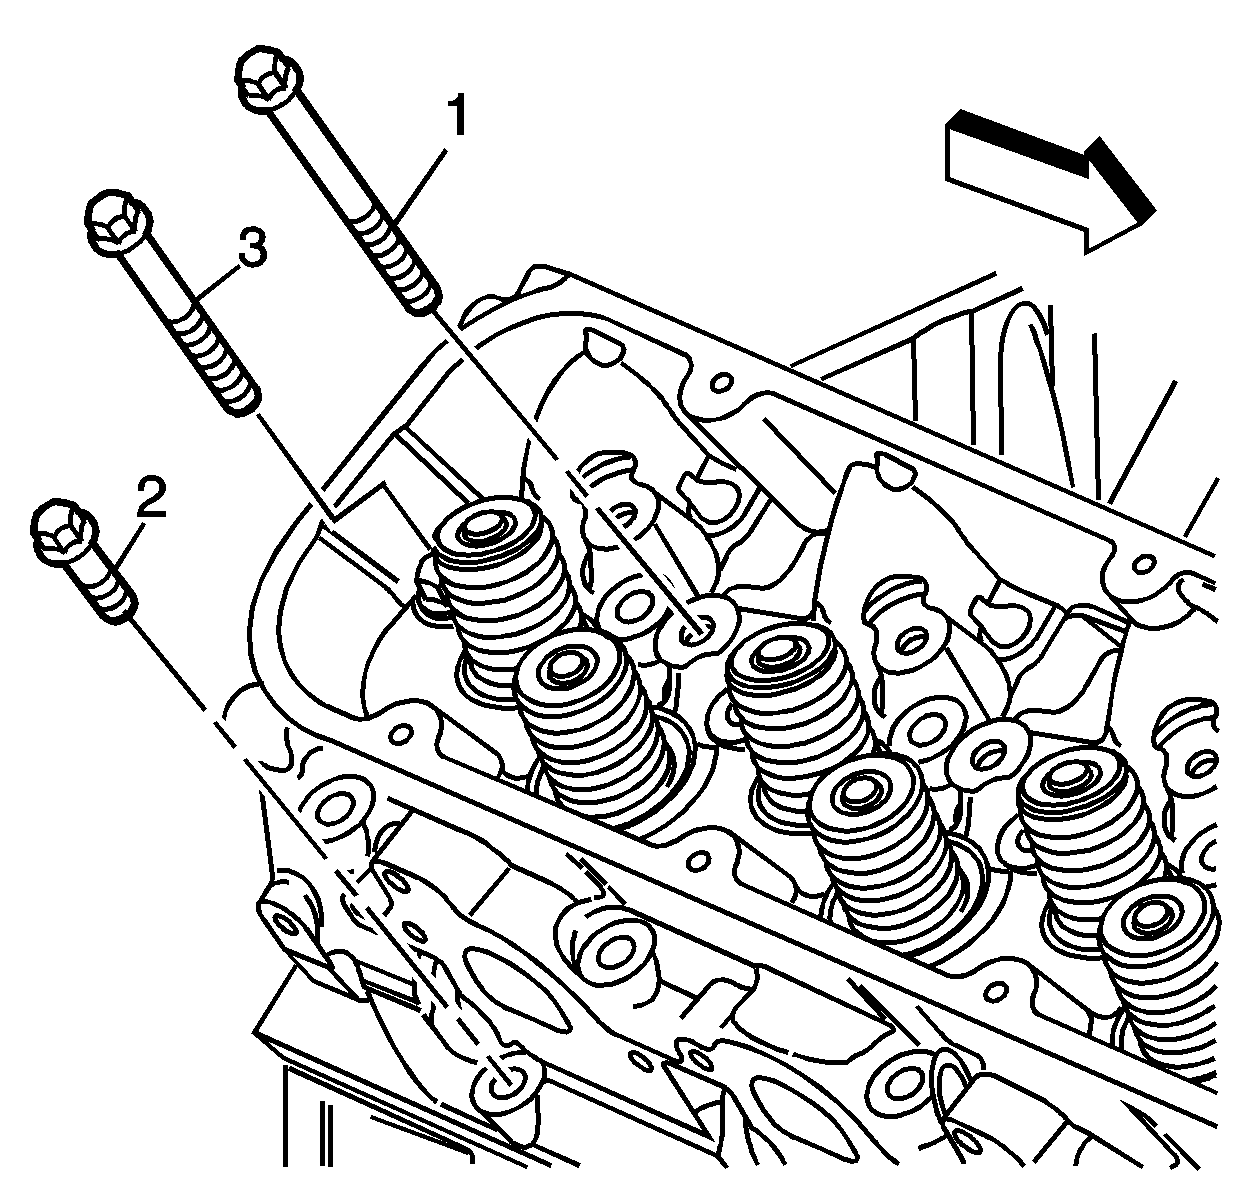
- Remove and discard the cylinder head bolts (1, 2, and 3).
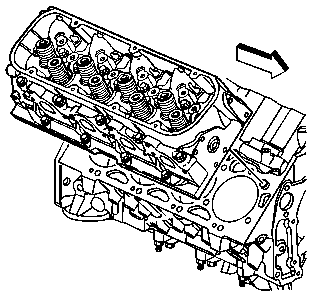
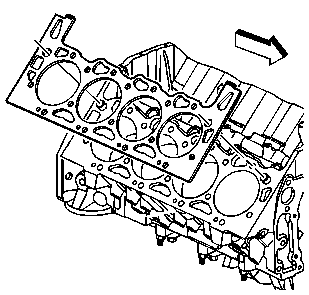
- Remove the cylinder head.
- Remove and discard the cylinder head gasket.
- Clean and inspect the cylinder head. Refer to Cylinder Head Cleaning and Inspection in Engine Mechanical - 8.1L Unit Repair.
Important: Place the cylinder head on two wood blocks to prevent damage to the sealing surface.
Installation Procedure
Notice: Do not reuse a cylinder head gasket once the initial clamping loads are applied. The initial tightening sequence procedure of the cylinder head bolts compresses the cylinder head gasket. If any bolt must be loosened once the initial sequence is started the cylinder head gasket must be replaced. Failure to replace the cylinder head gasket can lead to cylinder head bolt breakage or cylinder head gasket failure. A broken cylinder head bolt or failed cylinder head gasket can lead to extensive engine damage.
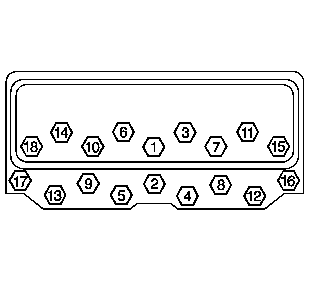
Important: Make sure the threaded holes in the engine block are clean and not damaged. Do not use sealer on any engines that use a composition type gasket. Align the cylinder head gasket locating mark to face up. Ensure that the head gasket tabs are located over the numbers 1 and 2 cylinders for correct installation.
- Place a NEW cylinder head gasket into position.
- Install the cylinder head.
- If not pre-applied to the new cylinder head bolts, apply sealant GM U.S. P/N 12346004, Canada P/N 10953480, or equivalent to the cylinder head bolts.
- Install NEW cylinder head bolts (1, 2, and 3).
- Tighten the cylinder head bolts.
- Tighten the cylinder head bolts a first pass in sequence to 30 N·m (22 lb ft).
- Tighten the cylinder head bolts a second pass in sequence to 30 N·m (22 lb ft) then an additional 120 degrees using J 36660-A .
- Tighten the bolts (1, 2, 3, 6, 7, 8, 9, 10, 11, 14, 16, 17) an additional 60 degrees, bolts (15, 18) an additional 45 degrees, bolts (4, 5, 12, 13) an additional 30 degrees using J 36660-A .
- Install the exhaust manifold. Refer to Exhaust Manifold Replacement - Right Side in Engine Exhaust.
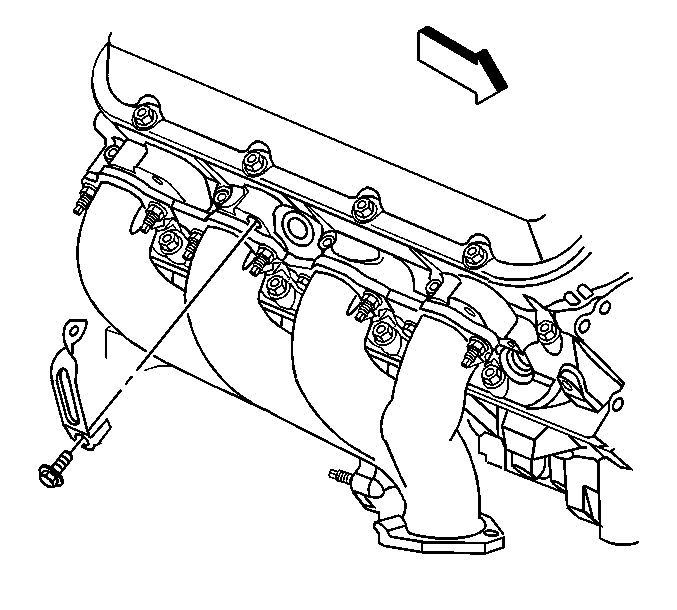
- Install the ECT sensor bracket and bolt.
- Install the ECT sensor to the cylinder head.
- Install the ECT sensor clip to the bracket.
- Install the water crossover. Refer to Engine Coolant Crossover Pipe Replacement in Engine Cooling.
- Install the valve rocker arms and pushrods. Refer to Valve Rocker Arm and Push Rod Replacement .
- Install the intake manifold. Refer to Intake Manifold Replacement .
- Fill the cooling system. Refer to Cooling System Draining and Filling in Engine Cooling.
Notice: Do not reuse the cylinder head bolts. NEW cylinder head bolts must be used. The cylinder head bolts are torque-to-yield bolts and cannot be reused once the initial torque is applied. During the initial torque of the cylinder head bolt the cylinder head bolt is stretched to achieve proper clamp load. Proper clamp load will not be achieved if a used cylinder head bolt is torqued again. A stretched cylinder head bolt can also break when torqued. Failure to replace the used cylinder head bolts with NEW cylinder head bolts can lead to improper clamp loads and extensive engine damage.
Important: The sealer must be applied to a minimum of eight threads starting at the point of the cylinder head bolt.
Notice: Use the correct fastener in the correct location. Replacement fasteners must be the correct part number for that application. Fasteners requiring replacement or fasteners requiring the use of thread locking compound or sealant are identified in the service procedure. Do not use paints, lubricants, or corrosion inhibitors on fasteners or fastener joint surfaces unless specified. These coatings affect fastener torque and joint clamping force and may damage the fastener. Use the correct tightening sequence and specifications when installing fasteners in order to avoid damage to parts and systems.
Notice: The cylinder head bolt tightening sequence must be followed. The final angle tightening sequence of the cylinder head bolts varies depending on the length of the cylinder head bolt. Failure to angle tighten the specific length bolt the proper number of degrees can lead to cylinder head bolt failure or improper clamping load of the cylinder head gasket. Cylinder head bolt or cylinder head gasket failure can lead to extensive engine damage.
Important: The long bolts are used in locations 1, 2, 3, 6, 7, 8, 9, 10, 11, 14, 16, and 17. The medium length bolts are used on locations 15 and 18. The short bolts are used in locations 4, 5, 12, and 13.
Tighten
Tighten
Tighten the ECT sensor bracket bolt to 50 N·m (37 lb ft).
Tighten
Tighten the ECT sensor to 20 N·m (15 lb ft).
