For 1990-2009 cars only
Special Tools
| • | J 34993 Cylinder Alignment Rods |
| • | J 35372 Support Block |
Removal Procedure
- Recover the refrigerant. Refer to Refrigerant Recovery and Recharging .
- Remove the compressor. Refer to Air Conditioning Compressor Replacement .
- Drain the oil from compressor into a suitable container. Measure and record the amount of oil drained from the compressor. Discard all used oil.
- Remove the clutch plate and hub assembly. Refer to Compressor Clutch Plate/Hub Assembly Replacement .
- Remove the clutch rotor and bearing. Refer to Clutch Rotor and/or Bearing Replacement .
- Remove the clutch coil. Refer to Air Conditioning Clutch Coil Replacement .
- Remove and discard the shaft seal parts. Refer to Compressor Shaft Seal Replacement .
- Remove the compressor through-bolts. Remove and discard the gaskets.
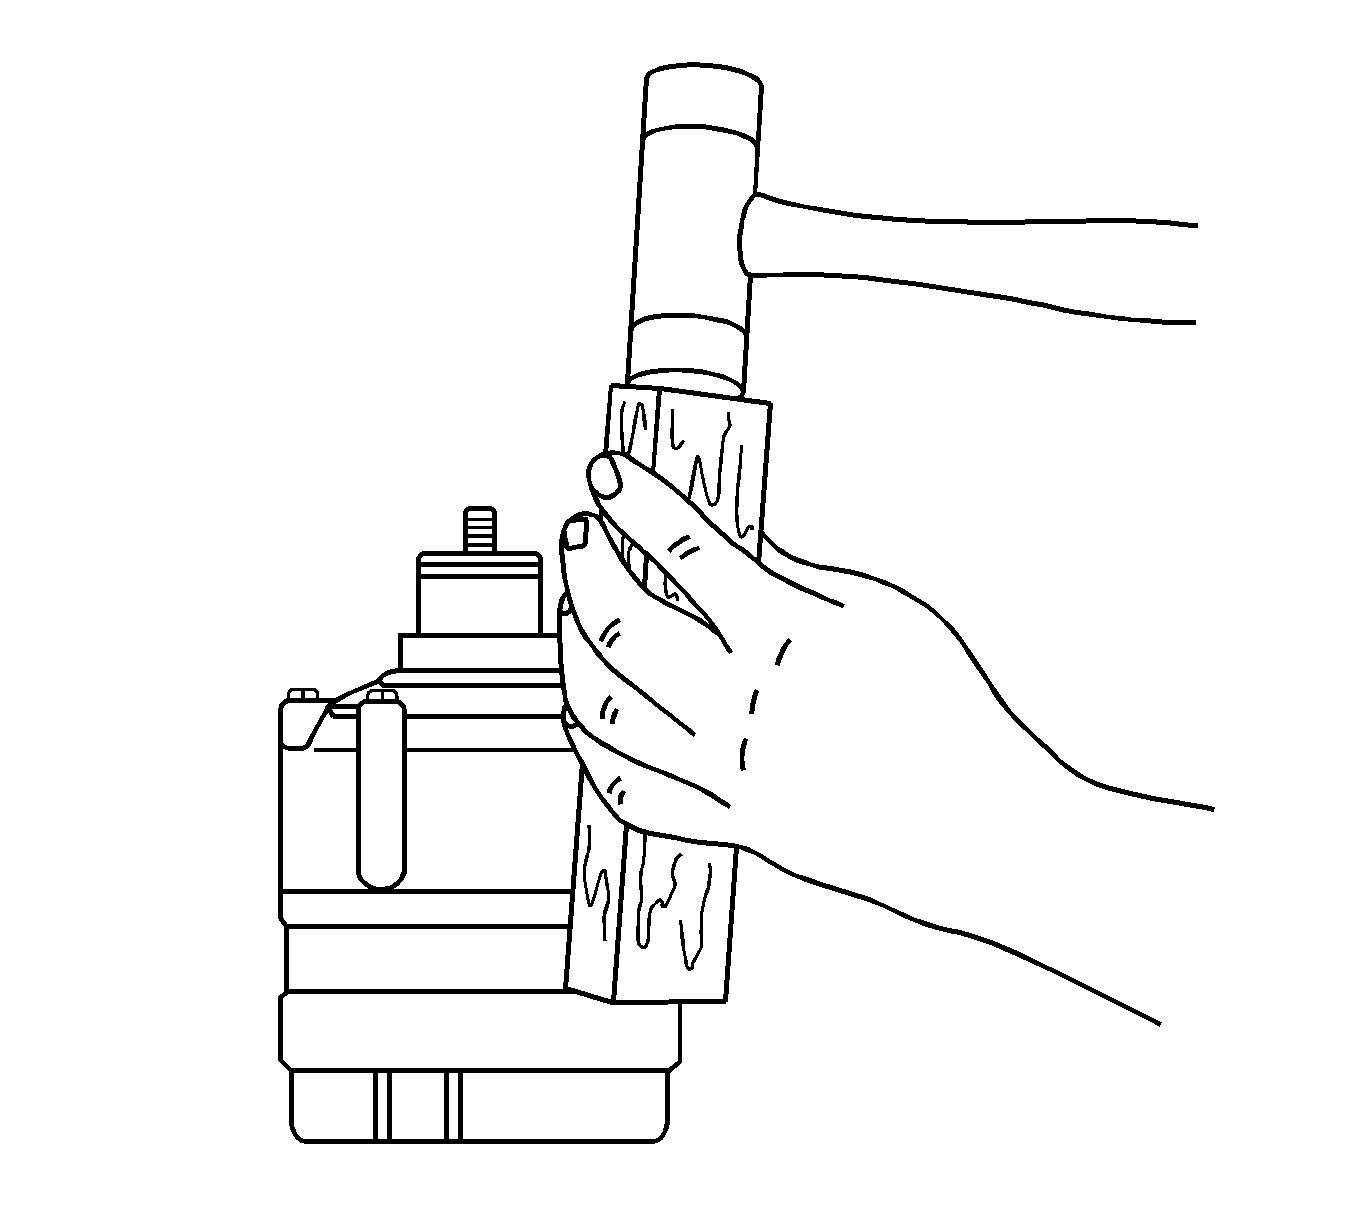
- Using a wooden block and a plastic-headed hammer, tap the compressor housing at the mounting locations to disengage the housing from the compressor cylinder.
- Remove the thrust washer and the bearing.
- Remove and discard the compressor housing-to-cylinder O-ring.
Important: Note the assembly sequence of the thrust washer and bearing for ease of assembly.
Installation Procedure
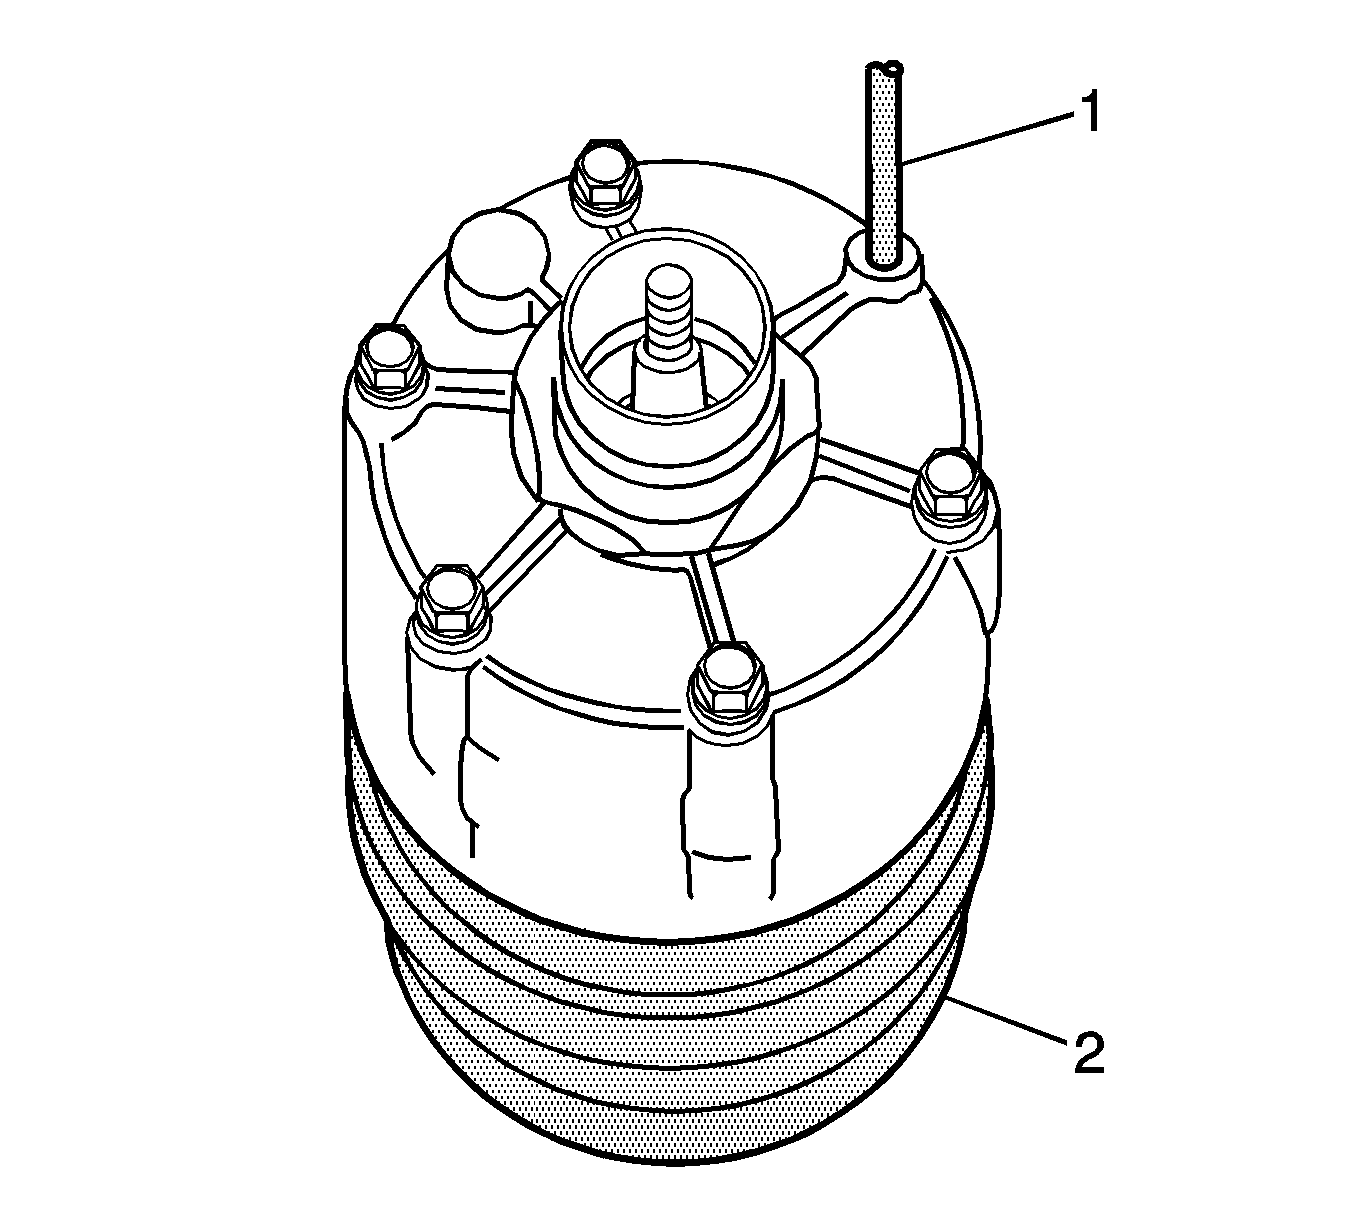
- Rest the rear head on the J 35372 (2). Locate the control valve at the 6 o'clock position.
- Install J 34993 (1) through the 11 o'clock and the 5 o'clock bolt holes.
- Lubricate the new cylinder-to-compressor housing O-ring with clean polyalkaline glycol (PAG) oil.
- Install the new O-ring in the cylinder O-ring groove.
- Install the thrust washer and bearing in the same order as they were removed.
- Align the guide pin recess in the compressor housing with the guide pin. Press down on the compressor housing with both hands to force it over the O-ring on the cylinder assembly.
- Add a new through-bolt gasket to the through-bolts and install it into the compressor assembly. Four through-bolts must thread into the rear head before removing the guide pins.
- Install a new shaft seal. Refer to Compressor Shaft Seal Replacement .
- Add new PAG oil equal to the amount drained in step 3.
- Install the clutch coil. Refer to Air Conditioning Clutch Coil Replacement .
- Install the clutch rotor and bearing. Refer to Clutch Rotor and/or Bearing Replacement .
- Install the clutch plate and hub assembly. Refer to Compressor Clutch Plate/Hub Assembly Replacement .
- Perform a leak test on the compressor. Refer to Compressor Leak Testing .
- Install the compressor. Refer to Air Conditioning Compressor Replacement .
- Evacuate and recharge the A/C system. Refer to Refrigerant Recovery and Recharging .
Notice: Refer to Fastener Notice in the Preface section.
Tighten
Alternately tighten the through-bolts in progressive torque sequence to 10 N·m (89 lb in).
