For 1990-2009 cars only
Generator Replacement LLV/LLR
Removal Procedure
- Disconnect the battery negative cable. Refer to Battery Negative Cable Disconnection and Connection.
- Remove the drive belt. Refer to Drive Belt Replacement for the 2.9L engine or Drive Belt Replacement for the 3.7L engine.
- Raise and support the vehicle only high enough to access the A/C compressor through the wheelhouse. Refer to Lifting and Jacking the Vehicle.
- Remove the left front wheel. Refer to Tire and Wheel Removal and Installation.
- Remove the left wheelhouse liner. Refer to Front Wheelhouse Liner Replacement.
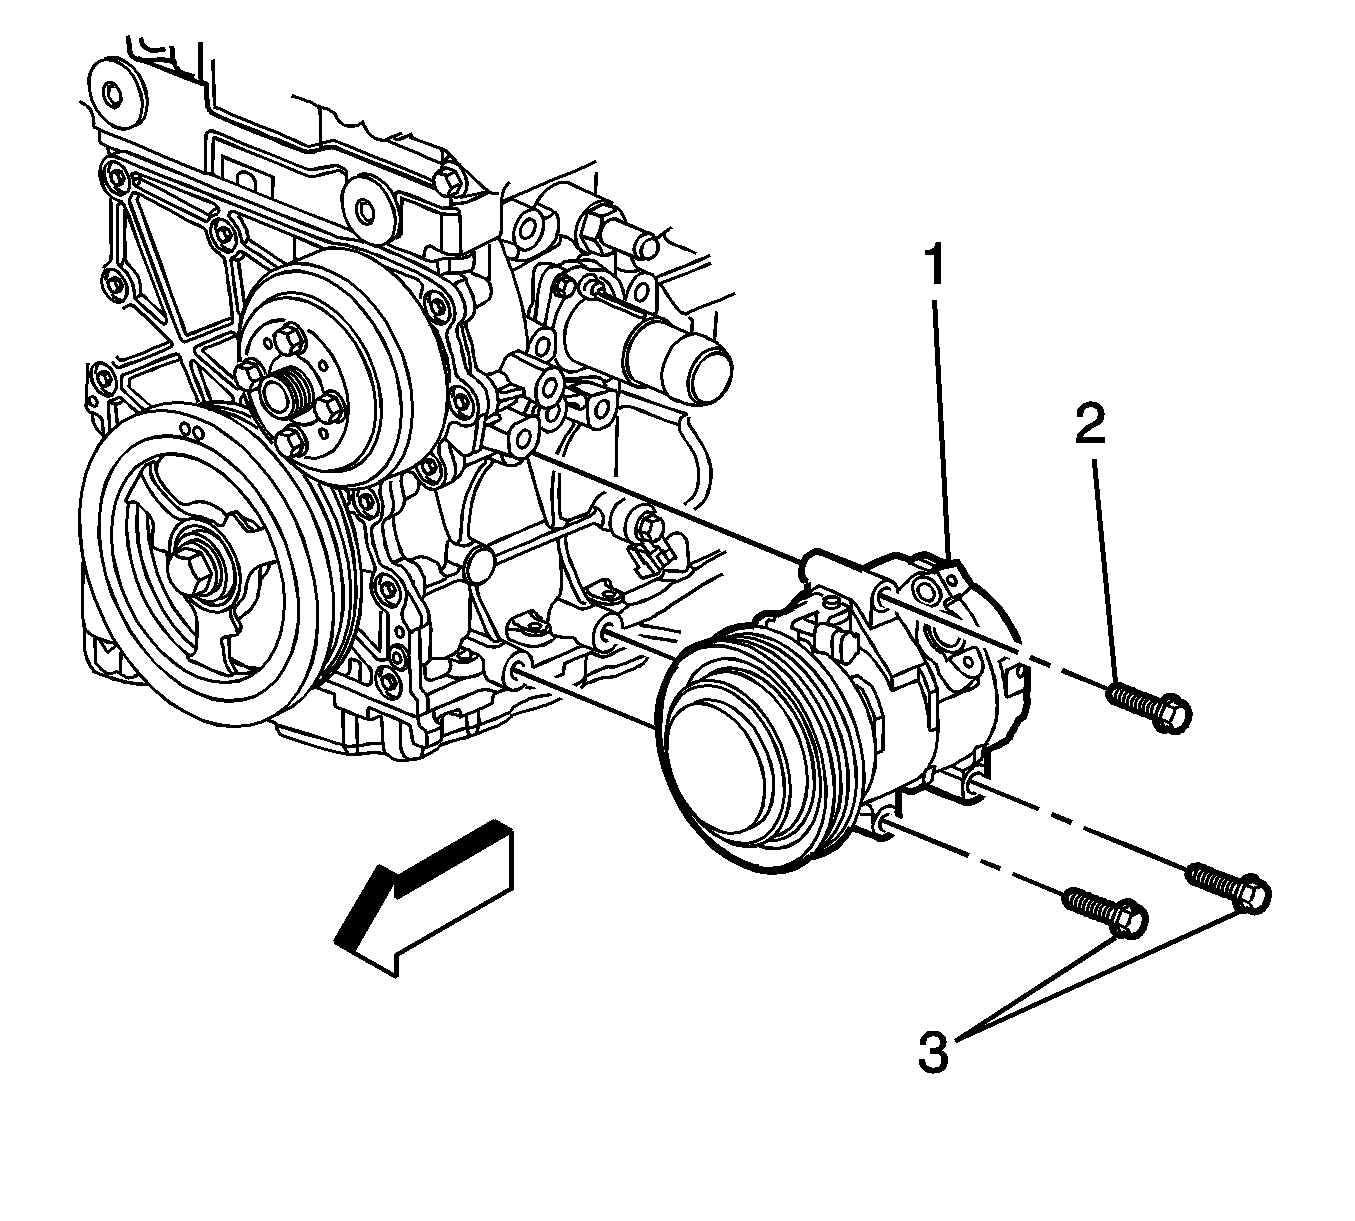
- Disengage the A/C compressor electrical connector from the bracket.
- Remove the A/C compressor mounting bolts (2, 3) ONLY.
- Lower the vehicle.
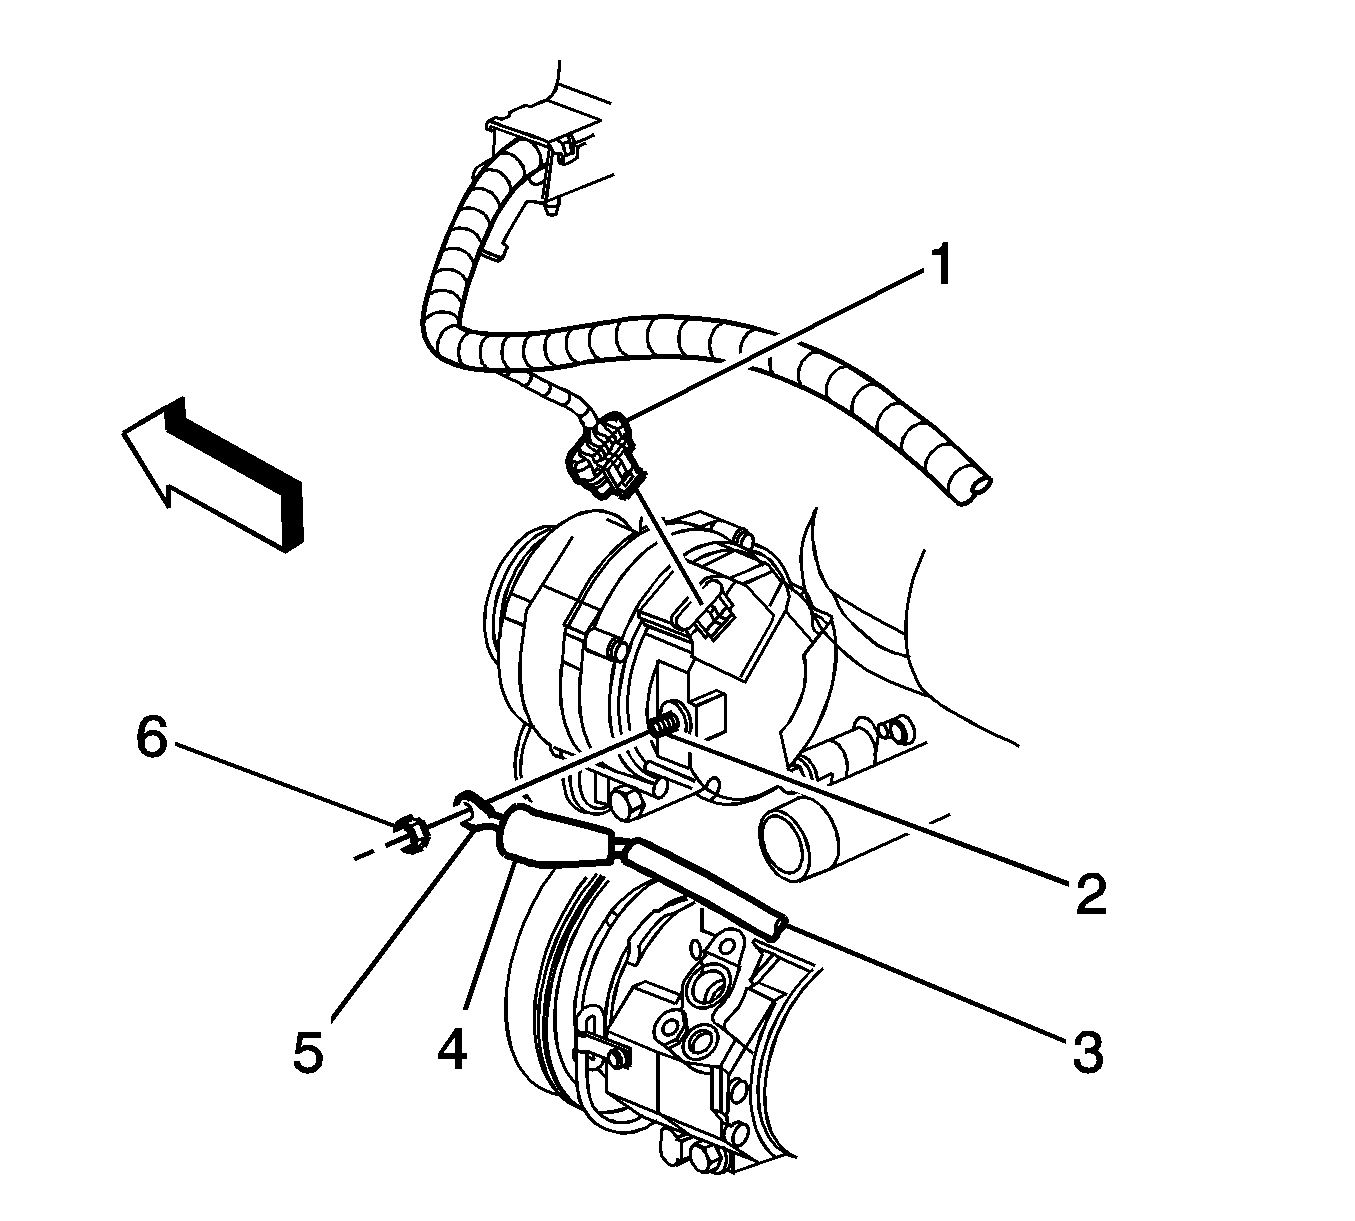
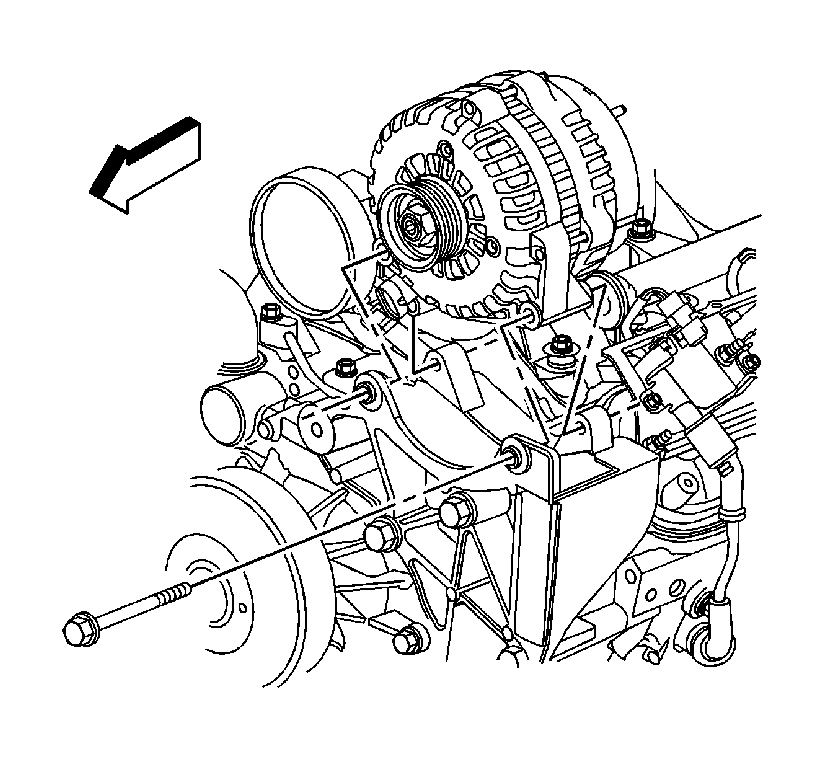
- Reposition the protective boot (4) from the generator output BAT terminal (2) for access.
- Remove the generator output BAT terminal nut (6) and disconnect the generator lead (5) from the generator.
- Disconnect the wiring harness connector (1) from the generator.
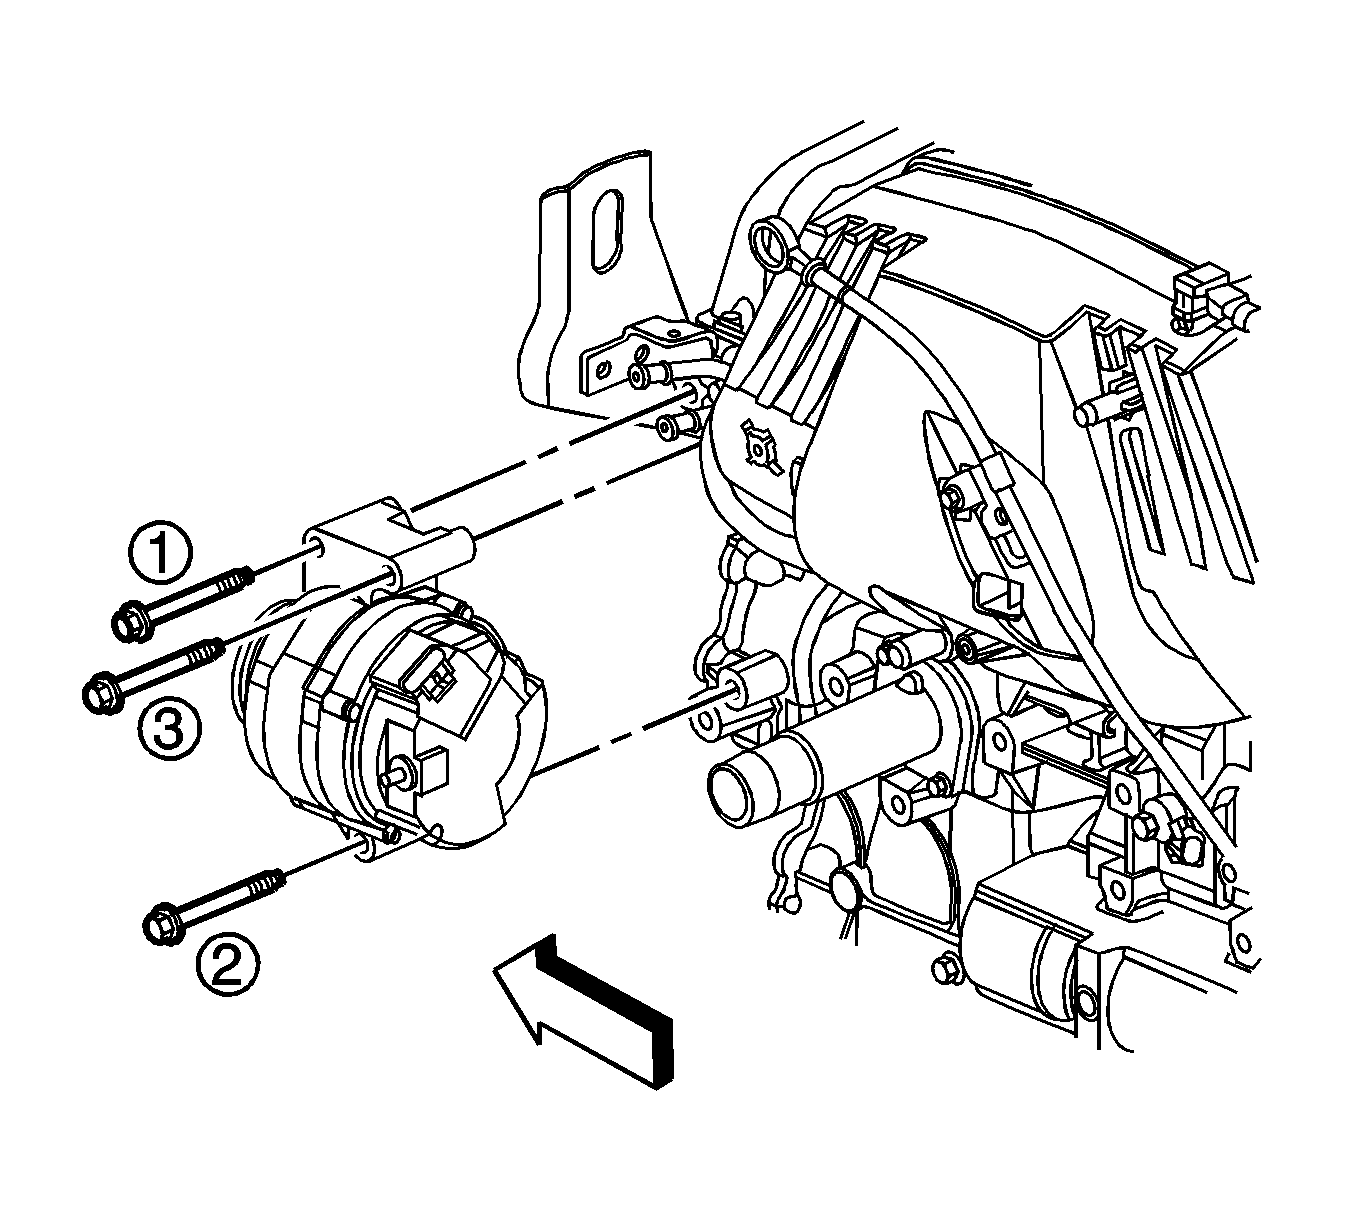
- Remove the 3 generator mounting bolts.
- Remove the engine lift bracket, in order to gain clearance to remove the generator. Refer to Engine Lift Bracket Replacement for the 2.9L engine or Engine Lift Bracket Replacement for the 3.7L engine.
- Position the A/C compressor forward, in order to gain clearance to remove the generator.
- Remove the generator from the engine.
Note: Evacuation of the A/C refrigerant will not be necessary.
The upper mounting bolt (2) will remain with the A/C compressor (1).
Installation Procedure
- Position the generator to the engine.
- Install the engine lift bracket. Refer to Engine Lift Bracket Replacement for the 2.9L engine or Engine Lift Bracket Replacement for the 3.7L engine.
- Install the generator mounting bolts and tighten in sequence to 50 N·m (37 lb ft).
- Connect the generator lead (5) to the generator and install the generator output BAT terminal nut (6).
- Press the protective boot (4) on to the generator output BAT terminal (2).
- Connect the wiring harness connector (1) to the generator.
- Raise and support the vehicle only high enough to access the A/C compressor through the wheelhouse. Refer to Lifting and Jacking the Vehicle.
- Position the A/C compressor (1) to the engine.
- Install the A/C compressor mounting bolts (2, 3) and tighten to 50 N·m (37 lb ft).
- Attach the A/C compressor electrical connector to the bracket.
- Install the left wheelhouse liner. Refer to Front Wheelhouse Liner Replacement.
- Install the left front wheel. Refer to Tire and Wheel Removal and Installation.
- Lower the vehicle.
- Install the drive belt. Refer to Drive Belt Replacement for the 2.9L engine or Drive Belt Replacement for the 3.7L engine.
- Connect the battery negative cable. Refer to Battery Negative Cable Disconnection and Connection.
Caution: Refer to Fastener Caution in the Preface section.
Tighten the nut to 20 N·m (15 lb ft).
Generator Replacement LH8
Removal Procedure
- Disconnect the negative battery cable. Refer to Battery Negative Cable Disconnection and Connection.
- Remove the intake manifold cover. Refer to Upper Intake Manifold Sight Shield Replacement.
- Remove the accessory drive belt. Refer to Drive Belt Replacement - Accessory.
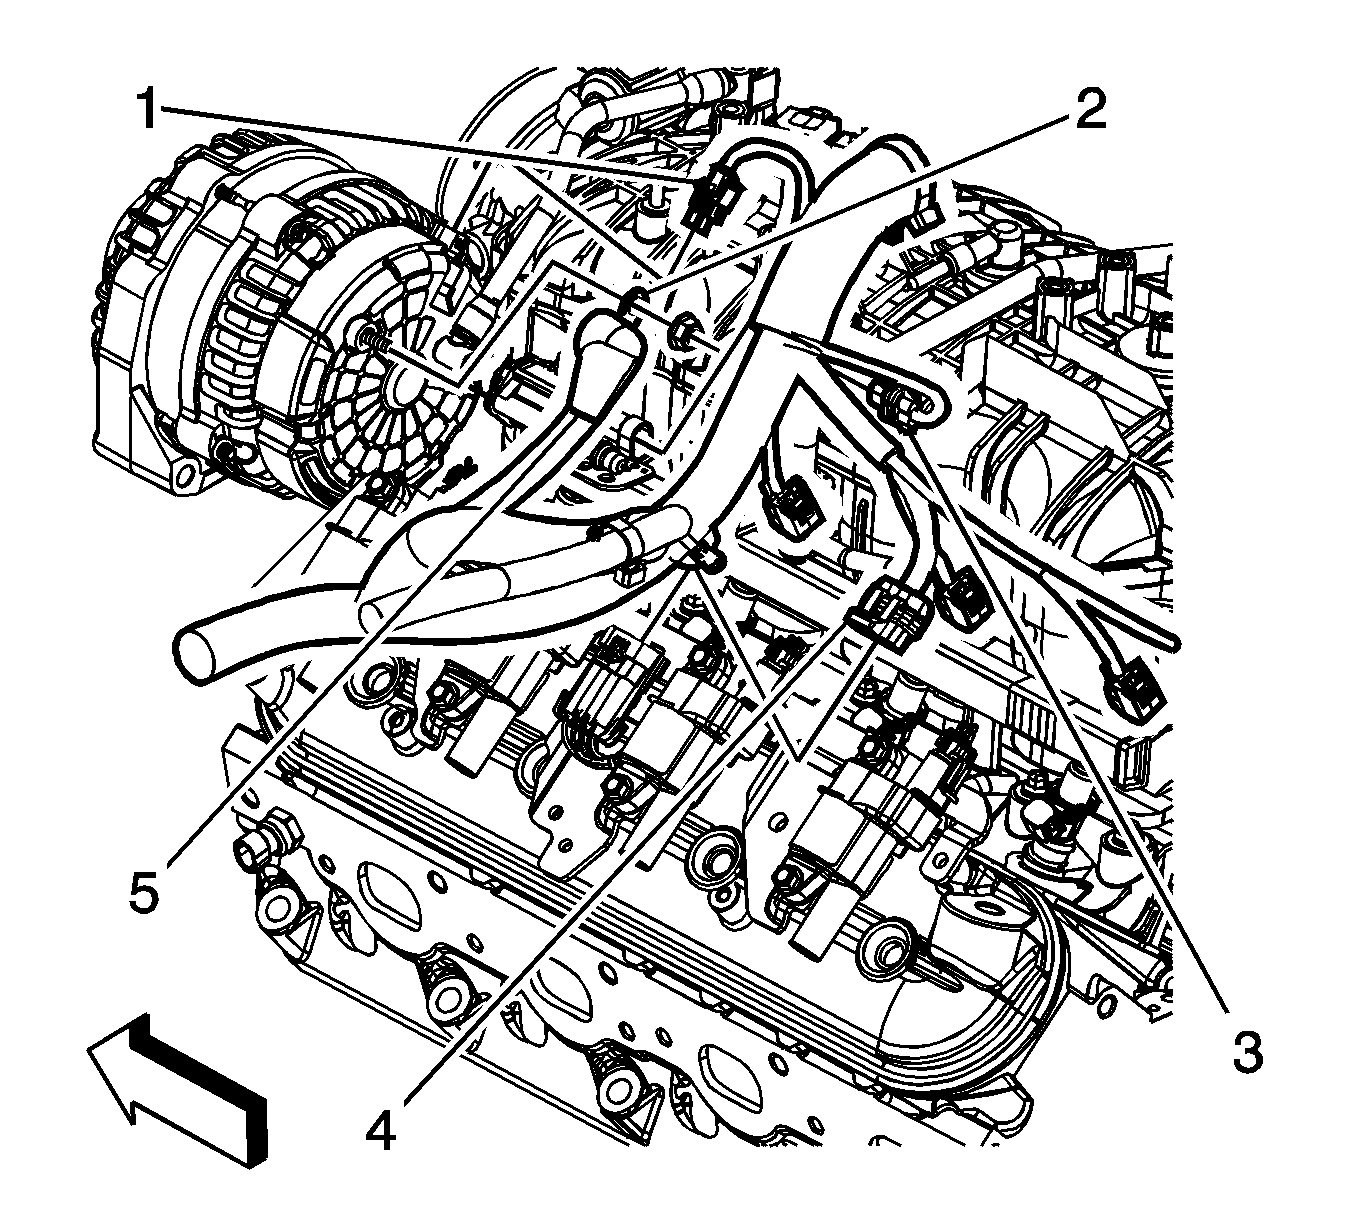
- Disconnect the engine wiring harness electrical connector (1) from the generator.
- Reposition the engine wiring harness/positive battery cable boot (5).
- Remove the engine wiring harness/positive battery cable nut from the generator.
- Remove the engine wiring harness/positive battery cable (2) from the generator.
- Remove the generator bolts.
- Remove the generator.
Installation Procedure
- Install the generator.
- Install the generator bolts.
- Install the engine wiring harness/positive battery cable (2) to the generator.
- Install the engine wiring harness/positive battery cable nut to the generator.
- Position the engine wiring harness/positive battery cable boot (5).
- Connect the engine wiring harness electrical connector (1) to the generator.
- Install the accessory drive belt. Refer to Drive Belt Replacement - Accessory.
- Install the intake manifold cover. Refer to Upper Intake Manifold Sight Shield Replacement.
- Connect the negative battery cable. Refer to Battery Negative Cable Disconnection and Connection.
Caution: Refer to Fastener Caution in the Preface section.
Tighten
Tighten the bolts to 50 N·m (37 lb ft).
Tighten
Tighten the nut to 9 N·m (80 lb in).
