For 1990-2009 cars only
Tools Required
J 44244 CNG Tank Support Harness
- Perform the Fuel Pressure Relief .
- Perform the Fuel Tank Venting .
- Perform the high pressure lock-off (HPL) removal procedure leaving the HPL installed into the tank finger-tight. Refer to High Pressure Lock-Off Solenoid Replacement .
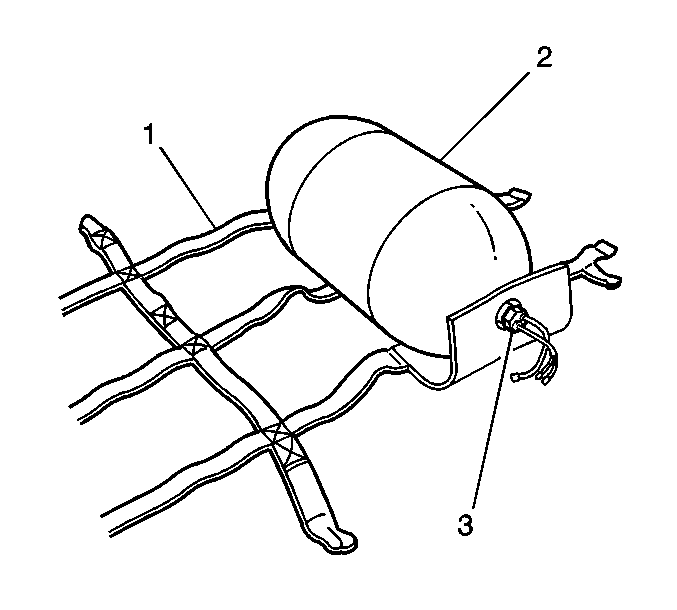
- Place the J 44244 (1) on the shop floor.
- Lower the CNG fuel tank (2) on top of the J 44244 (1).
- Place the J 44244 support flap so that the HPL (3) protrudes through the flap.
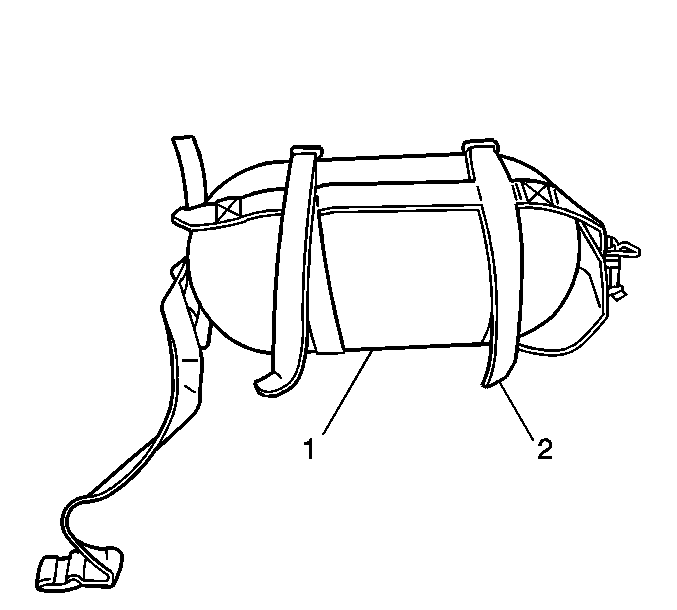
- Place the J 44244 (1) straps around the CNG fuel tank placing the end strap over the HPL (3) and around the neck of the CNG fuel tank.
- Securely fasten the J 44244 straps (2) around the CNG fuel tank (1). Longer CNG fuel tanks will require the use of all the J 44244 straps.
- Connect the J 44244 to a suitable lifting device.
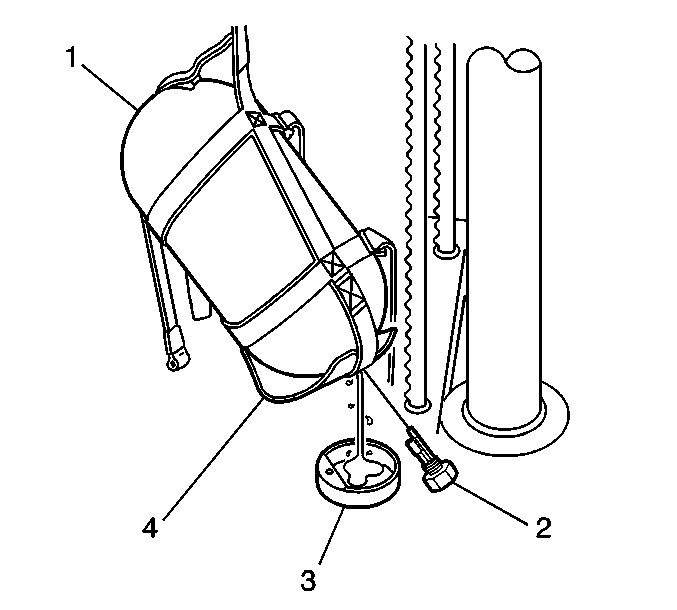
- Slowly raise the CNG fuel tank (1) until the HPL (2) is above the ground ensuring that the HPL does not contact the floor during the lifting process.
- Place a container (3) underneath the HPL (2) in order to collect any drained fluids.
- Remove the HPL (2), allowing any fluids to drain completely from the CNG fuel tank.
- Dispose of any collected fluids in a safe and approved manner.
- Flush the inside of the CNG fuel tank using clean water.
- Dry the inside of the CNG fuel tank using compressed air.
- Install the HPL (2) finger-tight.
- Slowly lower the CNG fuel tank (1) back to the ground ensuring the HPL does not contact the ground.
- Remove the J 44244 (1) from the CNG fuel tank (2).
- Complete the installation of the HPL into the tank and the tank into the vehicle by completing the installation steps as indicated in the High Pressure Lock-Off Solenoid Replacement .
Important: CNG Tank cleaning is only necessary when a part such as the high pressure lock-off solenoid has failed due to fuel contamination or when excess water accumulation, that may reduce fuel capacity, is suspected within the tank.


