Refer to Engine Controls Schematics
EGR and EVAP Valves
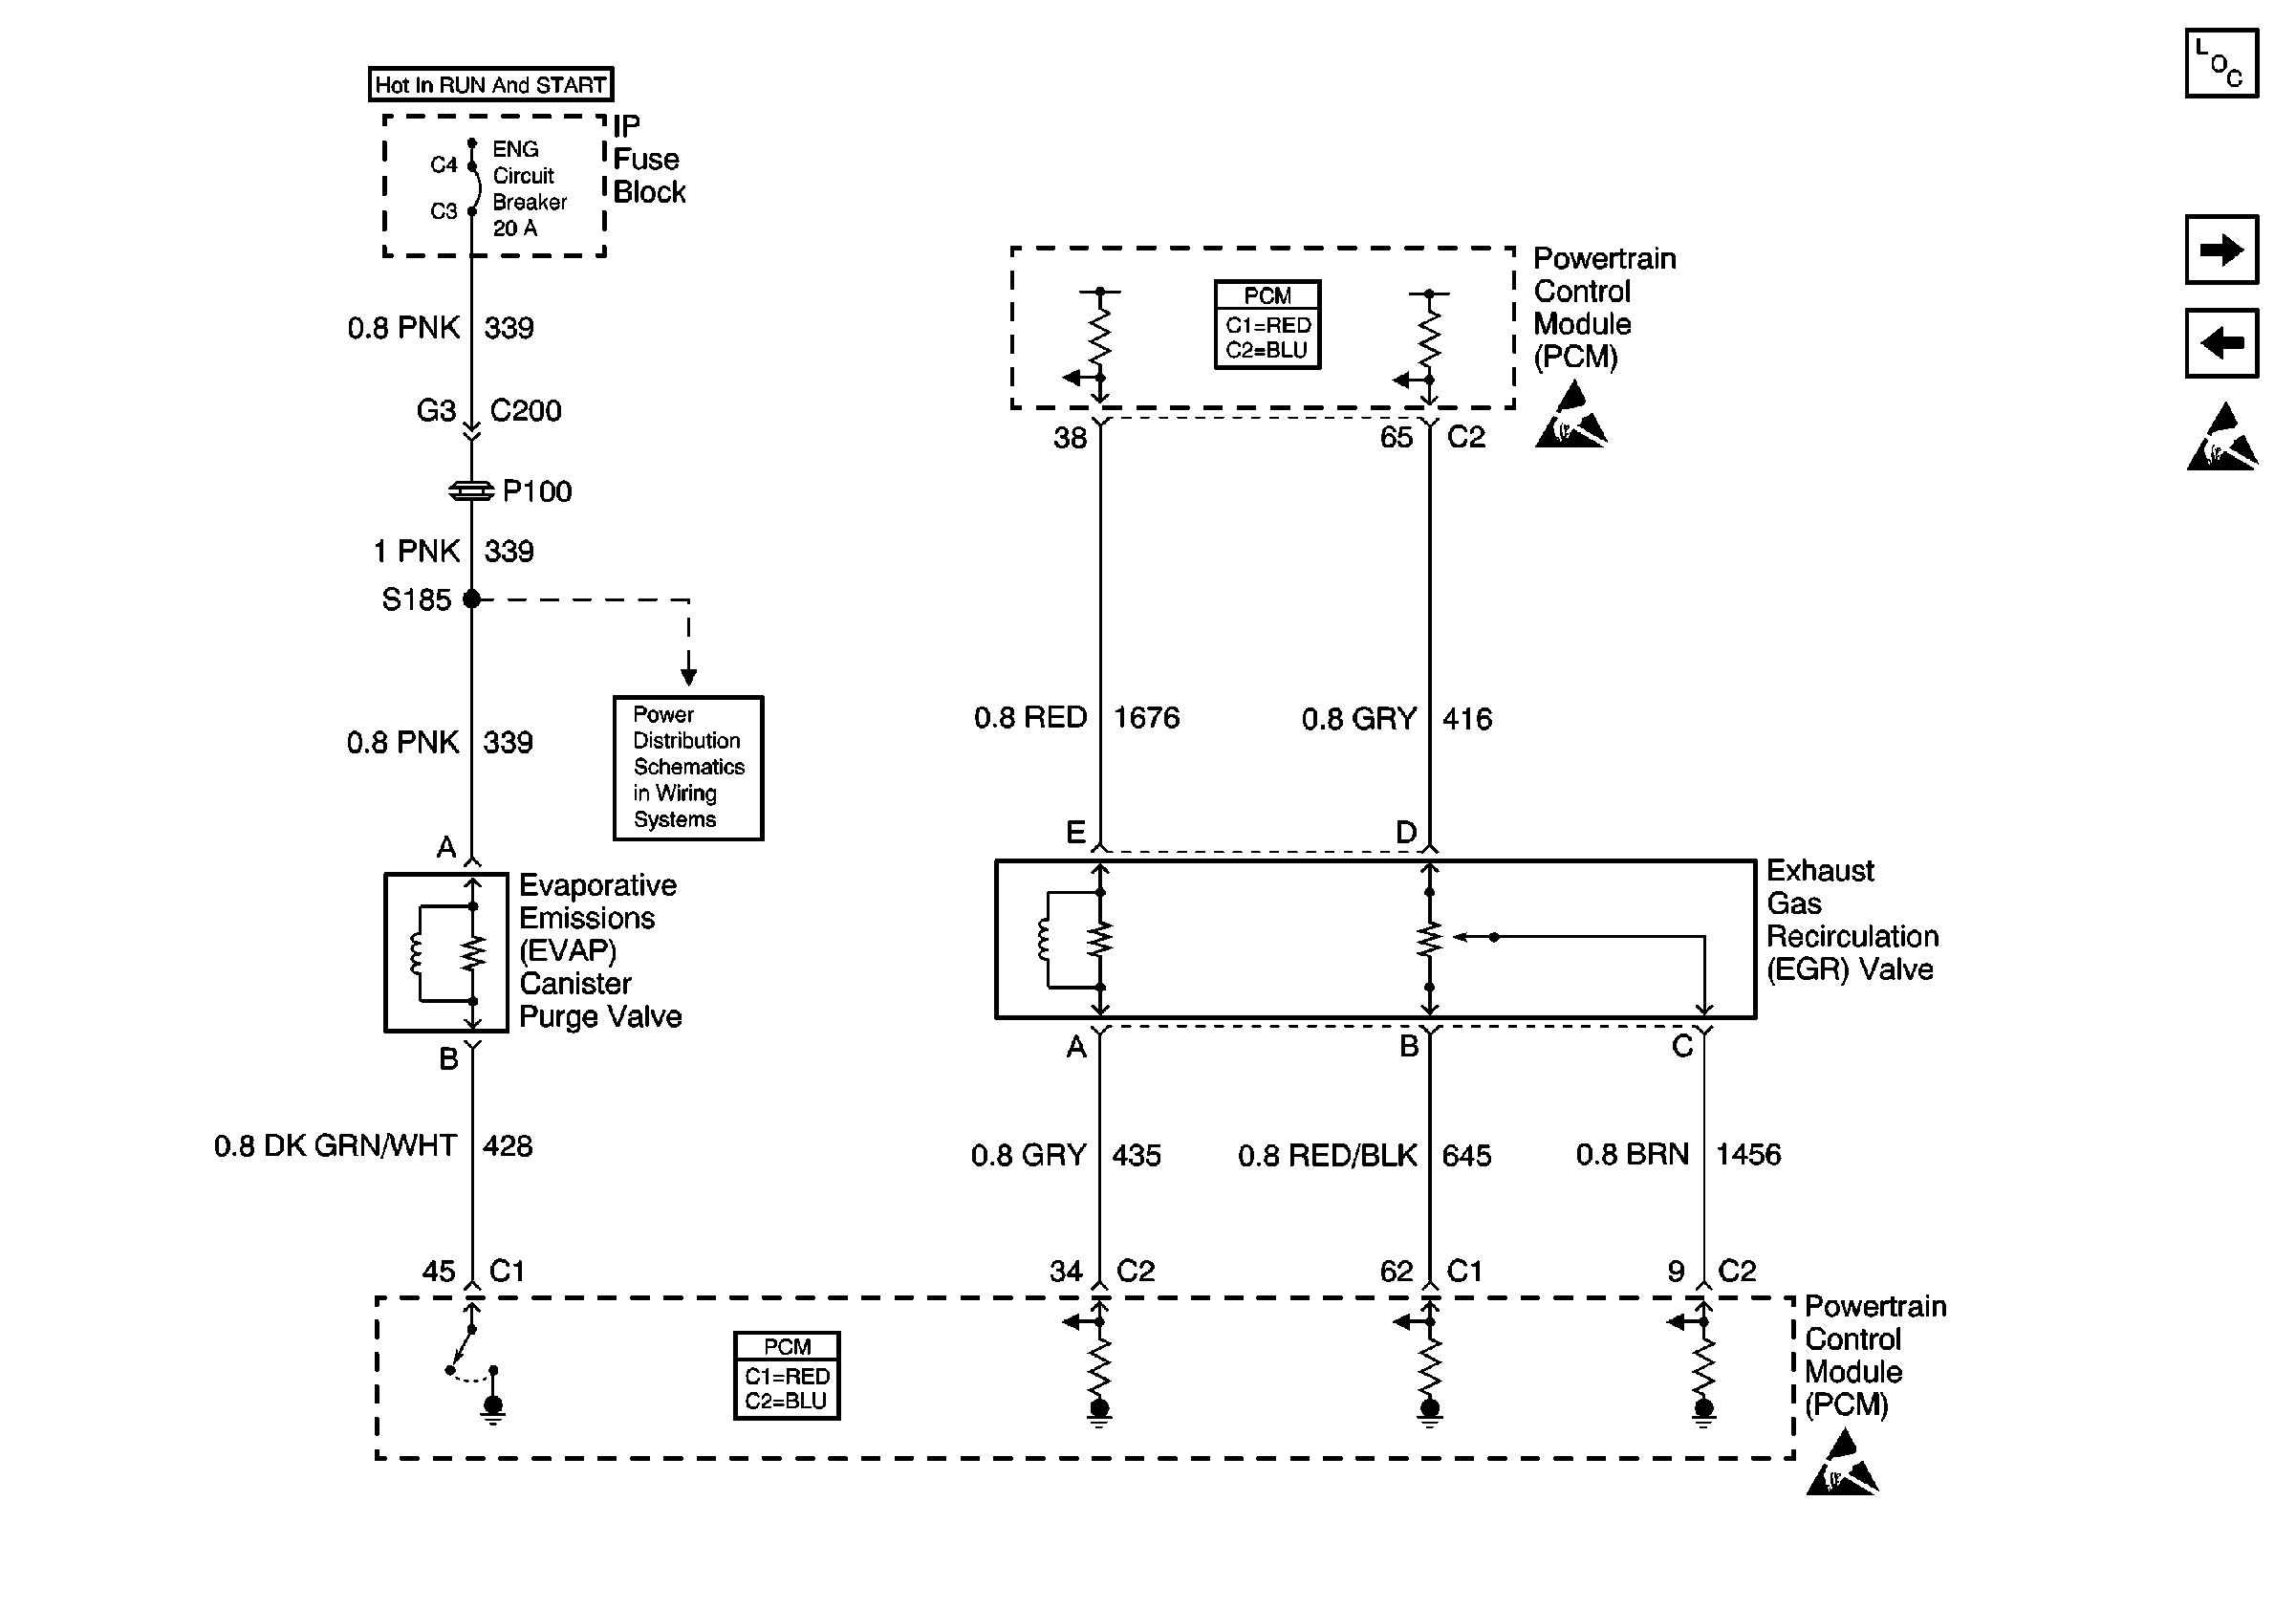
.
Circuit Description
12 volts is applied to the ignition feed circuit at terminal A when the ignition key is turned ON. As the engine coolant temperature rises during engine operation (less than 45°C (113°F)) or when Short Term Fuel Trim count is greater than 122, the control module will then ground the EVAP canister purge control circuit at terminal B. The purge solenoid will then open the EVAP canister to purge the fuel to the intake manifold for normal combustion when needed.
Test Description
Numbers below refer to the step numbers on the Diagnostic Table
-
Checks to see if a vacuum source is present, along with certain conditions before the purge solenoid is commanded ON. Also shows a change of vacuum as the purge solenoid is being cycled
-
Checks for power to the solenoid, the ground circuit, the connections at the purge solenoid and the solenoid itself.
-
Checks for an open or grounded ignition feed circuit.
-
Checks for an open EVAP canister purge control circuit or faulty control module.
Step | Action | Value(s) | Yes | No |
|---|---|---|---|---|
1 | Was the Powertrain On-Board Diagnostic (OBD) System Check performed? | -- | ||
Is vacuum present when the solenoid is energized? | 45°C (113°F) 2000 RPM | |||
Is the test light ON? | -- | |||
Is the test light ON? | -- | |||
Is the test light ON? | -- | |||
6 | Check the purge line to the EVAP canisters and repair if necessary. If the purge line is OK, then no problem is found. Is the action complete? | -- | -- | |
7 |
Was a problem found? | -- | ||
8 | Repair the open in the ignition feed circuit. Is the action complete? | -- | -- | |
9 | Repair the open in the EVAP canister purge control circuit to the EVAP purge solenoid. Is the action complete? | -- | -- | |
10 |
Was a problem found? | -- | ||
11 | Replace the EVAP purge solenoid. Refer to the Evaporative Emission Canister Purge Solenoid Valve Replacement . Is the action complete? | -- | -- | |
12 | Replace the control module. Refer to Powertrain Control Module Replacement . Is the action complete? | -- | -- | |
13 |
Does the component operate properly? | -- | System OK |
