For 1990-2009 cars only
Removal Procedure
- Remove the radiator assembly. Refer to Radiator Replacement.
- Remove the washer solvent container filler neck. Refer to Windshield Washer Solvent Container Filler Tube Replacement.
- If fitted, remove the headlamp washer hose from the headlamp washer pump.
- Place a suitable container under the washer pump (3).
- Remove the washer pump (3) from the washer solvent container.
- Drain the washer solvent by directing the flow out of the solvent container into the suitable container.
- Use a suitable tool to separate the washer hose (1) from the washer pump (3).
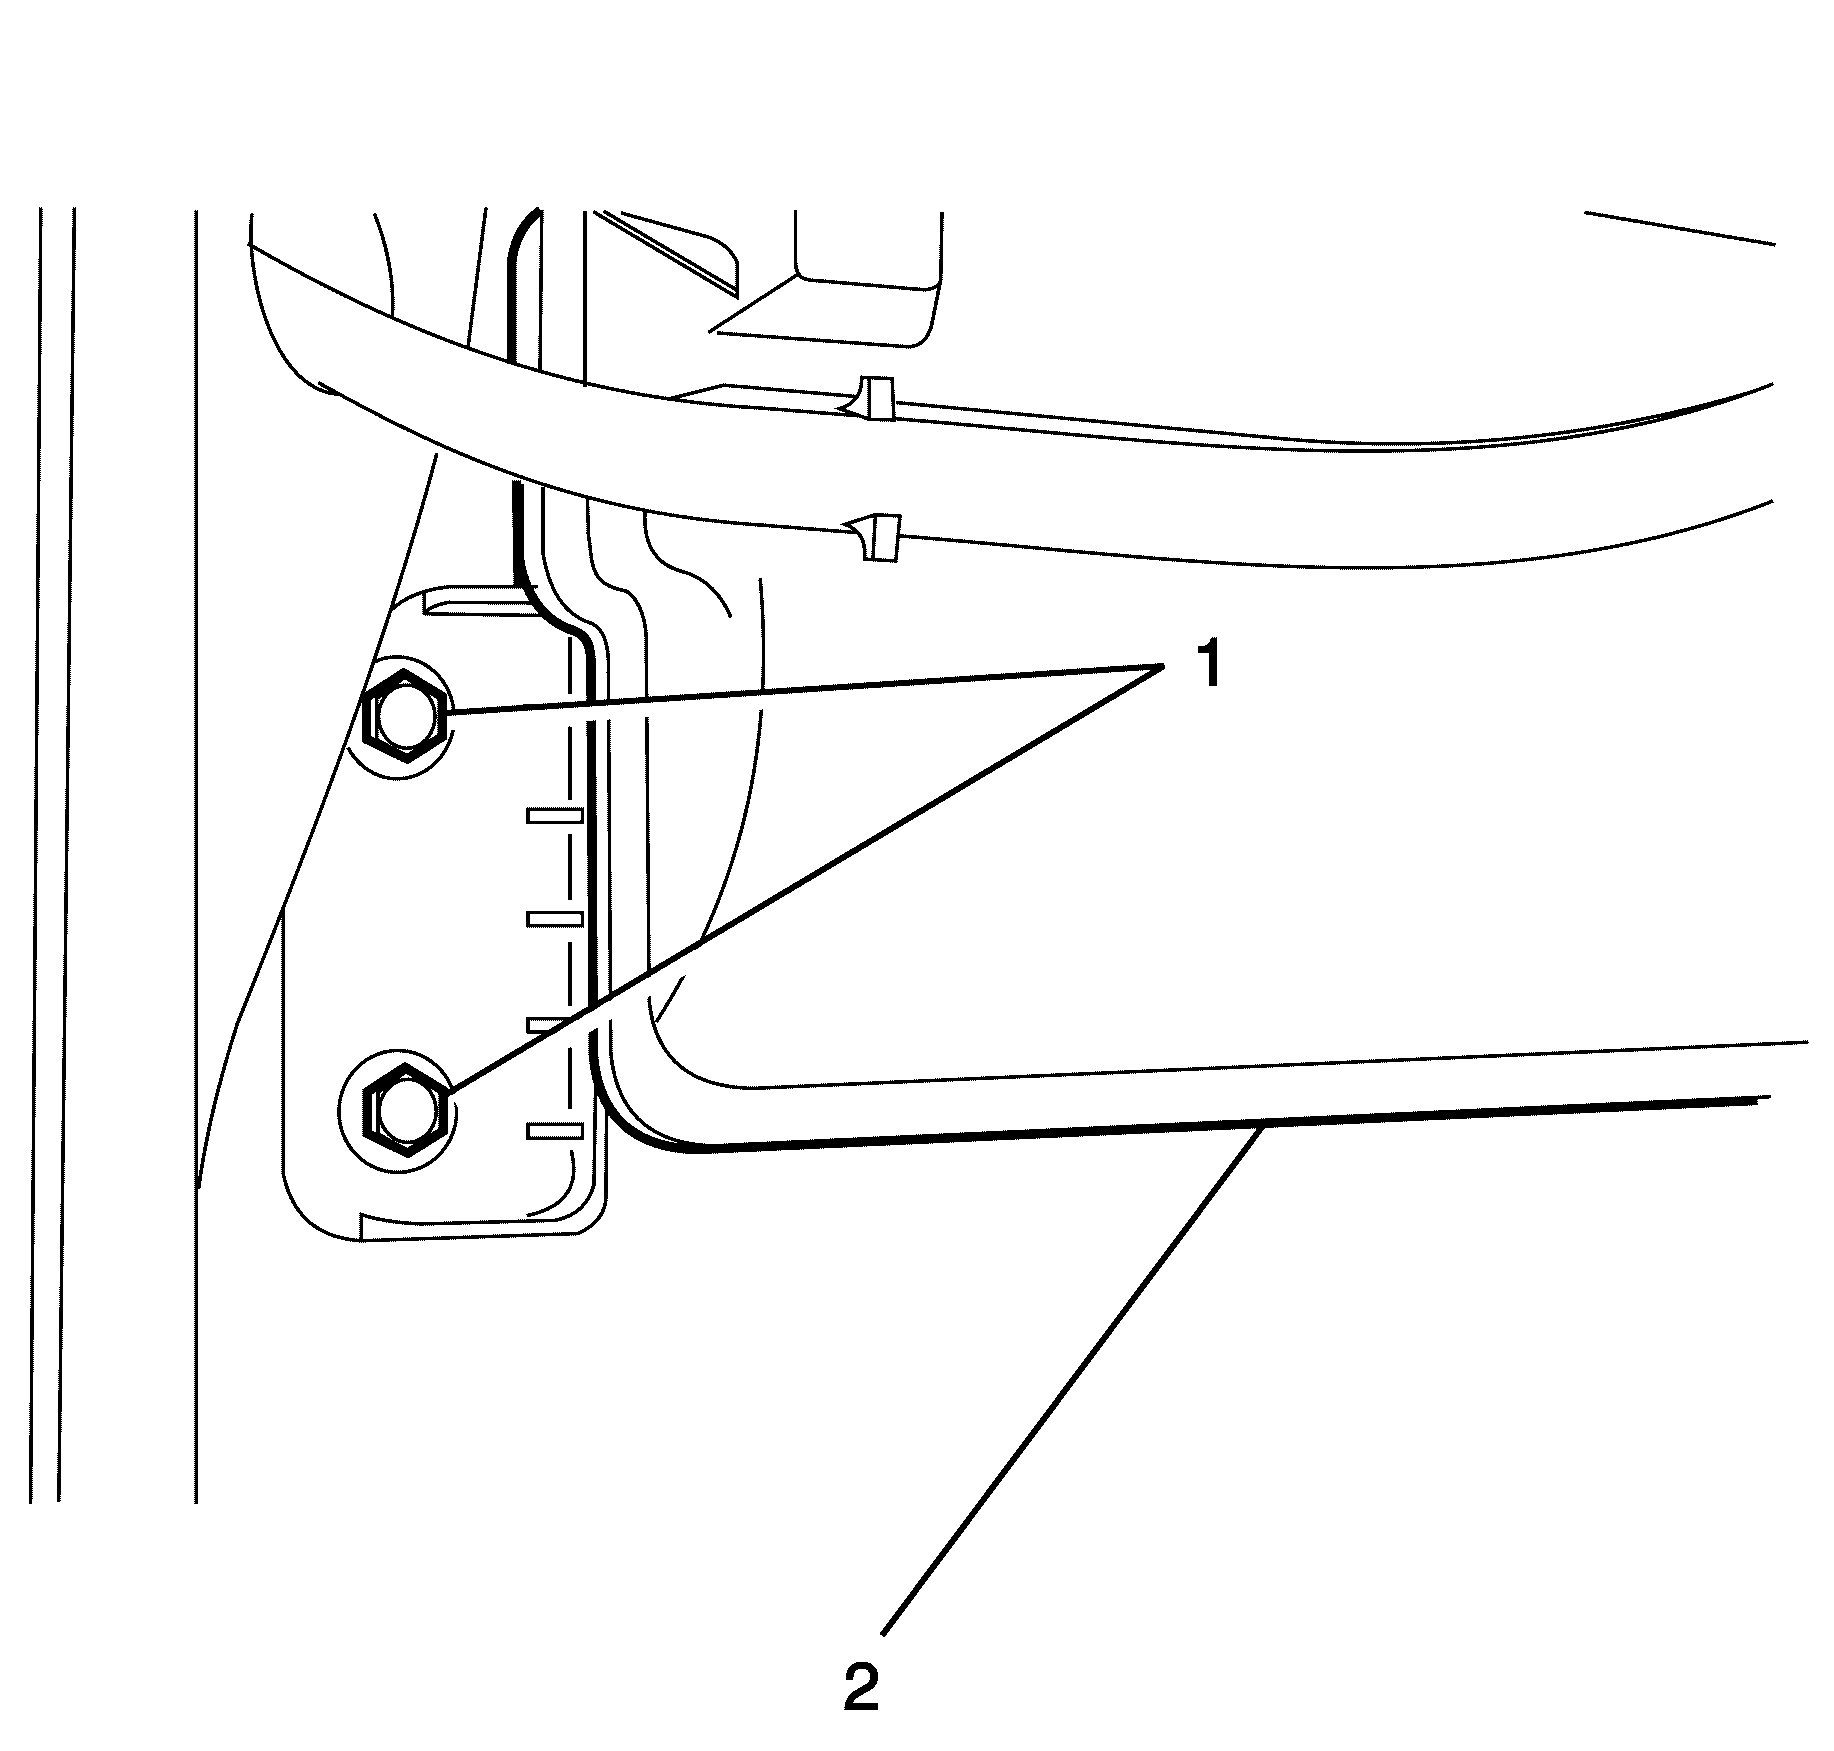
- Remove the washer solvent container (2) to front end module support retaining bolts (1). Carry out the same procedure for opposite side.
- Remove the solvent washer container (2).

Disconnect the washer pump electrical connector (2).
Important: Inspect the rubber seal for damage, due to perishing and replace as necessary.
Installation Procedure
- Install the washer solvent container (2) to the front end module support.
- Install the washer solvent container (2) to the front end module support retaining bolts (1).
- If fitted, install the headlamp washer hose.
- Connect the washer pump hose (1) to the washer pump (3)
- Install the washer solvent container filler neck. Refer to Windshield Washer Solvent Container Filler Tube Replacement.
- Fill the washer solvent container with washer solvent.
- Install the radiator assembly. Refer to Radiator Replacement.
- Test the washer pump for the correct operation.
Notice: Refer to Fastener Notice in the Preface section.
Tighten
Tighten the bolts (1) to (5 N·m (44 lb in).
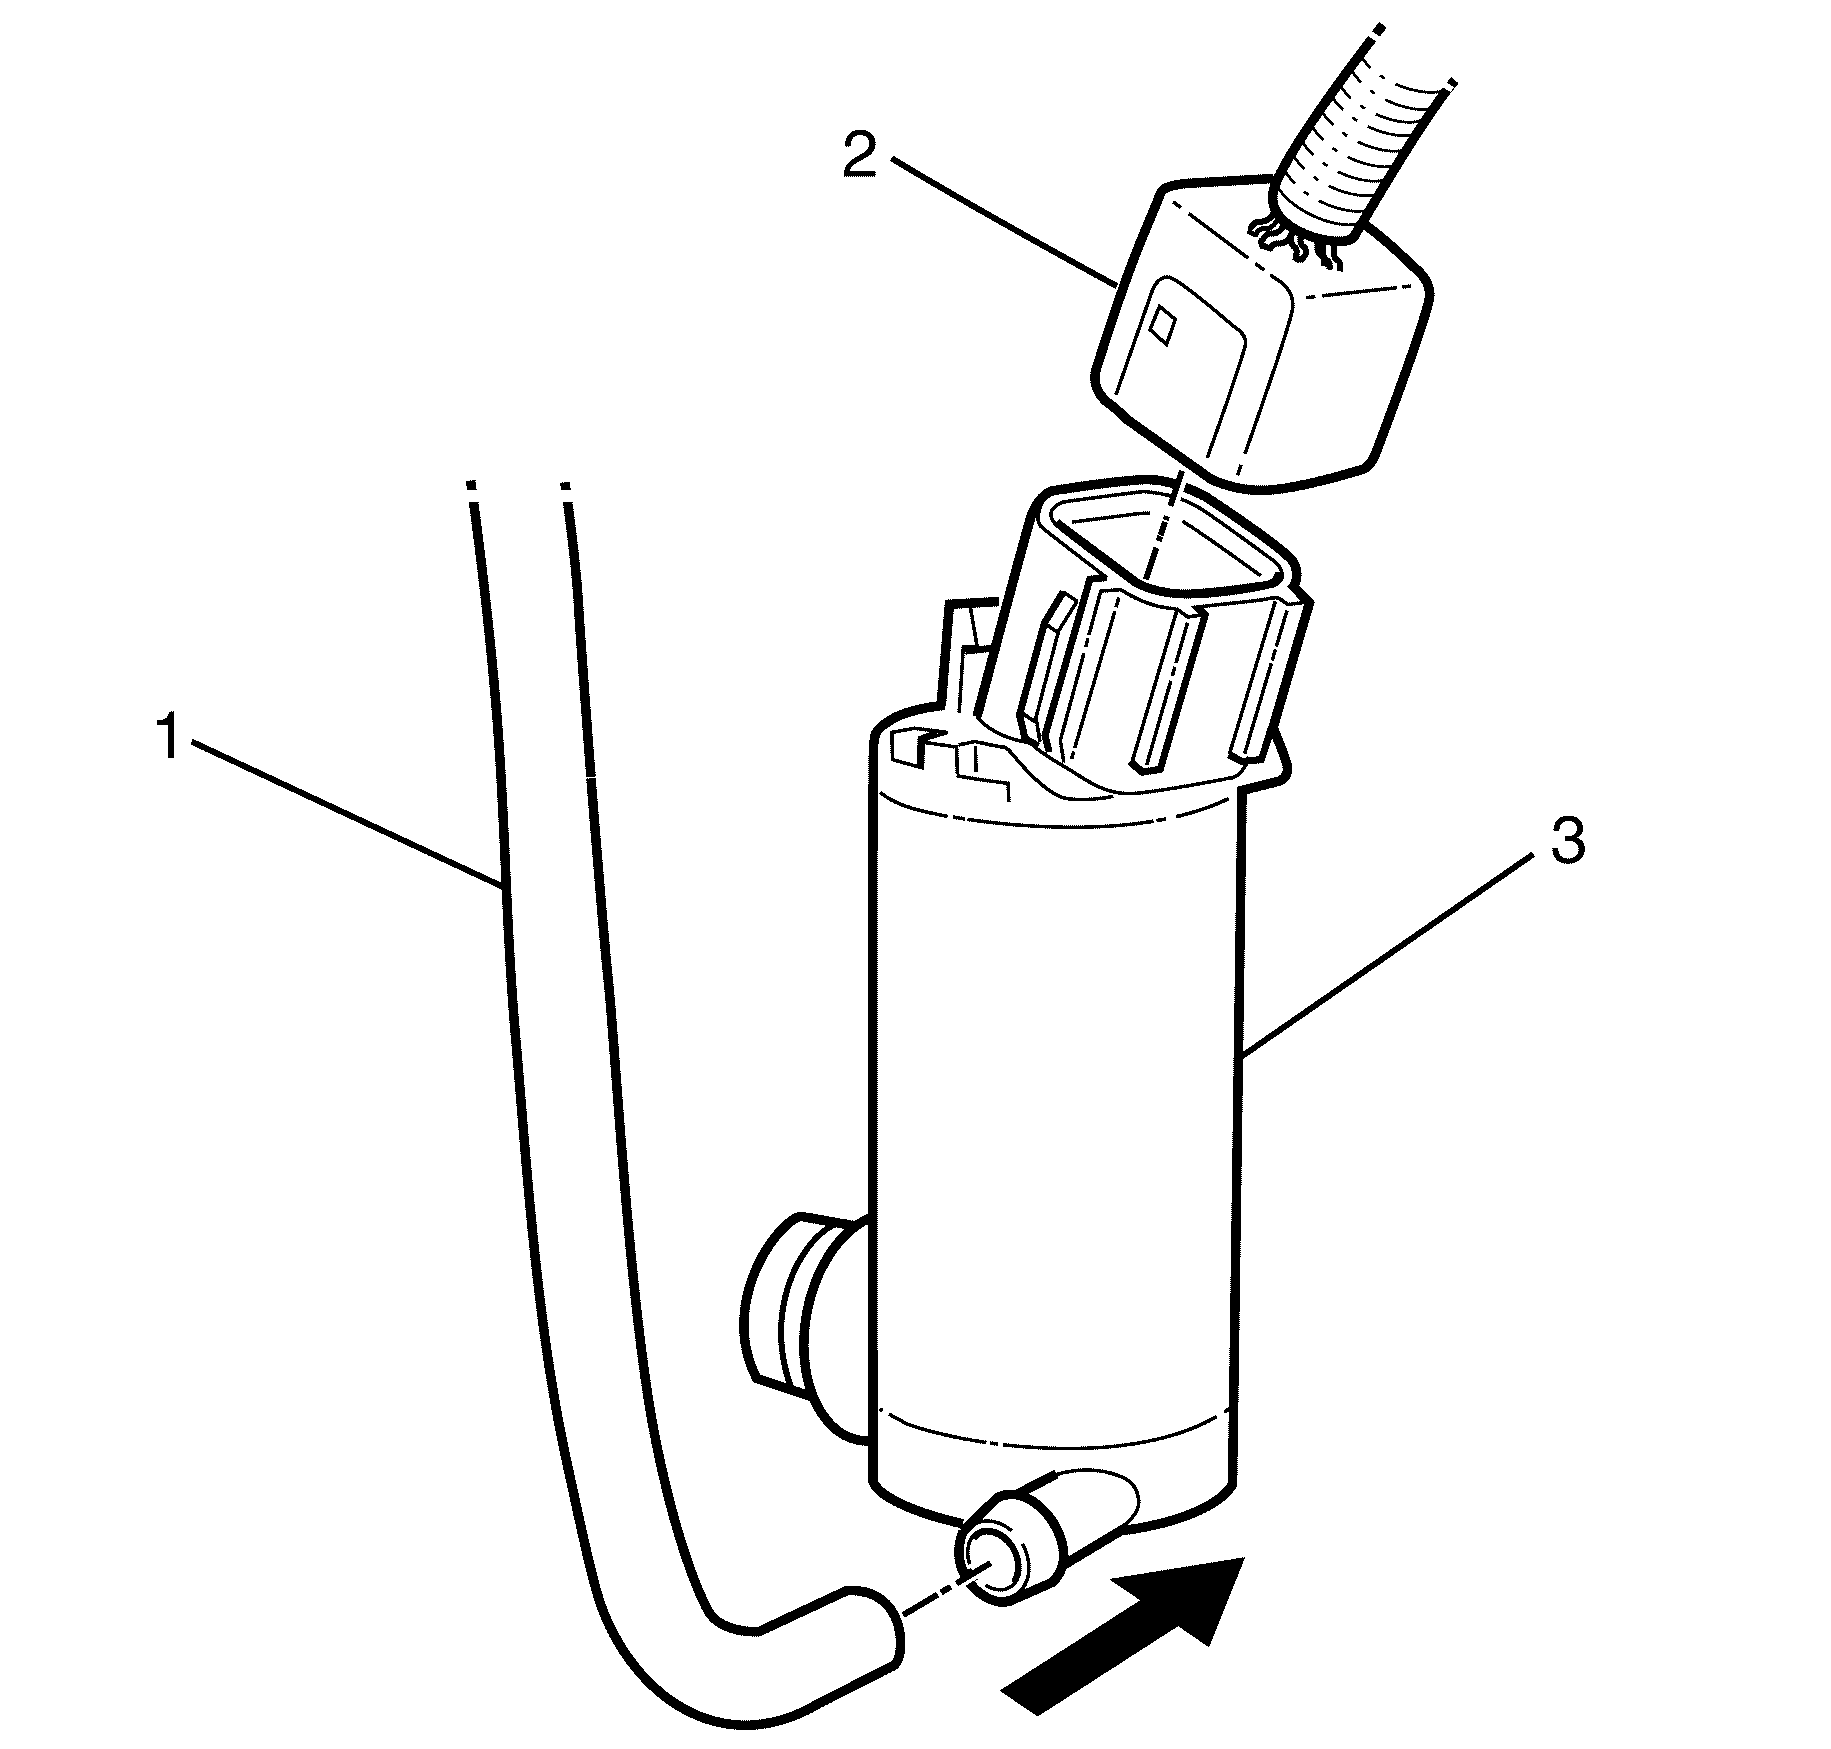
Connect the washer pump electrical connector (2).
