Tools Required
AU-525 Quick Connect Release Tool
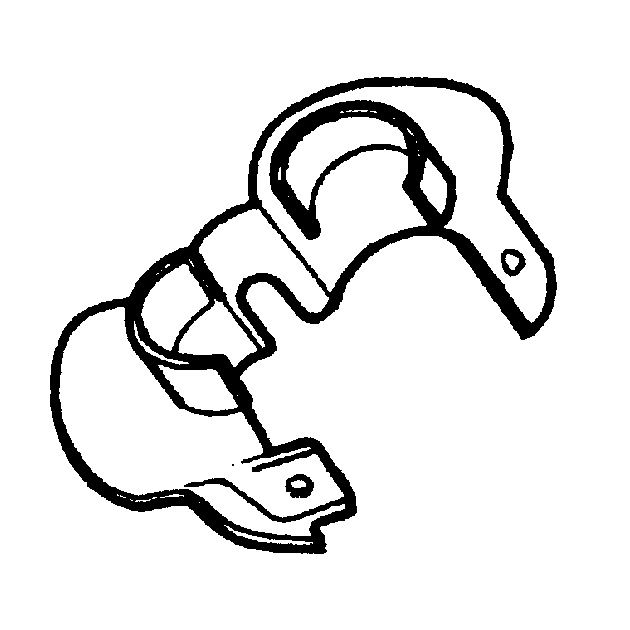
Removal Procedure
- Disconnect the battery ground cable from the battery. Refer to Battery Negative Cable Disconnection and Connection.
- Ensure engine is below 50 C before removing the coolant pressure cap.
- Drain the cooling system. Refer to Cooling System Draining and Filling.
- Remove the engine cover. Refer to Engine Cover Replacementor Engine Cover Replacement.
- Remove the radiator air baffle and deflector. Refer to Radiator Air Upper Baffle and Deflector Replacement.
- Remove the air intake duct. Refer to Air Cleaner Inlet Duct Replacementor Air Cleaner Inlet Duct Replacement.
- Remove the mass air flow meter. Refer to Mass Airflow Sensor/Intake Air Temperature Sensor Replacement or Mass Airflow Sensor/Intake Air Temperature Sensor Replacement.
- Detach the radiator inlet hose. Refer to Radiator Inlet Hose Replacement.
- Raise and support vehicle. Refer to Lifting and Jacking the Vehicle.
- Remove the air deflector. Refer to Front Air Deflector Replacement.
- Detach the radiator outlet hose. Refer to Radiator Outlet Hose Replacement.
- Lower the vehicle.
- Detach the coolant recovery reservoir hose. Refer to Coolant Recovery Reservoir Replacement.
- Remove the coolant air bleed hose. Refer to Engine Coolant Air Bleed Hose Replacement.
- Place a suitable container beneath the radiator and engine.
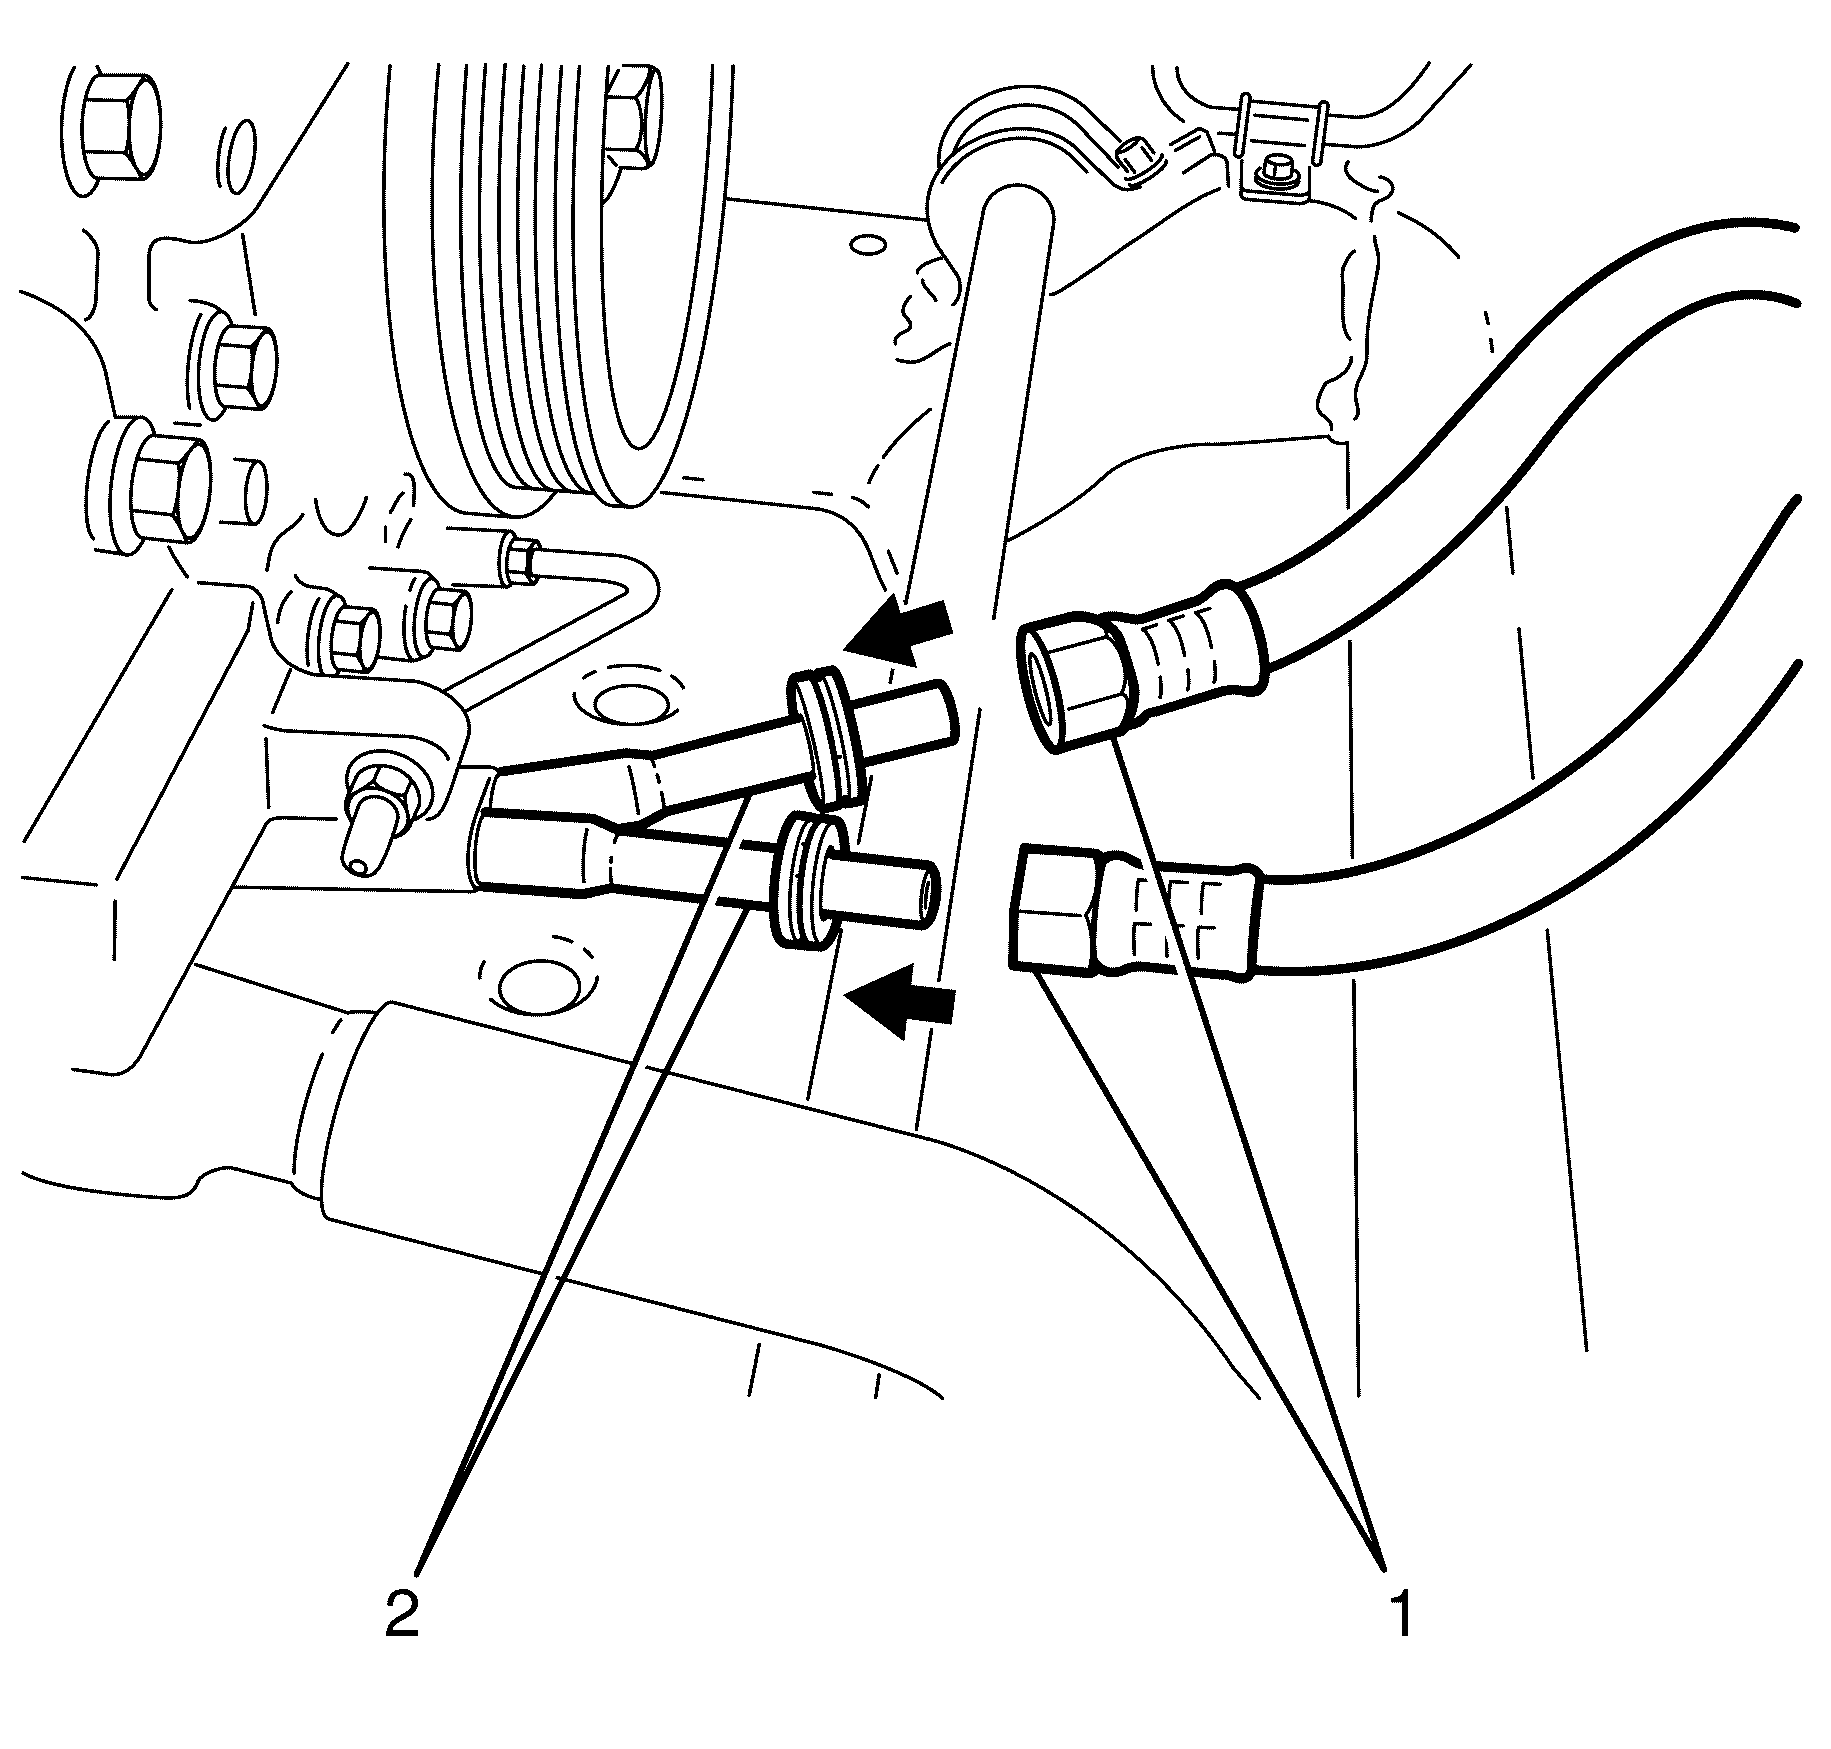
- Disconnect the transmission cooler line (2) from the flexible hose (1) using the AU-525 .
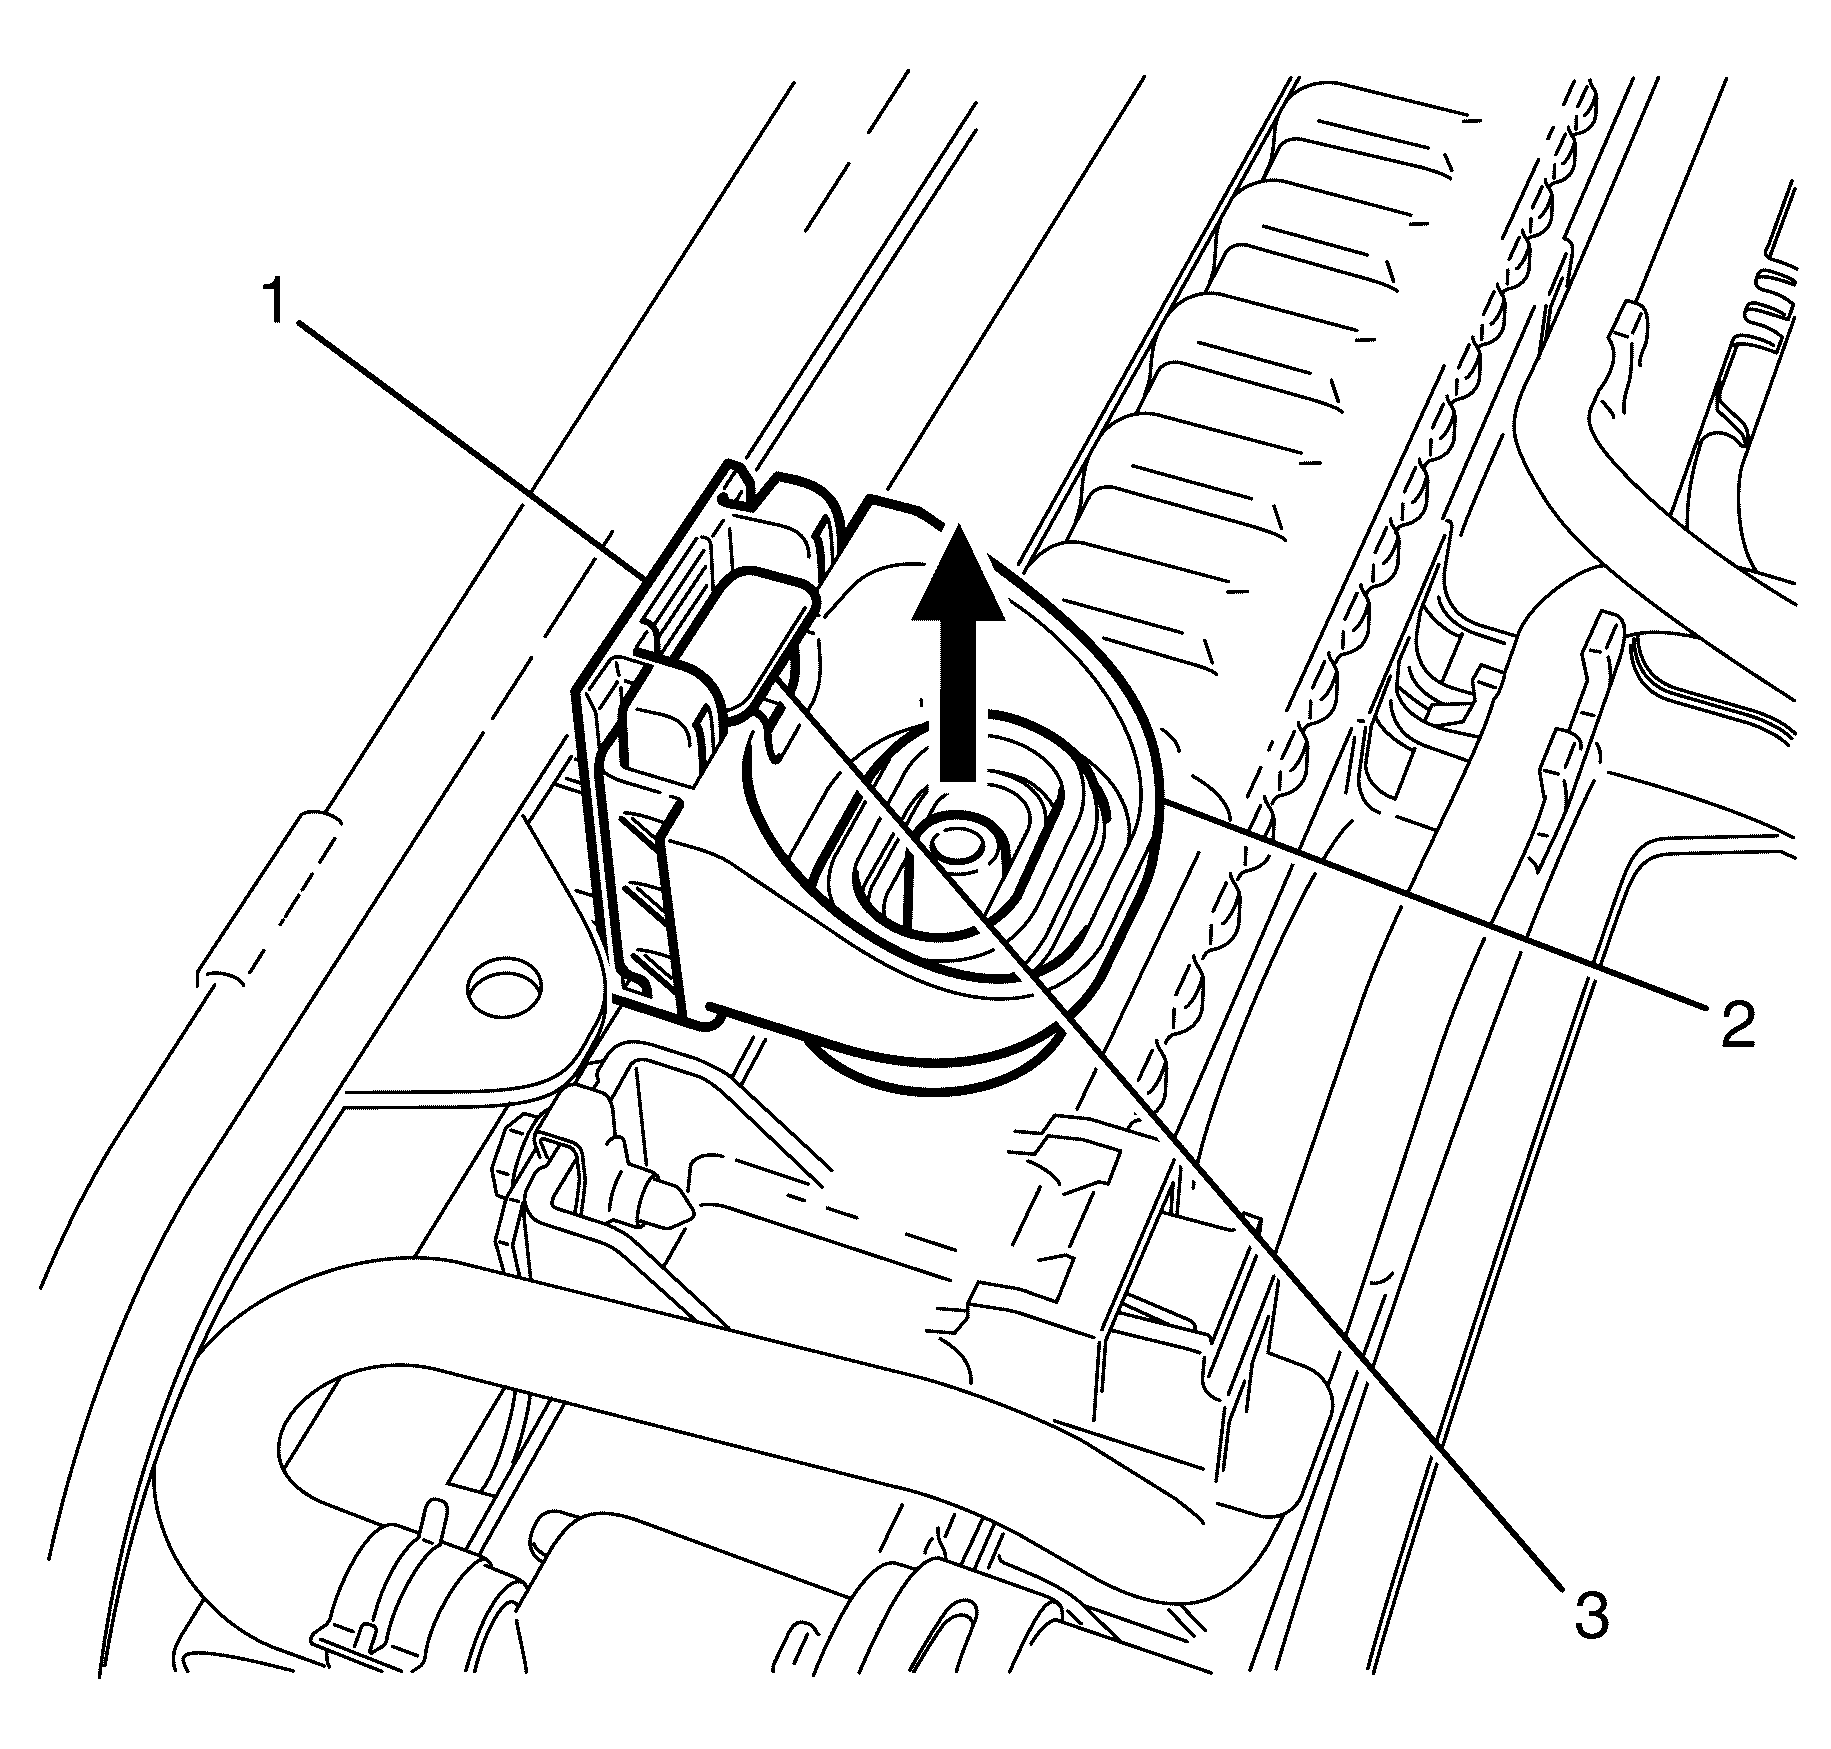
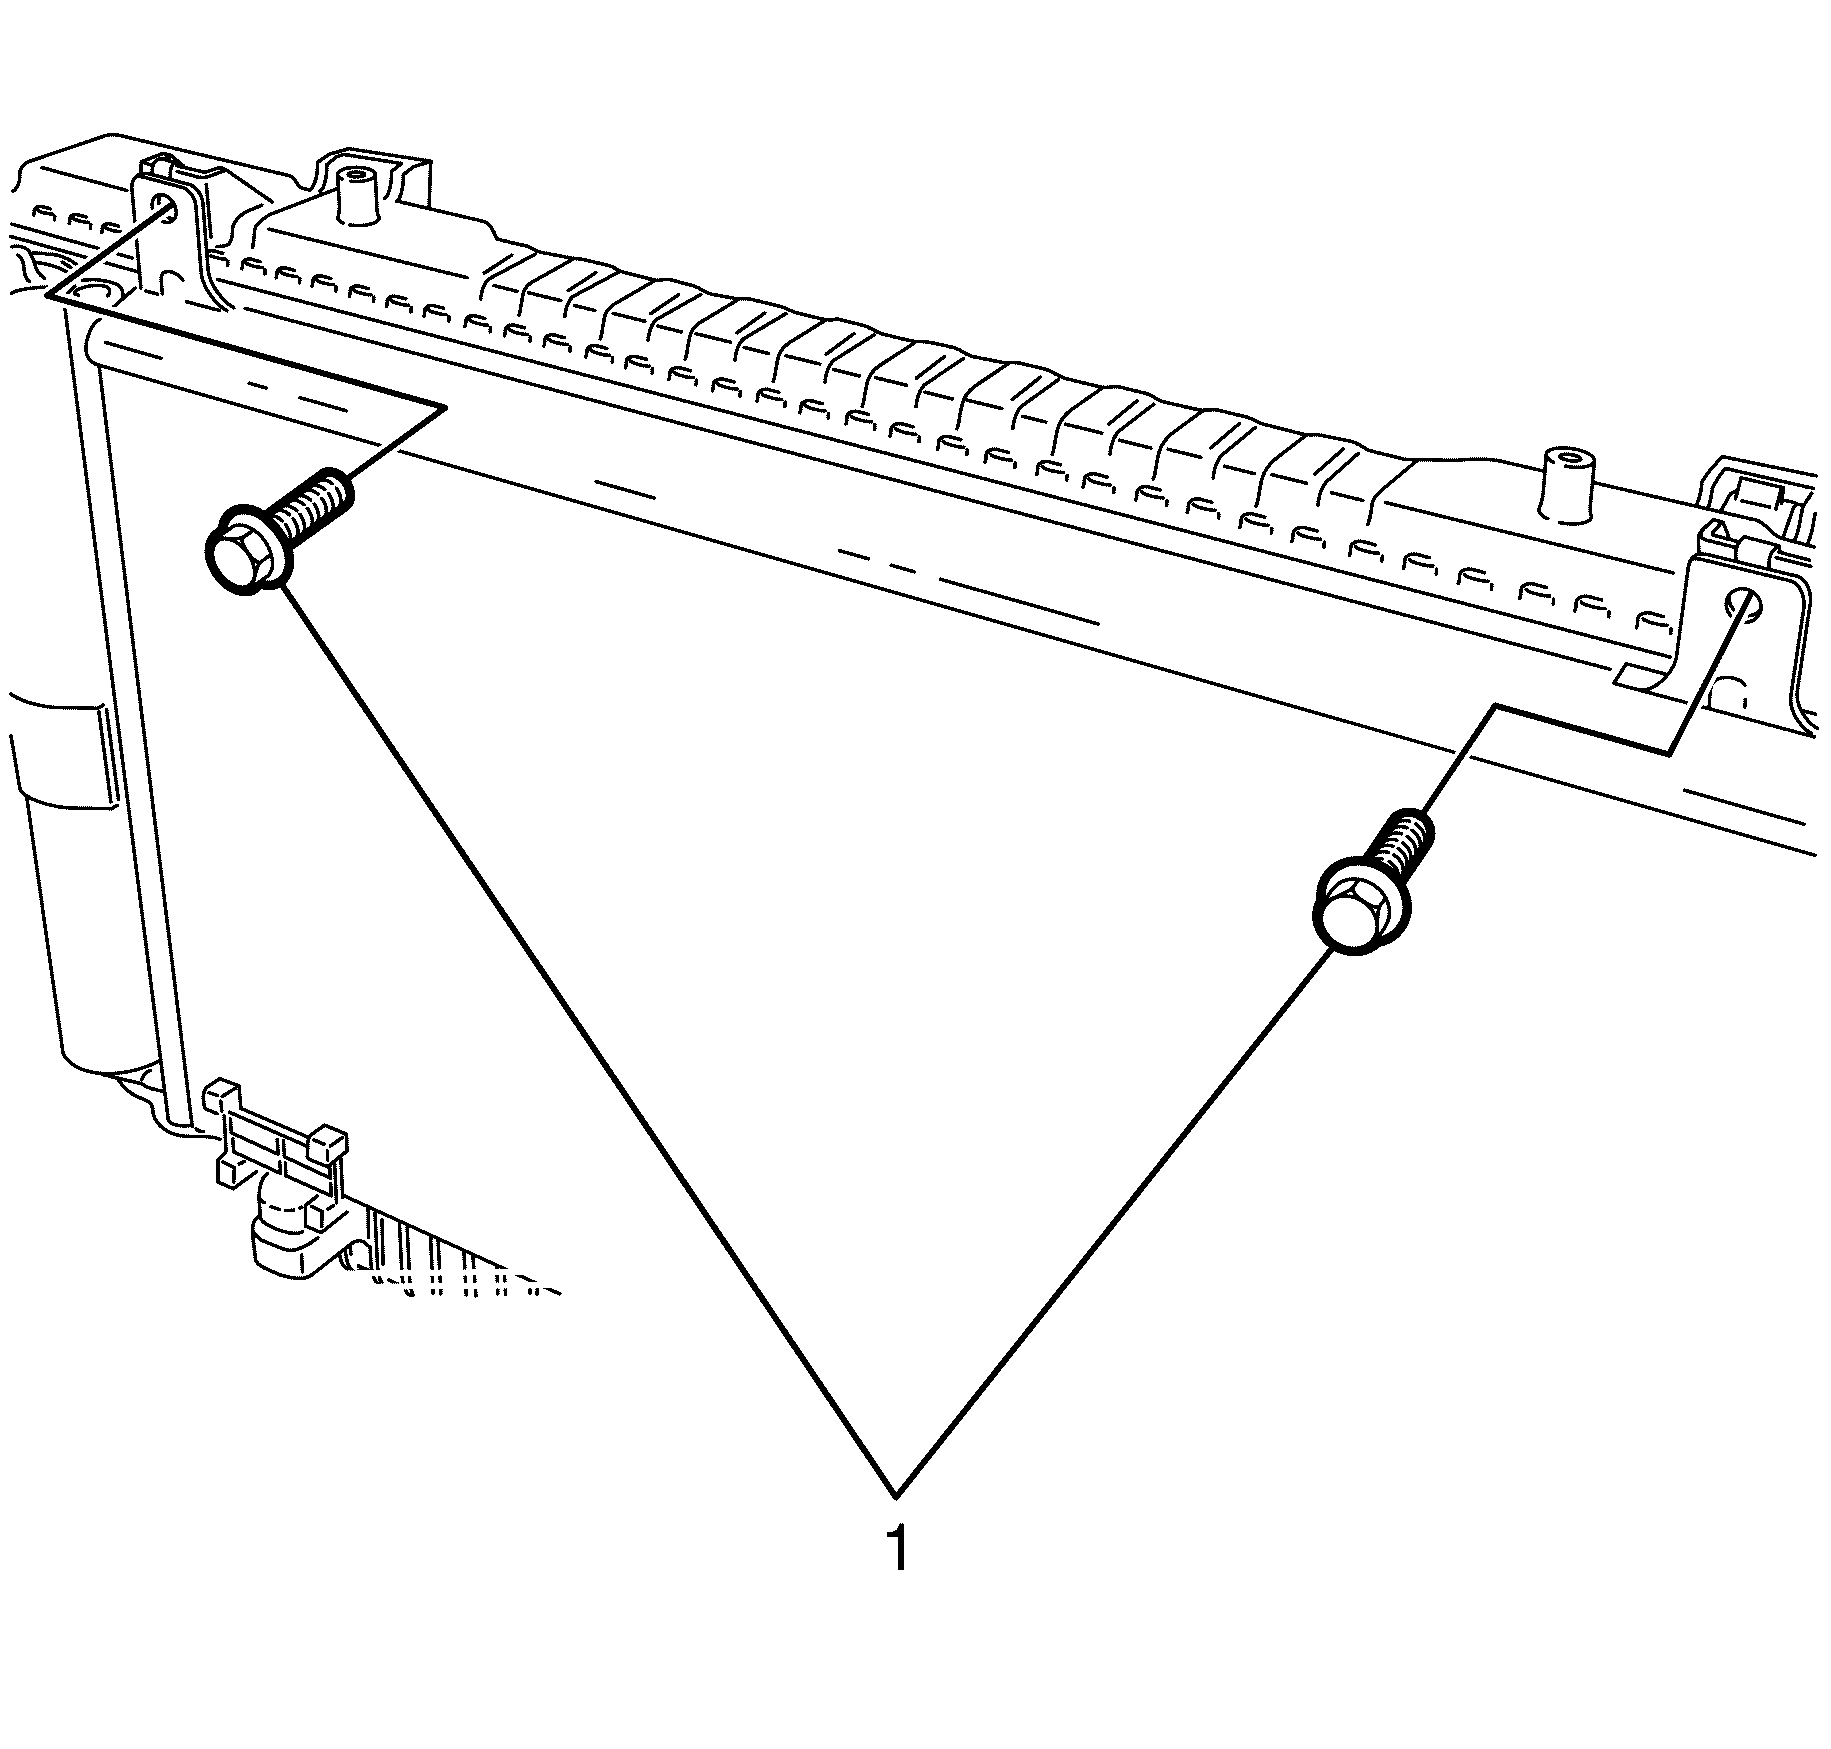
- Remove the radiator support brackets (2) from top of radiator by rasing the securing lock (3) 10mm and then sliding the bracket off the radiator slide pin (1). Carry out same procedure for other bracket.
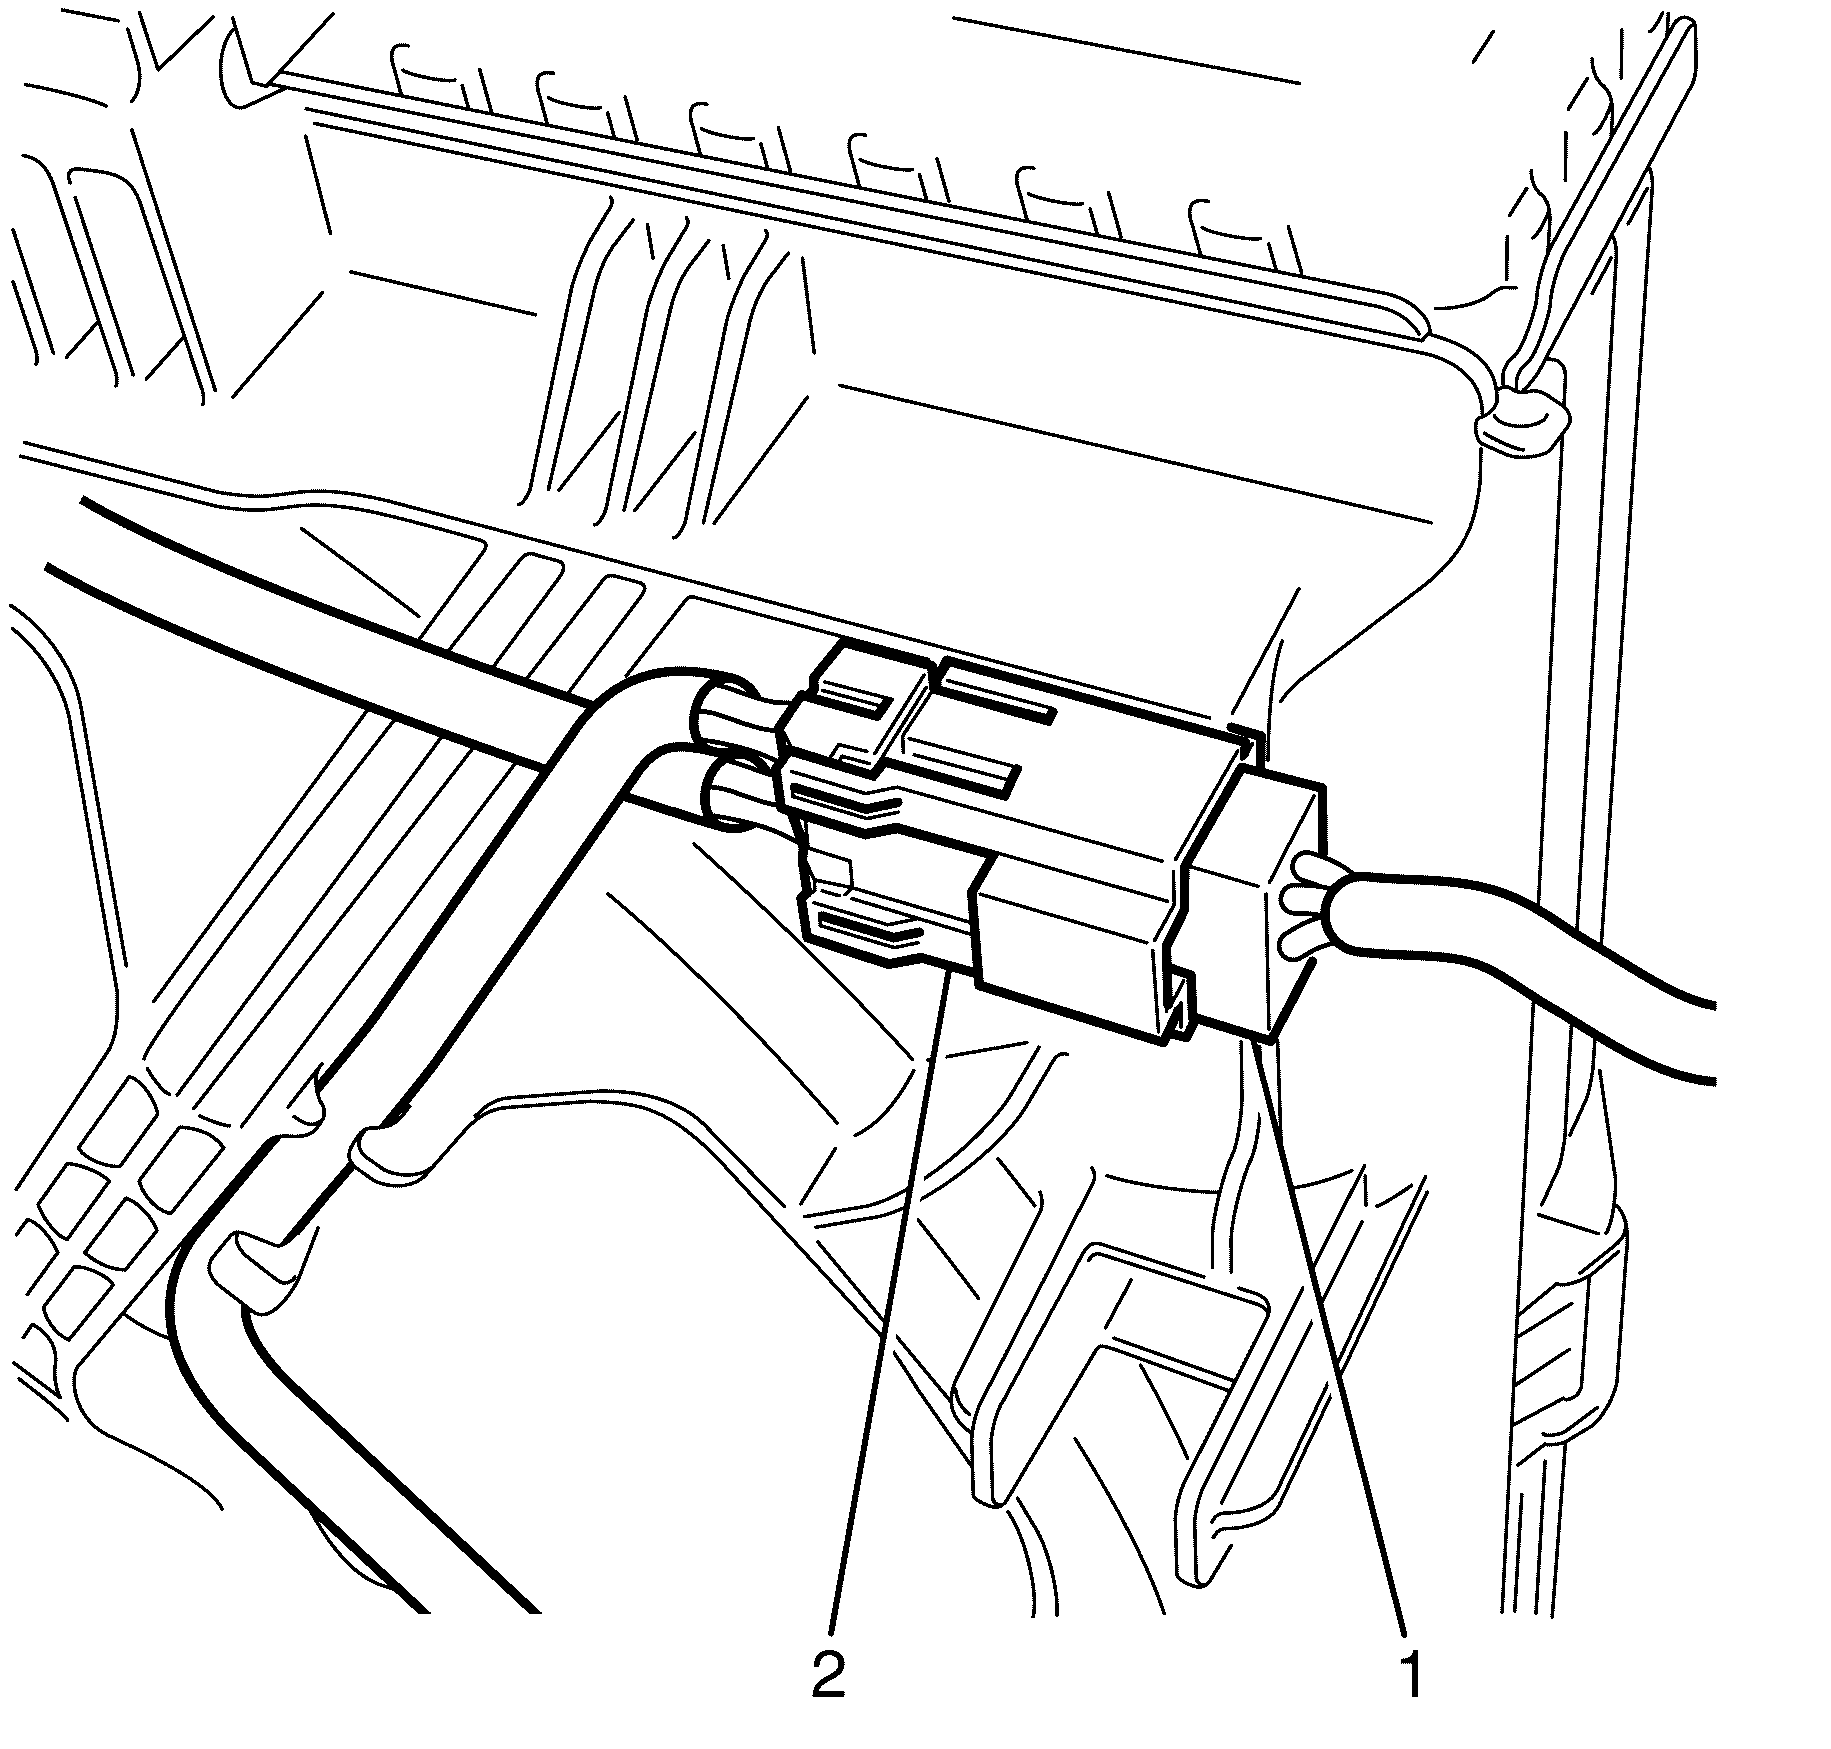
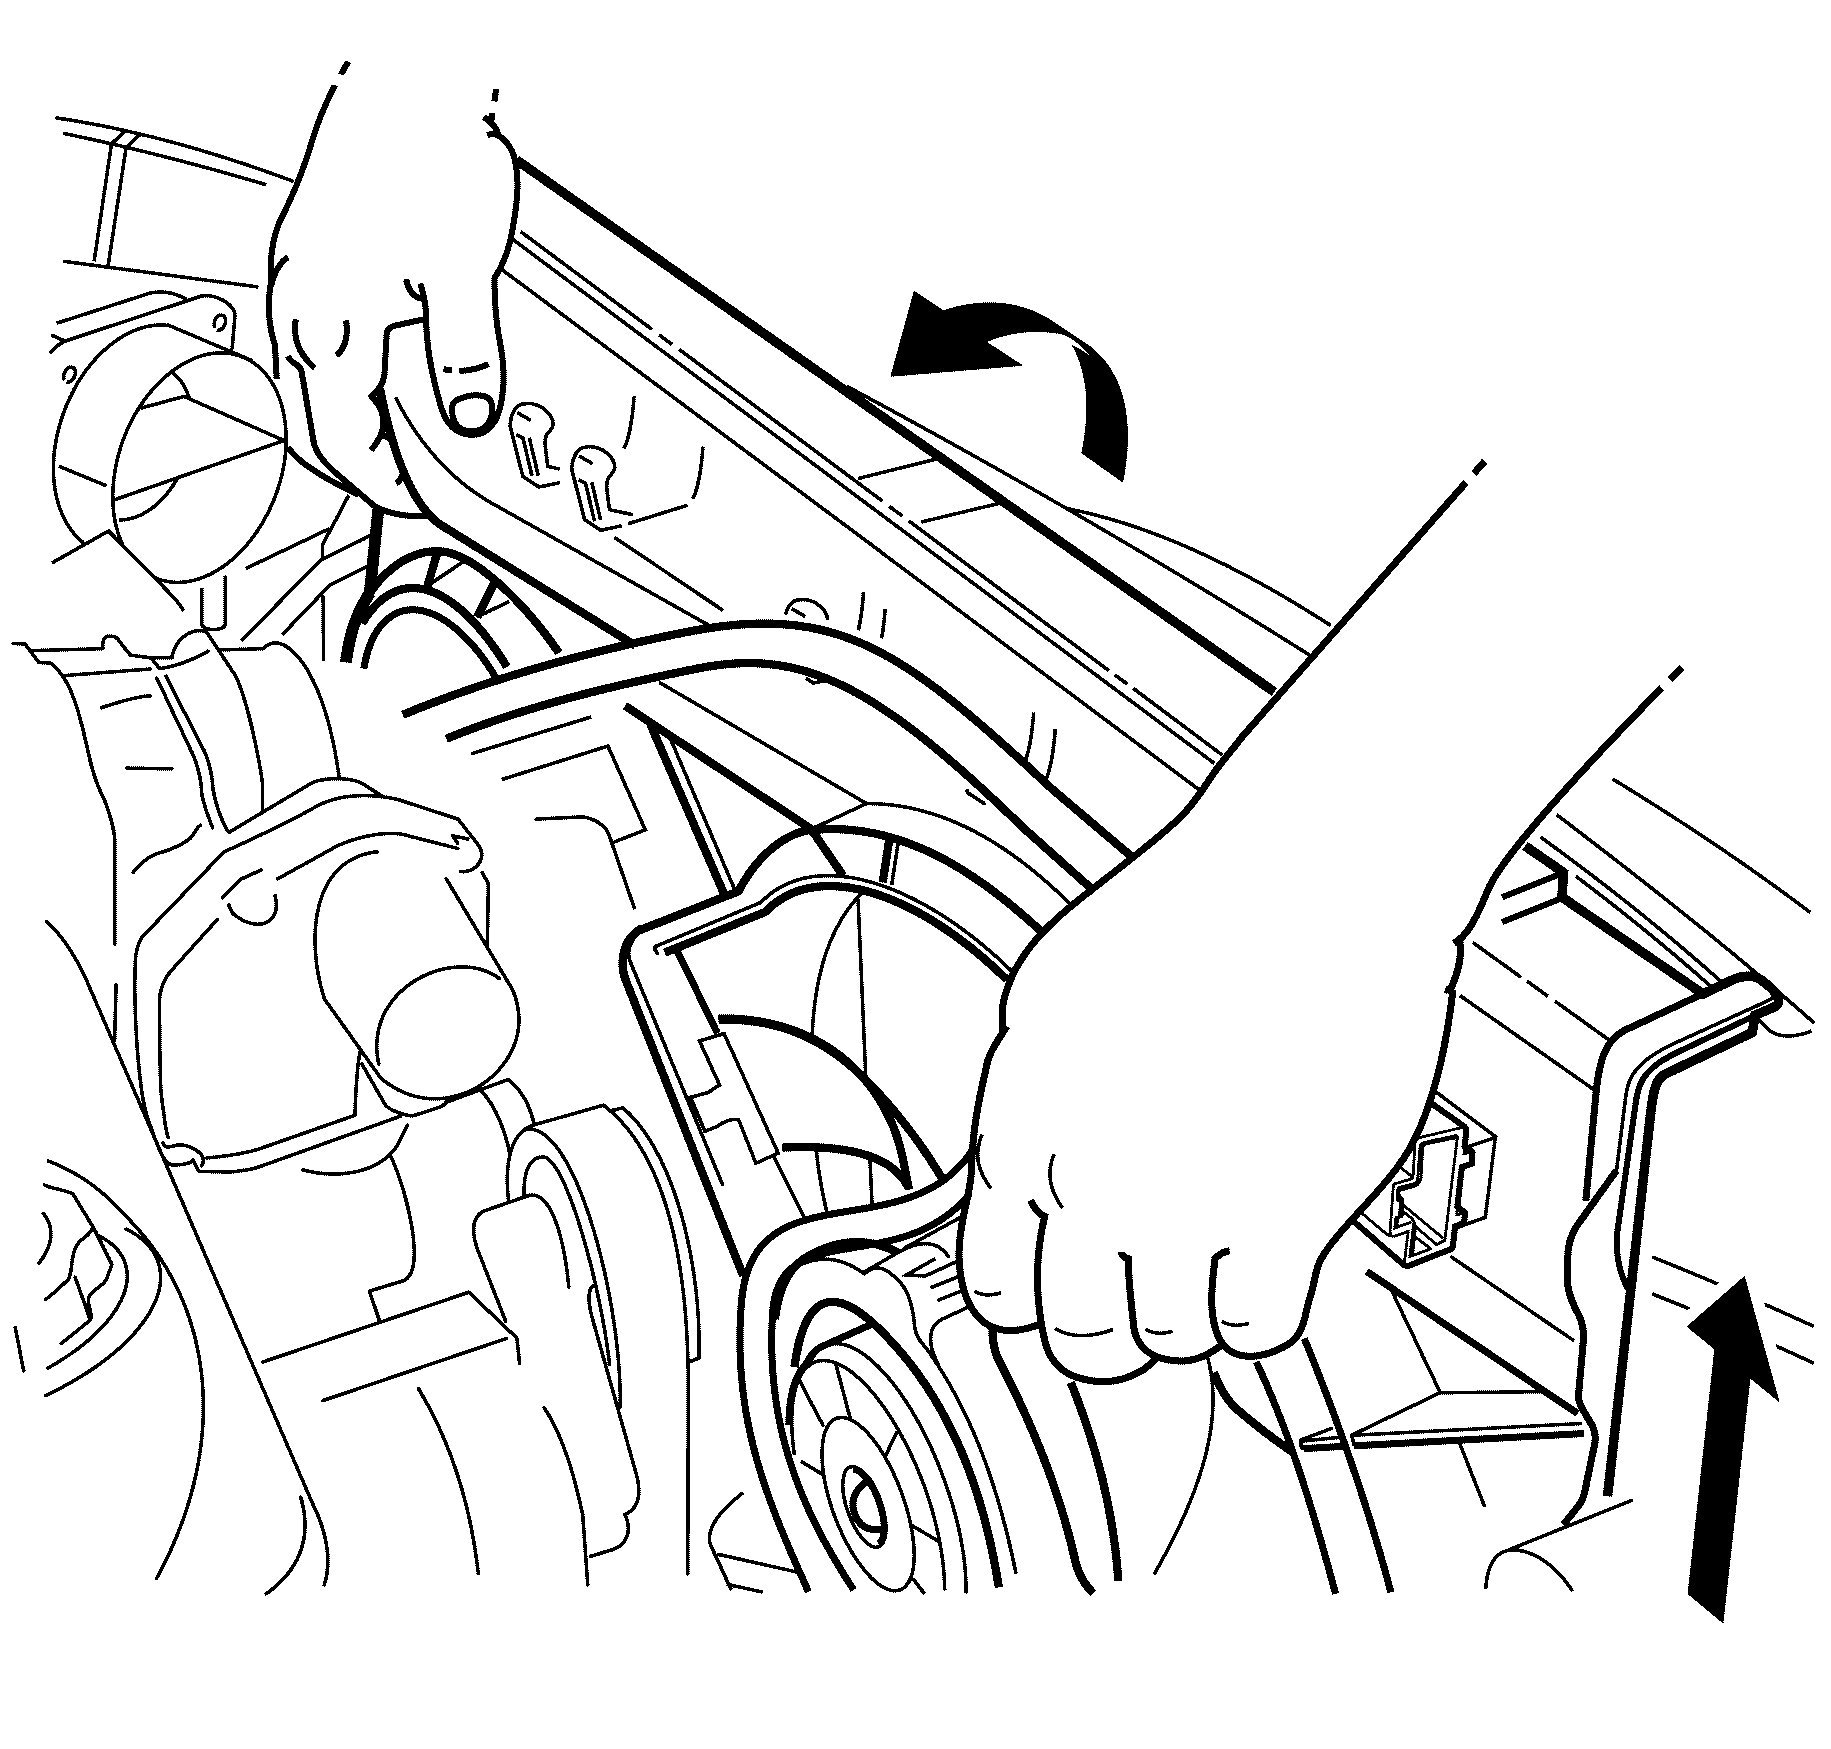
- Disconnect the cooling fans electrical connector (2) from the main wiring loom connector (1).
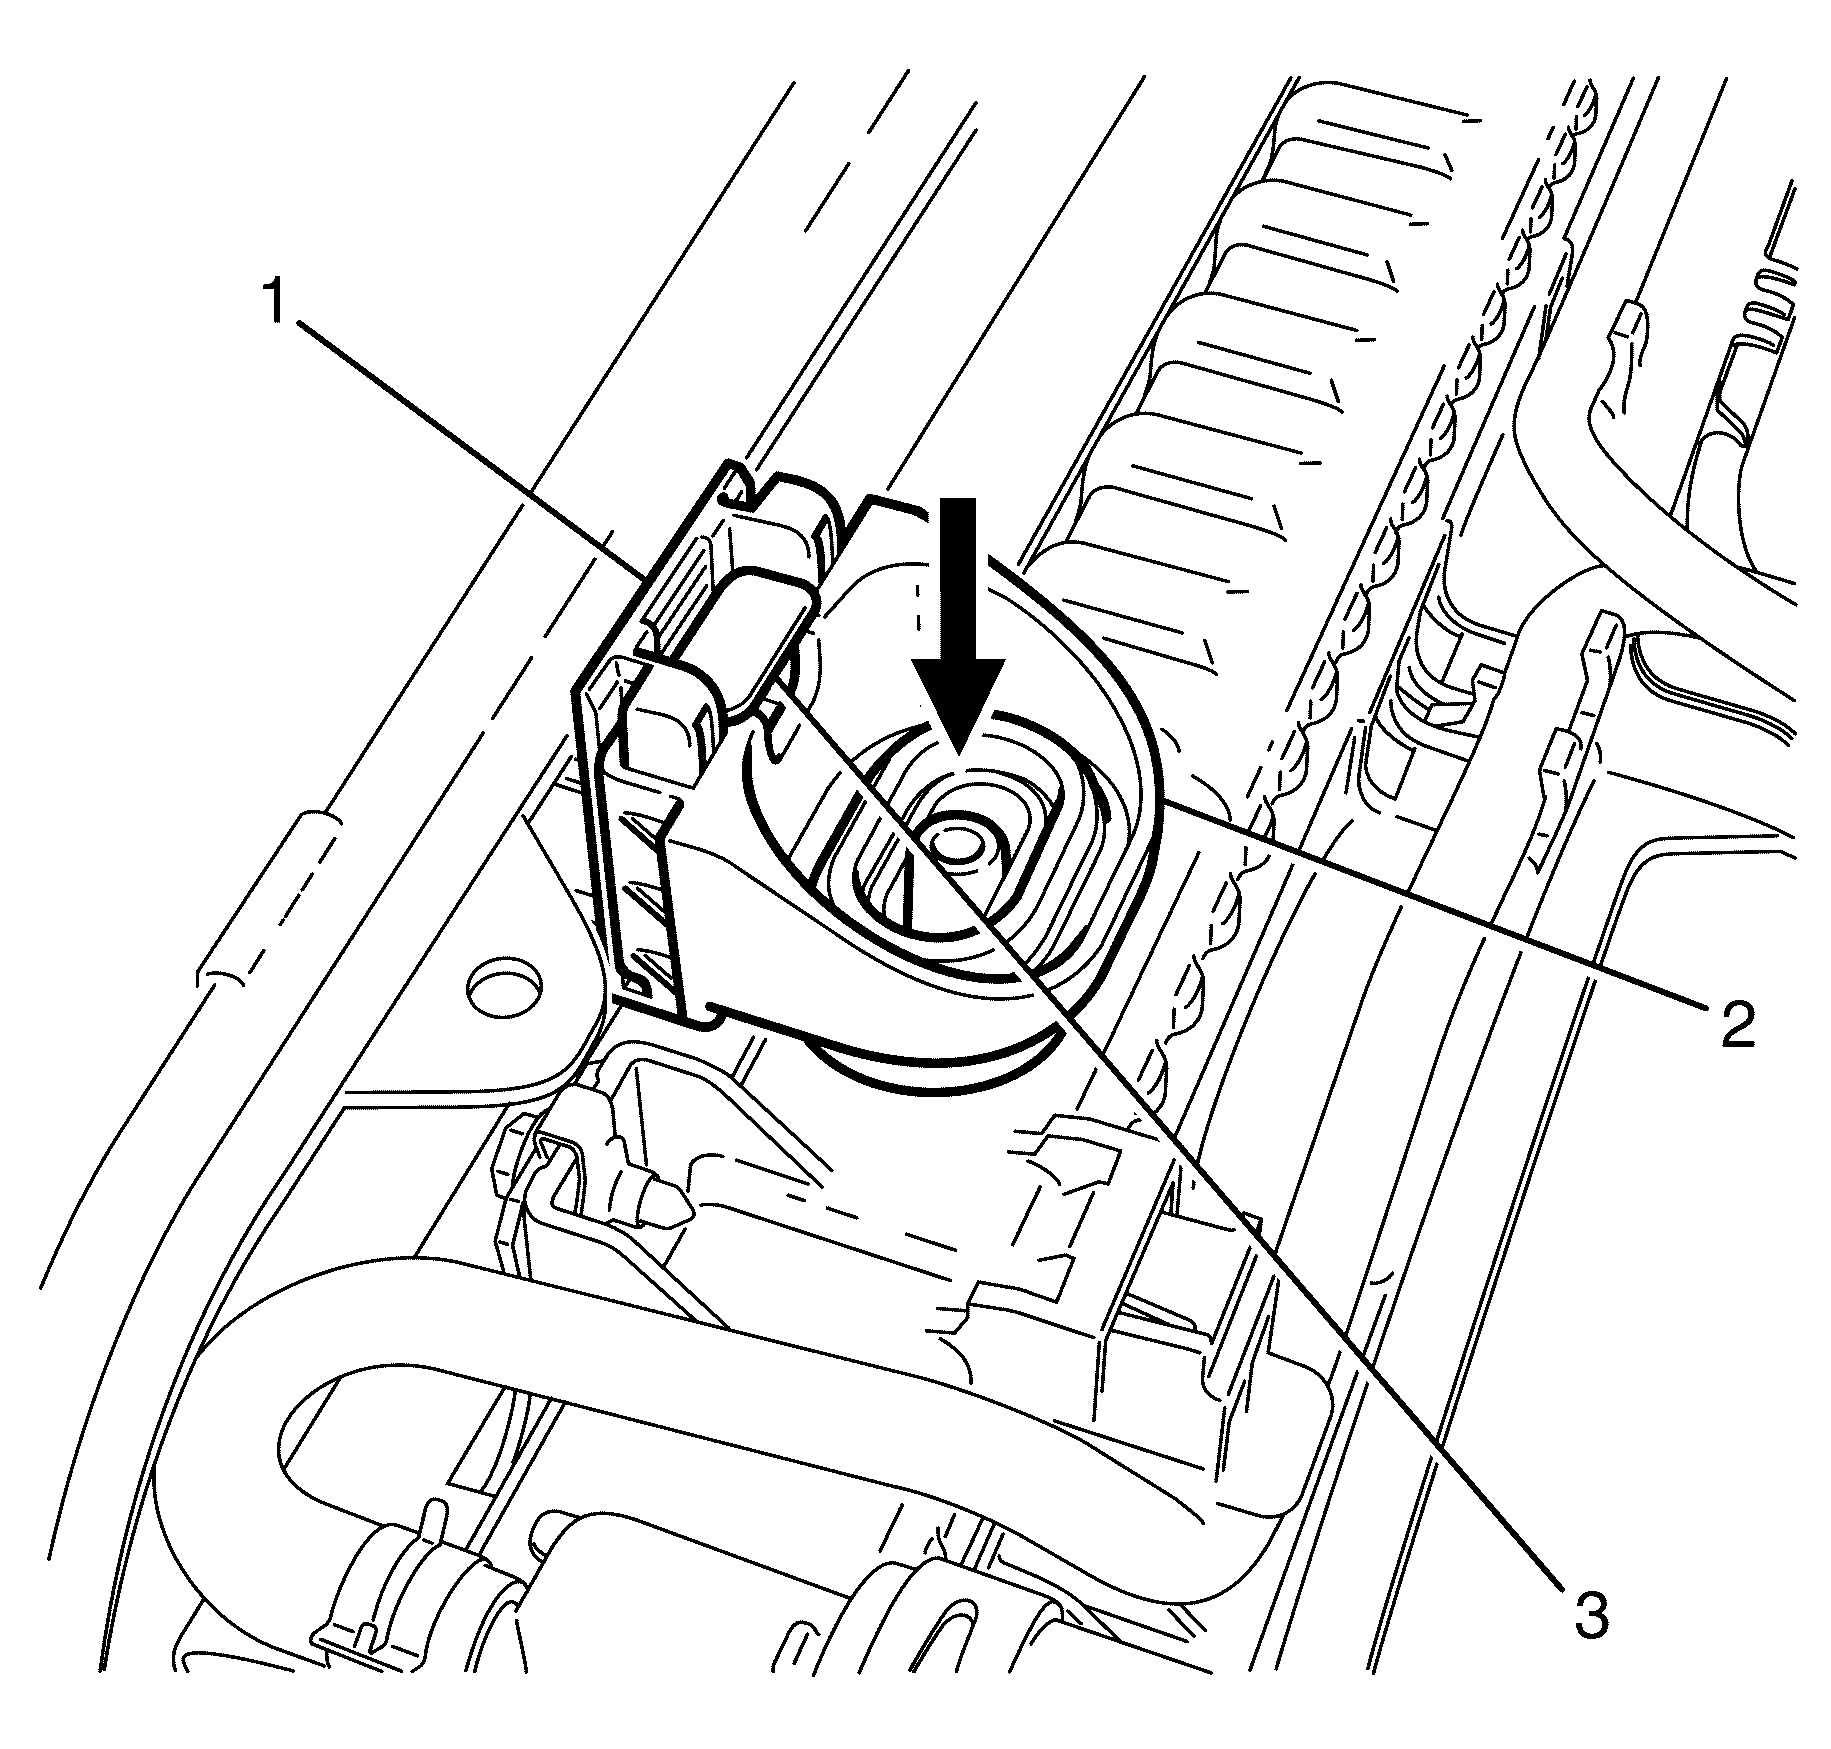
- Remove the two radiator and condenser retaining bolts (1).
- Detach the condenser by lifting it out of the retaining brackets located on the radiator assembly.
- Remove the radiator and fan assembly, by tilting it forward and lifting it out of the rubber grommets located in the cross member.
Caution: Refer to Battery Disconnect Caution in the Preface section.
Caution: Refer to Radiator Cap Removal Caution in the Preface section.
Caution: Refer to Safety Glasses Caution in the Preface section.
Caution: Refer to Vehicle Lifting Caution in the Preface section.
Caution: Refer to General Repair Instructions in the Preface section.
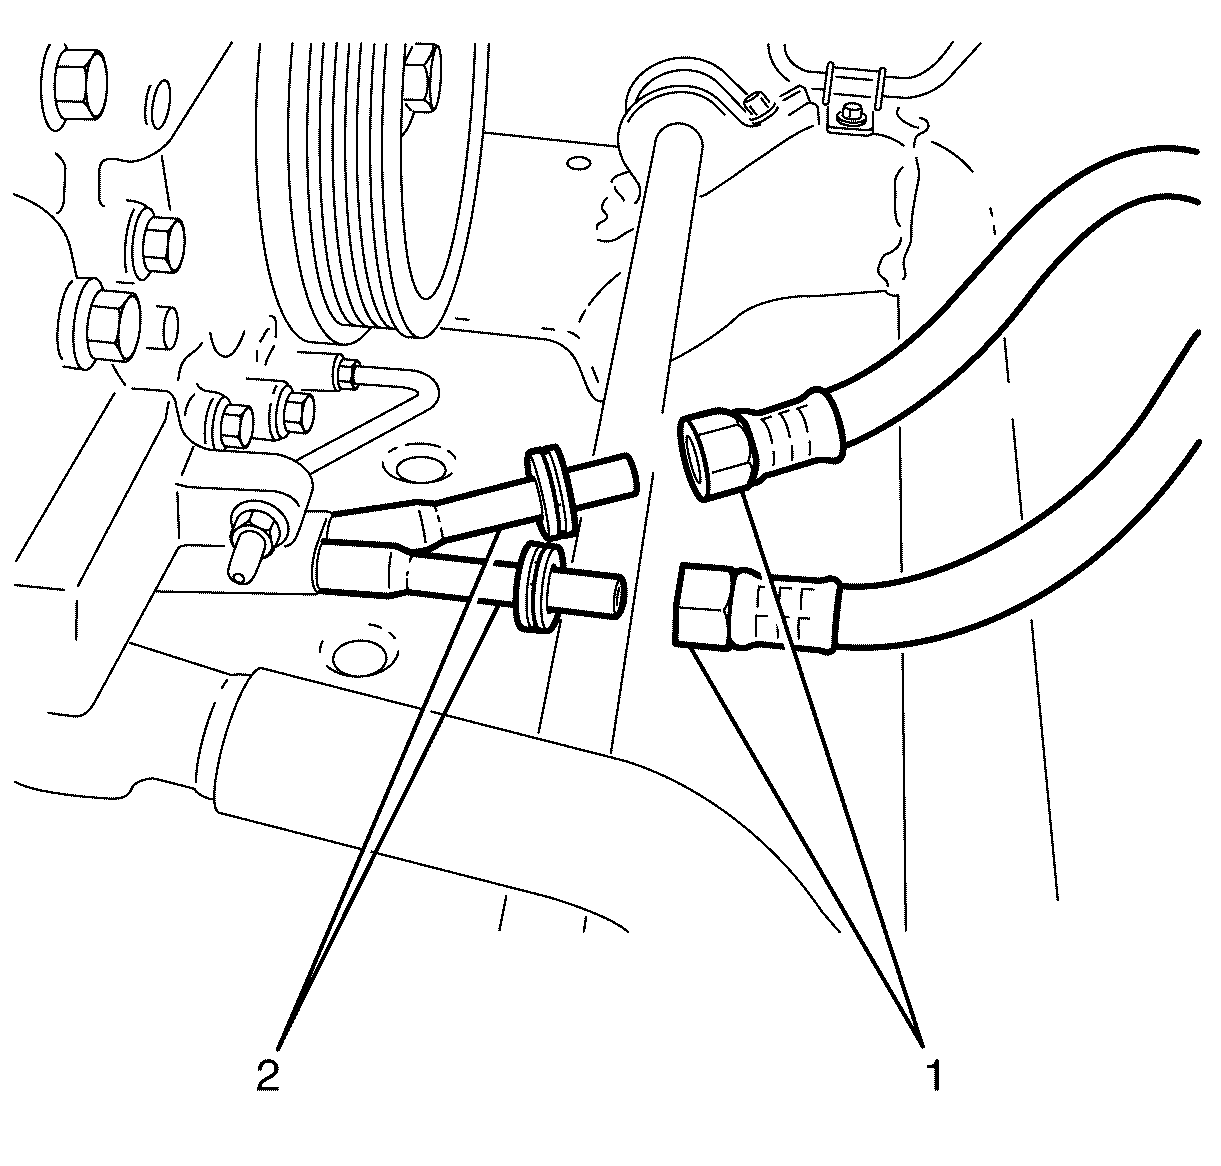
| • | Detach plastic cover from hose fitting and slide along pipe |
| • | Open the AU-525 then close and clip around the hose to be disconnected. |
| • | While holding the flexible hose (1) push the hose inwards with one hand, then pull back to separate from the steel hose piping (2). |
| • | Repeat procedure for the second fitting. |
Notice: Refer to General Repair Instructions in the Preface section.

Installation Procedure
- Install the radiator into the rubber retaining grommets located in the cross member.
- Install the condenser into the radiator
- Install the two radiator and condenser retaining bolts (1).
- Install the radiator retaining brackets (2), onto the radiator slide pin (1).
- Secure the retaining brackets by pushing the securing lock (3) downwards until lock reaches bottom of radiator bracket.
- Connect the cooling fans electrical connector (2) to the main wiring loom connector (1)
- Connect the flexible hoses (1) to the transmission cooler lines (2), listen for an audible click to confirm fitting.
- Push plastic cover forward along pipe and clip onto hose fitting.
- Raise and support vehicle. Refer to Lifting and Jacking the Vehicle.
- Install the outlet hose to the radiator. Refer to Radiator Outlet Hose Replacement.
- Lower vehicle.
- Install the coolant air bleed hose. Refer to Engine Coolant Air Bleed Hose Replacement.
- Install the coolant recovery reservoir hose. Refer to Coolant Recovery Reservoir Replacement.
- Install the inlet hose. Refer to Radiator Inlet Hose Replacement.
- Install the air deflector. Refer to Front Air Deflector Replacement.
- Install the mass air flow meter. Refer to Mass Airflow Sensor/Intake Air Temperature Sensor Replacement or Mass Airflow Sensor/Intake Air Temperature Sensor Replacement.
- Install the air intake duct. Refer to Air Cleaner Inlet Duct Replacement.or Air Cleaner Inlet Duct Replacement.
- Install the radiator air baffle and deflector. Refer to Radiator Air Upper Baffle and Deflector Replacement.
- Install the engine cover. Refer to Engine Cover Replacementor Engine Cover Replacement.
- Install the battery ground lead to the vehicle. Refer to Battery Negative Cable Disconnection and Connection.
- Fill the cooling system. Refer to Cooling System Draining and Filling.
- Inspect cooling system for leaks.

Notice: Refer to Fastener Notice in the Preface section.
Tighten
Tighten the radiator and condenser bolts to 11 N·m
(97 lb in).
Caution: Refer to General Repair Instructions in the Preface section.
Caution: Refer to Safety Glasses Caution in the Preface section.
Caution: Refer to Vehicle Lifting Caution in the Preface section.
