Front Floor Console Replacement Non-Full Length
Removal Procedure
- Remove the shift control lever (manual transmission only). Refer to Shift Lever Replacement in Manual Transmission.
- Remove the console from the floor.
Pull up on the console in order to release the retainer clips.
Installation Procedure
- Use care when installing the console so the clips do not bend.
- install the console to the floor.
- Install the shift lever (manual transmission only). Refer to Shift Lever Replacement in Manual Transmission.
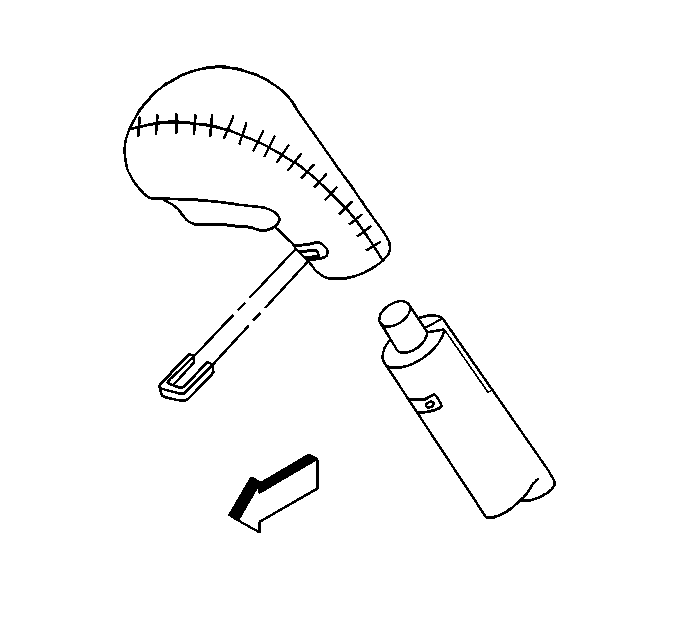
Front Floor Console Replacement Full Length (Auto Trans)
Removal Procedure
- Remove the shift handle retaining clip at the front of the handle.
- Remove the shift handle from the shift lever.
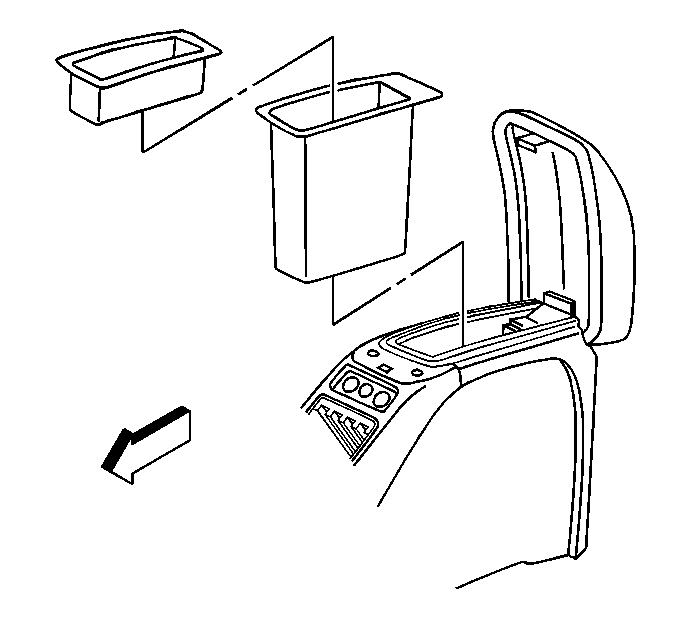
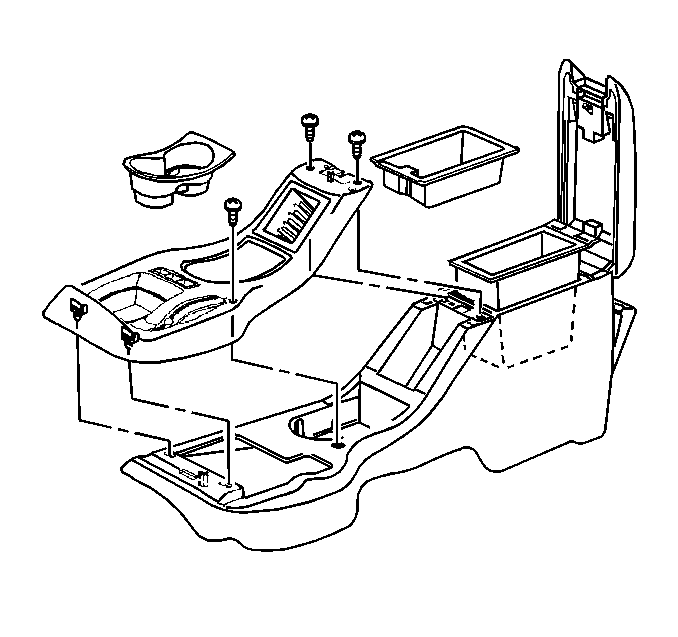
- Open the console lid.
- Remove the console compartment inserts.
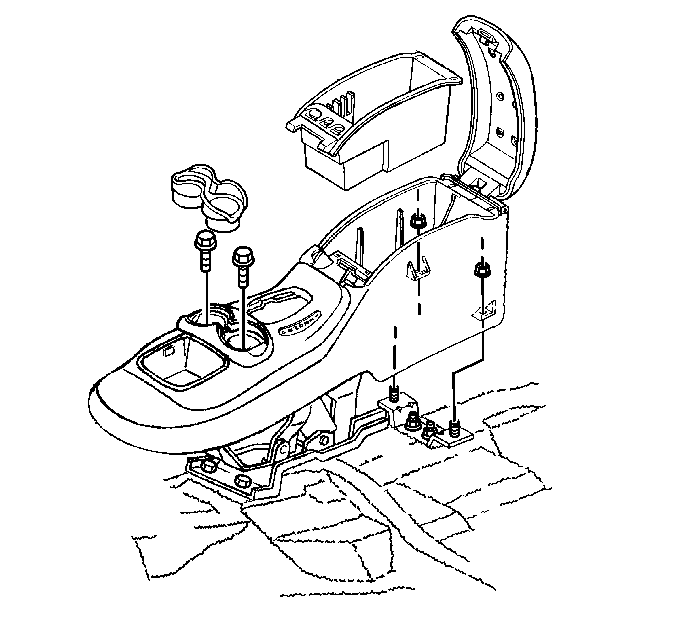
- Remove the nuts that retain the front of the console.
- Remove the cup holder insert.
- Remove the screws that retain the front of the console to the vehicle.
- Remove the console from the vehicle.
Installation Procedure
- Install the console to the vehicle.
- Install the screws that retain the front of the console.
- Install the cup holder insert.
- Install the nuts that retain the rear of the console.
- Install the console compartment insert.
- Install the console compartment insert screws.
- Install the shift handle to the shift lever.
- Install the shift handle retaining clip at the front of the handle.
Notice: Use the correct fastener in the correct location. Replacement fasteners must be the correct part number for that application. Fasteners requiring replacement or fasteners requiring the use of thread locking compound or sealant are identified in the service procedure. Do not use paints, lubricants, or corrosion inhibitors on fasteners or fastener joint surfaces unless specified. These coatings affect fastener torque and joint clamping force and may damage the fastener. Use the correct tightening sequence and specifications when installing fasteners in order to avoid damage to parts and systems.
Tighten
Tighten the screws to 7 N·m (63 lb in).
Tighten
Tighten the nuts to 10 N·m (89 lb in).
Tighten
Tighten the nuts to 1.9 N·m (17 lb in).
Front Floor Console Replacement Full Length (Manual Trans)
Removal Procedure
- Remove the shift control lever. Refer to Shift Lever in Manual Transmission.
- Remove the cup holder insert.
- Remove the screws that retain the trim plate to the console.
- Remove the trim plate from the console.
- Open the storage compartment cover.
- Remove the storage compartment.
- Remove the nuts that retain the console to the vehicle.
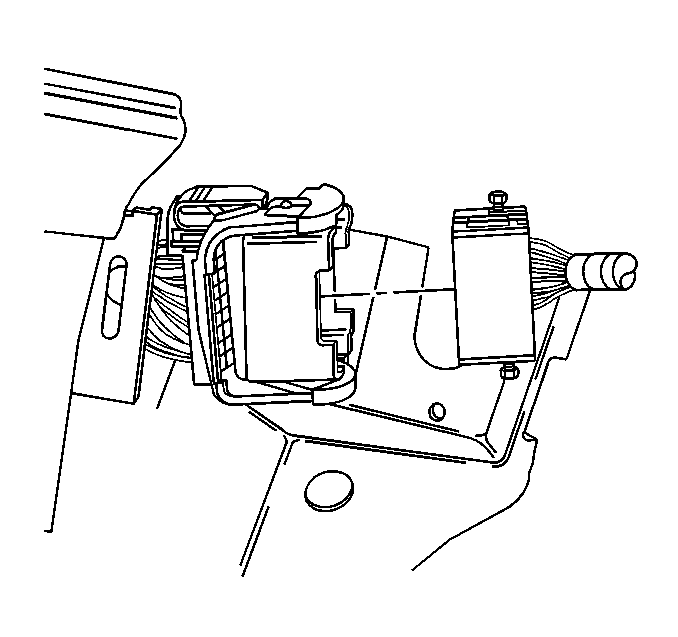
- Remove the electrical connector, if equipped.
- Remove the console from the vehicle.
Installation Procedure
- Install the console to the vehicle.
- Install the electrical connector, if equipped.
- Install the nuts that retain the console to the vehicle.
- Install the storage compartment to the vehicle.
- Install the trim plate to the console.
- Install the screws that retain the trim plate to the console.
- Install the cup holder insert.
- Install the shift control lever. Refer to Shift Lever in Manual Transmission.
Notice: Use the correct fastener in the correct location. Replacement fasteners must be the correct part number for that application. Fasteners requiring replacement or fasteners requiring the use of thread locking compound or sealant are identified in the service procedure. Do not use paints, lubricants, or corrosion inhibitors on fasteners or fastener joint surfaces unless specified. These coatings affect fastener torque and joint clamping force and may damage the fastener. Use the correct tightening sequence and specifications when installing fasteners in order to avoid damage to parts and systems.
Tighten
Tighten the nuts to 10 N·m (88 lb in).
Tighten
Tighten the nuts to 1.9 N·m (17 lb in).
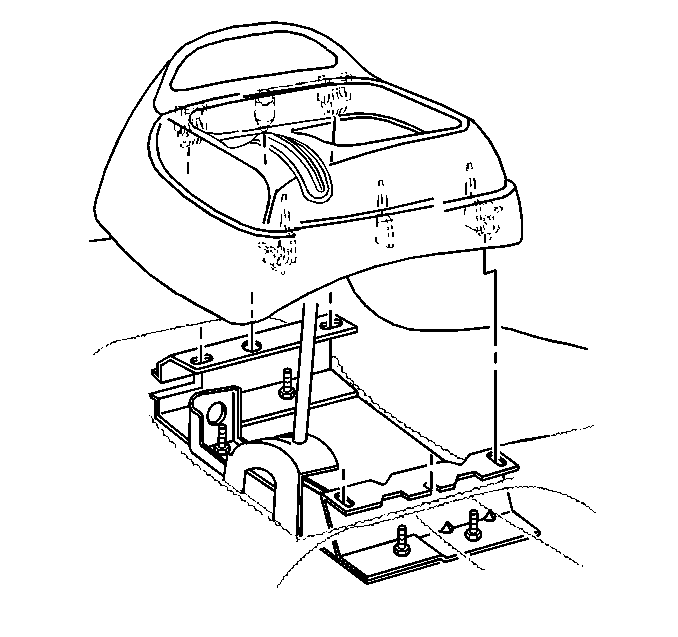
Front Floor Console Replacement Full Length (Envoy)
Removal Procedure
- Remove the front ashtray from the console by gently prying out the ashtray with a flat-bladed tool.
- Carefully lift up on the wood shifter assembly close-out in order to remove the assembly from the console. Rotate the closeout panel in order to fit the panel over the shift handle.
- Remove the passenger side toe-panel by gently prying out the panel with a flat-bladed tool.
- Disconnect the instrument panel to console wiring harness connection.
- Open the armrest in order to expose and remove the convenience tray from the storage compartment.
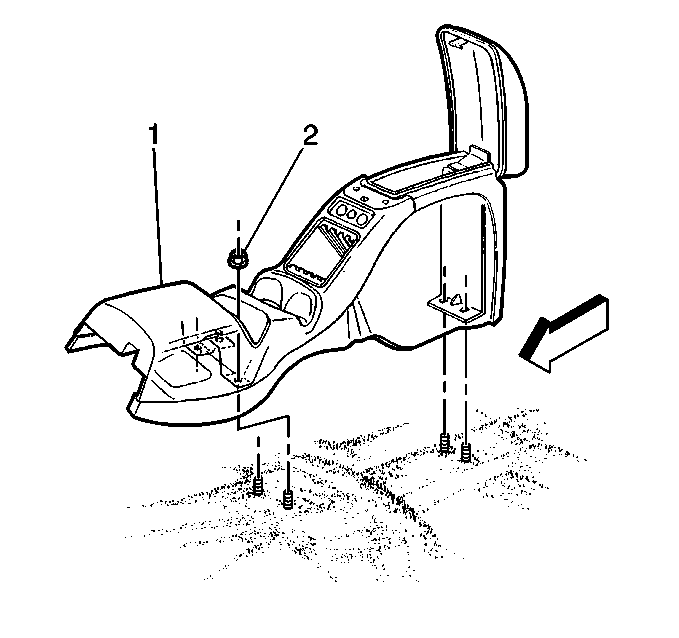
- Remove the fasteners (2) that retain the console (1) to the shifter assembly and the vehicle floor.
- Remove the console from the vehicle by lifting the console over the floor studs.
- If replacing the center console, remove the compact disc player from the console. Refer to Remote CD Changer Replacement in Entertainment.
- Remove the amplifier from the console. Refer to Radio Speaker Amplifier Replacement in Entertainment.
- Remove the rear seat audio control from the console. Refer to Rear Seat Audio Control Replacement in Entertainment.
- Remove and retain the console wiring harness for use on the new console.
Installation Procedure
- Install the console wiring harness to the console.
- Install the rear seat audio control to the console. Refer to Rear Seat Audio Control Replacement in Entertainment.
- Install the amplifier to the console. Refer to Radio Speaker Amplifier Replacement in Entertainment.
- Install the compact disc player to the console. Refer to Remote CD Changer Replacement in Entertainment.
- Install the console to the vehicle by lifting the console (1) over and onto the floor studs.
- Install the fasteners (2) that retain the console to the vehicle.
- Install the convenience tray to the armrest storage compartment.
- Connect the instrument panel to console wiring harness connection.
- Install the passenger side toe-panel by firmly pressing the panel into place.
- Carefully press the wood shifter assembly close-out into place. Rotate the closeout panel in order to fit the panel over the shift handle.
- Install the front ashtray to the console by firmly pressing the ashtray into place.
Important: Do not pinch the instrument panel to console wiring harness during this process.
Notice: Use the correct fastener in the correct location. Replacement fasteners must be the correct part number for that application. Fasteners requiring replacement or fasteners requiring the use of thread locking compound or sealant are identified in the service procedure. Do not use paints, lubricants, or corrosion inhibitors on fasteners or fastener joint surfaces unless specified. These coatings affect fastener torque and joint clamping force and may damage the fastener. Use the correct tightening sequence and specifications when installing fasteners in order to avoid damage to parts and systems.
Tighten
Tighten the console to the vehicle retainers to 10 N·m
(88 lb in).
