Battery Positive and Negative Cable Replacement LH2
Removal Procedure
- Disconnect the battery negative cable from the battery. Refer to Battery Negative Cable Disconnection and Connection .
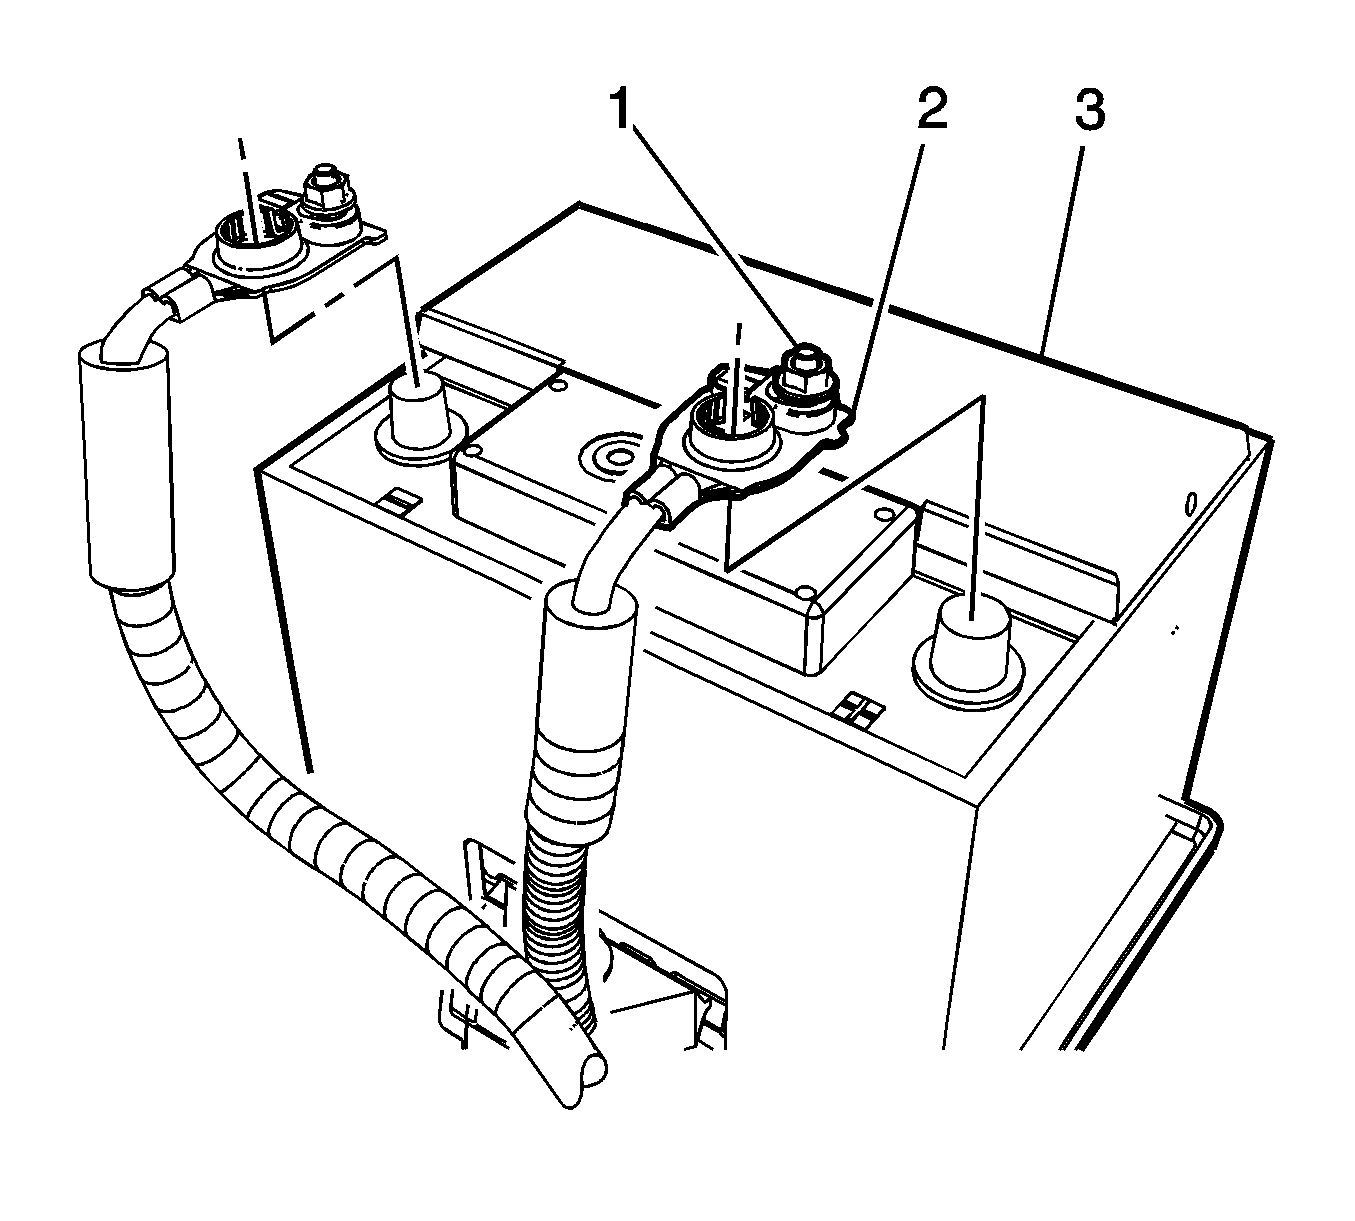
- Loosen the battery positive cable nut (1) and disconnect the battery positive cable (2) from the battery (3).
- Open the stud cover on the fuse/relay center.
- Remove the battery positive cable nut and disconnect the battery positive cable lead from the fuse/relay center stud.
- Remove the battery cable clips.
- Remove the battery negative cable to frame rail nut and disconnect the battery negative cable from the frame rail stud.
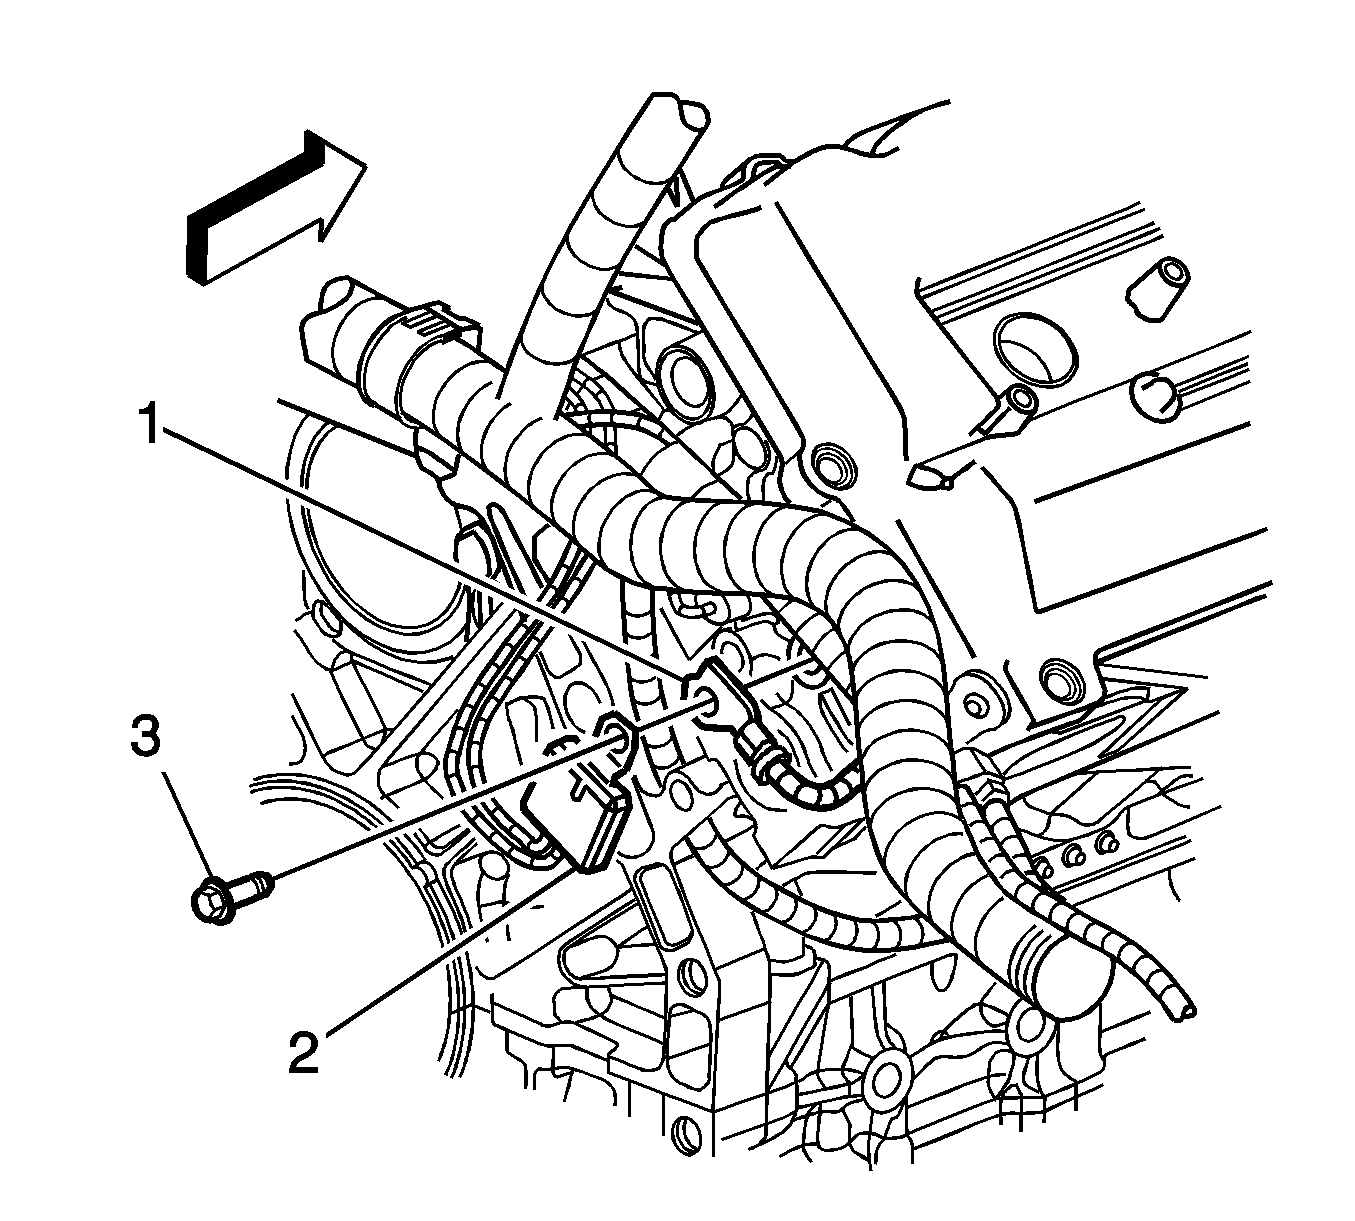
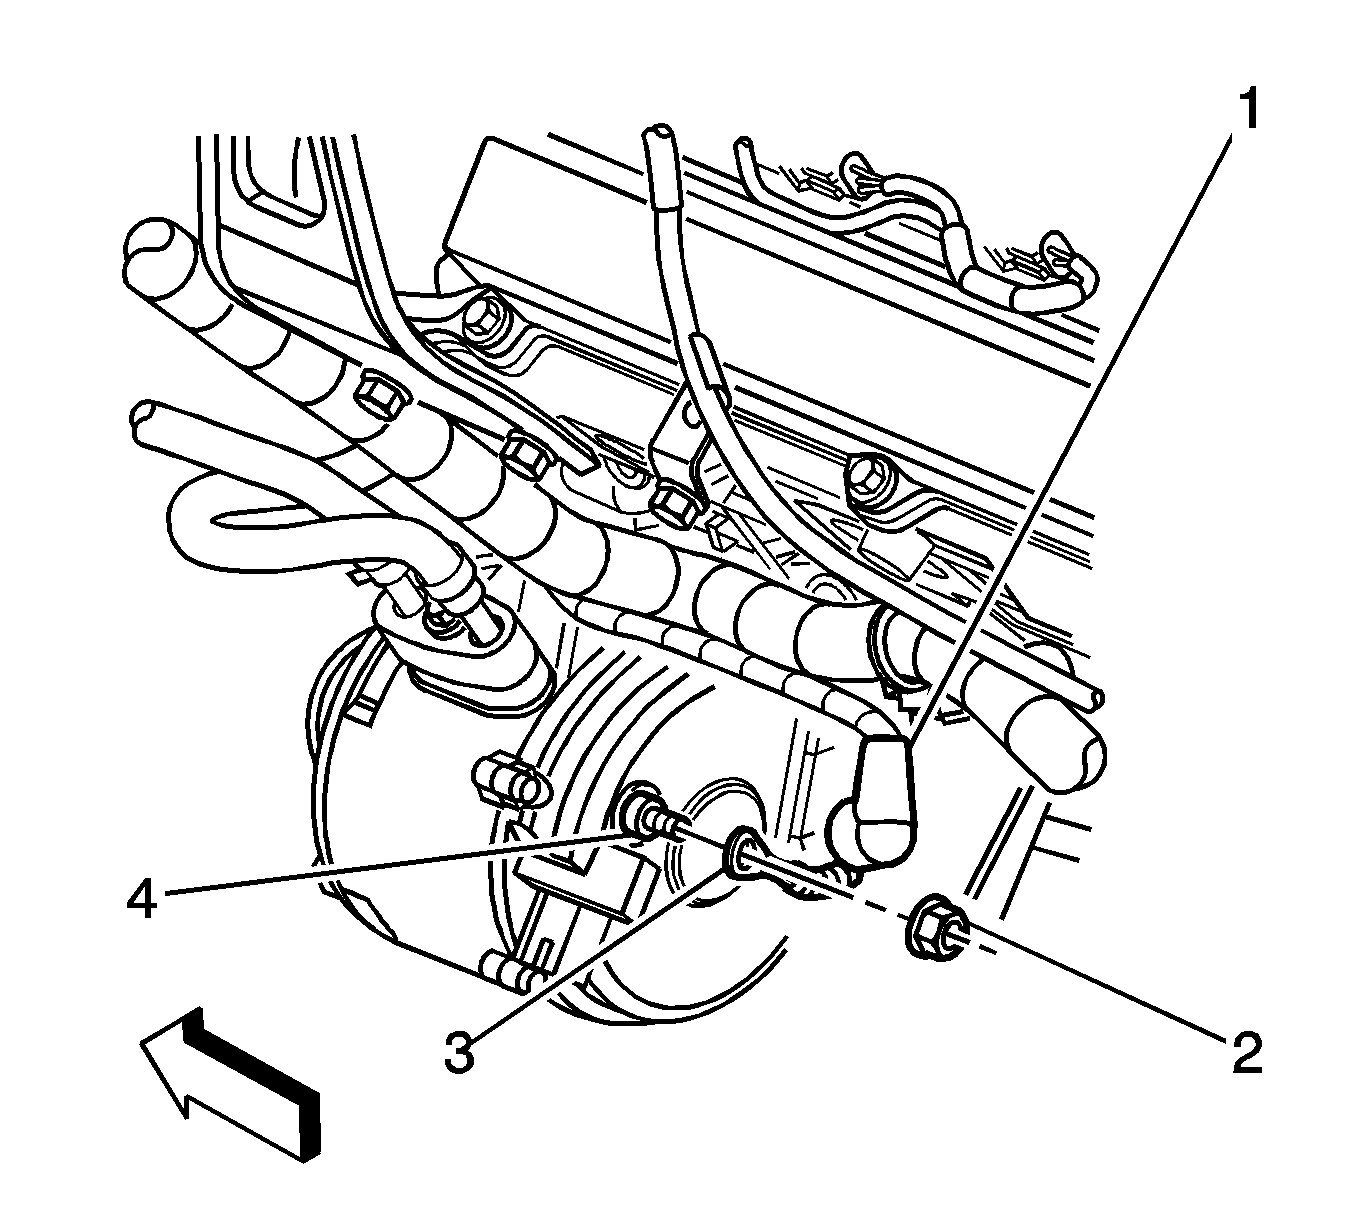
- Remove the battery cable bolt (3) securing the battery negative cable (1) and engine harness ground pack (2) to the right rear cylinder head.
- Remove the intake manifold. Refer to Intake Manifold Replacement .
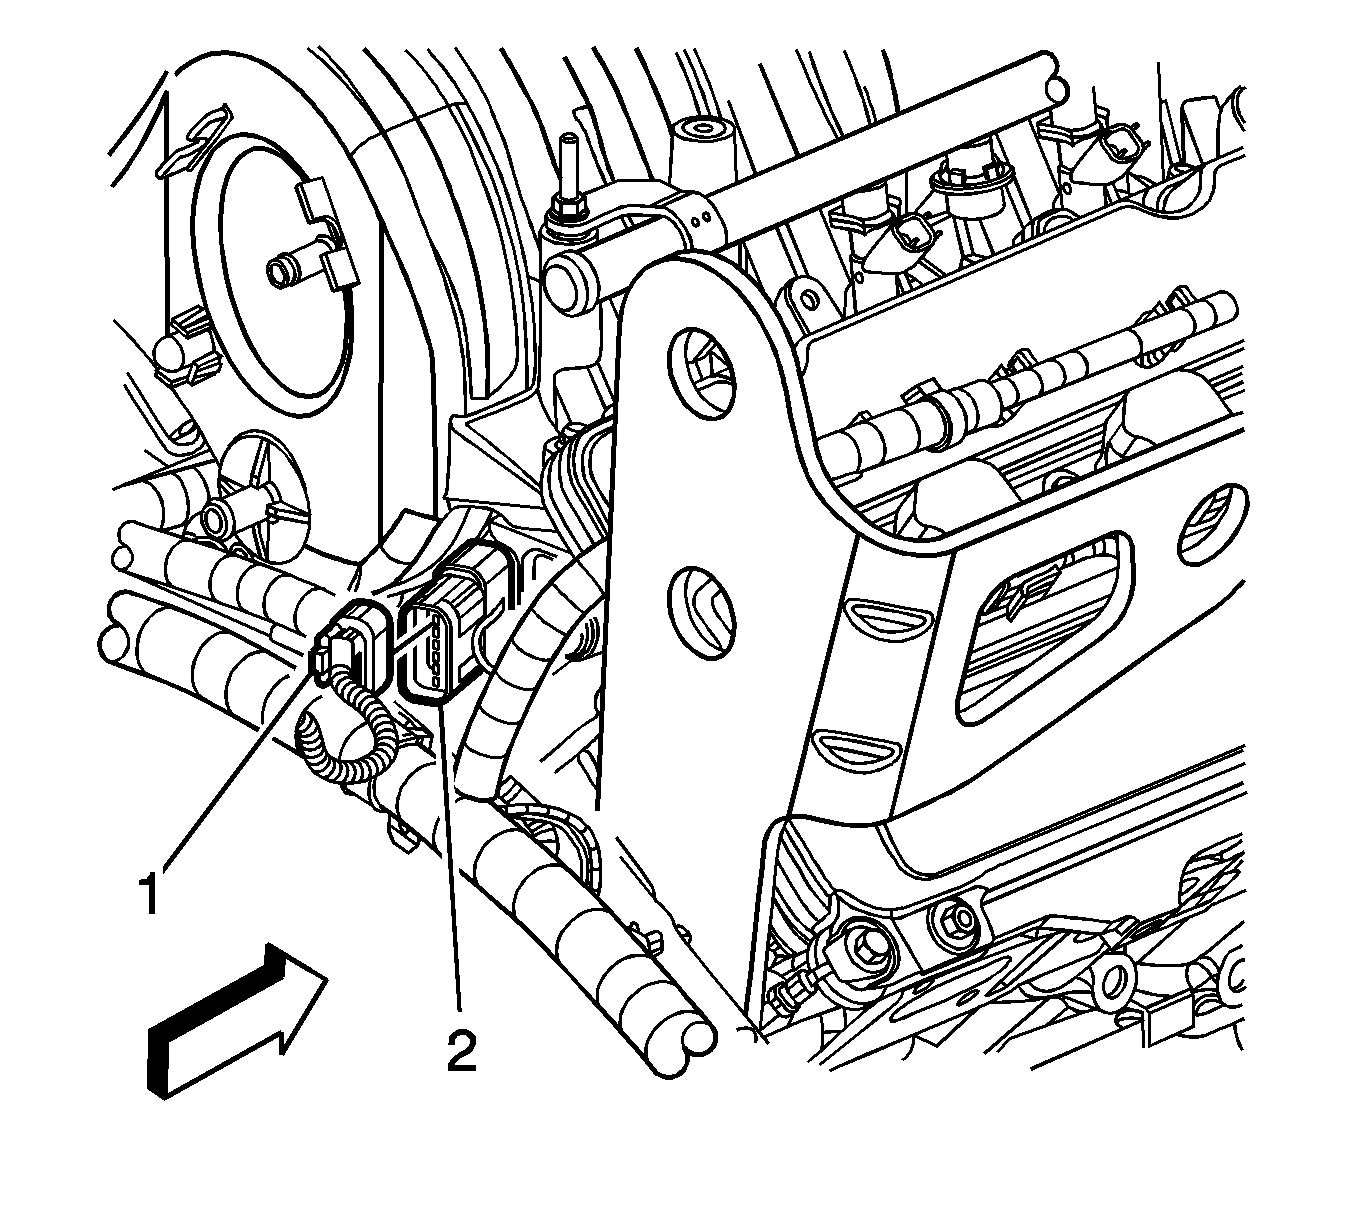
- Disconnect the starter jumper wiring harness (2) from the engine harness connector (1).
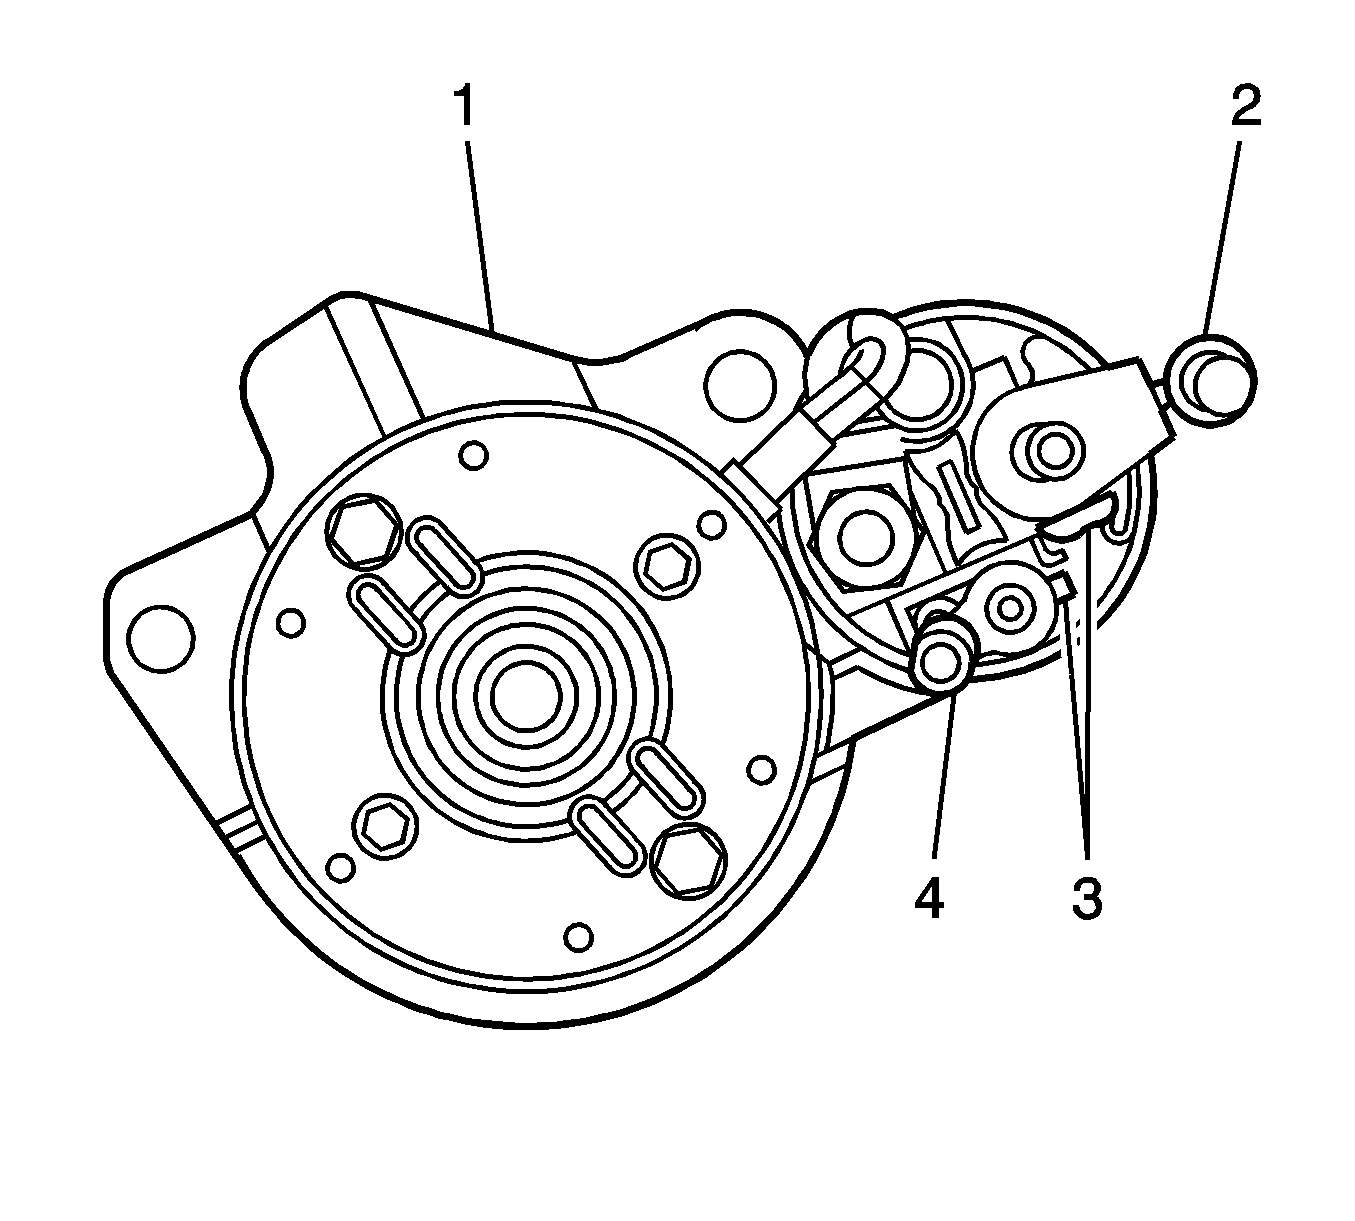
- Remove the positive battery cable terminal nut and disconnect the terminals (2) from the starter solenoid.
- Disconnect the battery positive/starter cable from the generator:
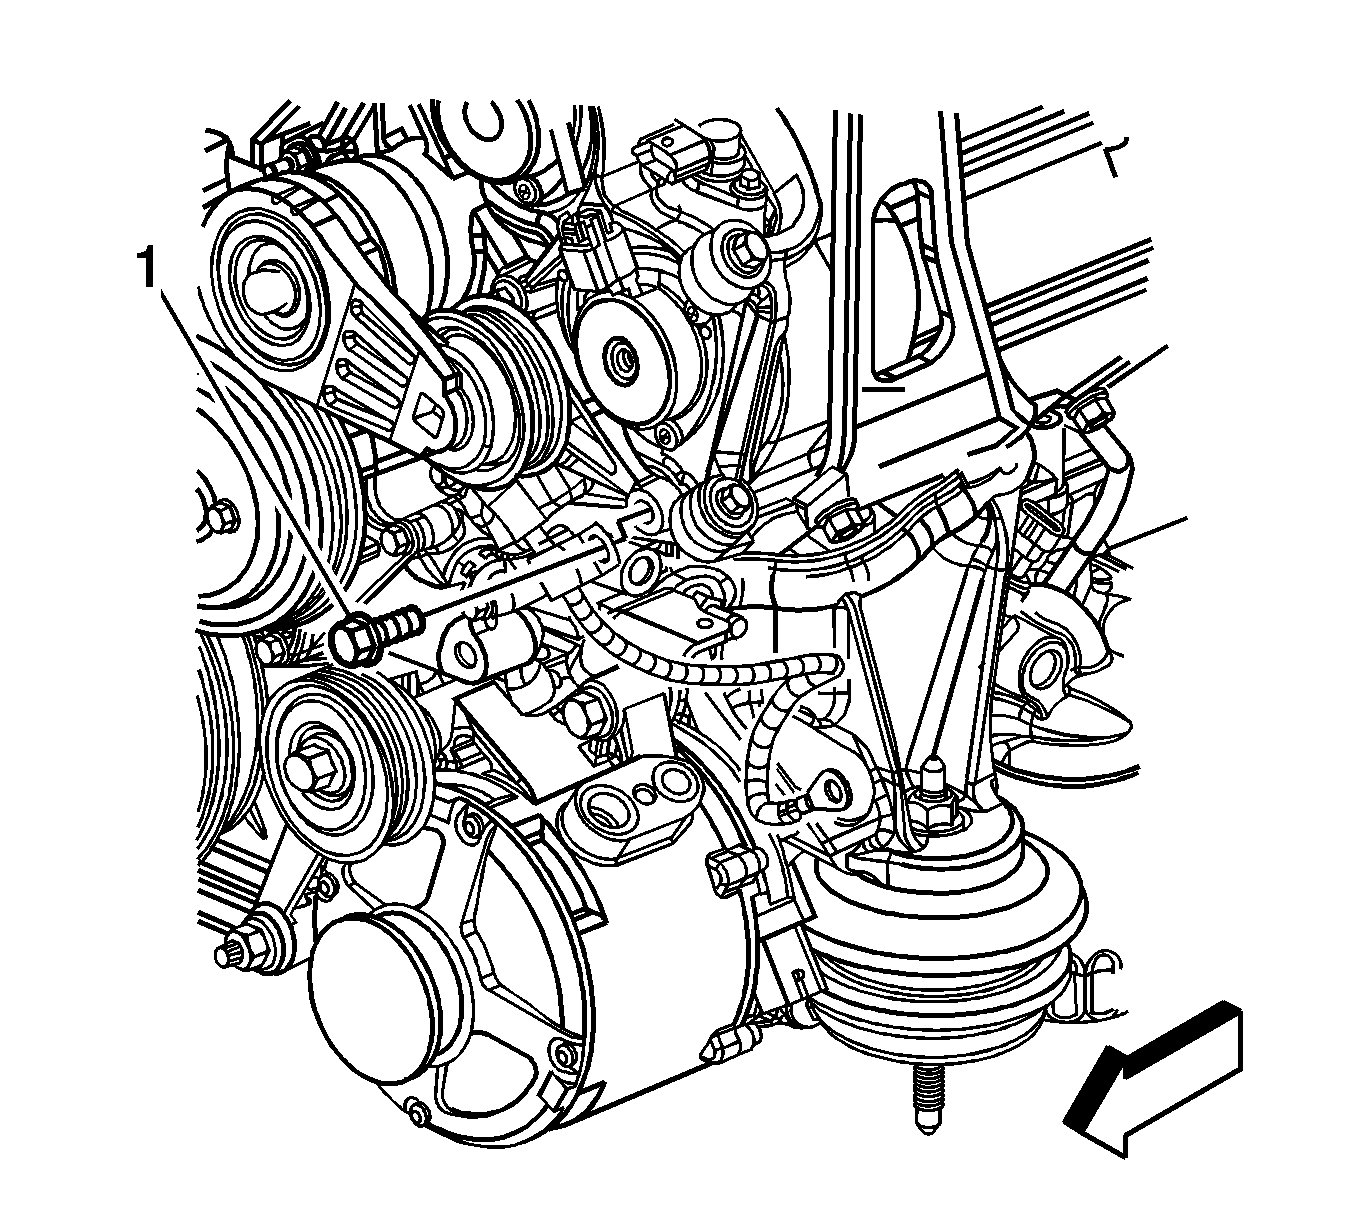
- Remove the positive battery cable routing clip bolt (1) securing the cable and clip to the front of the engine.
- Remove the battery positive and negative cable assembly.
| 11.1. | Slide the boot (1) back along the cable. |
| 11.2. | Remove the battery positive/starter cable nut (2). |
| 11.3. | Remove the battery positive/starter cable terminal (3) from the stud (4). |
Installation Procedure
- Install the battery positive and negative cable assembly.
- Connect the battery positive/starter/generator cable to the generator.
- Install the positive battery cable routing clip bolt (1) into the cable retaining clip and attach to the front of the engine.
- Install the battery positive cable terminals and nut to the starter solenoid.
- Connect the starter jumper wiring harness (2) to the engine harness connector (1).
- Install the intake manifold. Refer to Intake Manifold Replacement .
- Position the battery negative cable (1) and engine harness ground pack (2) to the right rear cylinder head and install the battery cable bolt (3).
- Position the battery negative cable to frame rail stud and install the negative battery cable to frame rail nut.
- Install the battery clips.
- Position the positive battery cable lead to the fuse/relay center stud and install the positive battery cable nut.
- Close the stud cover on the fuse/relay center.
- Connect the positive battery cable (2) to the battery (3) and tighten the nut (1).
- Connect the negative battery cable. Refer to Battery Negative Cable Disconnection and Connection .
Notice: Refer to Fastener Notice in the Preface section.
| 2.1. | Install the cable terminal (3) on the generator stud (4). The wire should be between the 2 and 4 o'clock position. |
| 2.2. | Install the terminal nut (2). |
Tighten
Tighten the generator nut to 20 N·m (15 lb ft).
| 2.3. | Slide the boot (1) back into place over the stud (4) and the nut (2). |
Tighten
Tighten the bolt to 35 N·m (26 lb ft).
Important: Ensure the engine harness leads (2) are positioned on the solenoid prior to the positive cable terminal being installed.
Tighten
| • | Tighten the large nut (2) to 12 N·m (106 lb in). |
| • | Tighten the small nut to 4 N·m (35 lb in). |
Tighten
Tighten the battery positive cable routing clip bolt to 35 N·m (26 lb ft).
Tighten
Tighten the battery negative cable to frame rail nut to 11 N·m (97 lb in).
Tighten
Tighten the positive battery cable nut to 12 N·m (106 lb in).
Tighten
Tighten the positive battery cable nut to 8 N·m (71 lb in).
Battery Positive and Negative Cable Replacement LC3
Removal Procedure
- Disconnect the battery negative cable from the battery. Refer to Battery Negative Cable Disconnection and Connection .
- Loosen the battery positive cable nut (1) and disconnect the battery positive cable (2) from the battery (3).
- Open the stud cover on the fuse/relay center.
- Remove the battery positive cable nut and disconnect the battery positive cable lead from the fuse/relay center stud.
- Remove the battery cable clips.
- Remove the battery negative cable to frame rail nut and disconnect the battery negative cable from the frame rail stud.
- Remove the battery cable bolt (3) securing the battery negative cable (1) and engine harness ground pack (2) to the right rear cylinder head.
- Remove the supercharger. Refer to Supercharger Replacement .
- Disconnect the starter jumper wiring harness (2) from the engine harness connector (1).
- Remove the positive battery cable terminal nut and disconnect the terminals (2) from the starter solenoid.
- Disconnect the battery positive/starter cable from the generator:
- Remove the positive battery cable routing clip bolt (1) securing the cable and clip to the front of the engine.
- Remove the battery positive and negative cable assembly.
| 11.1. | Slide the boot (1) back along the cable. |
| 11.2. | Remove the battery positive/starter cable nut (2). |
| 11.3. | Remove the battery positive/starter cable terminal (3) from the stud (4). |
Installation Procedure
- Install the battery positive and negative cable assembly.
- Connect the battery positive/starter/generator cable to the generator.
- Install the positive battery cable routing clip bolt (1) into the cable retaining clip and attach to the front of the engine.
- Install the battery positive cable terminals and nut to the starter solenoid.
- Connect the starter jumper wiring harness (2) to the engine harness connector (1).
- Install the supercharger. Refer to Supercharger Replacement .
- Position the battery negative cable (1) and engine harness ground pack (2) to the right rear cylinder head and install the battery cable bolt (3).
- Position the battery negative cable to frame rail stud and install the negative battery cable to frame rail nut.
- Install the battery clips.
- Position the positive battery cable lead to the fuse/relay center stud and install the positive battery cable nut.
- Close the stud cover on the fuse/relay center.
- Connect the positive battery cable (2) to the battery (3) and tighten the nut (1).
- Connect the negative battery cable. Refer to Battery Negative Cable Disconnection and Connection .
Notice: Refer to Fastener Notice in the Preface section.
| 2.1. | Install the cable terminal (3) on the generator stud (4). The wire should be between the 2 and 4 o'clock position. |
| 2.2. | Install the terminal nut (2). |
Tighten
Tighten the generator nut to 20 N·m (15 lb ft).
| 2.3. | Slide the boot (1) back into place over the stud (4) and the nut (2). |
Tighten
Tighten the bolt to 35 N·m (26 lb ft).
Important: Ensure the engine harness leads are positioned on the solenoid prior to the positive cable terminal being installed.
Tighten
| • | Tighten the large nut (2) to 12 N·m (106 lb in). |
| • | Tighten the small nut to 4 N·m (35 lb in). |
Tighten
Tighten the battery negative cable routing clip bolt to 35 N·m (26 lb ft).
Tighten
Tighten the battery negative cable to frame rail nut to 11 N·m (97 lb in).
Tighten
Tighten the positive battery cable nut to 12 N·m (106 lb in).
Tighten
Tighten the positive battery cable nut to 8 N·m (71 lb in).
