Special Tools
| • | EN 46109 Guide Pins |
| • | EN-47748 Supercharger Lift Bracket |
| • | EN-47833 Supercharger Service Holding Fixture |
Removal Procedure
- Remove the hood. Refer to Hood Replacement.
- Remove the engine sight shield. Refer to Intake Manifold Sight Shield Replacement.
- Remove the front supercharger inlet duct assembly. Refer to Supercharger Inlet Duct Assembly Replacement.
- Drain the charge air cooling system. Refer to Charge Air Cooling System Draining and Filling.
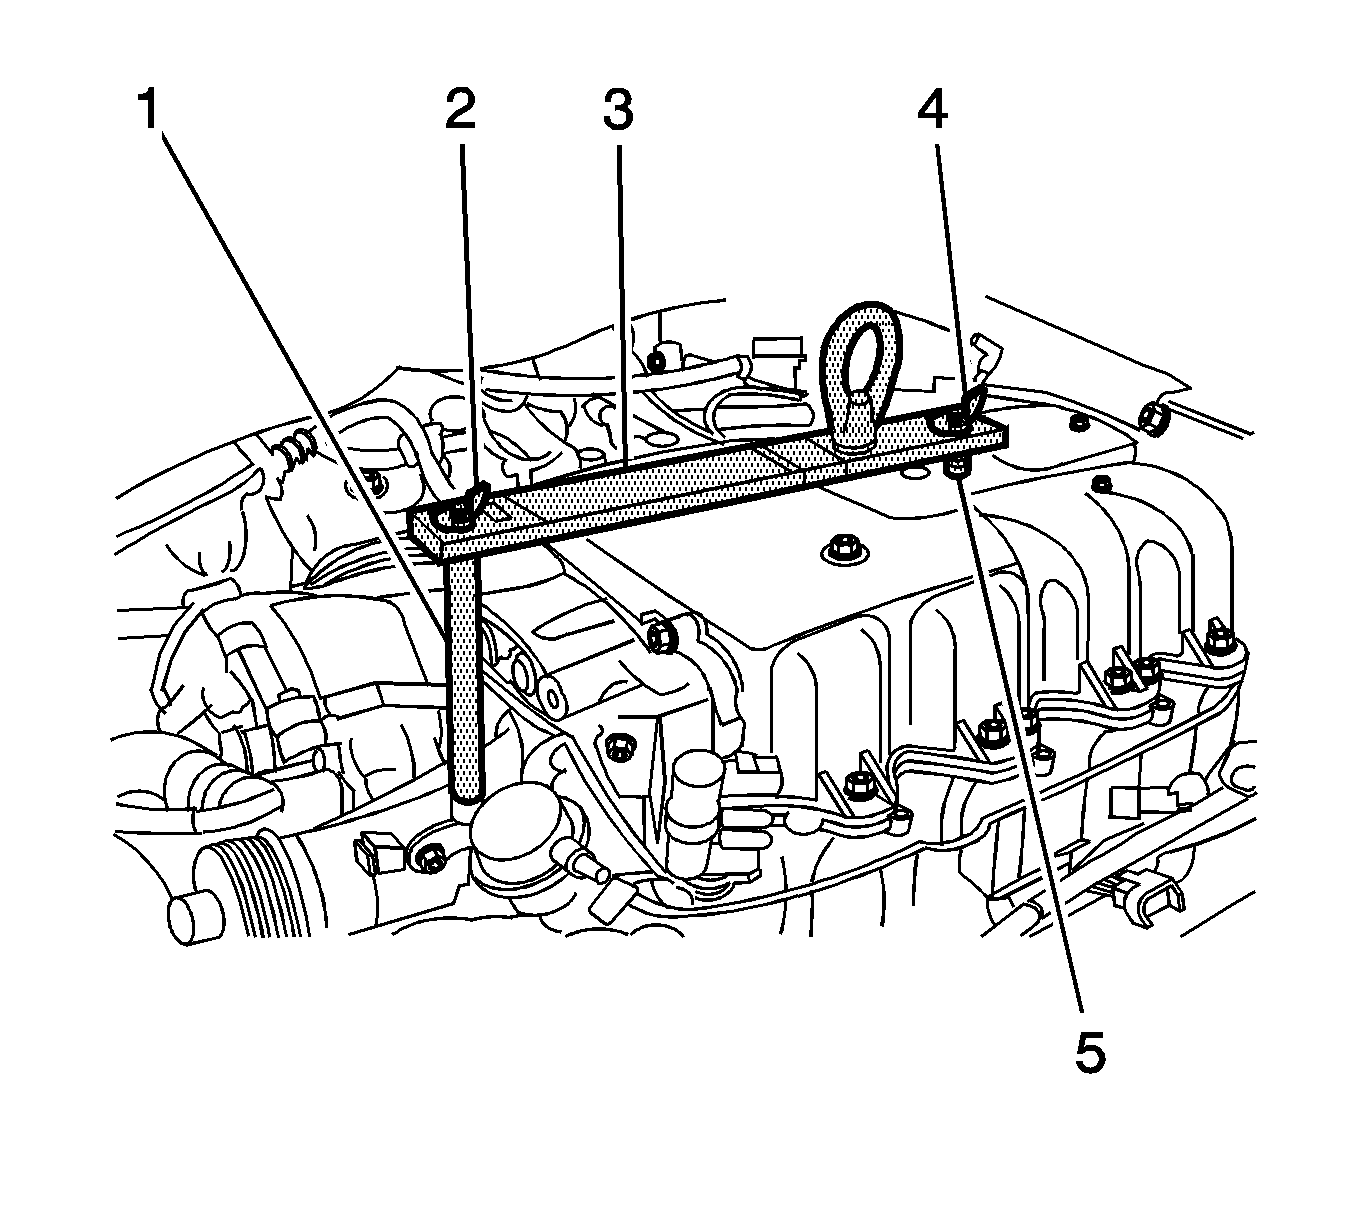
- Remove the front portion of the supercharger front manifold (2). It is not necessary to remove the hoses from the manifold. Discard the manifold O-ring seals. Position the hoses with manifold aside. Refer to Charge Air Cooler Front Manifold Replacement.
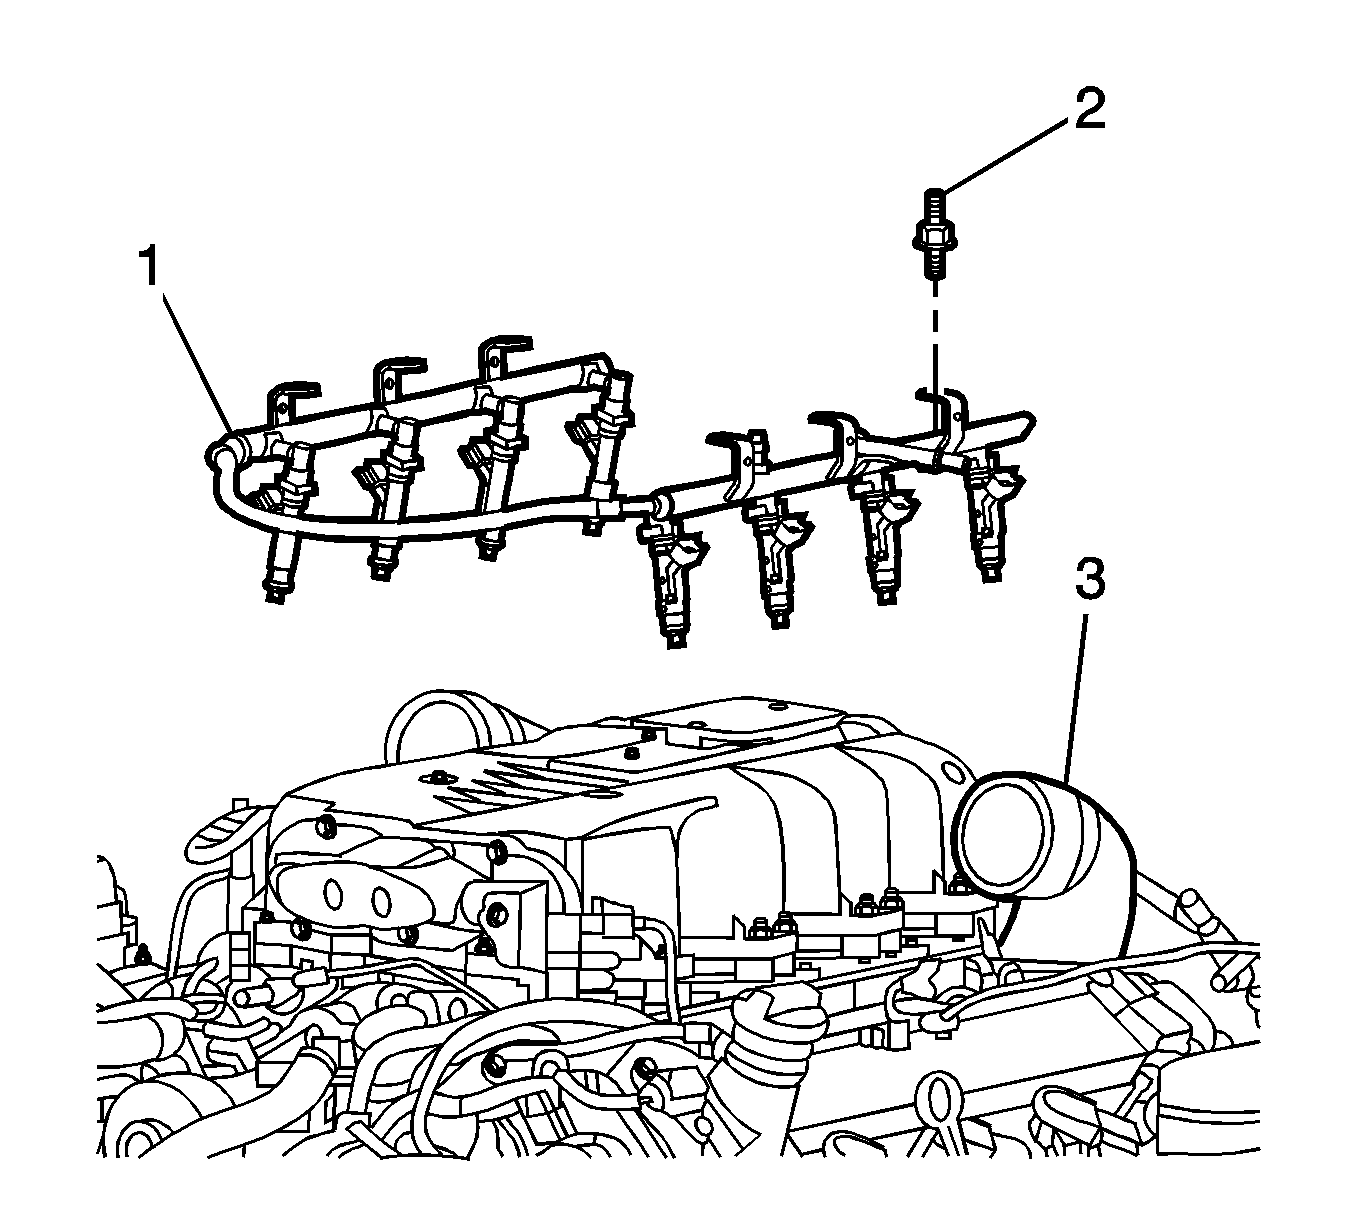
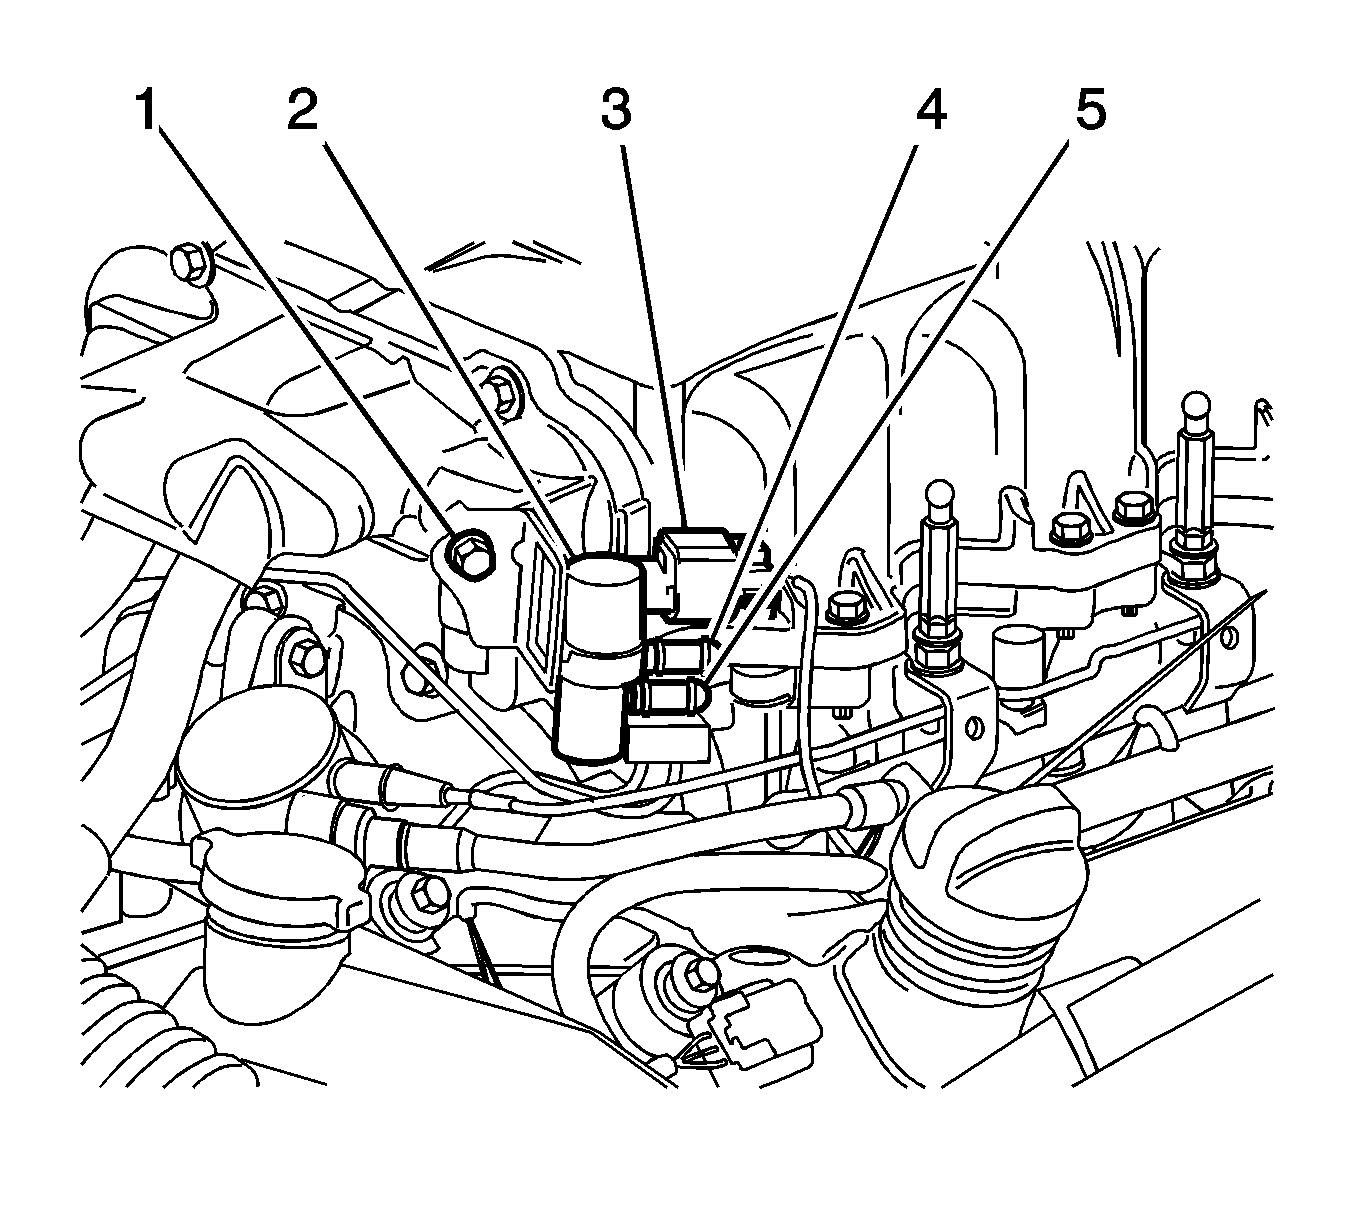
- Remove the fuel injector rail assembly (1). Refer to Fuel Injector and Fuel Rail Replacement.
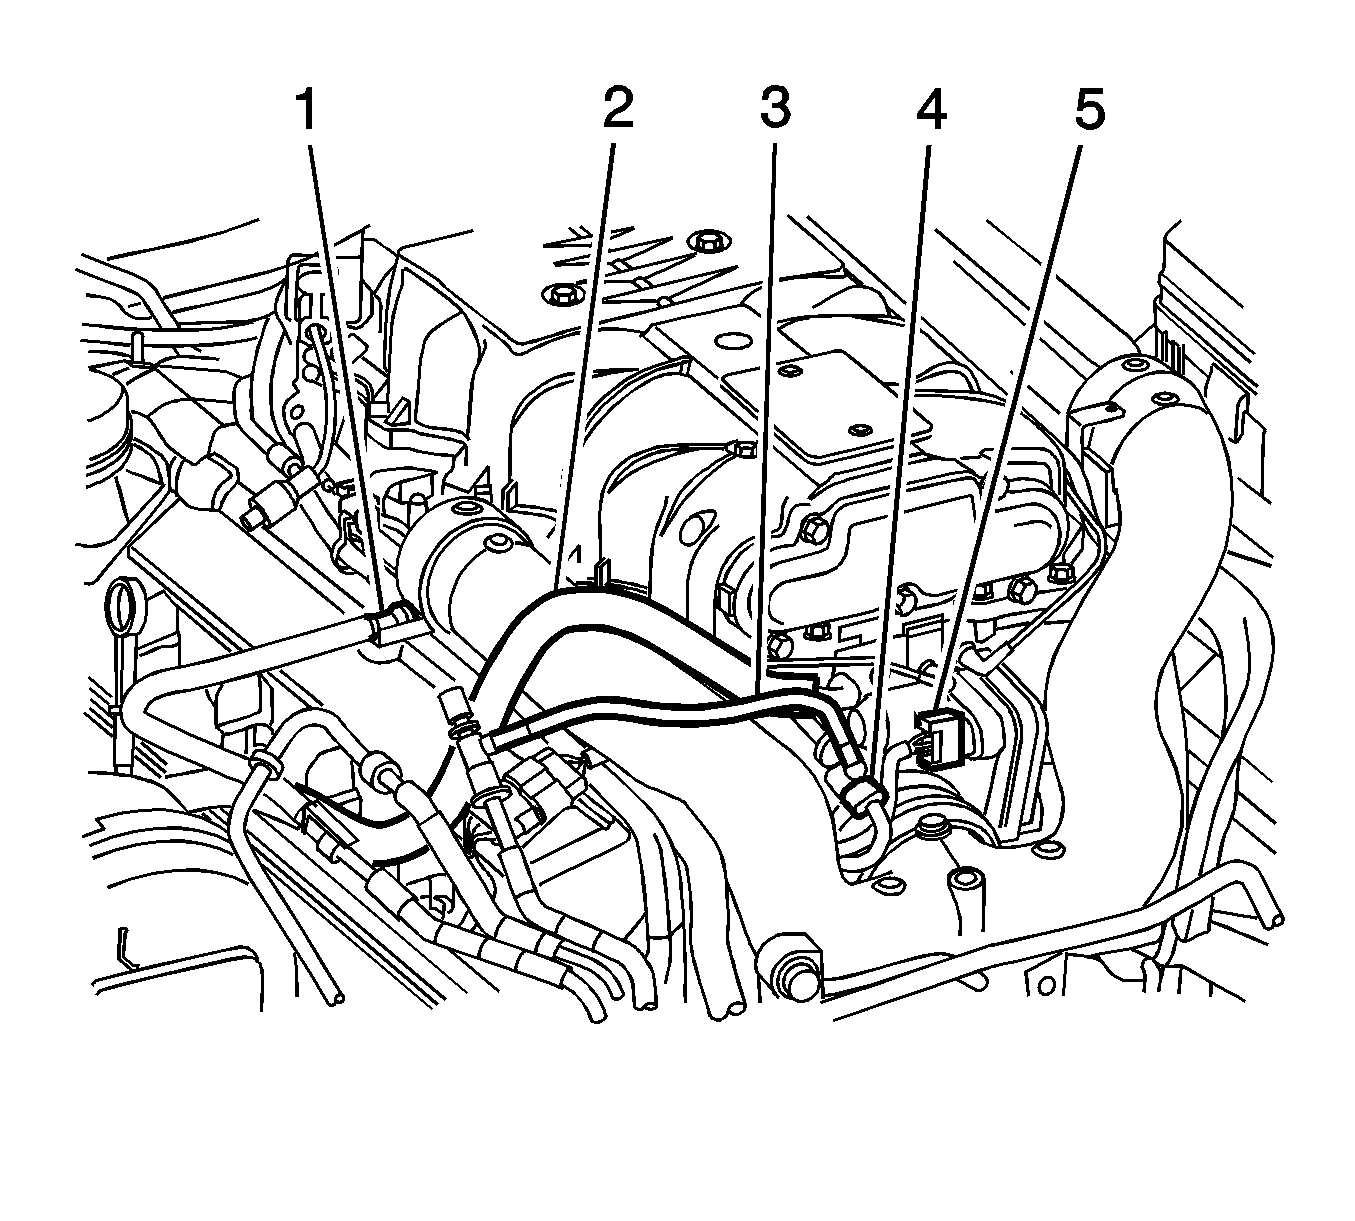
- Disconnect the throttle body electrical connector (5).
- Disconnect the evaporative emission (EVAP) canister purge solenoid valve hose (3) from the EVAP valve. Refer to Plastic Collar Quick Connect Fitting Service. Position the hose aside.
- Disconnect the EVAP canister purge solenoid valve electrical connector (4).
- Disconnect the brake booster vacuum hose (2) from the fitting on the supercharger. Position the hose aside.
- Disconnect the supercharger bypass regulator solenoid valve electrical connector (3).
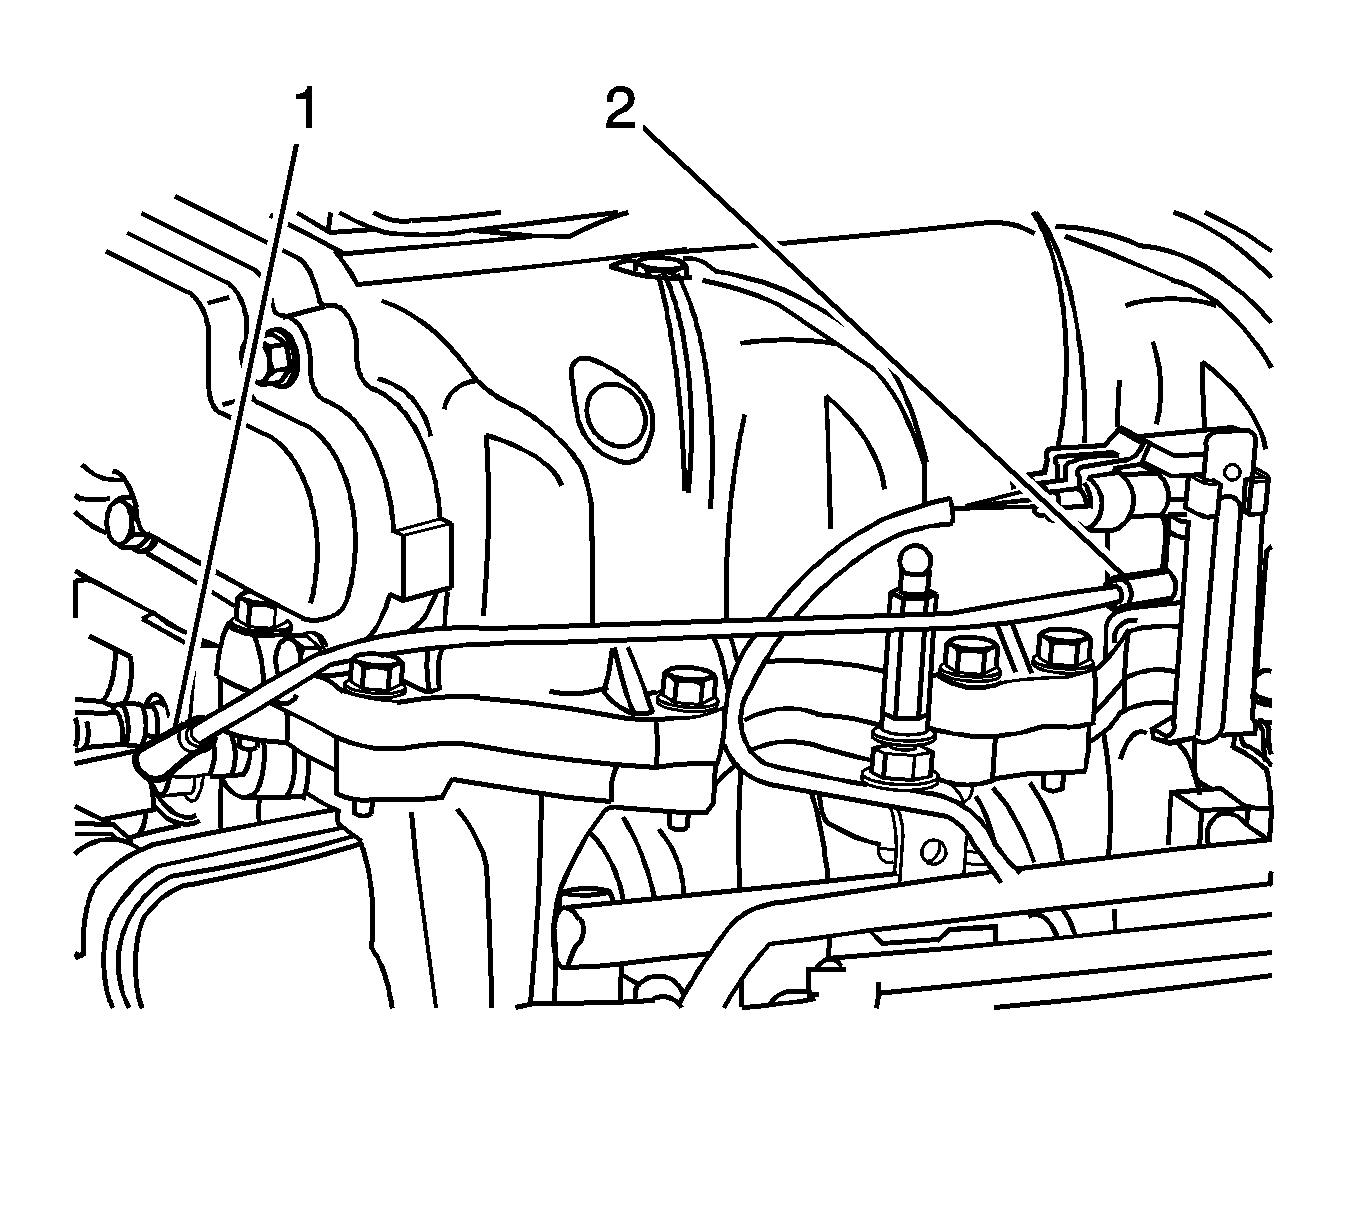
- Disconnect the manifold absolute pressure (MAP) sensor vacuum line (2) from the supercharger.
- Disconnect the supercharger intake air temperature (IAT) sensor electrical connector.
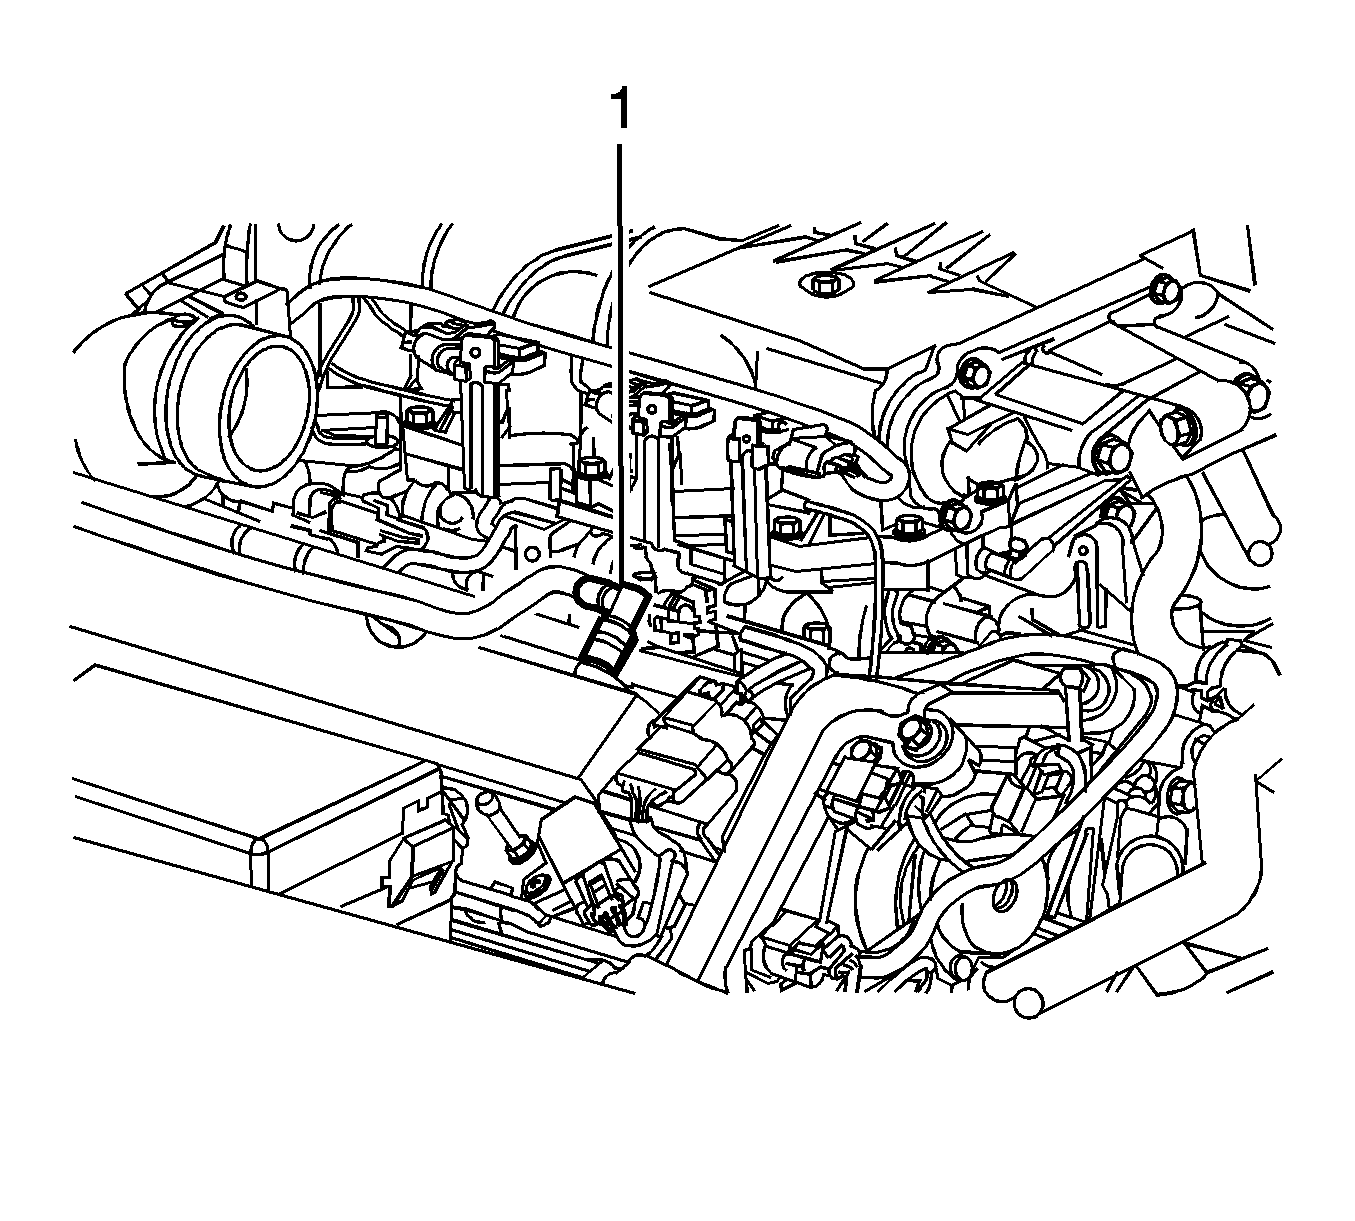
- Disconnect the supercharger inlet absolute pressure (SIAP) sensor vacuum line fitting (1) from the rear of the supercharger. Position the sensors, vacuum lines, and wire harness aside.
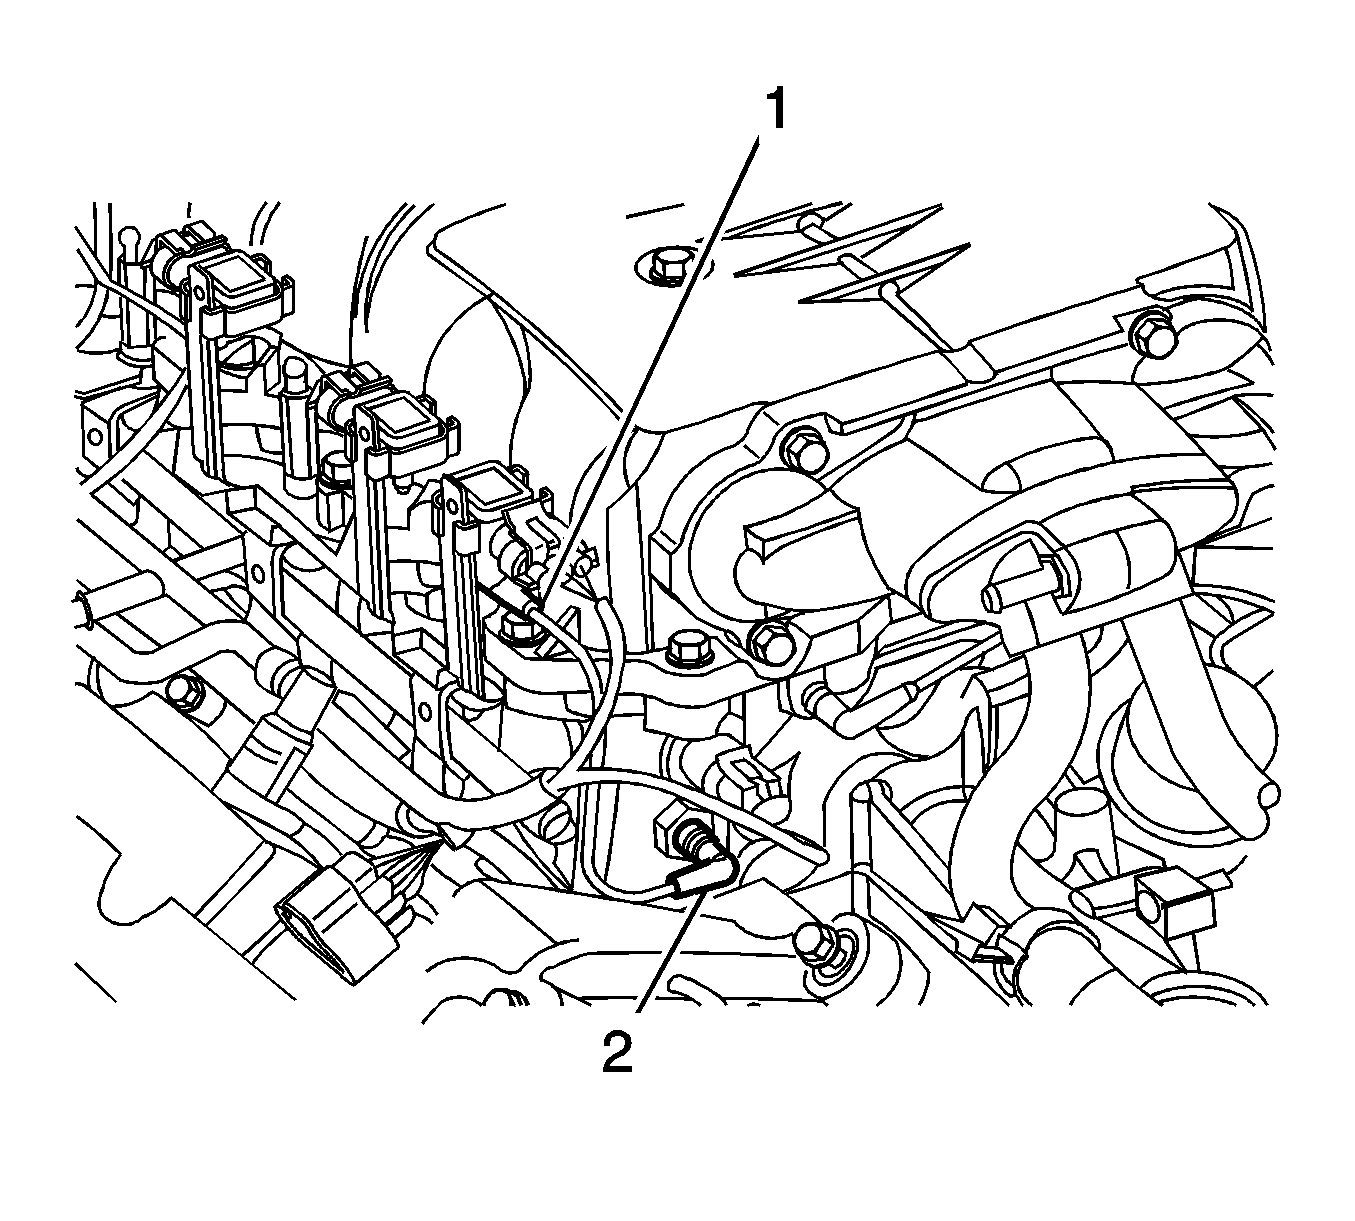
- Disconnect the positive crankcase ventilation (PCV) tube fitting (1) from the right camshaft cover.
- Remove the supercharger drive belt. Refer to Supercharger Belt Replacement.
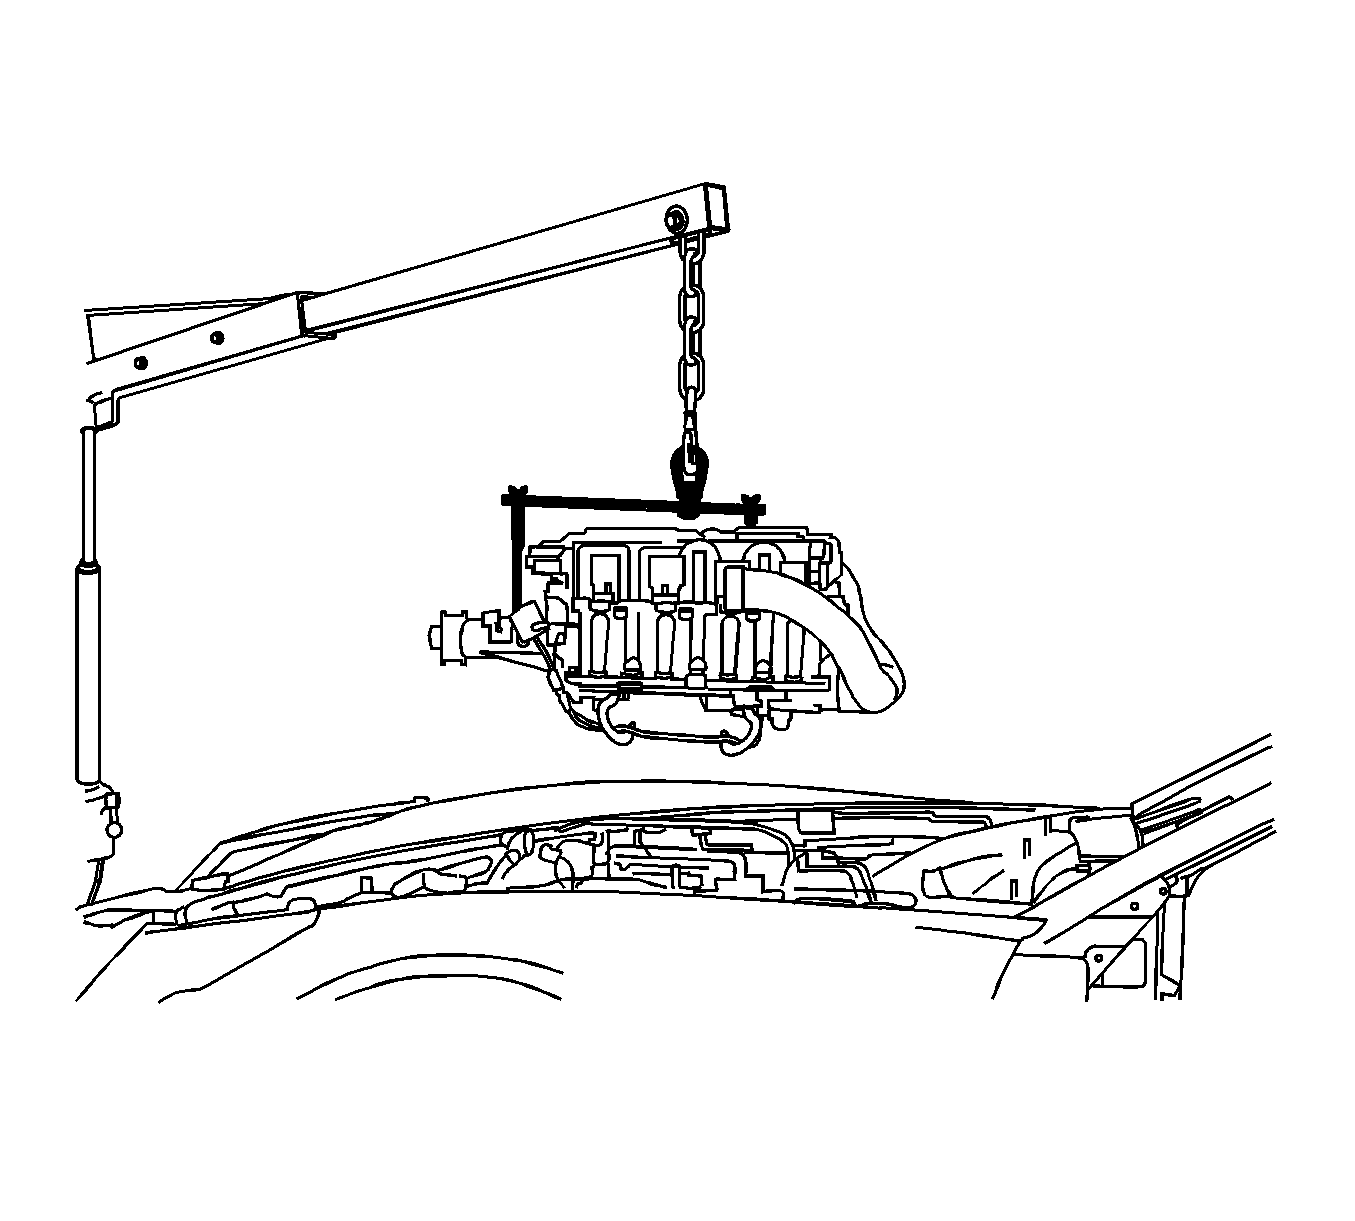
- Install the EN-47748 (1-5) to the supercharger.
- Install an engine hoist to the EN-47748 .
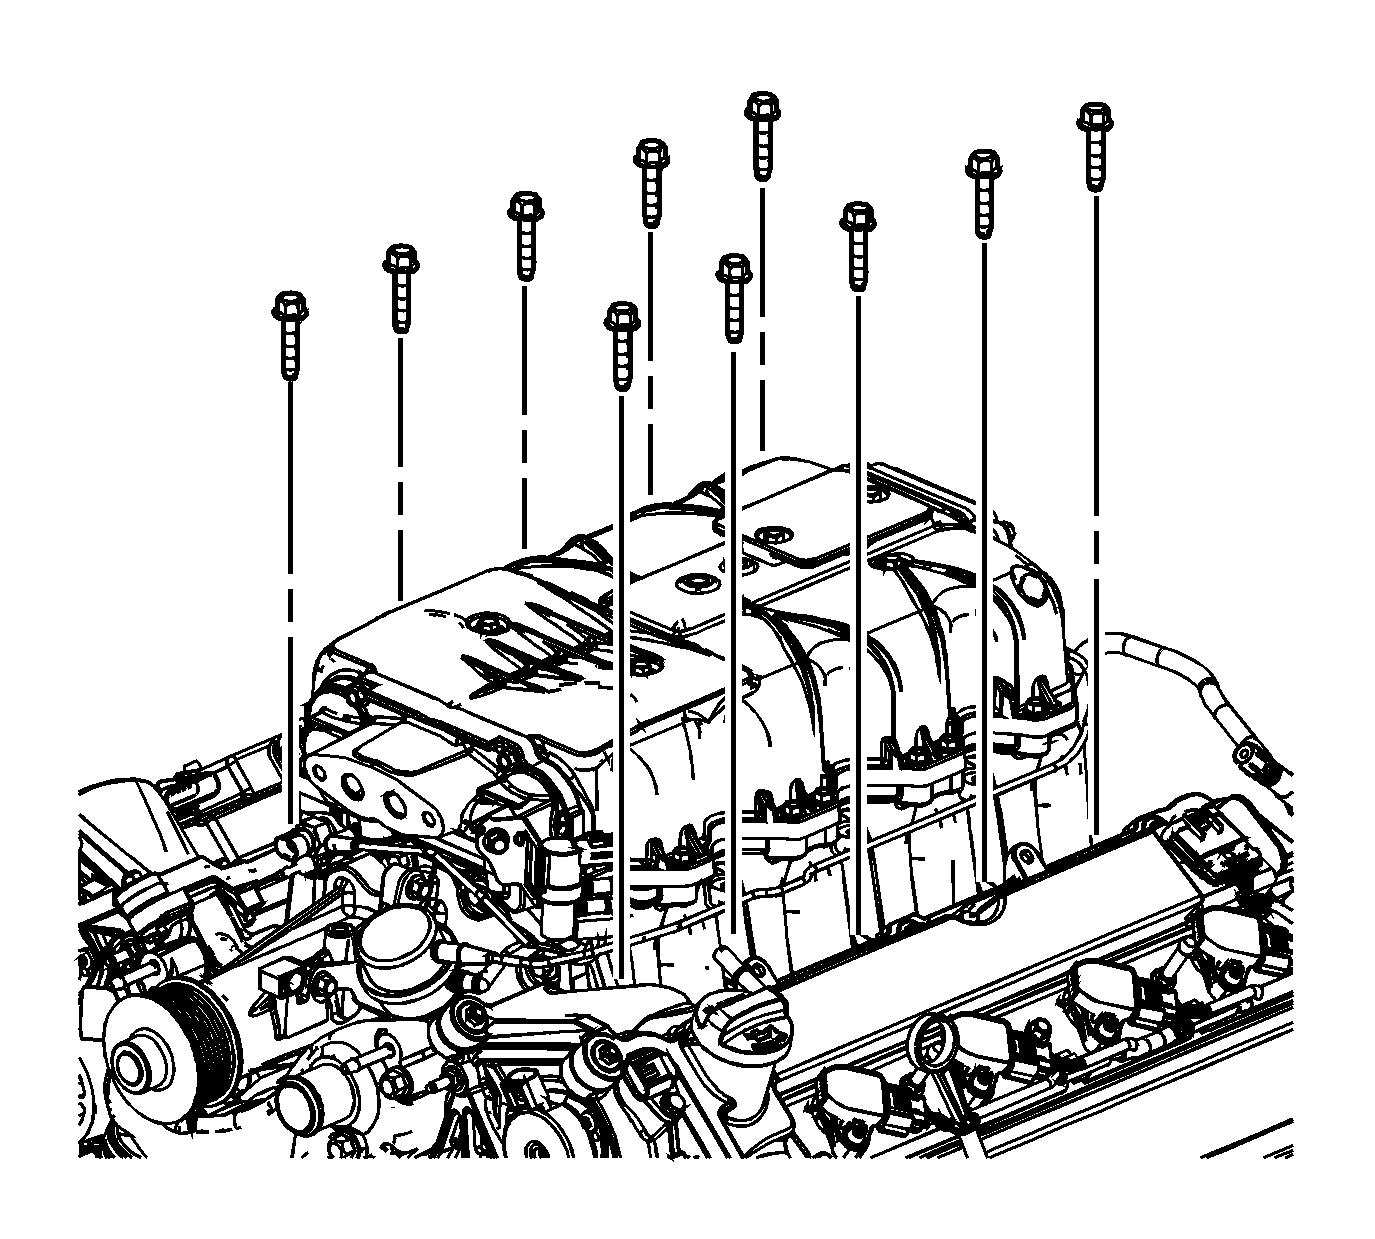
- Remove and discard the supercharger bolts.
- Remove the supercharger.
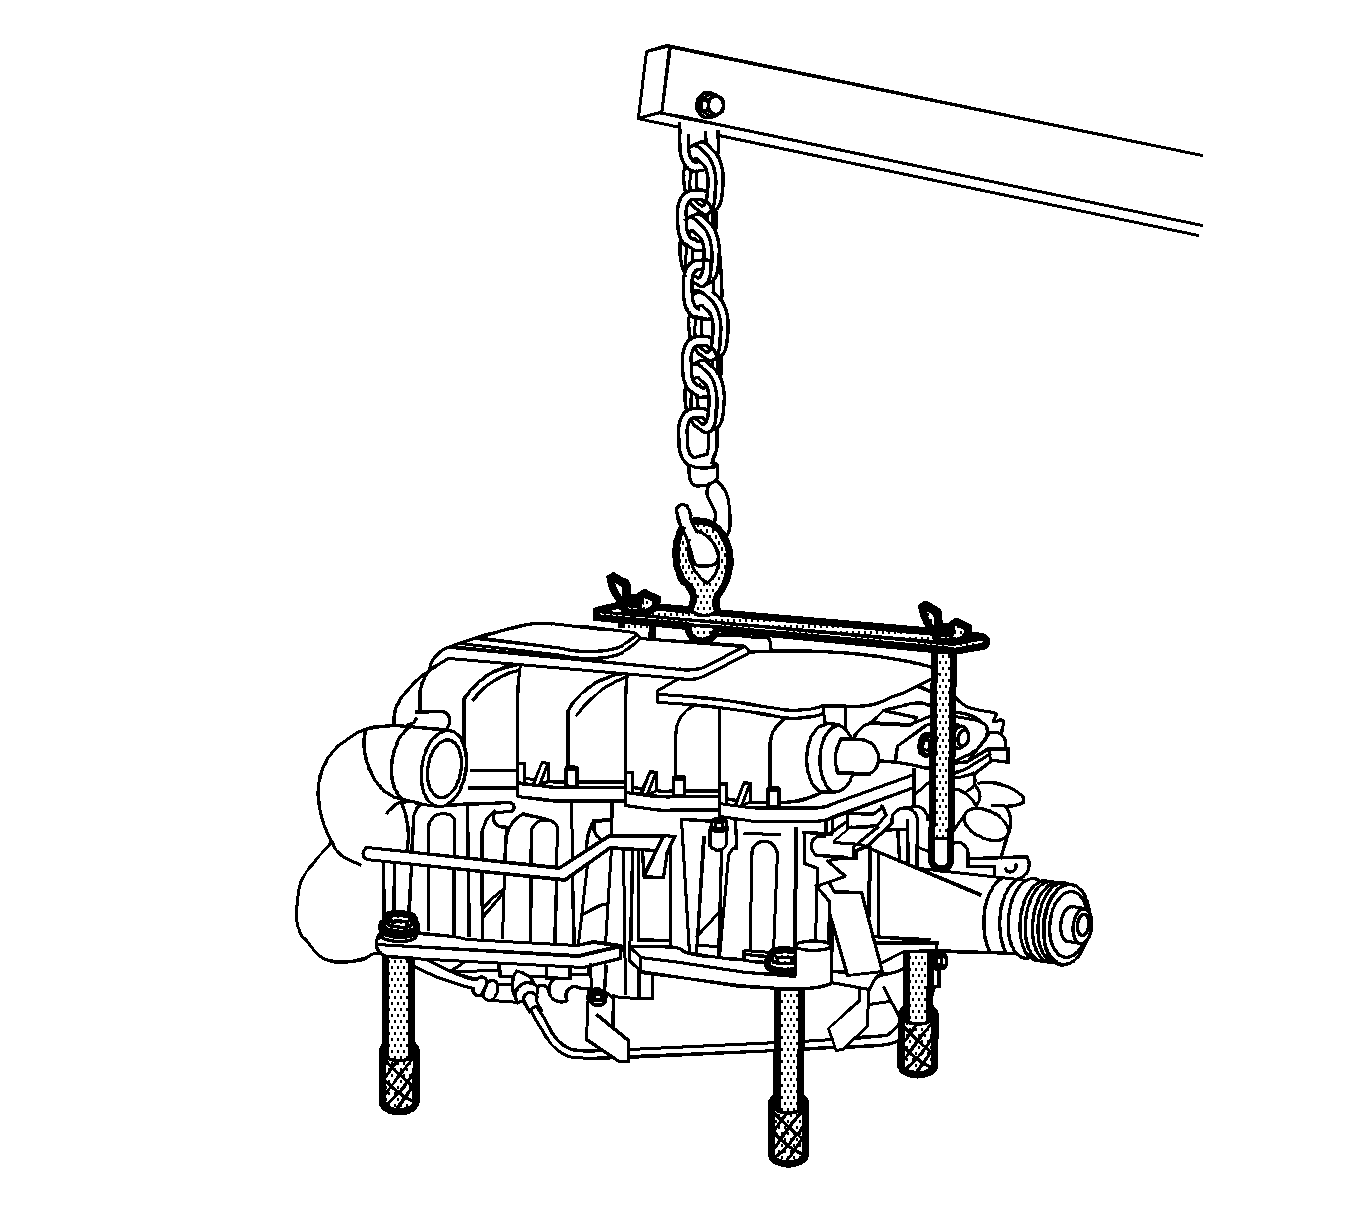
- Install the EN-47833 to the supercharger while the supercharger is suspended by the engine hoist.
- Place the supercharger on a workbench and remove the engine hoist.
- If replacing the supercharger, transfer the necessary parts.
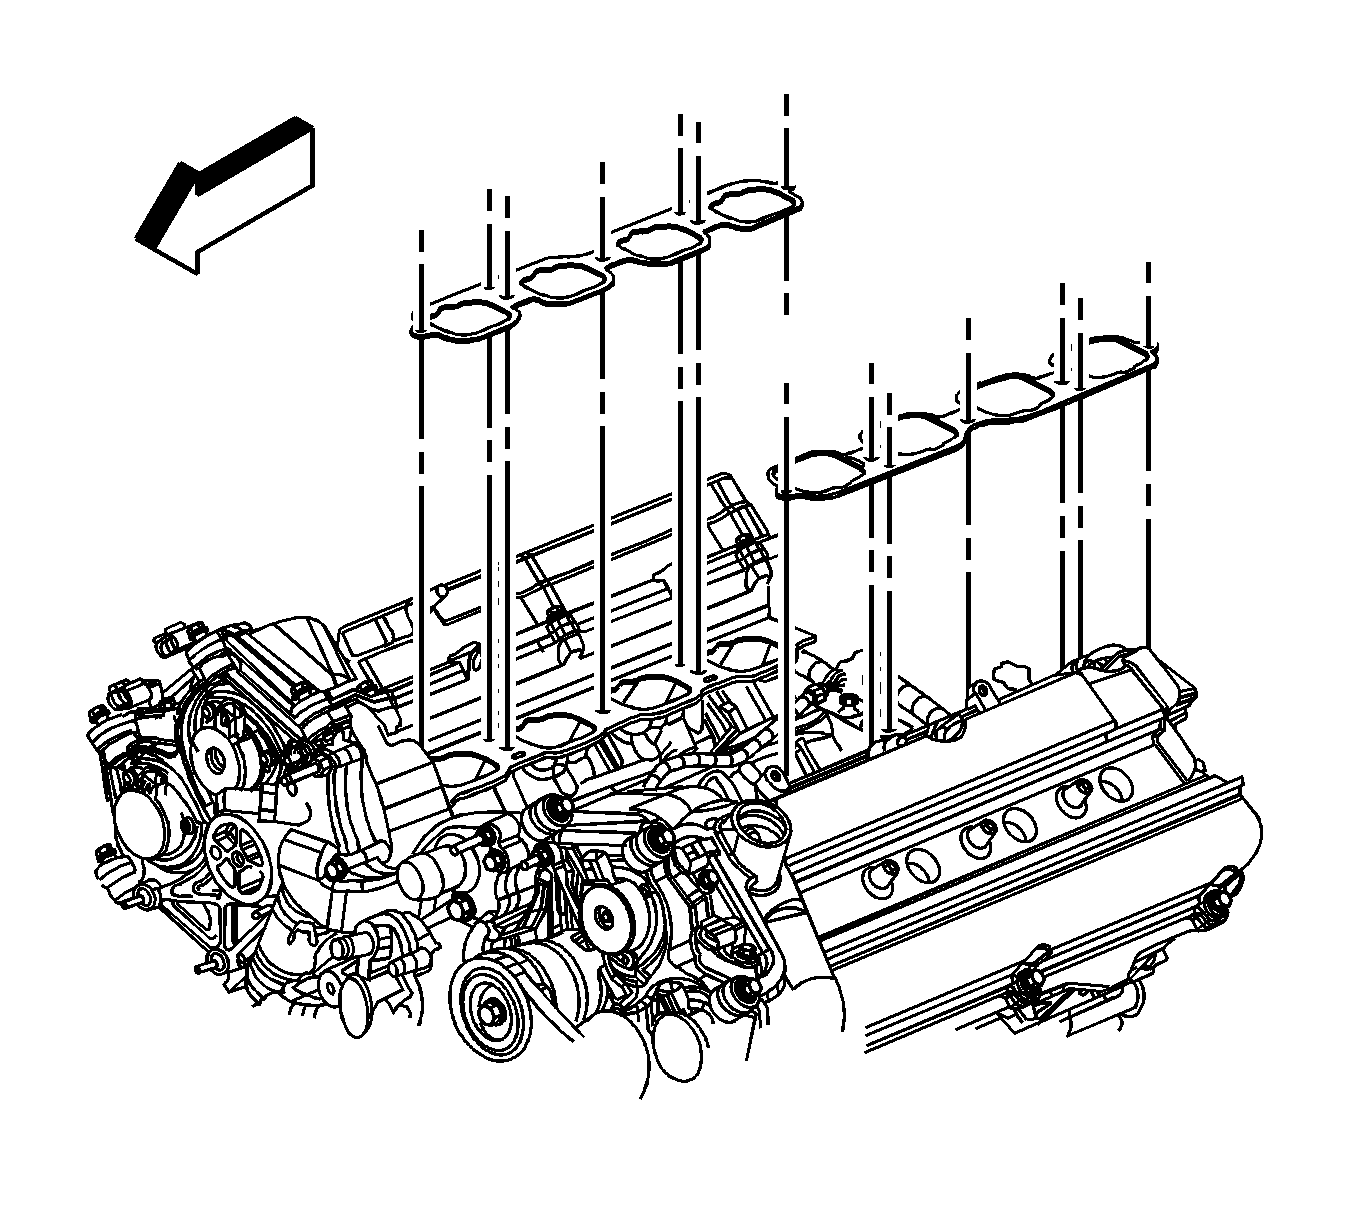
- Remove the supercharger gaskets from the engine.
- Clean and inspect the supercharger. Refer to Supercharger Cleaning and Inspection.
- Clean and inspect the supercharger mating surface on the engine.
Important: Do not allow coolant to contact the supercharger drive belt.
Place a shop rag under the front portion of the supercharger to catch any remaining coolant.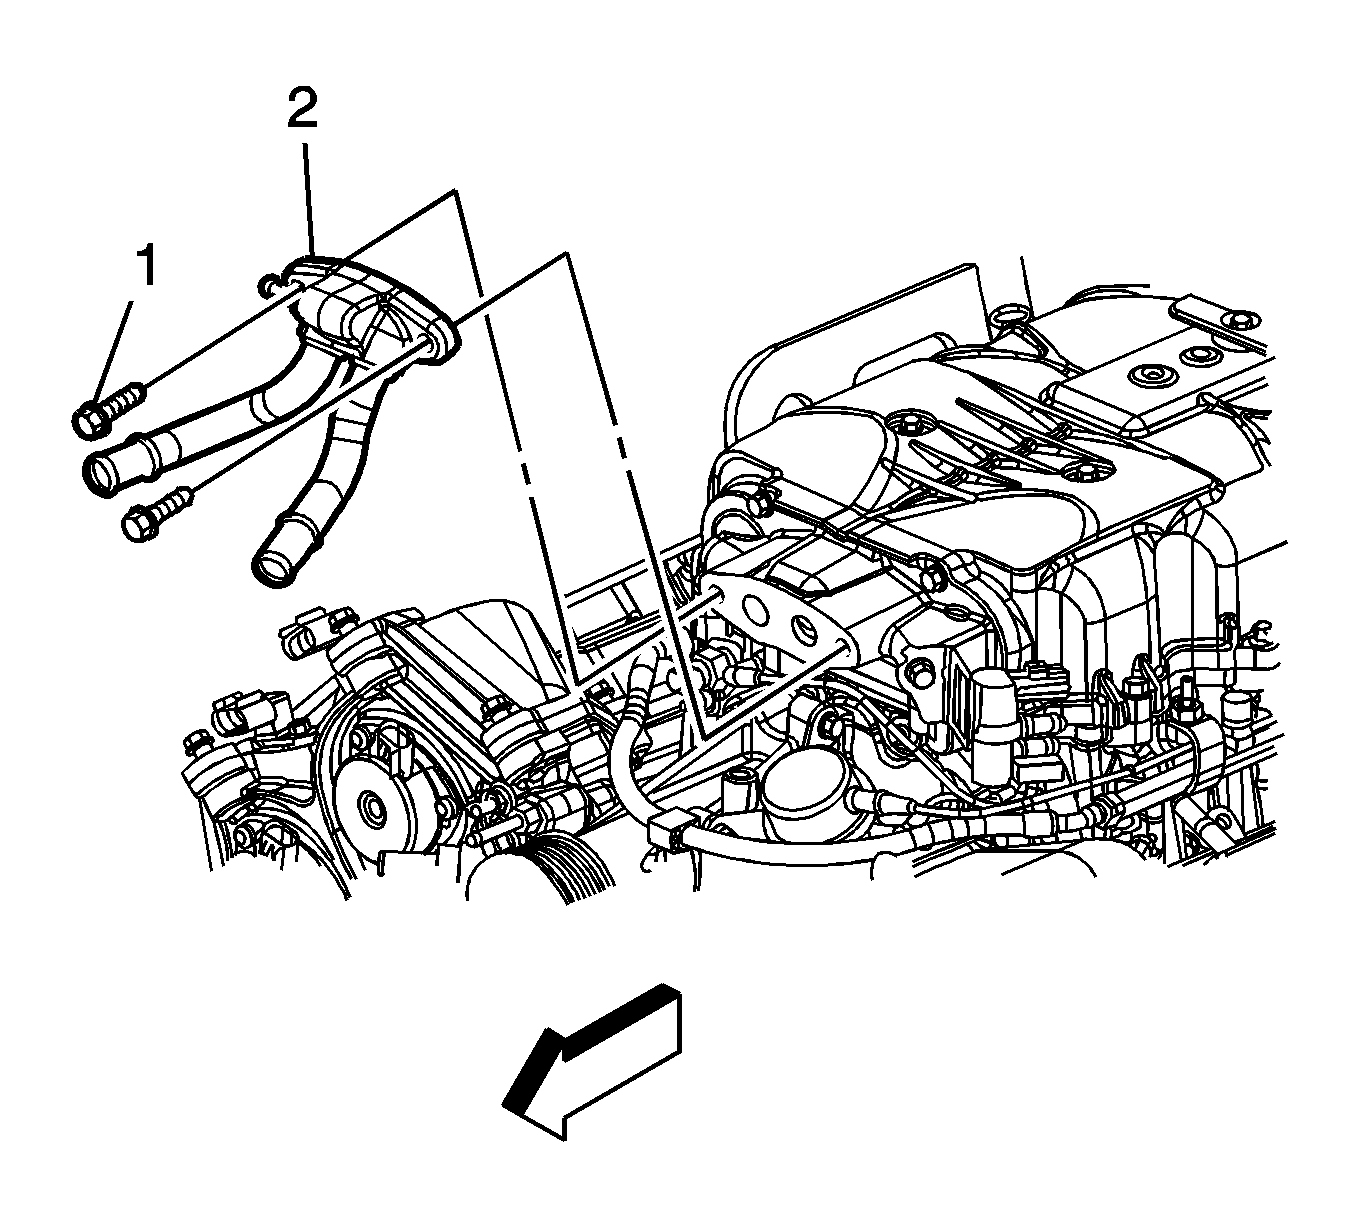
Caution: The supercharger must be lifted with the EN 47748. The weight of the supercharger assembly is approximately 34 kg (75 lb) and could cause injury if lifted by hand.
Notice: The supercharger must be lifted with the EN 47748. Damage could occur to the finish and/or components of the supercharger and surrounding engine or vehicle components.
Notice: The EN 47833 must be installed to the supercharger in order to prevent damage to the supercharger bypass actuator cable and the finish of the supercharger. Failure to use the EN 47833 can lead to bending the brackets of the supercharger bypass actuator cable. Bent supercharger bypass actuator cable brackets will cause the supercharger bypass valve to function improperly.
Installation Procedure
- Install the new supercharger gaskets to the engine.
- Install two of the appropriate size guide pins from the EN 46109 alignment pin set to the engine in the front two bolt hole locations.
- If previously removed, install the EN-47748 to the supercharger.
- Install an engine hoist to the EN-47748 and raise the supercharger off the workbench.
- Remove the EN-47833 from the supercharger.
- Inspect the gasket surface on the supercharger and clean as necessary.
- Ensure that all wiring and vacuum lines are positioned aside and install the supercharger to the engine.
- Remove the engine hoist and the EN-47748 .
- Remove the EN 46109 alignment pins.
- Loosely install the NEW supercharger bolts.
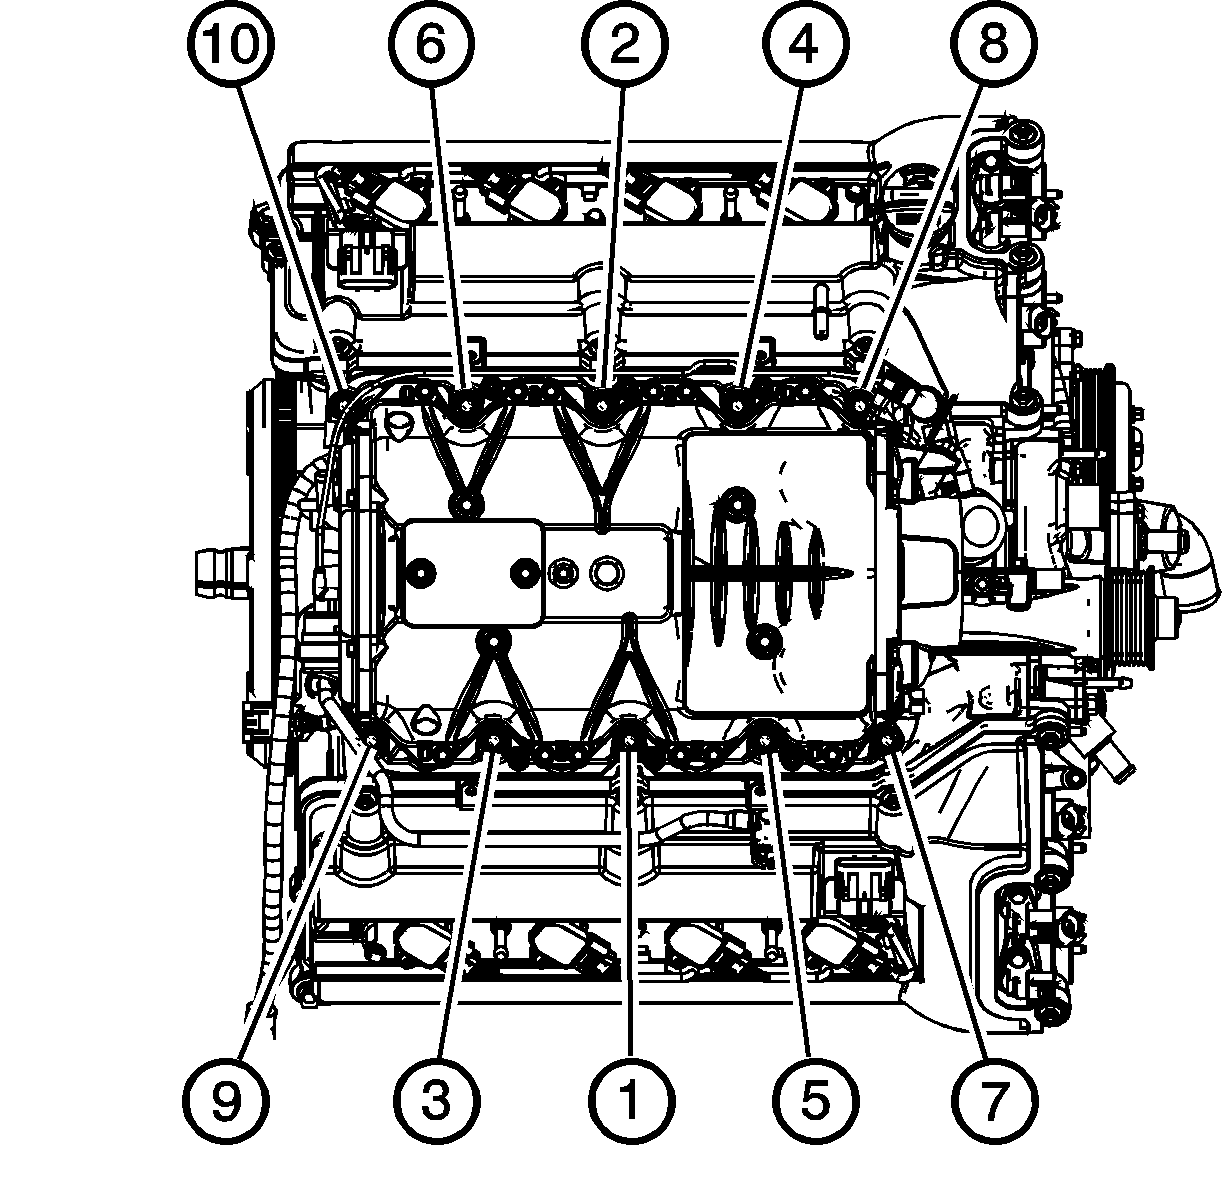
- Tighten the supercharger bolts in sequence as shown.
- Install the supercharger drive belt. Refer to Supercharger Belt Replacement.
- Connect the PCV tube fitting (1) to the right side camshaft cover.
- Connect the SIAP sensor vacuum line fitting (1) to the rear of the supercharger.
- Connect the supercharger IAT sensor electrical connector.
- Connect the MAP sensor vacuum line fitting (2) to the supercharger.
- Connect the supercharger bypass regulator solenoid valve electrical connector (3).
- Connect the brake booster vacuum hose (2) to the fitting on the supercharger.
- Connect the EVAP canister purge solenoid valve electrical connector (4).
- Connect the EVAP canister purge solenoid valve hose (3) to the EVAP valve. Refer to Plastic Collar Quick Connect Fitting Service.
- Connect the throttle body electrical connector (5).
- Install the fuel injector rail assembly (1). Refer to Fuel Injector and Fuel Rail Replacement.
- Using NEW O-rings, install the front portion of the supercharger front manifold (2). Refer to Charge Air Cooler Front Manifold Replacement.
- Install the front section of the supercharger inlet duct assembly. Refer to Supercharger Inlet Duct Assembly Replacement.
- Install the engine sight shield. Refer to Intake Manifold Sight Shield Replacement.
- Install the hood. Refer to Hood Replacement.
- Fill the charge air cooling system with coolant and check for leaks. Refer to Charge Air Cooling System Draining and Filling.
Notice: Refer to Fastener Notice in the Preface section.
Tighten
Tighten the supercharger bolts to 25 N·m (18 lb ft).
