Removal Procedure
Caution: Refer to Express Down Feature Caution in the Preface section.
Important: The window motor and door module are sealed from the factory, and are serviced as part of the regulator assembly. The entire unit must be replaced if repairs are necessary.
- Lower the door window.
- Disconnect the battery.
- Remove the door trim panel. Refer to Door Trim Panel Replacement .
- Disconnect the door panel electrical connector.
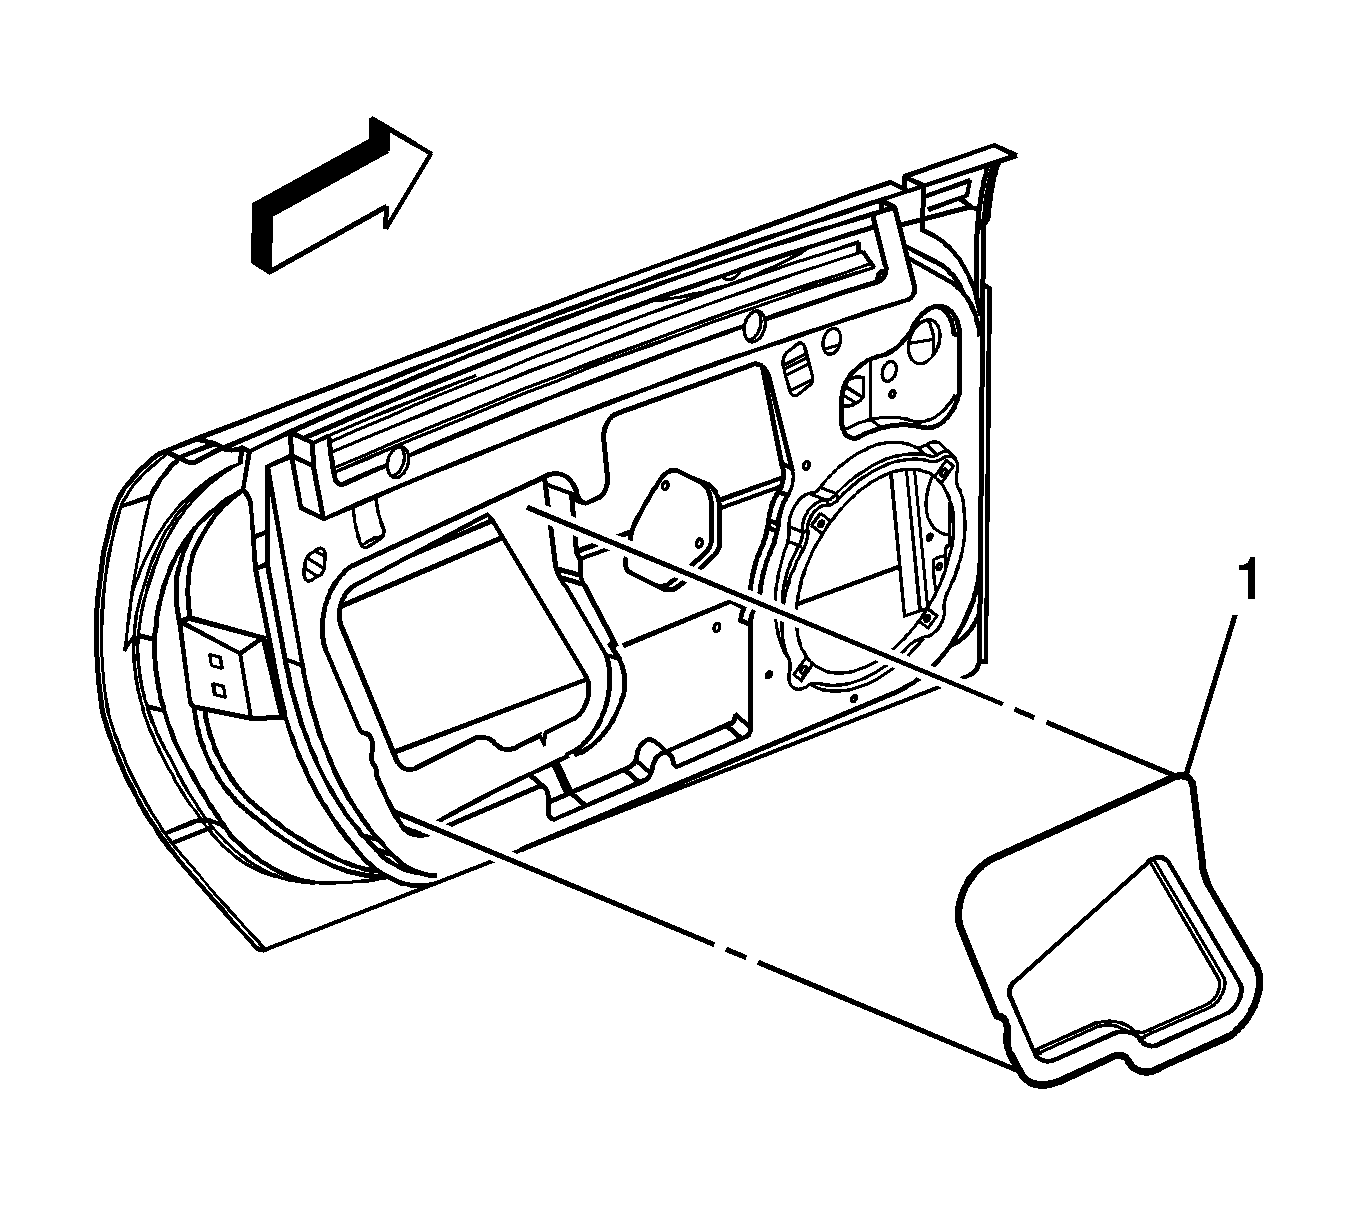
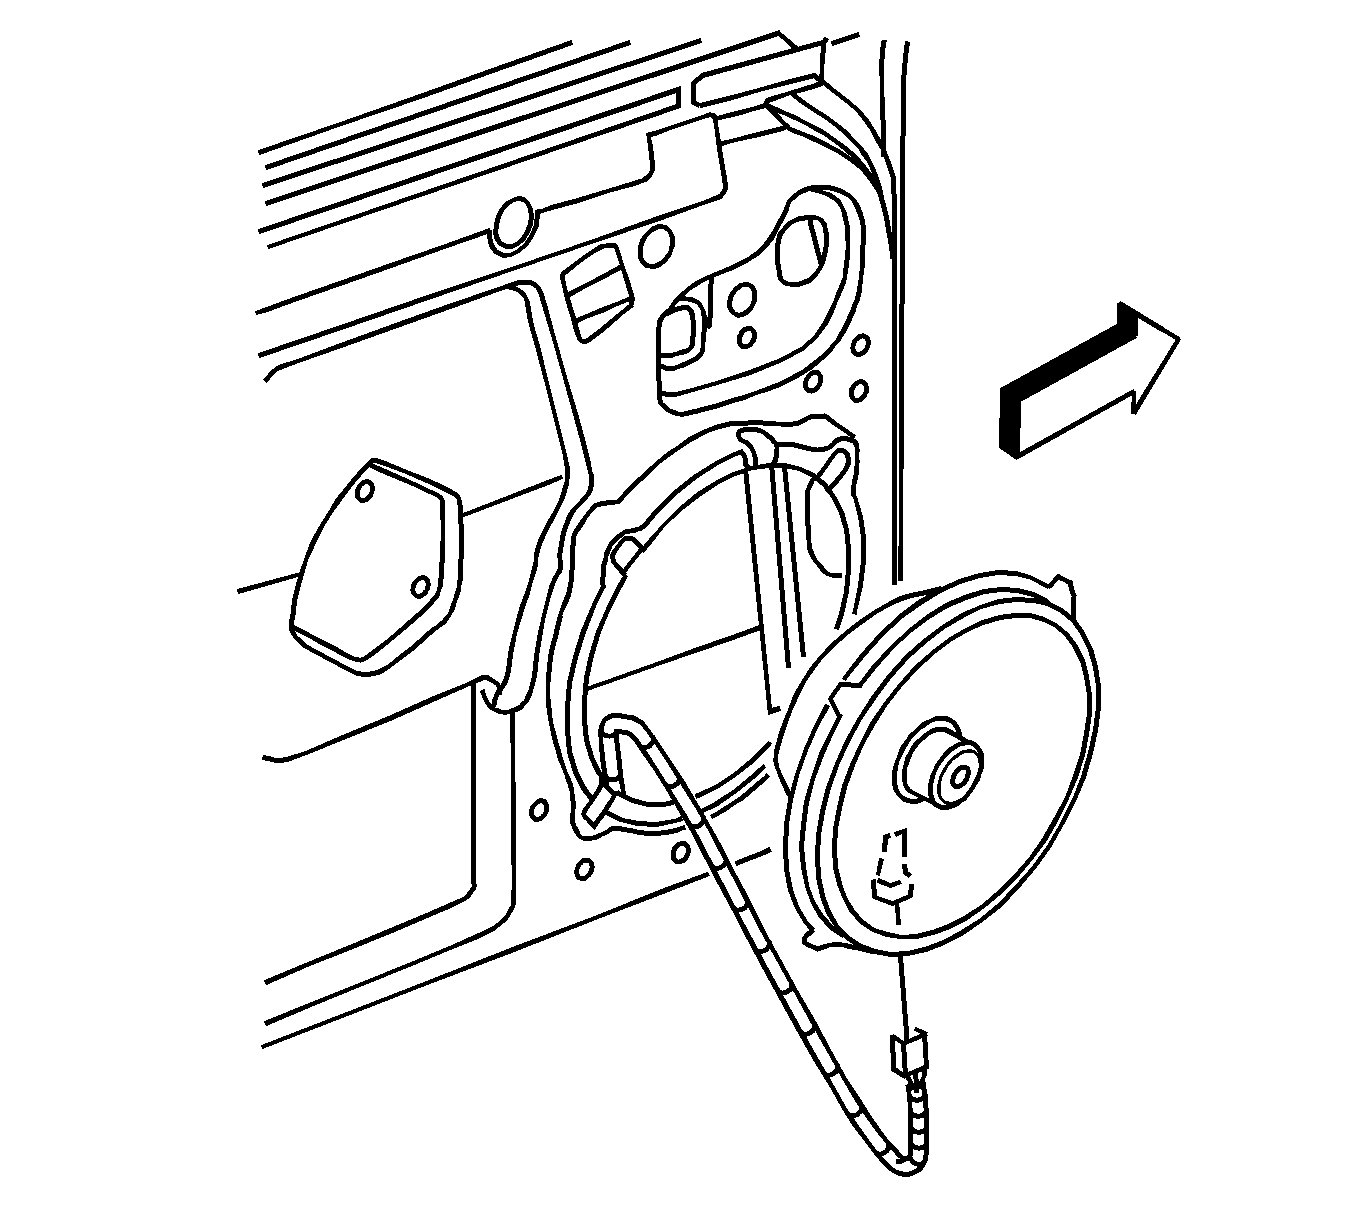
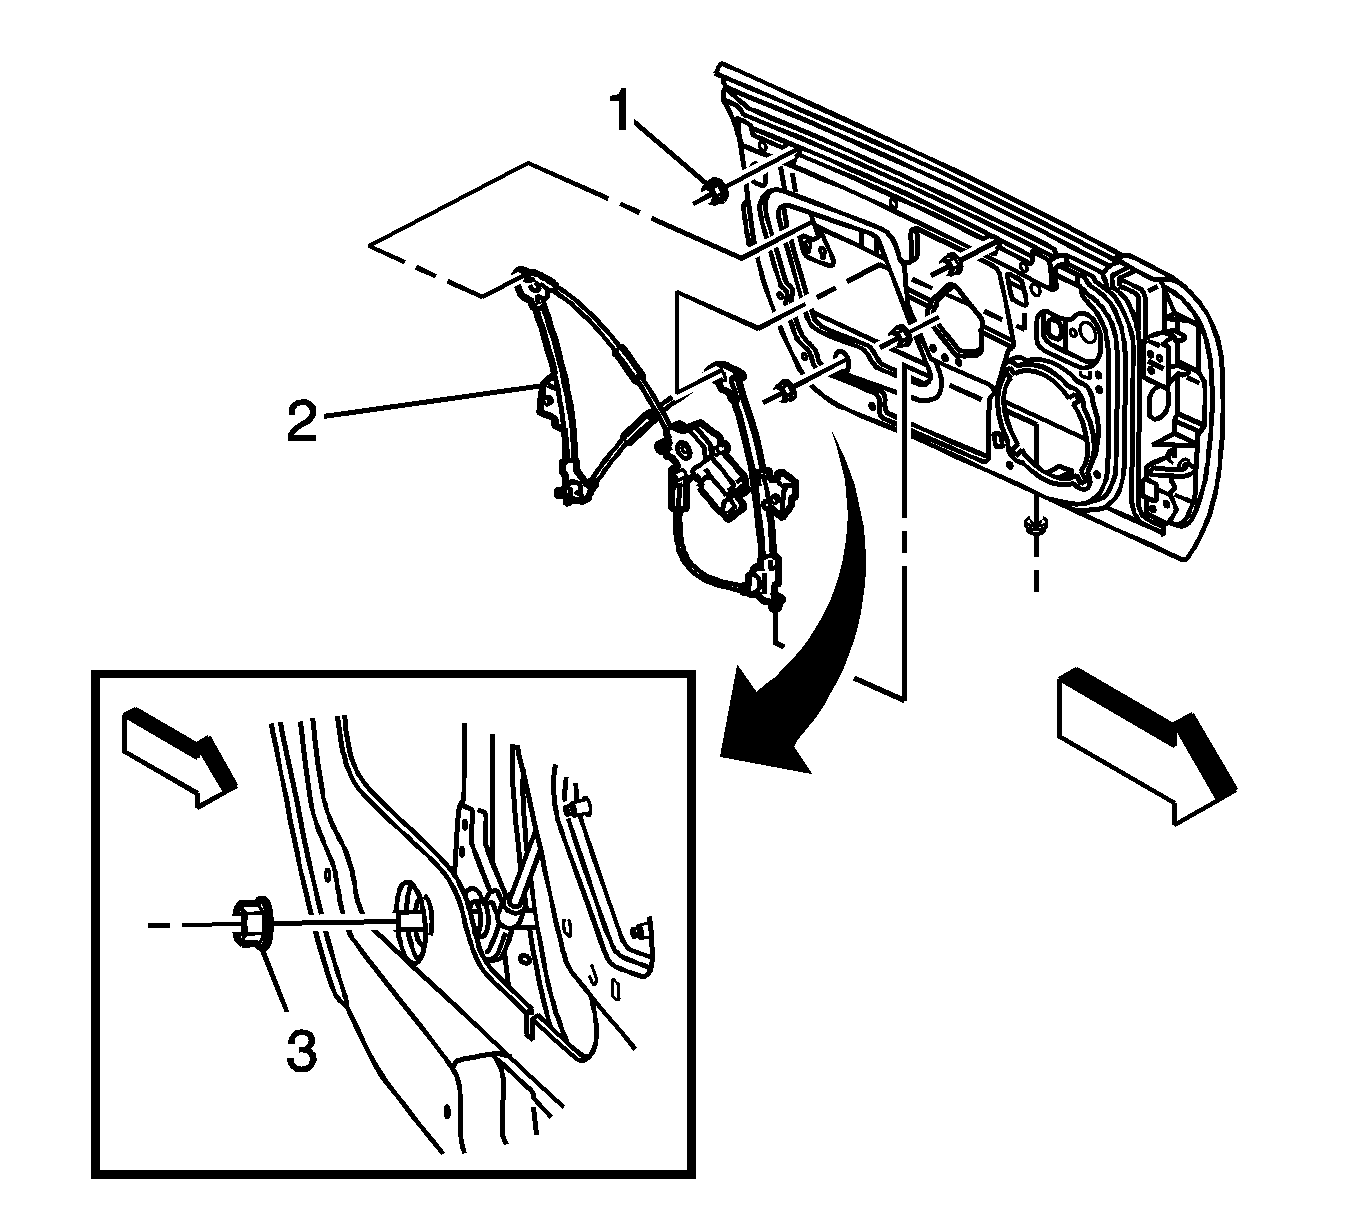
- Remove the large water deflector (1) for inside access to the rear of the door.
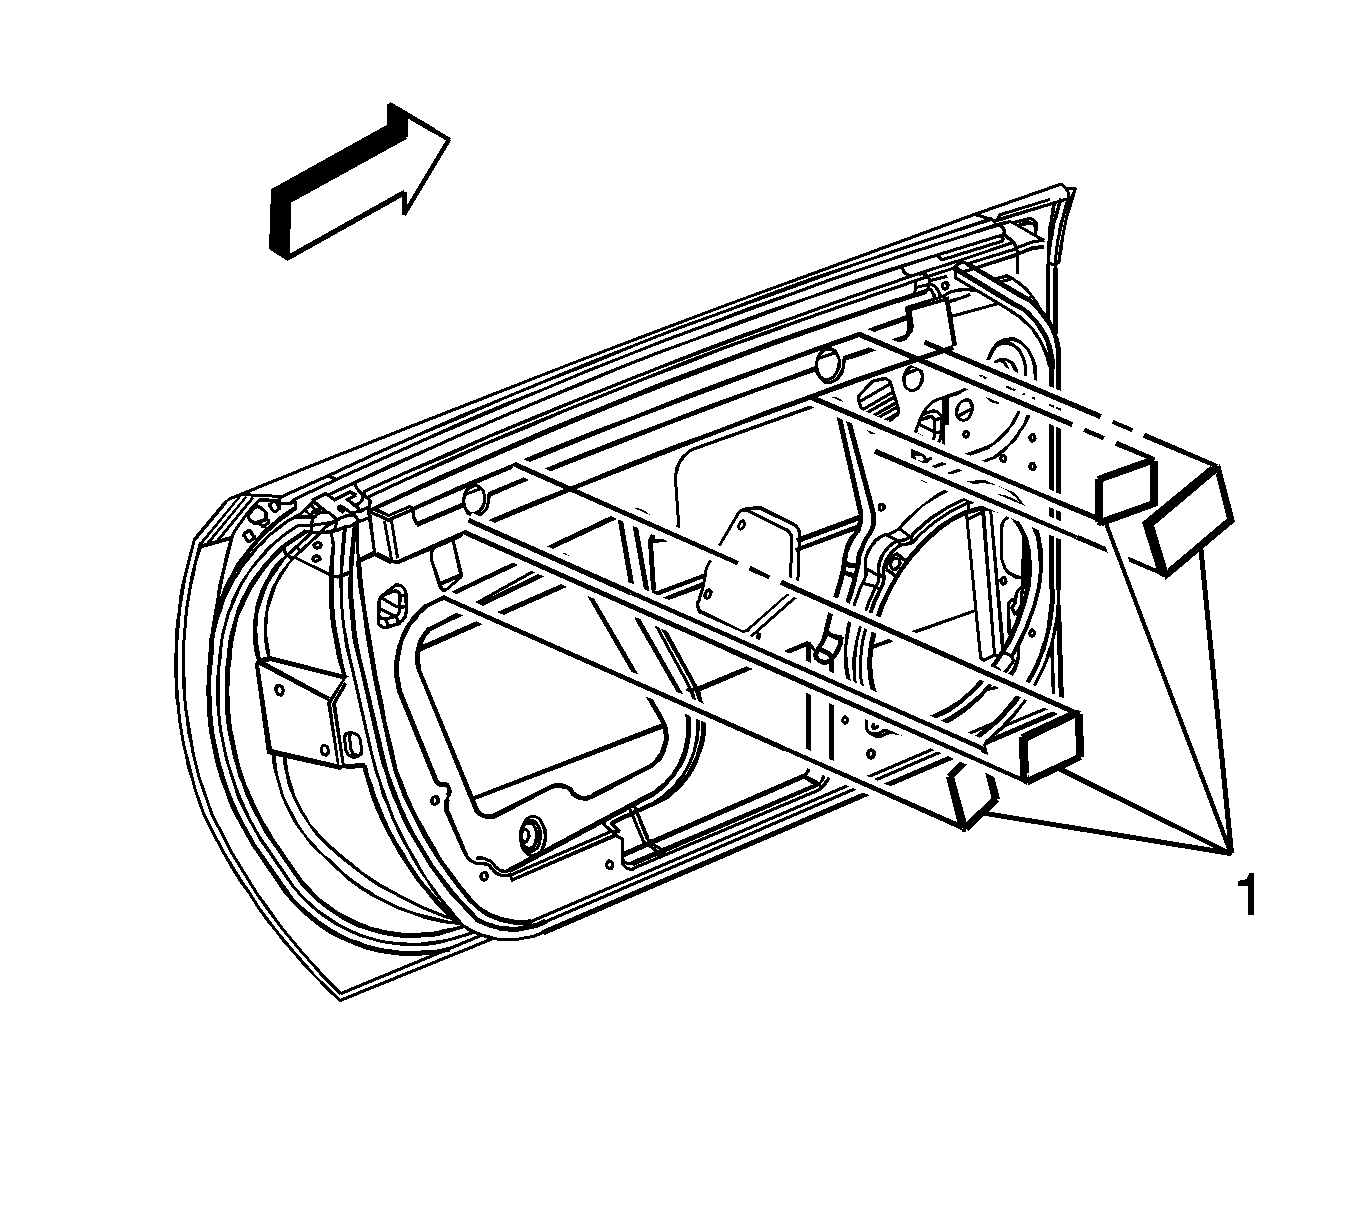
- Remove the small mastic seals (1) near the top of the door for access to the upper regulator mounting fasteners.
- Remove the small plug on the bottom of the door for access to the lower regulator mounting fastener.
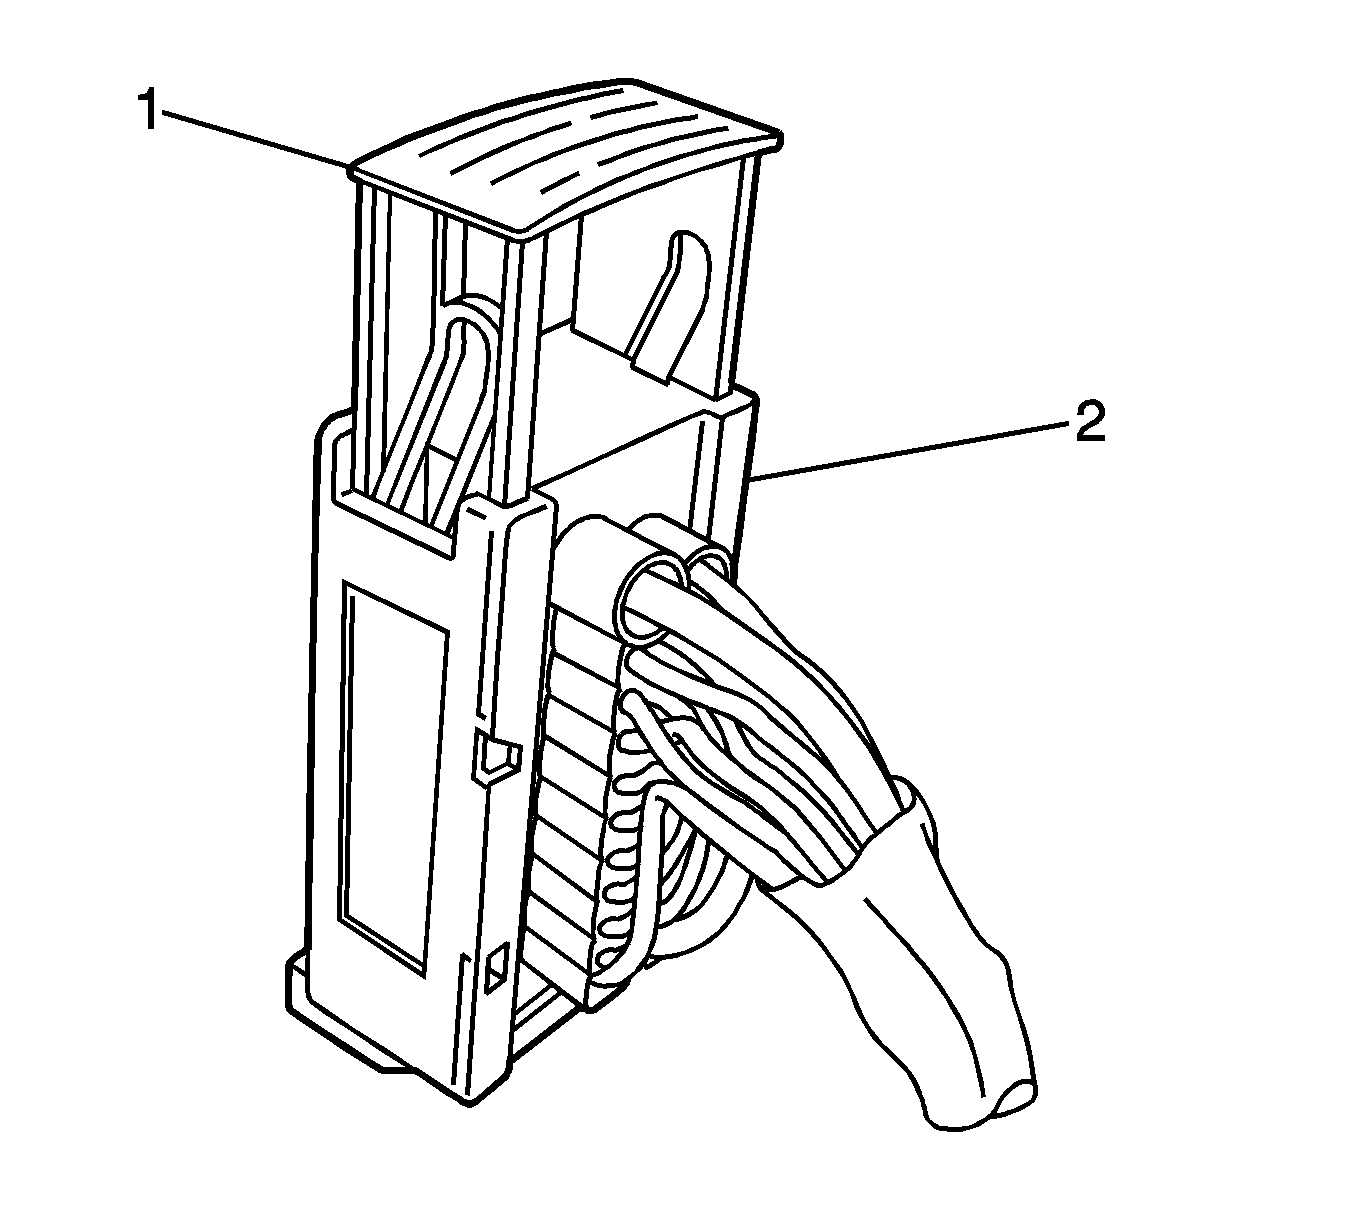
- Remove the radio speaker fasteners (4).
- Remove the electrical connector lock.
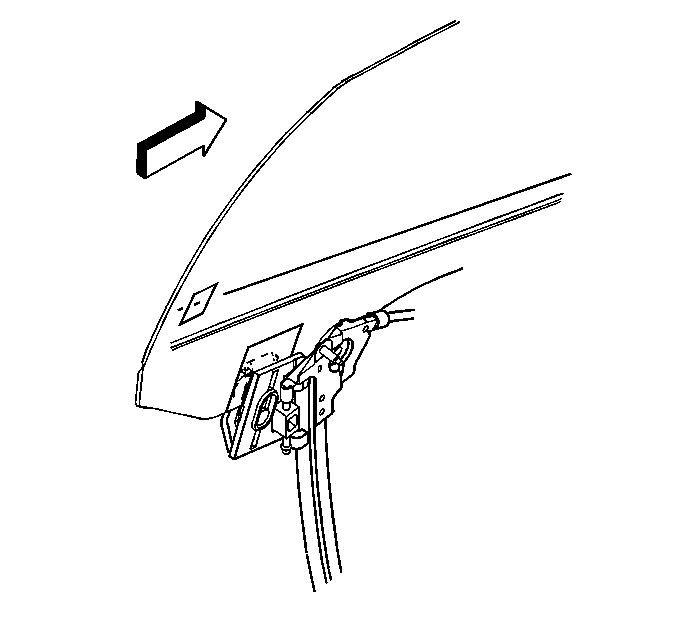
- Remove the door window. Refer to Door Window Replacement .
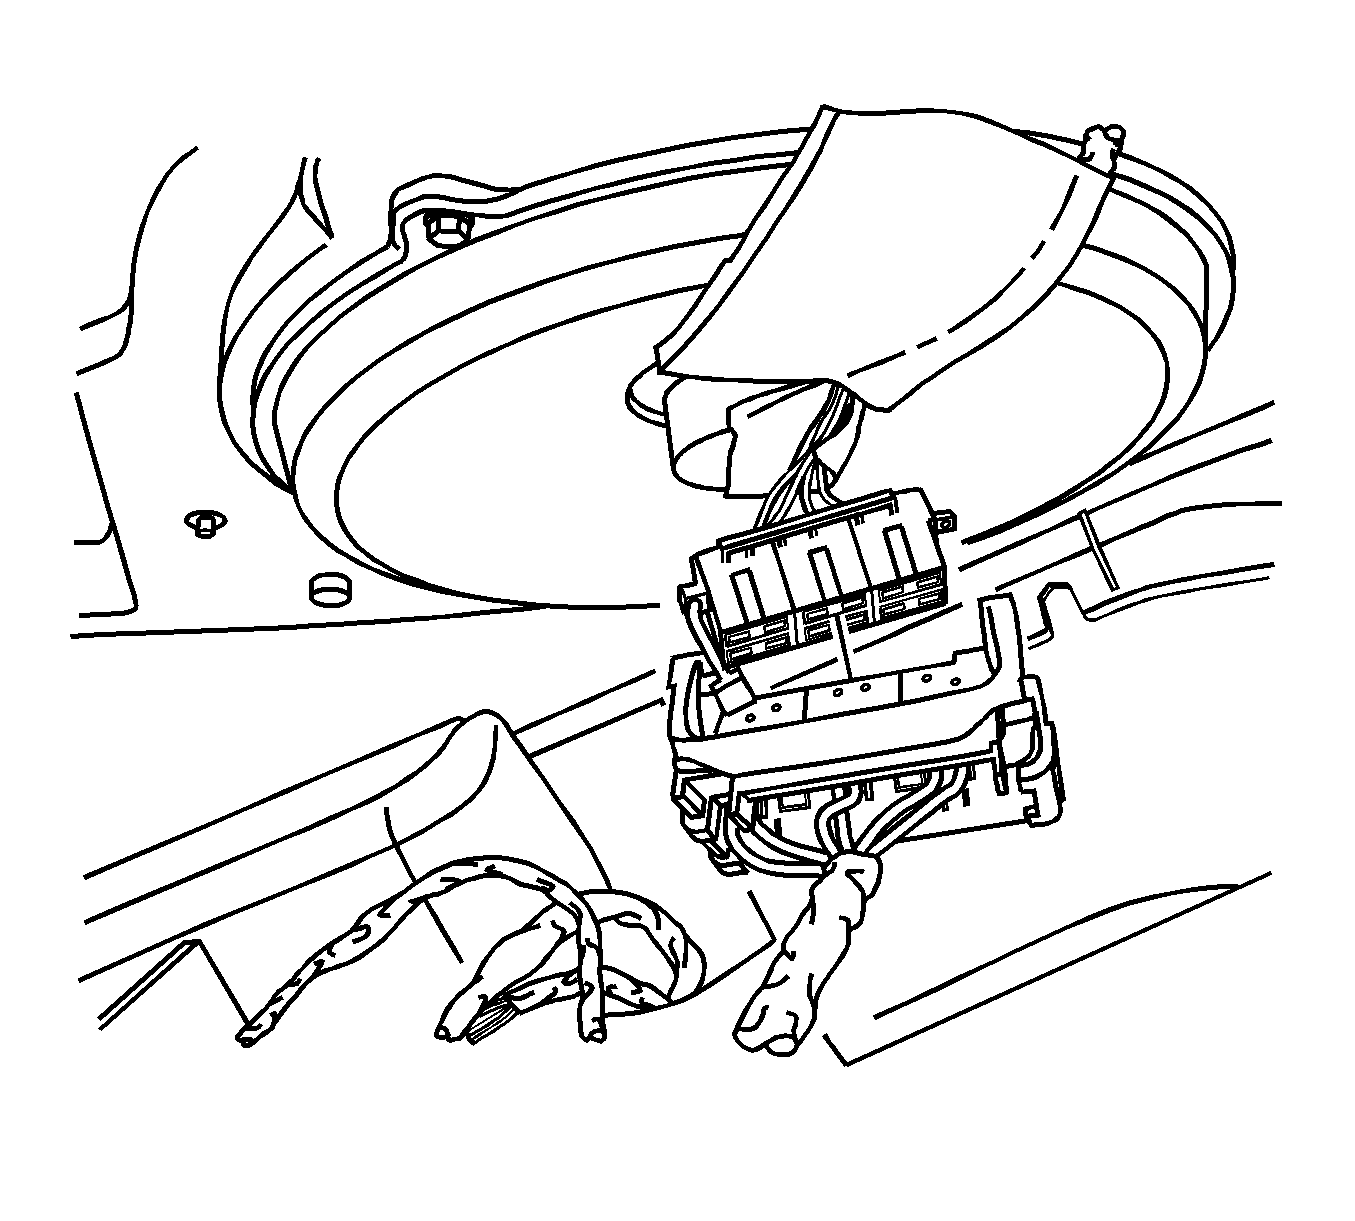
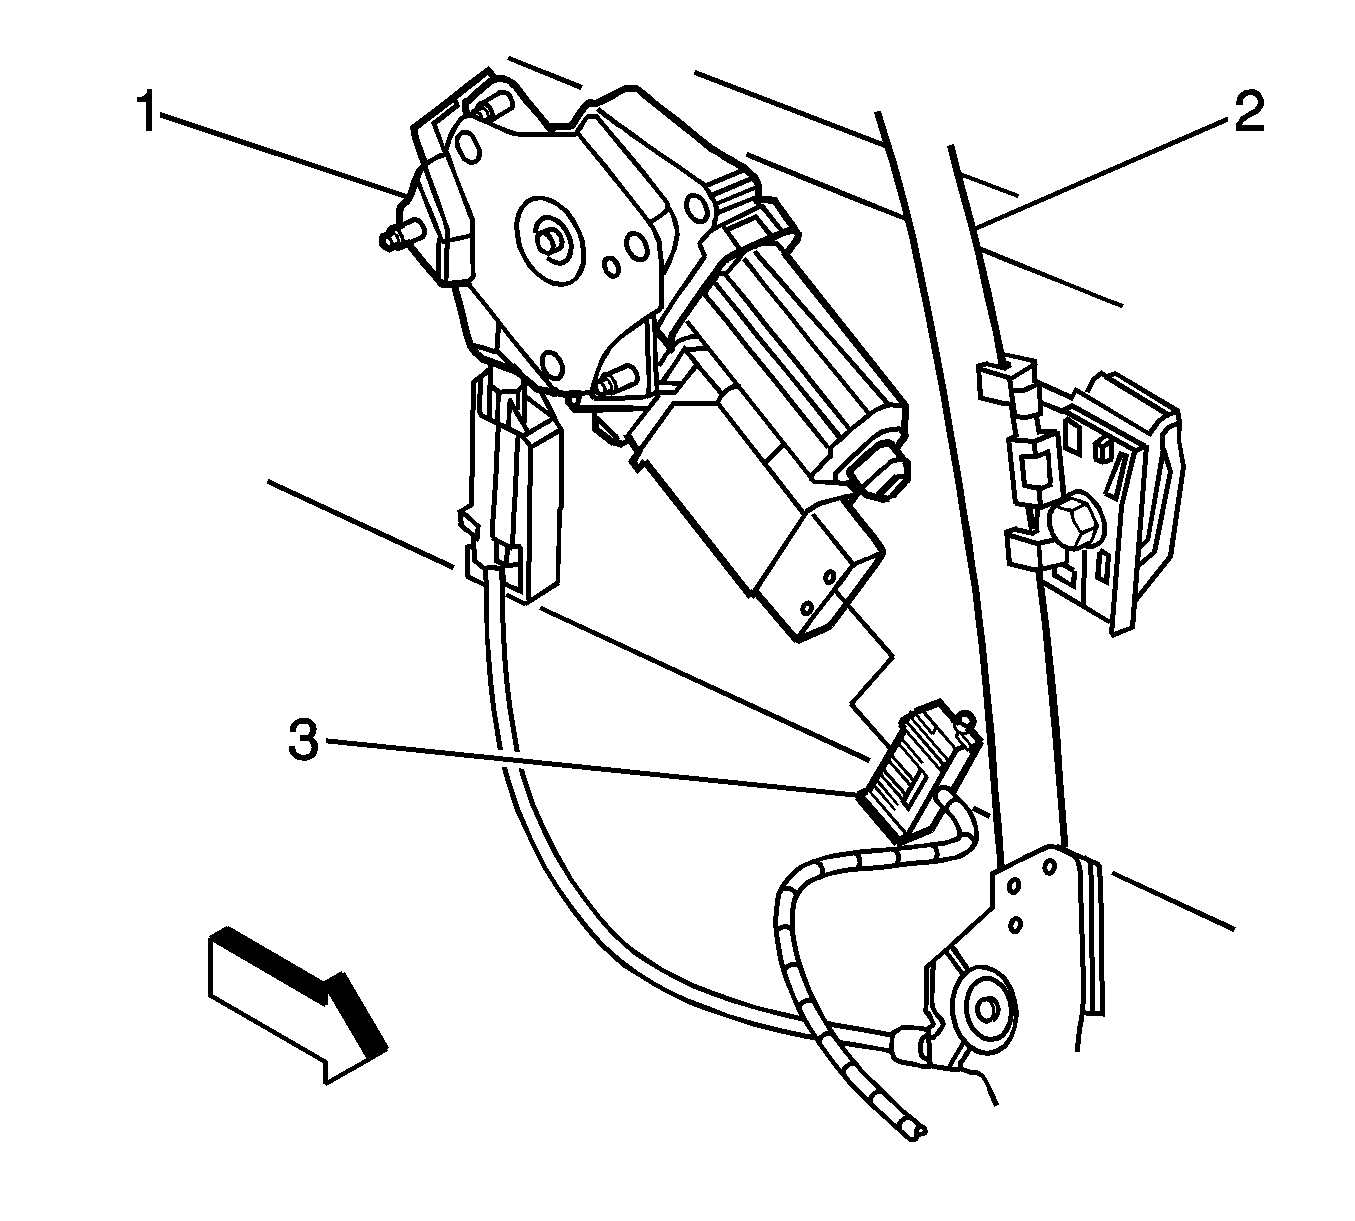
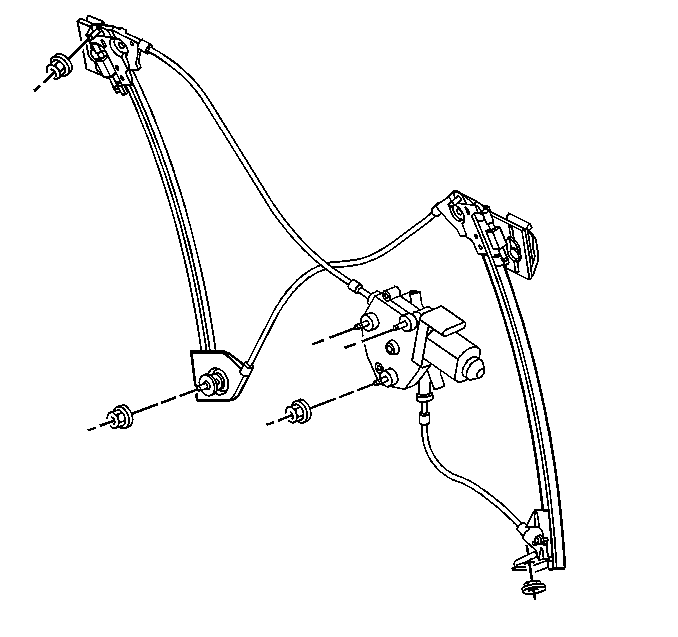
- Disconnect the regulator motor electrical connector (3).
- Slide the connector lock (1) up. Separate the harness.
- Mark the location of the regulator to aid in reassembly. Note the position and depth of the regulator mounting pads for positioning new parts.
- Remove the nuts from the regulator lower channel studs.
- Remove the nuts from the regulator motor studs.
- Remove the nuts from the upper regulator channel studs.
- Compact the regulator (2) and remove the regulator through the inner door access opening.
Caution: Refer to Battery Disconnect Caution in the Preface section.

Important: Do not handle the speaker by the water deflector.
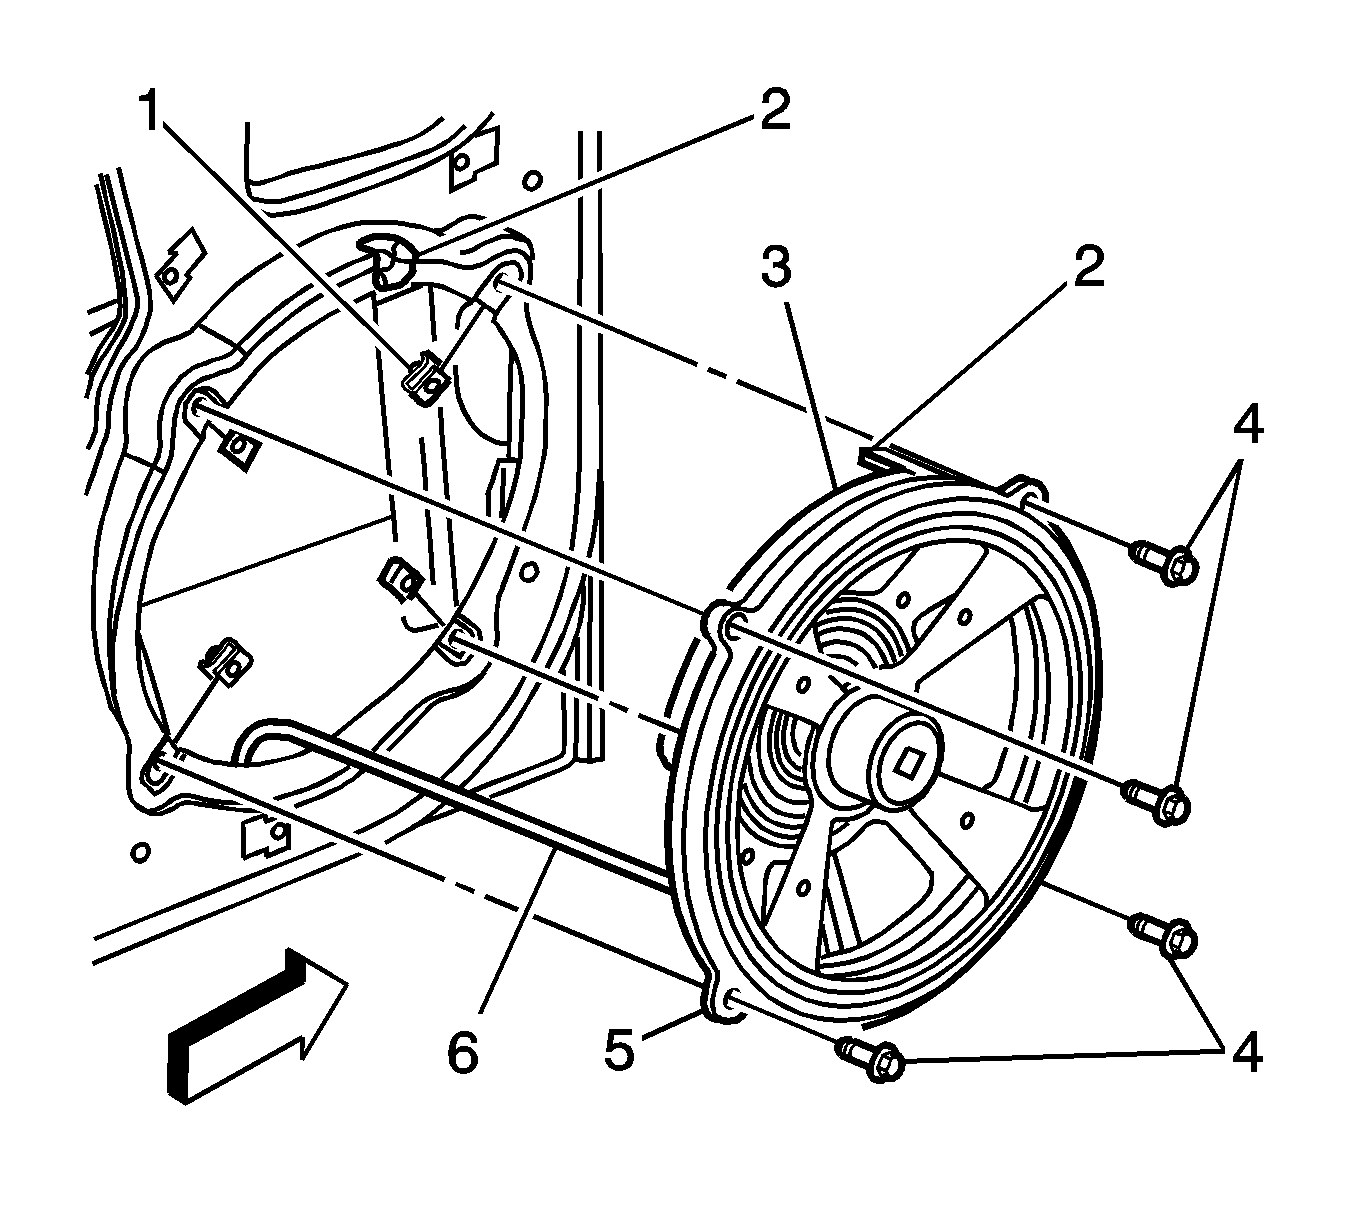
| 9.1. | Disconnect the electrical harness. |
| 9.2. | Remove the radio speaker from the door. |
Installation Procedure
Caution: Refer to Express Down Feature Caution in the Preface section.
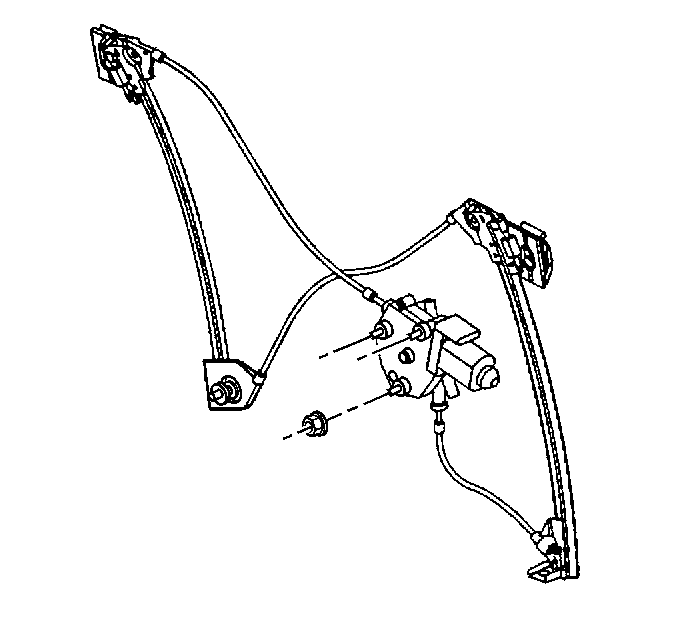
- If replacing the window regulator with a new part, adjust the replacement assembly jack screws to match the old regulator settings.
- Compact the regulator assembly, and insert the entire unit with the motor forward, into the door.
- Position the motor studs through the door inner panel.
- Install the nuts to the motor studs.
- Guide the regulator channel studs into, and through the holes in the door.
- Loosely install the nuts to the regulator channel studs.
- Connect the electrical connector (3) to the motor (1).
- Slide the connector lock (1) to the seated position.
- Install the window. Refer to Door Window Replacement .
- Adjust the window to align with the door opening. Refer to Door Window Major Height Adjustment and Door Window Tip-In Adjustment .
- Connect the battery.
- Connect the door window switch, and run window regulator clamps up to meet glass.
- Tighten the window regulator clamps to secure the glass.
- Tighten the nuts to the regulator channel studs in the following order:
- Run window glass to the full down position.
- Tighten the nuts to the regulator channel studs in the following order:
- Install the small mastic seals in the window clamp sight access holes.
- Connect the harness electrical connector to the speakers. Install the connector lock.
- Install the uppermost screws (4) mounting the speaker assembly to the door.
- Verify proper fit of speaker tab (2), noting the index notch in the door.
- Install the remaining screws (4).
- Install the water deflector (1).
- Connect the door panel electrical connector.
- Install the door trim panel. Refer to Door Trim Panel Replacement .
- Inspect the window fit, adjust as necessary. Refer to Door Window Major Height Adjustment or Door Window Tip-In Adjustment or Door Window Minor Height Adjustment .
- Install the access plug into the bottom of the door.
- Verify the operation of the window(s), mirror(s), and door switch electrical functions.
- Reinitialize the windows. Refer to Power Window Reinitialization .
Notice: Refer to Fastener Notice in the Preface section.
Tighten
Tighten the window regulator motor nuts to 10 N·m (89 lb in).
Tighten
Tighten the window regulator clamps to 16 N·m (12 lb ft).
| 14.1. | Upper forward |
| 14.2. | Upper rearward |
Tighten
Tighten the regulator channel stud nuts to 10 N·m (89 lb in).
| 16.1. | Lower forward |
| 16.2. | Lower rearward |
Tighten
Tighten the regulator channel stud nuts to 10 N·m (89 lb in).
Tighten
Tighten the door speaker assembly screws to 3 N·m (27 lb in).
