For 1990-2009 cars only
Removal Procedure
- Position the window full up to access the window clamp fasteners.
- Remove the door trim panel. Refer to Door Trim Panel Replacement .
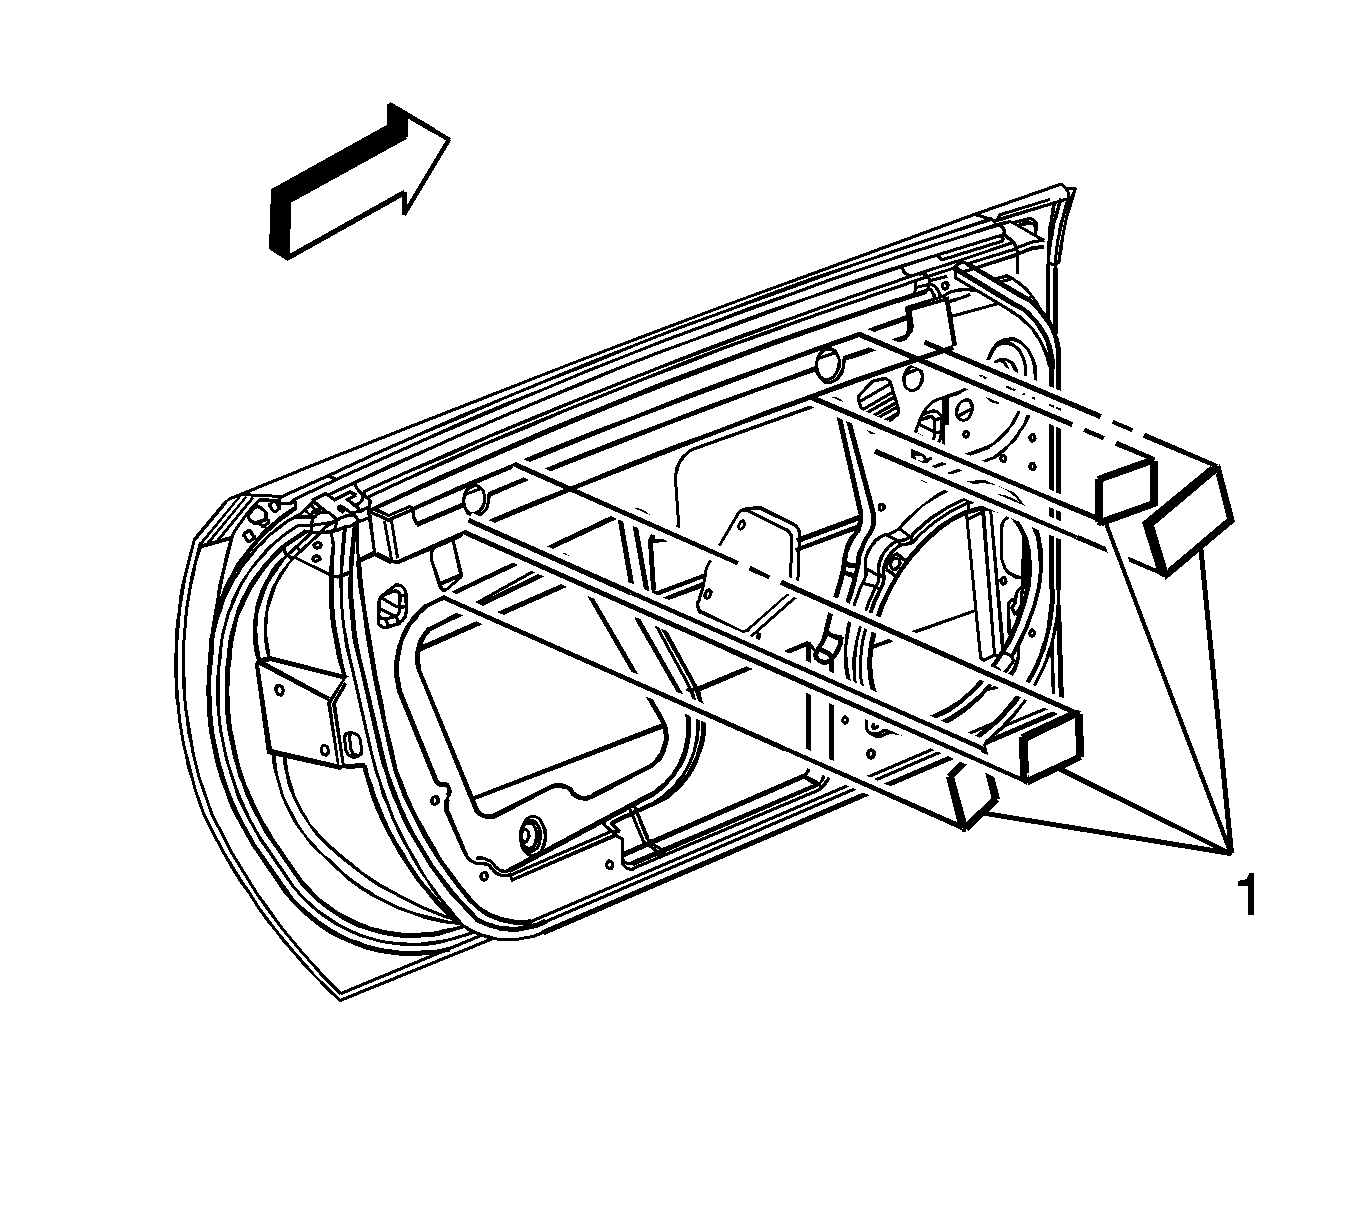
- Remove the mastic (1) covering the window clamp access holes.
- Loosen the window clamp fasteners.
- Lightly rock the window to break the window loose from the clamps rubber seals. Verify that the rubber inserts are not dislodged, or stuck on the window glass.
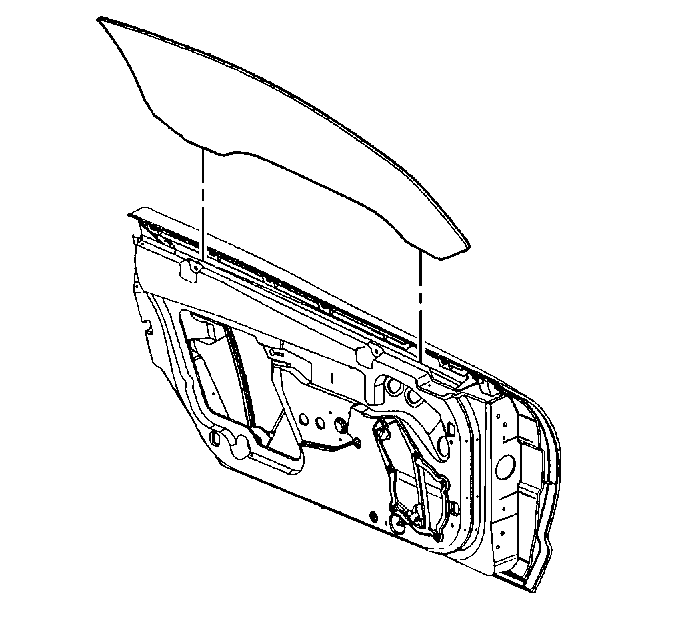
- Remove the window, through the top of the door.

Installation Procedure
- Install the window, through the top of the door, to the regulator that is in the full up position.
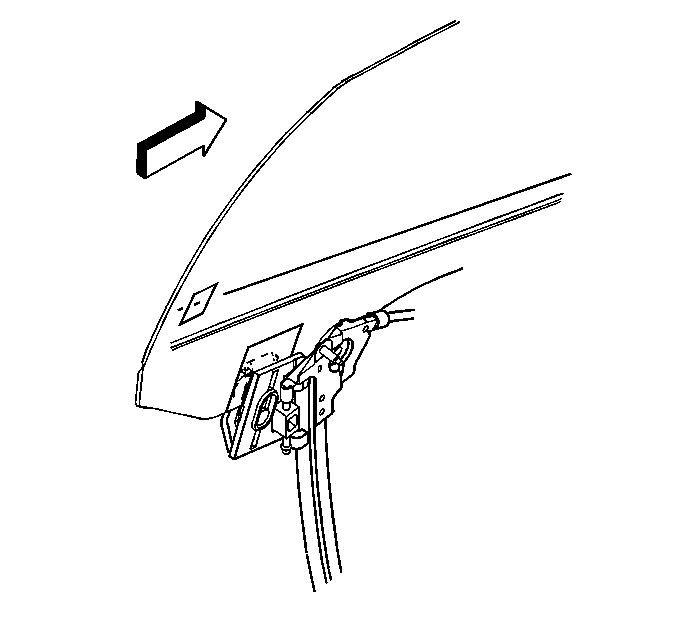
- Note the imprinted reference mark on the glass. Position the mark to the trailing edge of the rearmost clamp on the window regulator.
- Loosely tighten the window clamp fasteners to allow for adjustment of the window.
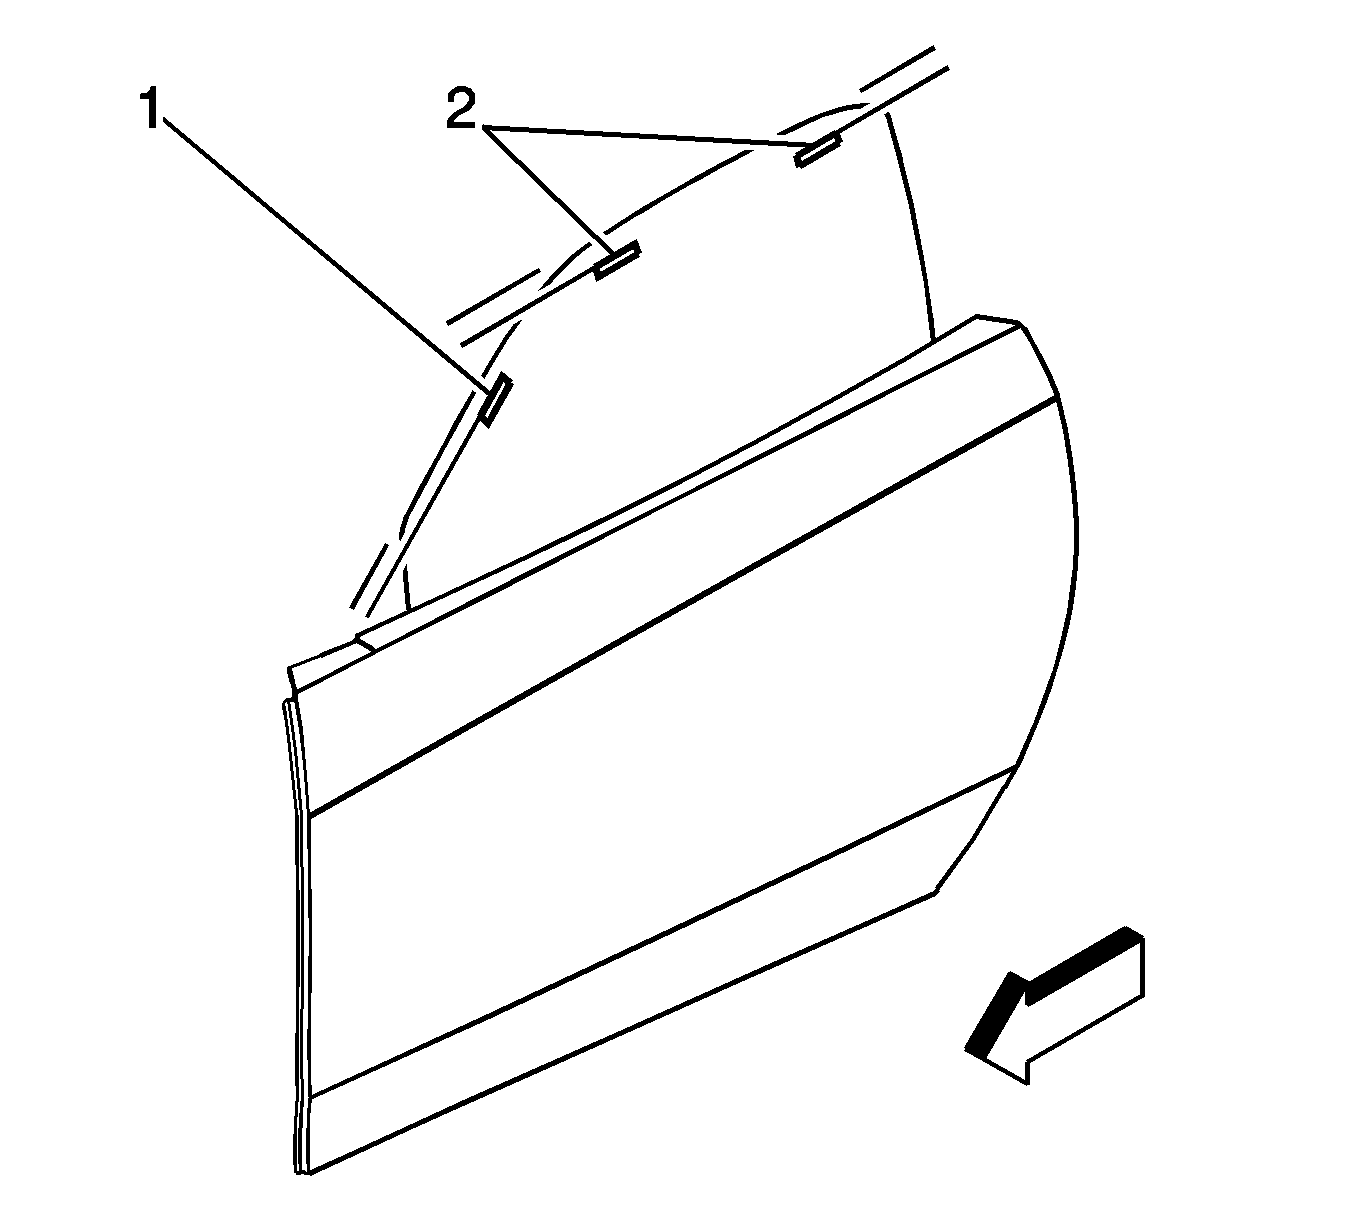
- Apply masking tape to the leading (1), and top edges (2) of the outer window glass.
- Place a mark on the leading edge tape (1) 8 mm (0.3 in) from the top of the glass.
- Place a mark on the top tape edges (2), 10 mm (0.4 in) from the top of the glass.
- Adjust the window using one of the following methods:
- Slide the window in the window clamps as necessary.
- Tighten the window clamps.
- Carefully open the door and guide the window past the seals.
- Install new mastic sealer (1) to the window clamp access holes.
- Install the door trim panel. Refer to Door Trim Panel Replacement .
- Lower the door glass and perform door module reprogramming after closing the door. Refer to: Door Window Adjustment
- To perform minor height and minor tip-in adjustments. Refer to Door Window Tip-In Adjustment and Door Window Minor Height Adjustment .
| • | Put a socket on the clamp bolt and use the socket to move the window. |
| 1. | Adjust the window forward or rearward first. |
| 2. | Adjust the front height second. |
| 3. | Adjust the rear height last. |
| • | Sit in the vehicle with the door closed and with the aid of an assistant standing outside of the vehicle, position the window in the door opening. |
| 1. | Adjust the window forward or rearward first. |
| 2. | Adjust the front height second. |
| 3. | Adjust the rear height last. |
| • | The window should penetrate the leading seal (1) 8 mm (0.3 in). |
| • | The window should penetrate the top seal at (2) and (3) 10 mm (0.4 in). |
Notice: Use the correct fastener in the correct location. Replacement fasteners must be the correct part number for that application. Fasteners requiring replacement or fasteners requiring the use of thread locking compound or sealant are identified in the service procedure. Do not use paints, lubricants, or corrosion inhibitors on fasteners or fastener joint surfaces unless specified. These coatings affect fastener torque and joint clamping force and may damage the fastener. Use the correct tightening sequence and specifications when installing fasteners in order to avoid damage to parts and systems.
Tighten
Tighten the window regulator window clamp bolts
to 16 N·m (12 lb ft).
