For 1990-2009 cars only
Tools Required
| • | J 28467-86 Right Engine Lift Bracket |
| • | J 28467-87 Left Engine Lift Bracket |
Removal Procedure
- Drain the engine oil. Refer to Engine Oil and Oil Filter Replacement .
- Remove the powertrain. Refer to Powertrain Removal and Installation .
- Remove the left exhaust manifold assembly. Refer to Exhaust Manifold Replacement - Left Side .
- Remove the left engine mount bracket. Refer to Engine Mount Bracket Replacement - Left Side .
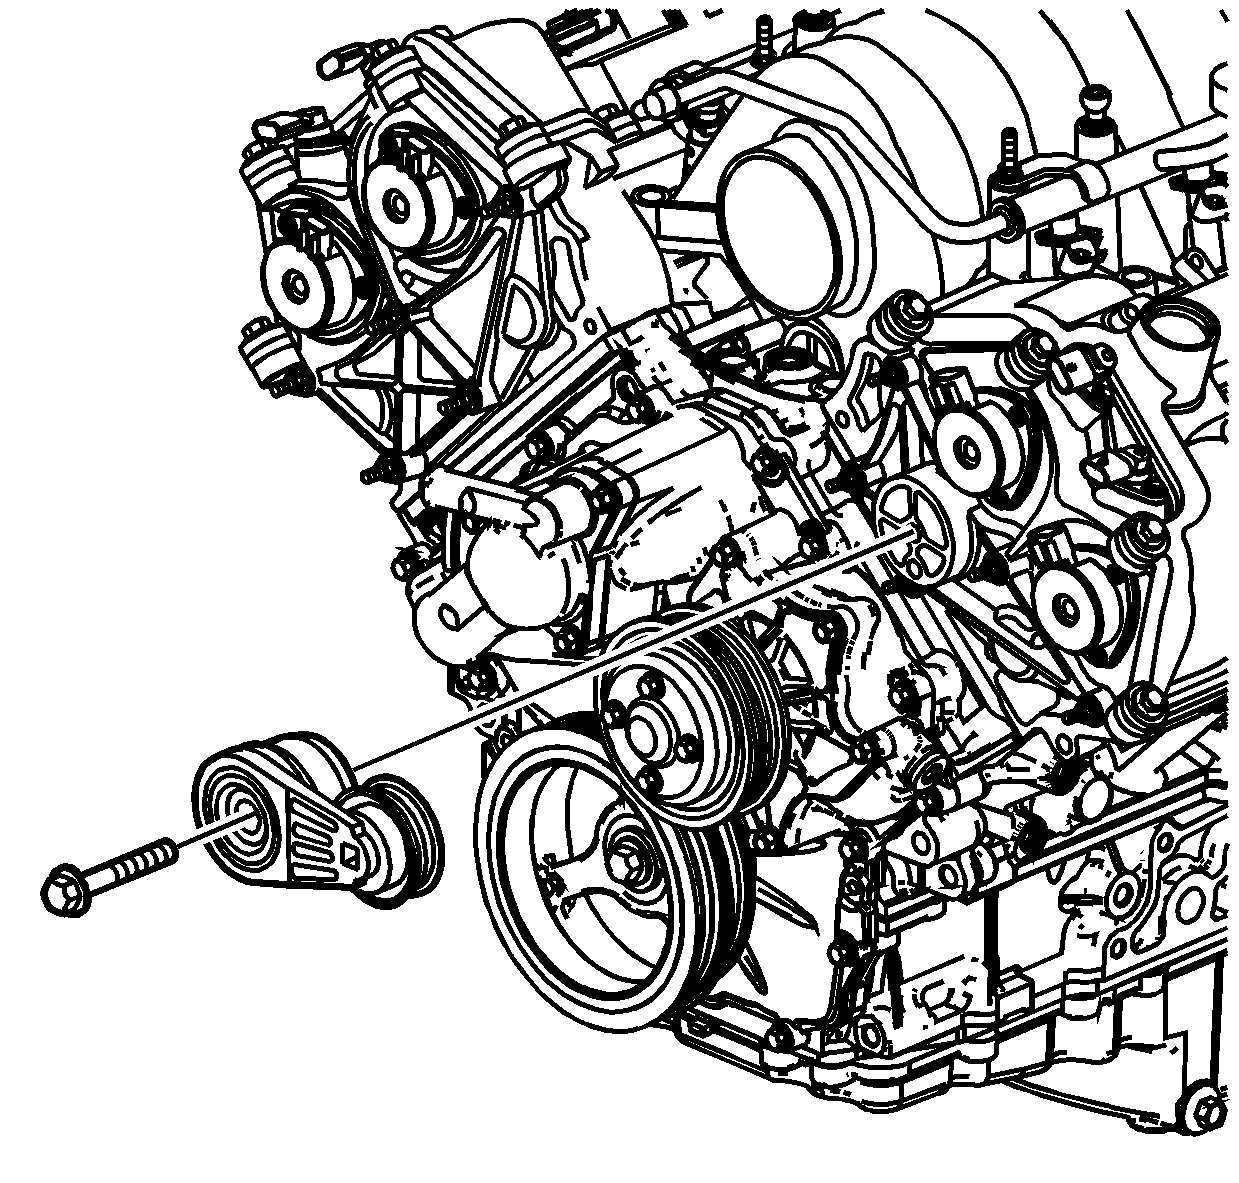
- Remove the drive belt tensioner. Refer to Drive Belt Tensioner Replacement .
- Remove the generator. Refer to Generator Replacement .
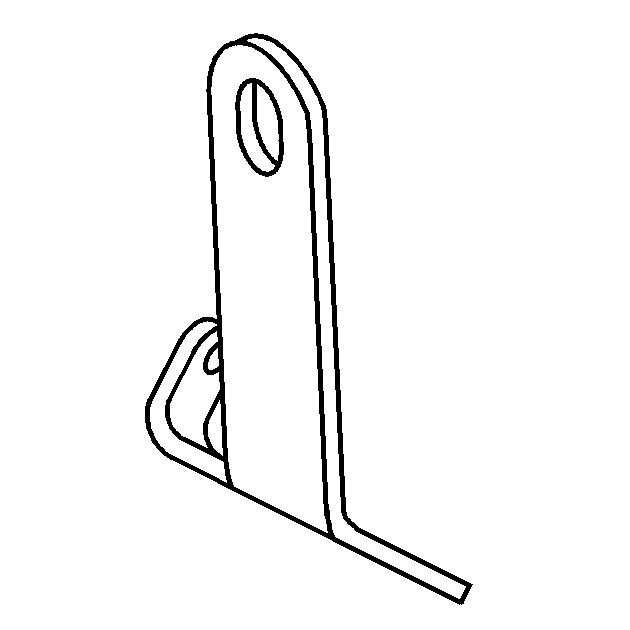
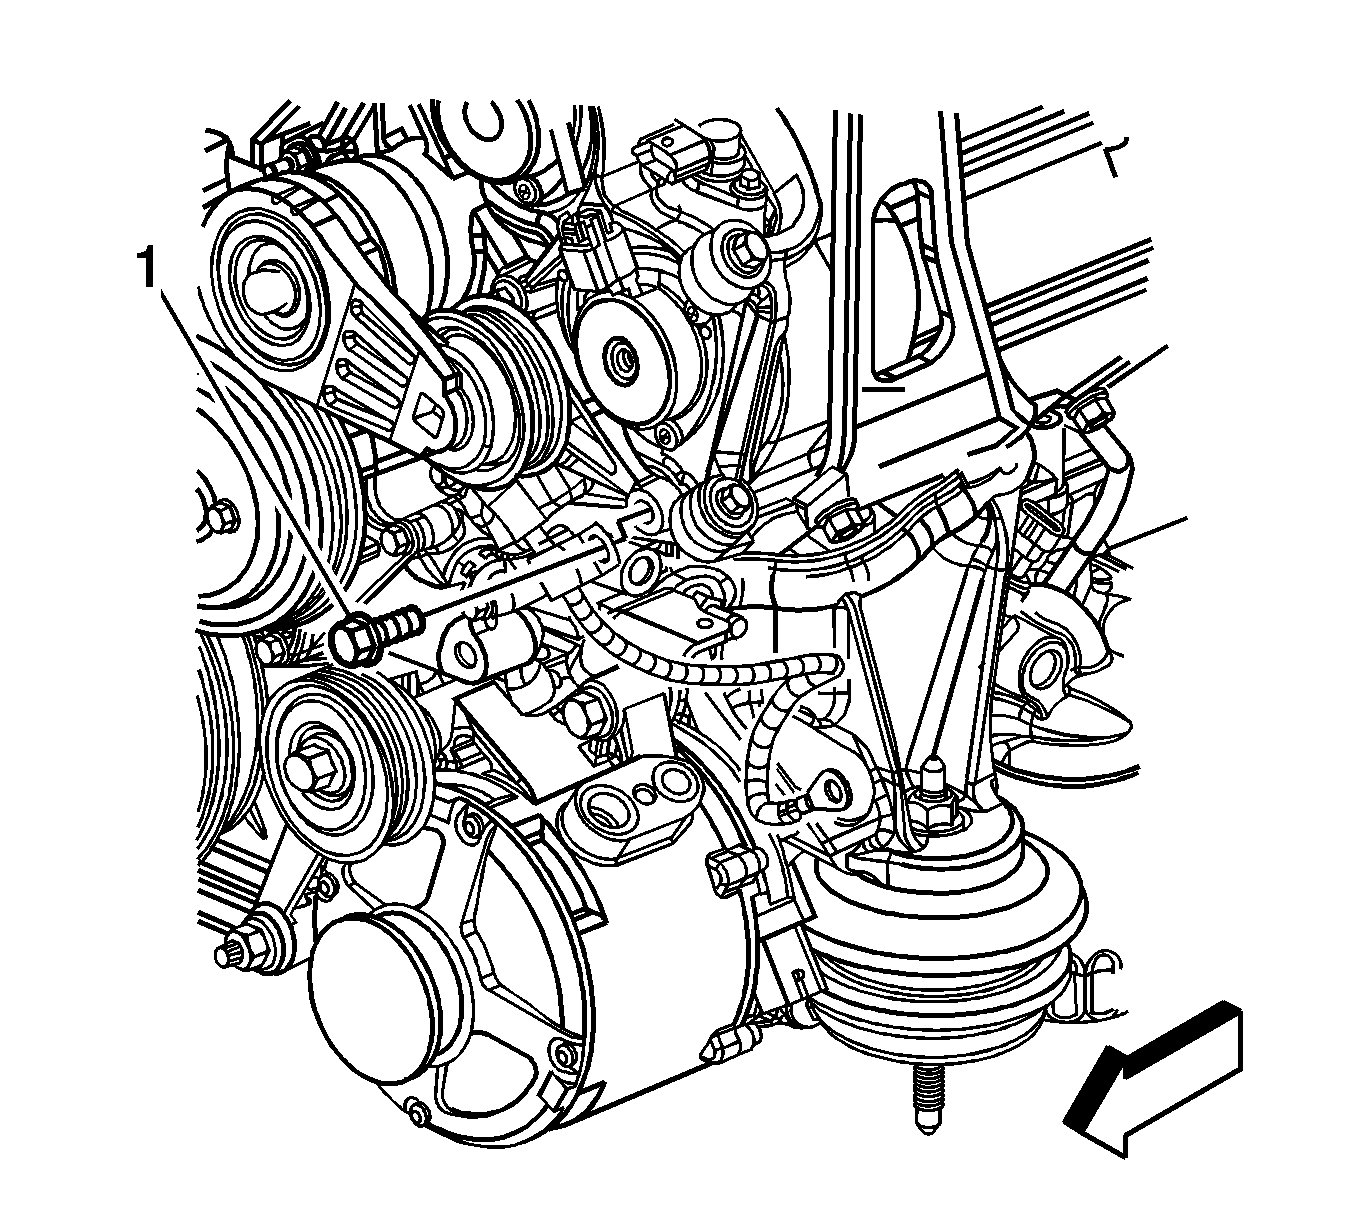
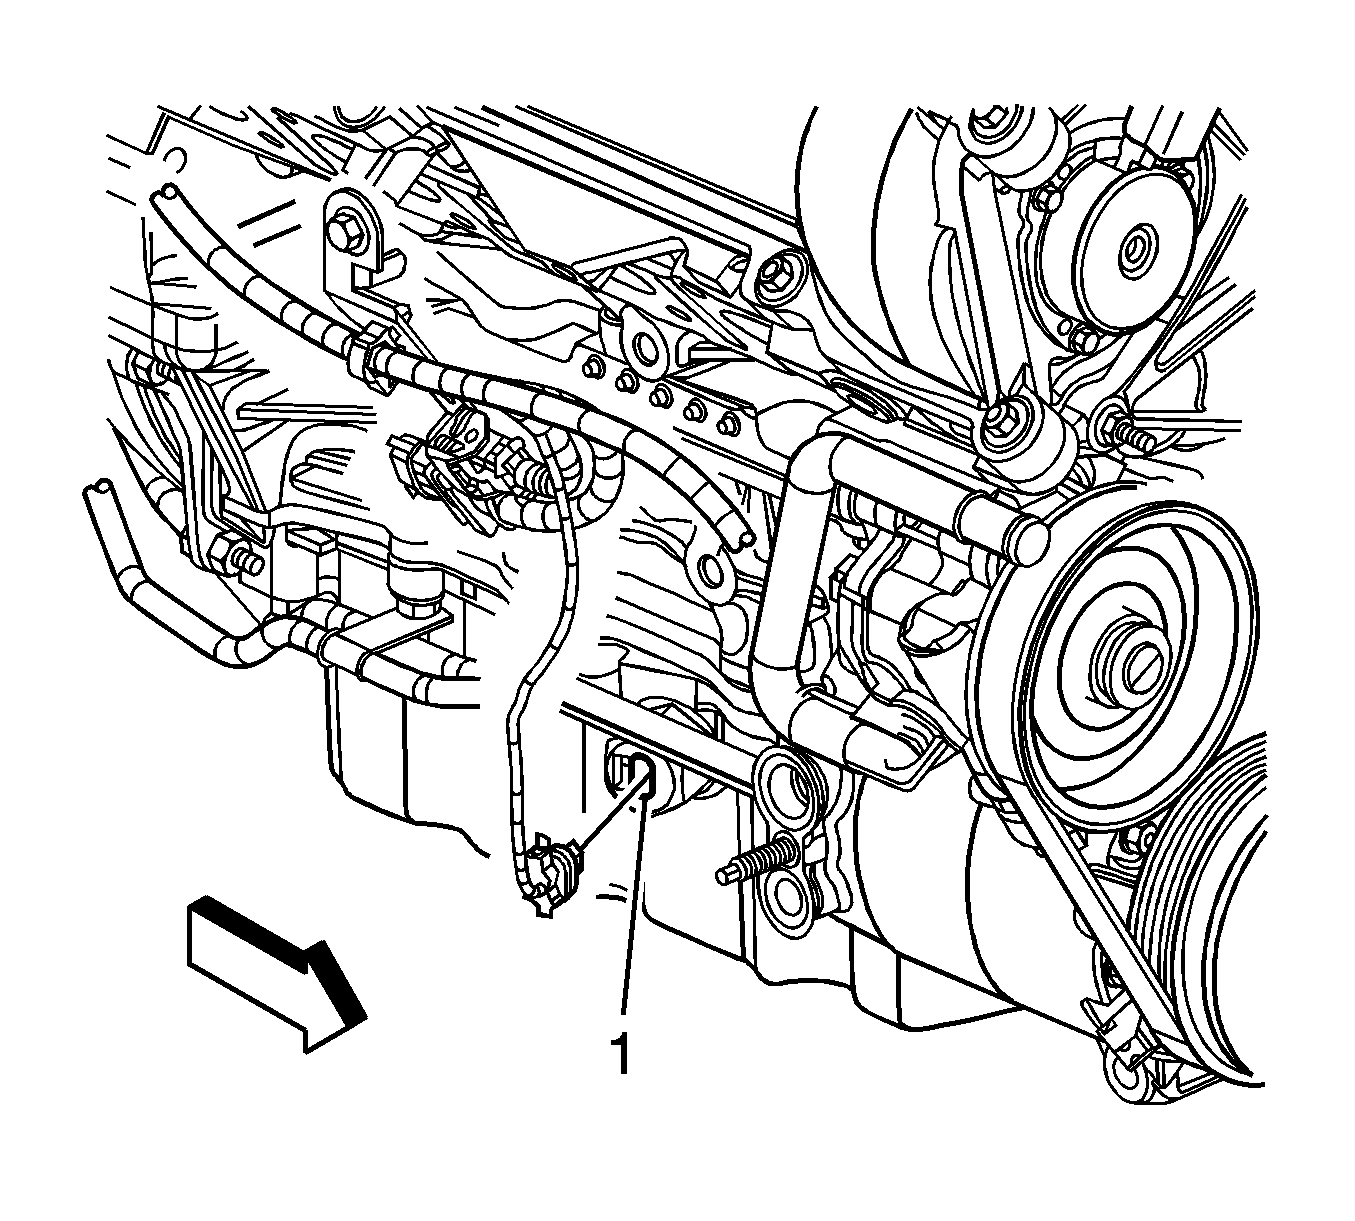
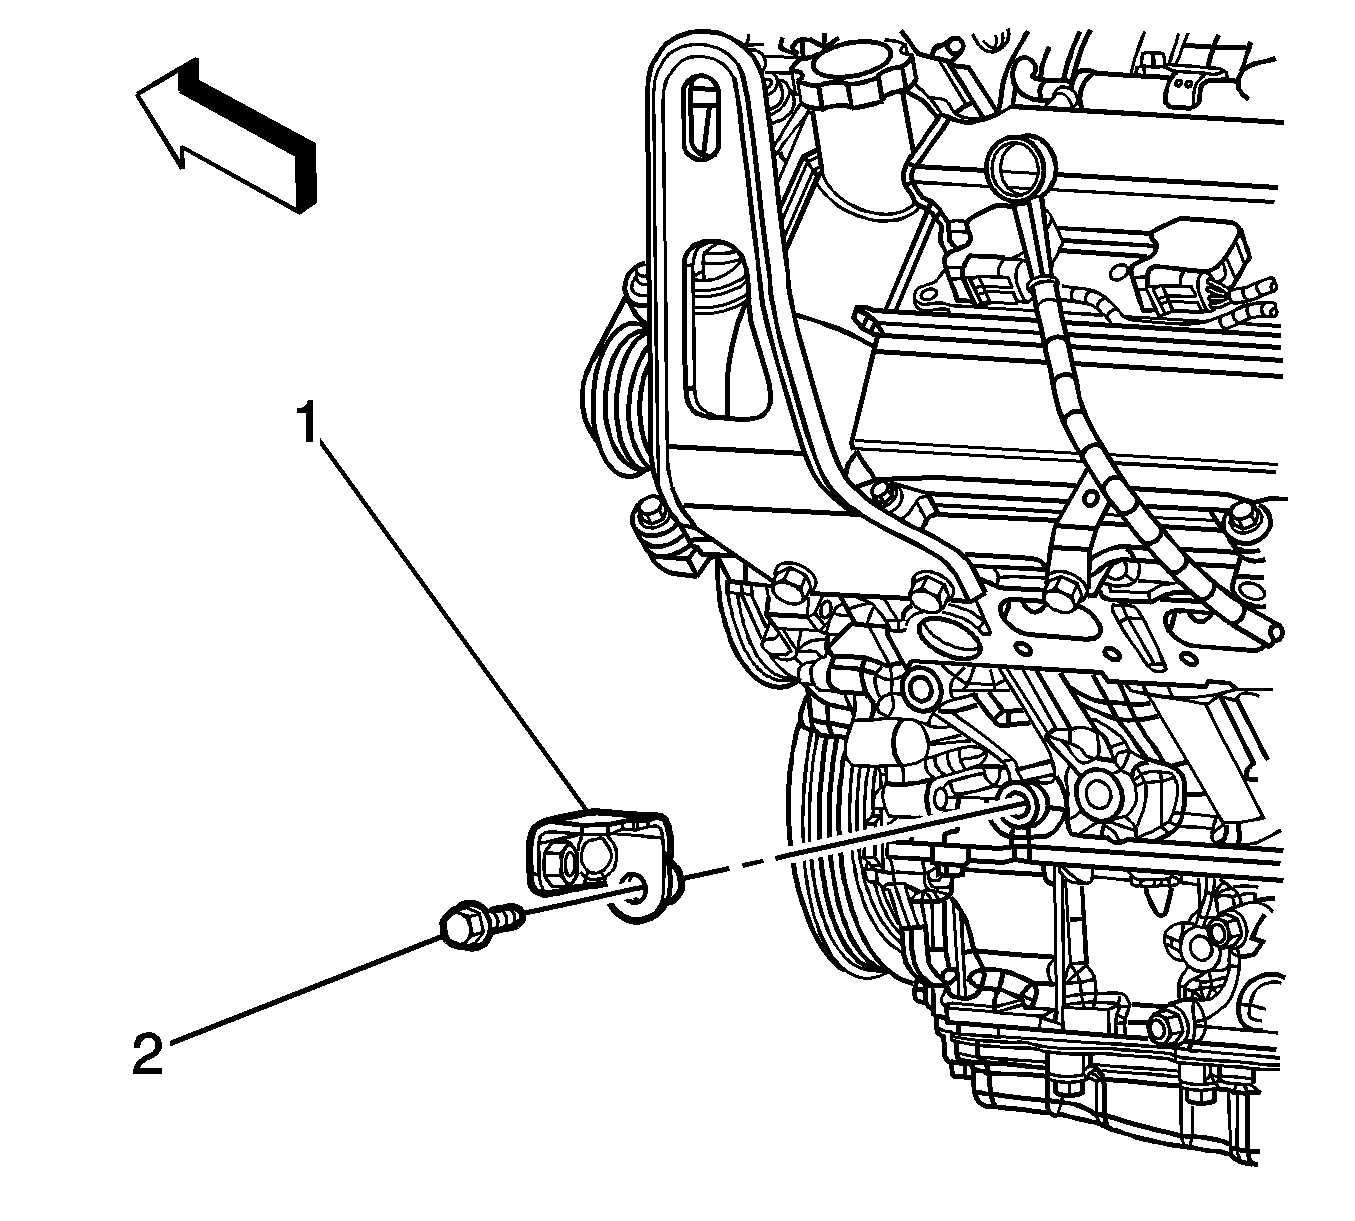
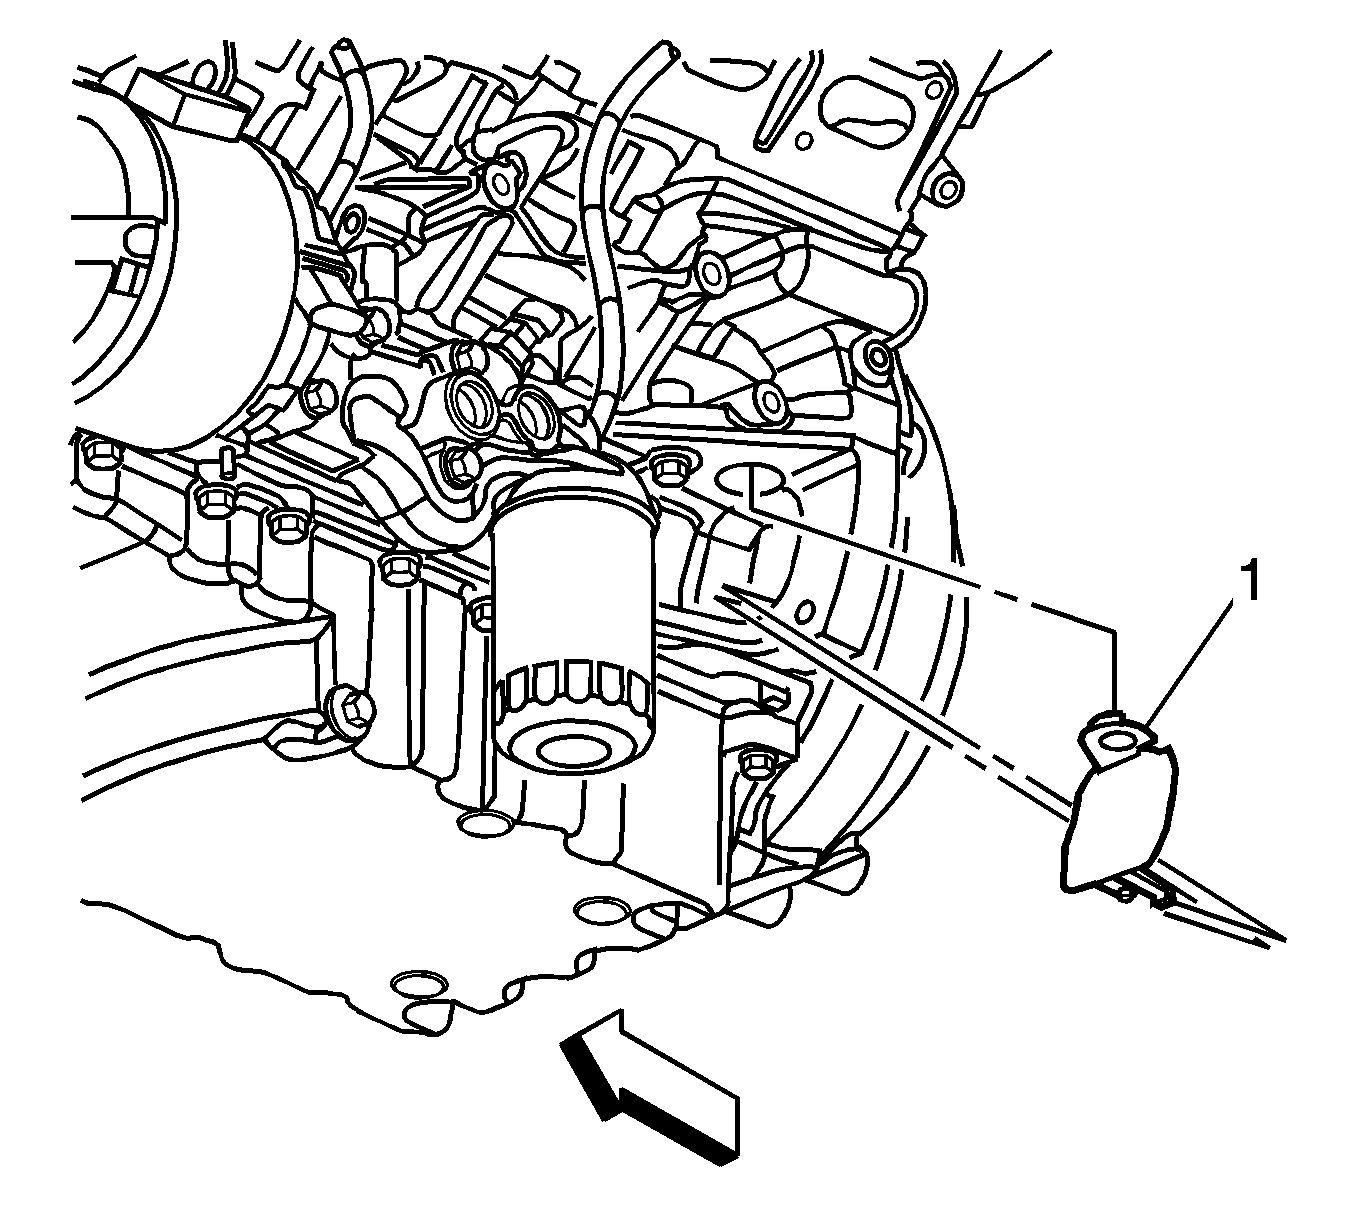
- Remove the bolt (1) securing the starter/generator harness clip to the front of the engine.
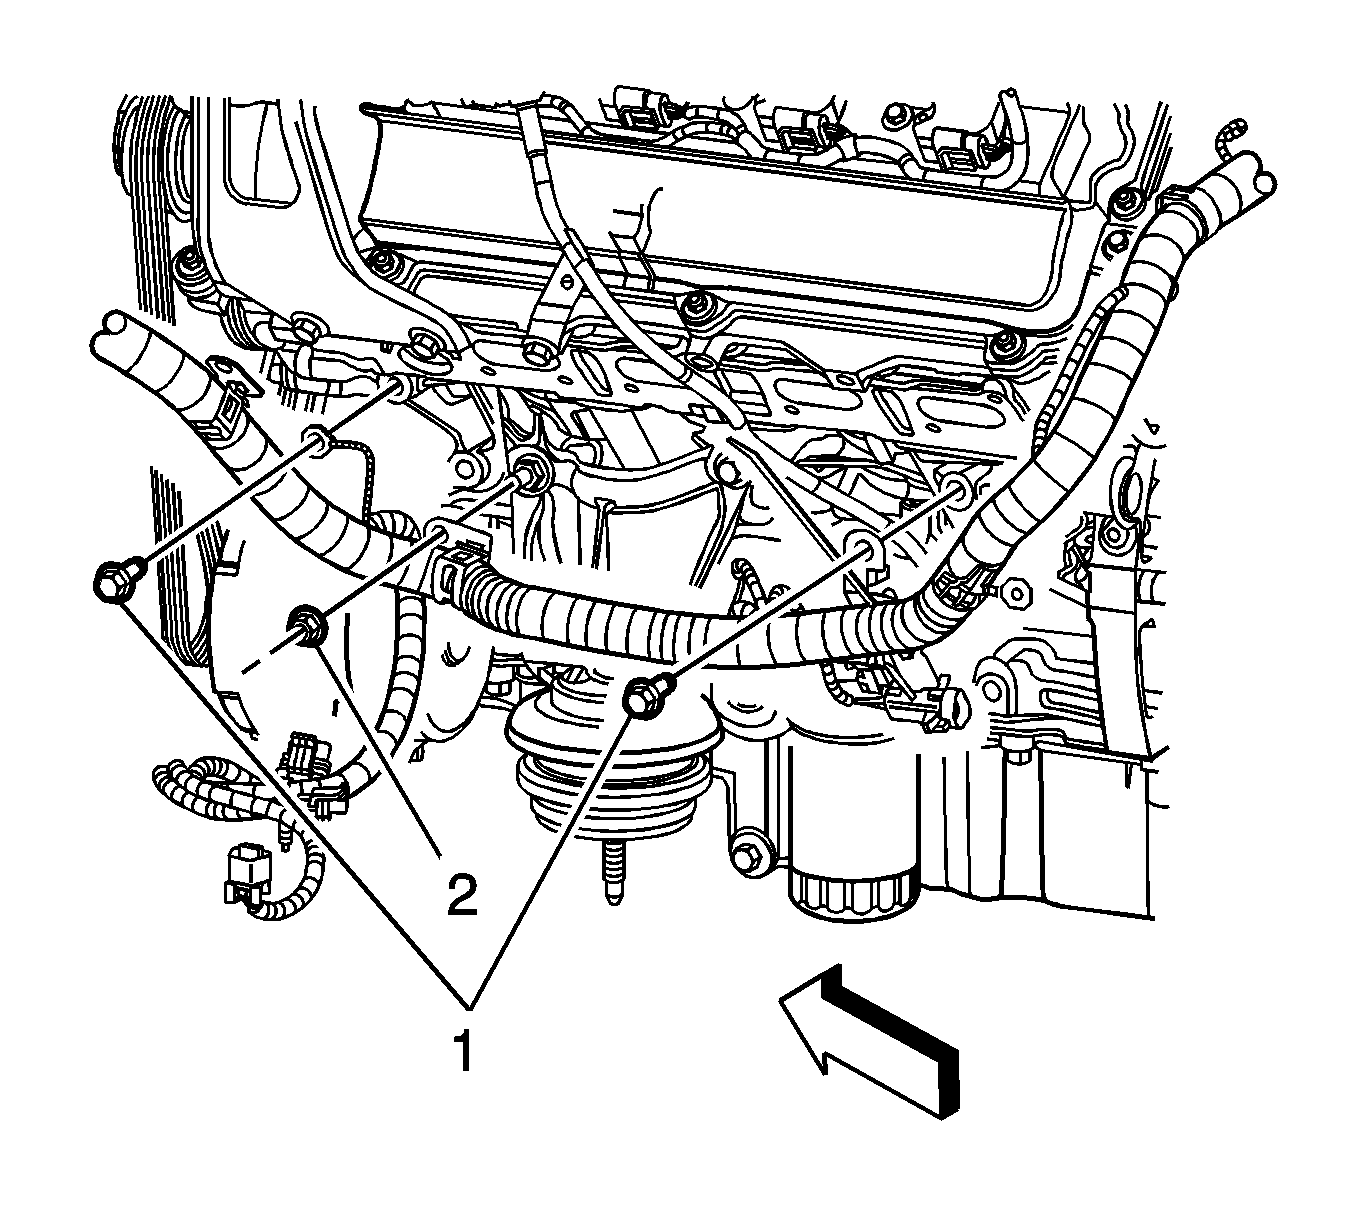
- Remove the bolts and nut securing the engine wiring harness to the left side of the engine.
- Remove the right exhaust manifold assembly. Refer to Exhaust Manifold Replacement - Right Side .
- Remove the right engine mount bracket. Refer to Engine Mount Bracket Replacement - Right Side .
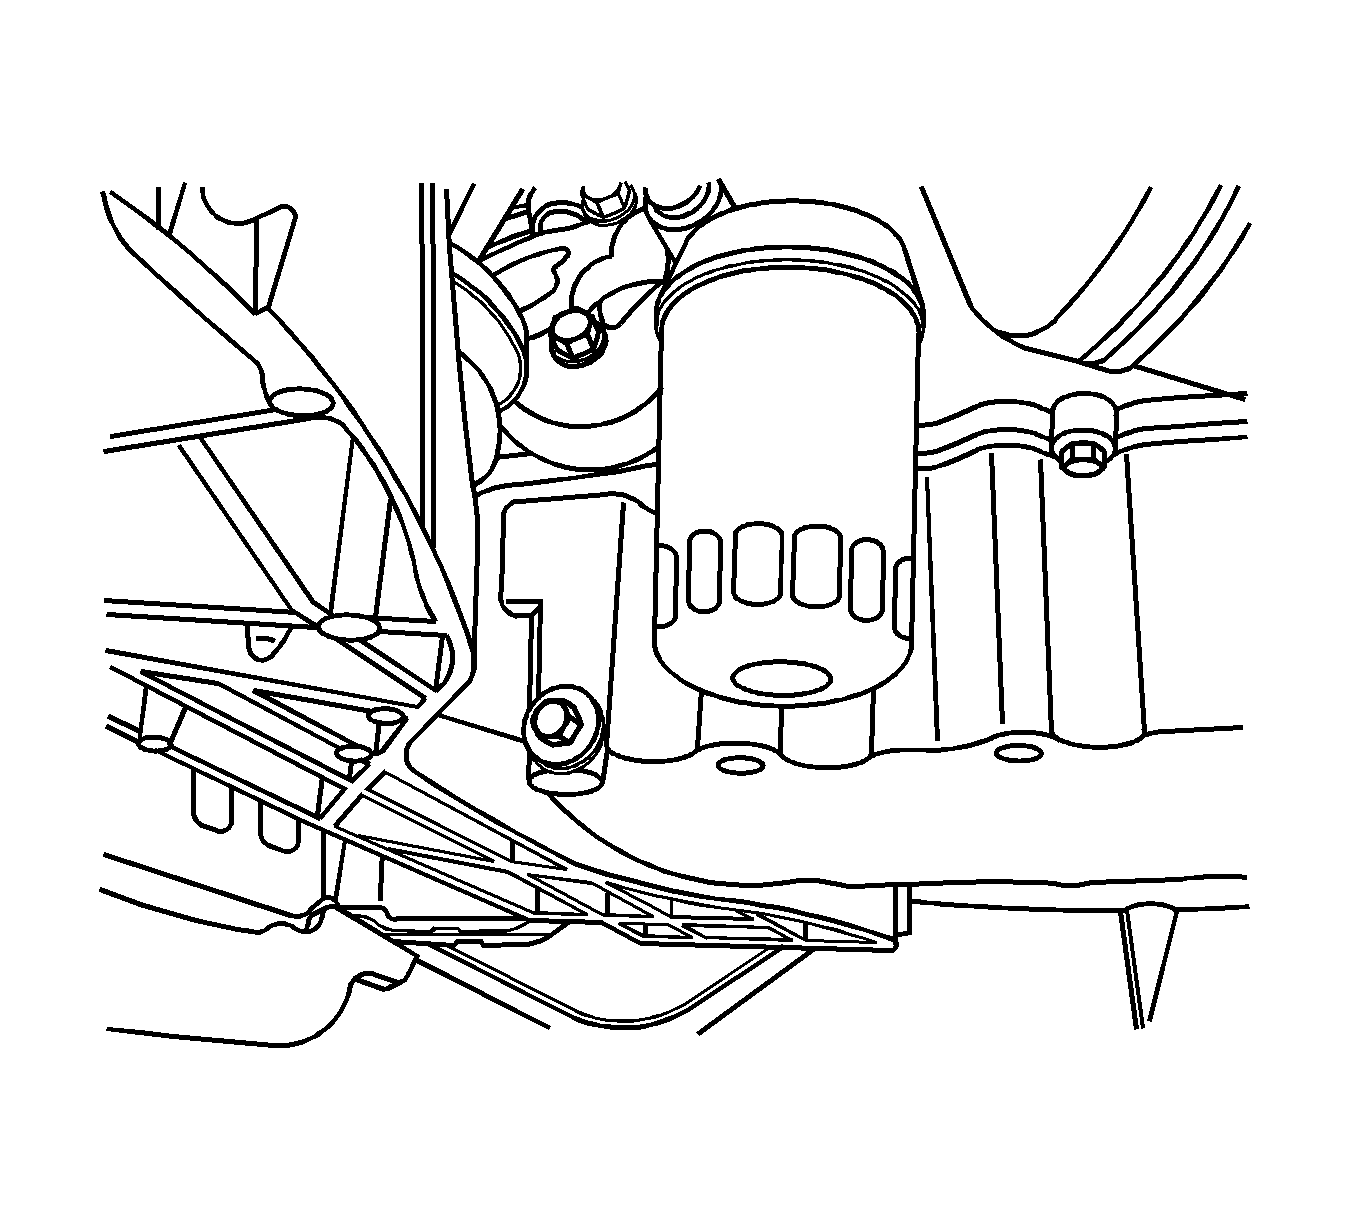
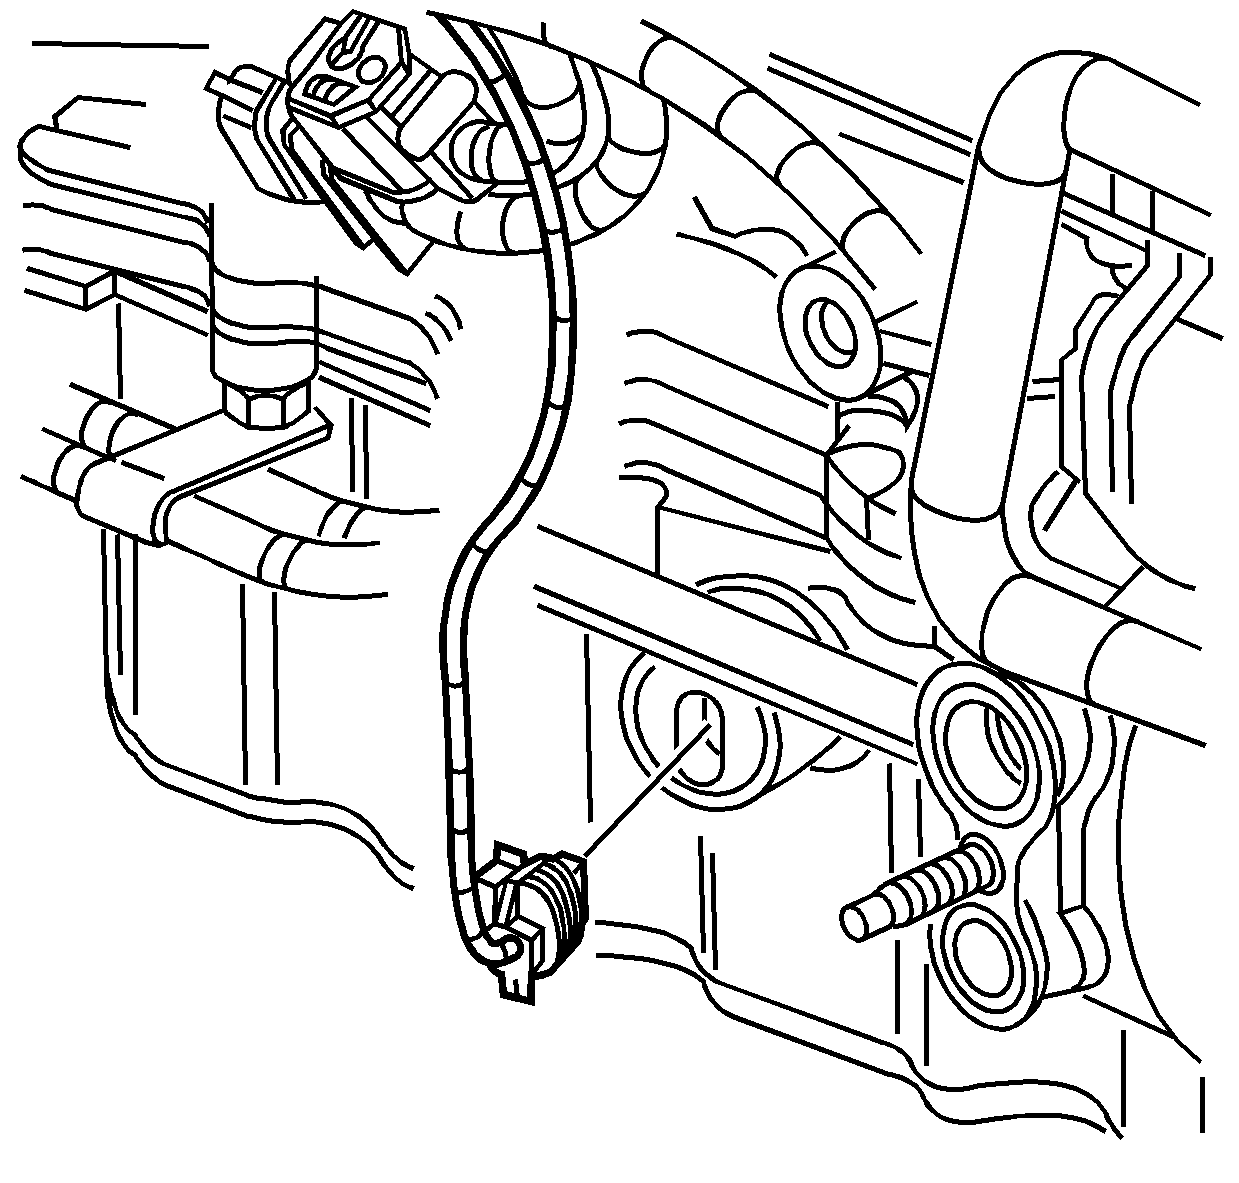
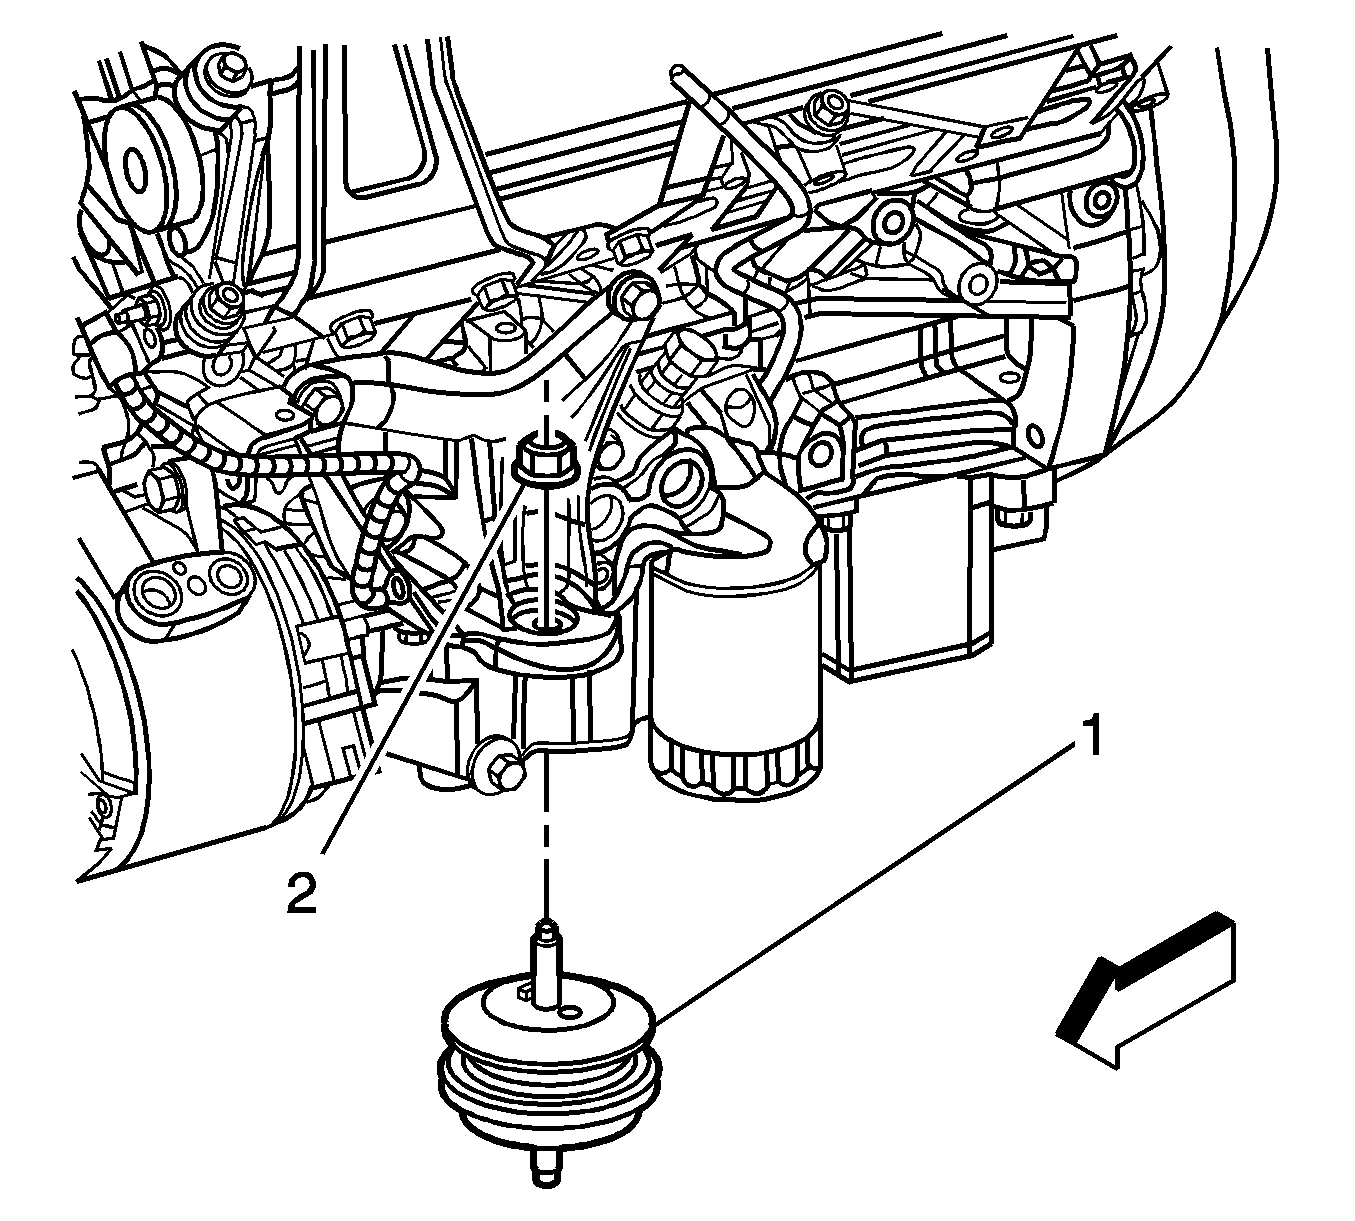
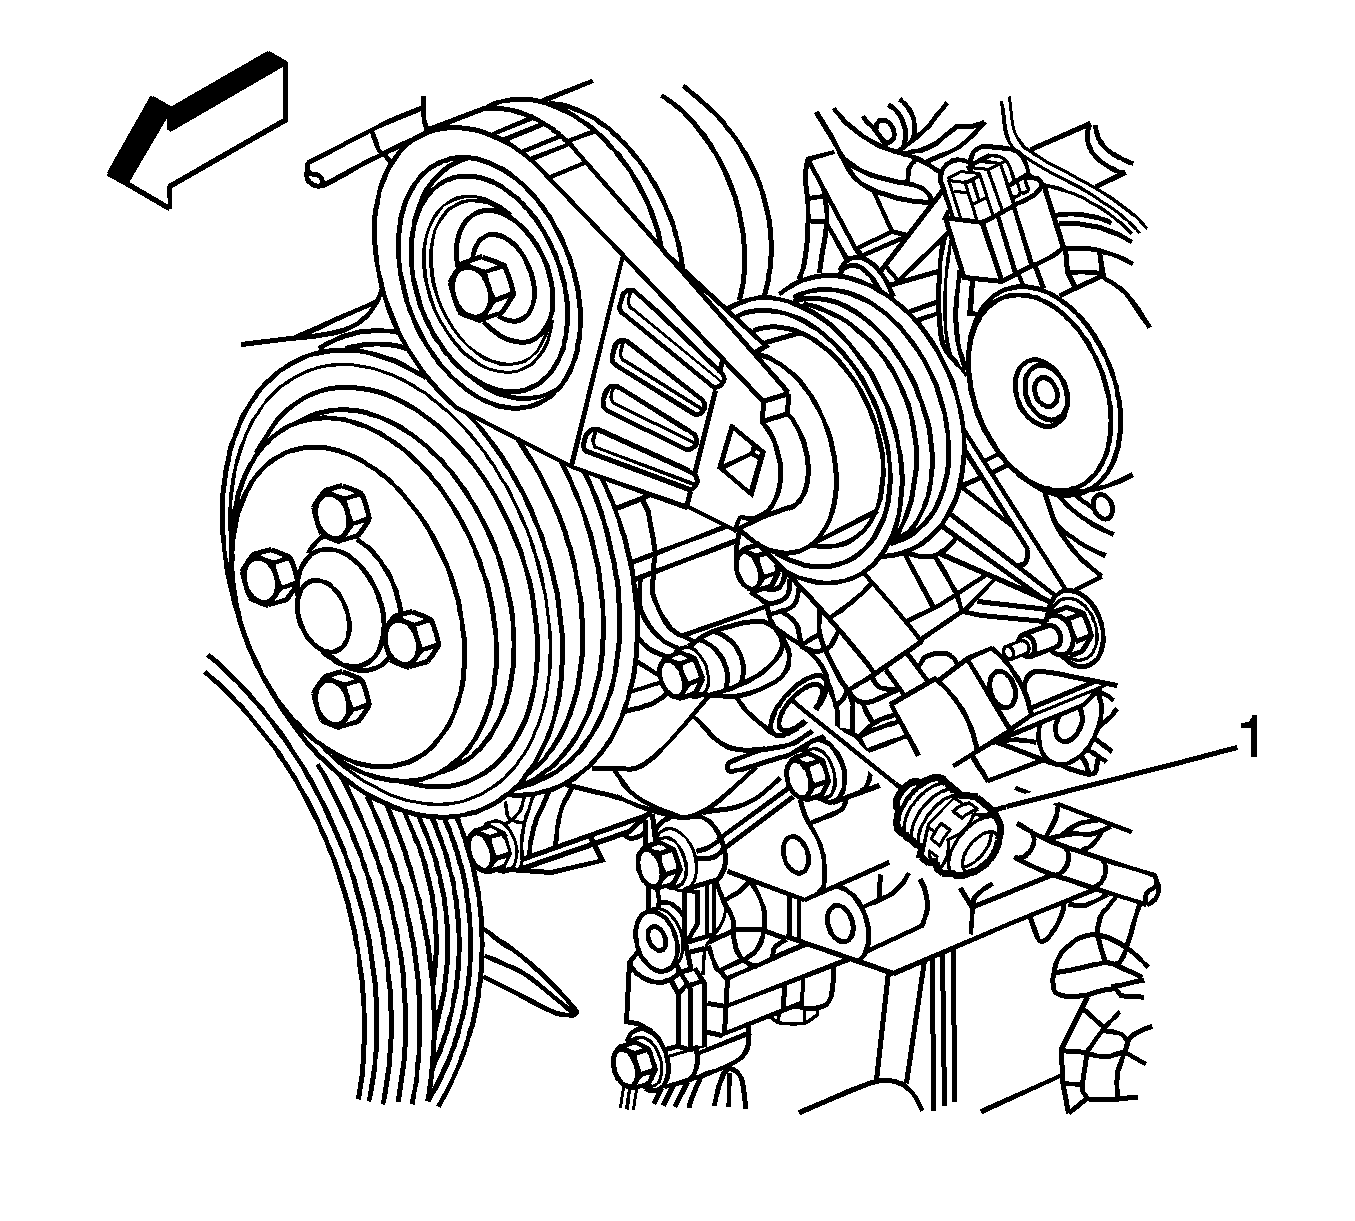
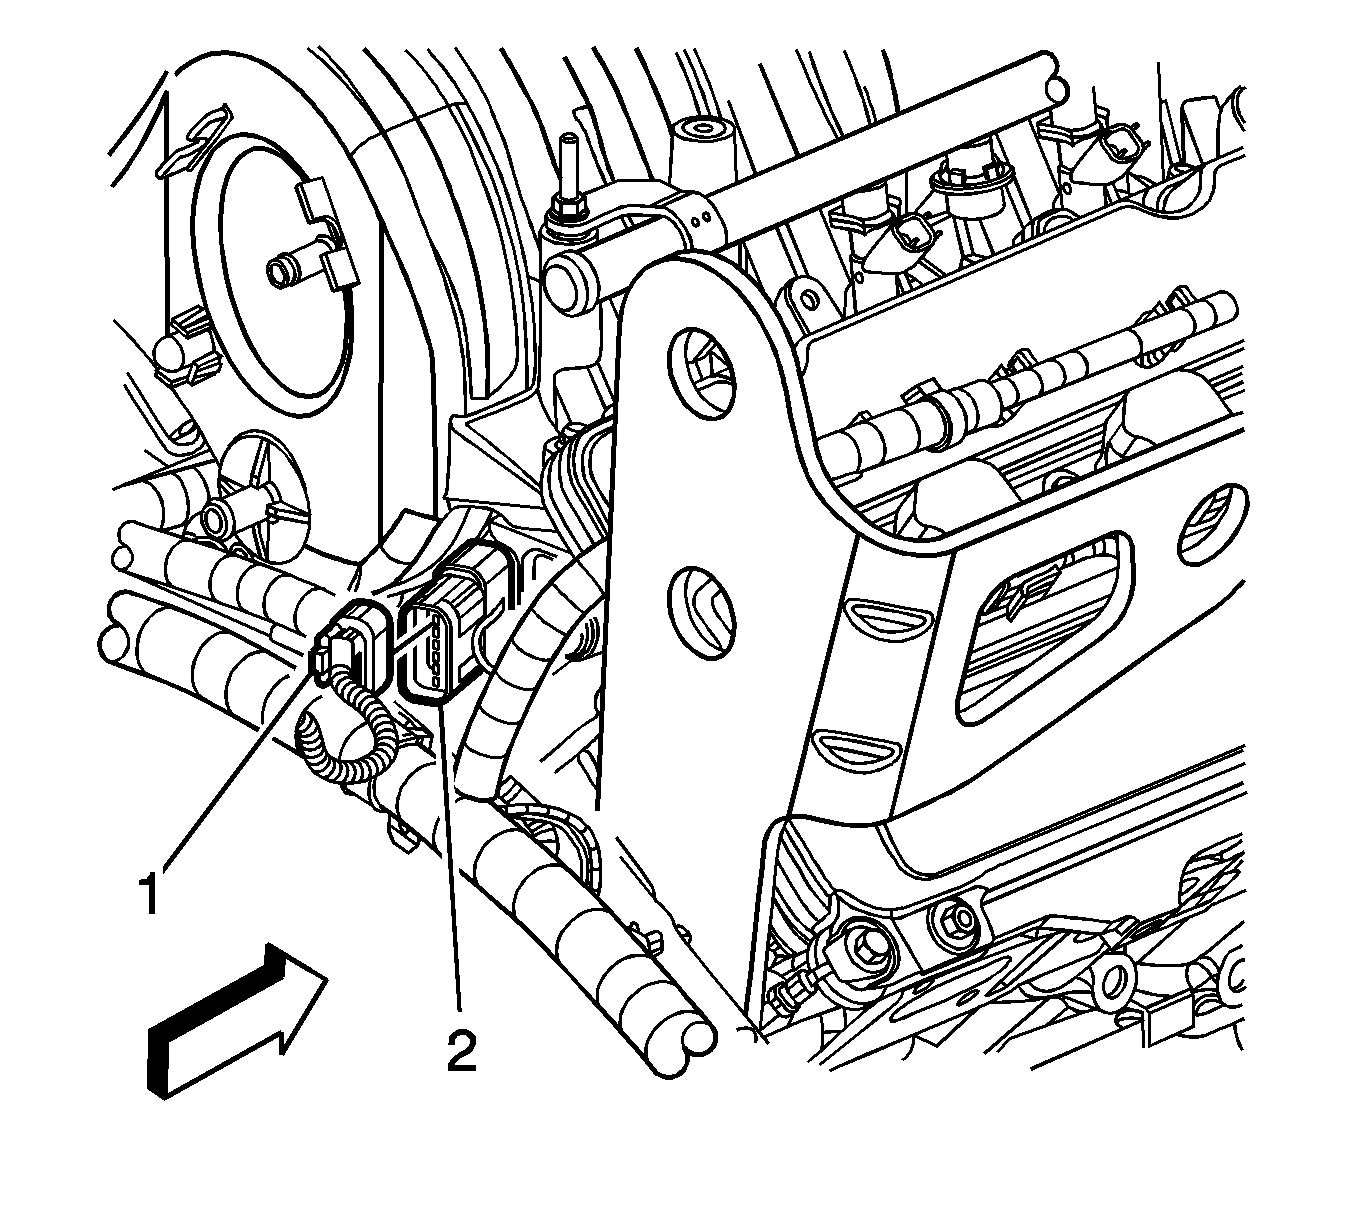
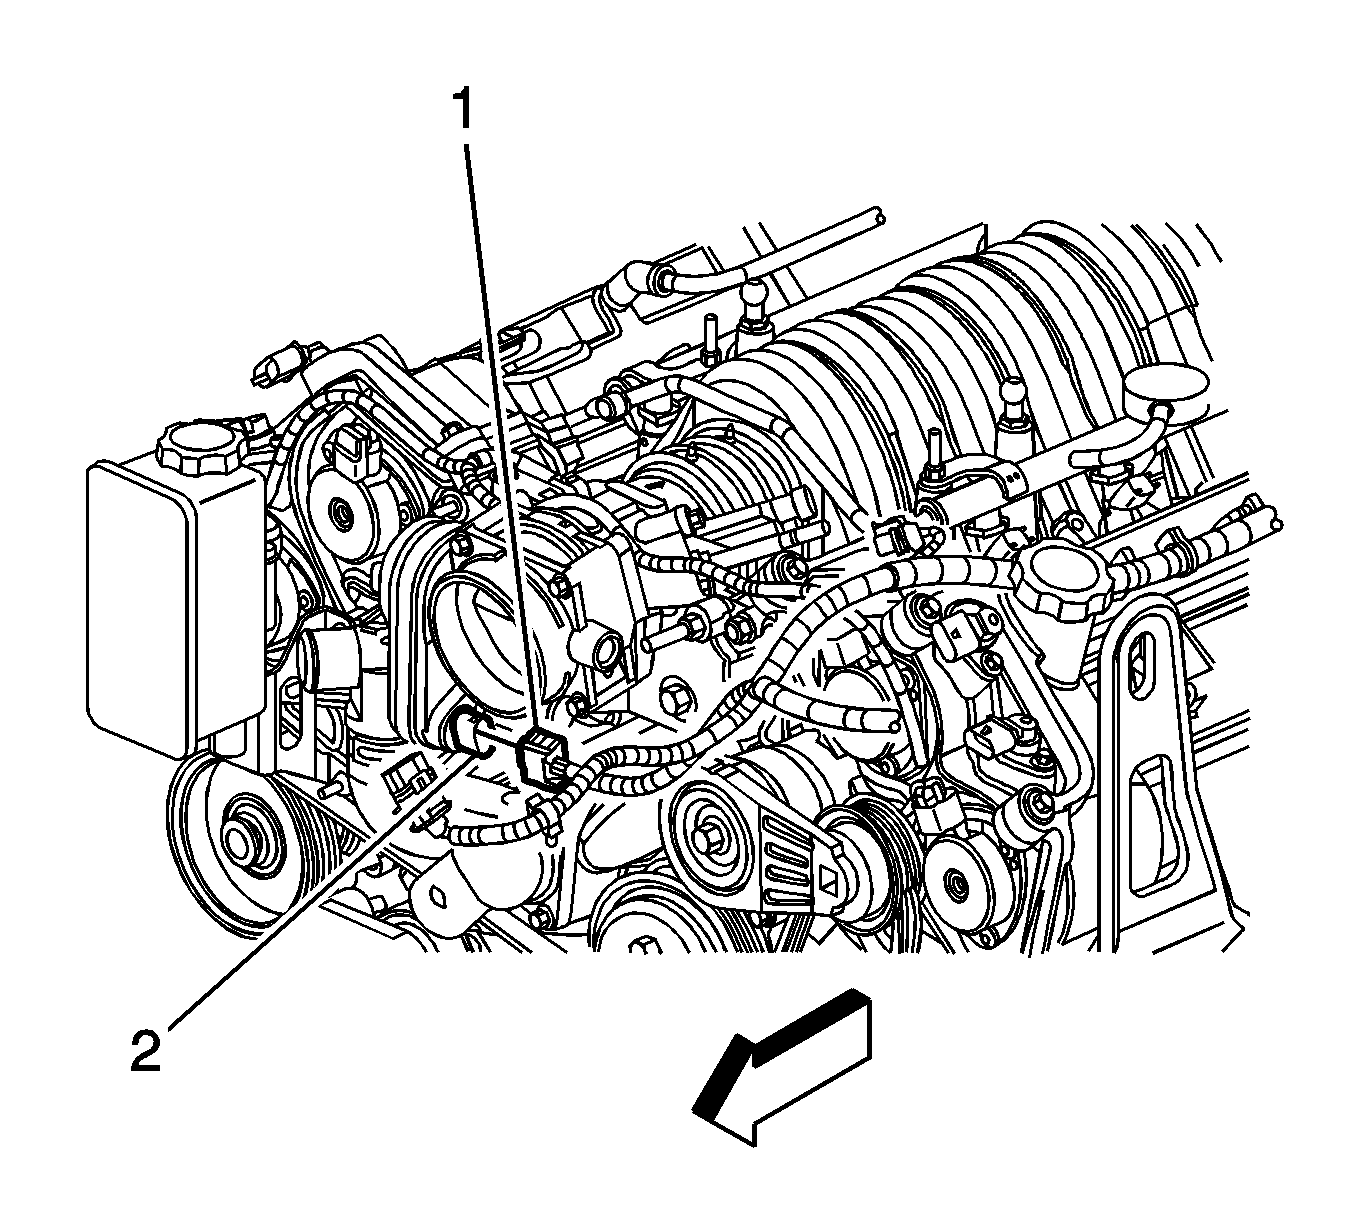
- Disconnect the electrical connector (2) from the engine oil level sensor (1).
- Remove the power steering reservoir . Refer to Remote Power Steering Fluid Reservoir Replacement .
- Remove the air conditioning compressor and bracket. Refer to Air Conditioning Compressor Replacement .
- Remove the transmission cooler lines. Refer to Transmission Fluid Cooler Upper Pipe Assembly Replacement and Transmission Fluid Cooler Lower Pipe Assembly Replacement - Transmission to Auxiliary Cooler .
- Remove the coolant temperature sensor. Refer to Engine Coolant Temperature Sensor Replacement .
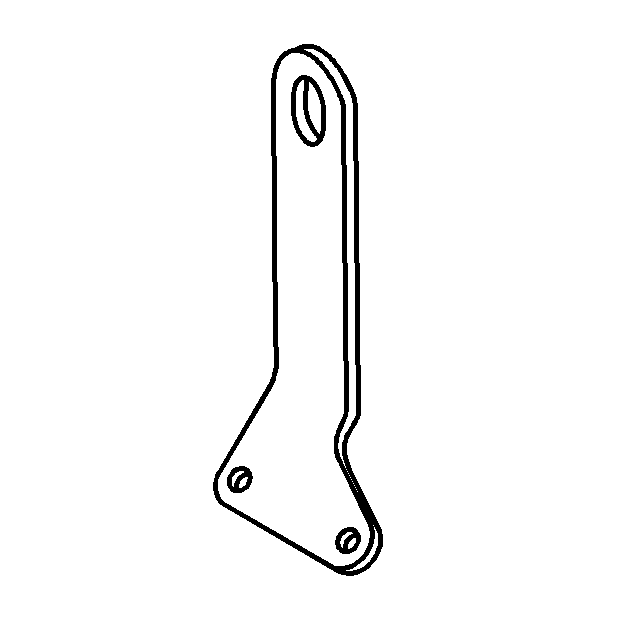
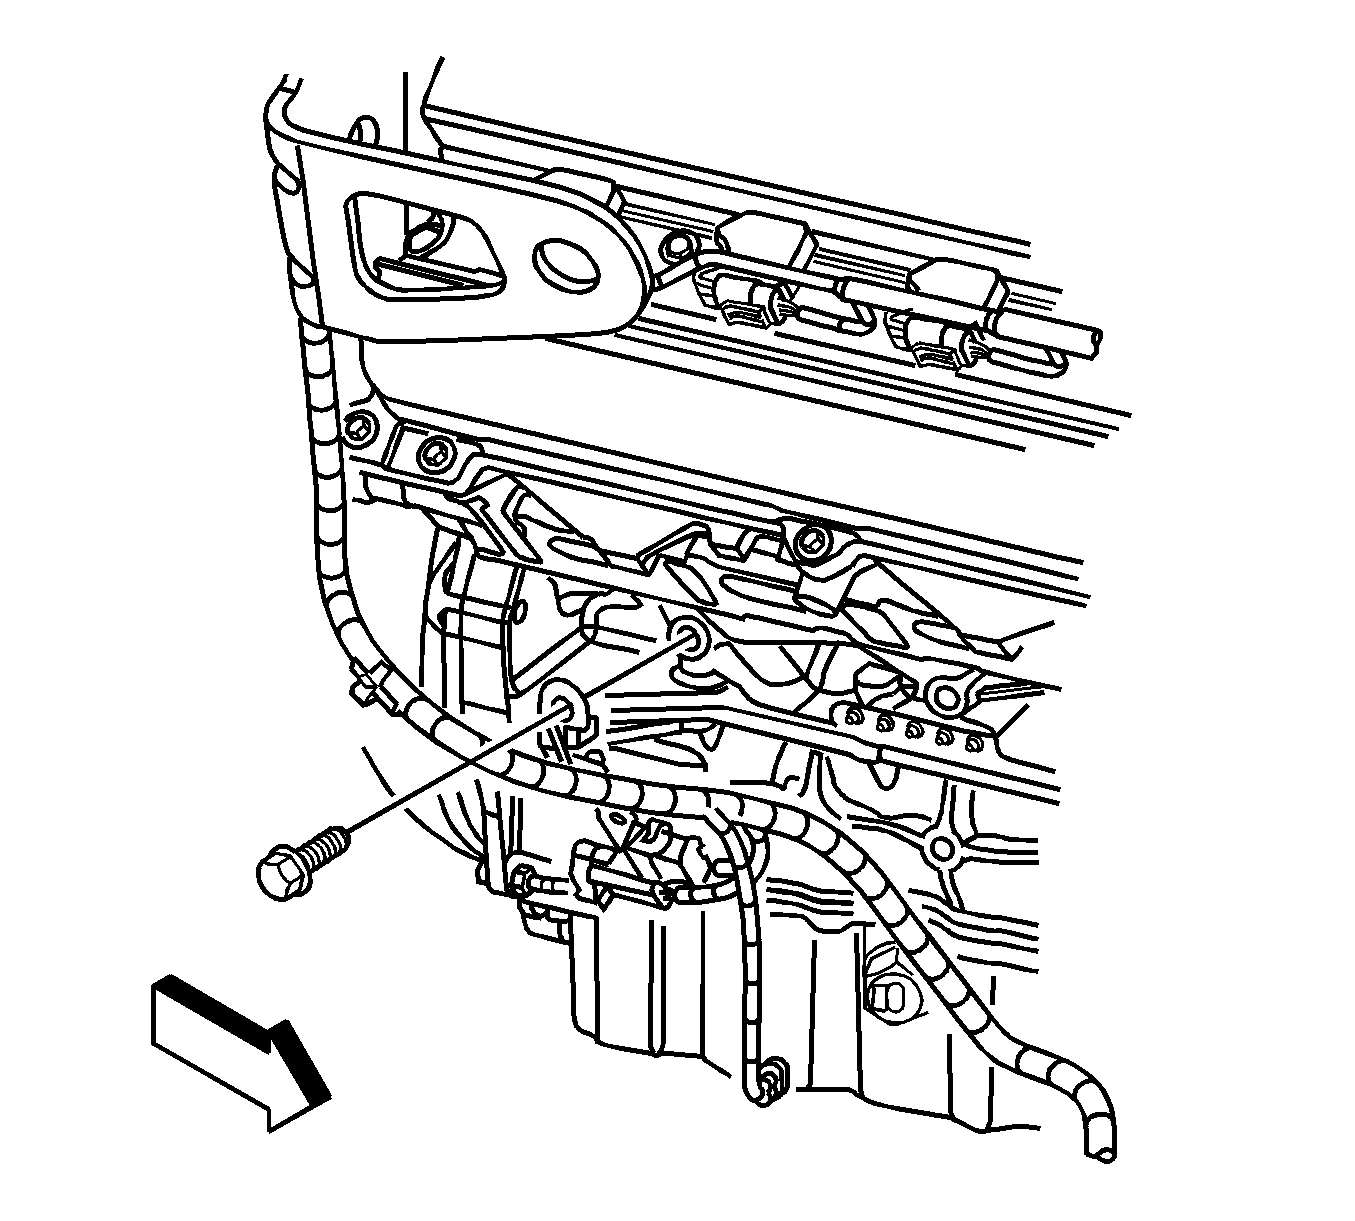
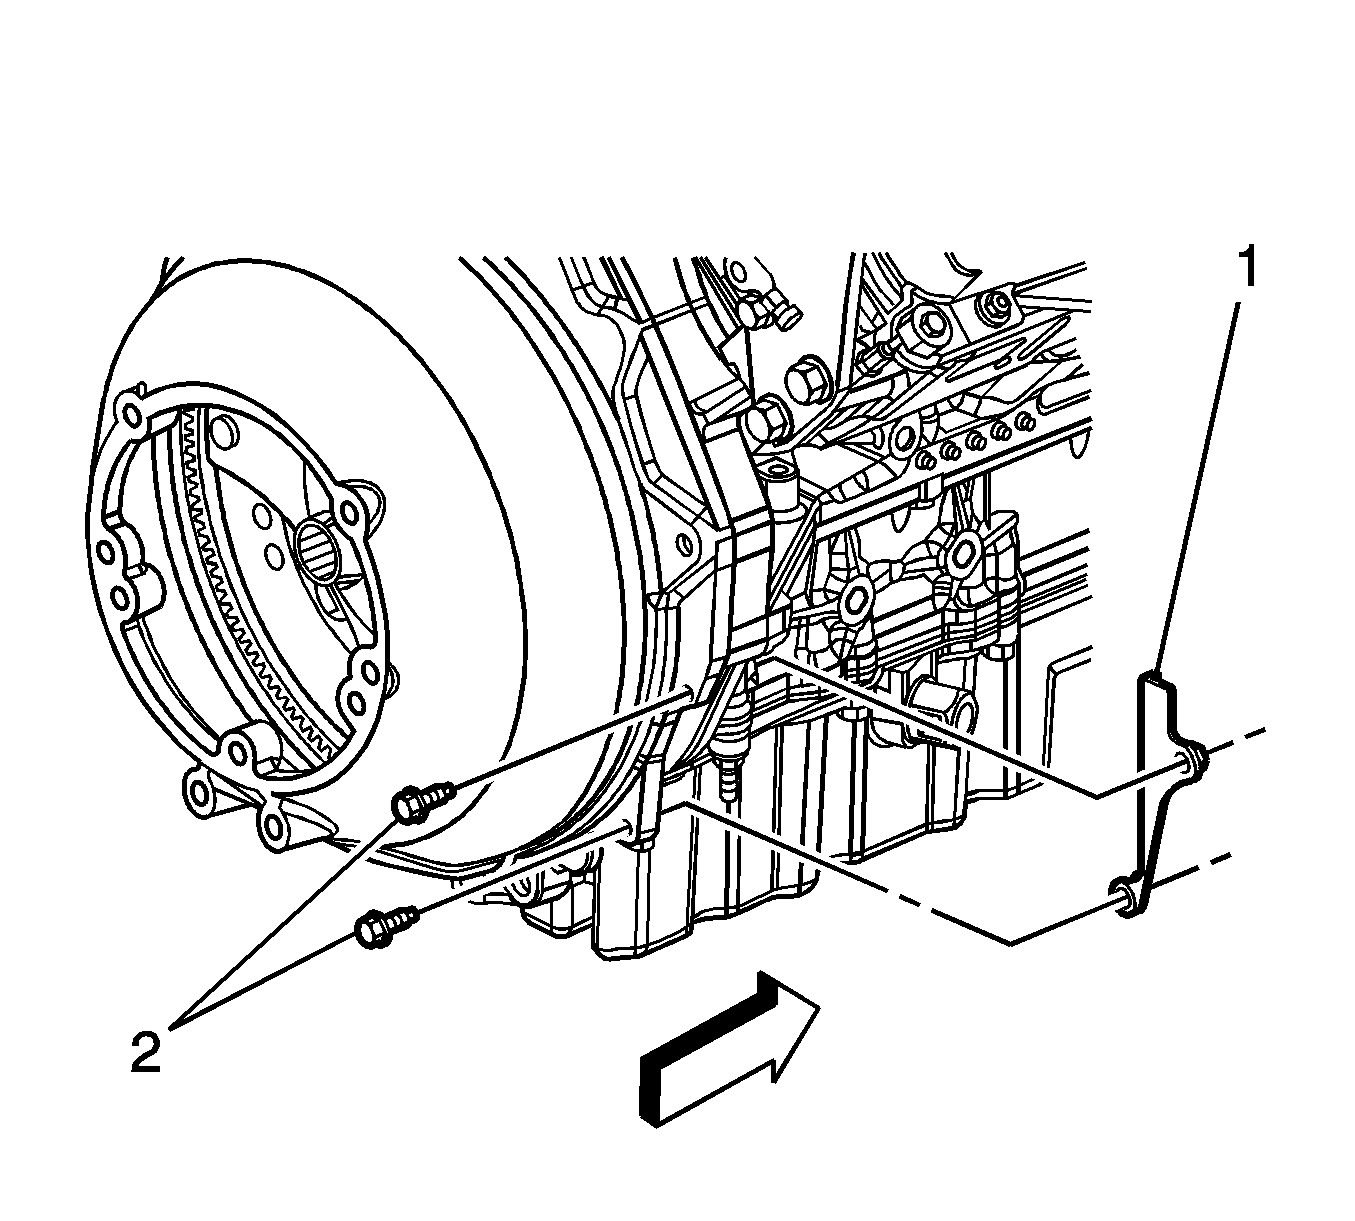
- Remove the bolts (1) and nut (2) securing the wiring harness to the engine.
- Remove the engine wiring harness.
- Remove the throttle body assembly. Refer to Throttle Body Assembly Replacement .
- Remove the left ignition module assembly. Refer to Ignition Coil Module Replacement - Left Side .
- Remove the right ignition module assembly. Refer to Ignition Coil Module Replacement - Right Side .
- Remove the starter motor from the engine. Refer to Starter Motor Replacement .
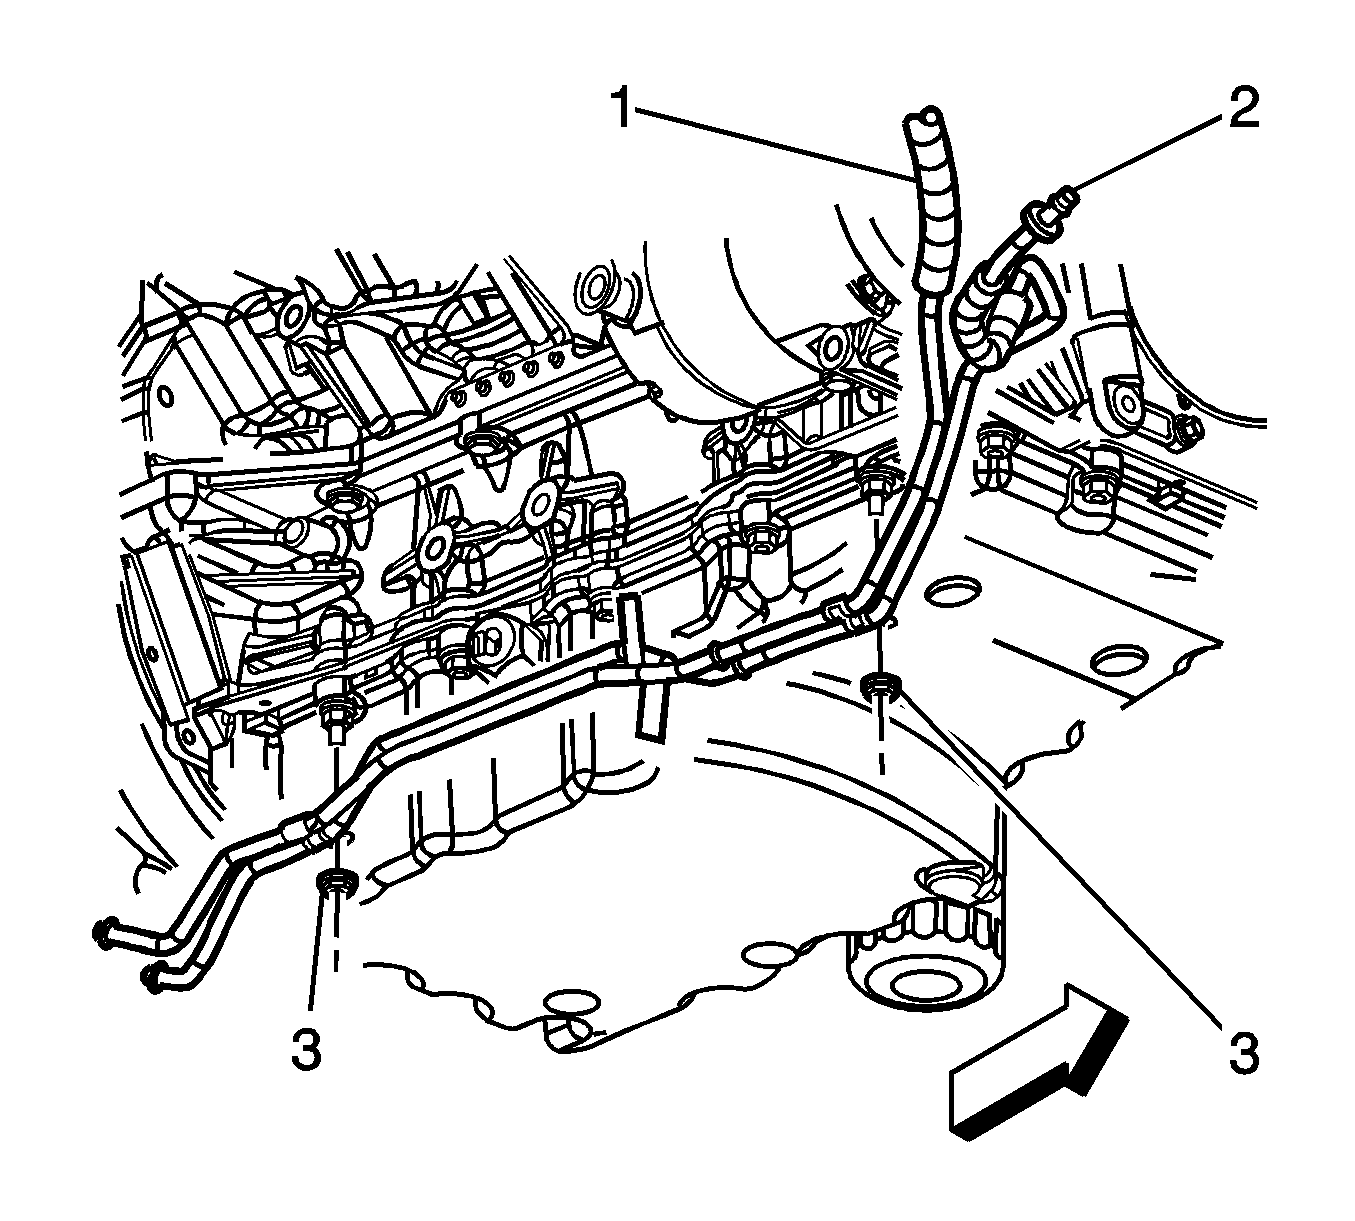
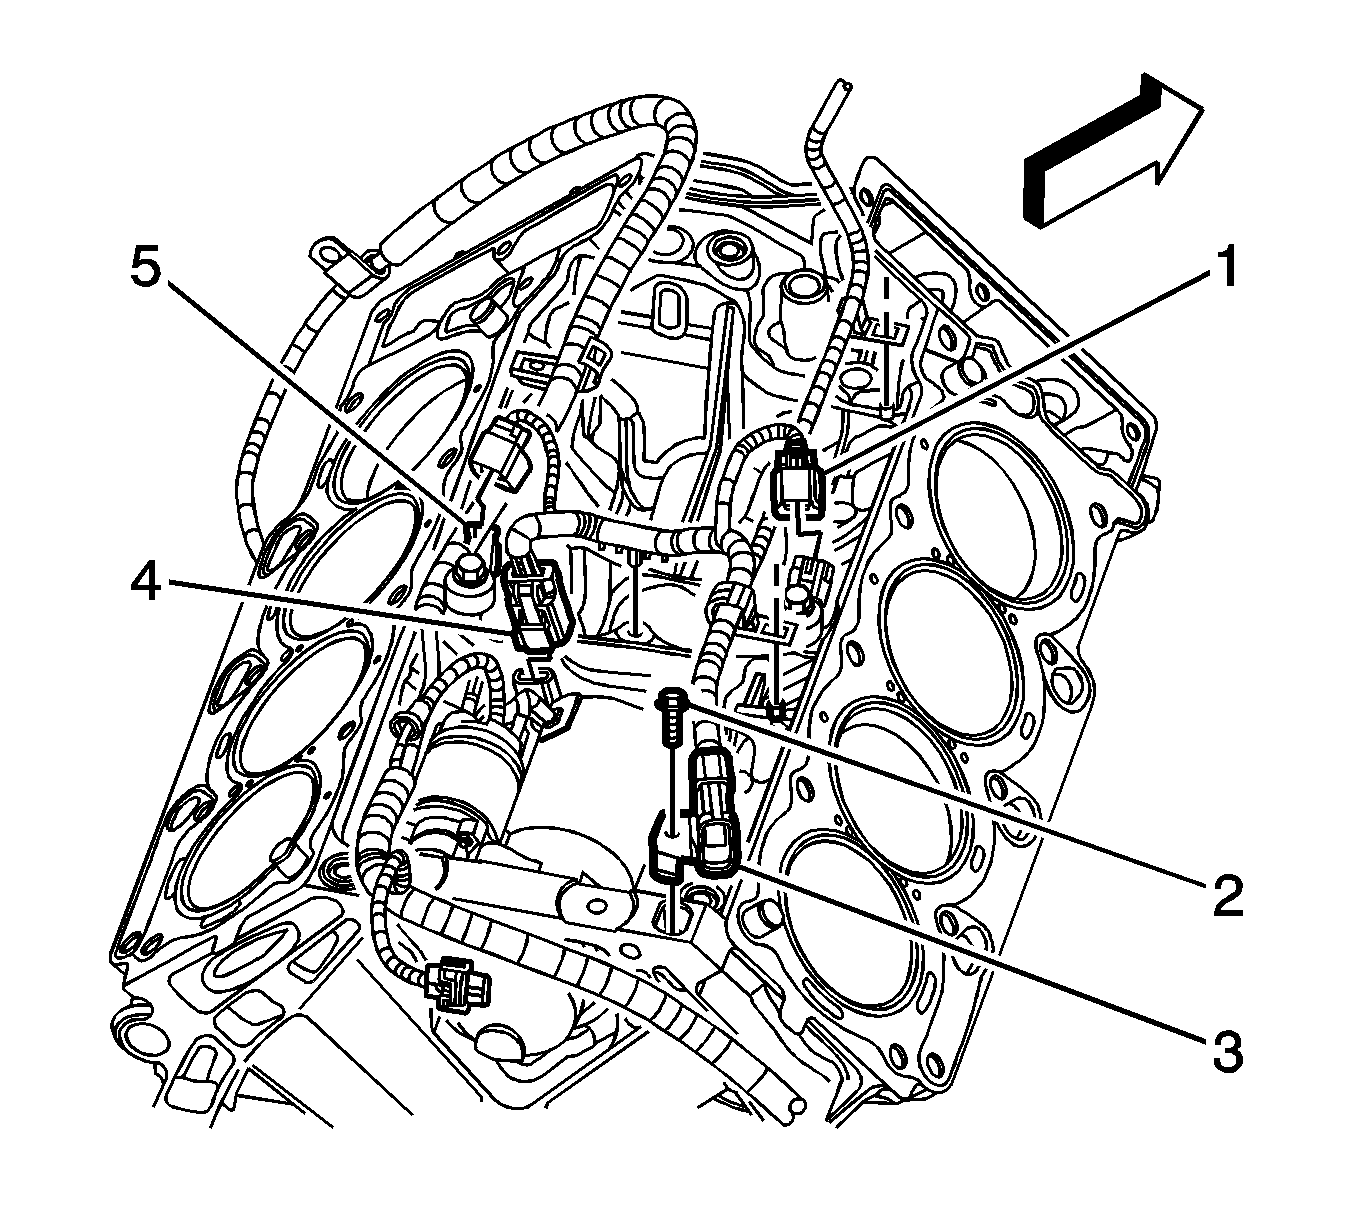
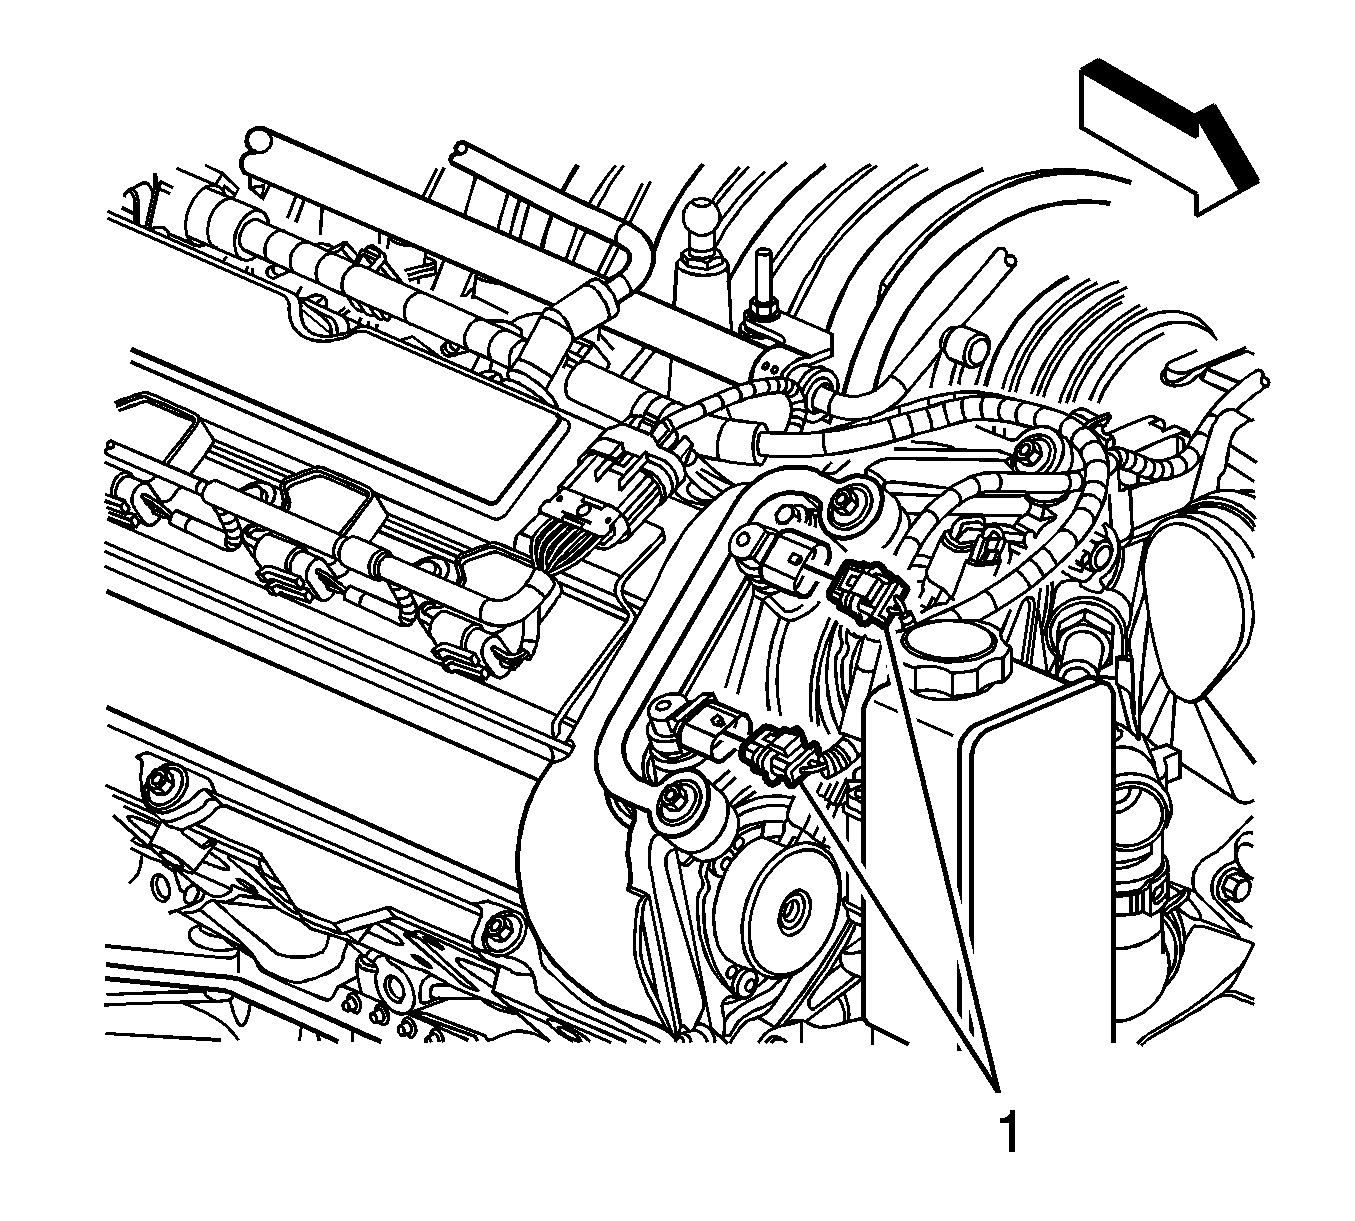
- Disconnect the electrical connector (5) from the left-hand knock sensor.
- Disconnect the electrical connector (1) from the right-hand knock sensor.
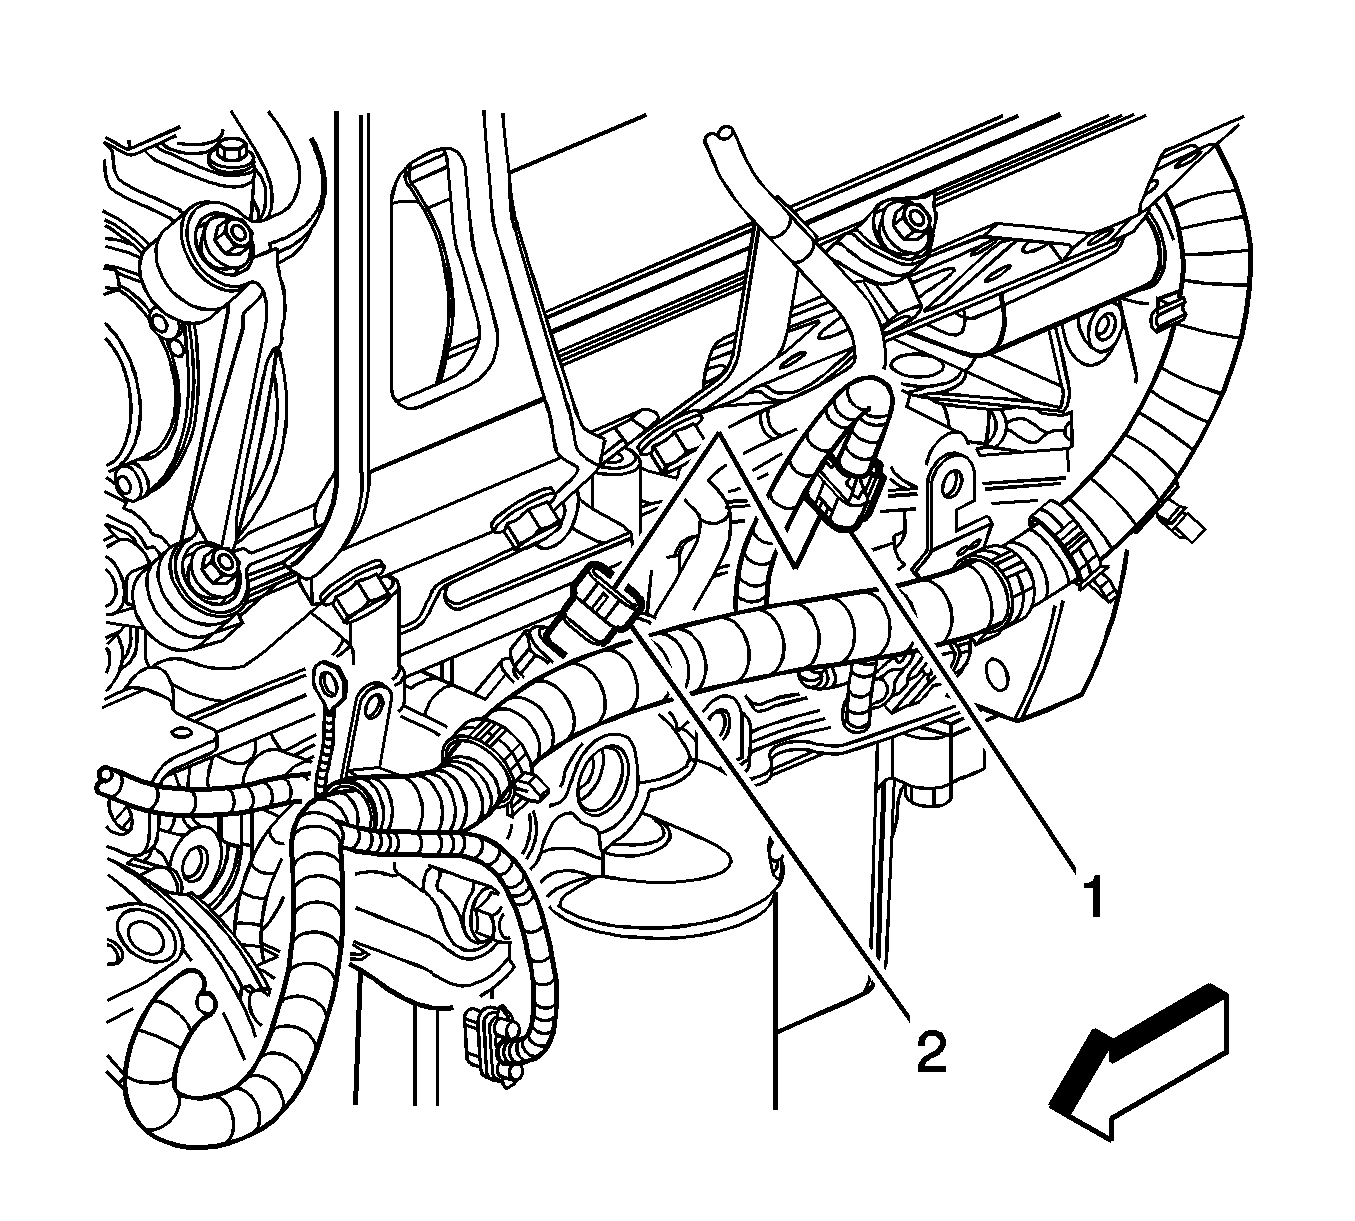
- Disconnect the electrical connector from the crank sensor (4).
- Remove the bolt (2) securing the wiring harness (3) to the engine.
- Remove the driveline support bolts.
- Insert a flat-headed screwdriver, or similar tool, between the driveline support and the flywheel housing, then separate the driveline assembly from the engine.
- Slowly pull the driveline support assembly away from the engine.
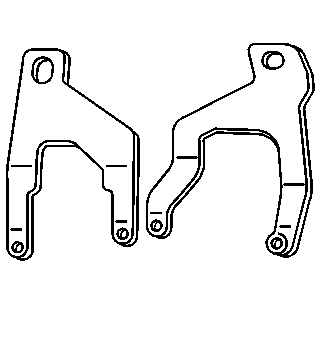
- Install the J 28467-86 and J 28467-87 to the engine.
- Install an engine hoist to the J 41798 .
- Remove the flywheel housing bolts.
- Remove the flywheel housing from the engine.
- Remove the engine from the lift table.
- Remove the engine hoist.
- Remove the engine lift brackets.
Caution: Refer to Battery Disconnect Caution in the Preface section.
Important: Visually inspect the transmission wiring harness to ensure detachment from the engine.
Installation Procedure
- Using an engine hoist, install the replacement engine on an engine stand.
- Install the transmission oil cooler pipes to engine. Refer to Transmission Fluid Cooler Upper Pipe Assembly Replacement and Transmission Fluid Cooler Lower Pipe Assembly Replacement - Transmission to Auxiliary Cooler .
- Connect the harness to the low lever oil switch.
- Install the bolt through the engine harness clip and secure to the right side of the engine.
- Connect the left rear engine harness ground terminal to the engine.
- Connect the harness to the oil pressure sensor.
- Install the air conditioning/power steering bracket to the engine assembly. Refer to Air Conditioning Compressor Replacement .
- Install the power steering pump reservoir to the engine. Refer to Remote Power Steering Fluid Reservoir Replacement .
- Install the drive belt tensioner. Refer to Drive Belt Tensioner Replacement .
- Install the generator coolant inlet hose fitting.
- Install the generator rear brace to the engine.
- Install the generator stud to the engine lower crankcase.
- Install the generator . Refer to Generator Replacement .
- Connect the harness connector (5) to the left knock sensor.
- Connect the harness connector (1) to the right knock sensor.
- Connect the harness connector (4) to the crank sensor.
- Install the bolt (2) through the harness bracket.
- Install the starter. Refer to Starter Motor Replacement .
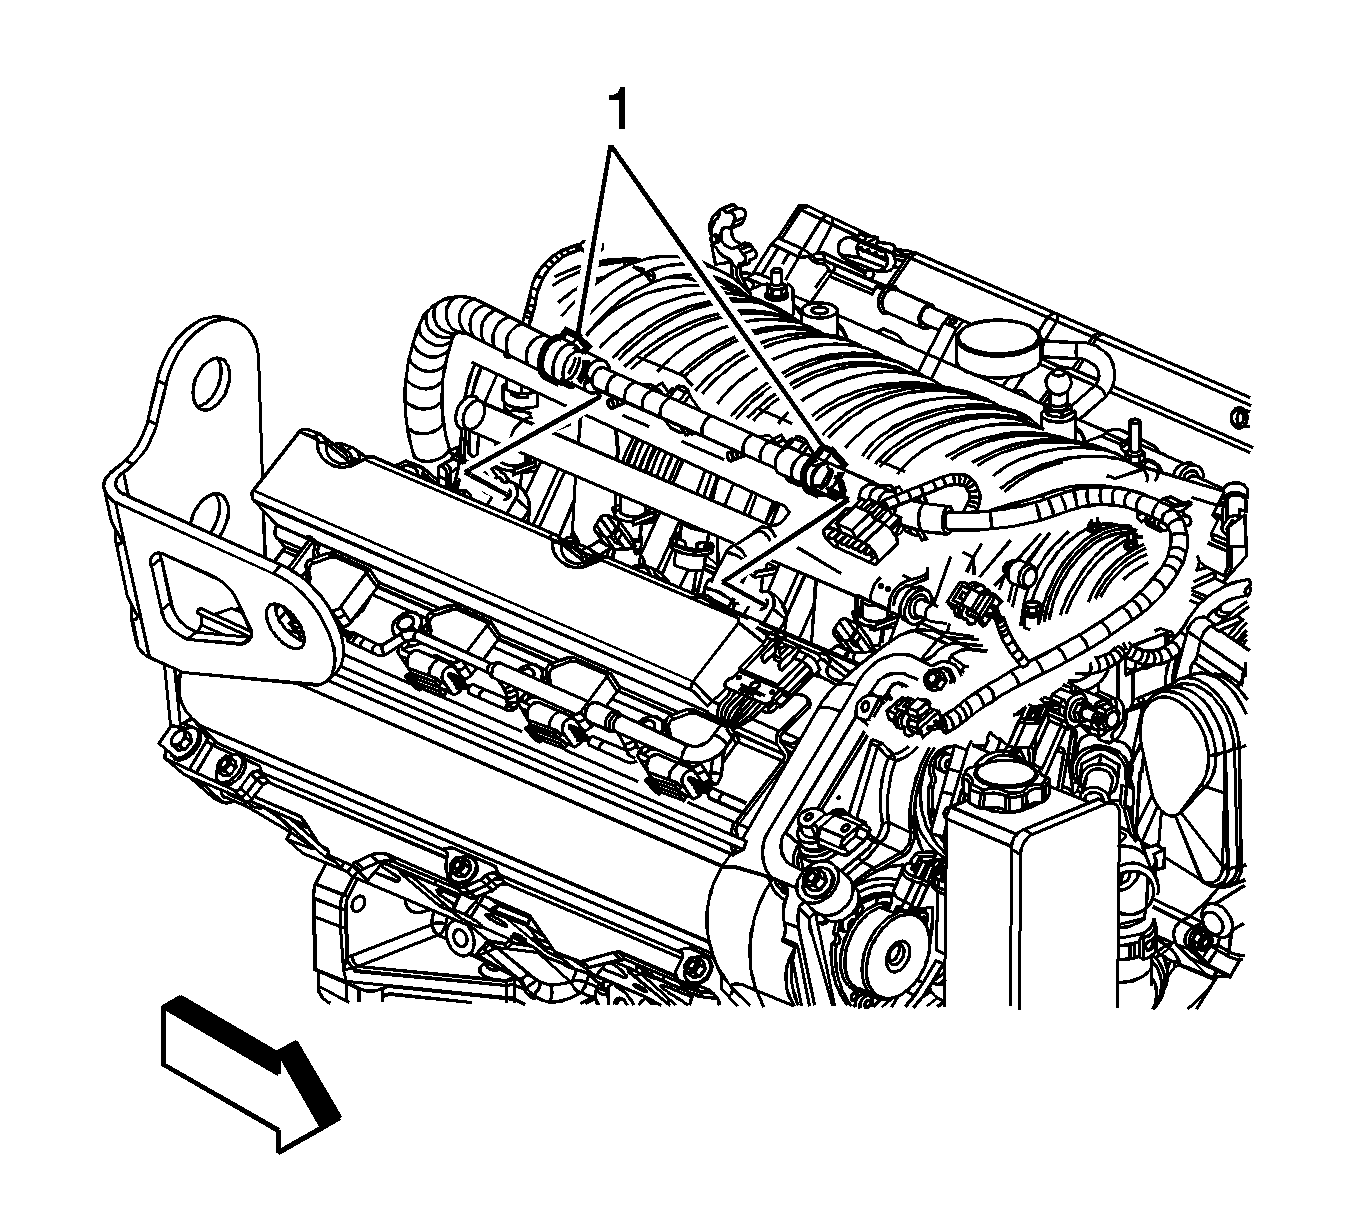
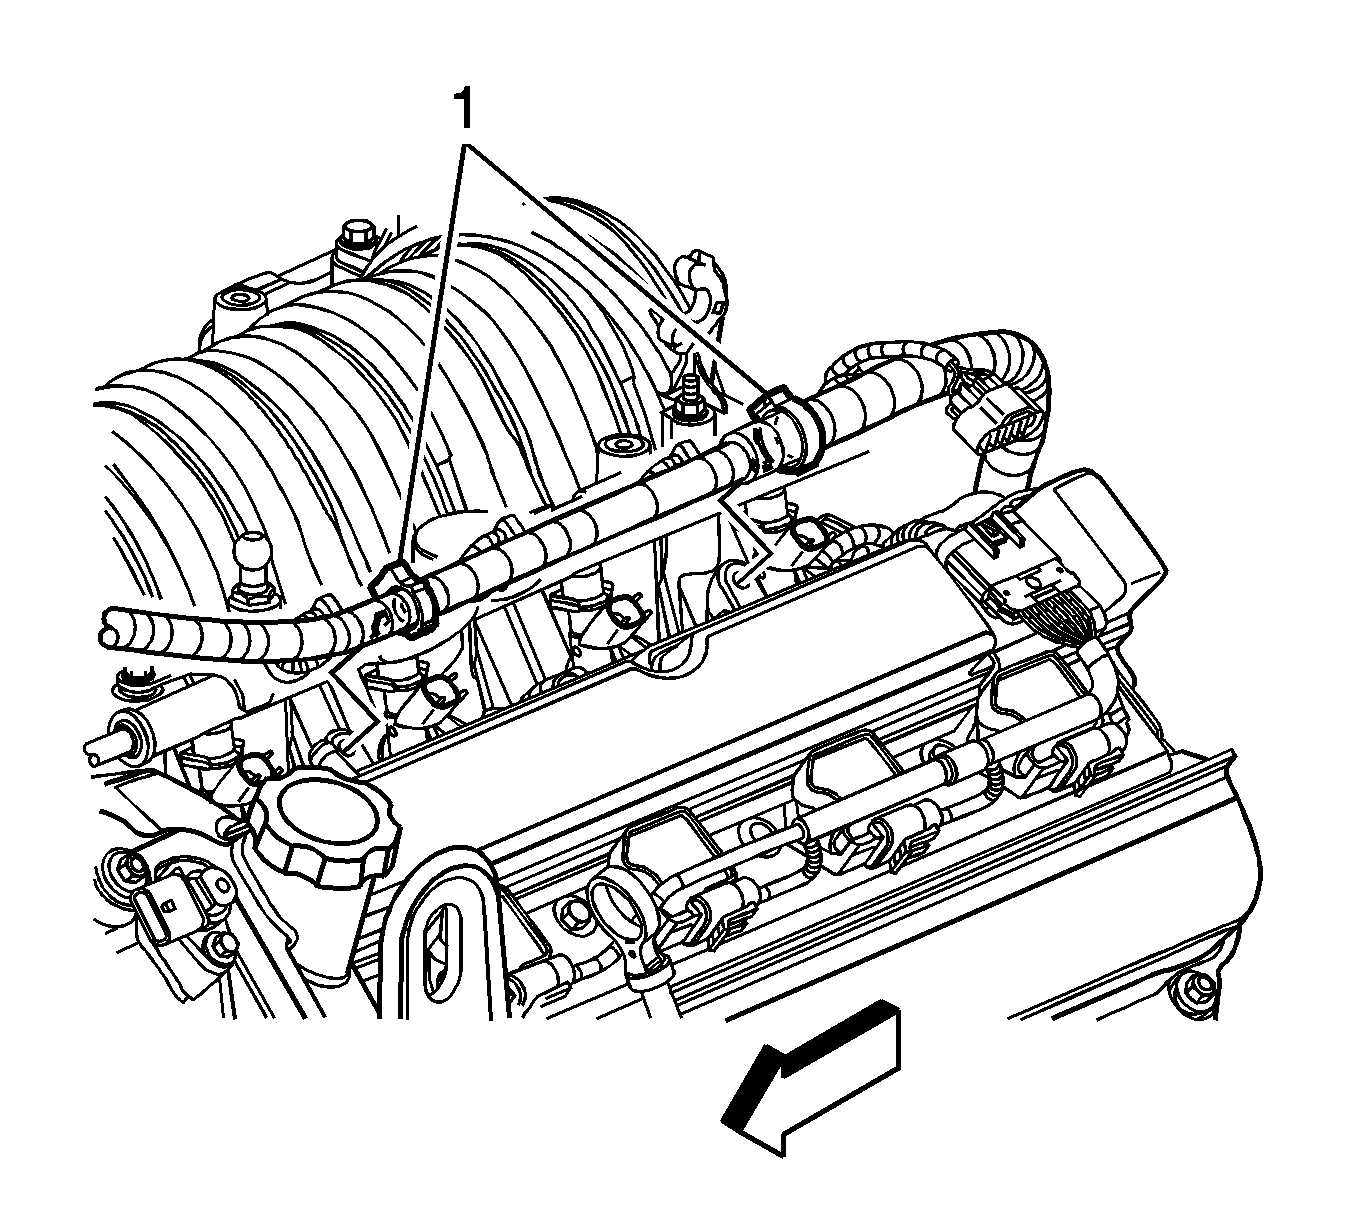
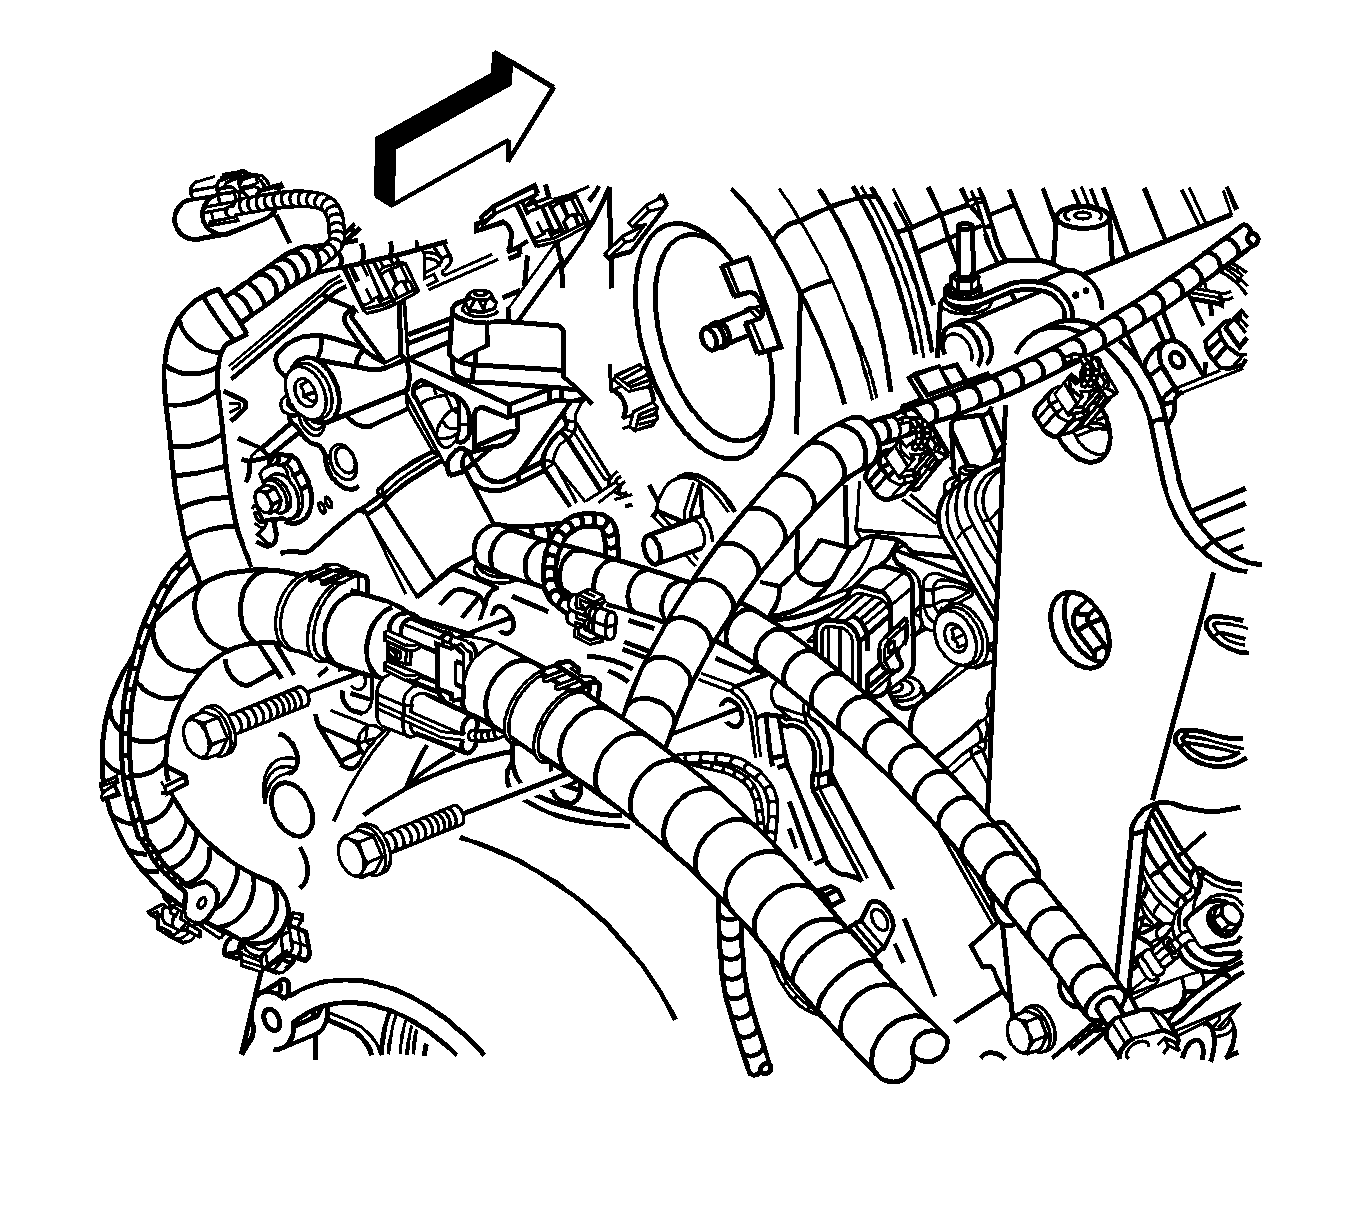
- Attach the right side upper wiring harness as shown.
- Attach the left side upper wiring harness to the cam cover as shown.
- Connect the engine harness to the right camshaft position sensors.
- Connect the engine wiring harness to the purge valve solenoid.
- Connect the engine wiring harness to the left camshaft position sensors.
- Connect the jumper harness to the engine harness as shown.
- Install the left ignition module assembly. Refer to Ignition Coil Module Replacement - Left Side .
- Install the right ignition module assembly. Refer to Ignition Coil Module Replacement - Right Side .
- Install the coolant temperature sensor. Refer to Engine Coolant Temperature Sensor Replacement .
- Connect the harness to the throttle position sensor.
- Install the left engine mount bracket to the engine. Refer to Engine Mount Bracket Replacement - Left Side .
- Secure the wiring harness to the engine.
- Install the right engine mount bracket to the engine. Refer to Engine Mount Bracket Replacement - Right Side .
- Install an engine hoist to the engine.
- Remove the engine from the engine stand.
- Install the flywheel housing and bolts. Refer to Engine Flywheel Replacement .
- Install the flywheel housing left side cover to the engine.
- Install the engine closeout cover to the right side of the bell housing.
- Install the engine wiring harness to the engine by inserting the bolts through the harness clips and into the bell housing.
- Install the engine into the front cradle.
- Remove the engine lift brackets.
- Install the exhaust manifold studs to the right cylinder head.
- Install the exhaust manifold studs to the left cylinder head.
- Install the right exhaust manifold assembly to the engine. Refer to Exhaust Manifold Replacement - Right Side .
- Install the left exhaust manifold assembly to the engine. Refer to Exhaust Manifold Replacement - Left Side .
- Install the evaporator emission canister purge tube assembly to the engine.
- Install the powertrain. Refer to Powertrain Removal and Installation .
- Fill the oil system to the proper level.
Notice: Refer to Fastener Notice in the Preface section.
Tighten
Tighten the bolts to 35 N·m (26 lb ft).

Tighten
Tighten the bolt to 12 N·m (106 lb in).

Tighten
Tighten the fitting to 25 N·m (18 lb ft).
Tighten
Tighten the bolt to 50 N·m (37 lb ft).
Tighten
Tighten the stud to 12 N·m (106 lb in).
Tighten
Tighten the bolt to 10 N·m (89 lb in).
Tighten
| • | Tighten the bolts (1) to 35 N·m (26 lb ft). |
| • | Tighten the nut (2) to 35 N·m (26 lb ft). |
Tighten
Tighten the bolts to 10 N·m (89 lb in).
Tighten
Tighten the bolts to 50 N·m (37 lb ft).
Tighten
Tighten the studs to 6 N·m (53 lb in).
Tighten
Tighten the studs to 6 N·m (53 lb in).
