For 1990-2009 cars only
Tools Required
J 38185 Hose Clamp Pliers
Removal Procedure
- Drain the cooling system. Refer to Cooling System Draining and Filling .
- Remove the air outlet duct in order to gain access to the thermostat housing. Refer to Air Cleaner Outlet Duct Replacement .
- Remove the heater hose from the thermostat housing using a J 38185 .
- Remove the coolant radiator hose from the thermostat housing. Refer to Coolant Bypass Hose Replacement .
- If equipped, remove the auxiliary water pump. Refer to Auxiliary Water Pump Replacement .
- Remove the drive belt tensioner. Refer to Drive Belt Tensioner Replacement - Generator and to Drive Belt Tensioner Replacement - Air Conditioning, Power Steering, and Water Pump .
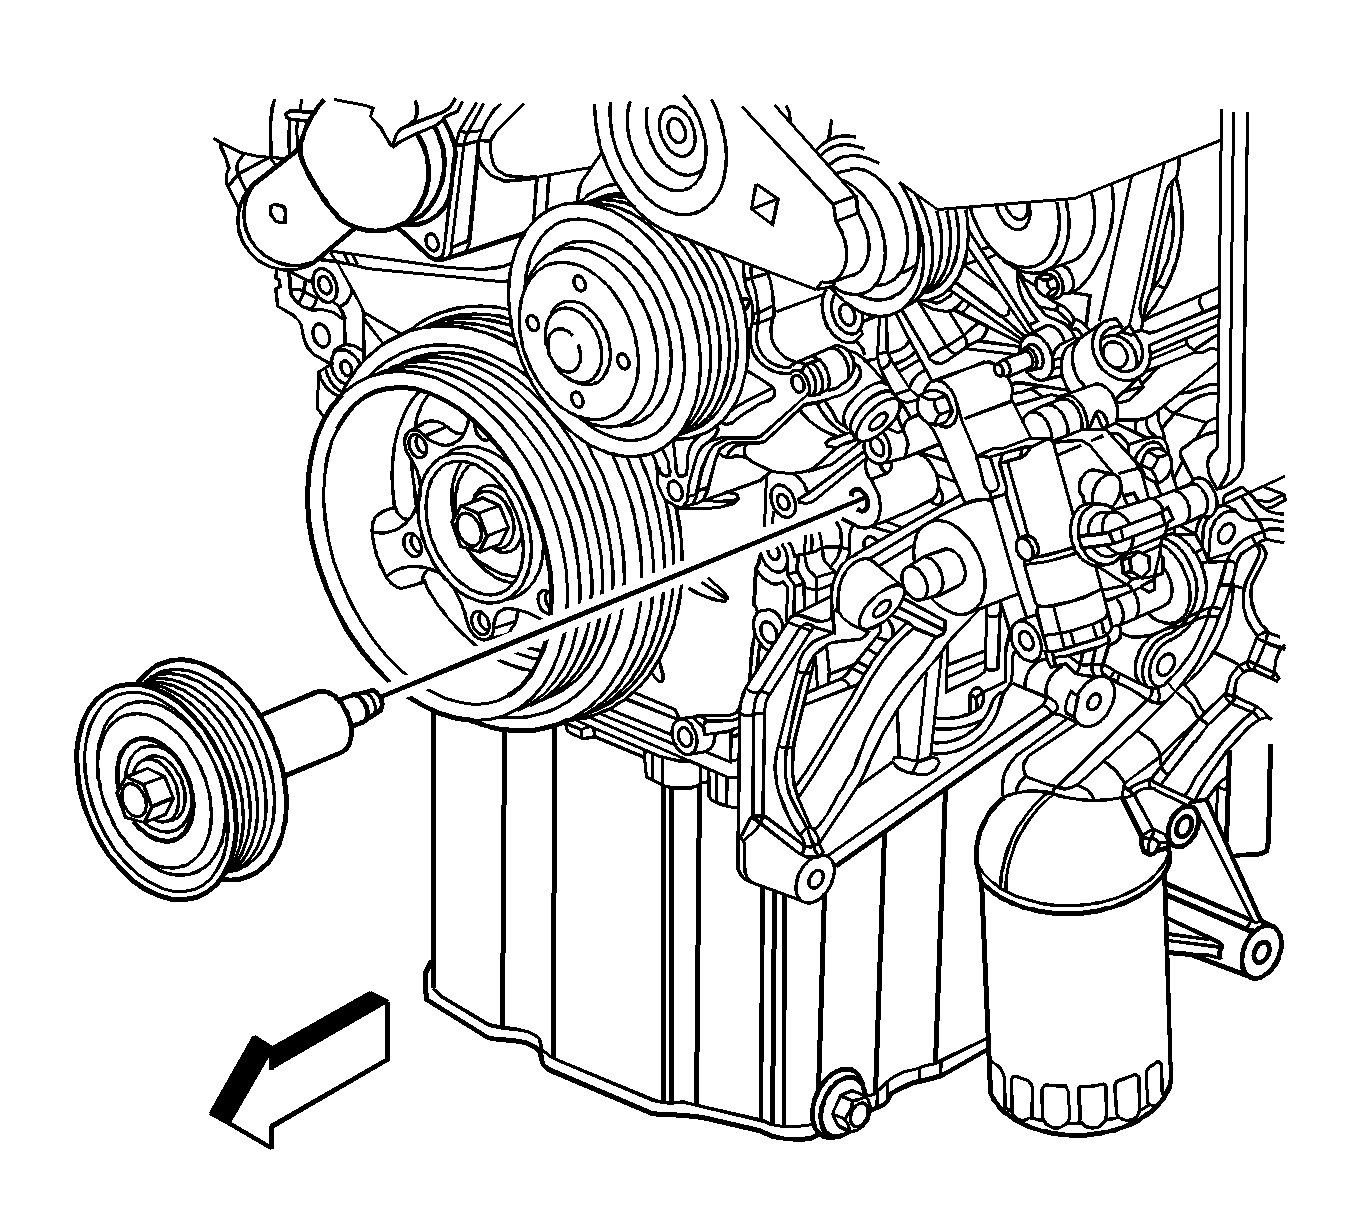
- Remove the drive belt idler pulley bolt.
- Remove the water pump pulley.
- Raise and support the vehicle. Refer to Lifting and Jacking the Vehicle .
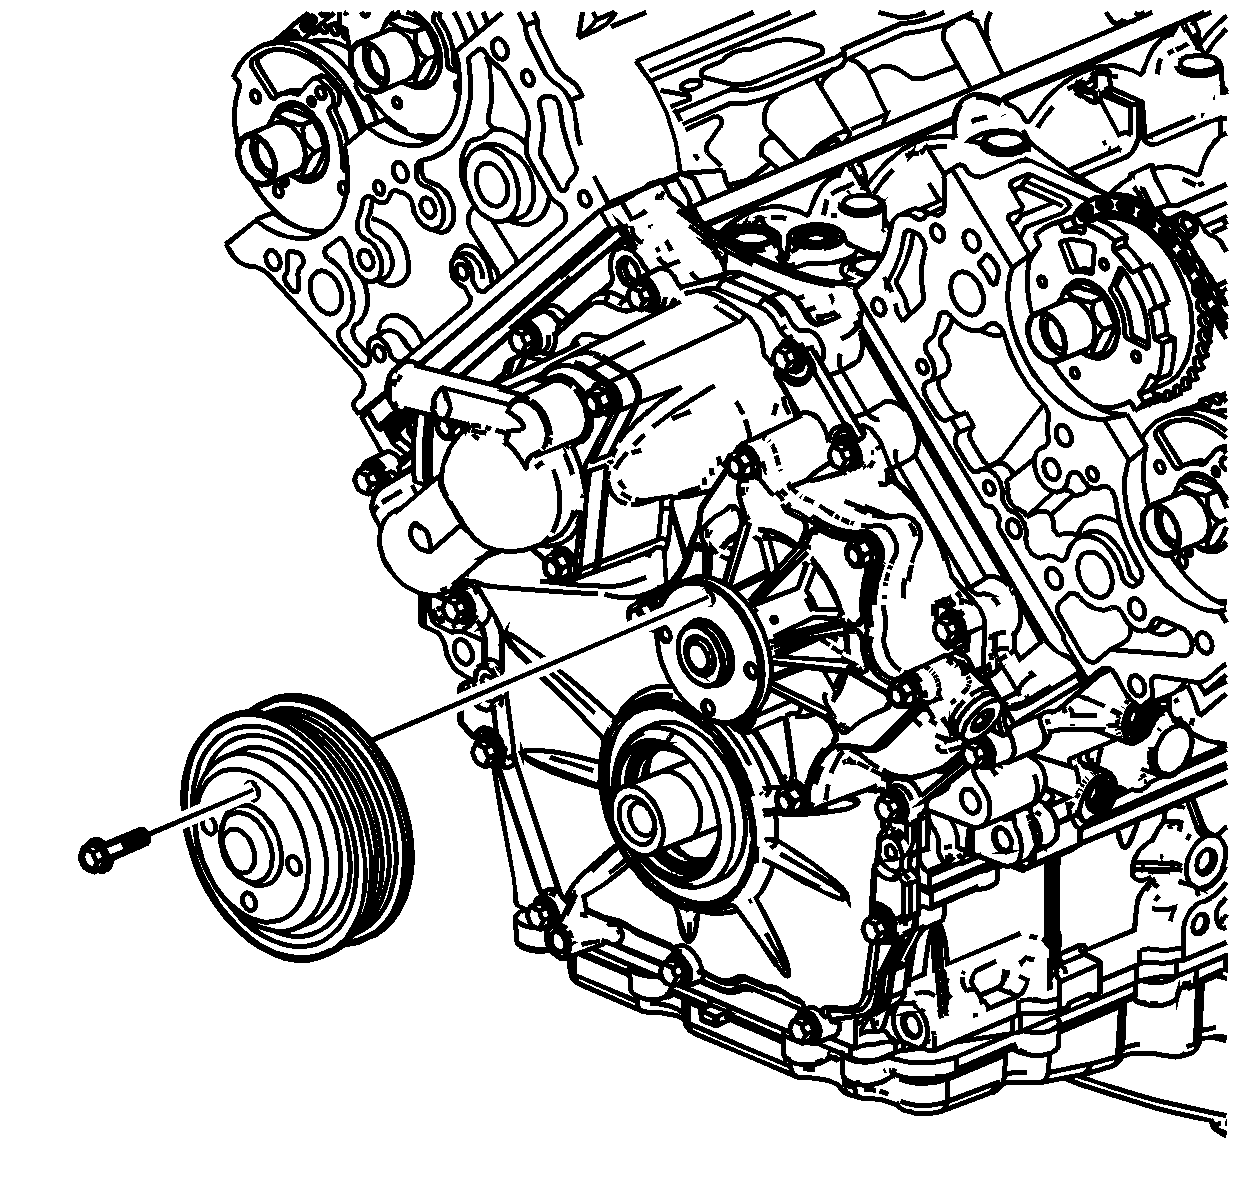
- Remove the crankshaft balancer. Refer to Crankshaft Balancer Replacement .
- Remove the engine front cover bolts.
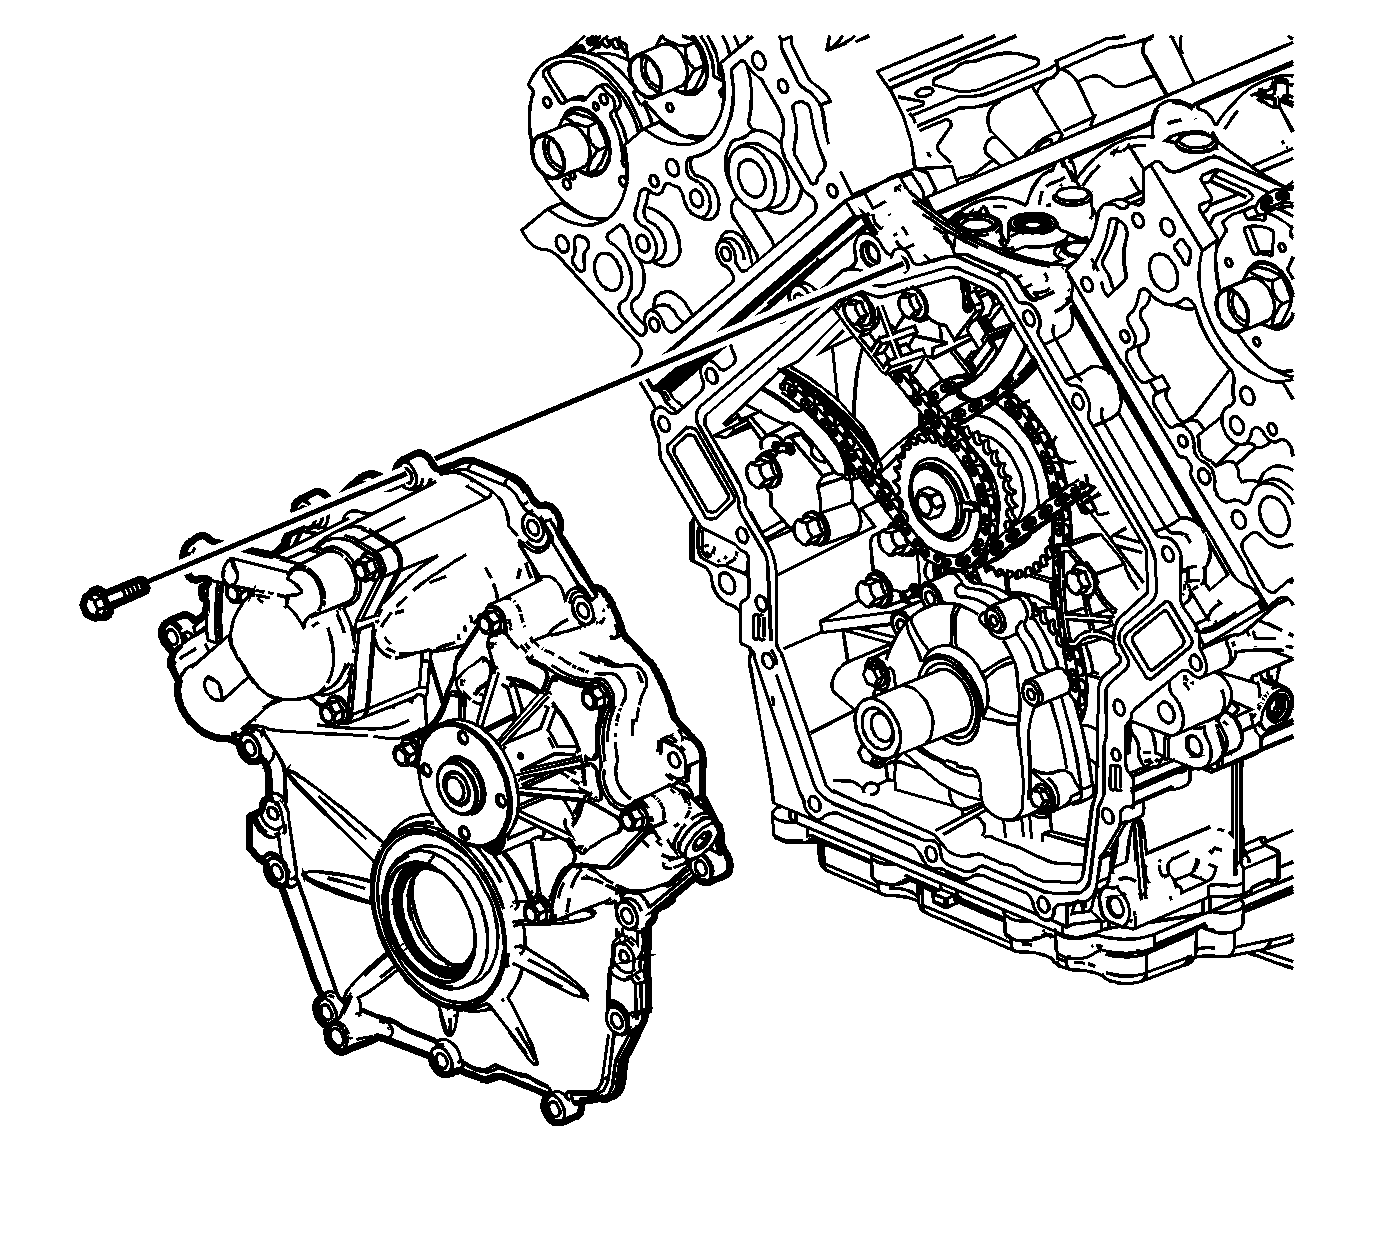
- Remove the engine front cover.
- Remove and discard the engine front cover gasket.
Remove the drive belt idler pulley.
Cleaning and Inspection
Clean and inspect the engine front cover. Refer to Engine Front Cover Cleaning and Inspection .
Installation Procedure
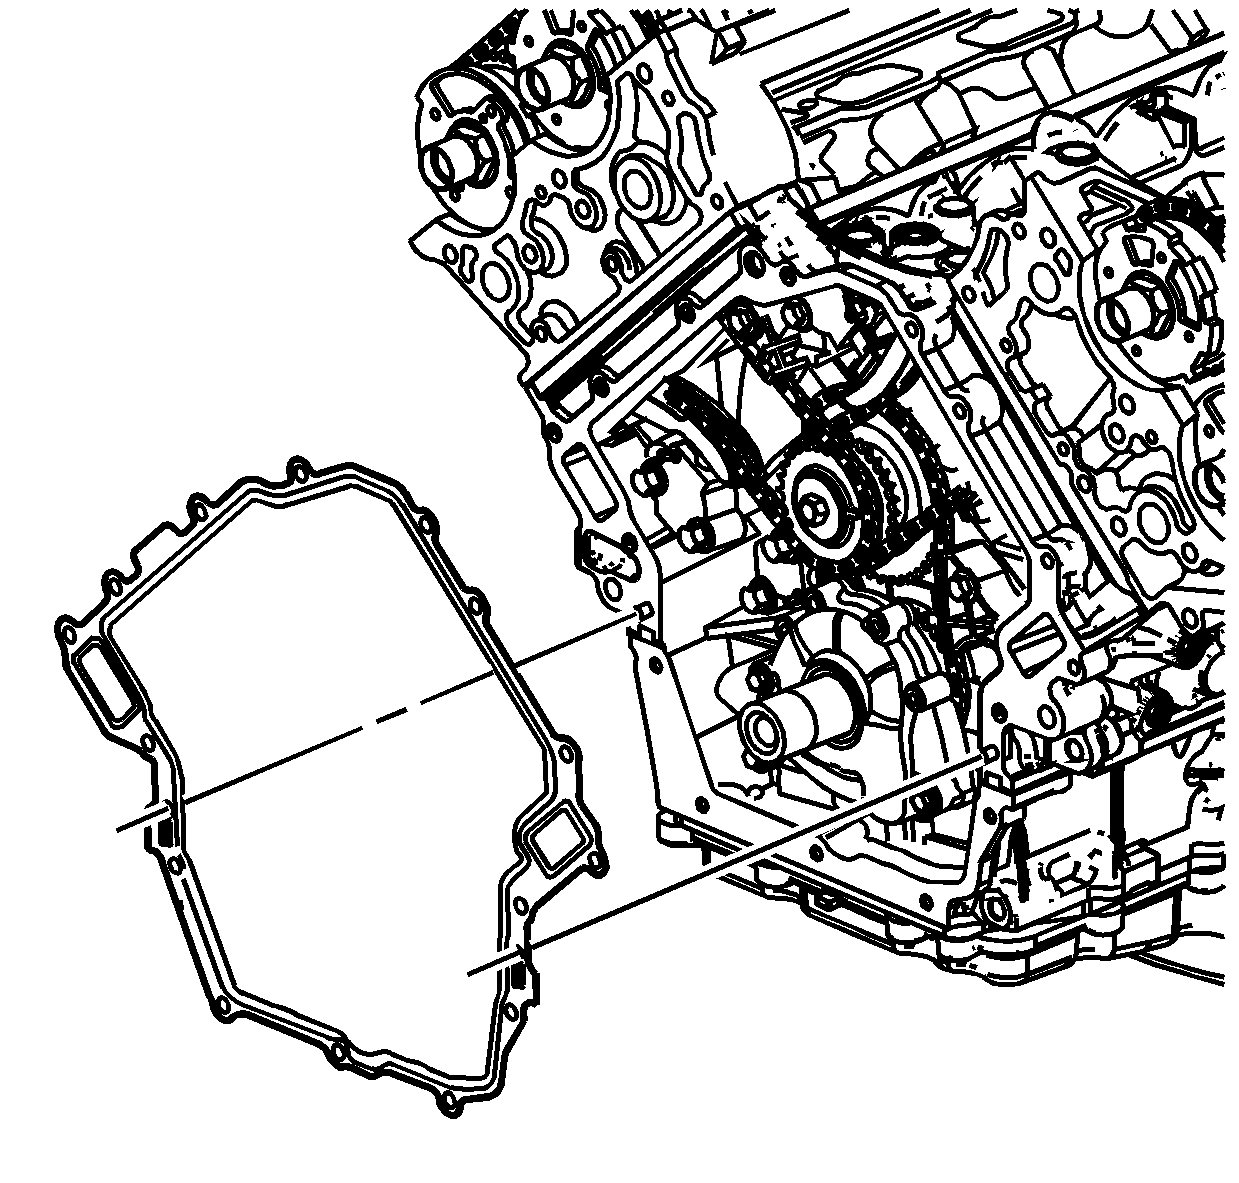
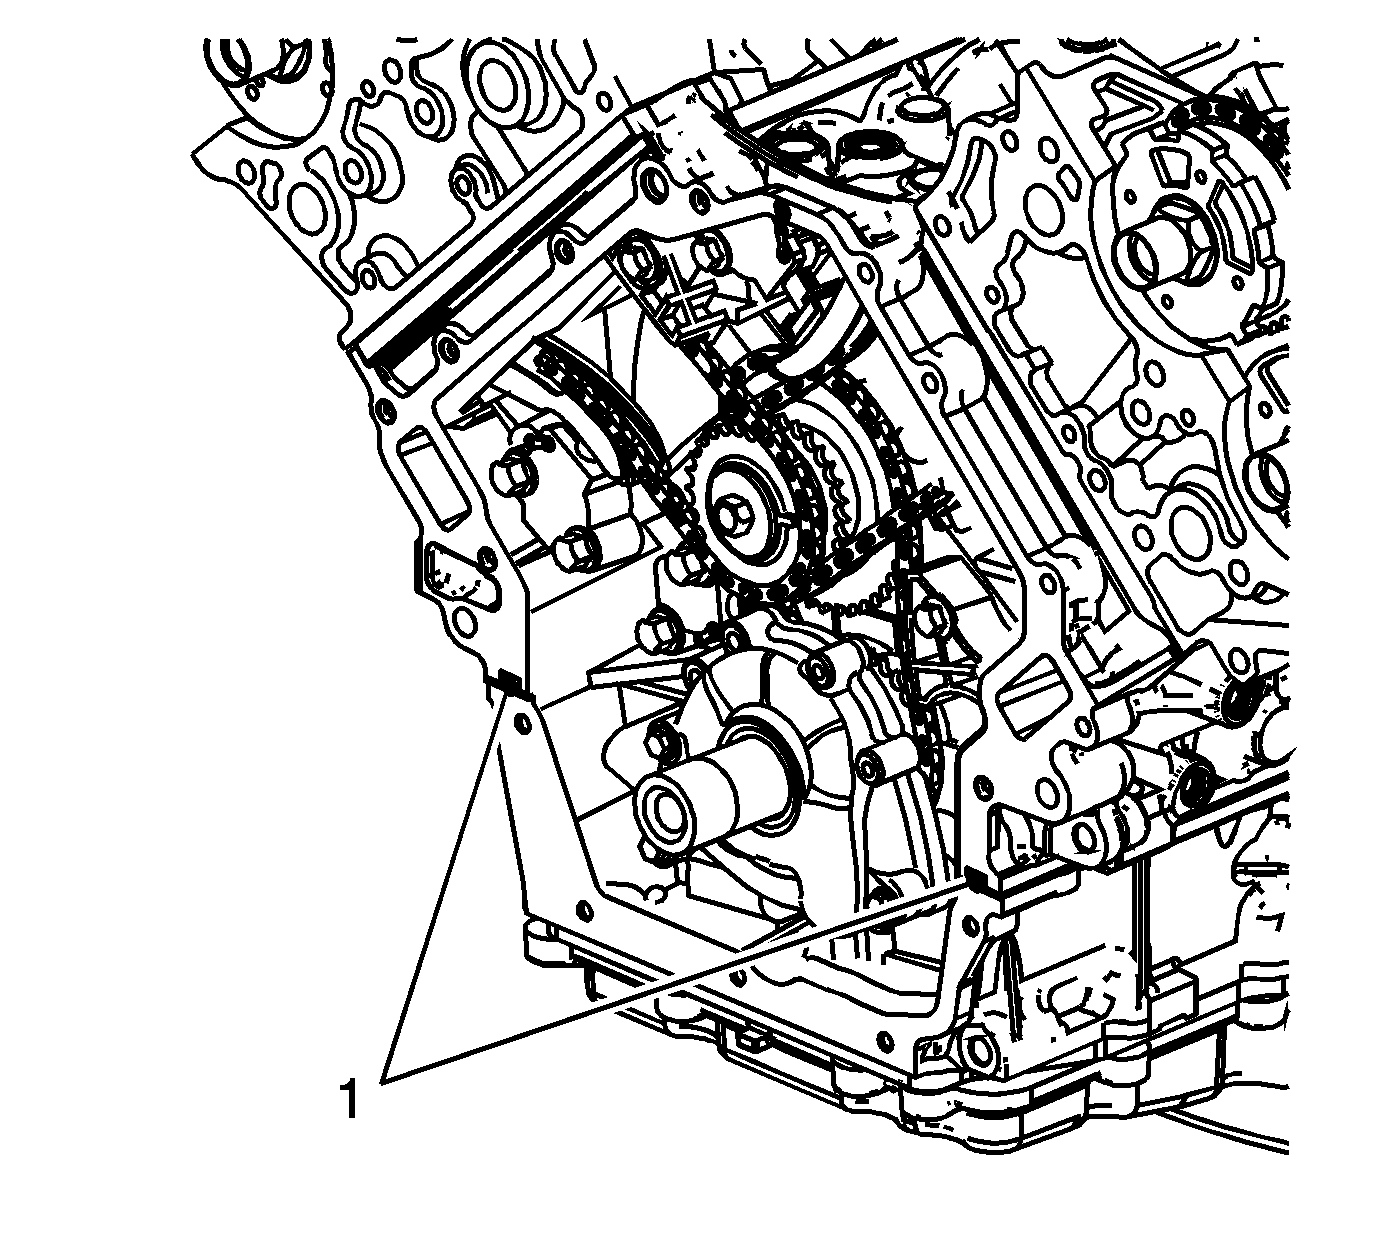
- Place a small amount of sealant at the split line (1) of the upper and lower crankcases, and at the top of the block face. Refer to Adhesives, Fluids, Lubricants, and Sealers for the correct part number.
- Place the NEW engine front cover gasket over the crankcase dowel pins.
- Place the engine front cover in position on the crankcase.
- Apply the thread locking compound to the threads of the engine front cover bolts. Refer to Adhesives, Fluids, Lubricants, and Sealers for the correct part number.
- Install the engine front cover retaining bolts.
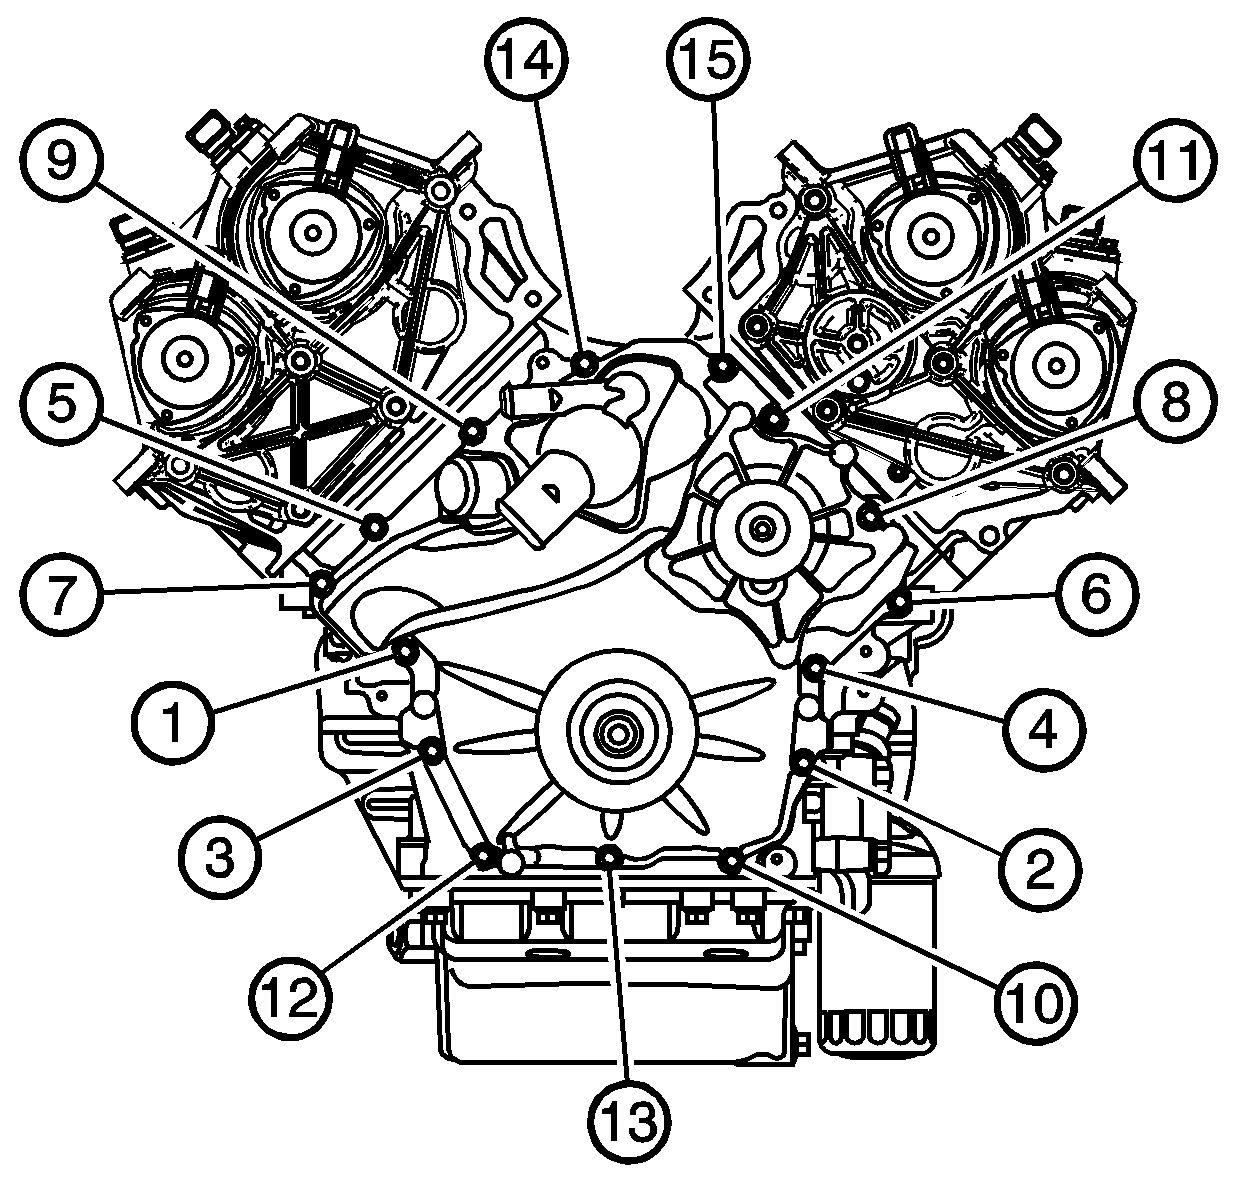
- Tighten the engine front cover bolts in the sequence shown.
- Install the crankshaft balancer. Refer to Crankshaft Balancer Replacement .
- Install the water pump pulley.
- Install the drive belt idler pulley.
- Install the drive belt idler pulley bolt.
- Install the drive belt tensioner. Refer to Drive Belt Tensioner Replacement - Generator and to Drive Belt Tensioner Replacement - Air Conditioning, Power Steering, and Water Pump .
- Install the coolant radiator hose to the thermostat housing. Refer to Coolant Bypass Hose Replacement .
- Install the heater hose to the thermostat housing using a J 38185 .
- If equipped, install the auxiliary water pump. Refer to Auxiliary Water Pump Replacement .
- Install the air outlet duct. Refer to Air Cleaner Outlet Duct Replacement .
- Fill the cooling system. Refer to Cooling System Draining and Filling .
Notice: Refer to Fastener Notice in the Preface section.
Tighten
Tighten the engine front cover bolts in proper sequence to 15 N·m (11 lb ft).
Tighten
Tighten the water pump pulley bolts to 10 N·m (89 lb in).
Tighten
Tighten the drive belt idler pulley bolt to 50 N·m (37 lb ft).
