Sunroof Sunshade Assembly Replacement Rear
Removal Procedure
- Open the rear sunshade (5) to the full open/forward position.
- It is only necessary to lower the headliner. Only do those step in headliner replacement that will lower the headliner enough to gain access to the part. Refer to Headlining Trim Panel Replacement.
- Remove the rear sunroof vent window. Refer to Sunroof Window Replacement.
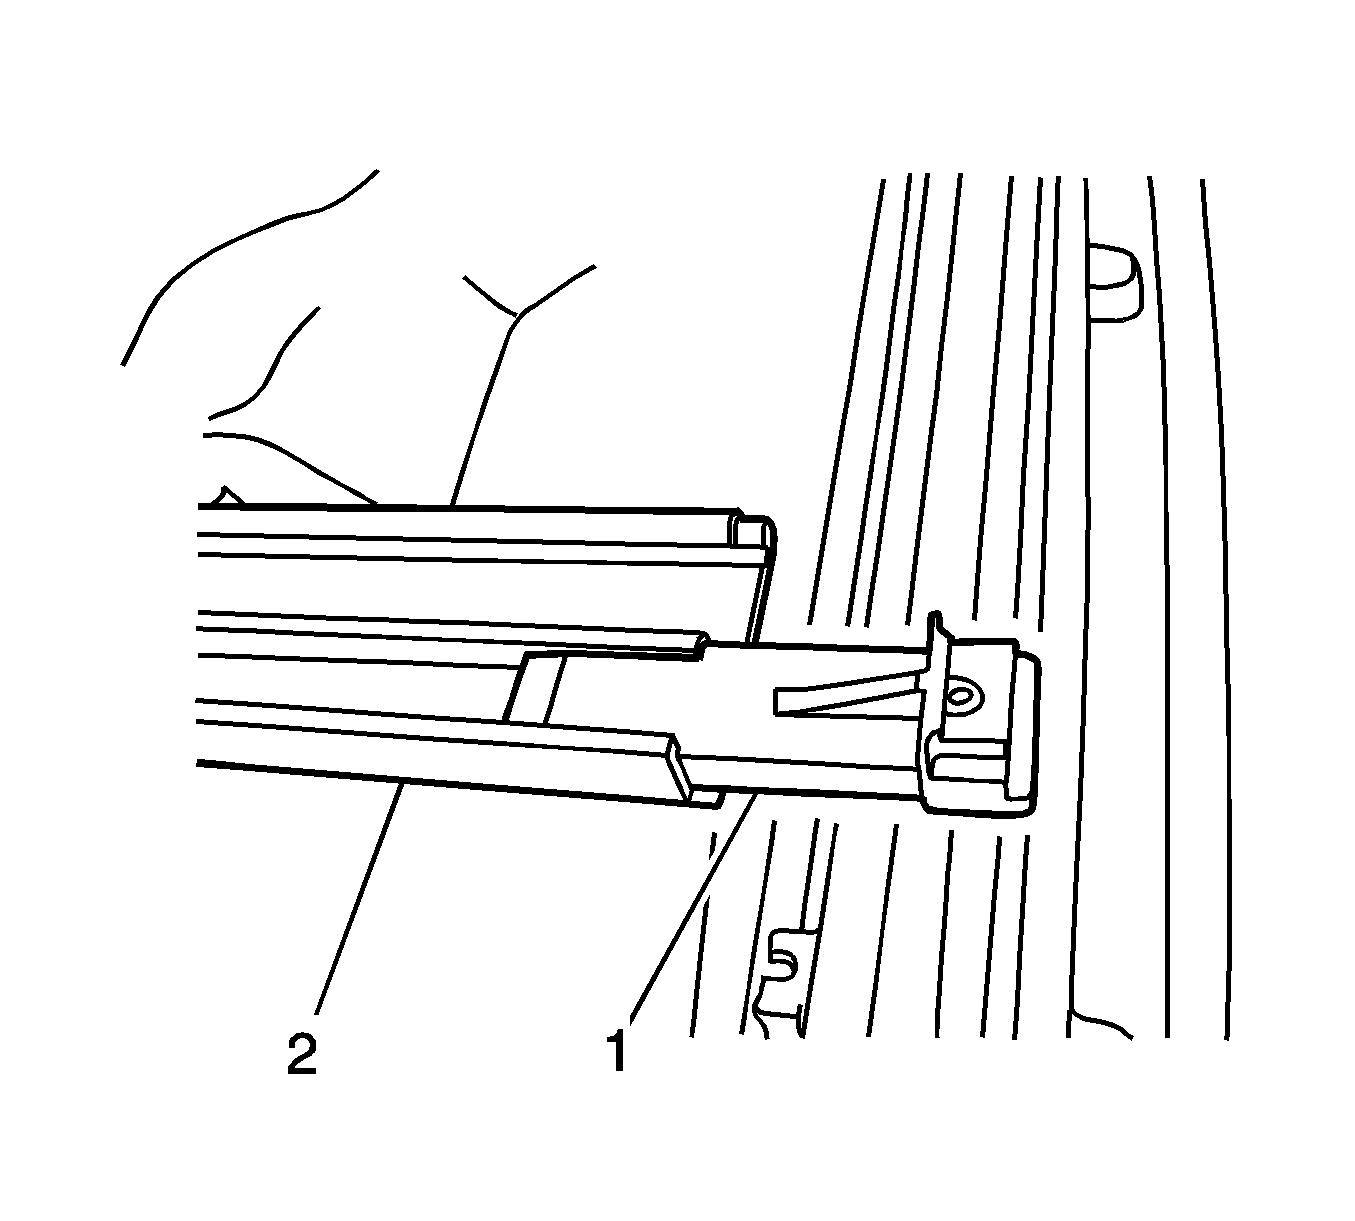
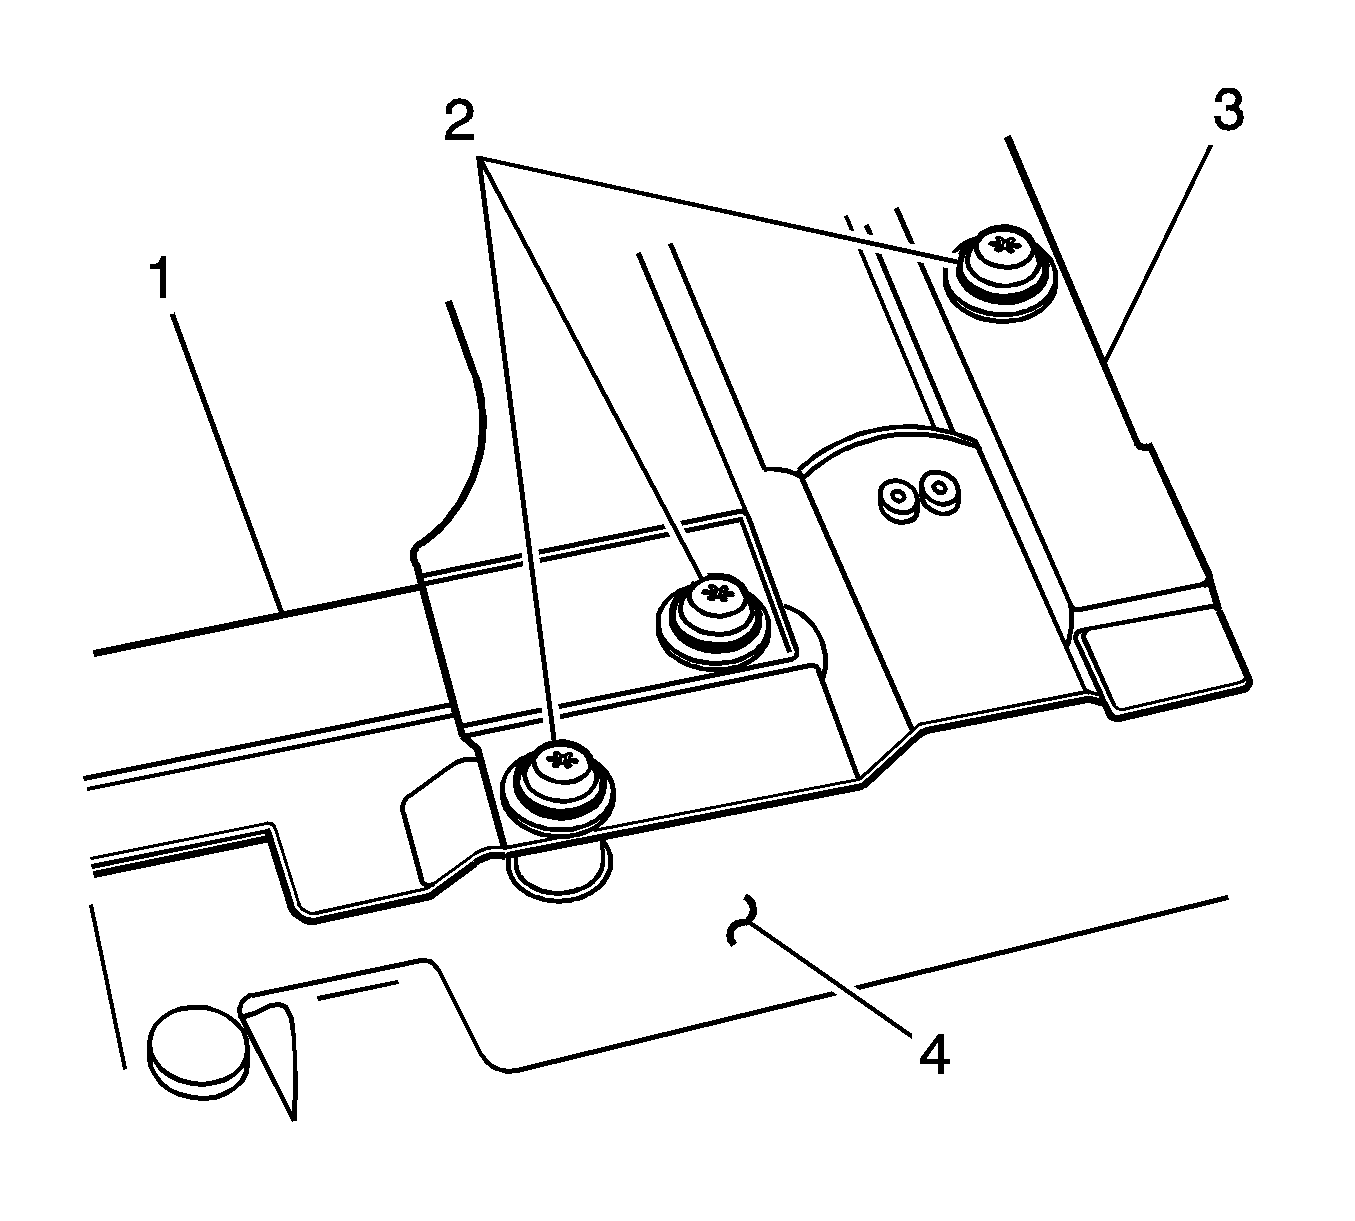
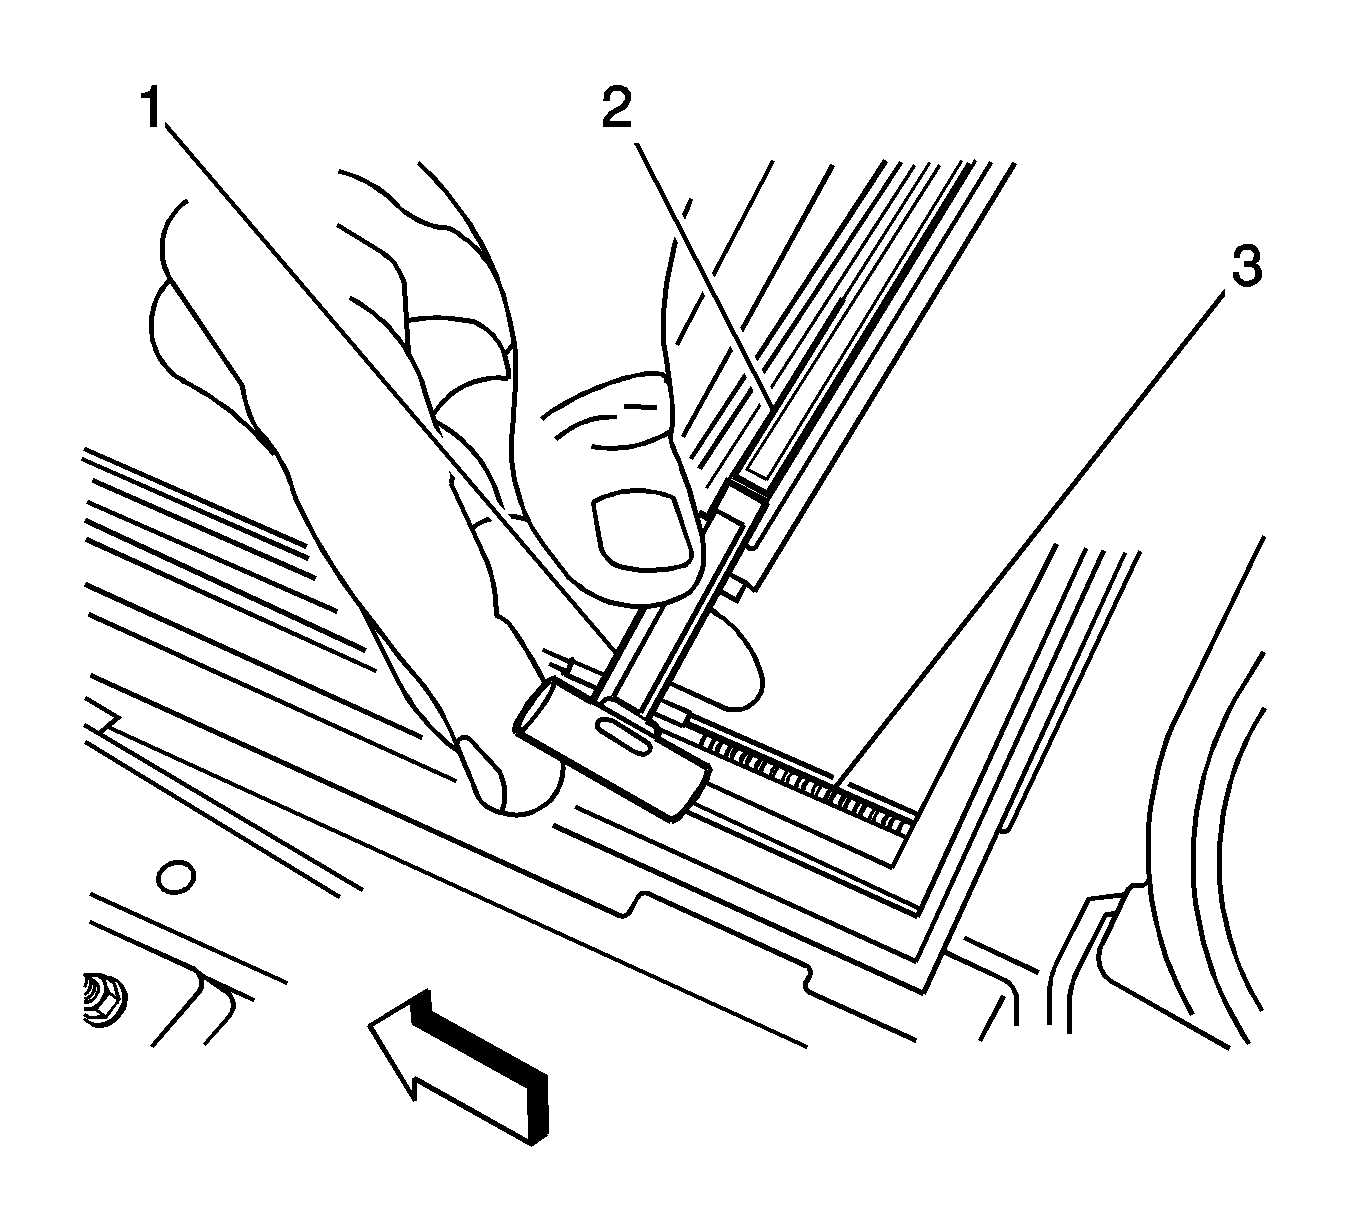
- Using a medium flat-bladed tool, release the sunroof/sunshade screws (2) from the cable assembly (4).
- Remove the screws (2) securing the sunshade assembly (3) to the lower sunroof frame assembly.
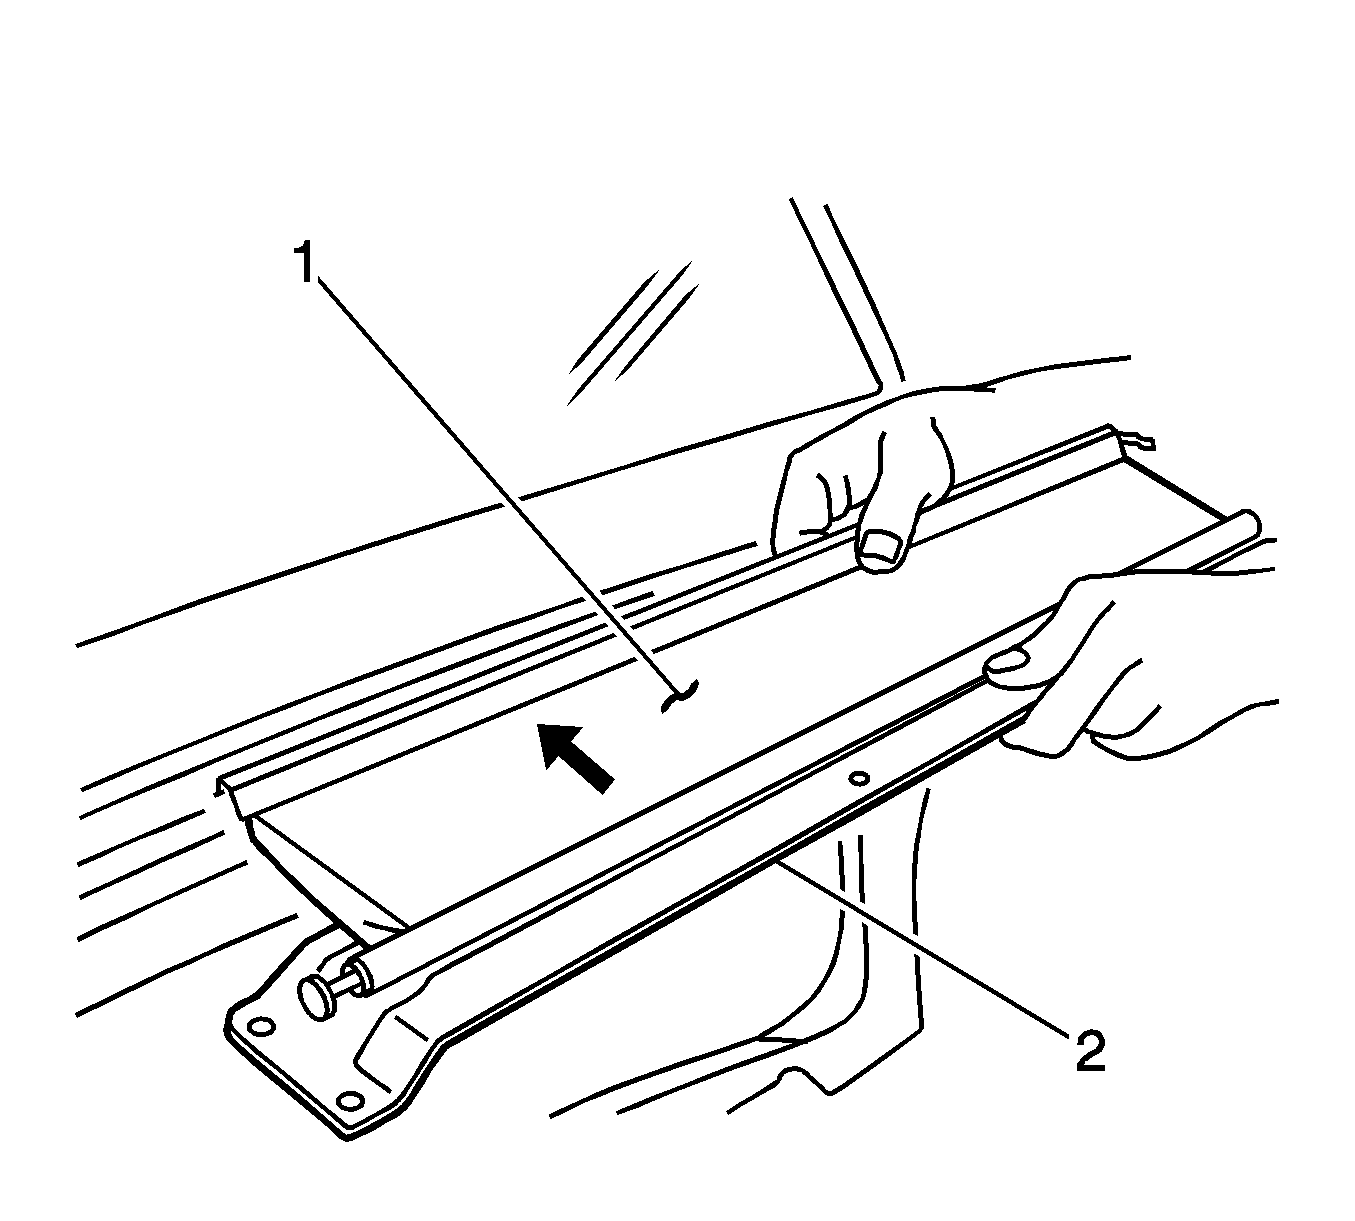
- With the sunshade assembly screws removed, gently move forward one corner of the assembly in order to release the sunshade from the rear track assembly.
- Remove the sunshade assembly from the vehicle.
Note: Prior to releasing the sunshade track retainers from the sunshade cable barrels, ensure that the sunshade is at the full open position.
Installation Procedure
- Position the sunroof/sunshade assembly to the rear sunroof track assembly.
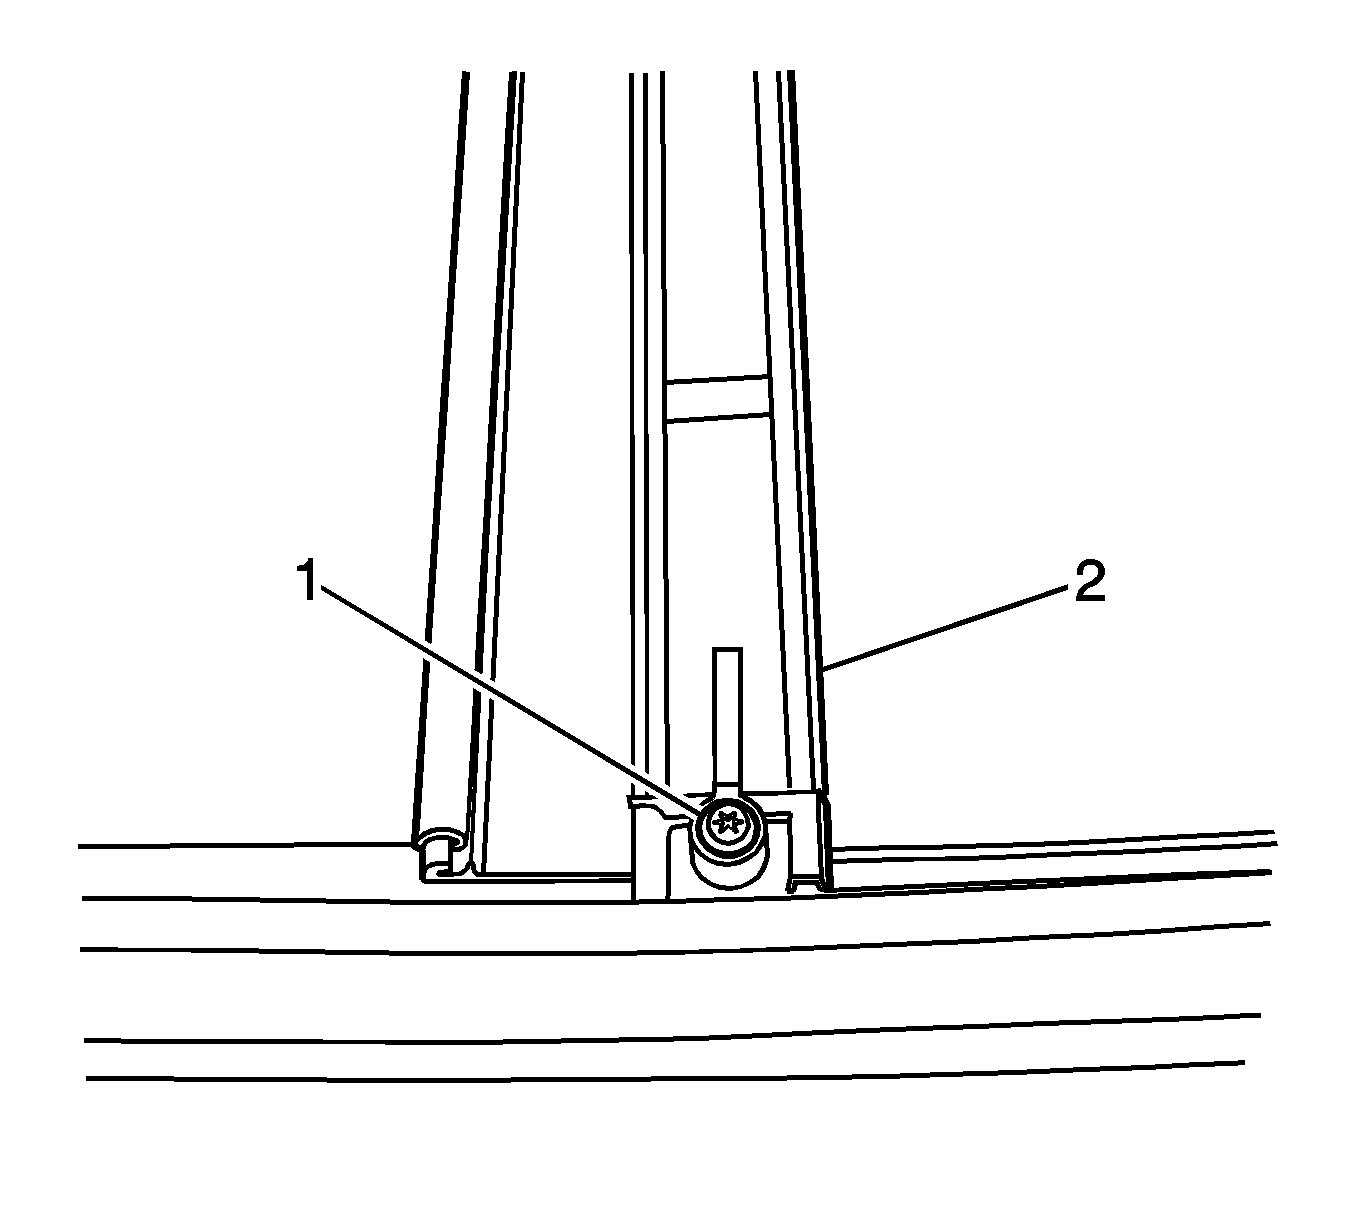
- Prior to installing the sunshade assembly to the bottom of the sunroof frame, pull the sunshade material (1) approximately 75 mm (3 in) outward from the assembly (2). Pull the material outward.
- Position the sunroof/sunshade assembly to the sunroof frame.
- Install the sunroof/sunshade assembly screws (2).
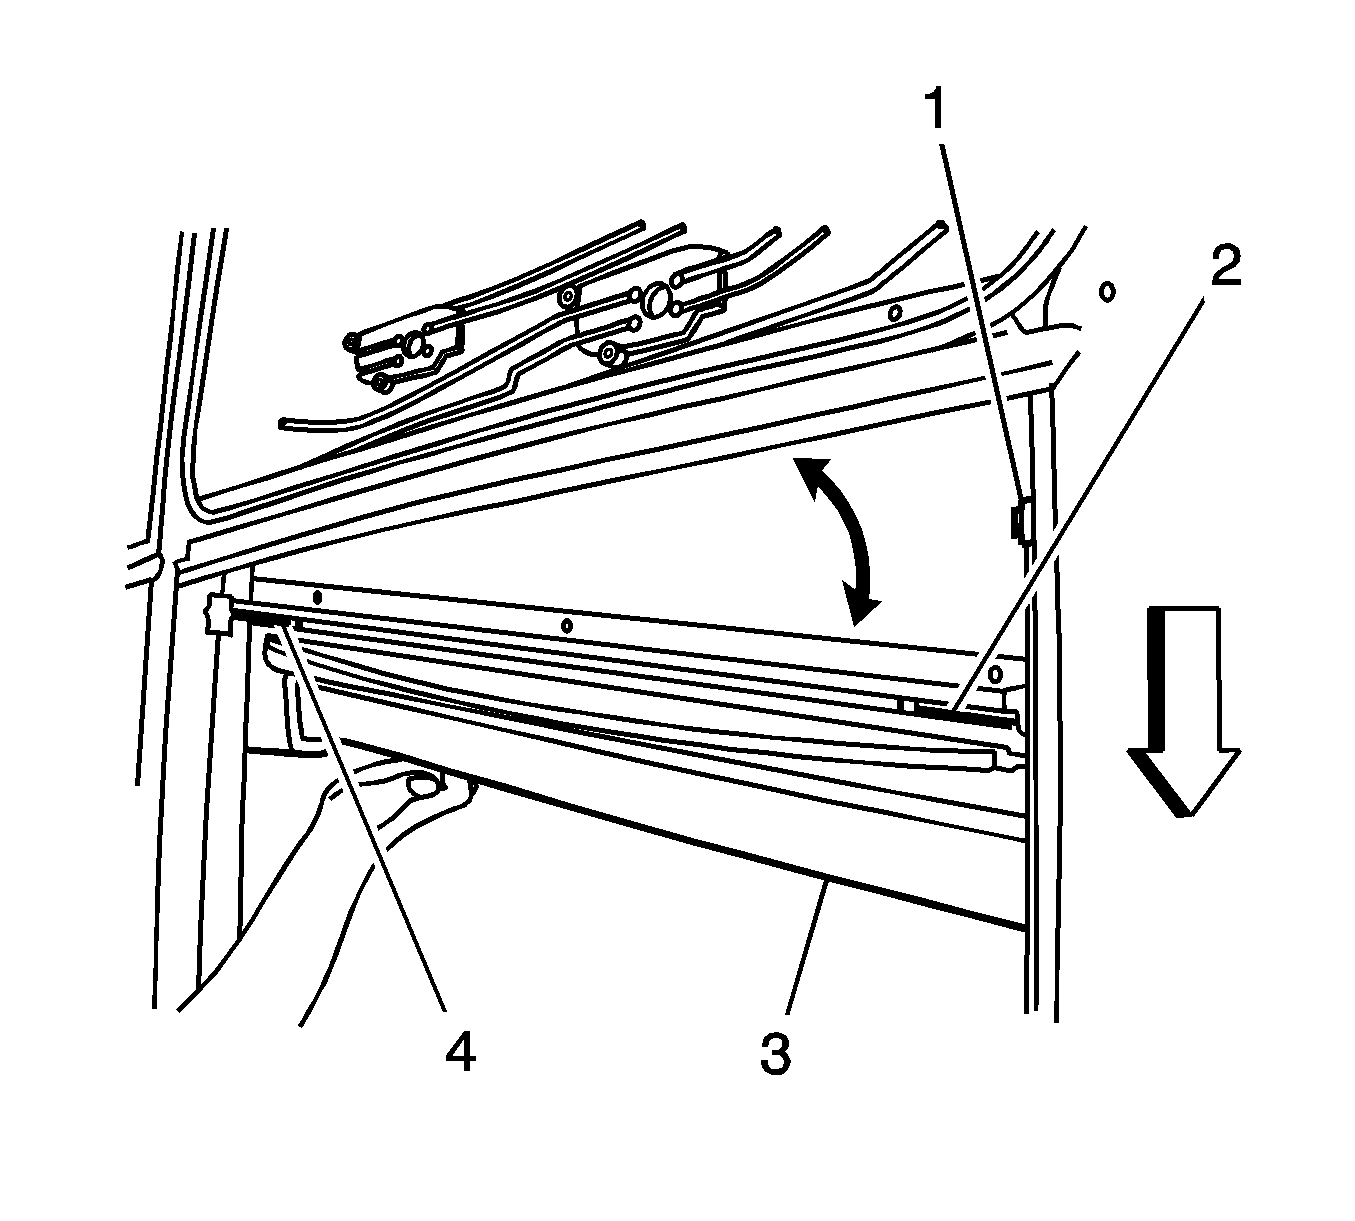
- Pull the sunshade material outward. Install the sunshade screws (1) into the sunshade channel (2).
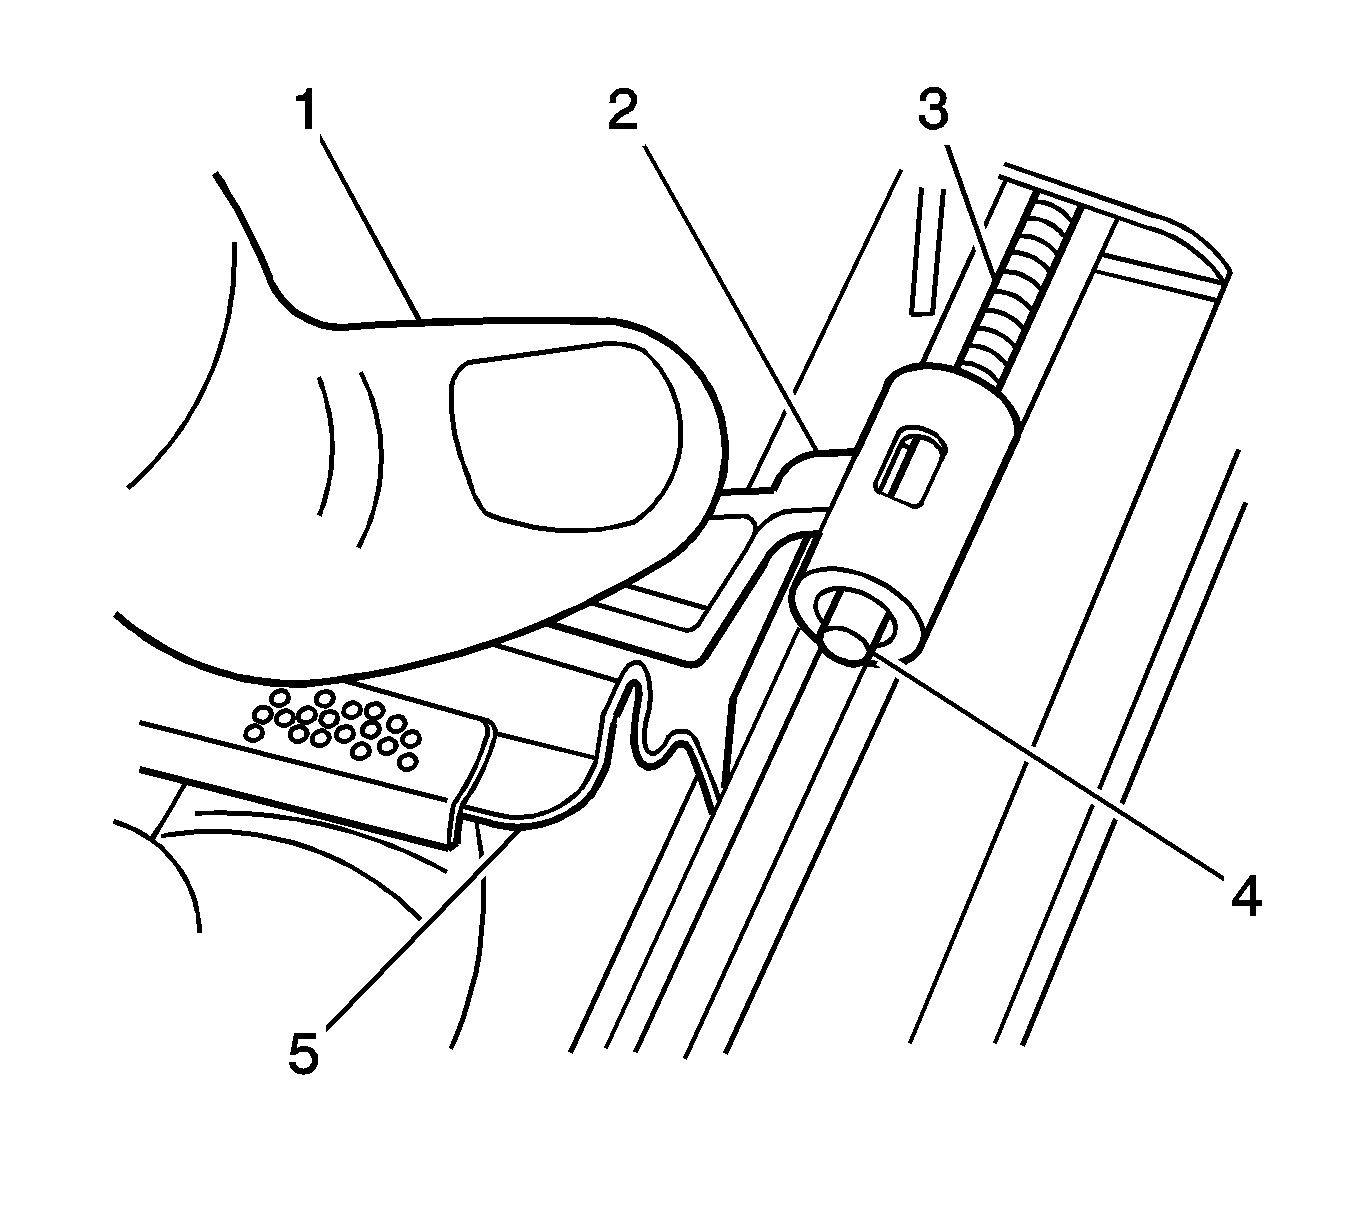
- Use downward thumb (1) pressure to press on the retainer (2) until the retainer locks over the sunshade cable barrel (4).
- Install the headliner. Refer to Headlining Trim Panel Replacement.
- Install the rear sunroof vent window. Refer to Sunroof Window Replacement.
- Perform the rear vent window sunshade initialization process. Refer to Sunroof Rear Sunshade Initialization.
Note: Install one side of the sunroof/sunshade first, then move the other side rearward in order to locate the sunshade retainer into the front track channel.
Caution: Refer to Fastener Caution in the Preface section.
Tighten
Tighten the 6 screws to 5 N·m (44 lb in).
Sunroof Sunshade Assembly Replacement Front
Removal Procedure
- Open the front sunshade to the full open/rearward position.
- It is only necessary to lower the headliner. Only do those step in headliner replacement that will lower the headliner enough to gain access to the part. Refer to Headlining Trim Panel Replacement.
- Remove the front sunroof window. Refer to Sunroof Window Replacement.
- Remove the sunshade screw (1) from the sunshade link (2) from the cable assembly.
- Remove the screws (2) securing the sunshade assembly (3) to the lower sunroof frame assembly.
- With the sunshade assembly screws removed, gently move forward one corner of the assembly (3) in order to release the sunshade from the front track assembly.
- Remove the sunshade assembly from the vehicle.
Note: Prior to releasing the sunshade track retainers from the sunshade cable barrels, ensure that the sunshade is at the full open position.
Installation Procedure
- Position the sunroof/sunshade assembly to the front sunroof track assembly.
- Prior to installing the sunshade assembly to the bottom of the sunroof frame, pull the sunshade material (1) approximately 75 mm (3 in) outward from the assembly (2). Pull the material outward.
- Position the sunroof/sunshade assembly to the sunroof frame.
- Install the sunroof/sunshade assembly screws (2).
- Pull the sunshade material outward. Install the sunshade link (1) into the sunshade channel (2).
- Position the sunshade link (2) until the link is aligned over the sunshade cable barrel (4).
- Use downward thumb pressure (1) to press on the retainer (2) until the retainer locks over the sunshade cable barrel (4).
- Install the headliner. Refer to Headlining Trim Panel Replacement.
- Install the front sunroof vent window. Refer to Sunroof Window Replacement.
- Perform the front window/sunshade initialization process. Refer to Sunroof Front Sunshade/Window Initialization.
Note: Install one side of the sunroof/sunshade (3) first, then move the other side rearward in order to locate the sunshade retainer (2, 4) into the front track (1) channel.
Caution: Refer to Fastener Caution in the Preface section.
Tighten
Tighten the 6 screws to 5 N·m (44 lb in).