Test Description
The numbers below refer to the step numbers in the diagnostic table.
-
In most cases, the vibration can be reproduced in the stall, but it is either not as bad or a lot worse than experienced on the road. This is normal. First-order driveline vibrations may be caused the imbalance of a component. The In-Stall test will help determine which component needs to be repaired or replaced.
-
If the vehicle has a vibration that is equal to first-order driveline rotation, and it is not present when testing the vehicle in the stall, then it is possible that the vibration is being generated by internal rear axle components. This may also be true if the vibration was correctable in the stall but returned when the vehicle was driven on the road.
Step | Action | Yes | No | ||||||
|---|---|---|---|---|---|---|---|---|---|
1 | Has the Vibration Analysis - Road Testing table been completed? | Go to Step 2 | |||||||
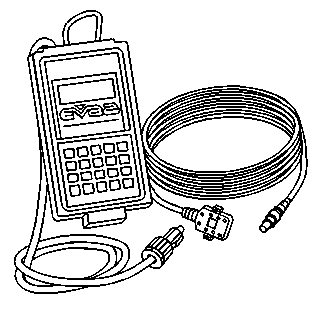
2 | Did you record frequency data from the J 38792-A Electronic Vibration Analyzer (EVA) 2 during the Vibration Analysis - Road Testing procedure? | Go to Step 3 | Go to Step 5 | ||||||
3 | Based on the Vibration Analysis - Road Testing table, is the concern first-order driveline related? | Go to Step 6 | Go to Step 4 | ||||||
4 | Based on the Vibration Analysis - Road Testing table, is the concern second-order driveline related? | Go to Step 21 | Go to Step 5 | ||||||
5 | Based on the Vibration Analysis - Road Testing table, is the concern a noise that is not felt? | ||||||||
6 |
Did any of the components listed exhibit any of the conditions listed? | Go to Step 7 | Go to Step 8 | ||||||
7 | Replace the components as necessary. Refer to one of the following procedures in Propeller Shaft: Did you complete the overhaul or replacement? | Go to Step 28 | -- | ||||||
Attempt to duplicate the vibration in the stall. Refer to Vibration in Service-Stall Test (Non-Torque Sensitive) . Were you able to duplicate the vibration? | Go to Step 10 | Go to Step 9 | |||||||
Perform the Vibration in Service-Stall Test (Torque Sensitive) . Were you able to duplicate the vibration? | Go to Diagnostic Starting Point - Rear Drive Axle in Rear Drive Axle | ||||||||
10 |
Did you complete the operation? | Go to Step 11 | -- | ||||||
11 | Was the vibration most evident under the transmission mount? | Go to Step 12 | Go to Step 14 | ||||||
12 |
Did any of the components listed exhibit any of the conditions listed? | Go to Step 13 | Go to Step 15 | ||||||
13 |
Is the vibration still present? | Go to Step 15 | Go to Step 28 | ||||||
14 | Was the vibration most evident under the propeller shaft support bearing assembly? | Go to Step 15 | Go to Step 17 | ||||||
15 |
Did any of the components listed exhibit any of the conditions listed? | Go to Step 16 | Go to Step 17 | ||||||
16 |
Is the vibration still present? | Go to Step 17 | Go to Step 28 | ||||||
17 |
Did any of the components listed exhibit any of the conditions listed? | Go to Step 18 | Go to Step 19 | ||||||
18 |
Is the vibration still present? | Go to Step 19 | Go to Step 28 | ||||||
19 | Visually inspect the rear axle pinion flange for damage. Does the pinion flange exhibit any damage? | Go to Step 20 | Go to Step 25 | ||||||
20 |
Is the vibration still present? | Go to Step 25 | Go to Step 28 | ||||||
21 |
Did any of the components listed exhibit any of the conditions listed? | Go to Step 22 | Go to Step 23 | ||||||
22 |
Is the vibration still present? | Go to Step 23 | Go to Step 28 | ||||||
23 | Measure the propeller shaft angle. Refer to Driveline Working Angles Measurement . Does the propeller shaft angle require adjustment? | Go to Step 24 | Go to Step 27 | ||||||
24 |
Is the vibration still present? | Go to Step 27 | Go to Step 28 | ||||||
25 | Balance the propeller shafts. Refer to Driveline System Balance Adjustment . Were you able to balance the driveline system? | Go to Step 26 | |||||||
26 | Perform the Vibration in Service-Stall Test (Non-Torque Sensitive) . Is the vibration still present? | Go to Step 27 | Go to Step 28 | ||||||
27 | Replace the propeller shaft. Refer to the following procedures in Propeller Shaft: Did you complete the replacement? | Go to Step 28 | -- | ||||||
28 |
Is the vibration still present? | Go to Step 3 | System OK |
