Tools Required
| • | EN 46327 Timing Chain Retention Tool |
| • | J 45059 Angle Meter |
| • | J 44212 Camshaft Holding Tool |
Removal Procedure
- Remove the right camshaft cover. Refer to Camshaft Cover Replacement - Right Side .
- Remove the camshaft position sensor. Refer to Camshaft Position Sensor Replacement .
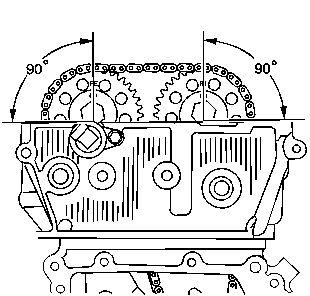
- Rotate the crankshaft to TDC of the # 1 cylinders compression stroke, both camshaft sprocket drive pins should be at the top of their rotation.
- Install the J 44212 over the camshafts.
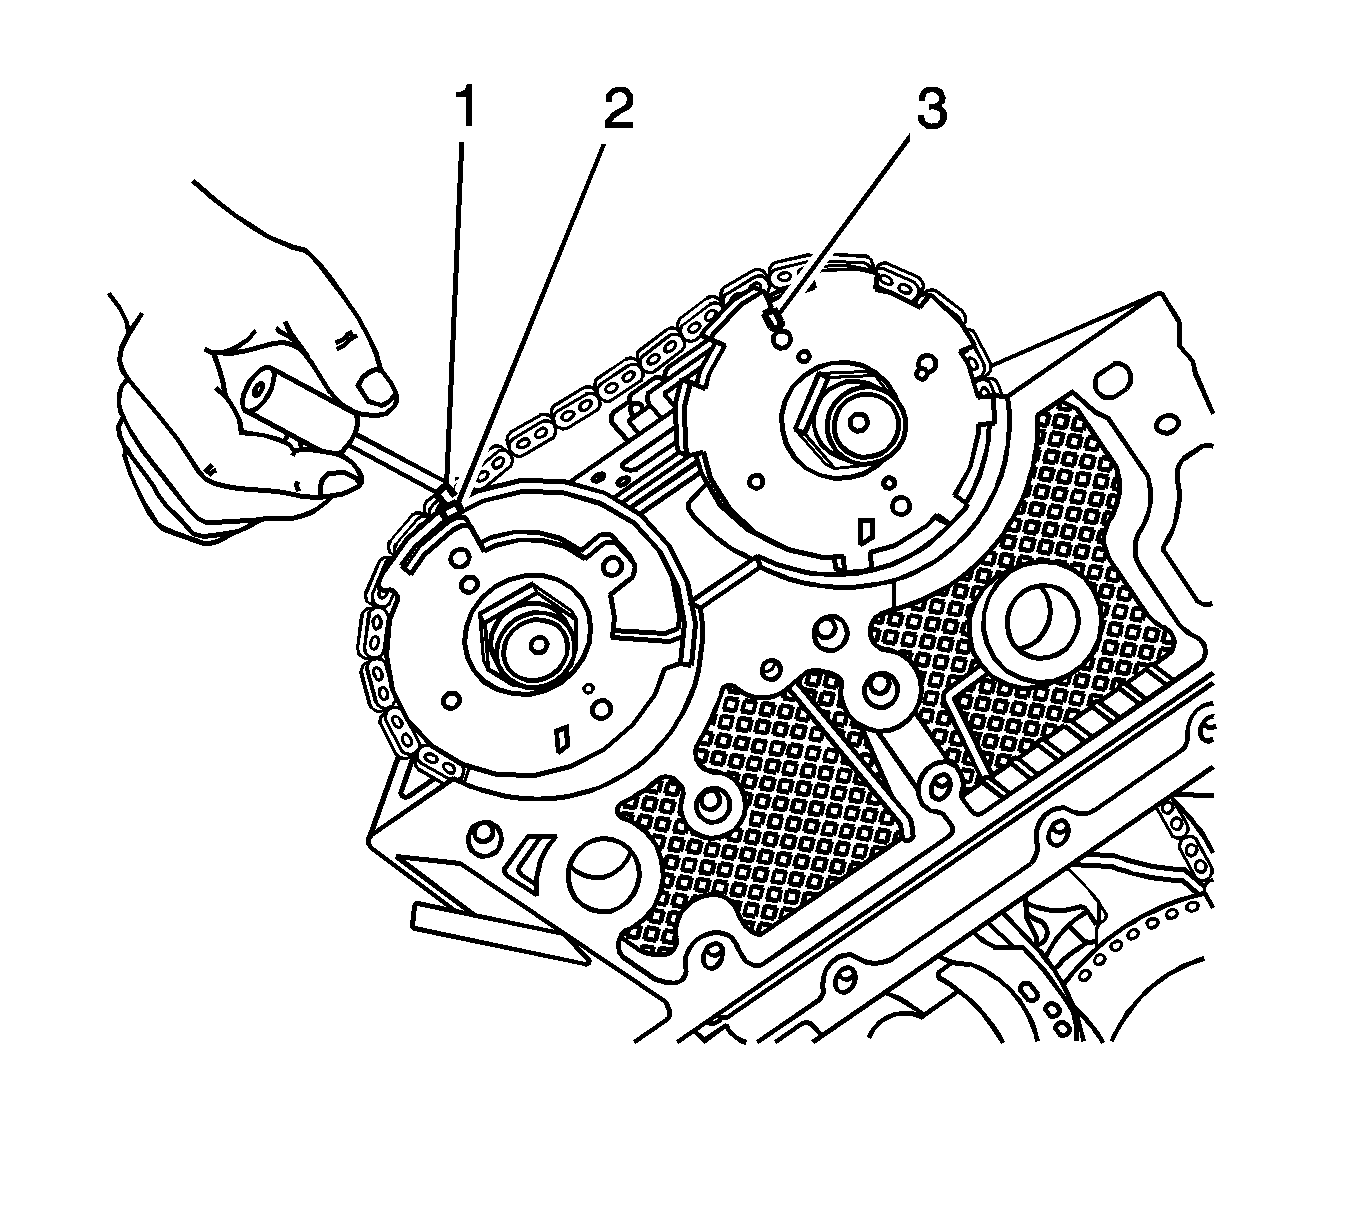
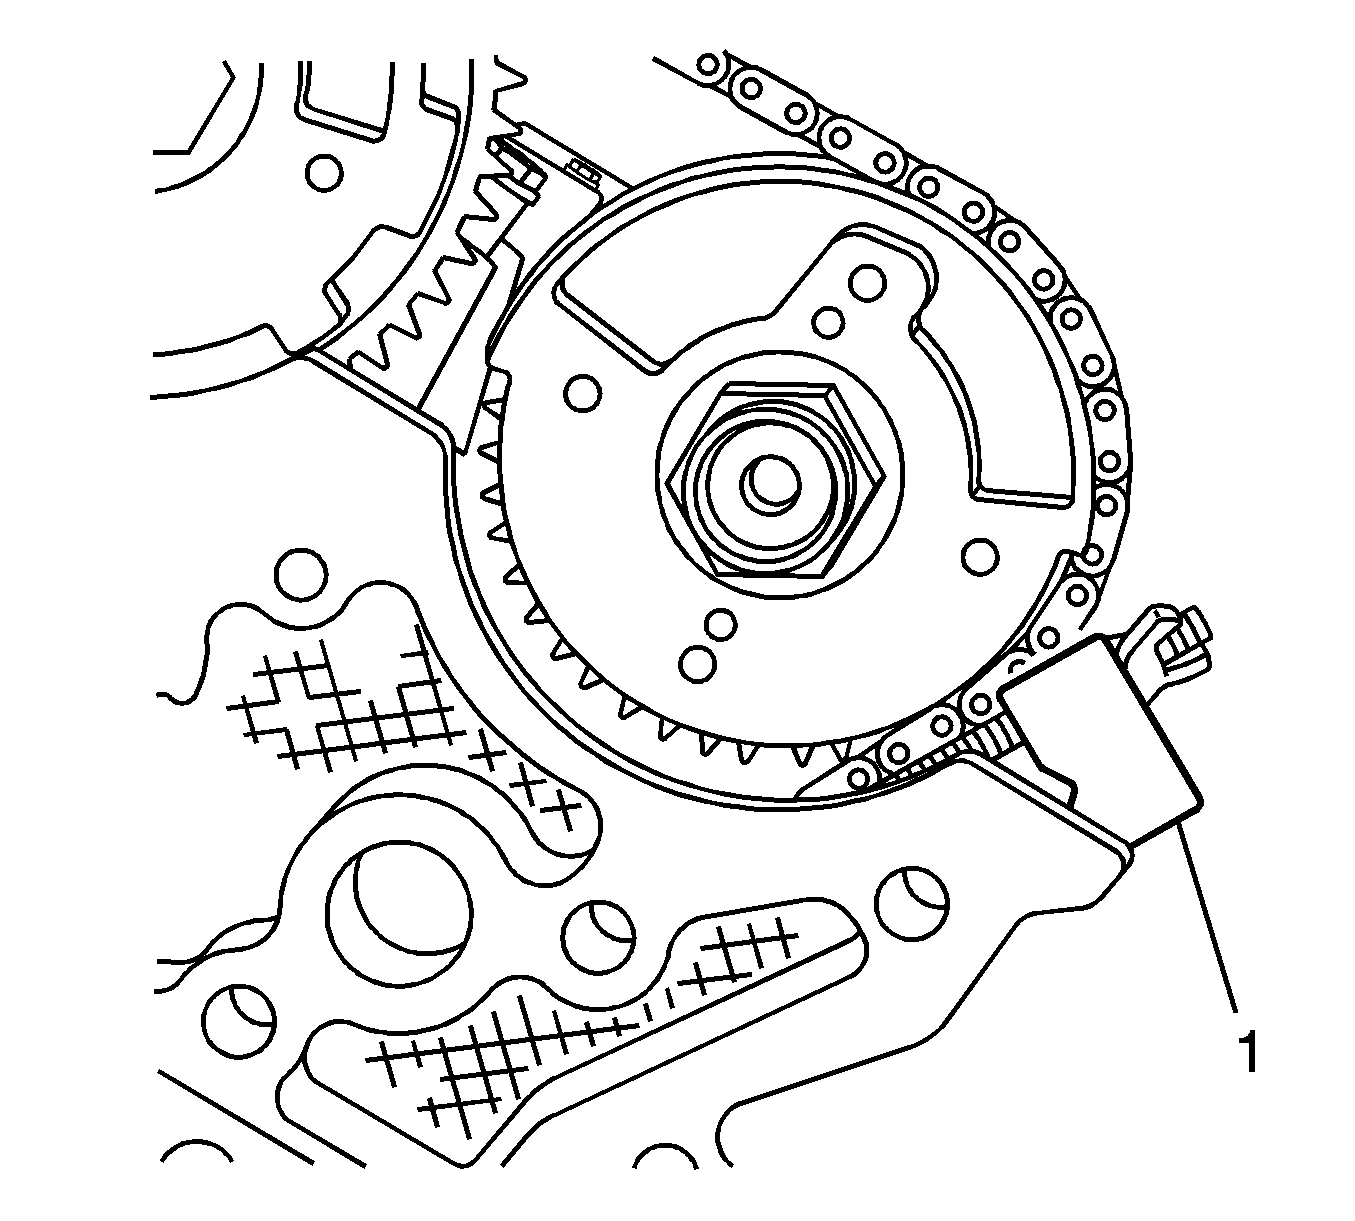
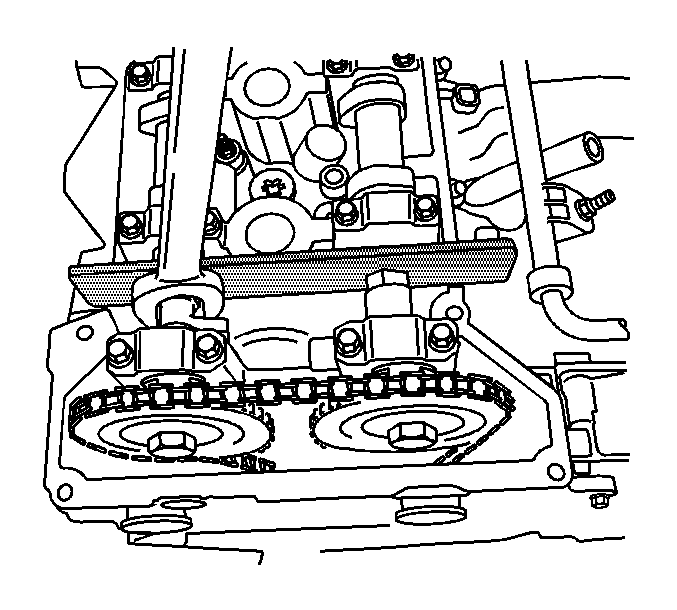
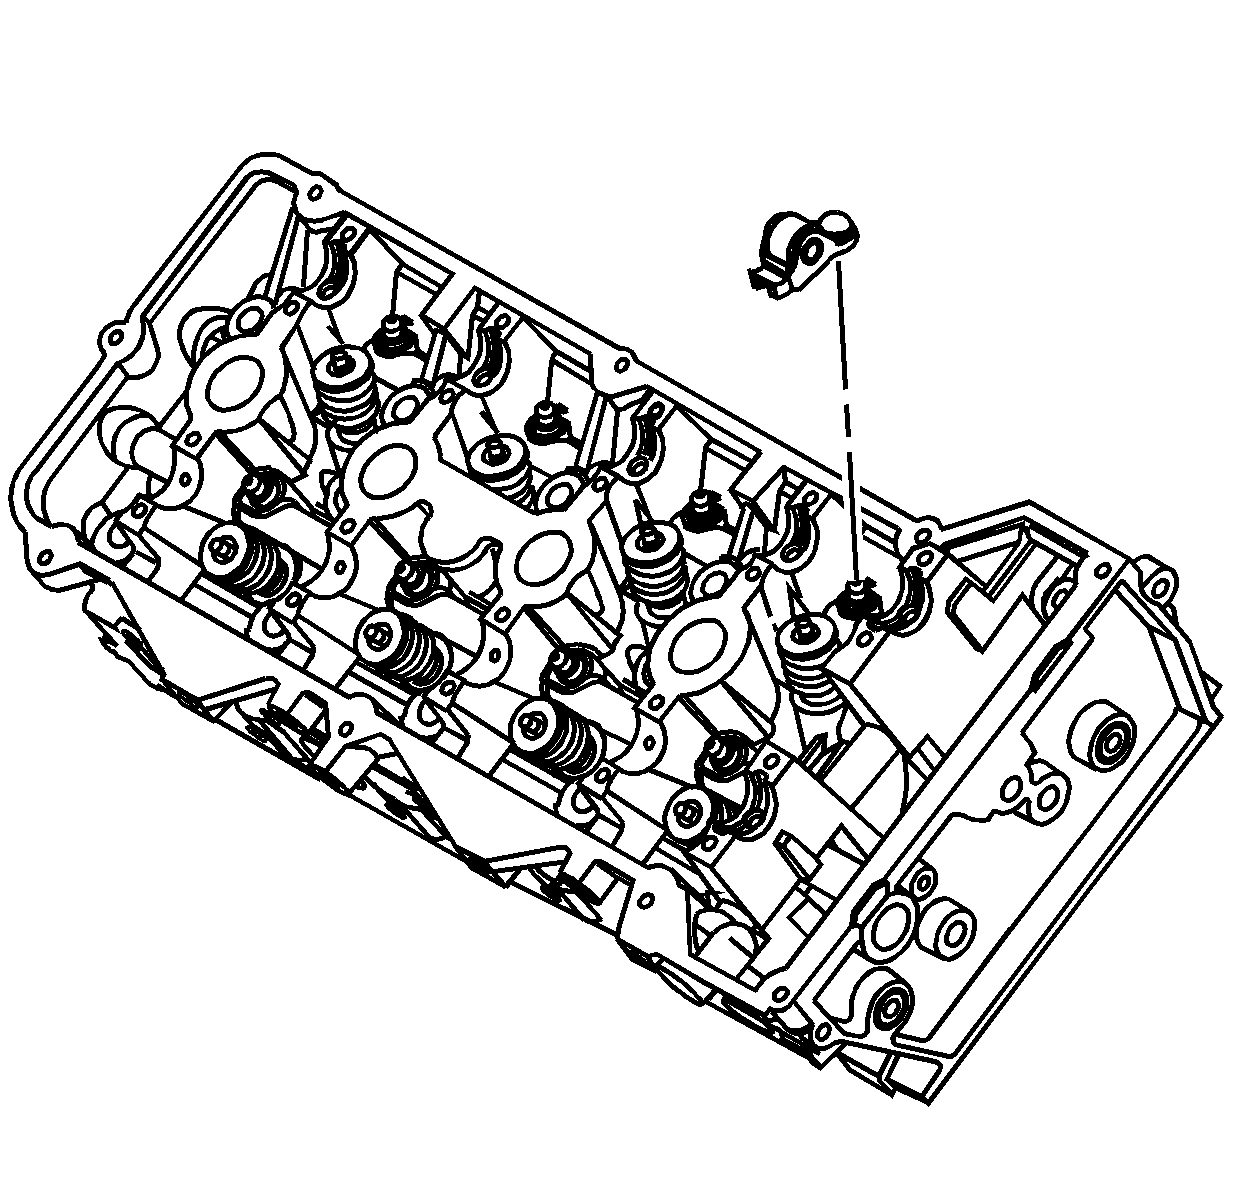
- Use a paint stick to create a mark (1) on the timing chain link adjacent to each camshaft sprocket timing mark (2, 3).
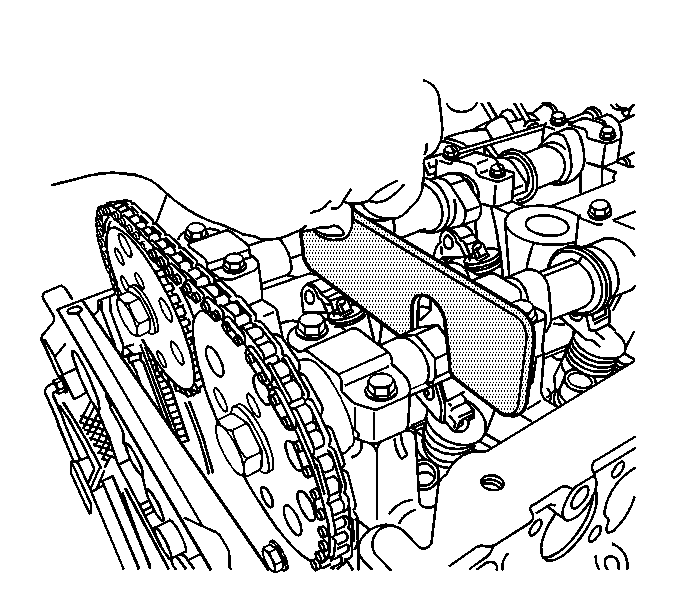
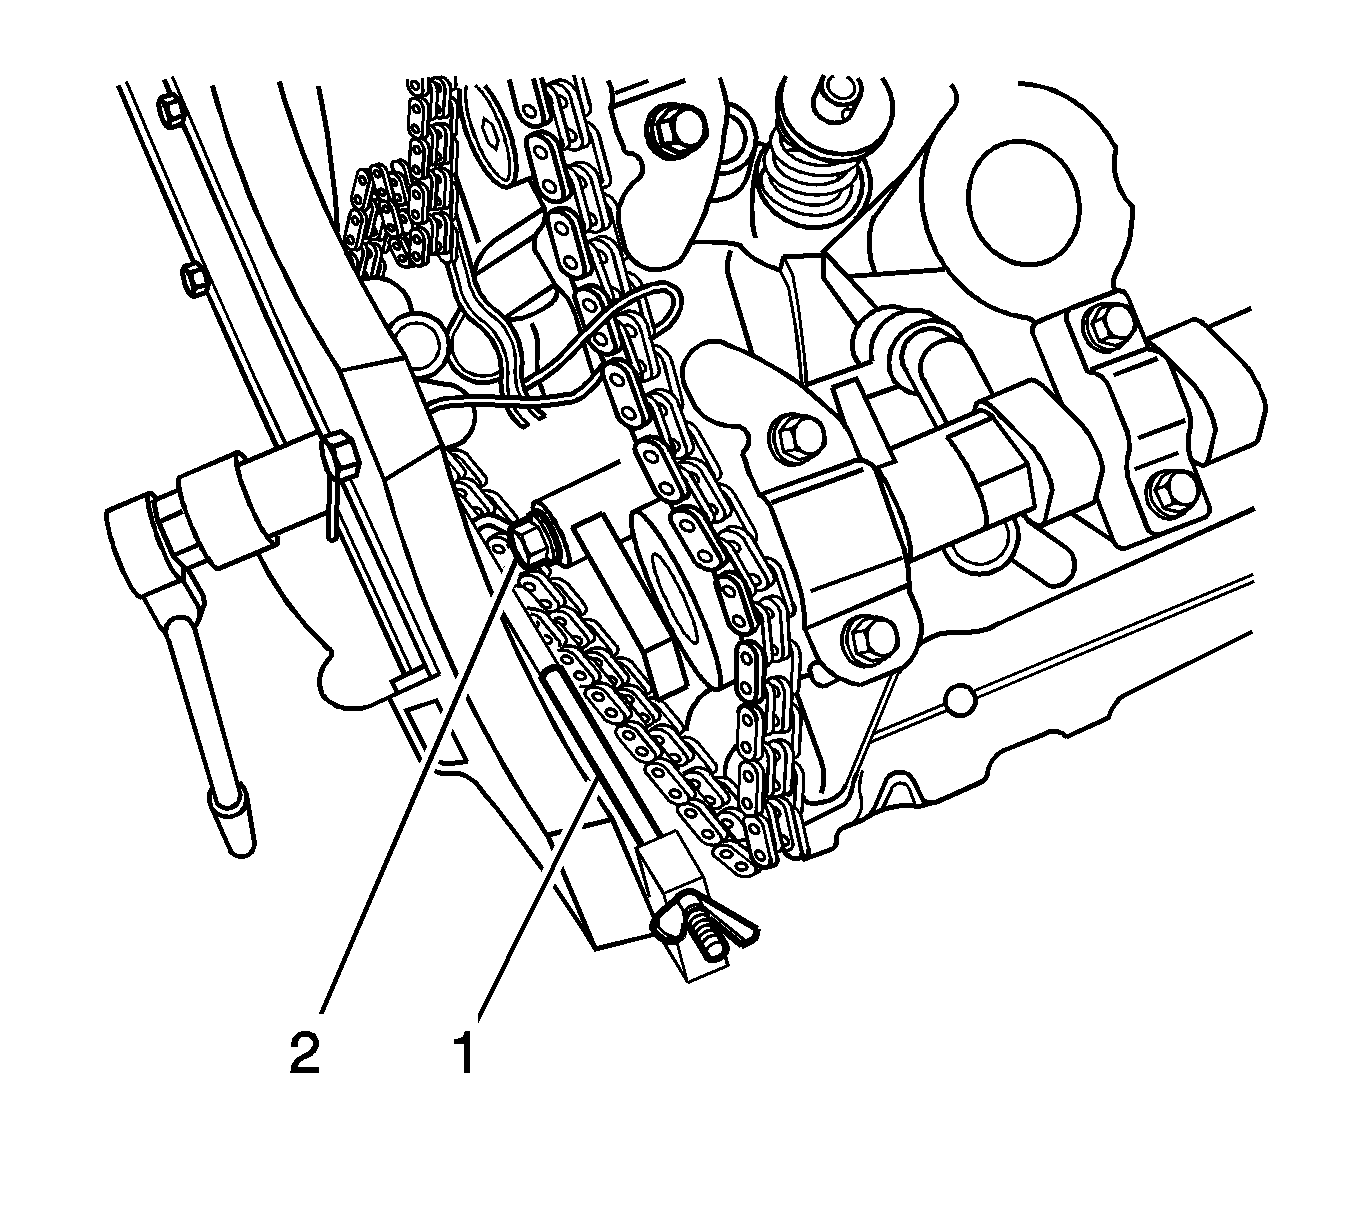
- Install both EN 46327 (1) to the engine using the following step:
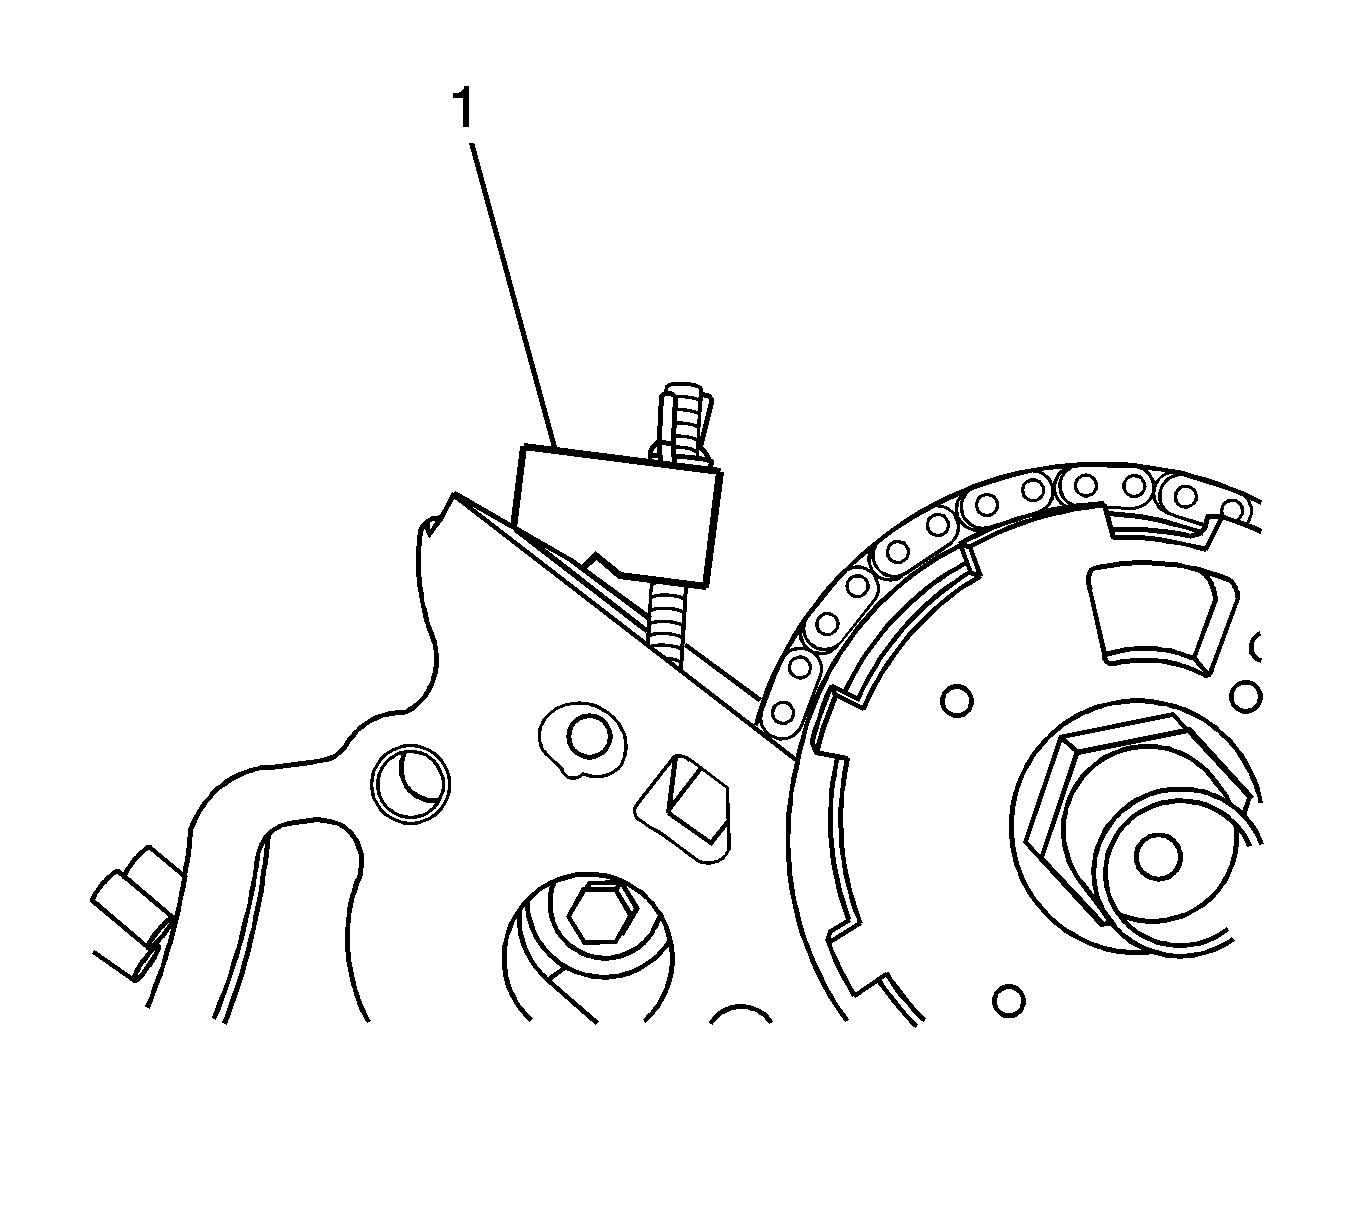
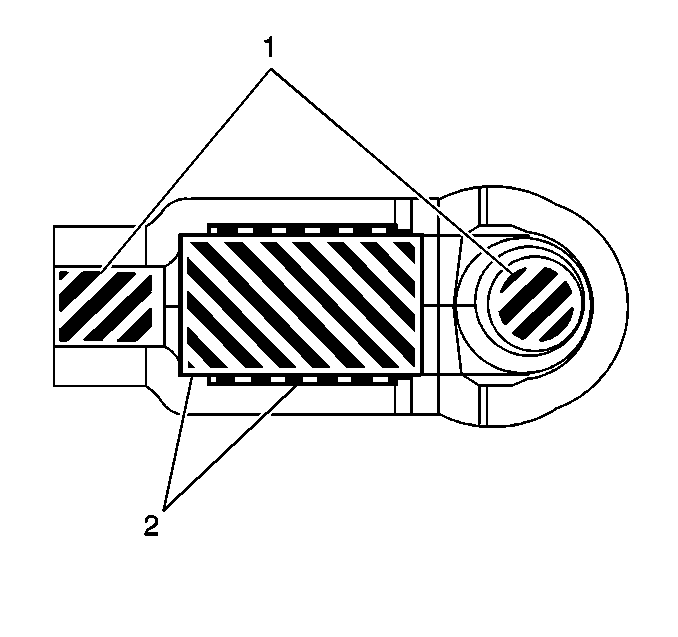
- Position the bottom retention tool on the cylinder head with the V-notch of the block (1) adjacent to the right exhaust camshaft sprocket and chain.
- Insert the hook end (2) into a secondary timing chain link as shown.
- Rotate the wing nut until it contacts the retention tool block (1). DO NOT tighten the wing nut at this time.
- Rotate the wing nut (2) of the EN 46327 (4) to the top of its travel.
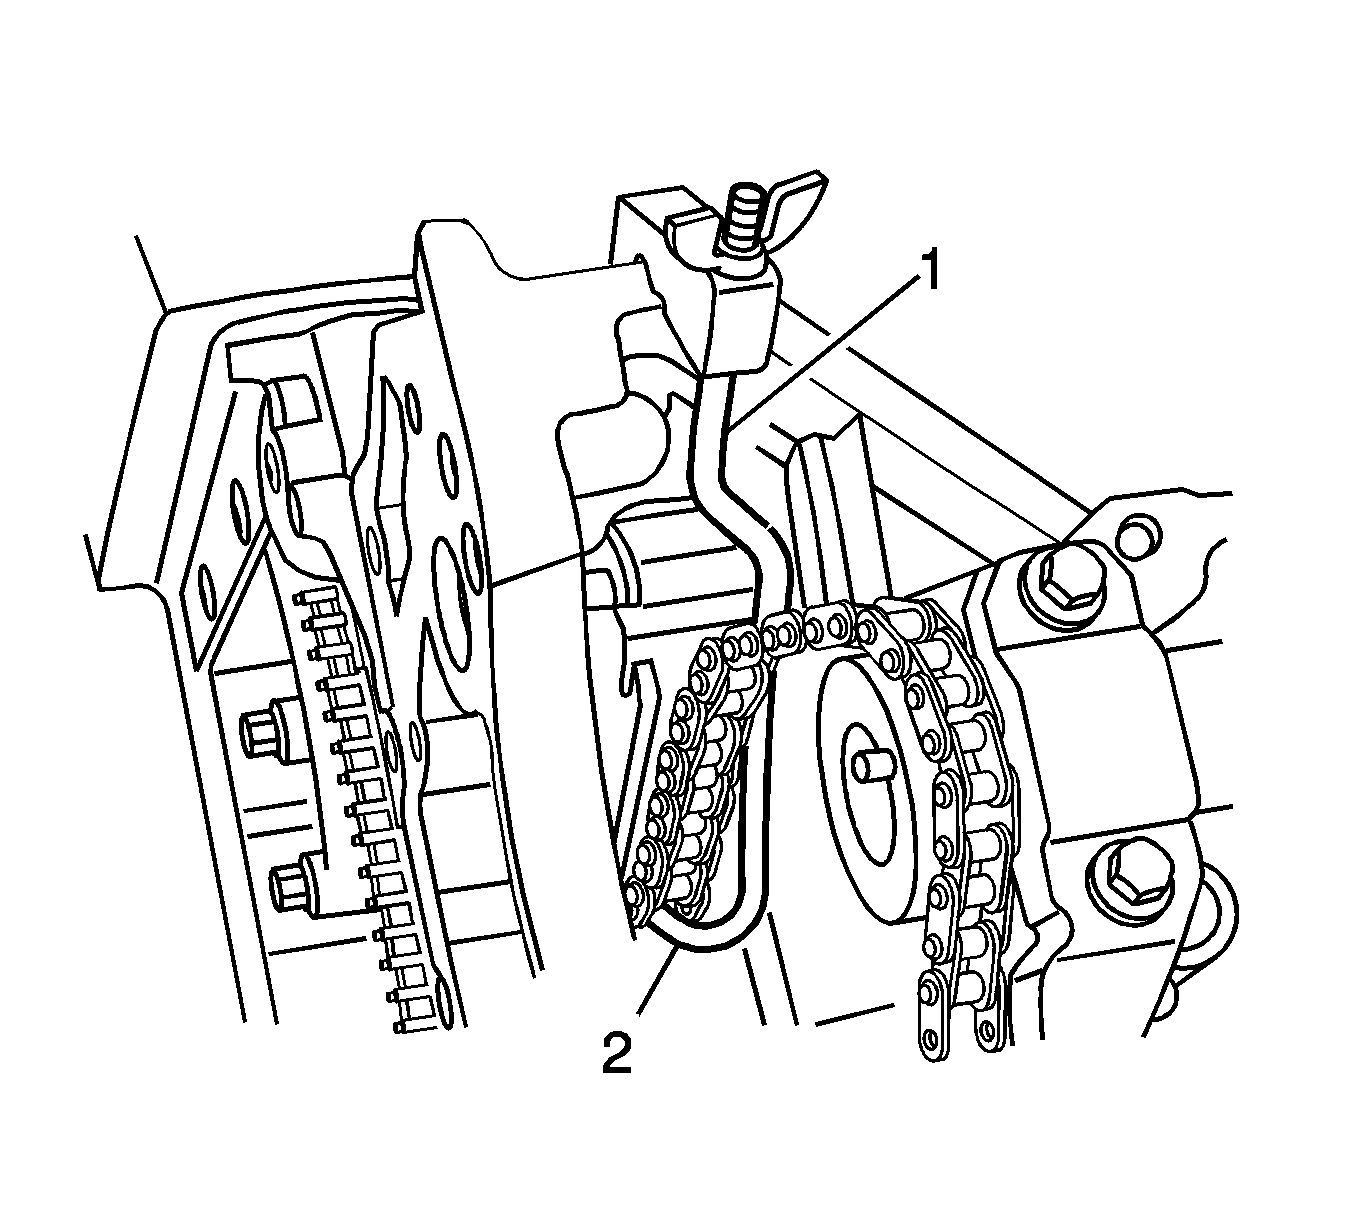
- Position the top retention tool on the cylinder head with the V-notch of the block (1) adjacent to the right intake camshaft sprocket and chain.
- Insert the hook end (2) into a secondary timing chain link as shown.
- Rotate the wing nut until it contacts the retention tool block (1). Alternately tighten both wing nuts to retain the chain.
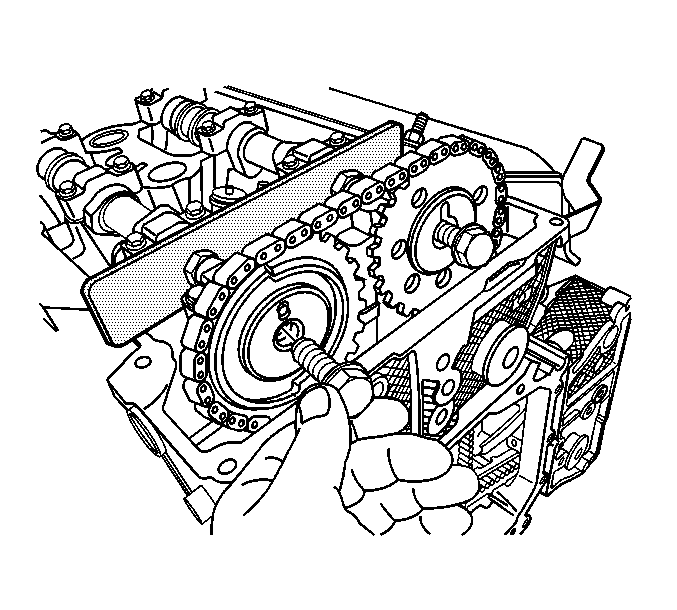
- Use an open wrench on the hex cast into the camshafts in order to prevent the camshafts from rotating when removing the camshaft sprocket bolts.
- Remove the camshaft sprocket bolts.
- Remove the camshaft sprockets.
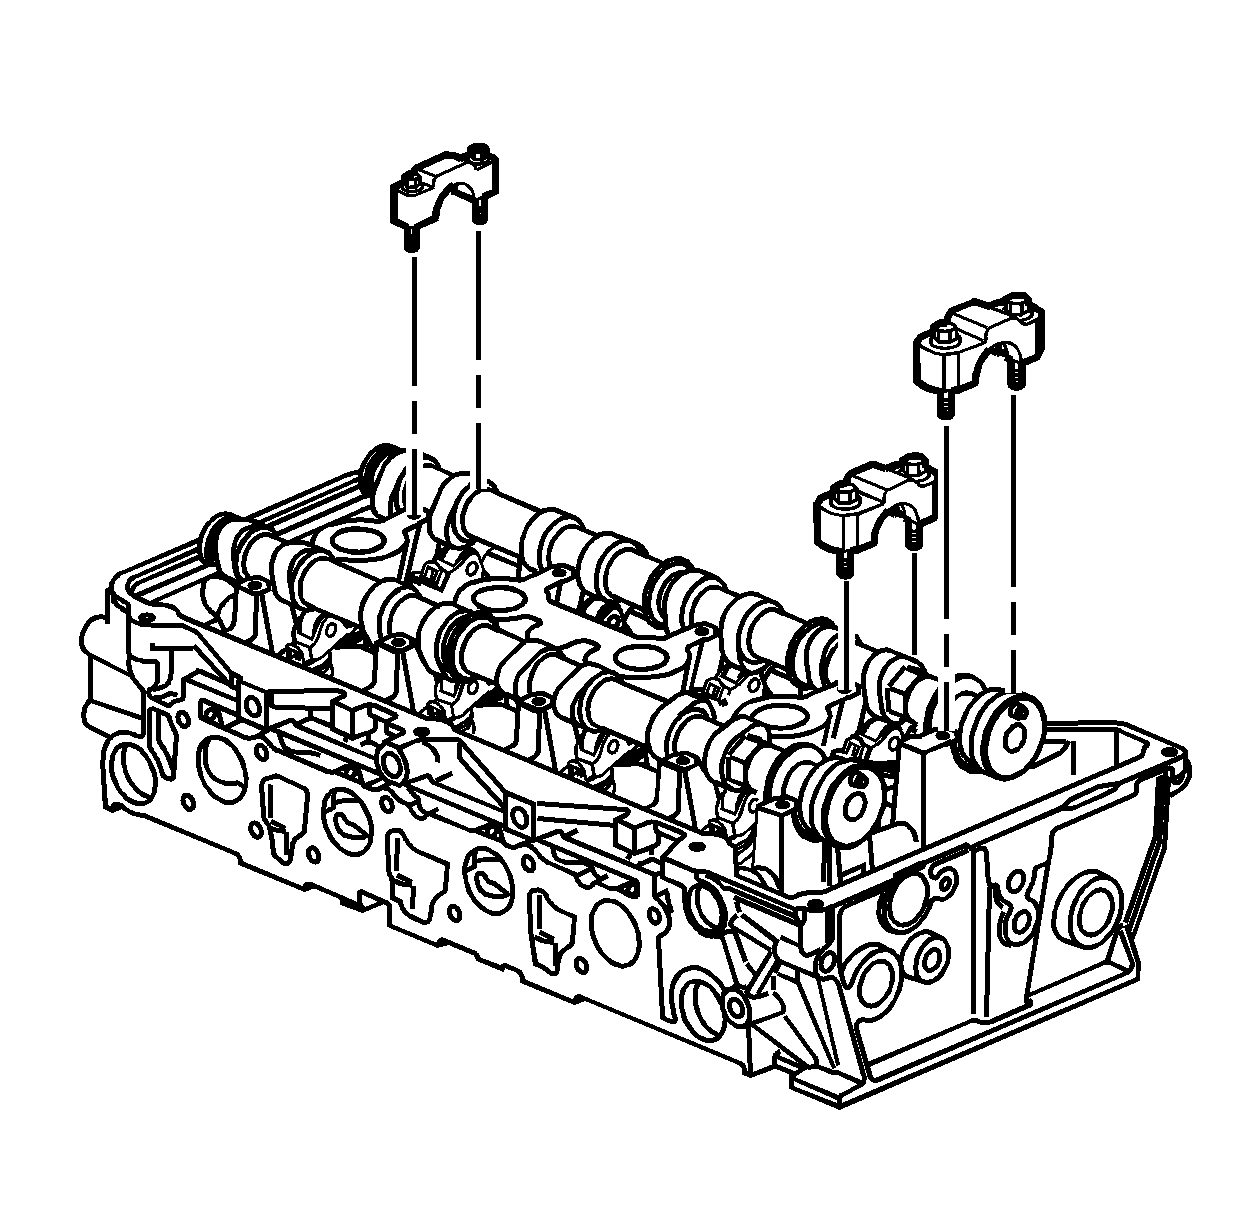
- Alternately loosen the camshaft bearing cap bolts a few turns at a time until all valve spring pressure has been released.
- Remove the camshaft bearing caps.
- Remove the J 44212 from the camshafts.
- Remove the camshafts.
- Remove the camshaft followers.
- Clean and inspect the camshafts. Refer to Camshaft Cleaning and Inspection .
Caution: Refer to Camshaft Holding Tool Caution in the Preface section.
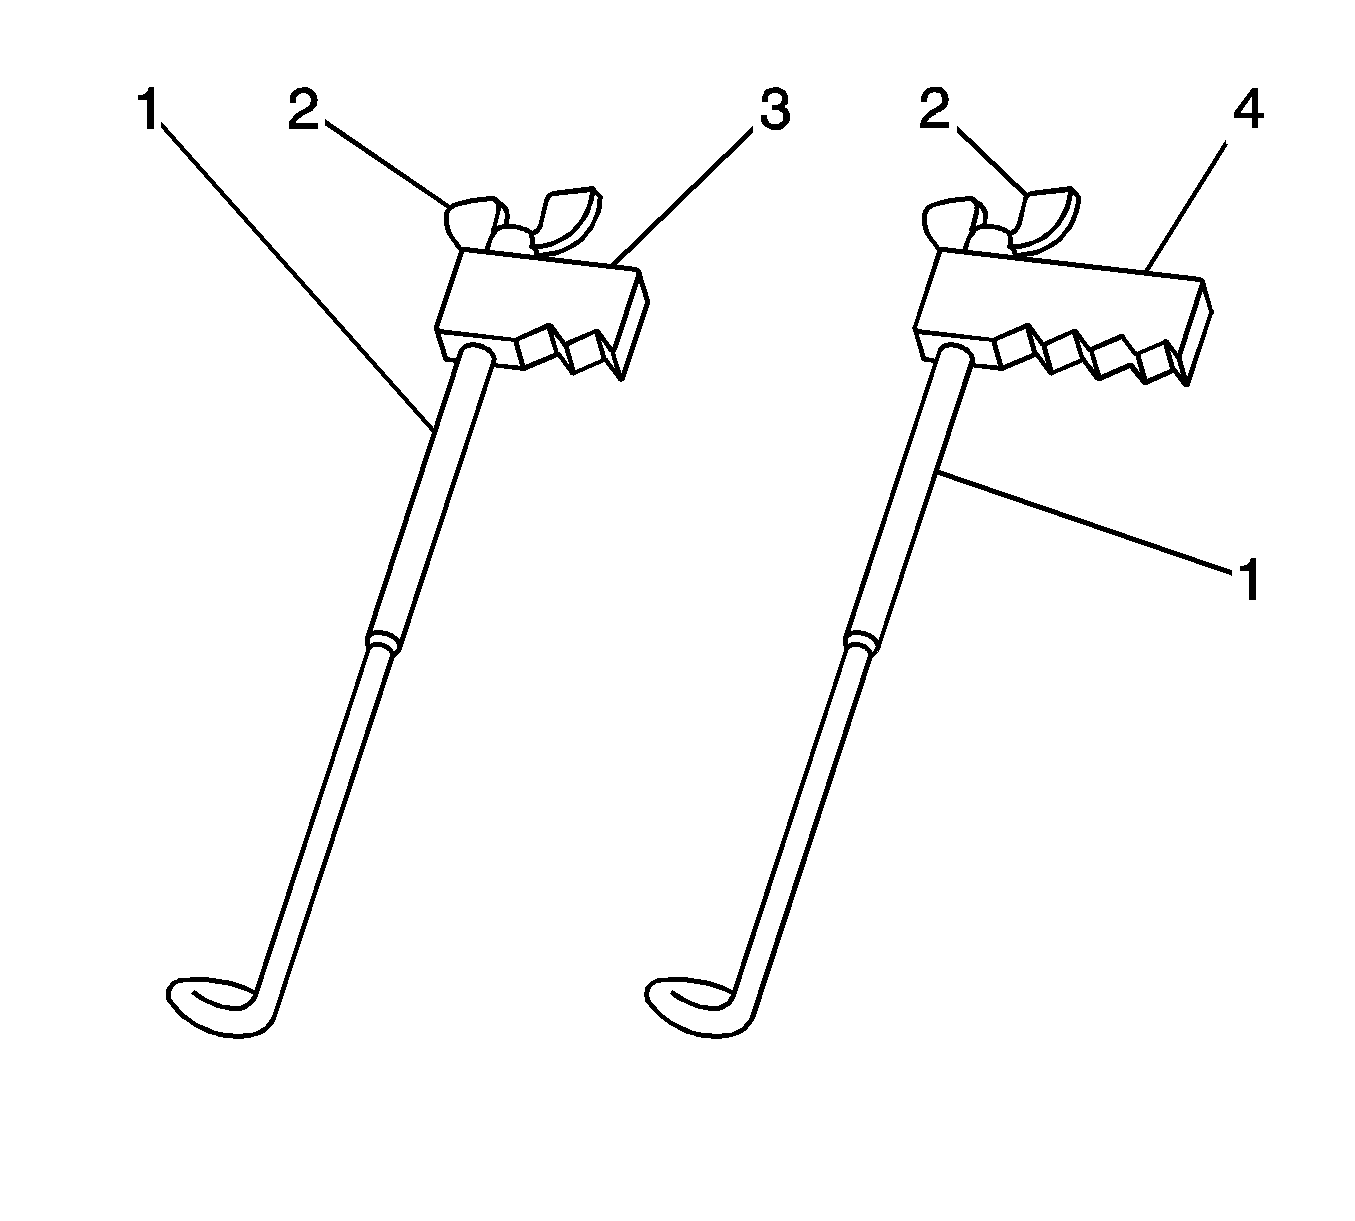
Rotate the wing nut (2) of the EN 46327 (3) to the top of its travel.
Notice: Refer to Torque Reaction Against Timing Drive Chain Notice in the Preface section.
Installation Procedure
- Apply a liberal amount of lubricant to the roller pivot pocket (2) and valve slot areas (1) of the camshaft followers. Refer to Adhesives, Fluids, Lubricants, and Sealers .
- Place the camshaft followers in position on the valve tip and the stationary hydraulic lash adjusters (SHLA) (1). The rounded head of the follower goes on the SHLA, while the flat end goes on the valve tip.
- Clean the camshaft carriers with a clean, lint-free cloth.
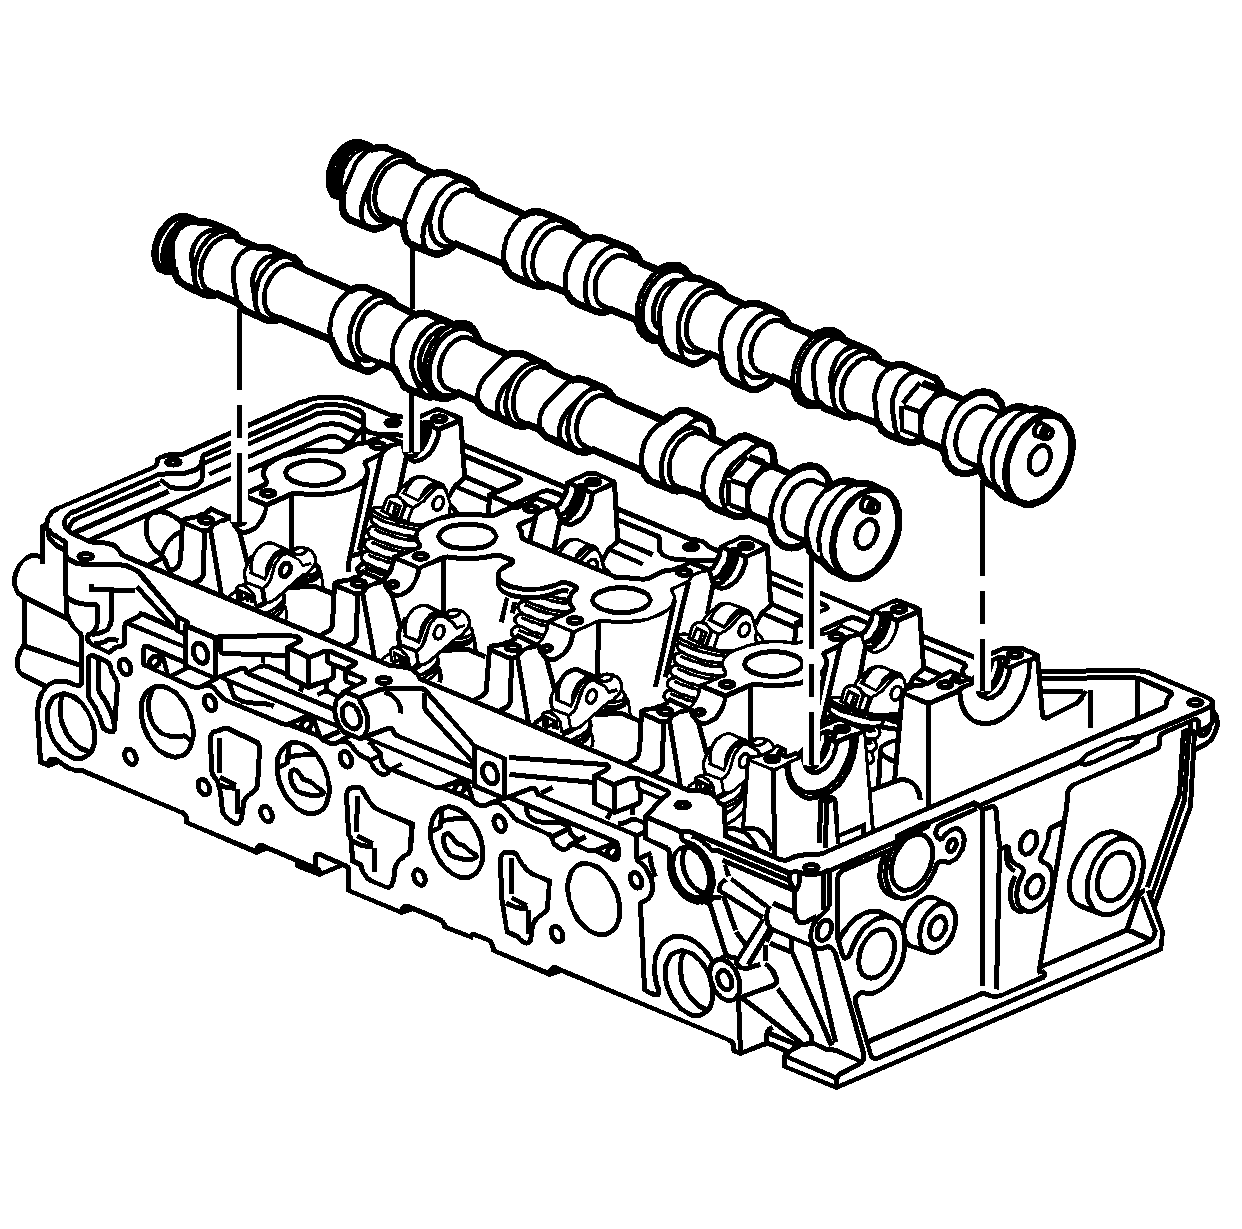
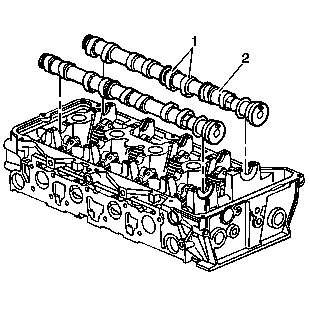
- Apply a liberal amount of lubricant to the camshaft carriers, camshaft lobes (1) and the camshaft journals (2). Refer to Adhesives, Fluids, Lubricants, and Sealers .
- Place the camshaft in the camshaft carriers with the camshaft sprocket drive pins near the top of their rotation and the camshaft lobes in a neutral position. The camshafts can be identified by a stamping near the rear journal. For example: R-EXH is defined as Right bank Exhaust.
- Observe the markings on the camshaft bearing caps. Each camshaft bearing cap is marked in order to identify its location. The markings have the following meanings:
- Apply a liberal amount of lubricant to the camshaft bearing caps. Refer to Adhesives, Fluids, Lubricants, and Sealers .
- Install the camshaft bearing caps according to the identification marks.
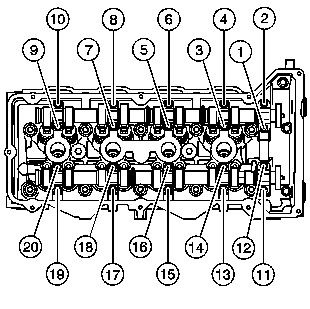
- Install the camshaft bearing cap bolts in sequence.
- Alternately hand tighten the camshaft bearing cap bolts a few turns at a time until all caps are fully seated.
- Tighten the camshaft bearing cap bolts to 5 N·m (44 lb in).
- Tighten the camshaft bearing cap bolts an additional 30 degrees using the J 45059 .
- Align the camshafts.
- Install the J 44212 over the camshafts.
- Install the intake and exhaust camshaft sprockets aligning the paint marks made during disassembly. Ensure that the camshaft sprockets align with the pins of the camshafts.
- Use an open wrench on the hex cast into the camshafts in order to prevent the camshafts from rotating when tightening the camshaft sprocket bolts.
- Install the camshaft sprocket bolts.
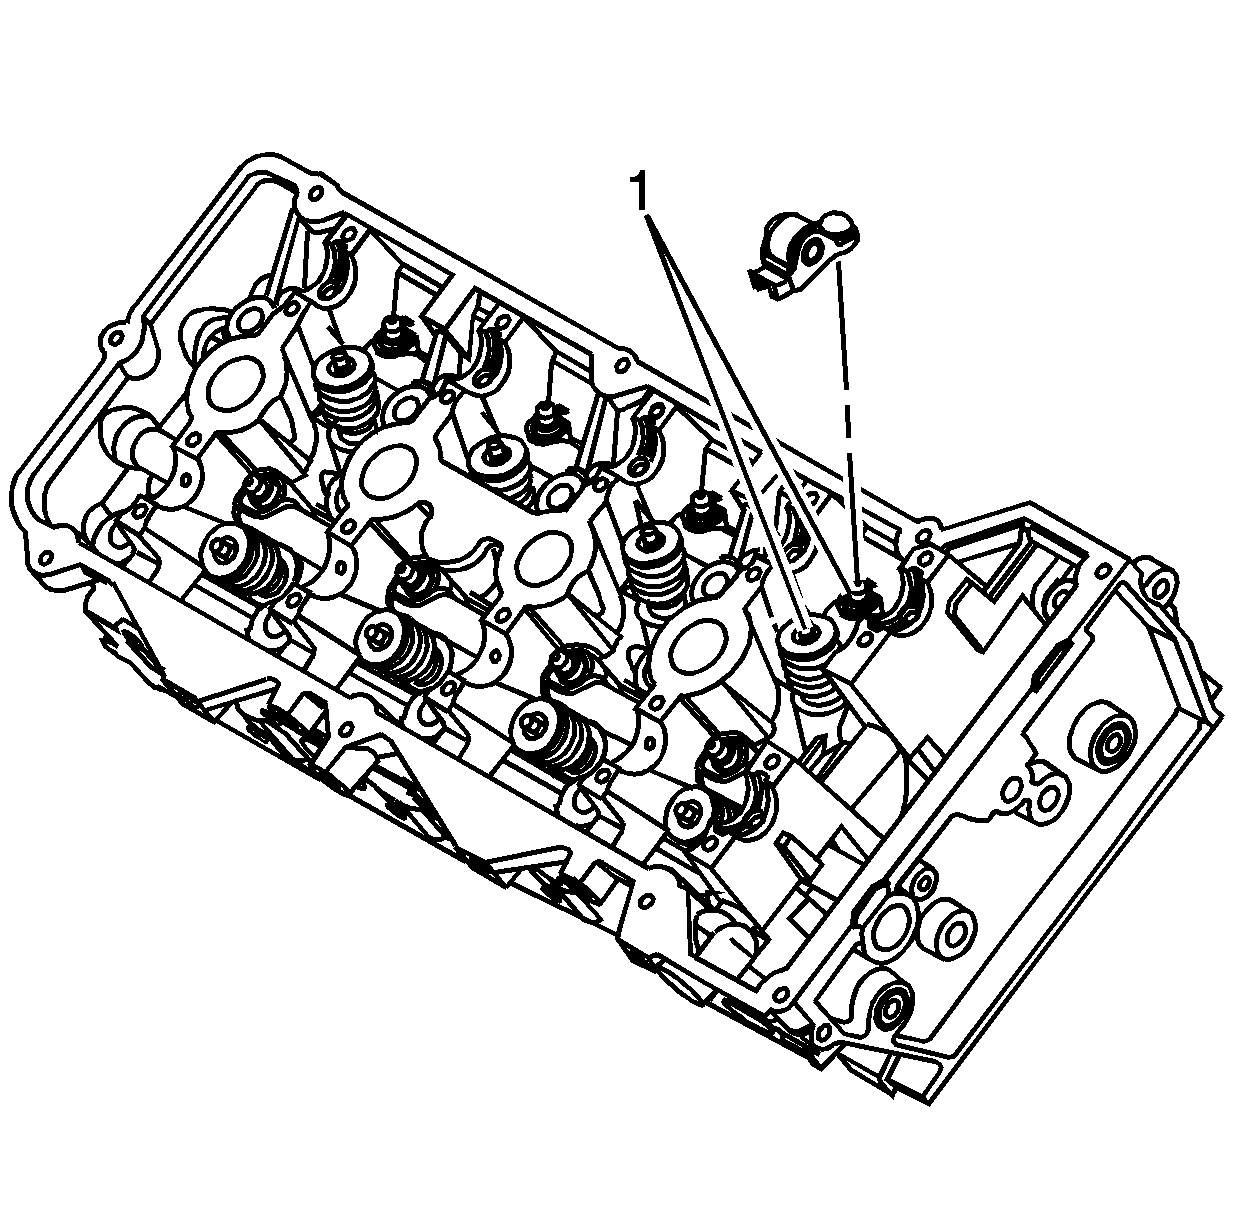
- Remove the EN 46327 (1).
- Verify the camshaft sprocket alignment.
- Remove the J 44212 from the camshafts.
- Install the camshaft position sensor. Refer to Camshaft Position Sensor Replacement .
- Install the right camshaft cover. Refer to Camshaft Cover Replacement - Right Side .
Important: The follower must be positioned squarely on the valve tip so that the full width of the roller will completely contact the camshaft lobe. If the followers are being reused you must put them back in their original location.
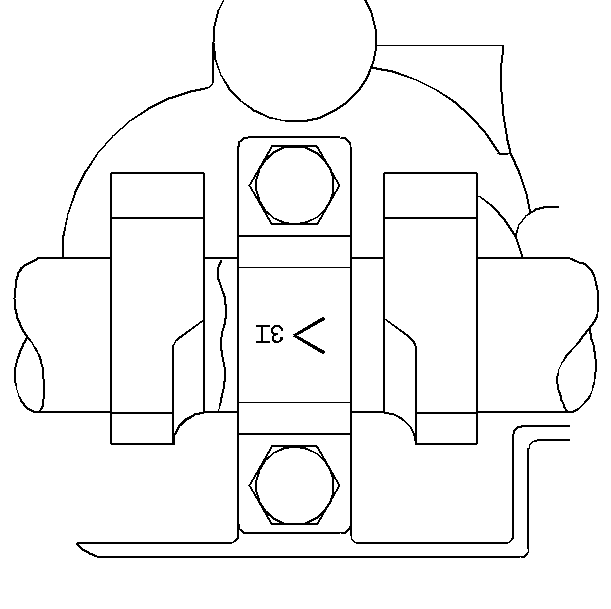
| • | The arrow should point to the front of the engine. |
| • | The number indicates the position from the front of the engine. |
| • | The "E" indicates the exhaust camshaft. |
| • | The "I" indicates the Intake camshaft. |
Notice: Refer to Fastener Notice in the Preface section.
Tighten
Notice: Refer to Torque Reaction Against Timing Drive Chain Notice in the Preface section.
Caution: Refer to Camshaft Holding Tool Caution in the Preface section.
Important: Ensure the camshaft sprockets properly engage the camshaft sprocket drive pins and camshafts.
Tighten
Tighten the camshaft sprocket bolts to 120 N·m (89 lb ft).
