Tools Required
| • | J 42640 Steering Column Anti-Rotation Pin |
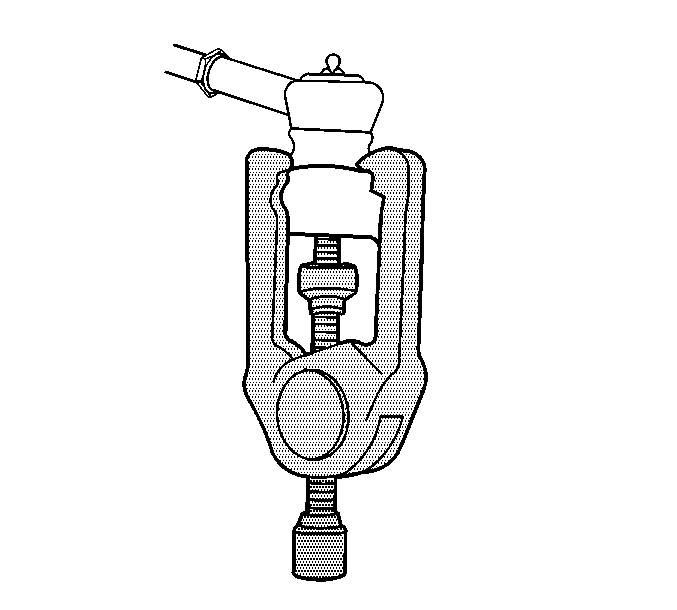
| • | J 24319-B Steering Linkage and Tie Rod Puller |
Removal Procedure
- Install J 42640 into the steering column access hole in order to lock the steering column. This will maintain the correct steering orientation.
- Raise and support the vehicle. Refer to Lifting and Jacking the Vehicle .
- Remove the tires and wheels. Refer to Tire and Wheel Removal and Installation .
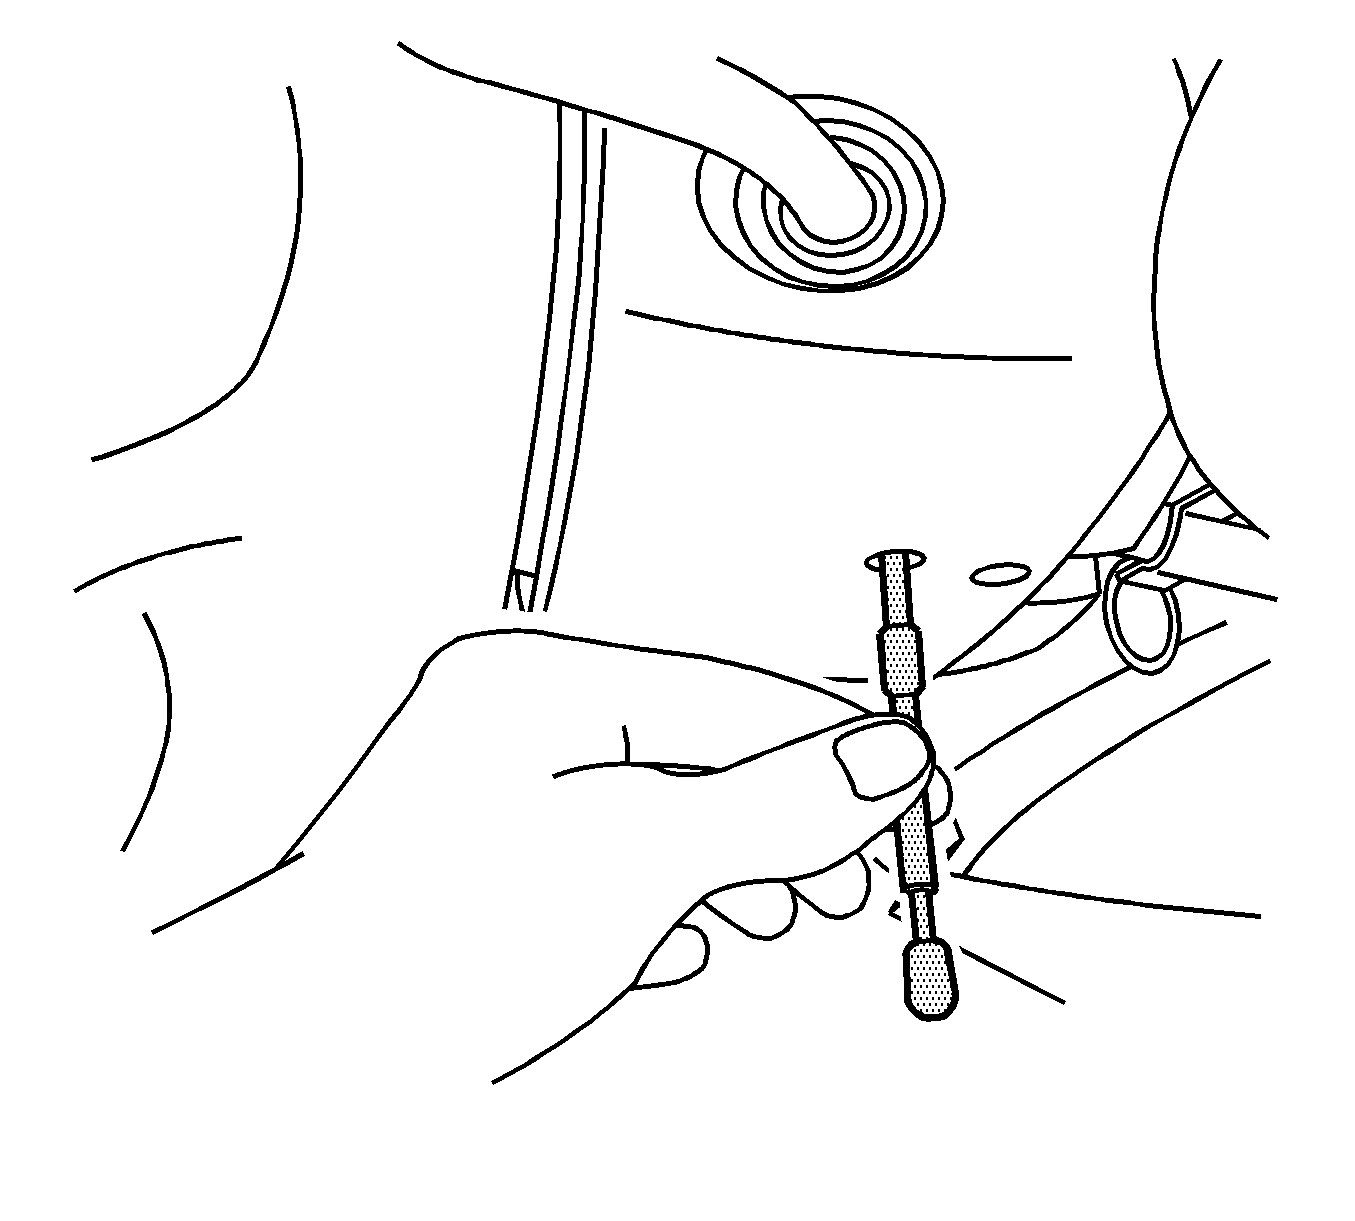
- Remove the outer tie rods retaining nuts (2).
- Using J 24319-B remove the outer tie rod from the steering knuckle.
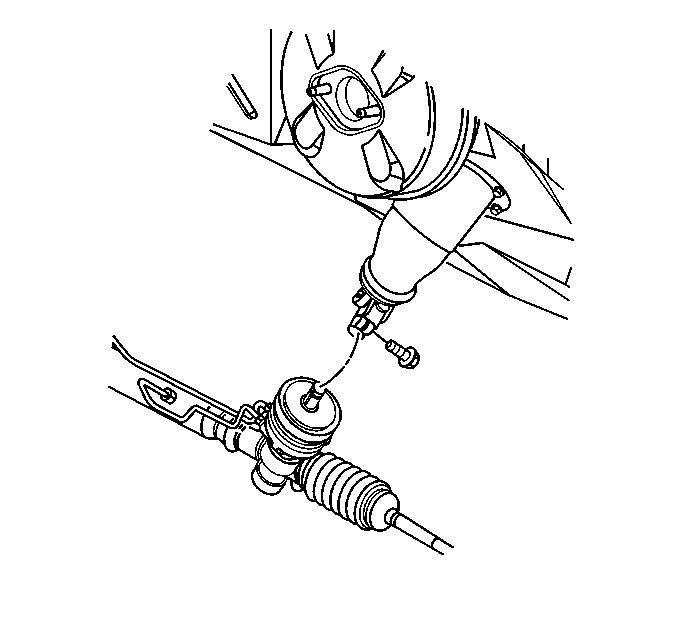
- Remove the intermediate shaft pinch bolt.
- Disconnect the intermediate shaft from the power steering gear.
- Remove the steering gear heat shield. Refer to Steering Gear Heat Shield Replacement .
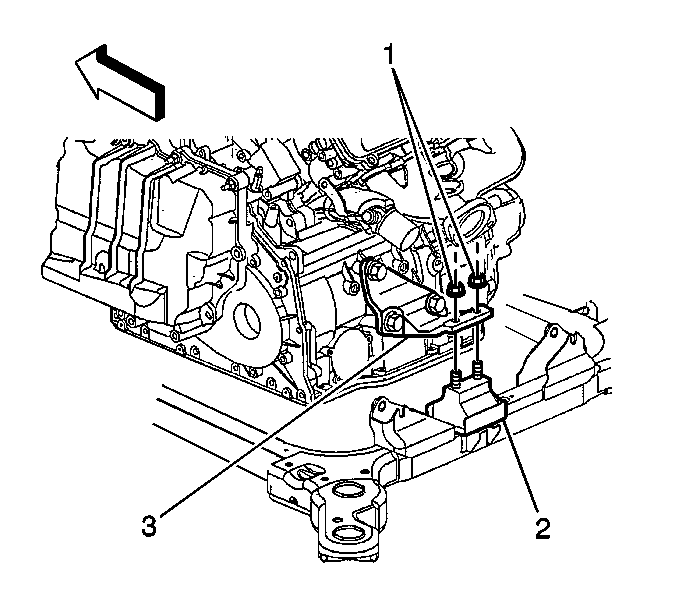
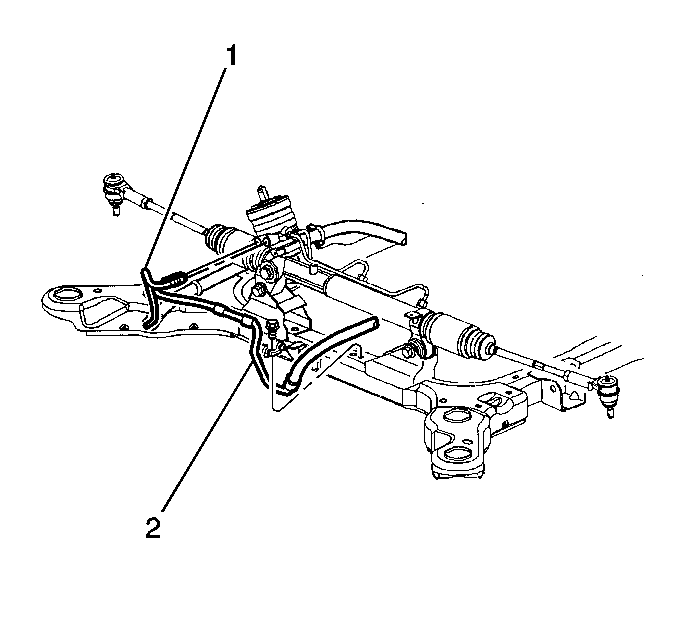
- Remove the rear transmission mount upper mounting nuts (1).
- Disconnect the variable effort steering electrical connector, if equipped.
- Install a drain pan under the vehicle.
- Remove the power steering pressure (2) and return hose (1) from the power steering gear.
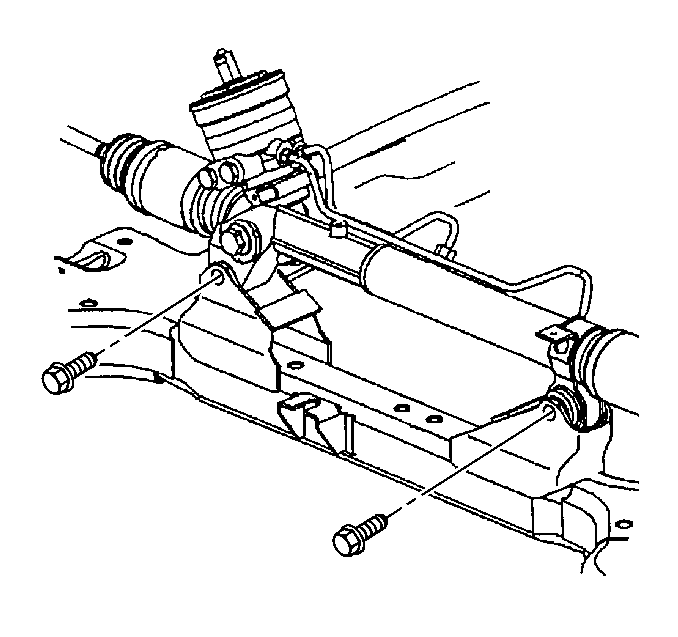
- Remove the steering gear mounting bolts.
- Install a jack under the rear portion of the frame.
- Remove the rear mounting bolts from the frame.
- Lower the rear portion of the frame.
- Remove the rack and pinion from the drivers side of the vehicle.
- Transfer necessary components.
Notice: The wheels of the vehicle must be straight ahead and the steering column in the LOCK position before disconnecting the steering column or intermediate shaft from the steering gear. Failure to do so will cause the coil assembly in the steering column to become uncentered which will cause damage to the coil assembly.

Caution: The frame must be properly supported before partially lowering. The frame should not be lowered any further than needed to gain access to the steering gear.
Installation Procedure
- Install the rack and pinion to the vehicle.
- Raise the rear portion of the frame.
- Install the frame mounting bolts.
- Install the transmission mount mounting nuts (1).
- Install the rack and pinion mounting bolts.
- Install the power steering pressure (2) and return hose (1) to the power steering gear.
- Remove the drain pan from under the vehicle.
- Connect the variable effort steering electrical connector.
- Install the power steering gear heat shield. Refer to Steering Gear Heat Shield Replacement .
- Install the outer tie rods to the steering knuckles.
- Install the outer tie rods retaining nuts.
- Install the intermediate shaft to the steering gear.
- Install the intermediate shaft pinch bolt.
- Install the tires and wheels. Refer to Tire and Wheel Removal and Installation .
- Lower the vehicle.
- Remove J 42640 from the steering column access hole.
- Bleed the power steering system. Refer to Power Steering System Bleeding .
- Adjust front toe. Refer to Front Toe Adjustment .
Notice: Use the correct fastener in the correct location. Replacement fasteners must be the correct part number for that application. Fasteners requiring replacement or fasteners requiring the use of thread locking compound or sealant are identified in the service procedure. Do not use paints, lubricants, or corrosion inhibitors on fasteners or fastener joint surfaces unless specified. These coatings affect fastener torque and joint clamping force and may damage the fastener. Use the correct tightening sequence and specifications when installing fasteners in order to avoid damage to parts and systems.
Tighten
Tighten the frame mounting bolts to 192 N·m (142 lb ft).
Tighten
Tighten the transmission mounting nuts (1) to 40 N·m (30 lb ft).
Tighten
Tighten the rack and pinion mounting bolts to 95 N·m (70 lb ft).
Tighten
Tighten the power steering pressure and return hoses to 27 N·m (20 lb ft).
Tighten
| • | Tighten the outer tie rod retaining nut (2) to 47 N·m (35 lb ft). |
| • | Tighten the outer tie rod retaining nut (2) up to 1/6 additional turn, or 70 N·m (52 lb ft) maximum. |
Tighten
Tighten the intermediate shaft pinch bolt to 45 N·m (33 lb ft).
