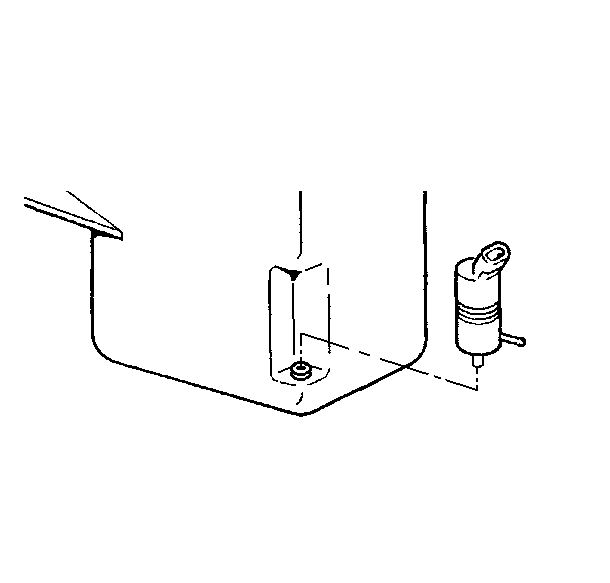
- Install the following
components to the washer solvent container:
| • | the washer level sensor |
| • | the washer container cap |
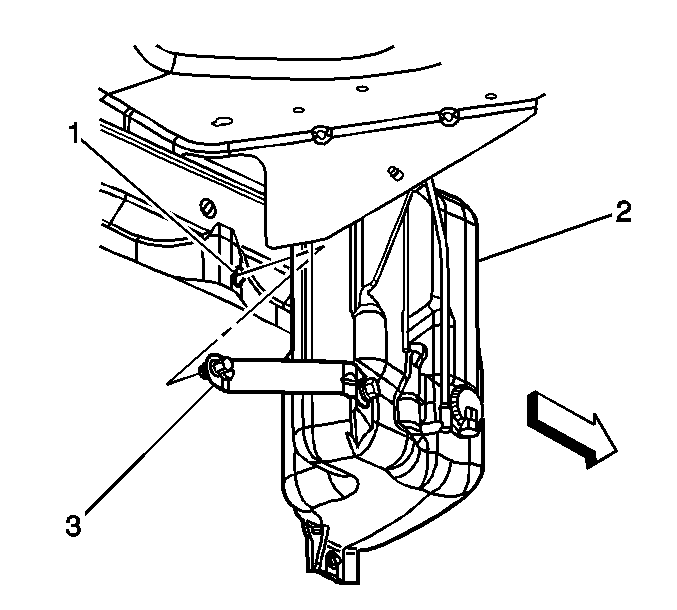
- Position the washer solvent
container filler neck up through the radiator support.
- Engage the electrical harness retainer clip to the washer solvent
container.
- Engage the container over the stud on the tie bar outer reinforcement
panel.
- Engage the clinch nut stud (3) to the key hole slot (1)
in the body rail.
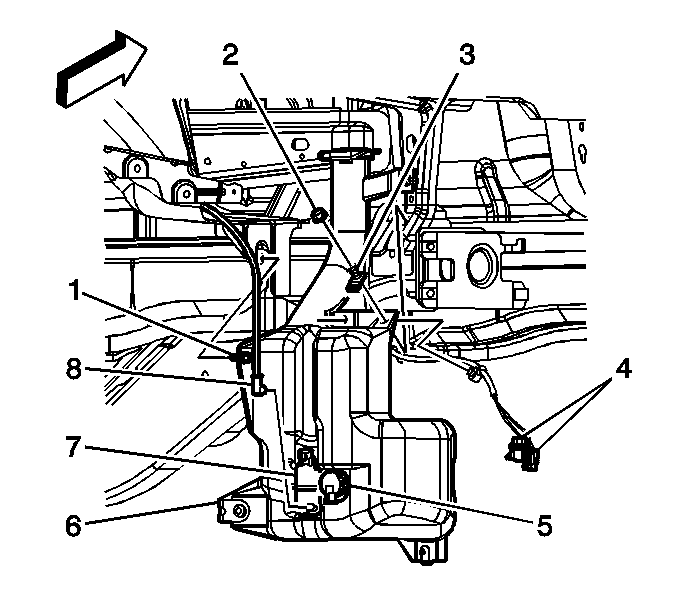
- Ensure the washer solvent
container is positioned over the stud (3) on the tie bar outer reinforcement
panel.
Notice: Use the correct fastener in the correct location. Replacement fasteners
must be the correct part number for that application. Fasteners requiring
replacement or fasteners requiring the use of thread locking compound or sealant
are identified in the service procedure. Do not use paints, lubricants, or
corrosion inhibitors on fasteners or fastener joint surfaces unless specified.
These coatings affect fastener torque and joint clamping force and may damage
the fastener. Use the correct tightening sequence and specifications when
installing fasteners in order to avoid damage to parts and systems.
- Install the nuts (1,2,6) to the washer solvent container.
Tighten
Tighten the nuts (1,2,6) to 6 N·m (53 lb in).
- Tighten the clinch nut.
Tighten
Tighten the clinch nut to 6 N·m (53 lb in).
- Secure the horizontal bracket nut.
Tighten
Tighten the horizontal bracket nut to 6 N·m (53 lb in).
- Connect the washer hose (8) to the washer pump (7).
- Connect the electrical connector (4) to the washer pump.
- Connect the electrical connector to the washer solvent level sensor (5).
- Install the headlamp assembly. Refer to
Headlamp Assembly or Headlamp Bulb and/or Cornering, Sidemarker, Park, Turn Signal Bulb Replacement
in Lighting Systems.
- Install the front bumper fascia. Refer to
Front Bumper Fascia Replacement
in Bumpers.
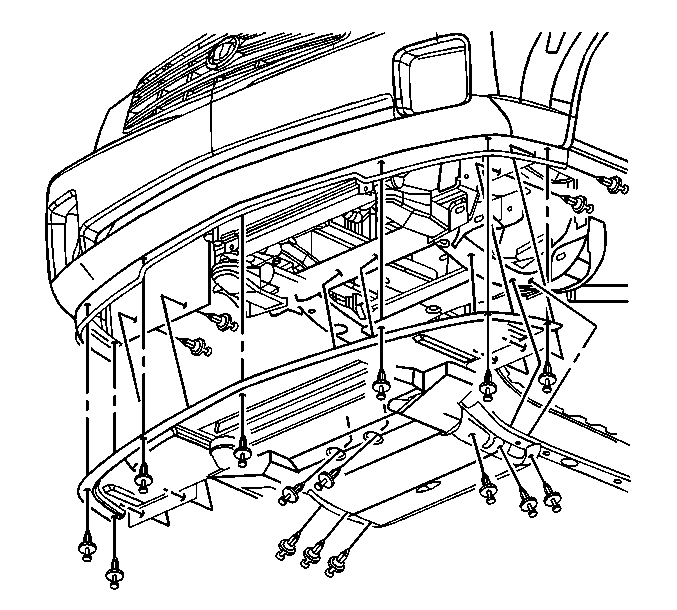
- Install the lower air
deflector. Refer to
Front Air Deflector Replacement
in Body Front End.
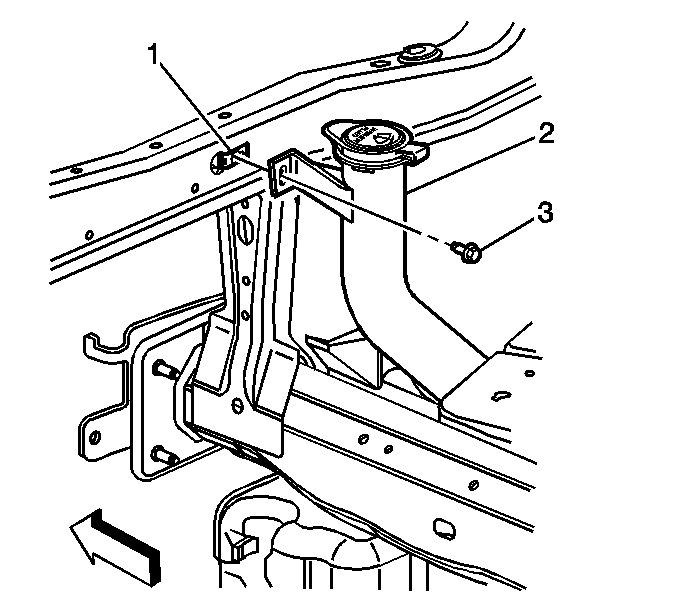
Notice: Use the correct fastener in the correct location. Replacement fasteners
must be the correct part number for that application. Fasteners requiring
replacement or fasteners requiring the use of thread locking compound or sealant
are identified in the service procedure. Do not use paints, lubricants, or
corrosion inhibitors on fasteners or fastener joint surfaces unless specified.
These coatings affect fastener torque and joint clamping force and may damage
the fastener. Use the correct tightening sequence and specifications when
installing fasteners in order to avoid damage to parts and systems.
- Install the bolt (3) in order to secure the washer solvent container
filler neck (2) to the upper tie bar (1).
Tighten
Tighten the bolt to 6 N·m (53 lb in).
- Reposition the condenser seal to the upper tie bar.
- Fill the washer solvent container.
- Install the washer solvent container cap to the washer solvent
container.
- Close the hood.


