Tools Required
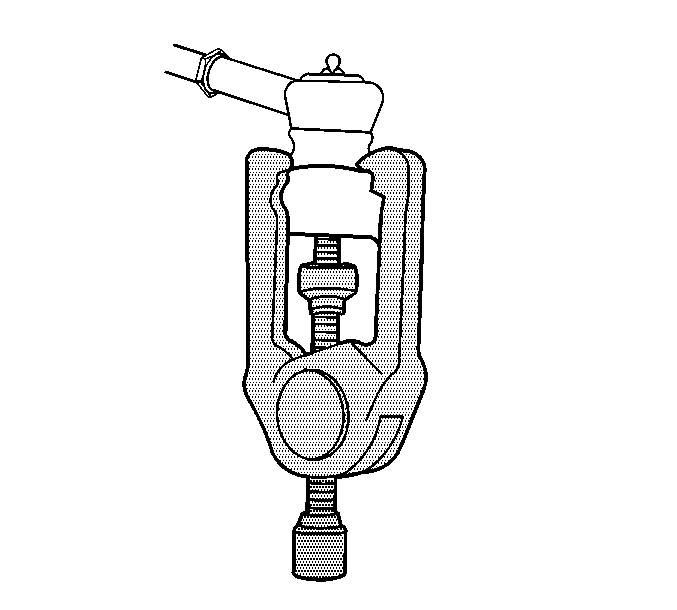
| • | J 24319-B Steering Linkage and Tie Rod Puller |
| • | J 39580 Engine Support Stand |
Removal Procedure
- Install the engine support fixture. Refer to:
- Raise and support the vehicle. Refer to Lifting and Jacking the Vehicle in General Information.
- Remove the front wheels. Refer to Tire and Wheel Removal and Installation in Tires and Wheels.
- Remove the front air deflector. Refer to Front Air Deflector Replacement in Body Front End.
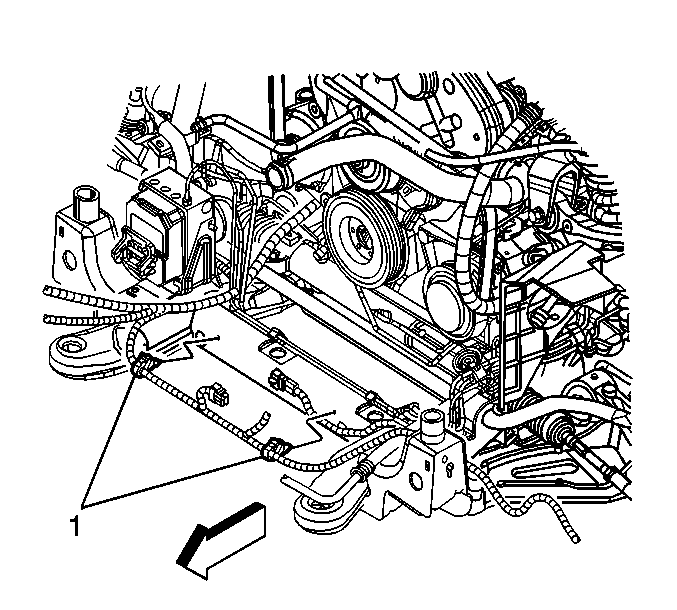
- Disconnect the electrical harness retainers (1) securing the engine harness to the frame.
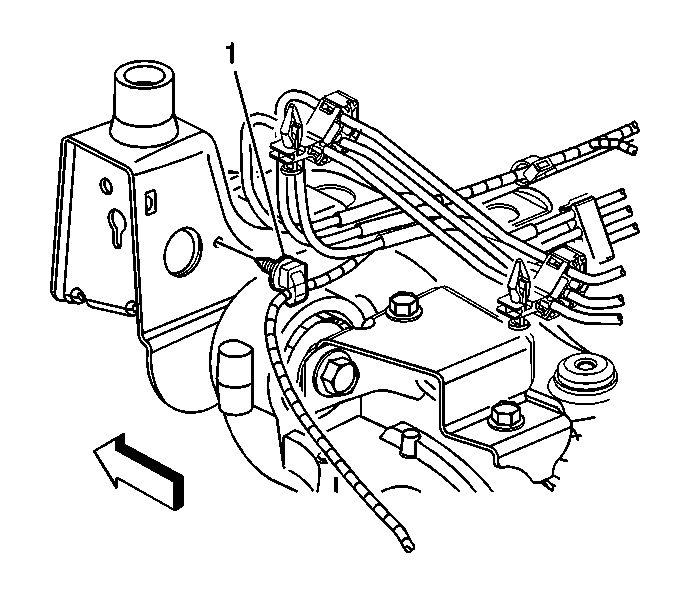
- Disconnect the left rearward retainer (1).
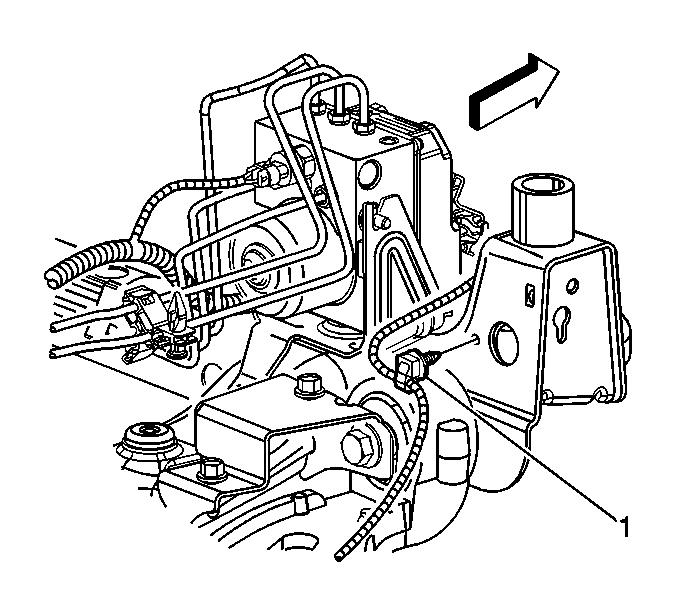
- Disconnect the right rearward retainer (1).
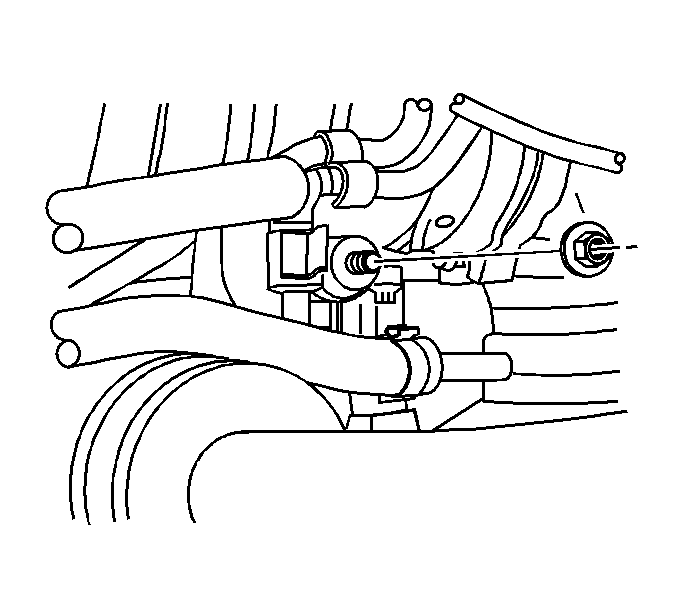
- Disconnect the antilock brake wiring harness from the lower control arms.
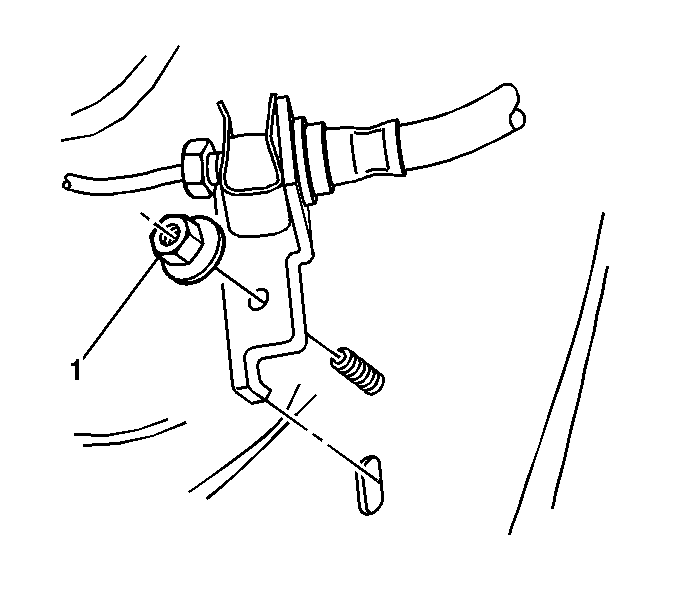
- Loosen the brake line bracket nut (1).
- Disconnect the brake lines from the frame.
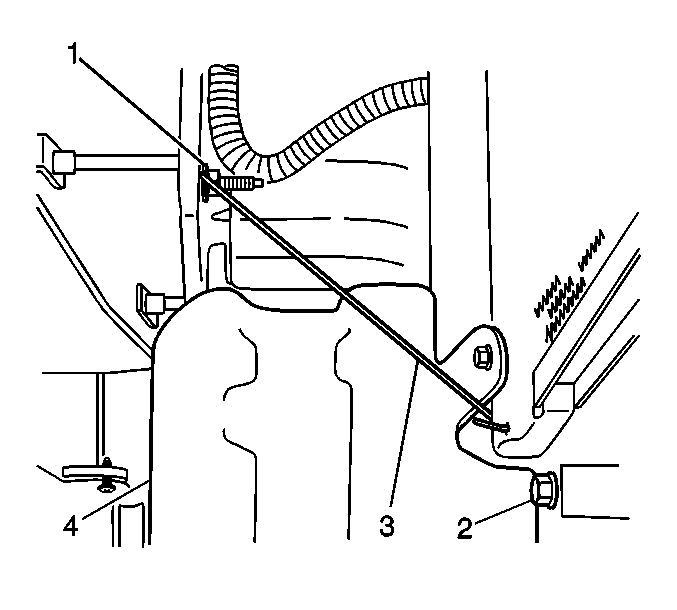
- Using mechanics wire (3), support the radiator and AC condenser assembly to the front inner energy absorber bracket bolt (1).
- Remove the washer bottle bracket nuts and bracket (3).
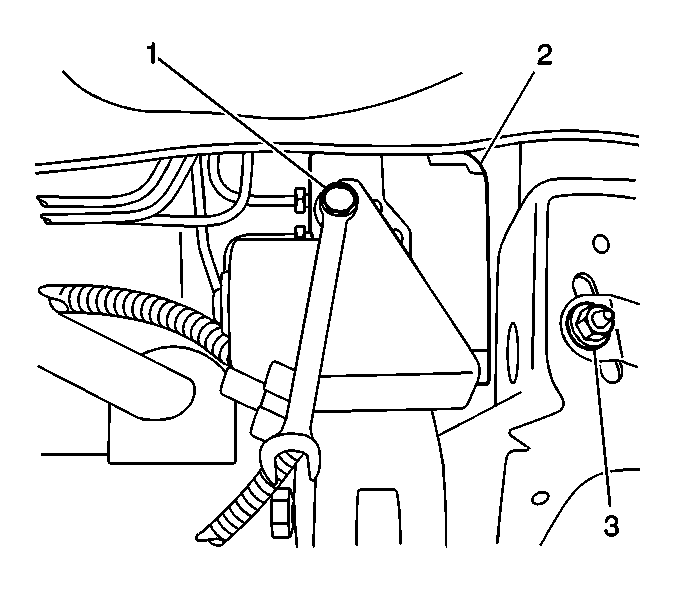
- Loosen the brake pressure modulator valve nuts (1) in order to separate the brake pressure modulator valve (2) from the bracket assembly.
- Loosen the stabilizer shaft mounting bolts.
- Remove the lower stabilizer shaft link retaining nut.
- Remove the stabilizer shaft link from the lower control arm.
- Remove the power steering pressure hose retaining nut from the air conditioning compressor.
- Position power steering pressure hose aside.
- Remove the power steering gear mounting bolts.
- Using mechanics wire (4) support the power steering gear (3) to the bolt bracket installed in the oil pan.
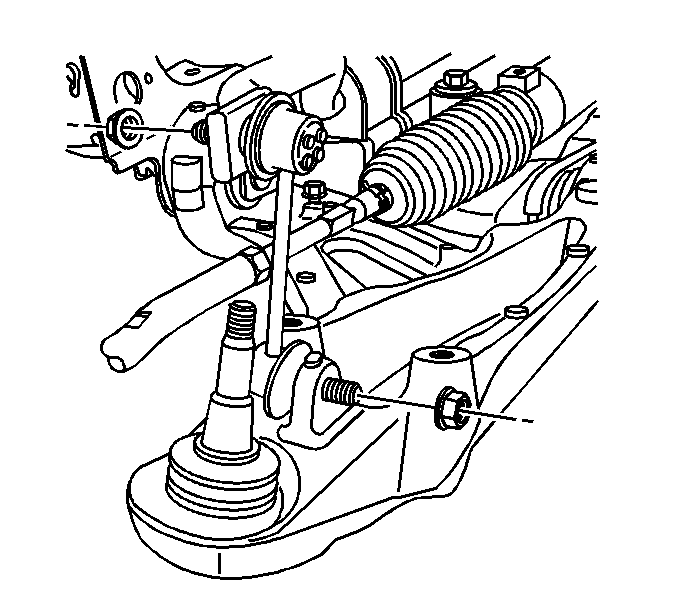
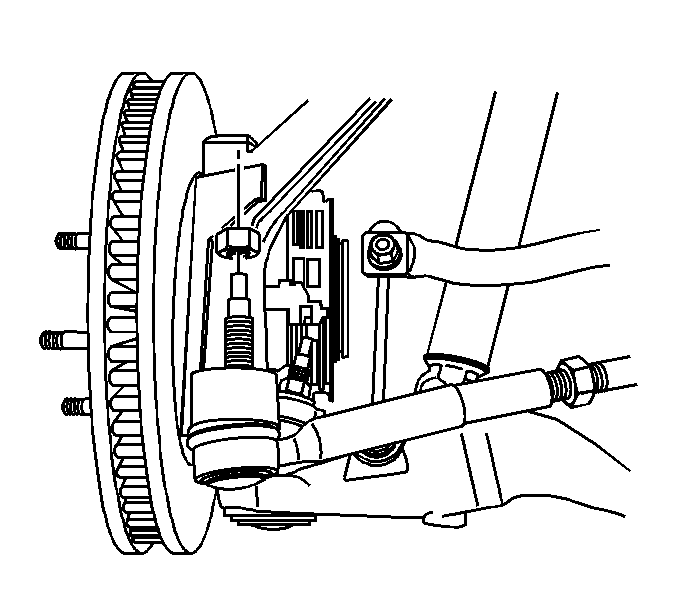
- Remove the outer tie rod retaining nut.
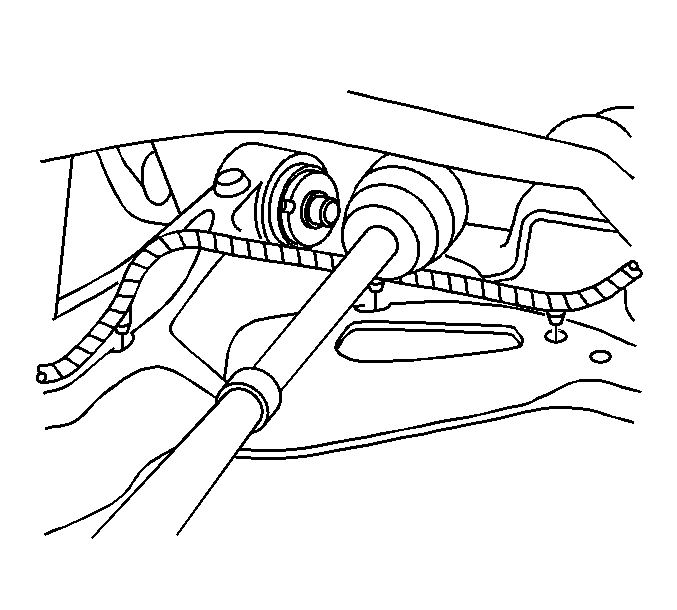
- Using J 24319-B , separate the outer tie rod from the steering knuckle.
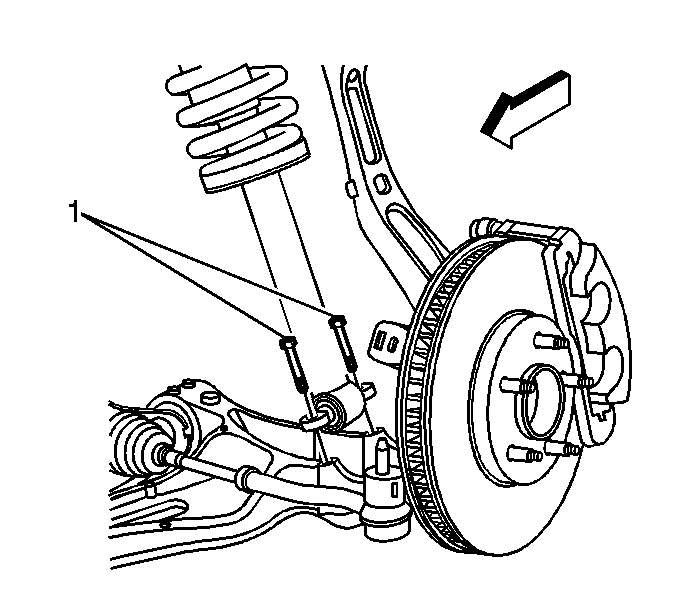
- Remove the lower shock bolts (1).
- Disconnect the lower ball joint from the steering knuckle and position the knuckle assembly away from the lower control arms. Refer to Lower Control Arm Replacement in Front Suspension.
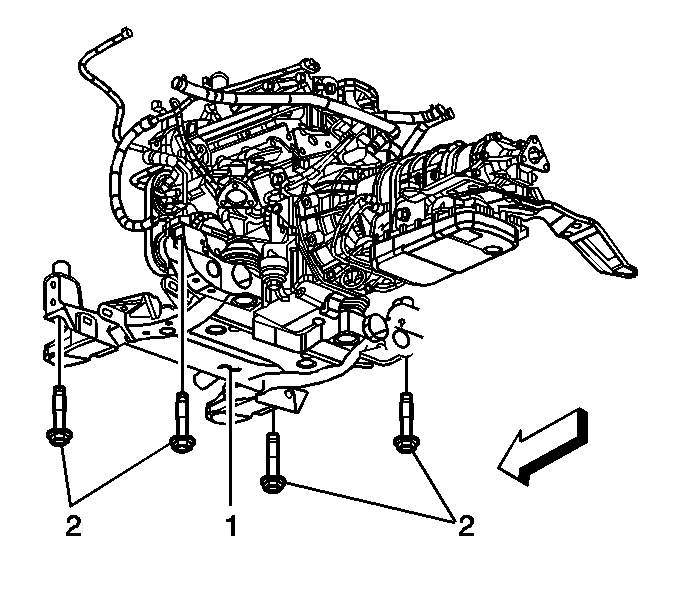
- Remove the engine mounts lower retaining nuts (2).
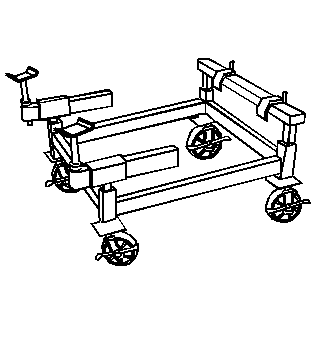
- Install J 39580 under the frame.
- Lower the vehicle to the frame support table.
- Remove the frame mounting bolts (2).
- With the aid of an assistant, carefully raise the body from the frame.
- Ensure when raising the body the following items are clear from the frame.
- Remove the lower control arms. Refer to Lower Control Arm Replacement in Front Suspension.
- Remove the stabilizer shaft. Refer to Stabilizer Shaft Replacement in Front Suspension.
- With the aid of an assistant, remove the frame from the support fixture.
| • | Engine Support Fixture in Engine Mechanical - 2.8L |
| • | Engine Support Fixture in Engine Mechanical - 3.6L |
| • | Engine Support Fixture in Engine Mechanical - 5.7L |
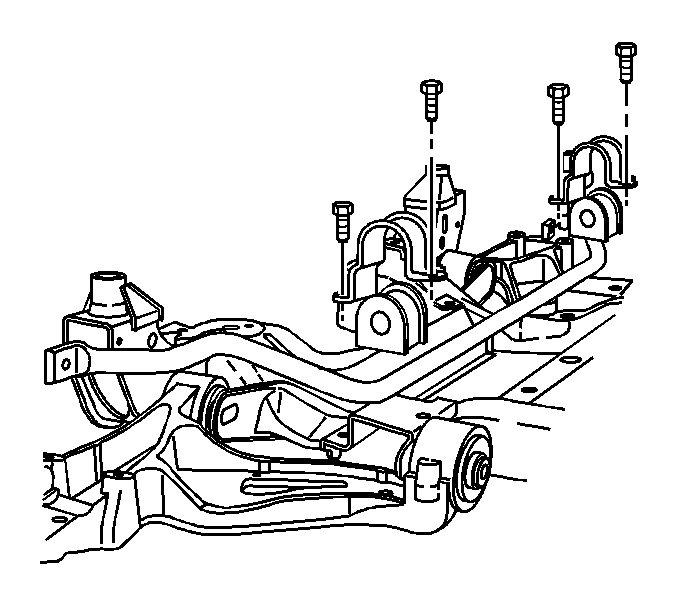
Important: Mark the stabilizer shaft to ensure the correct position when reinstalling.

Important: The brake calipers do not need to be removed from the knuckle assembly.

| • | The brake pipes |
| • | The steering knuckle assembly |
| • | The wheel speed sensor electrical harness |

Installation Procedure
- Install the lower control arm to the frame. Refer to Lower Control Arm Replacement in Front Suspension.
- Install the stabilizer shaft to the frame. Refer to Stabilizer Shaft Replacement in Front Suspension.
- With the aid of an assistant, position and secure the new frame assembly to the support fixture.
- With the aid of an assistant, carefully lower the body to the frame.
- Ensure the following components are clear from the frame.
- Install the frame mountings bolts (2).
- Raise the vehicle.
- Install the engine mount lower retaining nuts (2).
- Remove the J 39580 from under the vehicle.
- Remove the mechanics wire (4) supporting the power steering gear (3).
- Install the power steering gear mounting bolts.
- Install the ball joint to the steering knuckle.
- Install the lower ball joint retaining nut.
- Install the outer tie rod to the steering knuckle.
- Install the outer tie rod to steering knuckle retaining nut.
- Tighten the stabilizer shaft bolts.
- Install the stabilizer shaft link to the lower control arms.
- Install the stabilizer shaft link nuts.
- Install the lower shock mounting bolts (1).
- Install the brake pipe connection to the frame with the nuts (1).
- Install the brake pressure modulator valve nuts (1).
- Install the washer bottle bracket and nuts (3).
- Remove the mechanics wire (3) supporting the radiator.
- Secure the energy absorber bracket nut (1).
- Install the antilock brake wiring harness to the lower control arms.
- Secure the right rearward retainer (1).
- Secure the left rearward retainer (1).
- Secure the engine electrical harness retainers (1) to the frame.
- Install the front air deflector. Refer to Front Air Deflector Replacement in Body Front End.
- Install the front tires and wheels . Refer to Tire and Wheel Removal and Installation in Tires and Wheels.
- Lower the vehicle.
- Remove the engine support fixture. Refer to:
- Align the vehicle. Refer to Wheel Alignment Measurement in Wheel Alignment.
Do not tighten the stabilizer shaft mounting bolts at this time.
| • | The electrical harness |
| • | The steering knuckle assembly |
| • | The brake pipes |
Notice: Refer to Fastener Notice in the Preface section.
Tighten
Tighten the bolts to 191 N·m (141 lb ft).
Tighten
Tighten the nuts to 50 N·m (37 lb ft).
Tighten
Tighten the bolts to 95 N·m (70 lb ft).

Tighten
Tighten the nut to 20 N·m (15 lb ft)
plus an additional 210 degree rotation.
Tighten
Tighten the nut to 70 N·m (52 lb ft).
Important: Ensure correct position from the previously marked spots.
Tighten
Tighten the bolts to 60 N·m (44 lb ft).
Tighten
Tighten the nuts to 50 N·m (37 lb ft).
Tighten
Tighten the bolts to 25 N·m (18 lb ft).
Tighten
Tighten the nuts to 10 N·m (89 lb in).
Tighten
Tighten the nuts to 10 N·m (89 lb in).
Tighten
Tighten the nuts to 10 N·m (89 lb in).
Tighten
Tighten the nut to 25 N·m (18 lb ft).
| • | Engine Support Fixture in Engine Mechanical - 2.8L |
| • | Engine Support Fixture in Engine Mechanical - 3.6L |
| • | Engine Support Fixture in Engine Mechanical - 5.7L |
